
Haunted book paper maché sculpture for BOO! Halloween Stories — part 1
Published by Manning on October 2nd, 2017
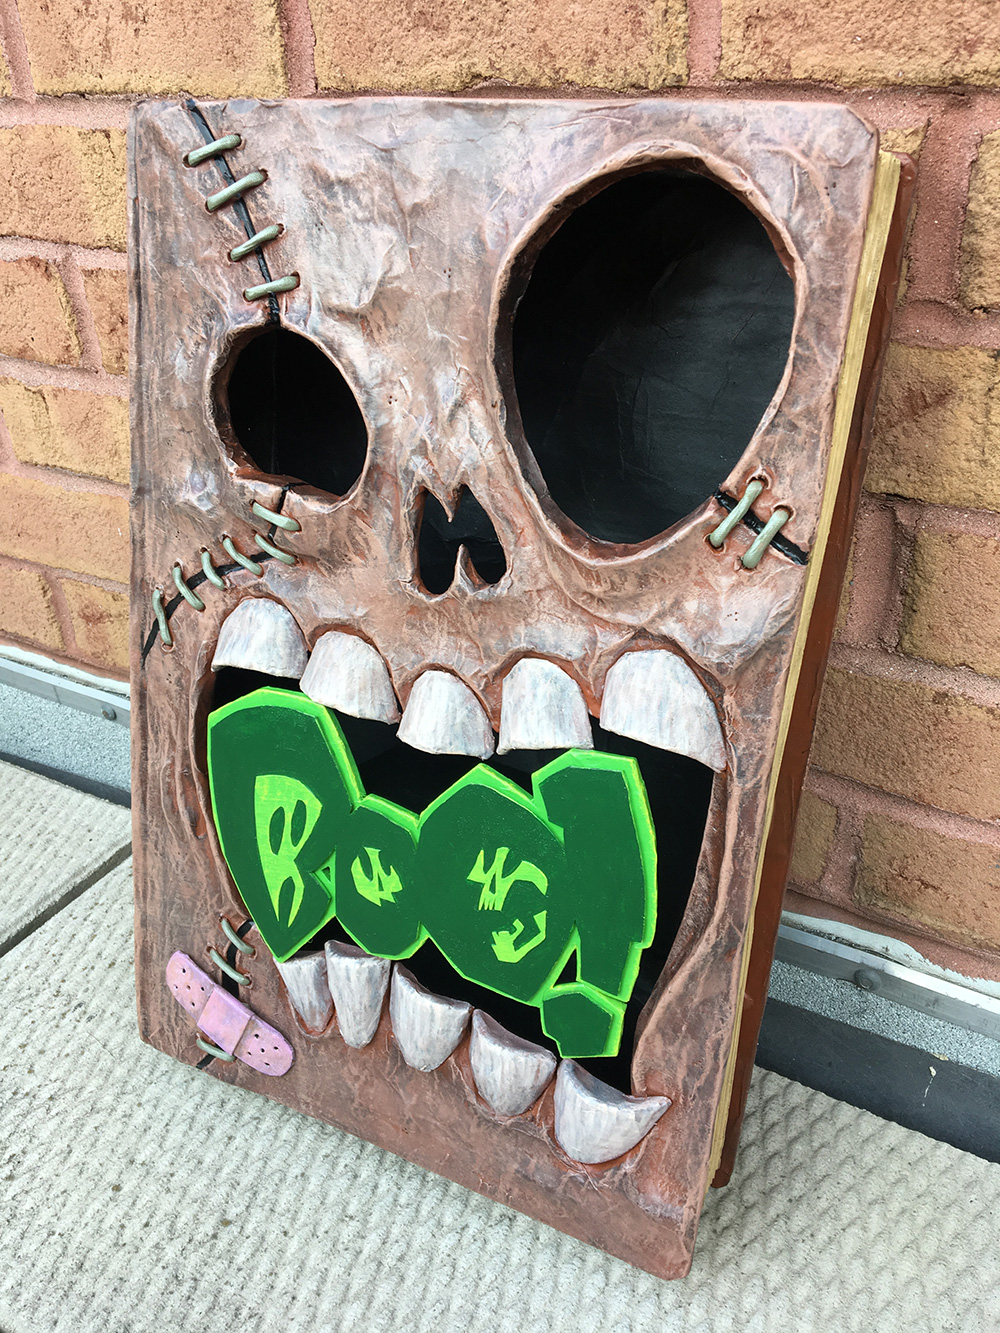
I made this paper maché haunted book sculpture for the cover of the 2017 edition of BOO! Halloween Stories — a comics anthology that I’ve been doing with my friend Jon Morris off and on for about fifteen years. The cover is usually just a regular illustration, but this year Jon had the idea to have me sculpt a demonic book — you know, like the Necronomicon or whatever — and then photograph that for the cover of the digital comic. This was an insanely fun project; here’s how I did it!
Sculpting the book cover
I must’ve sketched this thing about two dozen times before I settled on a layout that I liked; Jon sent me some sketches for inspiration as well — I was really torn between having the logo in the mouth or behind the eyes. Anyway, I settled on a final design, scanned it, laid it out with the “BOO!” logo in Photoshop, and printed it out at 12¾” x 18¾” — I chose this size because the construction paper I’d bought to make the pages was exactly 12″ x 18″ and I of course wanted the cover to be a little bigger than that. More on the construction paper pages coming up.

I cut out two pieces of foam board at 12¾” x 18¾” for the front and back covers, and covered them with packing tape. The packing tape is there to help prevent the foam board from warping when I apply clay and paper maché.
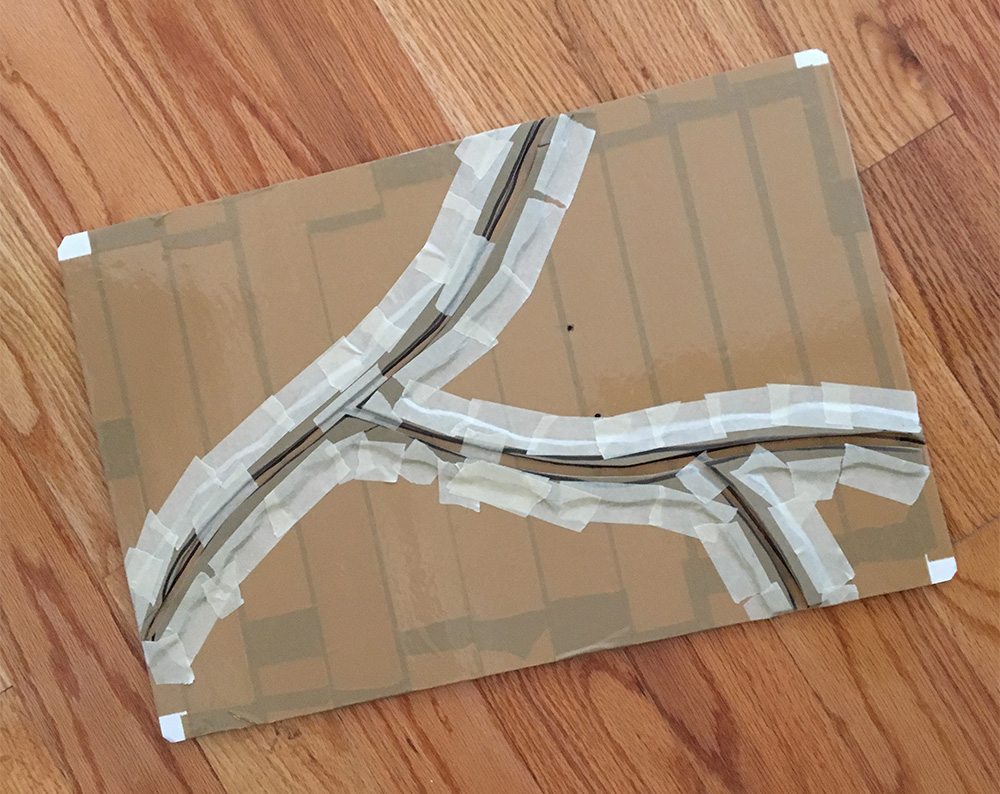
I cut out the eyes/nose/mouth holes from my printout, taped it onto the foam board, and traced the holes with a marker. I then removed the printout and put it aside just to use as a visual reference. I drew the rest of the details onto the foam board with the marker.
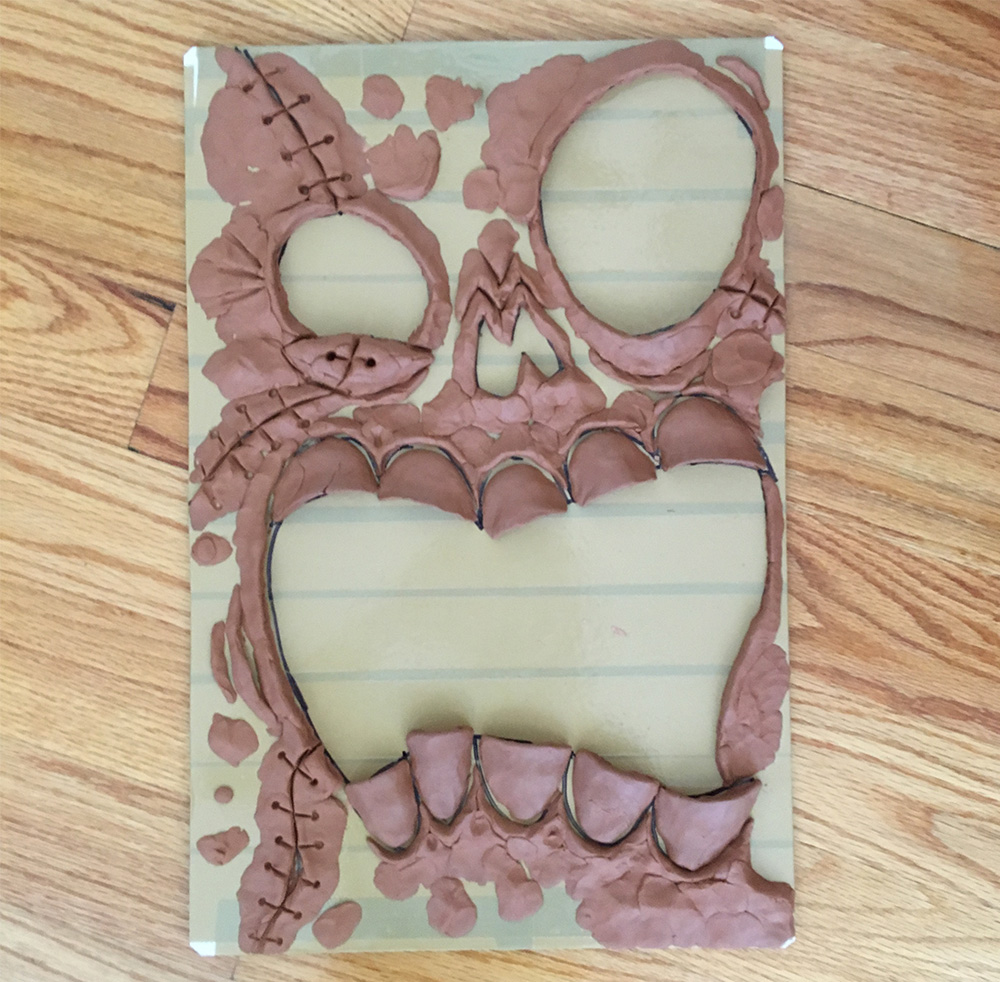
I sculpted the basic shapes of the face with Activa Plus clay, mostly using my hands but also using a variety of small sculpting tools that my sister got me for Christmas; thanks Amanda!
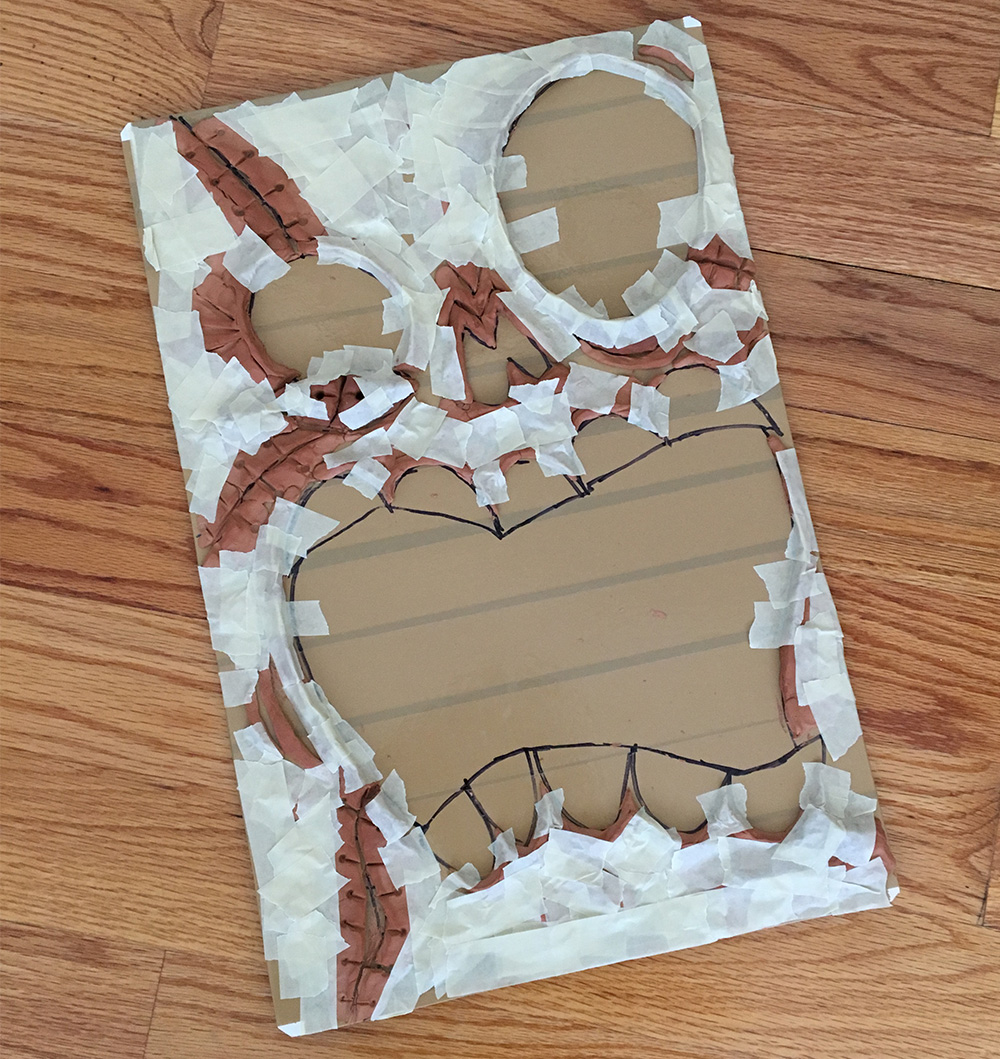
When the clay was dry, I covered a lot of the edges of the clay with masking tape. The tape helps smooth out a lot of the details and also conceal the lines between the clay and the foam board when the papier maché is applied.
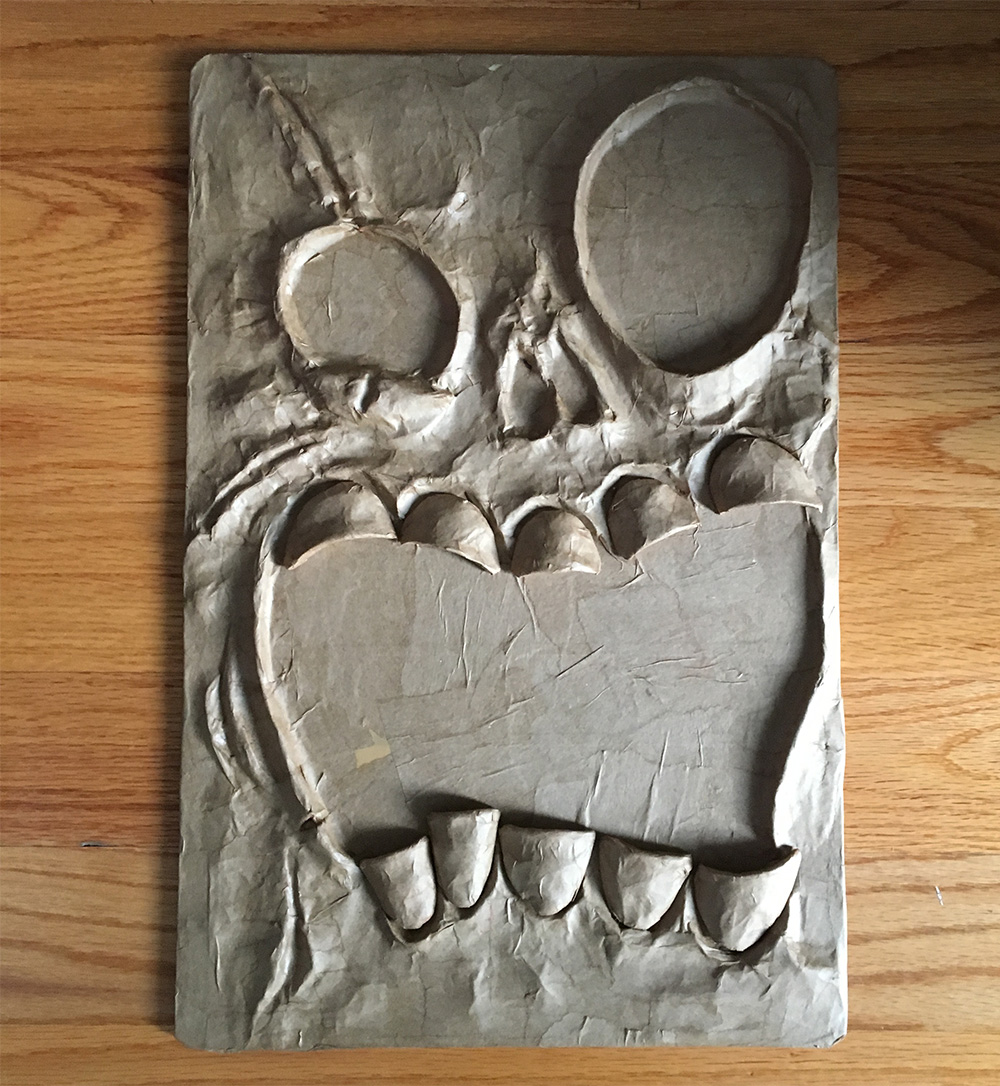
I covered the whole front cover sculpture with three layers of paper maché. You can read about my paper maché materials and process here. The short version is: I use Roman PRO-543 universal wallpaper adhesive (paid link) and alternating layers of newspaper and brown wrapping paper.

The teeth are actually separate here; I removed the clay teeth and covered them with paper maché separately, and they’re just sitting here in this pic, not attached; coming up you’ll see I ultimately decided to replace them entirely.
I cut out the eyes/nose/mouth holes with an X-acto knife and reinforced those edges with more papier maché. You can see the teeth aren’t attached at this stage.
(I’m skipping around a bit here, but I later removed the clay from the parts that make up the edges of the stitches. It turned out to be harder than I thought to punch holes through those areas; the clay crumbled in some places and the paper tore. So I sliced out the clay areas with an X-acto knife, and built new edges there using strips of soft craft foam and masking tape. Then I covered those areas with three more layers of paper maché. That did the trick.)
I used an awl to punch the holes for all the stitches. I bought some nylon string to use for the stitches themselves; it was bright yellow but I painted it this ugly green/brown color before threading it through. To thread the string through the holes, I made a “needle” from a nail; I snipped the flat part off the nail with wire cutters, and wound a lot of masking tape around the nail and the string. This let me firmly but carefully pull the string through all the holes. At the edge of each area of stitches, I cut the string in the back and taped it down onto the interior of the cover, locking it in place.
Teeth
I’d initially sculpted the teeth from clay as part of the face sculpture. I kept them separate from the face, let them dry, and then covered them with a layer of papier maché; my plan was to just glue them back in place. But I decided they felt way too heavy, so I made a new plan for lightweight teeth. I laid the clay teeth out on a piece of foam board and covered them with aluminum foil, taped in place.

I then covered each of them with five layers of papier maché. The aluminum foil acts as a release agent; the papier maché sticks to the foil but the foil doesn’t stick to the clay teeth inside, so you can easily remove them.
I let that dry thoroughly, then cut the teeth out with scissors; you’re looking at the inside surface of 3 and 4 above. I carefully matched the same size and shape of the clay teeth as I cut them out. I wound tiny strips of masking tape around these hollow teeth to create a “wall” on the back, then covered them completely with two layers of papier maché. When they were dry, the new teeth were super lightweight and looked almost exactly like the clay ones. Take a look; that’s the papier maché teeth at the top and the clay ones at the bottom; these are the five teeth for the lower jaw:
A silly note: whenever I’m working with anything like these teeth, I always number them on the back with a marker! I do this every step of the way so I don’t lose track of which is which. You might think just setting them down in order is good enough to keep track of them, but I know I will definitely knock them over at some point.
A few steps later, I glued the new paper maché teeth in the mouth with a hot glue gun.
Back cover
I made the back cover the same way as the front; I started with a piece of foam board, covered with packing tape to prevent warping. I added craft foam shapes for the edges of the stitches (the craft foam is tan so it’s hard to see here), and smoothed the exterior edges with masking tape. One step not shown here: after the masking tape, I then taped little strips of thick paper along the exterior edges of the wound, to smooth the edges of the craft foam seamlessly onto the foam board base. This way, the interior edge of the wound keeps a nice raised edge to it, and the exterior edge of the wound blends into the background. You’ll this much better once the thing is painted, coming up.
I covered all of this with paper maché, let it dry, punched holes with an awl, and threaded the string through.
Since the inside back cover would be visible through the eyes/nose/mouth, I added a few layers of paper maché to cover the stitches on that side.
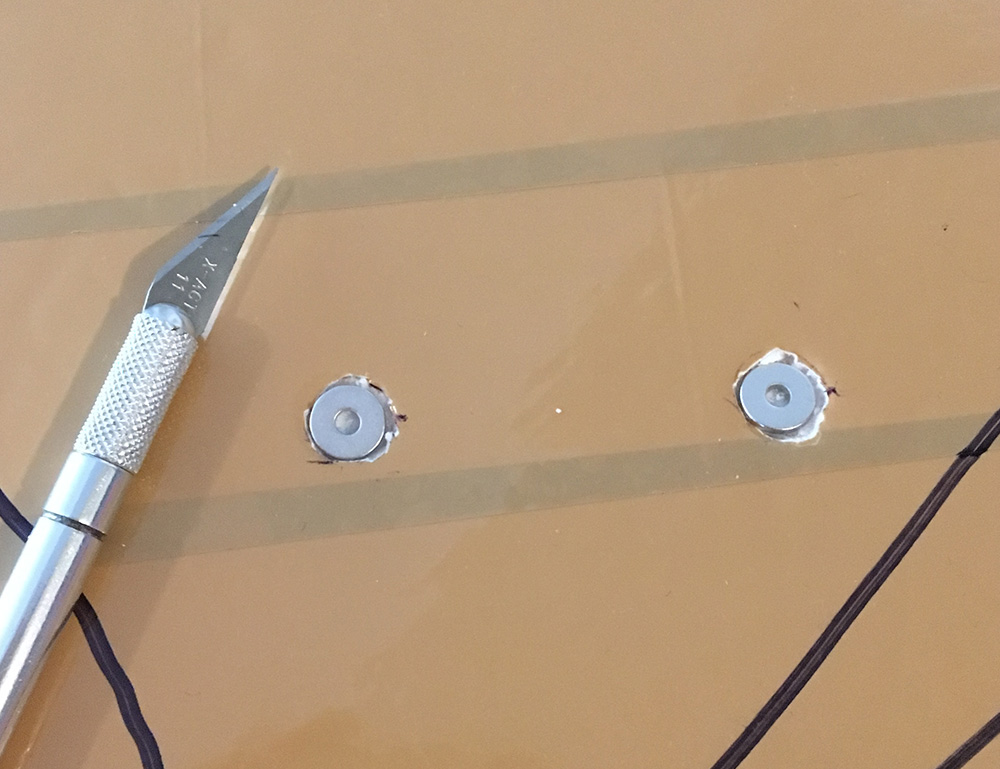
I embedded two magnets in the back of the mouth to hold the “BOO!” logo (more on that coming up) — I liked the idea of having this be removable, so hidden magnets were the way to go. I dug little holes out of the papier maché and foam board with an X-acto knife, inserted the magnets so that they were flush with the surface, and covered them over with one layer of heavy duty packing tape to prevent them from tearing out, and then one layer of papier maché.
(One magnet would’ve been strong enough for this, but I always use two magnet placements rather than one, so the connected pieces can’t turn.)
Making the spine
The book’s spine is another piece of foam board. I measured and cut the spine to be slightly wider than necessary, so I could give it a little bit of a curve and the edges would still sit at the right width to connect to the front and back cover. To gently curve the spine, I put it on the floor and used my knee to smoosh the middle of it, all the way down, to allow the edges to curve inward a little bit; I then did this more so with my hands. All this helped create the basic curved shape. The curve is so slight you can barely see it in these photos, but I think if the spine were perfectly flat you’d see that it looked kinda wrong.
(Pay no mind to the fact that the back cover is painted black already; I was just testing something.)
I added pieces of string along the spine to mimic the way old books show the binding string through the leather. I covered the string with masking tape, and then covered the whole spine with paper maché. That was it; easy!
Making the page edges
One of the things I had to figure out was: how to make the edges of the pages? My first thought was just to make a graphic of page edges in Photoshop, print it out, and paste it onto the edge of the book, which would be made out of foam board or whatevever. But I hated the thought of the edges looking fake and flat and, well, printed. Was there a way I could make real page edges that were uneven and three-dimensional?
Of course, I could’ve just used a real stack of paper and just attached my sculpted front cover and back cover on either side of that. But then I wouldn’t be able to have the big hollow shape in the mouth and eyes and nose — not to mention this would’ve made the sculpture super heavy! So I came up with a plan that was kind of overkill (okay, completely overkill), but I’m very happy with the results!
I bought three big packs of 18″ x 12″ construction paper — 300 sheets in all. I used an X-acto knife to carefully cut a huge rectangle out of the middle of every sheet; I made a foam board guide for this, just a little smaller than the 18″ x 12″ construction paper, laid it in place and cut around that. I cut the pages in groups of twos and threes and fours, and allowed myself to cut somewhat sloppily to let the edges be every so slightly misaligned, like an actual antique book. Cutting all 300 sheets took several hours (and killed three or four X-acto blades), and the resulting thin paper rectangles were extremely delicate! This whole part was kind of no fun, but I was committed.
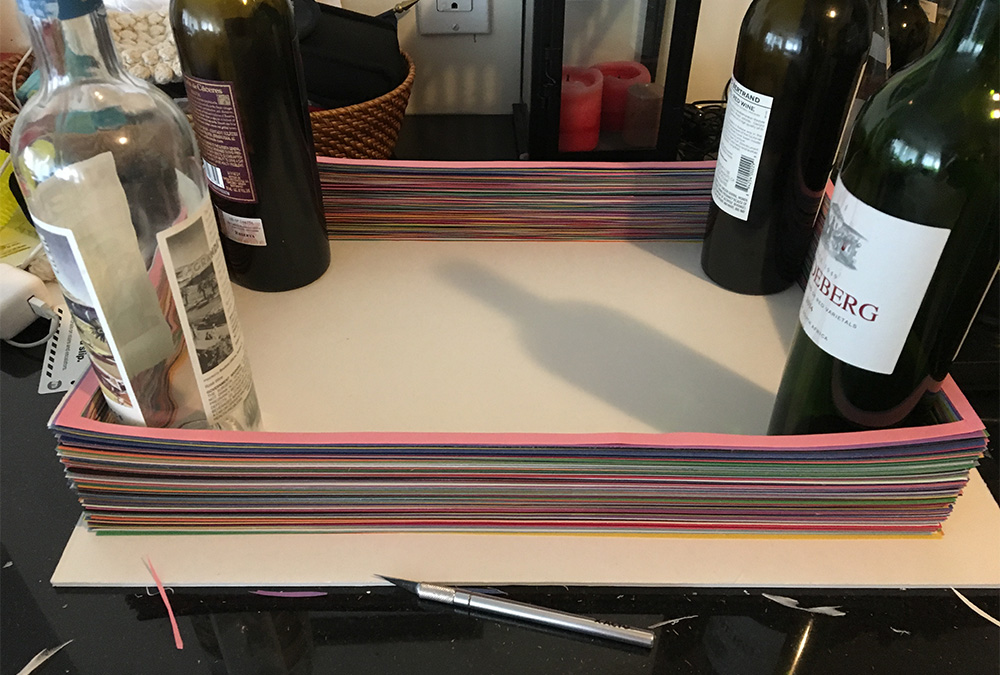
I used four wine bottles to help guide the thin paper shapes to stack nicely onto each other. Even working very carefully like this, they still wanted to fall all over the place, and a few tore along the way, but I eventually got my relatively neat stack of 300 cut-out sheets.
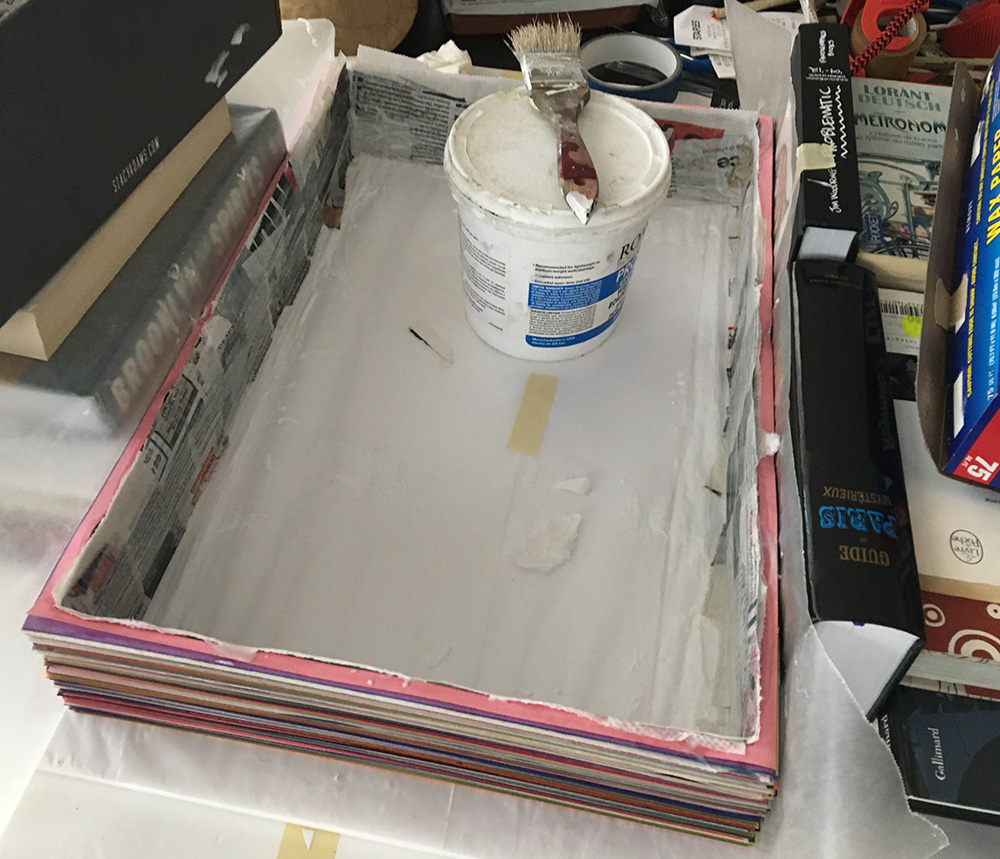
Now to stick ’em all together. I built a foam board box to perfectly fit inside the stack of sheets, so they couldn’t slide around too much. I then covered two pieces of foam board with wax paper and pressed one onto the top of the stack of sheets, weighed it down with a book, and then VERY carefully flipped the whole thing over and laid it on the other wax-paper-covered sheet of foam.
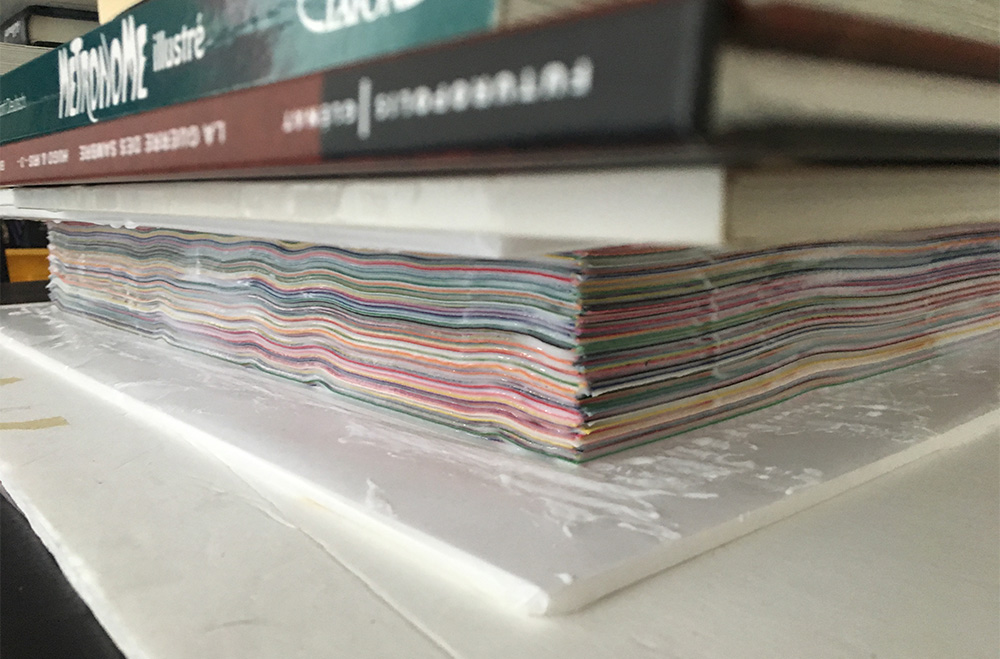
I then used a big paintbrush to brush wallpaper adhesive — the same stuff I use for paper maché — all around the edge of the pages. I used tons and tons of paste and really tried to work it in between all those paper edges. When that was done, I put more books on top to squish the pages together even more. I let this dry for two whole days, not really having any idea if it would work or not — I had a hunch the pages wouldn’t really stick together and the only way to find out would be trying to pick the thing up and having it fall apart! All that tedious cutting for nothing!
I’d anticipated the page edges might warp a lot from the paste, and I was right about that; they turned really wavy, which was great! Just like an old book! What I didn’t ancticipate was that as the paper swelled from the paste, it didn’t have anywhere to go since it was weighted down with books, and the sides of the pages started to swell outward! This didn’t look great, but everything was stil damp and workable, so I wrapped some heavy books in wax paper and used them to push the sides back in. I didn’t need the edges to be perfectly flat but I didn’t want them all bubbled out.
Anyway, the next day I used my X-acto knife to slice the whole glued-together shape off of the wax paper. Luckily the pages stuck together pretty well; the whole thing was still very fragile and it would’ve been easy to pull the pages apart, but at least the basic shape stayed intact; now I could make it stronger. I brushed wallpaper paste onto the interior edges of all the pages, and also pressed some paper towels in there to absorb the paste and create inner walls that would help hold the shape together even more. I reinforced these inner walls with a layer of newspaper and paste.
I stacked books on the shape again and let that dry for a couple days. Finally, the whole shape was pretty sturdy; finally solid enough to serve as the outer edges of the book sculpture.
(Note: I could’ve made this a lot easier on myself by allowing those page edges to be much wider — let’s say an inch all the way around rather than a quarter-inch. They would’ve been less flimsy, stacked a lot more easily, and probably wouldn’t have warped as badly. But I needed to keep this wall of pages super thin since the face I was sculpting included holes that go very close to the edges of the book.)
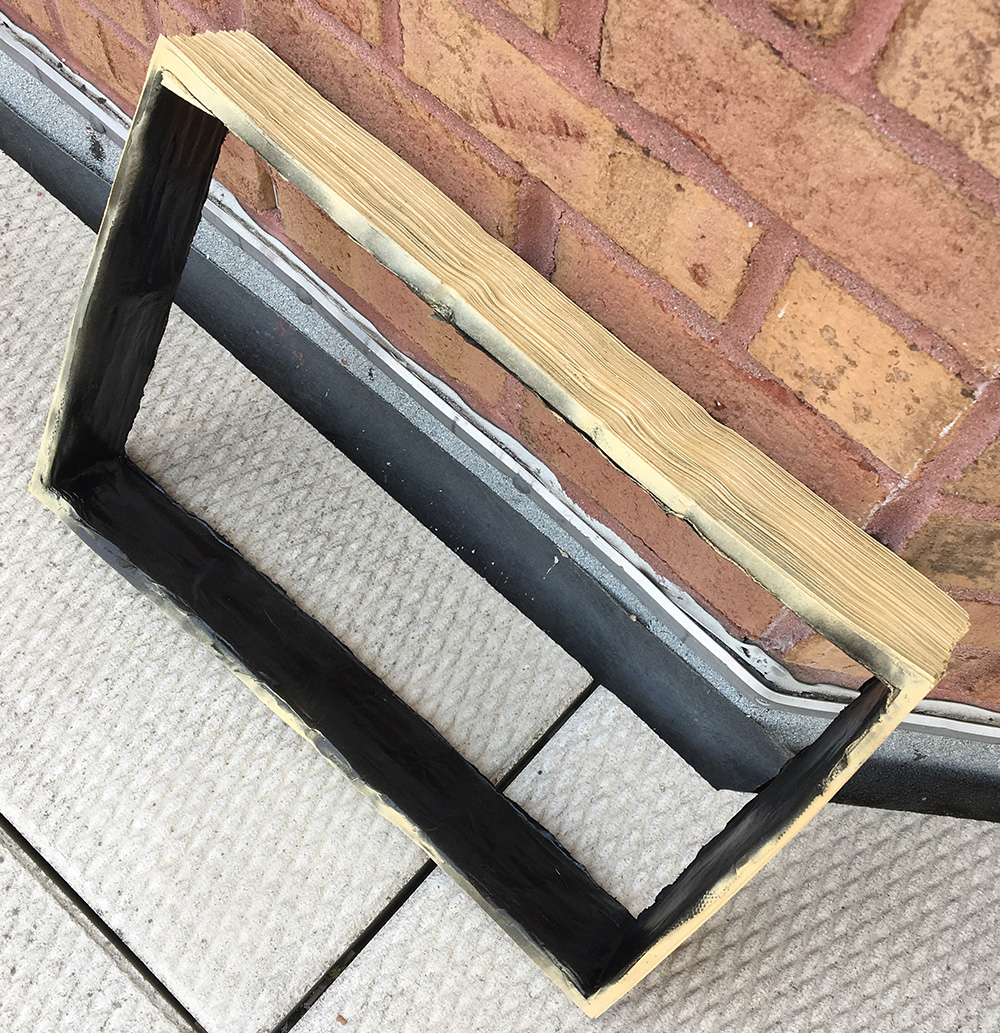
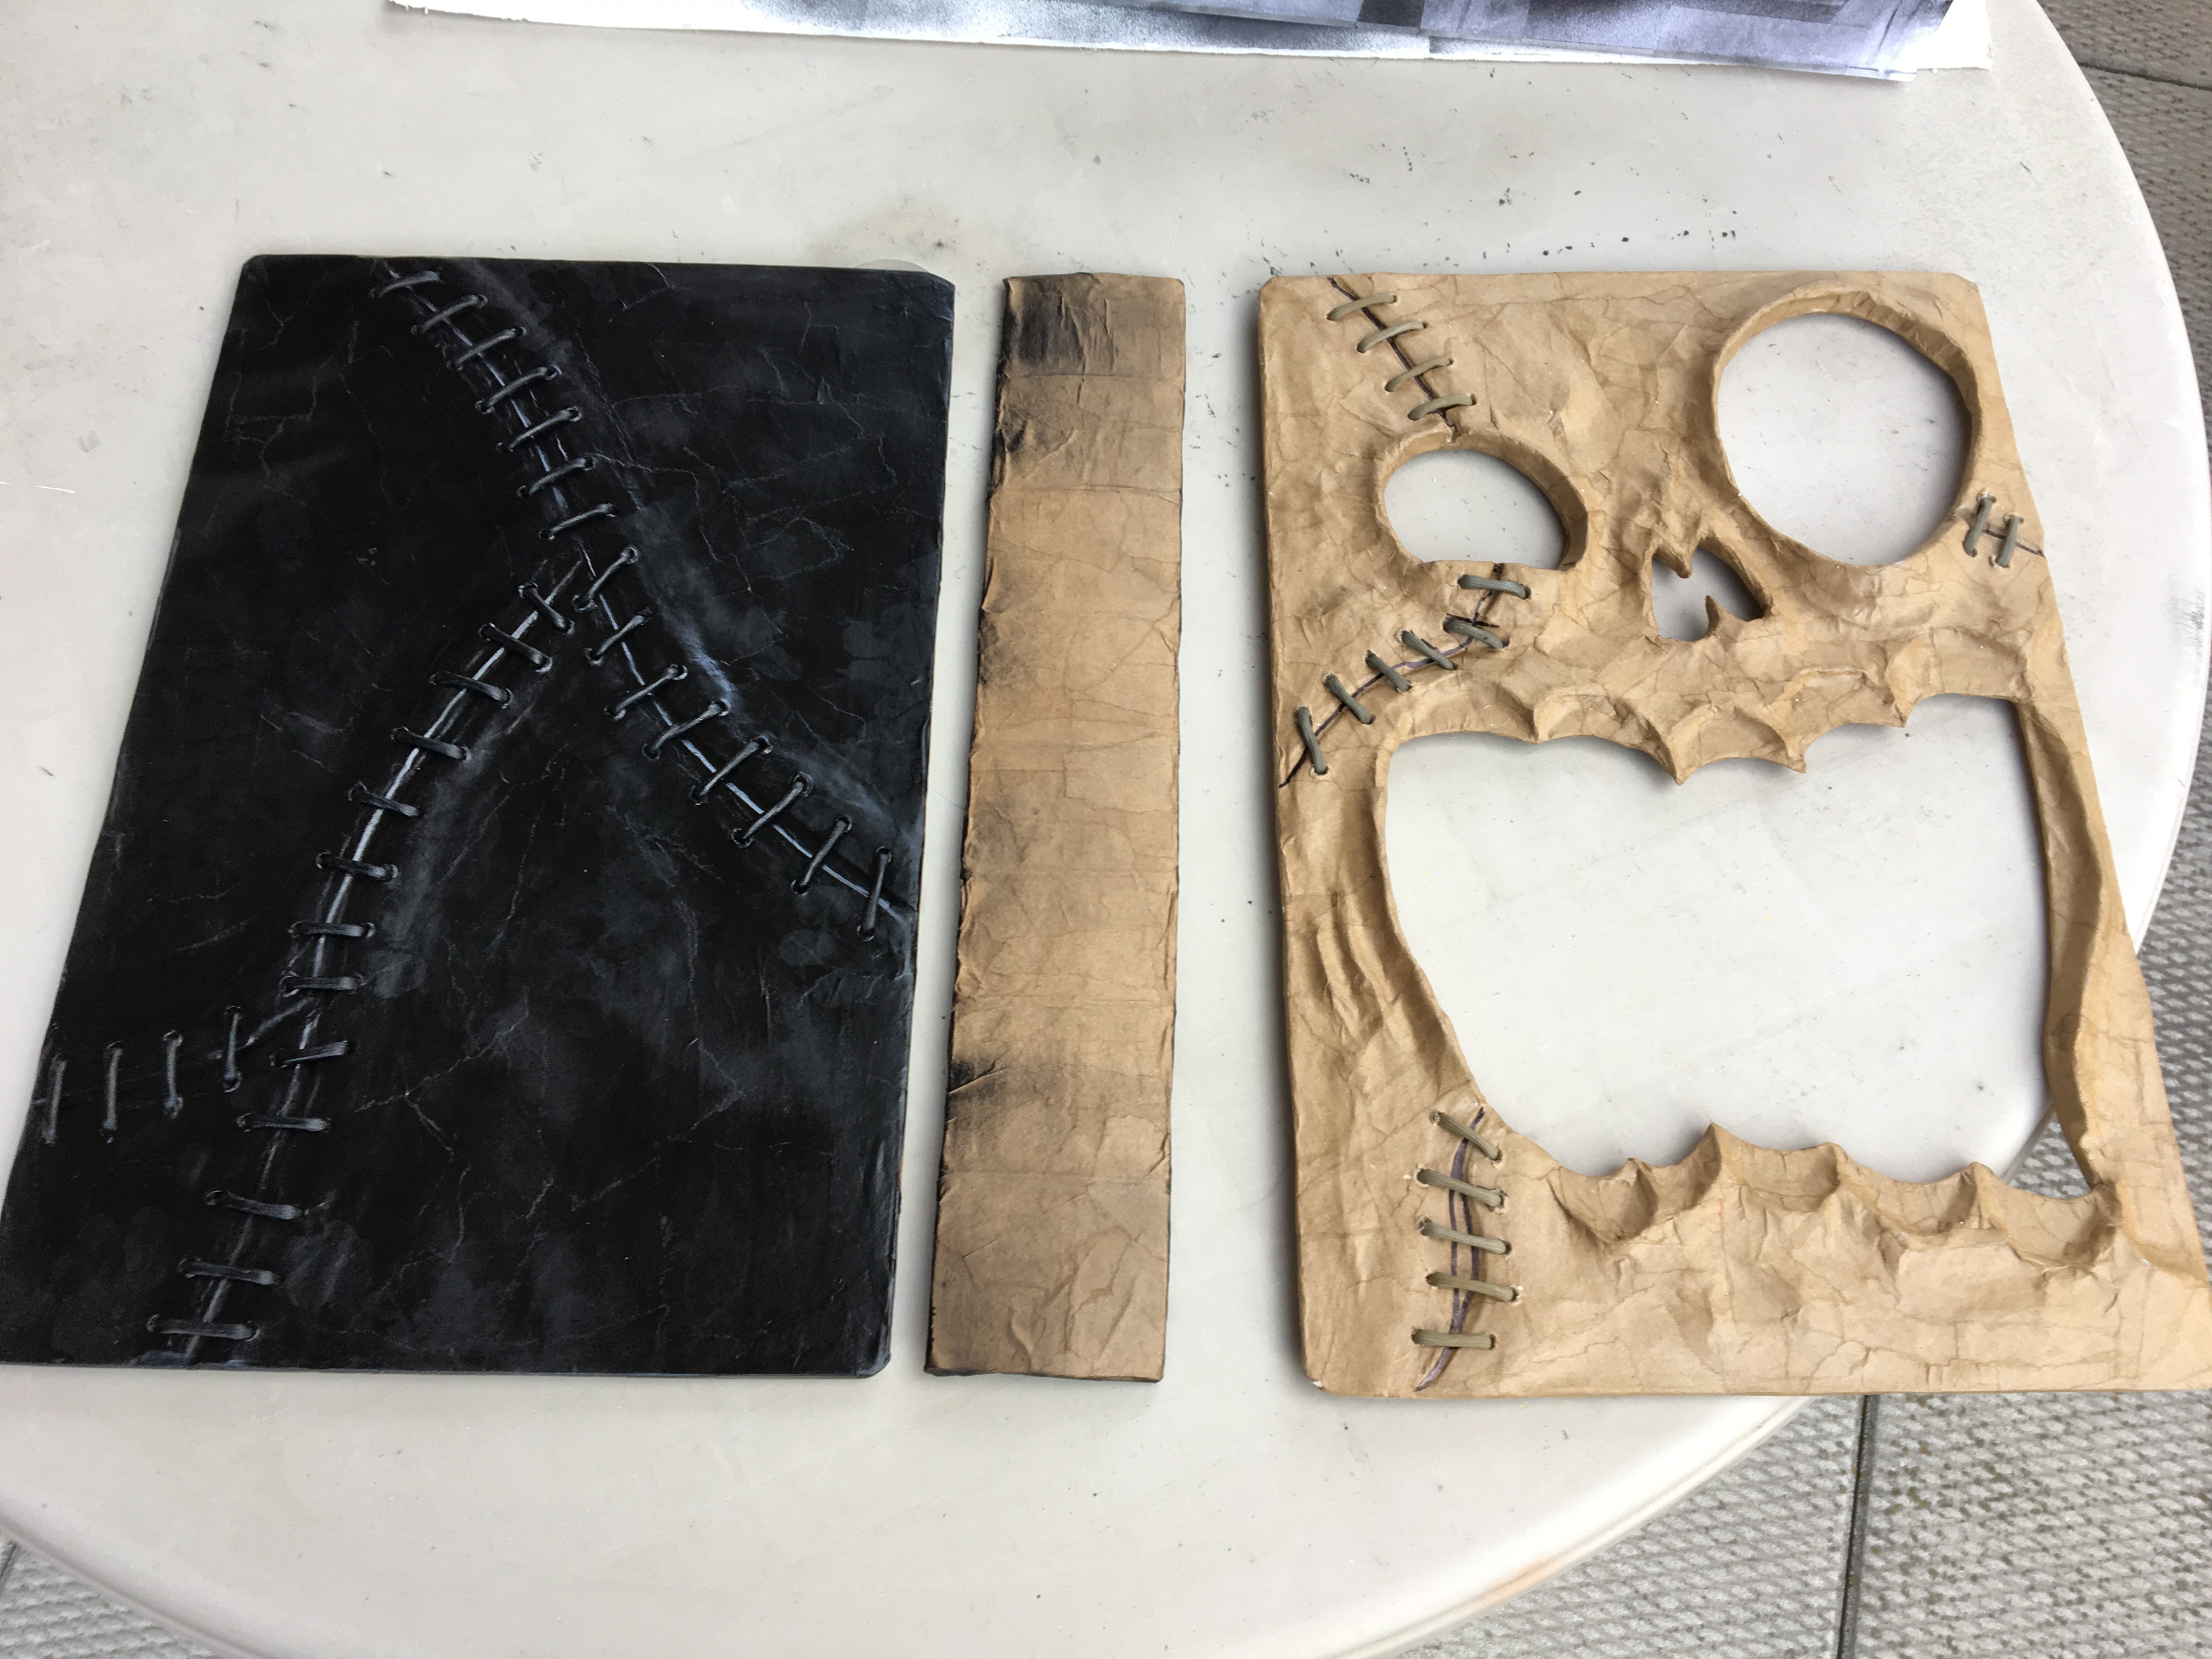
I’ll write a lot more about painting in part two, but for starters I took this part outside and spray painted the whole thing black, and then spray painted the exterior this beige color.
That’s all for part one! Continue to part two…
 About Manning Krull
 How to make a 4-foot paper maché alligator
 My violin skull mask, Mardi Gras 2015
 Three-headed paper maché dragon sculpture
Leave a comment