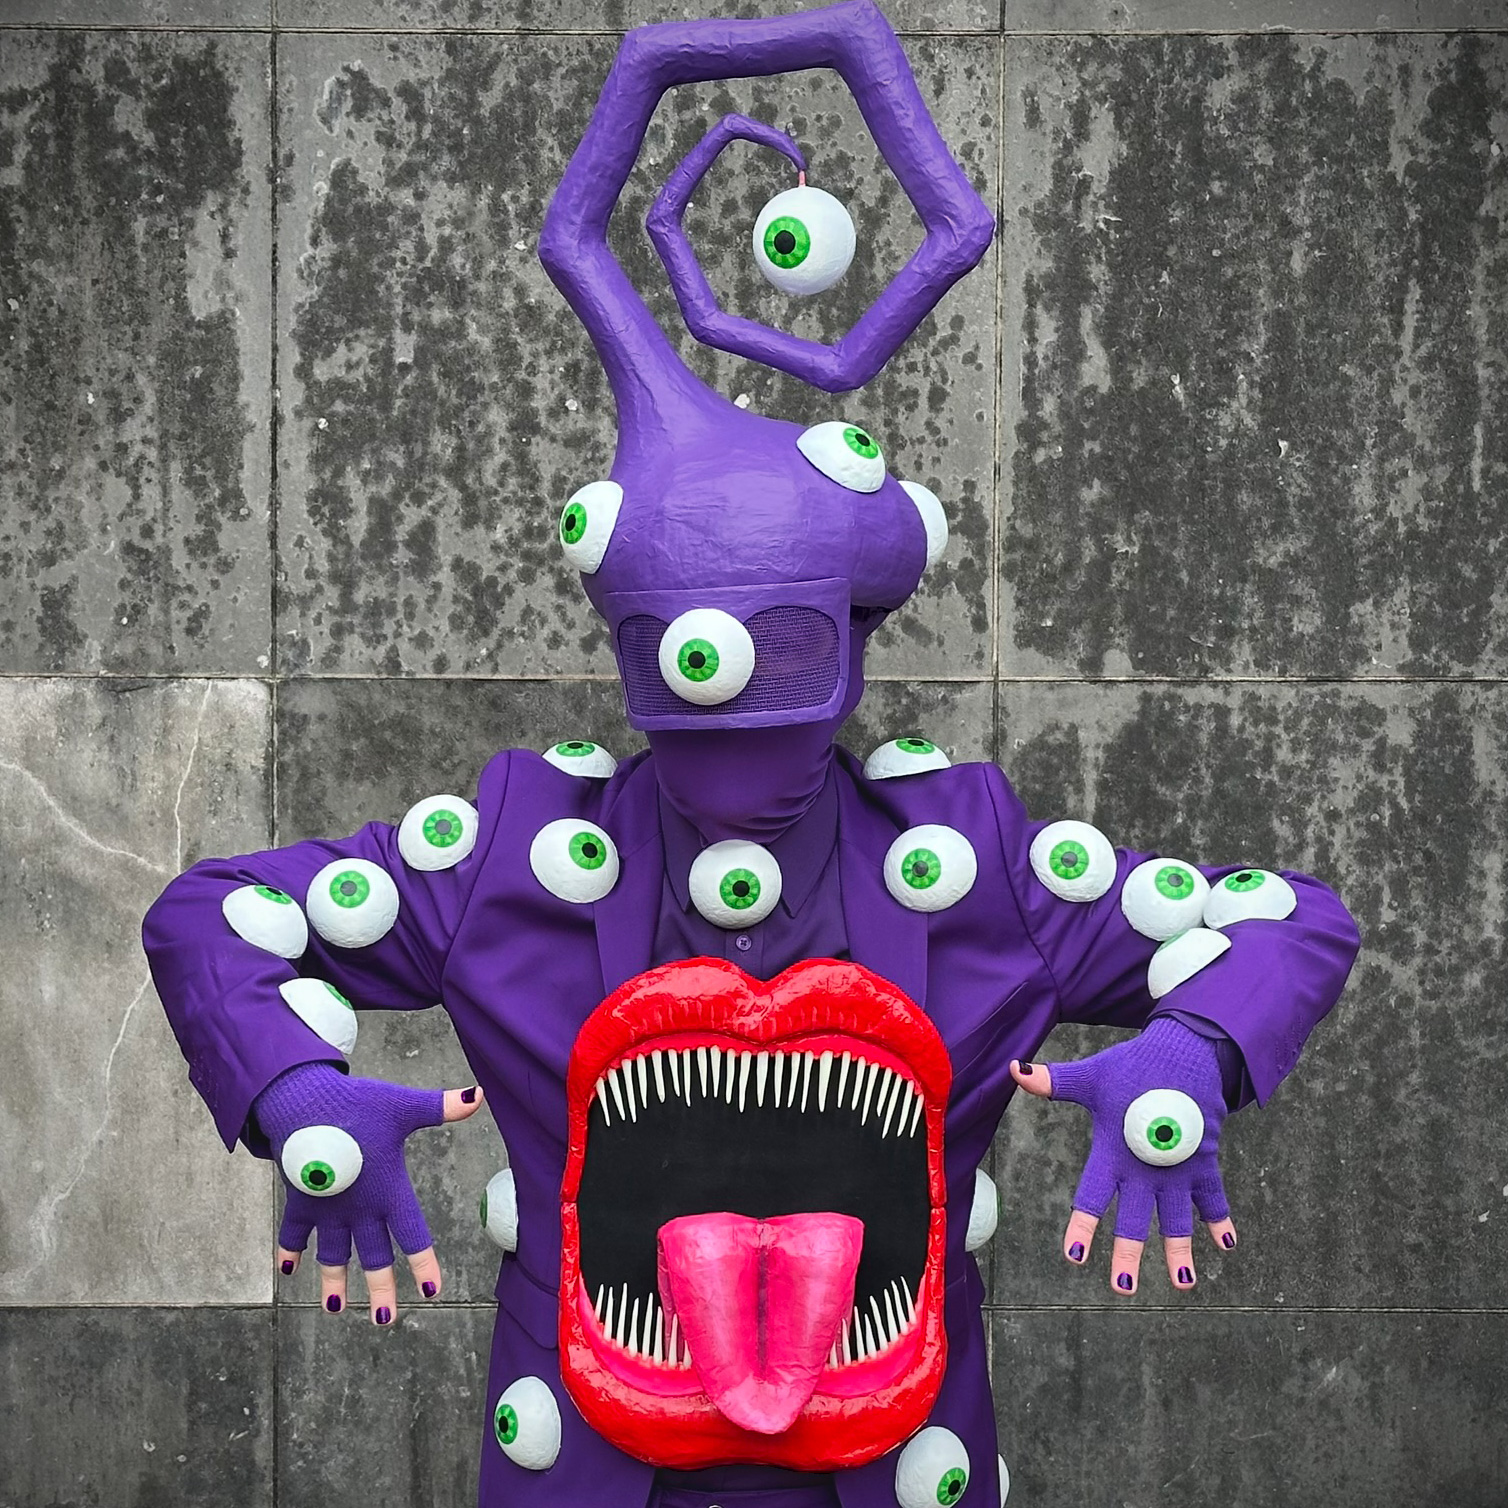
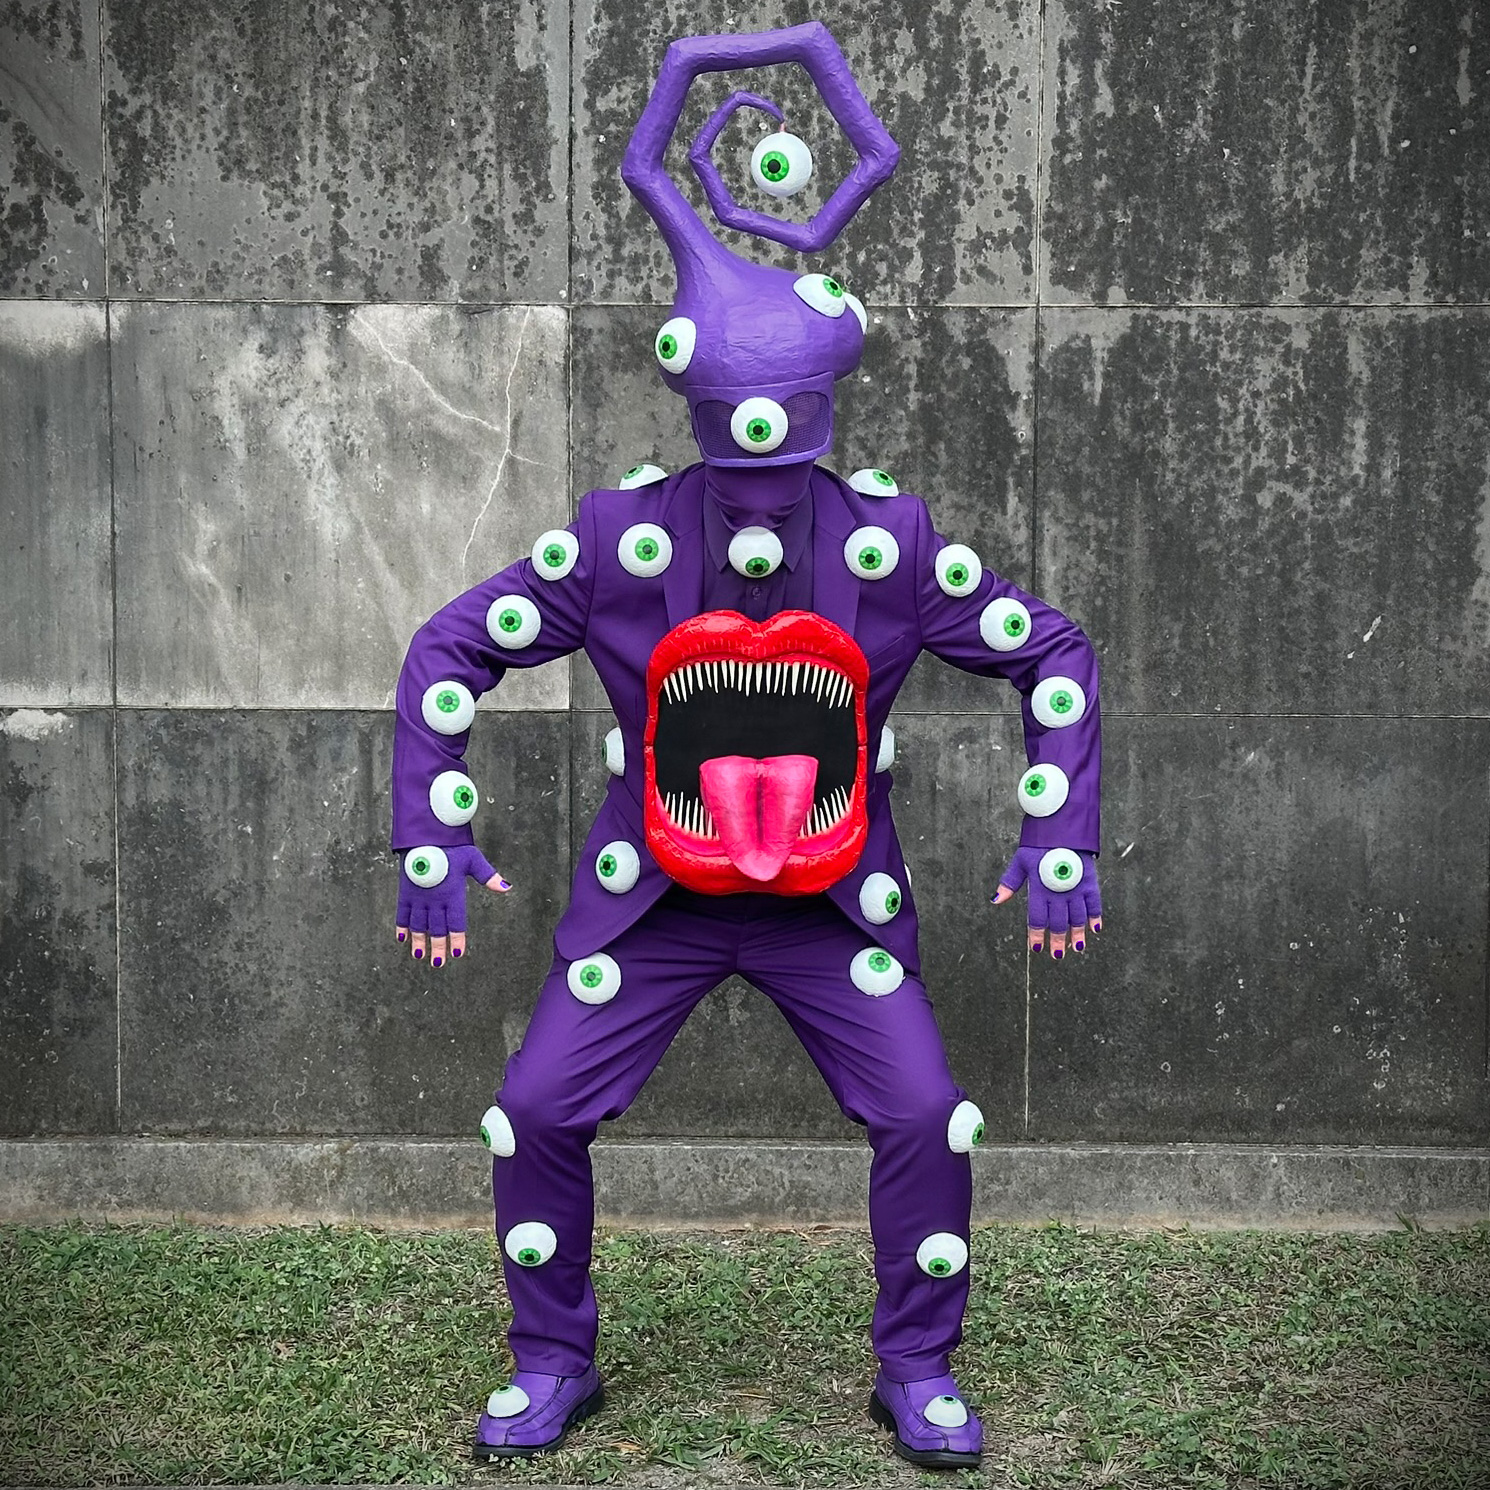
Eyeball alien costume, part 1: headpiece and dangling eyeball
Published October 31st, 2026
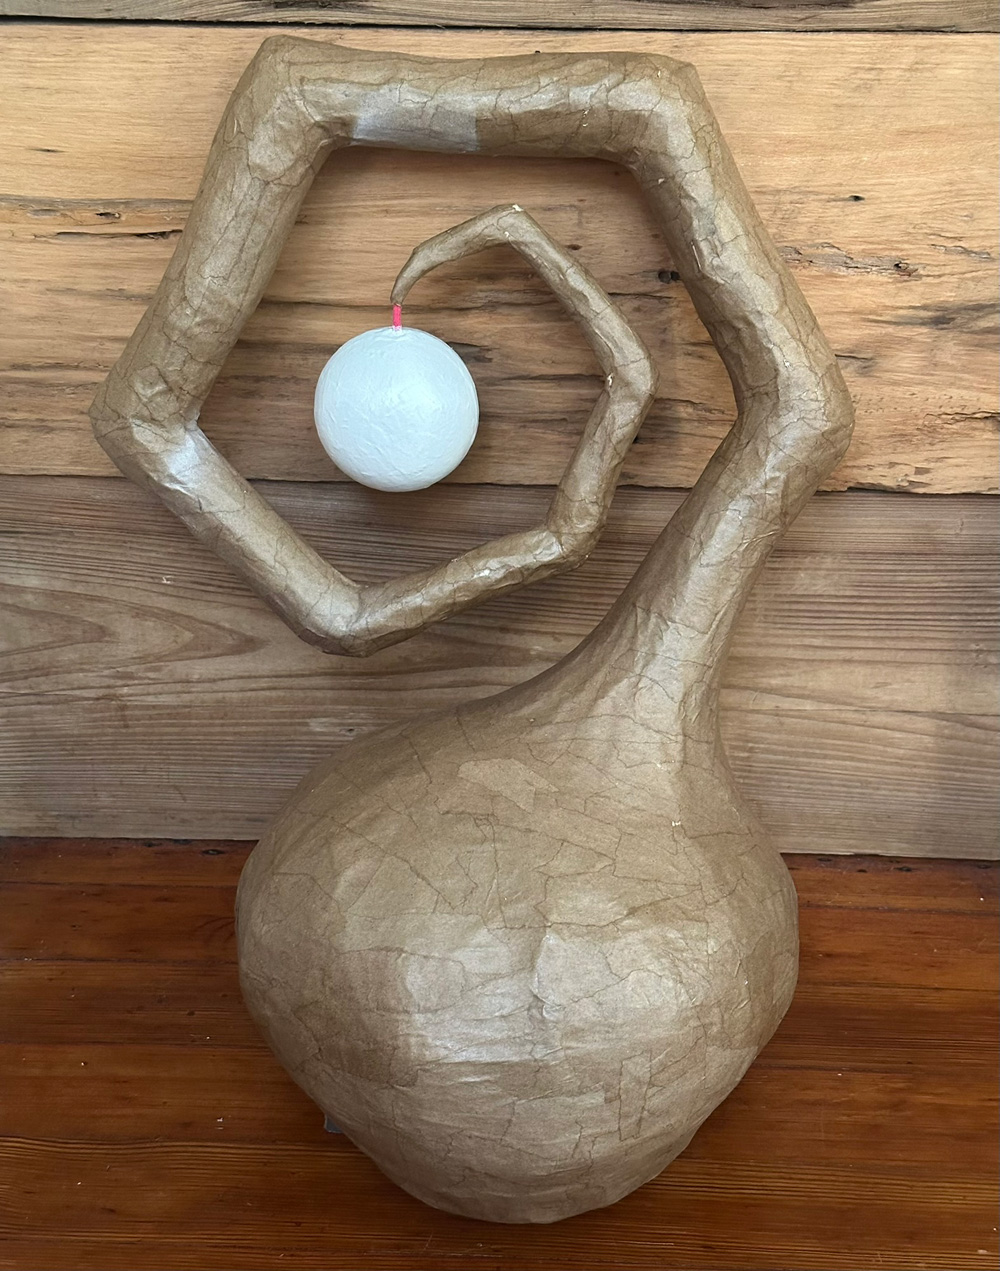
This alien costume is my Halloween costume for 2026! It's a whole bunch of parts. I'll start with how I made the headpiece — it's two basic pieces that are connected: the dome shape, and the spiral tentacle thing. Well, and also sort of a third piece; the removable face mask. Here's how I made all that stuff...
The wearable dome
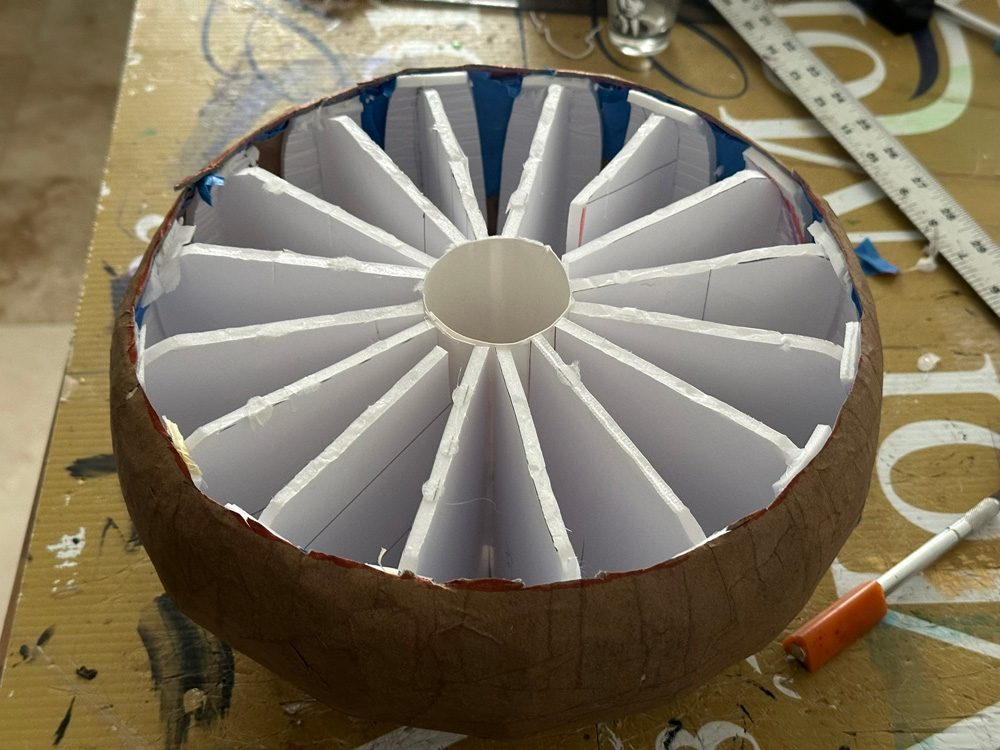
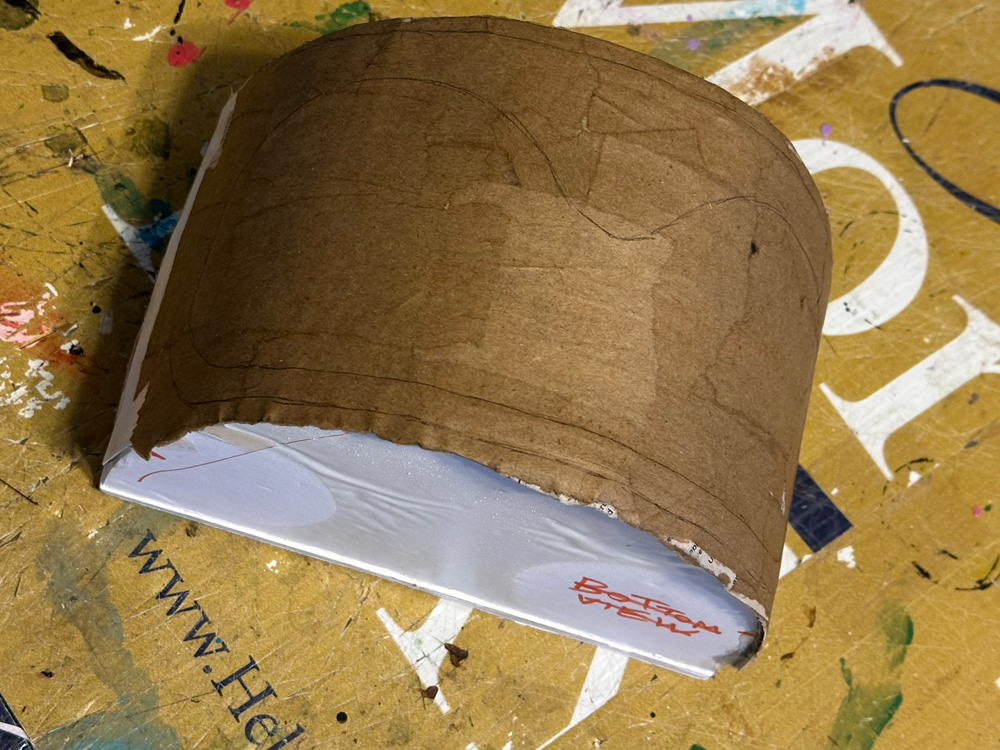
For the dome shape, I started with the same method I used for my pumpkin lid hat last year: a bunch of curved foam board ridges arranged radially around a central tube, and then covered with tape and other materials, and then eight layers of paper maché. I didn't take any pics of this process, sorry! Here's what the bottom looked like when the paper maché was done and it was time to take out all the inner junk:
The finished dome was a perfect circle, but I discovered that it didn't fit on my head correctly, so I decided to squish it to be more narrow and to be longer from back to front. The way I did this was to wrap blue painter's tape around it tightly, cinching it to be more narrow, and then I dampened the entire surface, inside and out, with a sponge and water. I did this a few times to let the water seep into the paper maché a bit. Then I let it just sit there upside-down to dry. When it was dry, I removed the tape, and the dome held the new skinnier shape perfectly. This is a trick I figured out years ago that, in some cases, can let you reshape paper maché after the fact.
The dome shape remained somewhat soft and squishable, so I reinforced the bottom edge with plastic zip ties (with the square hole part snipped off), taped inside the inner bottom edge and then covered with paper maché. When that was done, the whole shape felt much more solid.
Spiral tentacle thing
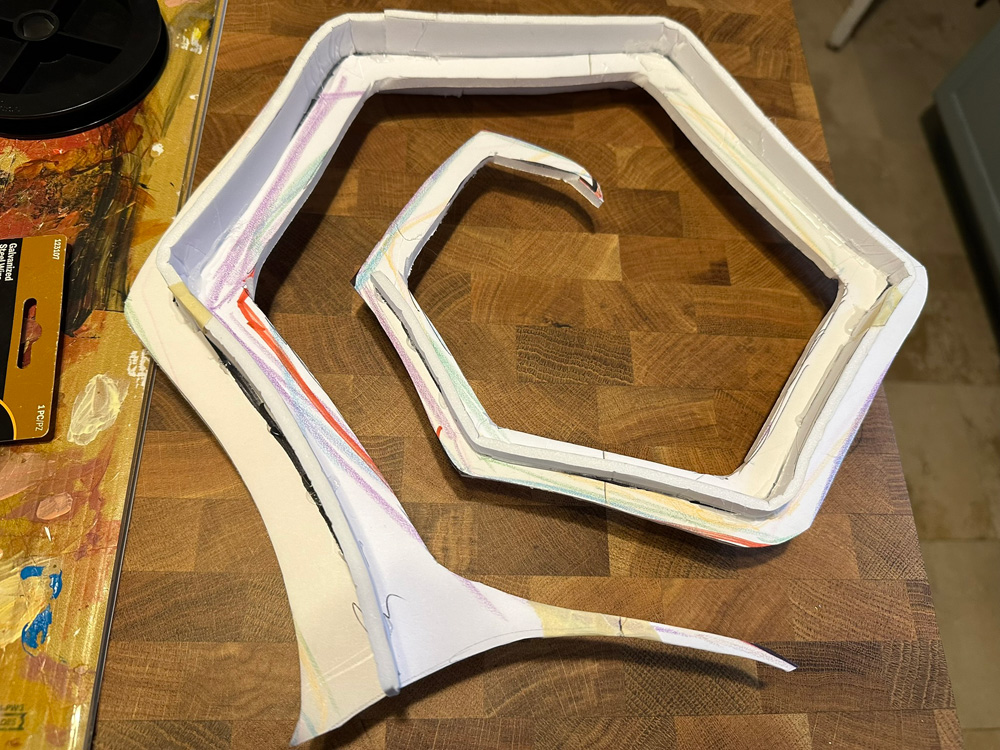
For the spiral tentacle thing, I started with a flat shape cut out from cardboard, and then I added a foam board ridge all along the central line of the shape with hot glue. I did this on both sides.
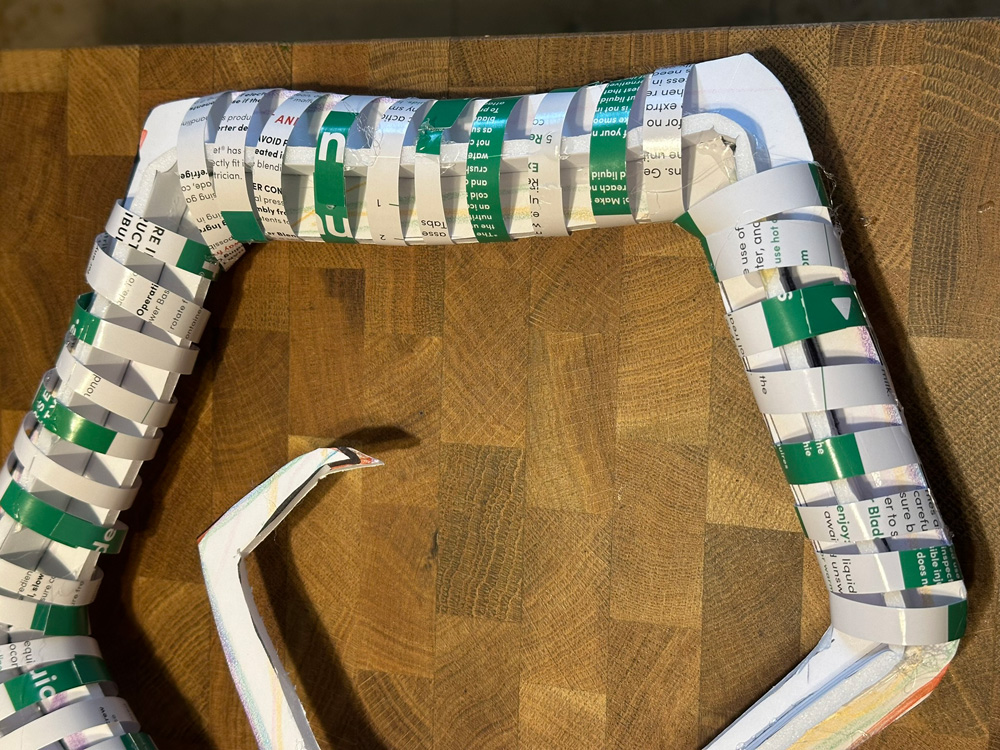
Then, I cut out some narrow strips of paper from an advertisement that was very thin but fairly stiff — like thinner than poster board and thicker than a glossy magazine cover. I wrapped this around the foam board shape using tiny dots of hot glue to hold it in place, and I was careful not to pull too hard when wrapping the strips around, so they would stay rounded rather than bend where they go over the ridges. Hard to explain, but the idea was to keep the shape as rounded as possible but not too loose.
For the last two segments of the spiral, the smallest ones, I skipped the paper strips and just used foam clay to pad those areas out; much easier/faster. Oh yeah, and I put a piece of very stiff wire inside the last two segements to help prevent them from sagging when I add the eyeball later.
Once I was done with the narrow strips and foam clay, I covered the whole thing with two layers of masking tape, which really smoothed it out. Then I put just two layers of paper maché on the whole thing. If I needed this spiral to be really sturdy I would do more like six or eight layers, but I didn't care about that for this simple costume piece.
Now, to attach the spiral tentacle thing to the dome, I first just glued it on with a ton of hot glue, and I held it in position in my hands while it set. When it was set, the connection was somewhat flimsy, but good enough for the next steps...
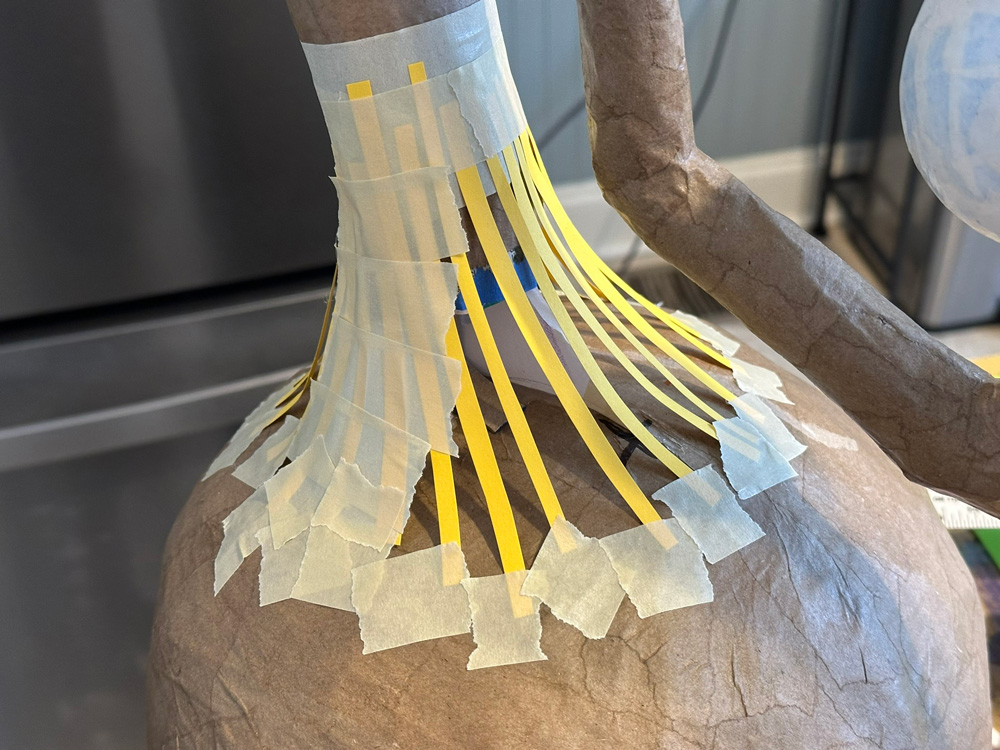
Next, I hot-glued some little cardboard supports around the base of the tentacle to make the connection a bit sturdier. Then I built a sort of upside-down funnel shape to hide the connecting area and smooth out the shape. To do this, I cut a bunch of very narrow strips of thick paper and taped them in place so that they have a curve to them. Each strip is extremely flimsy on its own, but once you have a ton of them together, they're strong enough to support masking tape, laid carefully in place. Then, once the masking tape goes all the way around and covers the whole thing, suddenly the shape feels much more solid! Not super solid, but the difference is huge. Then I added a second and third layer of masking tape, and then the shape was strong enough to put paper maché on; I added six layers of paper maché on this funnel shape. After it dried, it felt totally strong and stable. You could hold the thing out horizontally and it wouldn't sag at all.
Dangling eyeball
The dangling eyeball inside the spiral is a hollow plastic sphere — some packaging from a dollar store toy. It opens into two halves. I separated the halves and used wire snips to snip a small V-shaped notch at the edge of one half, and then I did the same on the edge of the other half. When I put the halves back together, I had a little square-shaped hole. This is where I'd insert the optic nerve (a piece of string) later.
I covered the eyeball with just one layer of paper maché to give me a good surface for painting. I left the little square hole uncovered.
For the optic nerve, I cut a length of thick white cotton string and tied a knot at one end; this is the anchor to keep the string inside the eyeball.
I "dyed" the string pink by putting a little bit of pink acrylic paint into my hands, and I just worked the paint into the string with my fingers. Then I squeezed as much of it out as possible, and let the string dry.
When the string was dry, I inserted the knotted end into the plastic sphere; I had to squish it through the little square hole. Then I used hot glue to lock the knot in place inside the hole. Then I covered over the little area around this connection point with a layer of paper maché.
I'll talk about painting the eyeball and adding the iris and pupil in my article about the rest of the eyes, coming up.
In the spiral, on that little tip in the center, I cut out a long notch with my X-acto knife, and then I put some hot glue in there and inserted the end of the optic nerve (which I'd trimmed to the right length).
Then I covered over that connection area with a piece of masking tape and a layer of paper maché.
The paint-infused string is fairly stiff but a little bit flexible, so when all of this was connected, the eye can swing around and twist around a little bit, but not too much. The side with the iris and pupil remain basically in front all of the time, which is what I wanted; I didn't want the eyeball to be able to turn around completely so that the iris and pupil end up in the back.
Making it wearable
I'm always trying new methods for making big masks and headpieces wearable, stable, and comfortable. For this one I tried something new. I used the removable suspension from a hard hat — that's the straps and padding and stuff that fits on your head — and I built a structure directly onto it that sort of mimics the way the shell of a hard hat goes over the suspension. I made this from strips of stiff pasteboard that came in a case of wine; like the pieces that separate and protect the bottles inside. I wanted to try working this way because whenever I use an actual hard hat I always have to cut pieces of it away, and it's a huge amount of work. Building my own custom shape with pasteboard and hot glue was way easier, although probably a little less sturdy. Anyway, I glued everything together with hot glue, and I put a huge amount of hot glue on the areas where the tabs of the hard hat suspension connect to the structure I built; I really don't want the thing coming apart!
I glued a flat roof of foam board on top of this wearable suspension thing. Then I put the wearable thing on my head and put the paper maché dome over top of that. It sat too low, so I figured out how much height I'd need to add inside, and then I made a little tube of foam board to stand in between the two pieces. I hot-glued all of this together.
Part of the wearable suspension thing was visible at the back of the headpiece, so I covered it with some foam clay and masking tape to sort of mold it onto the back of the dome. I covered this area with two layers of paper maché. (I left the adjustable strap free; I don't care that that part is visible.)
Painting
I applied a coat of Mod Podge to the whole headpiece to smooth out the surface. I always mix a few drops of acrylic paint into the Mod Podge so I can clearly see where I've covered. When that was dry, I painted the whole headpiece with a mixture of acrylic paint that I made to match my purple suit as well as possible.
Eyes on the base
I'll write about the other eyes on the headpiece in a separate article. So many parts to this costume!
Removable face mask
Much earlier in this whole process, I attached three magnets inside the dome of the headpiece, right inside the front edge. I hot-glued them in place and then put masking tape over them, and then just one layer of paper maché.
Then I put a strip of poster board over the magnets and attached three more magnets on top of that. I hot-glued these in place, and then added a second strip of poster board with more glue. This gave me three magnets that were locked in place inside the poster board strips, and they align perfectly with the magnets in the dome. Now I could remove this strip and build the face mask onto that.
The face mask is just eight layers of paper maché that I applied onto a curved shape, let it dry, and cut it out. The hard part was determining the exact curve shape.
I wanted the face mask to have a curve that exactly matches the curve of the front edge of the headpiece. To do this, I flipped over the headpiece and traced the front edge with tracing paper. Then I cut that shape out and traced it onto foam board four times, and cut those shapes out. Then I hot-glued thos shapes onto a rectangular base of foam board, and laid poster board over it, which I hot-glued in place.
I drew the face mask shape onto construction paper, cut it out, and laid it onto my curved base. Then I covered the poster board with shipping tape to act as a release agent for the paper maché. Then I just applied eight layers of paper maché onto the base with the mask shape on it.
When the paper maché was dry, I cut the whole surface off of the base, and, by looking at the back side, I could see the face mask shape and use that as a guide for cutting it out.
I added pieces of wire in the back, taped in place with masking tape, to help hold the curve shape of the face mask. I covered over all this with one layer of paper maché.
Remember the magnets I put inside the headpiece, and the removable strip that attaches to them? I connected the face mask to that removable strip with some wire wrapped in masking tape, hot-glued in place with tons of hot glue.
I painted some screen door material, let it dry, and hot-glued it into the face mask. Easy!
I hot-glued an eye right in the middle of the screen. Like I mentioned, I'll talk about how I made all the eyes in the next article.
Headpiece is finished! That's all for part one! Whew!