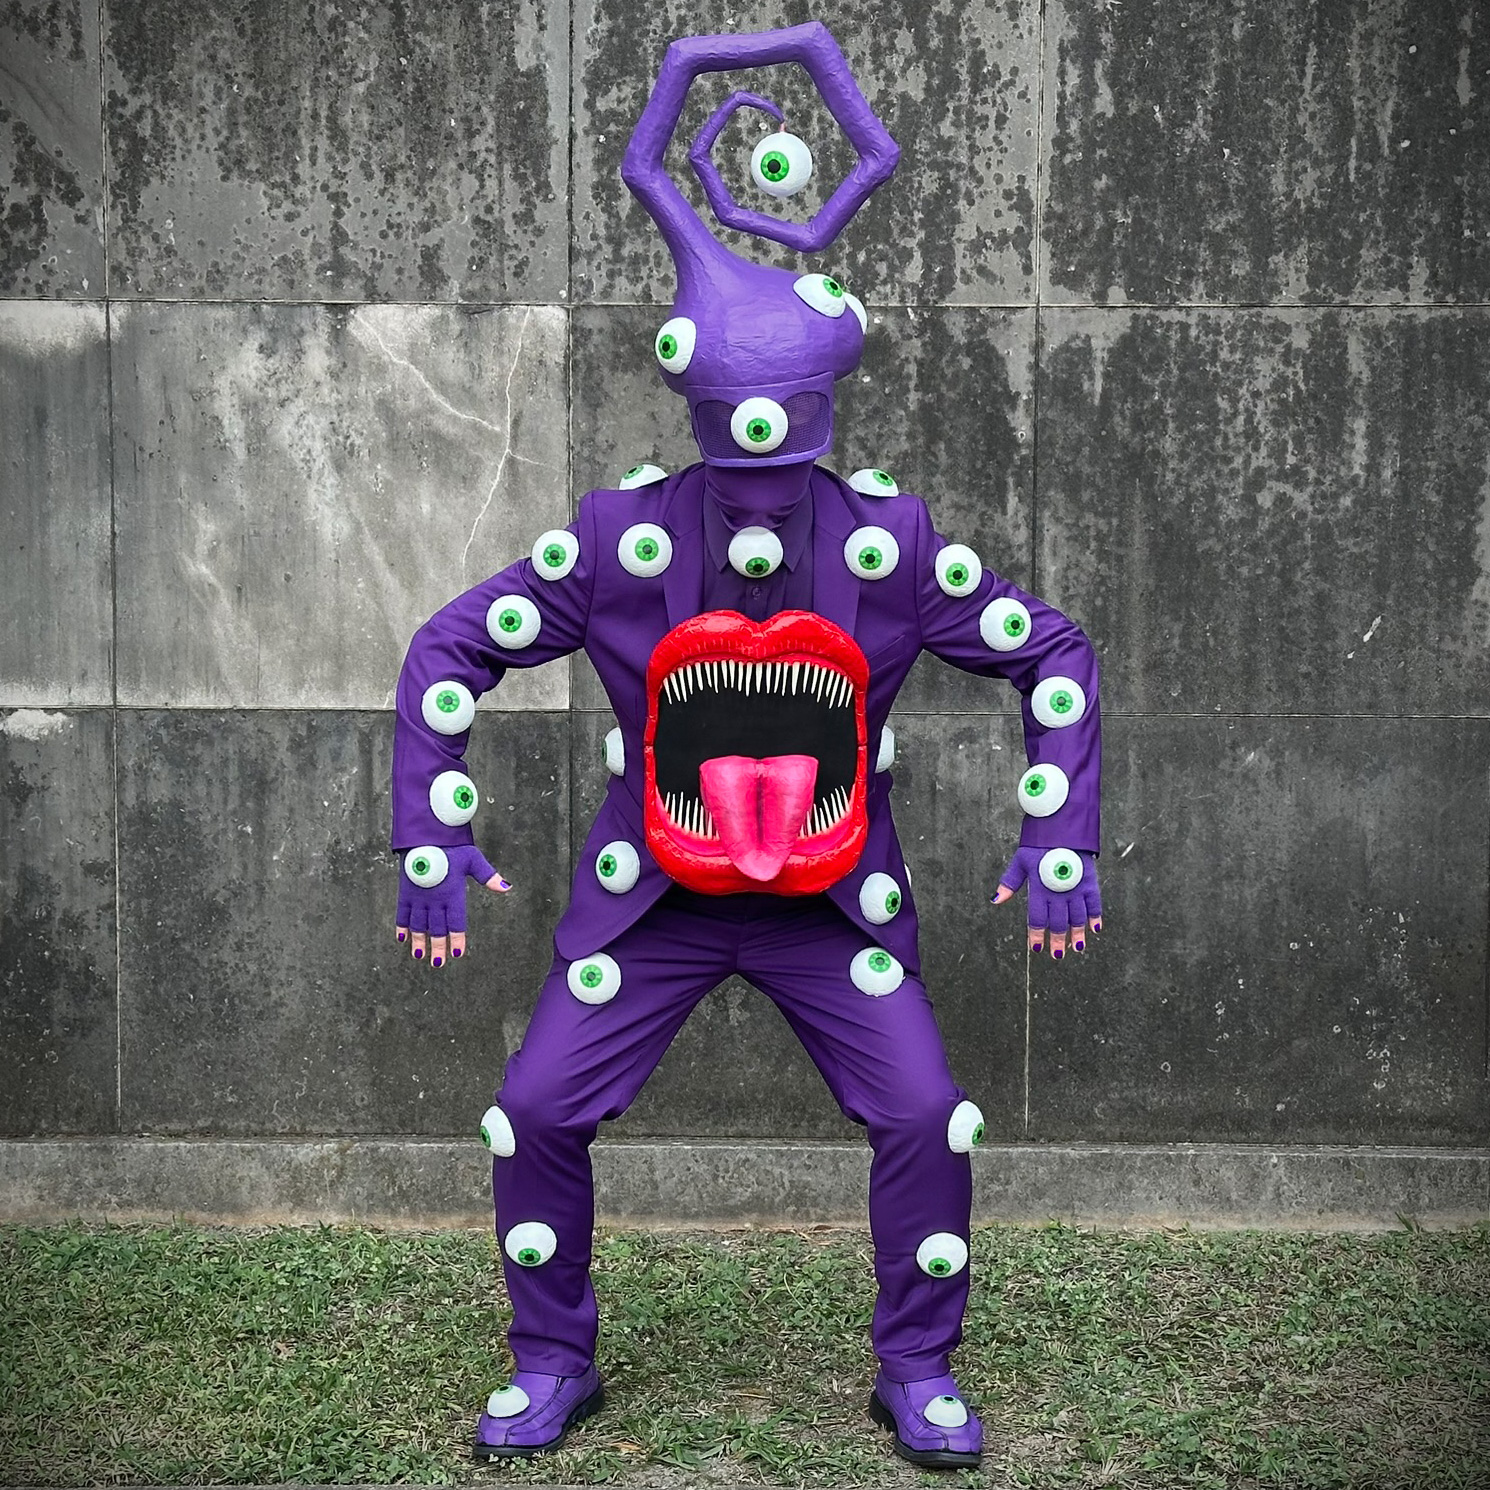
Eyeball alien costume, part 3: the mouth
Published October 31st, 2026
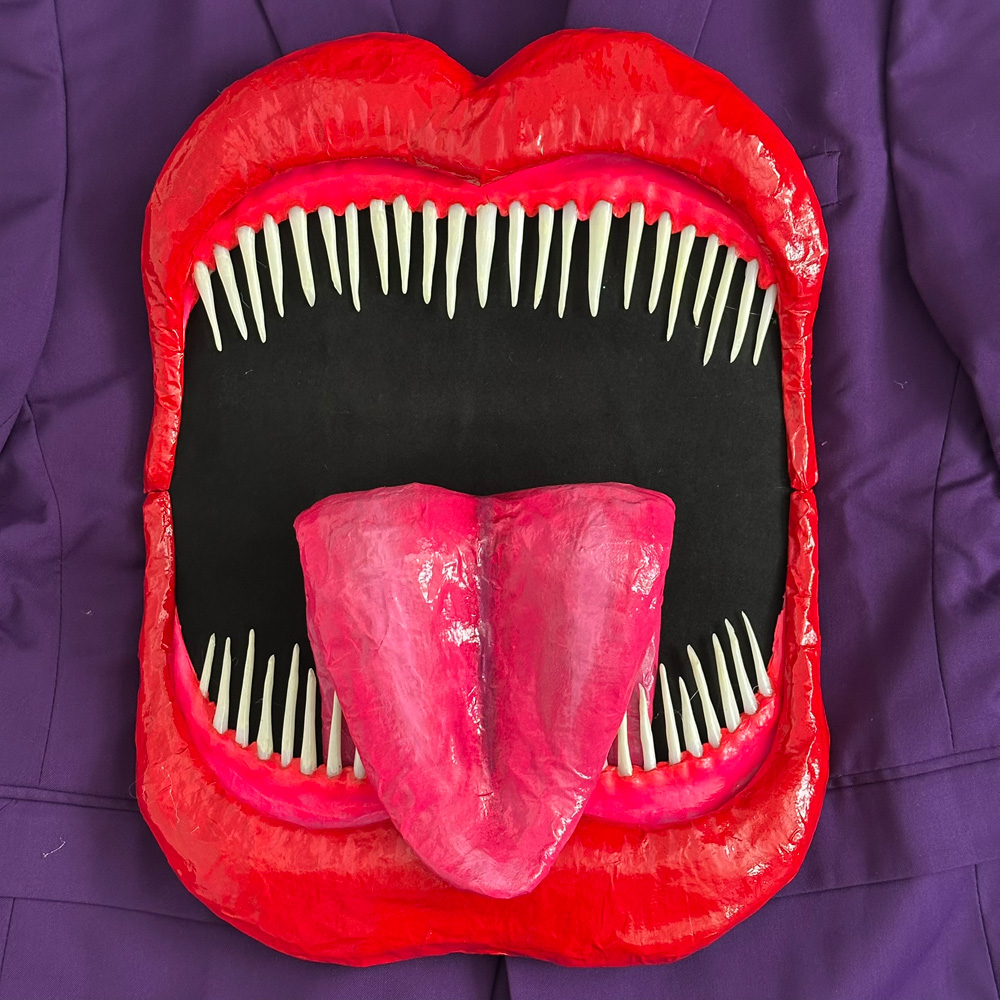
The alien mouth is made from a few components: lips, gums, teeth, tongue, and the black interior surface.
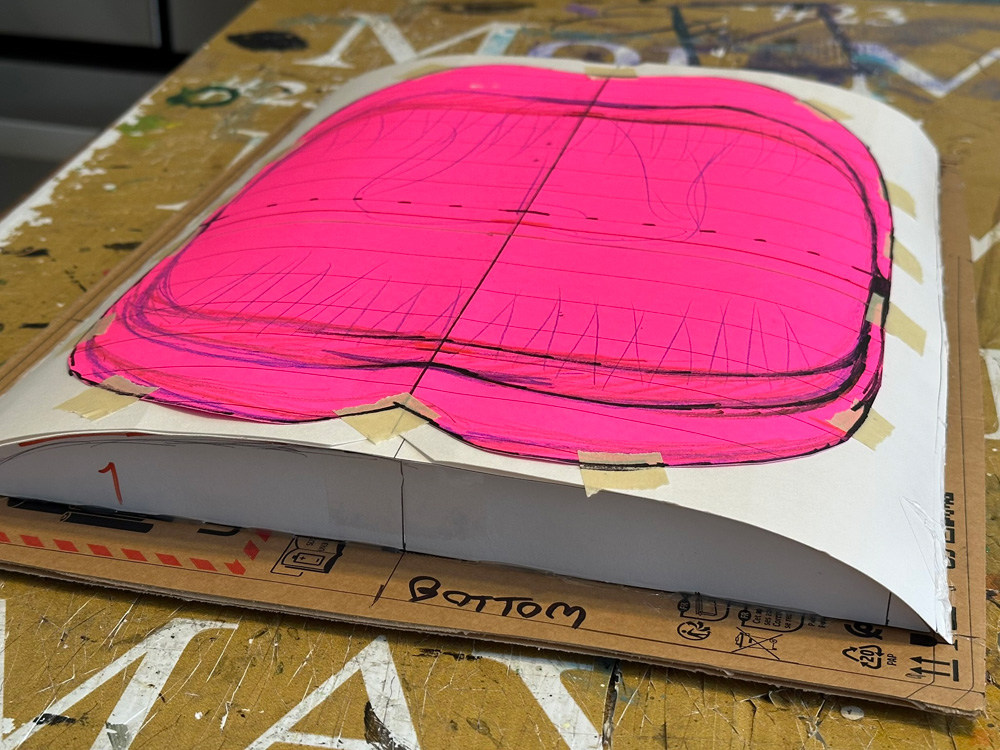
I designed the whole mouth shape on a piece of poster board and cut it out. Then I made a curved platform to work on while I'm building all the pieces, so that they can all have the same curve. I made this platform by cutting out some little curved pieces of foam board and gluing them onto a flat cardboard surface, and then I curved some poster board over top and glued that in place.
Teeth!
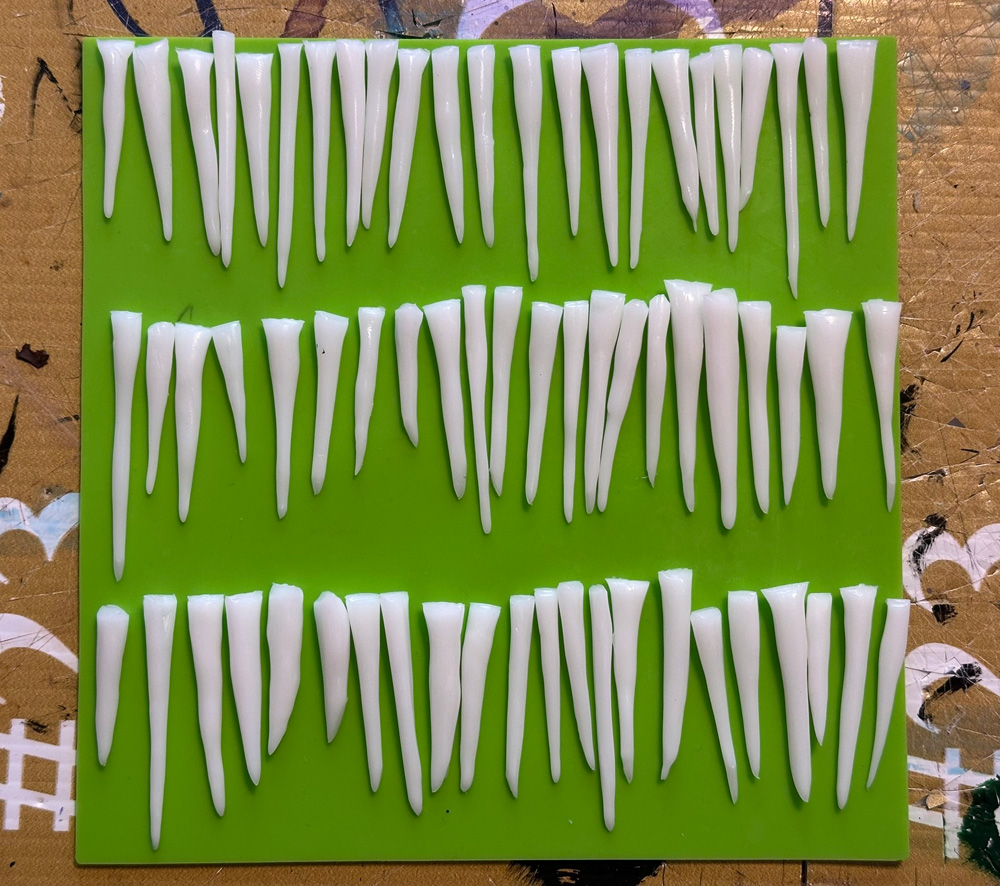
I started with the teeth! I made about 60 teeth from thermoplastic; this was my first time using this stuff. You just put a bunch of these tiny bits of plastic into hot water, let them soften and melt a bit, and then you can take out the blob and tear a piece off, and you have a minute or so to mold it before it cools down and sets. This stuff is fantastic, and very quick to work with; the only downside is that you can't do anything terribly precise with it. But for these teeth that was fine! I wanted them to have random lengths and widths. So I just made a ton of them as quickly as I could.
Gums
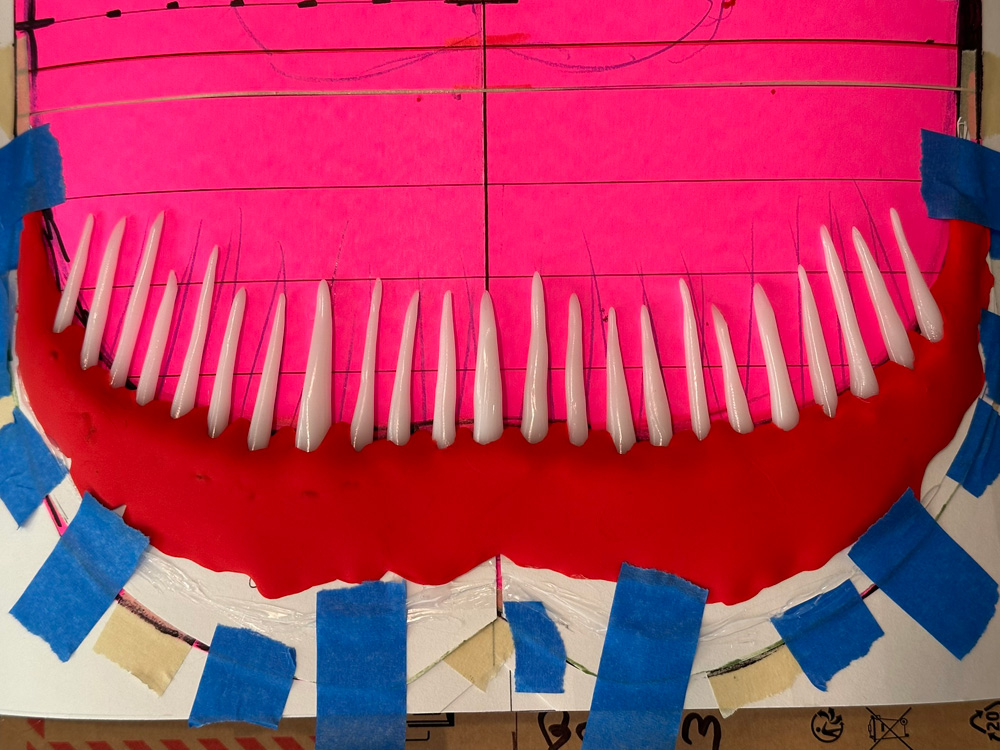
I took my original drawing of the mouth and some tracing paper, and I drew and cut out shapes for the gum pieces by themselves. I traced these onto poster board and cut them out; I made two copies of the top gums, and two copies of the bottom ones.
I laid the top gum shape in place on my curved platform and taped it down so it wouldn't move. Then I hot-glued the second copy onto the first one; having two copies glued together like this helps them retain their curve. Then I did the same steps for the bottom gums.
I hot-glued the teeth onto the gum shapes, using a lot of glue, and then when the glue had cooled, I added more hot glue over the tops of them; I really wanted the teeth to be locked in place so they can't slide out.
Then I used red foam clay to sculpt the gums over and around the teeth. I let this set for a day before continuing.
Lips
I went back to my original drawing and cut out the top and bottom lips; I didn't need to keep the intact drawing anymore for anything. I traced and cut out a second copy of both the top and bottom lip.
Just like with the gums, I laid the top lip in place and taped it down. Then I hot-glued the second copy of the top lip in place over that. Then I did the same steps for the bottom lip.
I padded out the lips with some foam board and foam clay. I let the foam clay set for a day, and then I untaped the lips so I could remove them from the mouth. I covered the lips with a layer of masking tape and then two layers of paper maché. Here's some info about my paper maché process and materials. The short version is: I use Roman PRO-543 universal wallpaper adhesive (paid link) and alternating layers of newspaper and brown wrapping paper.
Tongue
This part was fun! I made up an elaborate method for making the tongue...
I laid down a bunch of strips of masking tape, sticky side up, taped down onto my work surface with little pieces of tape. I put down enough of these to form big rectangle.
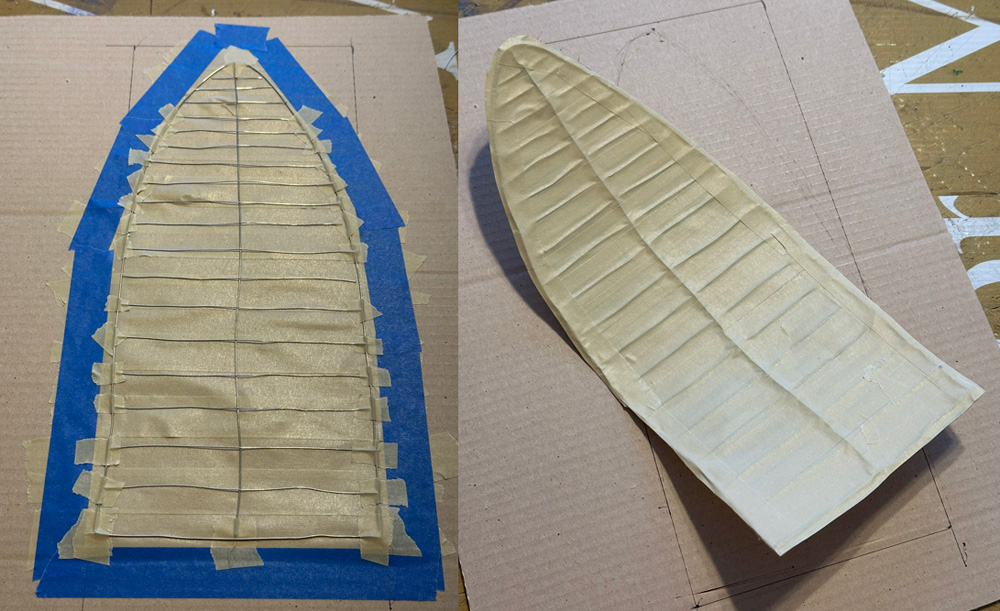
Then I laid a bunch of wire onto the masking tape. First, some wire to form the outline of the tongue. Then a piece down the middle. Then a bunch of horizontal pieces.
I covered all of the wire with more masking tape, so it's all locked in with tape on both sides. I cut out the tongue shape, and now I had basically a flexible, posable armature of the tongue. Masking tape is perfect for this — as opposed to, say, paper ‐ because it's flexible and has some stretch to it, and it doesn't tear easily.
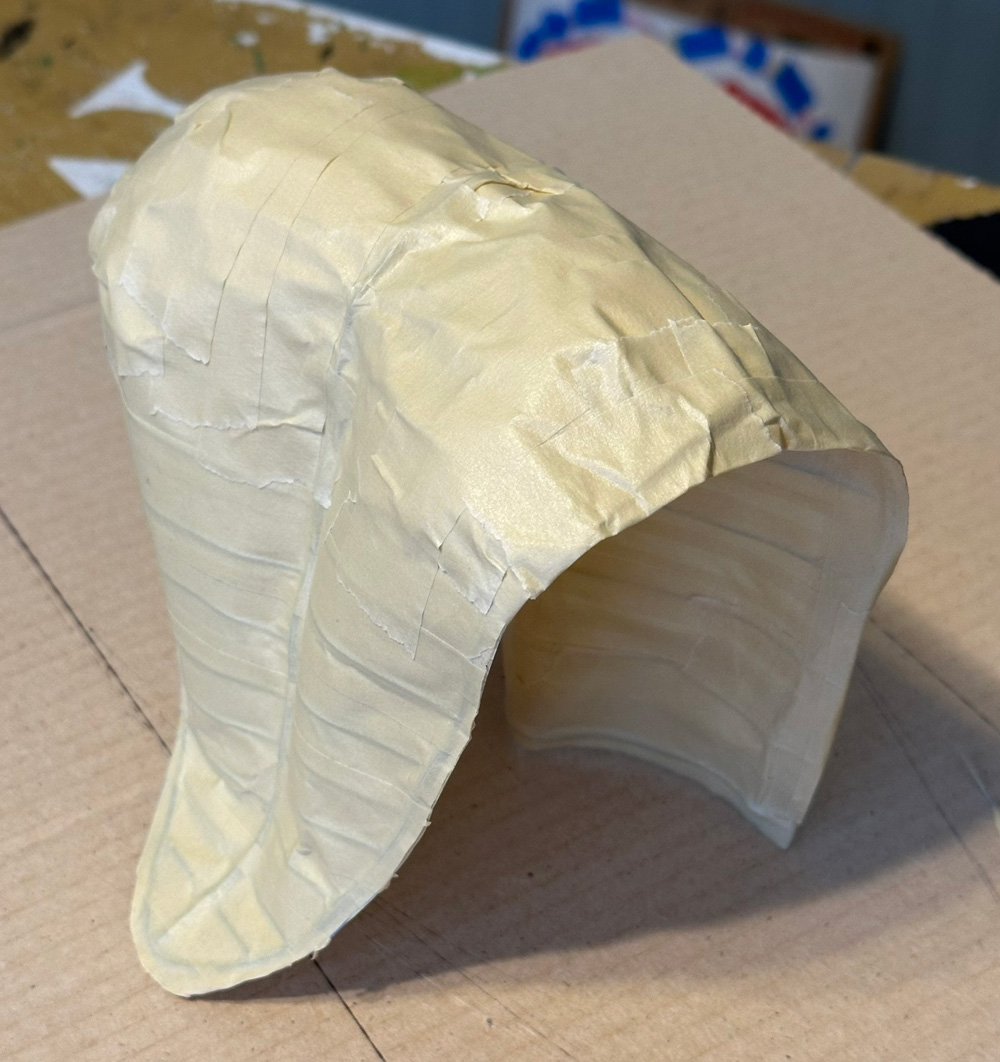
I bent and curved the tongue into the position I wanted. An unexpected thing happened while I was doing this; I found there were a few places where I needed to snip the wires to get them to go into the position I wanted to. So I did some snipping here and there and then taped the pieces back together as I went, until I finally had the position I wanted. I didn't want the tongue to stick out too far in the front, because I didn't want to bump it into things(/people) all the time.
Once I had the position worked out, I covered the tongue in a layer of paper maché — just to make it a bit more stable for the next step.
I then carefully covered the tongue in foam clay, trying to keep the layer of foam clay as thin as possible. When I was done, I saw some areas where I wanted to build up the shapes a little more, and also some dents I wanted to fix, so I addded some more foam clay.
I let the foam clay set for about 12 hours (that's plenty when the clay is very thin), and then I covered the whole tongue in masking tape, and then two layers of paper maché.
Painting
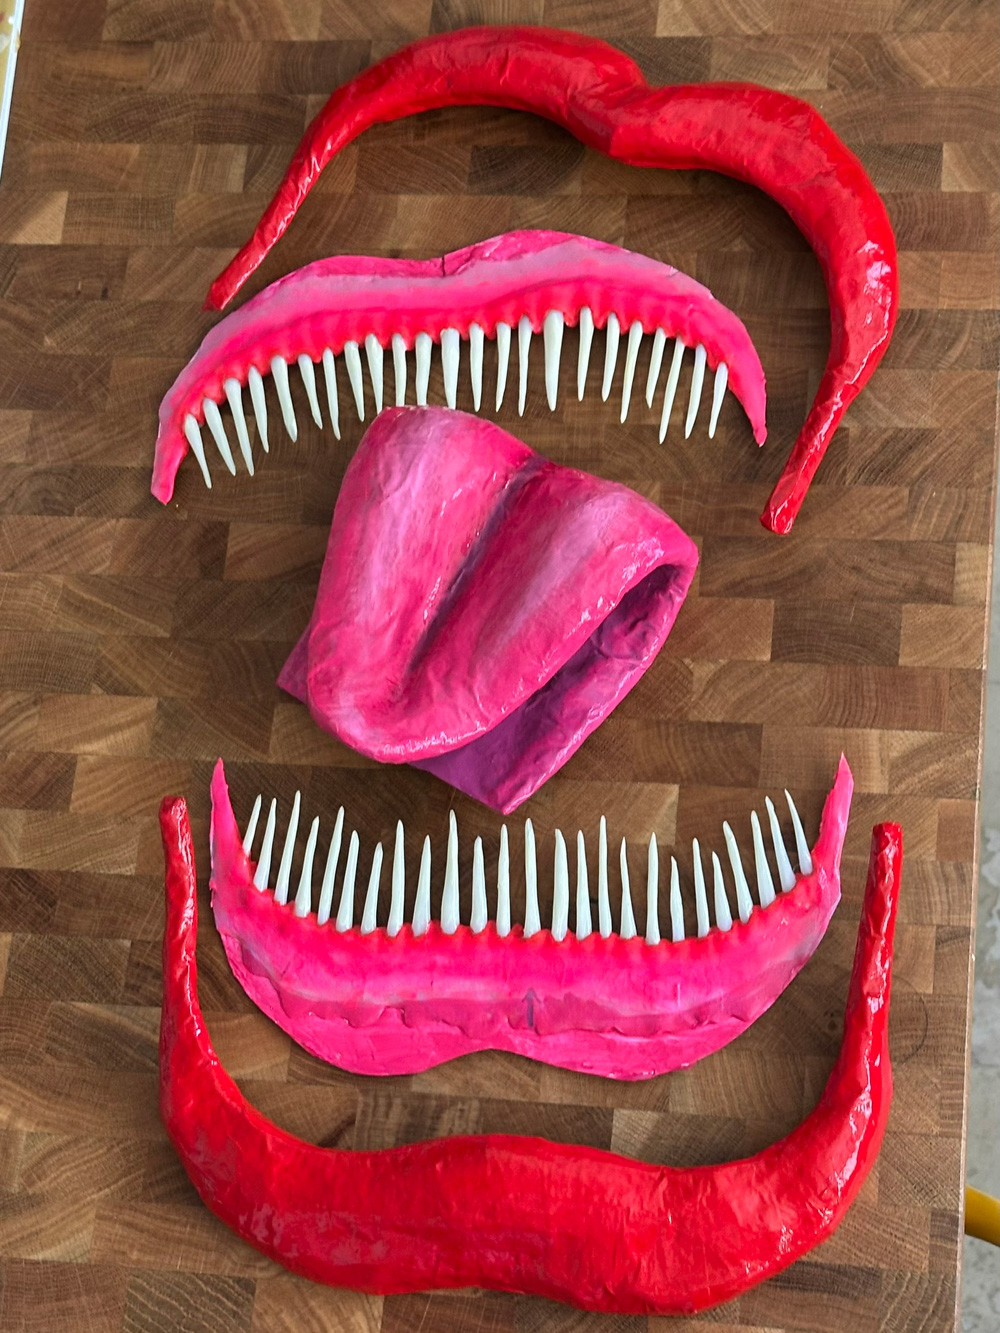
I carefully painted the gums with some pink acrylic paint; I wanted to be careful not to touch the teeth, so I just stopped painting a few millimeters from them, leaving them red where the teeth go in.
I painted some yellow stains on the teeth with yellow acrylic paint, thinned with acrylic medium.
For the lips and tongue, I painted them each with a base coat and then dry-brushed some lighter colors onto them.
The back surface, and assembling
I tried something for the backing of the mouth that didn't work out, so I ended up switching gears. My initial idea for the mouth would be that all the parts would be glued to a piece of black fabric, so that the mouth could bend with my body, like if I wanted to sit down. I cut a piece of black fabric for this, and spray-painted it matte black. But when I laid all the parts together and was preparing to glue everything, I could just tell this idea wouldn't work at all. The individual parts are fairly heavy and I could see that it would just hang weird and the backing would end up having big weird folds in it. Hard to explain! So I decided to go with a solid backing intead...
I went back to my original drawing of the mouth on the curved platform, and I covered it with eight layers of paper maché. Then when it was dry, I cut it out.
Usually my next step would be to spray paint this piece black, but in this case I decided instead to cover it with that piece of black-painted fabric. I did this for a couple reasons. 1. I've learned from some other projects that black fabric that's spray-painted matte black ends up looking more black and more matte than solid objects that have been spray-painted. 2. The surface of black fabric that's spray-painted black ends up looking smoother than paper maché. I wanted this background space to be as unobtrusive and invisible as possible, giving the illusion of a recessed space (when it's actually the opposite).
So anyhow, I hot-glued the top gums and top lip together. And then I hot-glued the tongue, the bottom gums, and the bottom lip together.
Then I hot-glued the fabric onto the paper maché backing, wrapping it around the edges and stretching it as tightly as possible.
And then I hot-glued the combined gums/lips/tongue onto the backing.
Then, I flipped the whole mouth over and added a thin line of hot glue all along the edge of the fabric, to really lock it in place.
To attach the mouth to the jacket, I sewed two big buttons onto the jacket, and then I added small loops of elastic cord on the back of the mouth. This way I could easily remove and reattach the mouth as needed, like if I wanted to take the jacket off. It just hangs there by these two connection points at the top. The mouth is basically hinged, with the top parts and bottom parts not glued together, so when I sit down or whatever the mouth can sort of fold up and move with my body.
That's about it for this costume! Woo! This was a fun one. Happy Halloween!!!