
Fortunato (zombificato) mask, part 2
Published July 12, 2026
This is part 2 of my Fortunato (zombificato) mask for Mardi Gras 2026. See part 1 here.
Teeth and gums
I made the teeth and gums as a separate little sculpture that would get glued into the mouth after the head was finished.
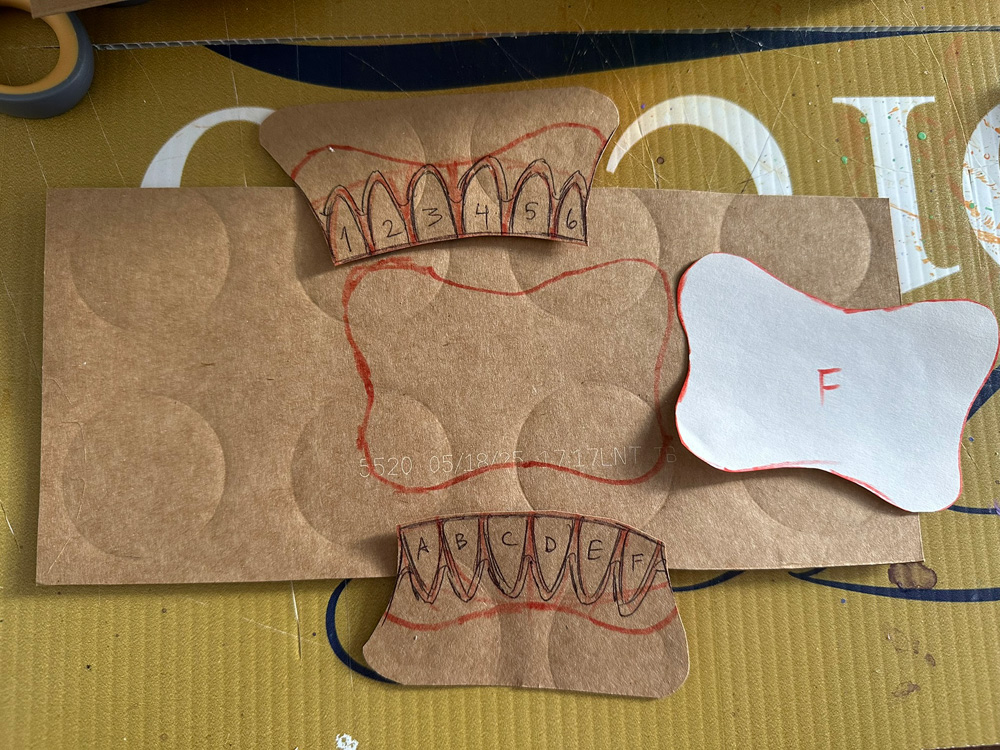
Let's rewind a bit here, to back before I'd added the lips to the face. I designed the mouth shape on a piece of paper and cut it out. Then I traced this shape twice onto pasteboard (from a LaCroix box) to make two copies. I cut one of these out, but I left the other tracing as-is on the larger piece of pasteboard. The cut-out one will become the teeth and gums, and the other will be the base that I glue the teeth and gums onto.
I traced this mouth shape onto the face; this was to give me a guide for sculpting the lips onto the face later on.
I curled up both pasteboard shapes in my hands a bit in order to give them a permanent curve, more or less matching the curve the face.
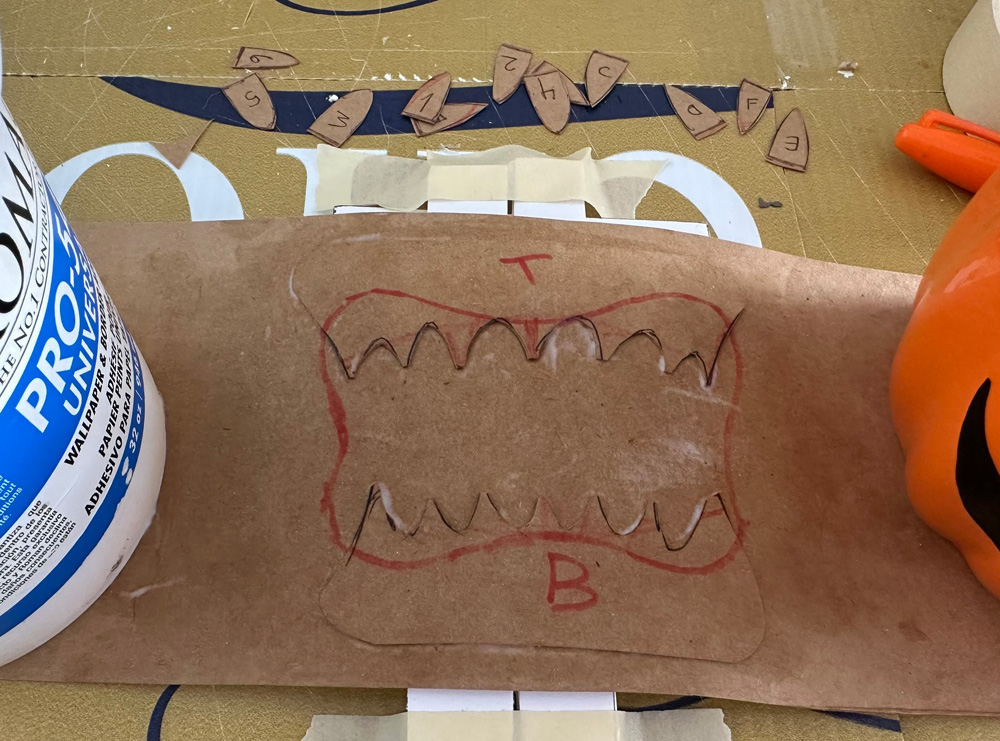
I drew the teeth and gums onto one of the pieces of pasteboard. I numbered all the teeth, and then I cut out the teeth and gum shapes. Then I numbered the teeth on the back as well, because the next step will cover the numbers on the front.
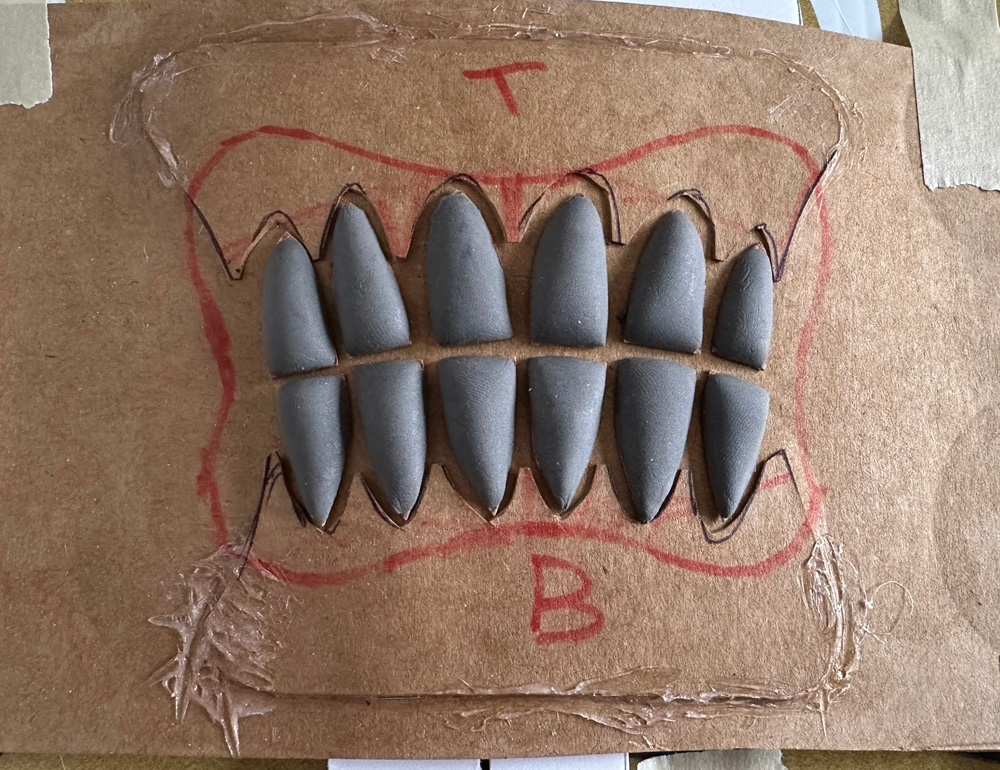
I put some foam clay on the front of all the teeth and sculpted them a bit to give them a nice 3D shape. I also put foam clay on the gums and sculpted them into something resembling how real gums have little bulges above the teeth.
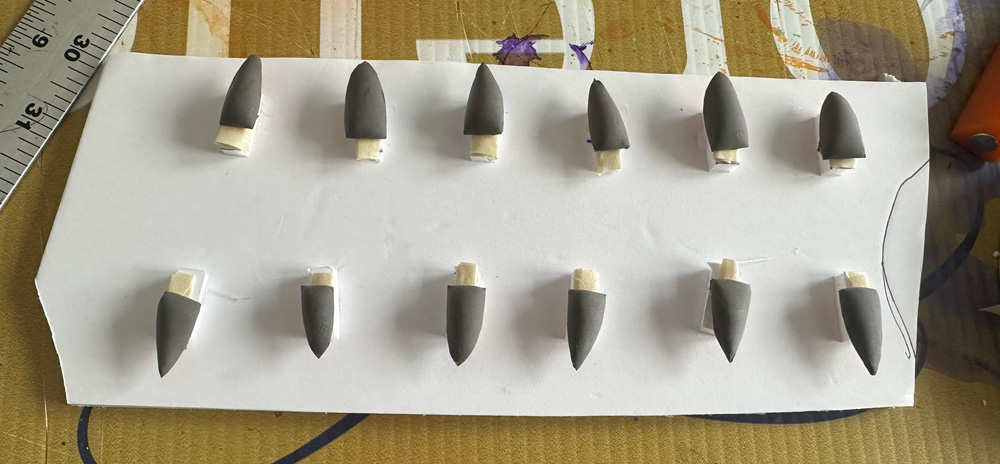
When the foam clay was dry, I set up a little station for painting all these pieces: a piece of foam board, with lots of little chunks of foam board hot-glued in place, and a tiny loop of blue painter's tape on each. This let me paint the pieces while they're raised up, so I could get at the sides of them without having them get stuck to my work surface.
I put a coat of Mod Podge on all the pieces, and then I painted them with acrylic paint.
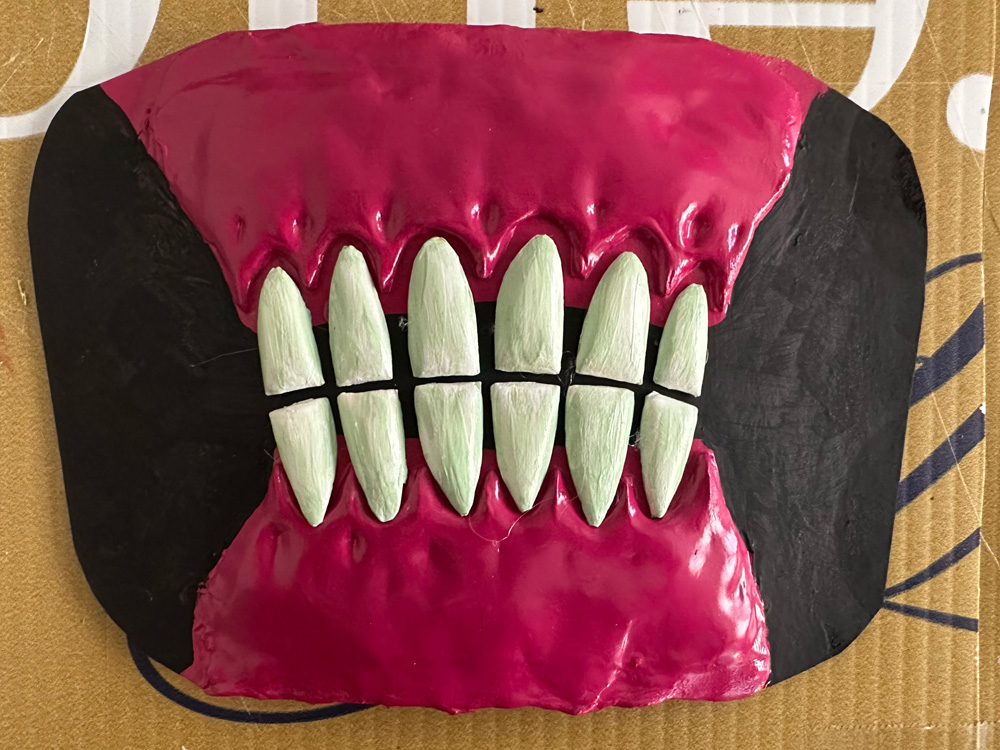
I hot-glued the gums onto the pasteboard base and spray painted the whole thing this sort of reddish-purple color. When that was dry, I painted some black space in between the gums.
When everything was dry, I hot-glued the teeth onto the mouth base. I used Gorilla Glue hot glue sticks for this, because they're much stronger than the cheap-o hot glue sticks I buy in bulk. I'm always worried about little things like teeth getting bumped and falling off!
I set aside this whole little teeth/gums sculpture to attach it into the mask later.
Ears
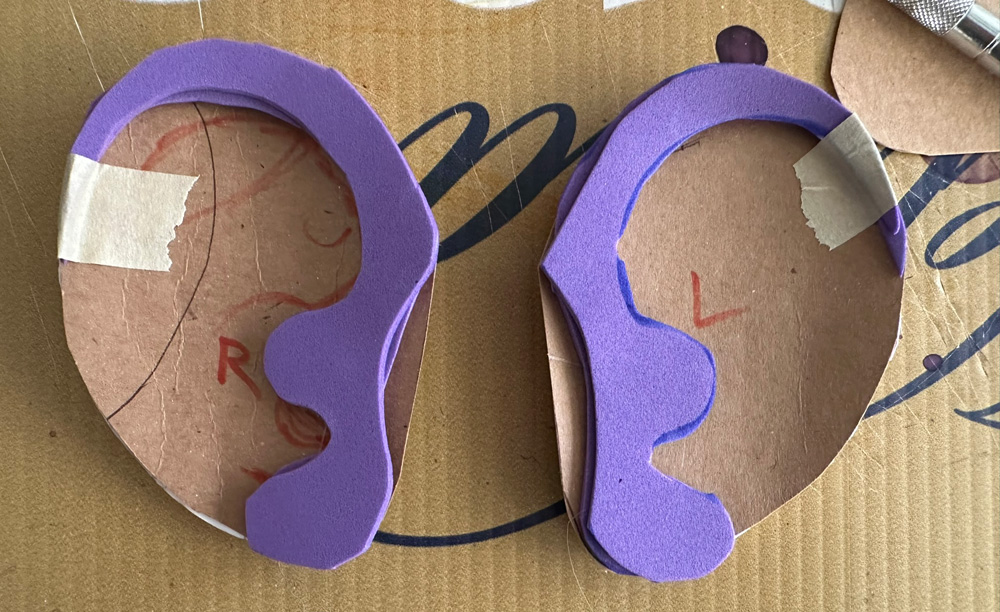
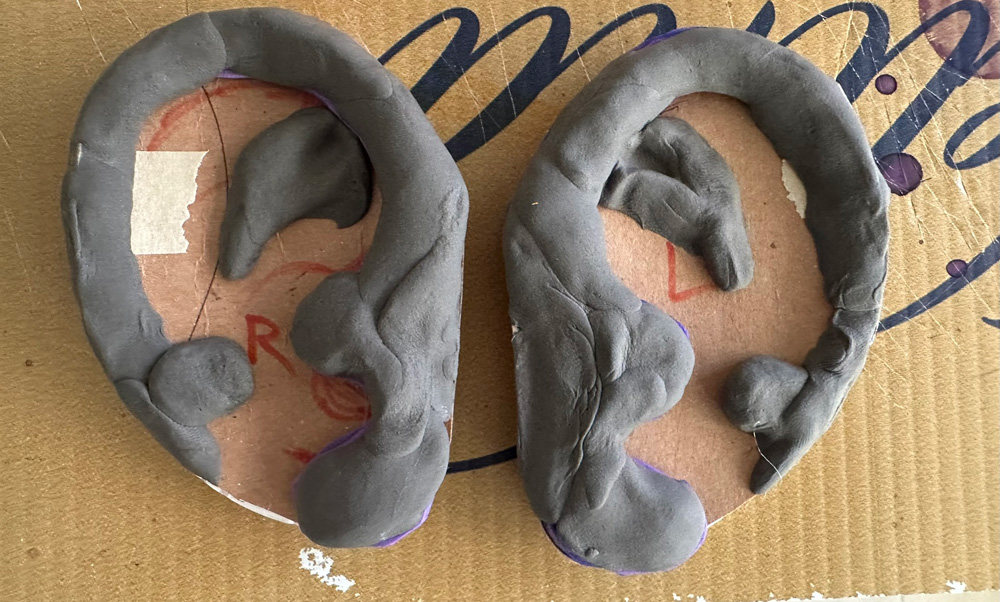
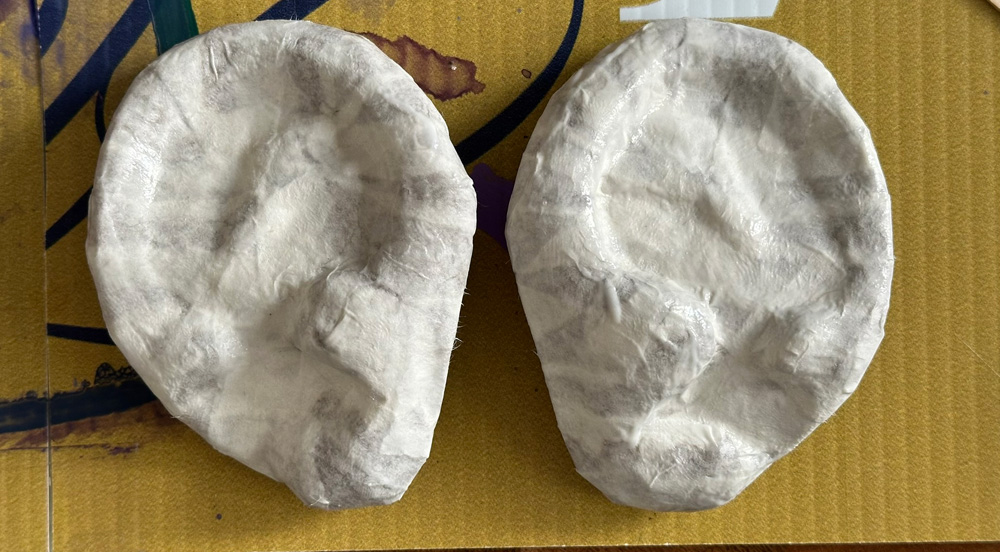
I made the ears from pasteboard (from a LaCroix box) and some foam board and craft foam and then foam clay and masking tape. I covered the ears with three layers of paper macheé.
The earrings are rubber O-rings from the hardware store. I poked a hole in each earlobe with an awl, and I ended up cutting out some material from the back side of the hole with my X-acto knife in order to have the hole remain circular and empty, with no junk from inside poking out.
I put a coat of Mod Podge on the earrings and then painted them silver. Of course I had to cut these to put them in the ears; I just moved the cut part to right behind the earlobe and put a bunch of hot glue on it to hold it in place.
Mustache
The mustache is two little pieces I cut out from a LaCroix box. I painted these black and glued them onto the face later with Mod-Podge.
Eyeballs
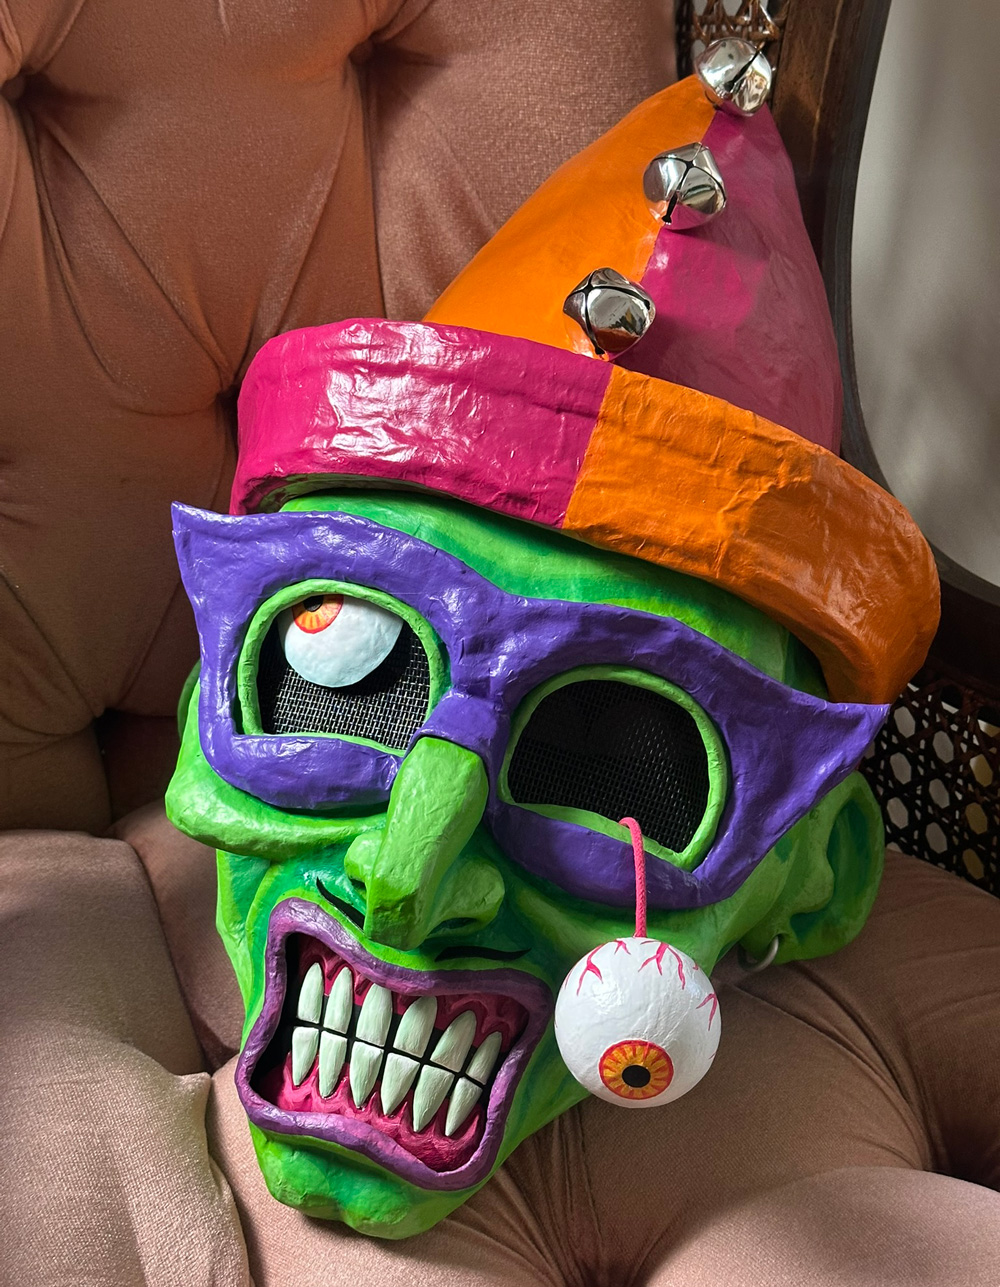
The two eyeballs are different shapes. The dangling one is a Christmas ornament covered in one layer of paper macheé, and the one in the eye socket is a dome shape, not spherical. I made that one by taking a larger plastic ball and covering it with plastic wrap and then six layers of paper macheé, and then when it was dry I traced a circle shape onto it and cut that out.
I made the irises with construction paper and a large hole punch. I cut little slits around the edges to let the irises mold to the shape of the eyeballs. I attached these with Mod Podge, working the Mod Podge into the paper to get it completely saturated. I then covered both eyeballs with Mod Podge.
I painted both eyes with a coat of Mod Podge and then white spray paint. I painted the iries by hand with acrylic paint.
I made the pupils with a 3/8" hole punch and black construction paper. He has tiny pupils because he was imprisoned in the dark for so long and now he's out in the light! I held these pieces with tweezers to put a tiny drop of hot glue onto the back and then place them on the eyeballs.
I painted the veins on the back of the dangling eyeball with a small paintbrush and acrylic paint.
I used a piece of thick string for the optic nerve; I "dyed" it reddish-pink by mixing up some acrylic paint and water and using my hands to work this mixture into the string. This makes the string a little stiff, but it's still somewhat flexible.
I poked a large hole in the back of the eyeball and ran the optic nerve into it, then I locked it in place with some hot glue. I hot-glued the other end inside eye socket.
For the other eye, this is subtle and may not be visible, but I painted a very faint, soft shadow around the edges with light blue paint; I wanted to try to create the illusion of making this eye look more spherical. No idea if that worked, but I like how it looks.
Eye mask
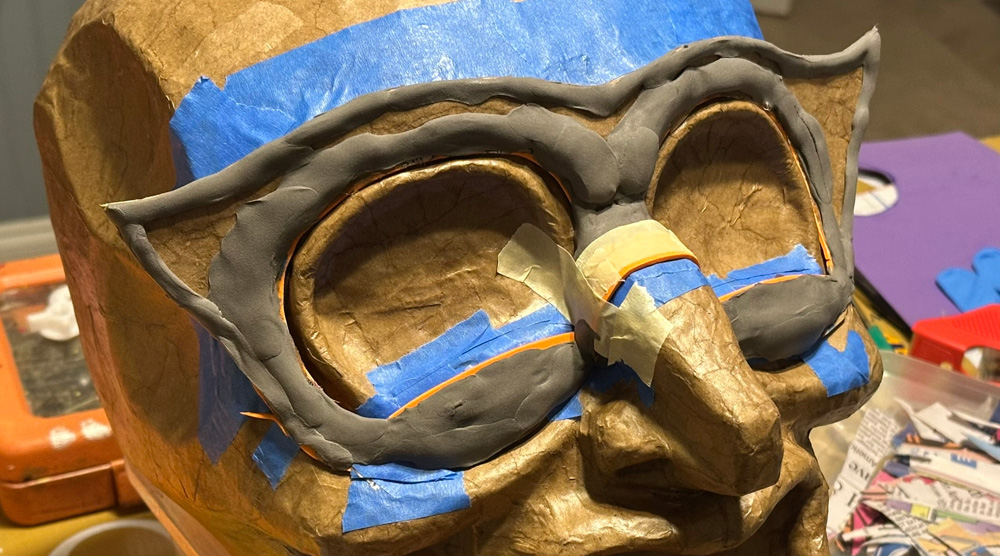
I designed the eye mask by using tracing paper on the face to draw the approximate shape, and then I cut this out and traced it onto craft foam and cut that out. With some trial and error I was able to trim this craft foam shape into two shapes (left and right) that would fit really well on the face. I taped them to the face with masking tape, and then I added the part for the bridge of the nose using a little piece of LaCroix box. I used some foam clay to make the whole mask somewhat 3D. When the foam clay had set, I removed the eye mask from the face and covered it with two layers of paper macheé.
Hat
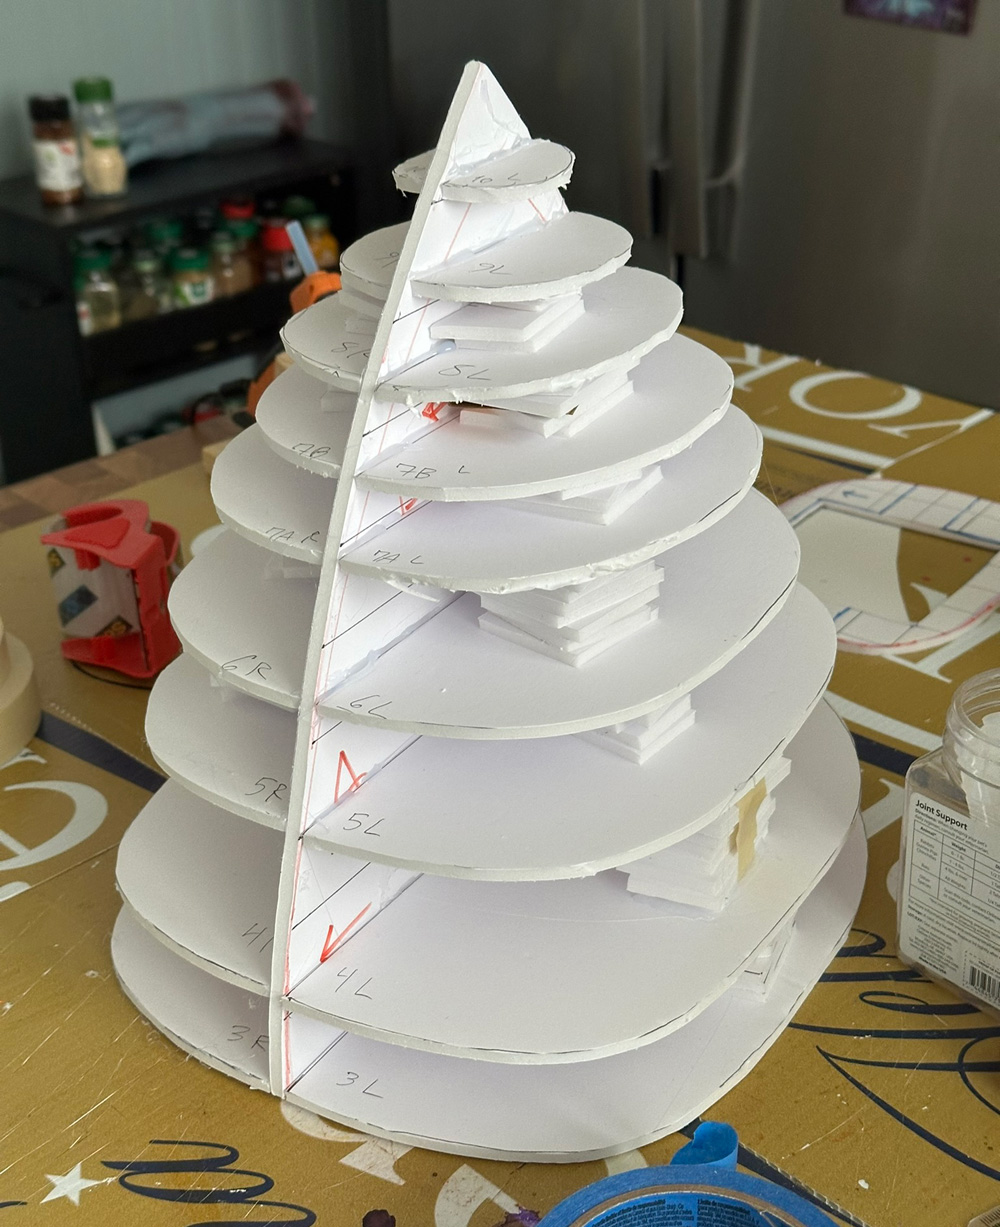
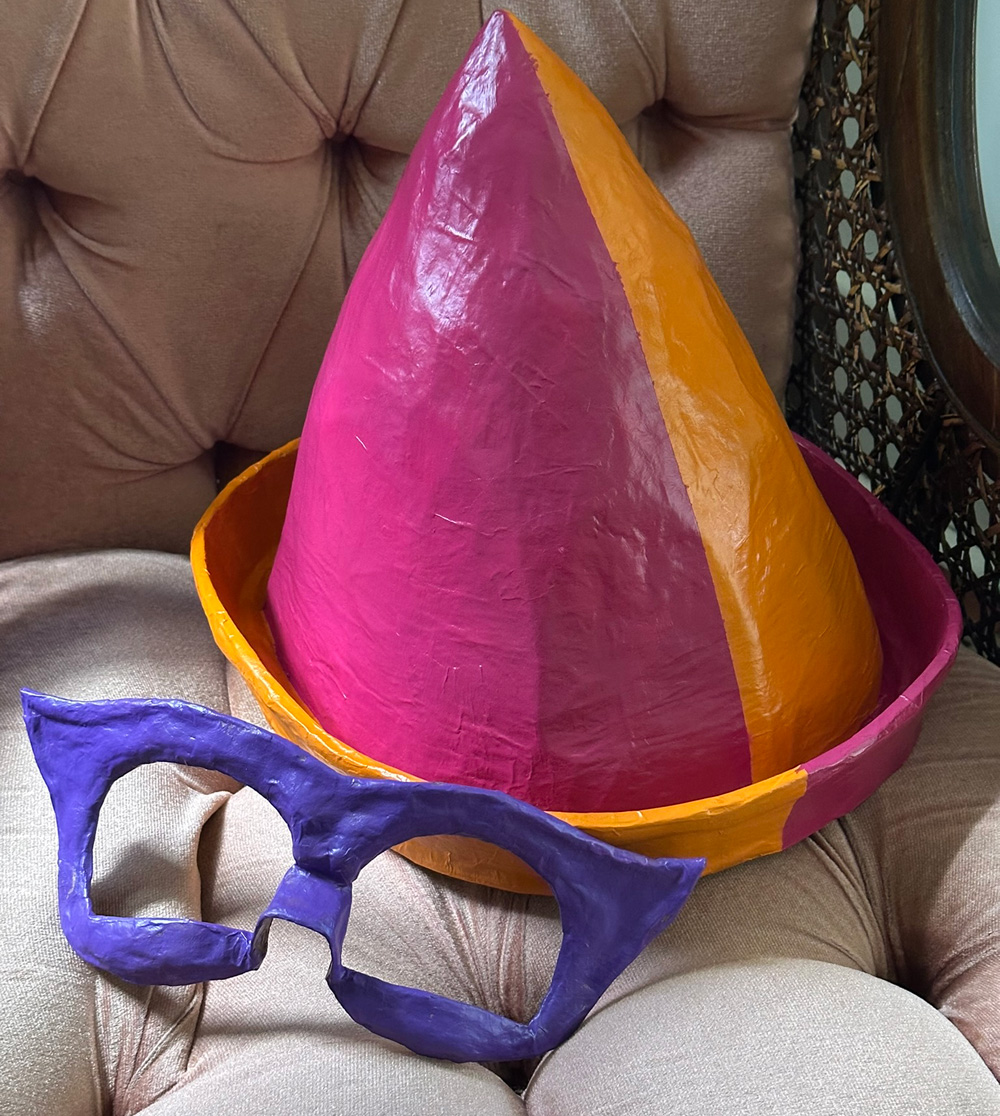
The hat was its own big convoltuted project, and I actually ended up making one whole hat and then scrapping it and making another.
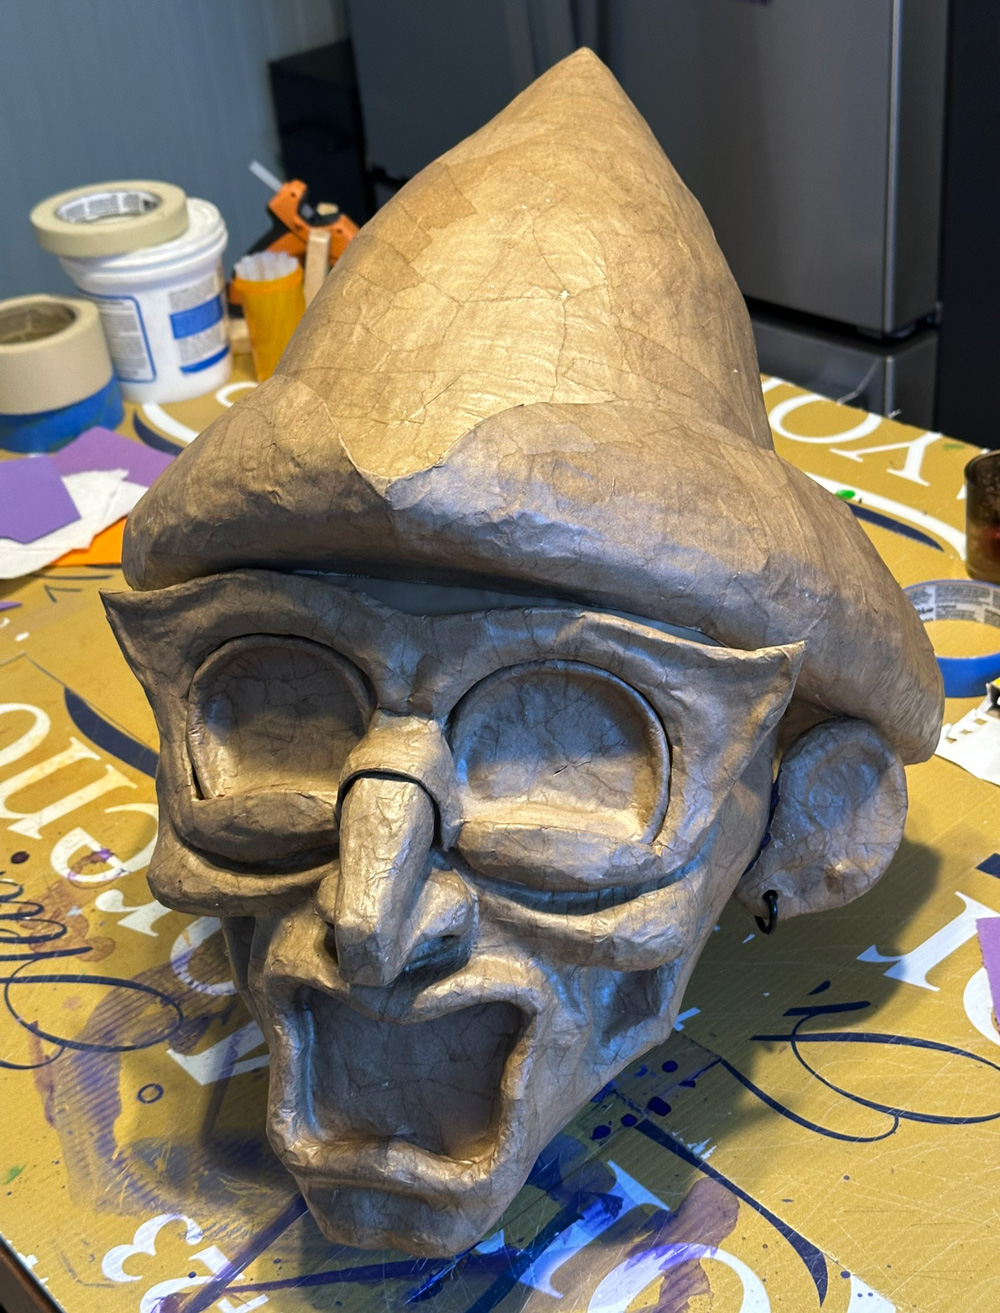
My first idea for the hat was to create a tricorn brim with a conical shape on top. This ended up not looking great, so then I just made a typical conical hat with a wide brim.
I made the cone part of the hat with my typical foam board armature method, then masking tape, construction paper strips, shipping tape as a release agent, and then paper macheé. When it was dry I removed all the interior junk and then built the brim onto that.
The brim is just some big curved strips of foam board that I taped in place. I added some subtle ridges of foam clay along the top edge and bottom edge, and then I covered the brim in a few layers of paper macheé.
Later on I spray painted the hat and then I poked three holes in it for the bells. I attached the bells using twist ties which I hot glued inside the hat. Then when both the hat and the head were 100% done, I hot glued the hat onto the head using Gorilla Glue hot glue sticks.
Painting
Painting for this mask happened in many stages at many different times while I was making and assembling all the pieces.
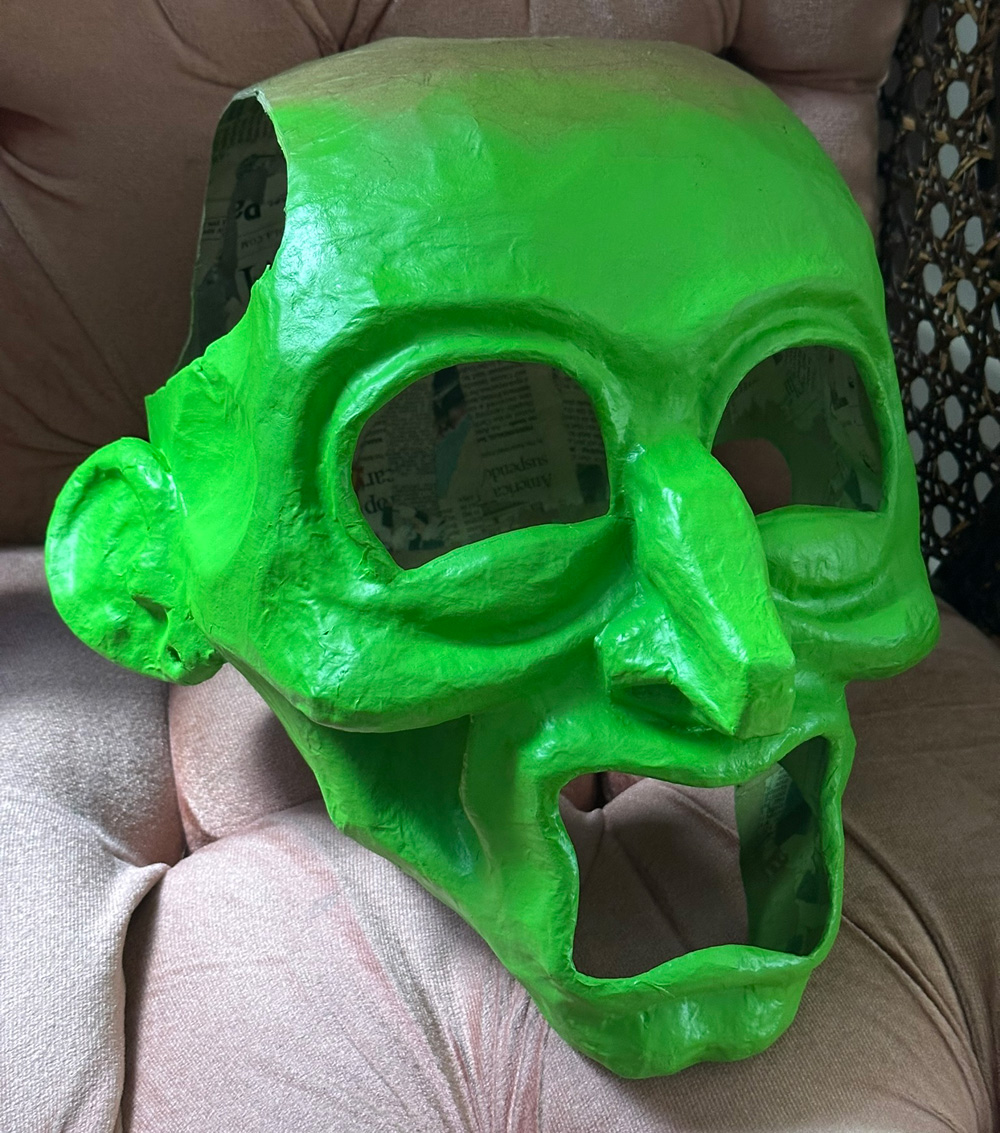
For the head, I spray painted it green, and then I mixed up acrylic paint in a darker green and lighter green. I painted the all the shadows first, and then all the highlights.
I mixed up a couple shade of purple by hand for the lips.
Screen
I cut out some pieces of screen door material for the eye holes and for the holes behind the ears.
I spray painted the ones for behind the ears. You can't spray paint screen while it's lying flat on a surface, because the paint will go through the screen and make it get stuck. So I always built a little stand out of foam board so I can spray paint the screen bits while they're spanning across empty space. I didn't take a picture of that this time, but here's a pic of the same thing for my previous Mardi Gras mask.
To prepare the pieces of screen to be glued into the mask, I glued some little tabs of paper around the edges. This lets me put hot glue on the paper tabs and press them in place inside the mask. Without the paper tabs, it's hard to glue the screen in place without the hot glue going through the screen and burning my fingers.
Other steps...
Somewhere toward the end of this whole process, I attached the teeth/gums part into the mask. I wanted the teeth and gums to be somewhat recessed, and I wasn't sure exactly how I was going to do that. I ended up building up some ridges of foam clay inside the mask, around the mouth hole. I then set the teeth/gums part onto that and then I sort of smooshed the clay over the edges of the gums to lock them in pace. I let the foam clay set over night, and then, inside the mask, I covered over the foam clay with one layer of paper macheé to really permanently lock everything together.
Oh yeah, I hot-glued the eye mask in place as well.
Making it wearable
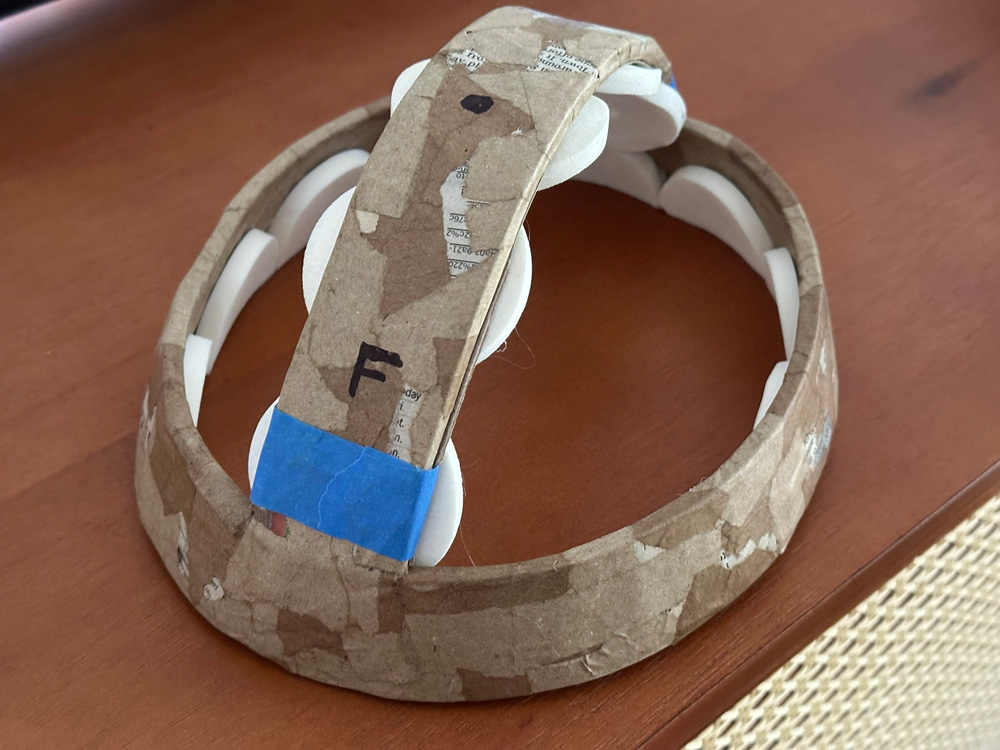
I built a simple structure out of some strips of foam board; one to go around my head and one to span across the top. I covered this with a few layers of paper macheé to make it sturdy and to help it stay glued inside the mask later on. I hot-glued some makeup pads around the interior, and then I hot-glued this whole thing into the mask. This is always a long convoluted process where I try to figure out if I need to add any material between the headpiece and the mask to raise it up at the right height and angle. I do this with some tape and magnets and lots of trial and error. When I'd finally worked that all out, I glued the headpiece in the mask with some huge blobs of hot glue.
That's about it for this mask! It ended up being one of my lightest and most comfortable masks, with pretty good visibility. Now on to the next parts of this costume!