
Fortunato's zombie hands
Published July 14th, 2026
I made these zombie hands/arms as part of my Fortunato (zombificato!) costume for Mardi Gras 2026. Here's how I made 'em!
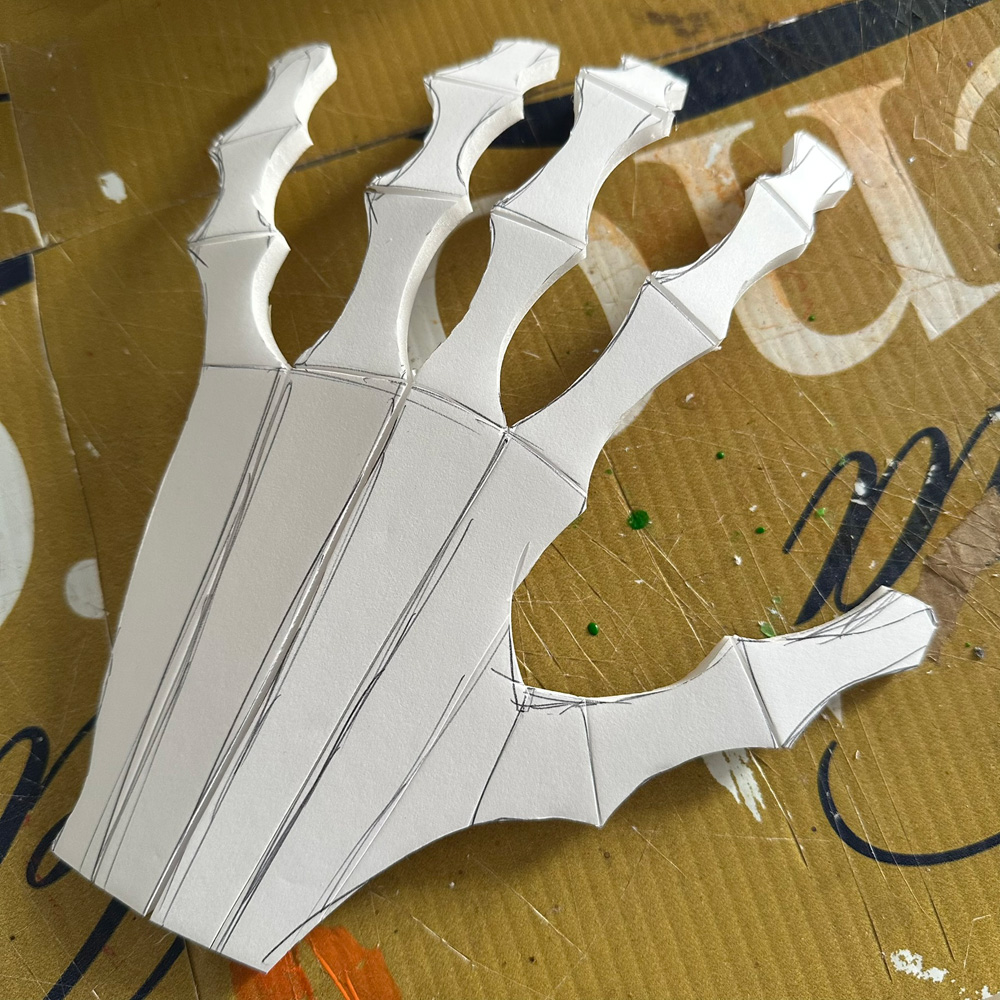
I traced my hand onto foam board, and then I made the following modifications to the drawing: I extended the fingers by about an inch. I marked lines across the fingers where the knuckle joints would go. I then made the finger segments skinner, and I made the knuckles wider. I drew vertical lines down the back of the hand where the, uh, metacarpals(?) go. Then I used my X-acto knife to cut the whole hand shape out. I then traced this shape onto foam board again to make a second copy.
Back to the first copy of the hand. I used my X-acto knife to slice shallow lines across all the knuckles. I also sliced shallow lines down the back of the hand, along the metacarpals. I then carefully bent the foam at all of these points. (There's a risk of the foam breaking here; easy to fix with masking tape.) Then I flipped the hand over and reinforced all the joints with thin strips of masking tape. Now I have a hand shape with lots of areas that can be bent in one direction, but not the other.
Next, I used my hot glue gun to lock all the joints in the positions I wanted them. For example, I'd hold one of the finger joints at a certain angle, put a drop of hot glue into the part of the foam that's sliced open, and let it set. Now that knuckle is fixed in that position. Repeat for all the finger joints, and the for the lines down the back of the hand as well. When this was done, I had a pretty solid hand shape that's fixed in a pretty realistic pose.
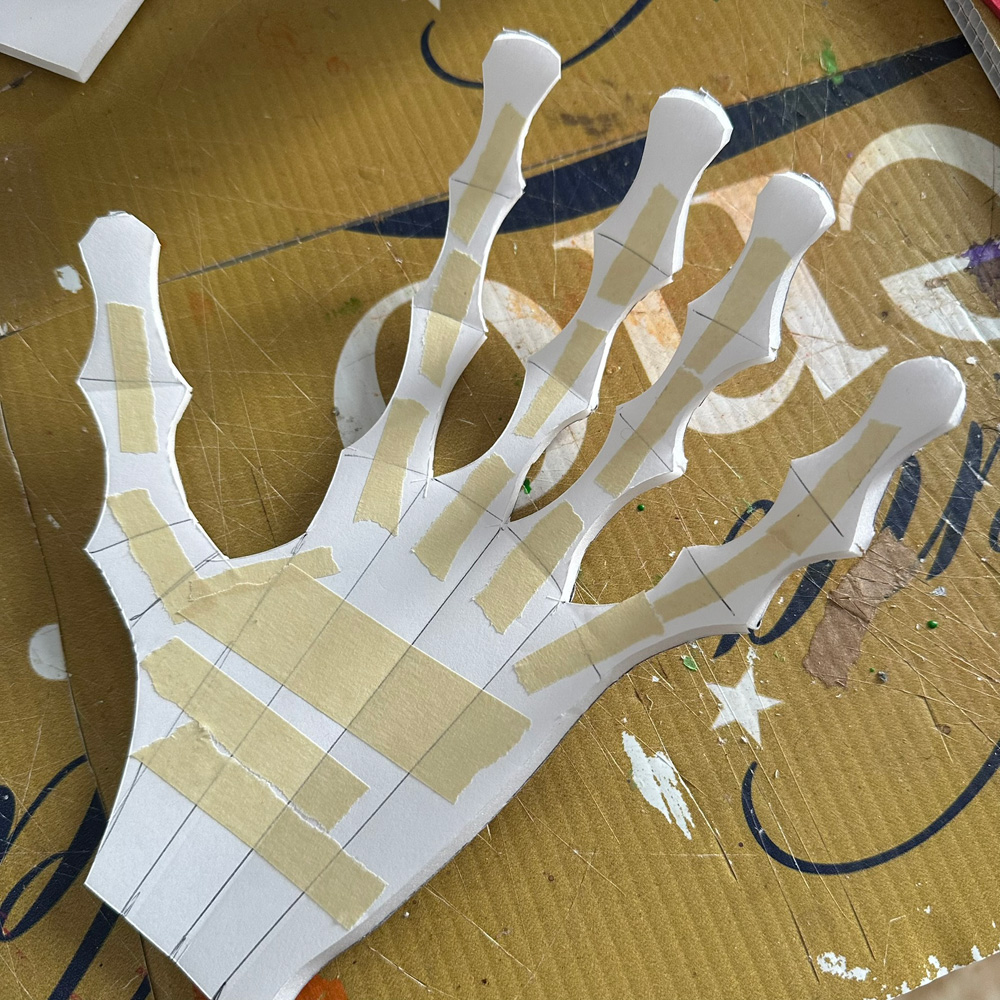
Once I'd gotten all the positions of the joints worked out, I went back and added more hot glue at all of the joints, just to make the whole thing feel more sturdy.
Then it was time to start padding out the hand shape. First, I used some bits of foam packaging to pad out the palm of the hand. Then I used foam clay to flesh out the fingers. I started with the inner surface of the fingers. First, I just put three blobs of foam clay on each segment of the fingers, to create the sort of padding we have on our fingers. I let that set for several hours.
While that was setting, I made the fingernails. I took a piece of pasteboard from a saltines box and curled it into a tight tube, and secured it with tape. I then covered the whole thing with Mod Podge. When this was dry, I removed the tape, and the pasteboard retained the curve. I cut the fingernails out of this. If you look straight at your fingertips you'll see that your nails are very curved along their front edge. So basically I just cut the nail shapes long-ways from the tube, and I left a long pointed bit at the back. The pointed bit will get embedded in the foam clay so the nails are locked in place.
Okay, back to the hand. I put a blob of foam clay onto the back surface of a fingertip, then placed the nail onto that, and then added some more foam clay to hide the pointed bit at the back of the nail. I smoothed this all out with my fingers to create the curved shape at the back of the nail.
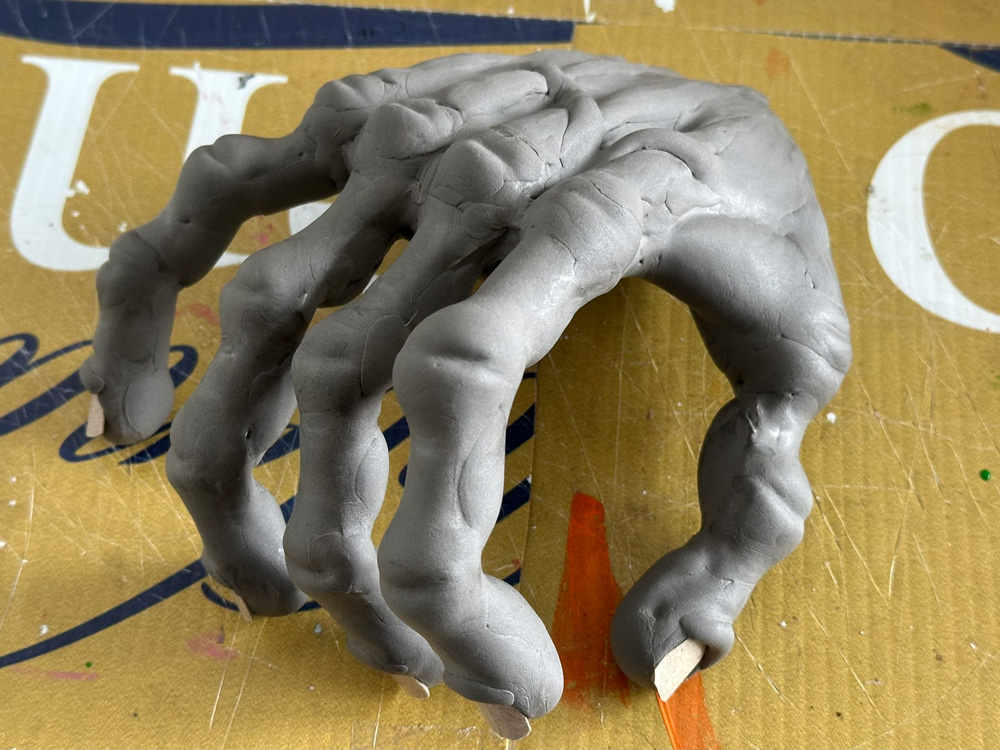
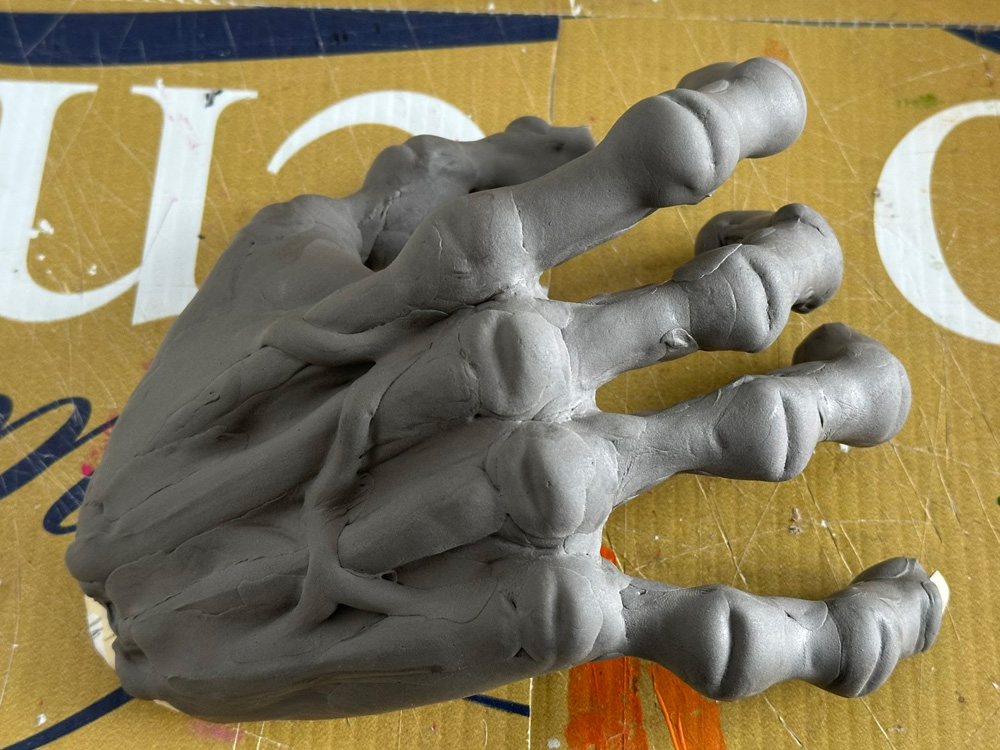
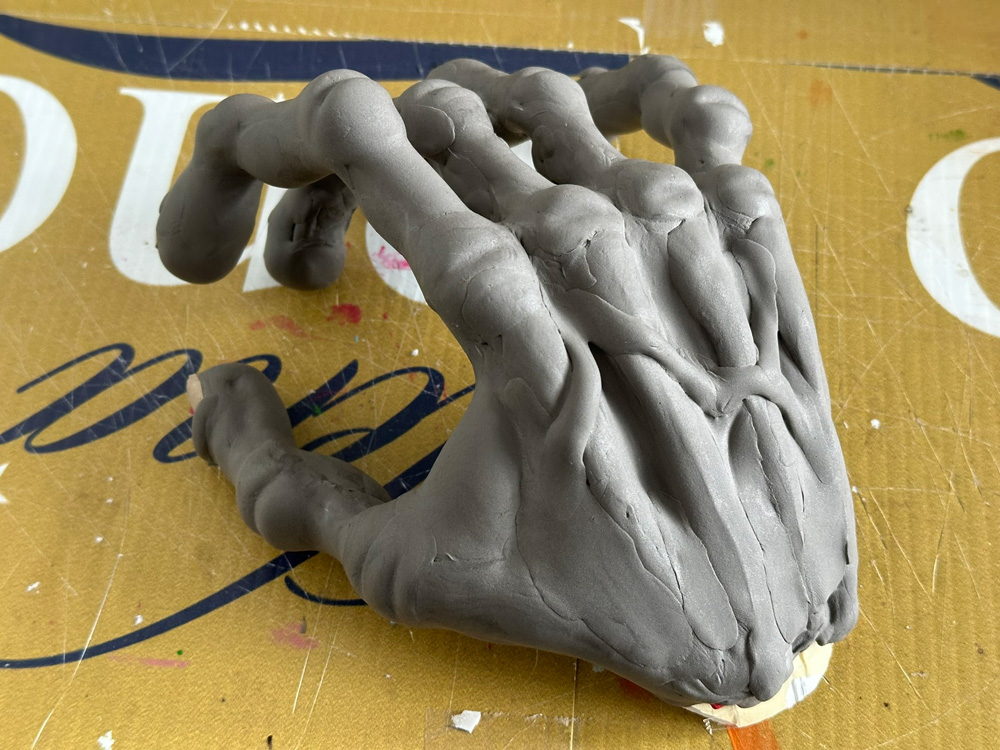
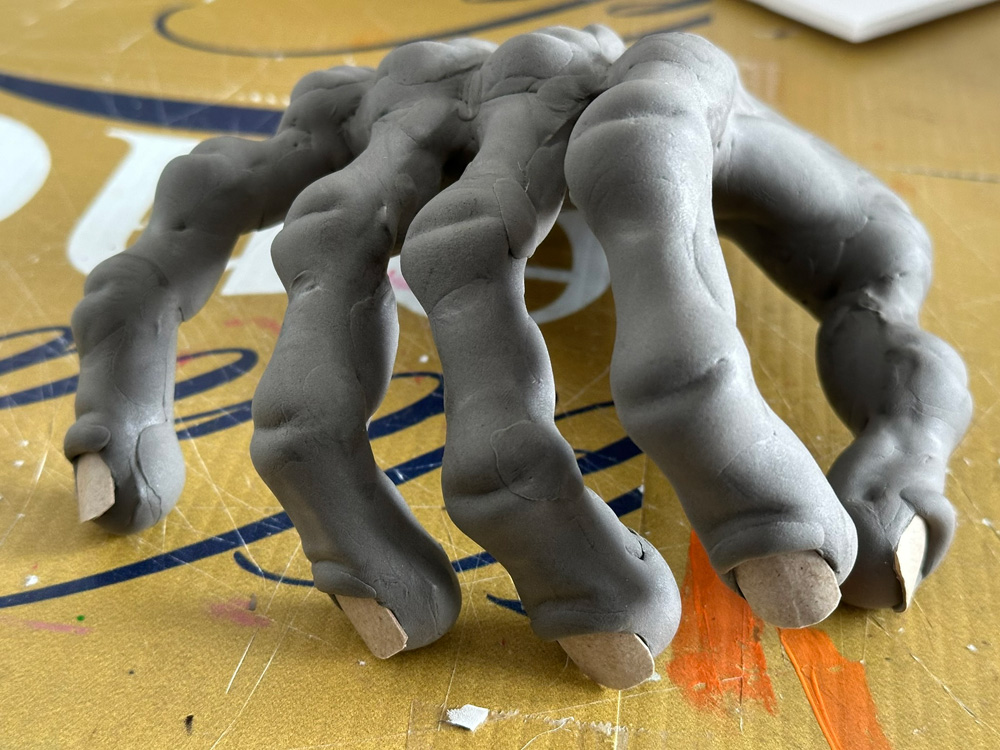
Then I added more foam clay to cover the back of the whole length of the finger. Then I added big blobs of foam clay to cover all the knuckles. I smoothed all this foam clay down to go around the finger and to merge with the foam clay I'd put on the inner side of the fingers earlier. Of course I repeated all these steps for all the fingers.
I let all of that set, and then I used more foam clay to build up the back of the hand. First a big flat shape to cover the whole back of the hand, then four long pieces to create the bones in the back of the hand. I put this in front of a fan to help the clay set quickly. If I'd let it set on its own, the bones in the back of the hand would smooth out a lot. So, I pointed the fan at it, and every few minutes I would re-work the clay with my hands to keep those bone shapes nice and distinct.
When this was pretty well set, I then rolled up some more foam clay to make the veins on the back of the hand. I let this set in front of the fan.
Last, I flipped over the hand and used foam clay to cover the whole inner palm area, and I looked for any other little tiny areas I'd missed and stuck little pieces of foam clay on/over them. And that's it for the hands! No paper maché on these.
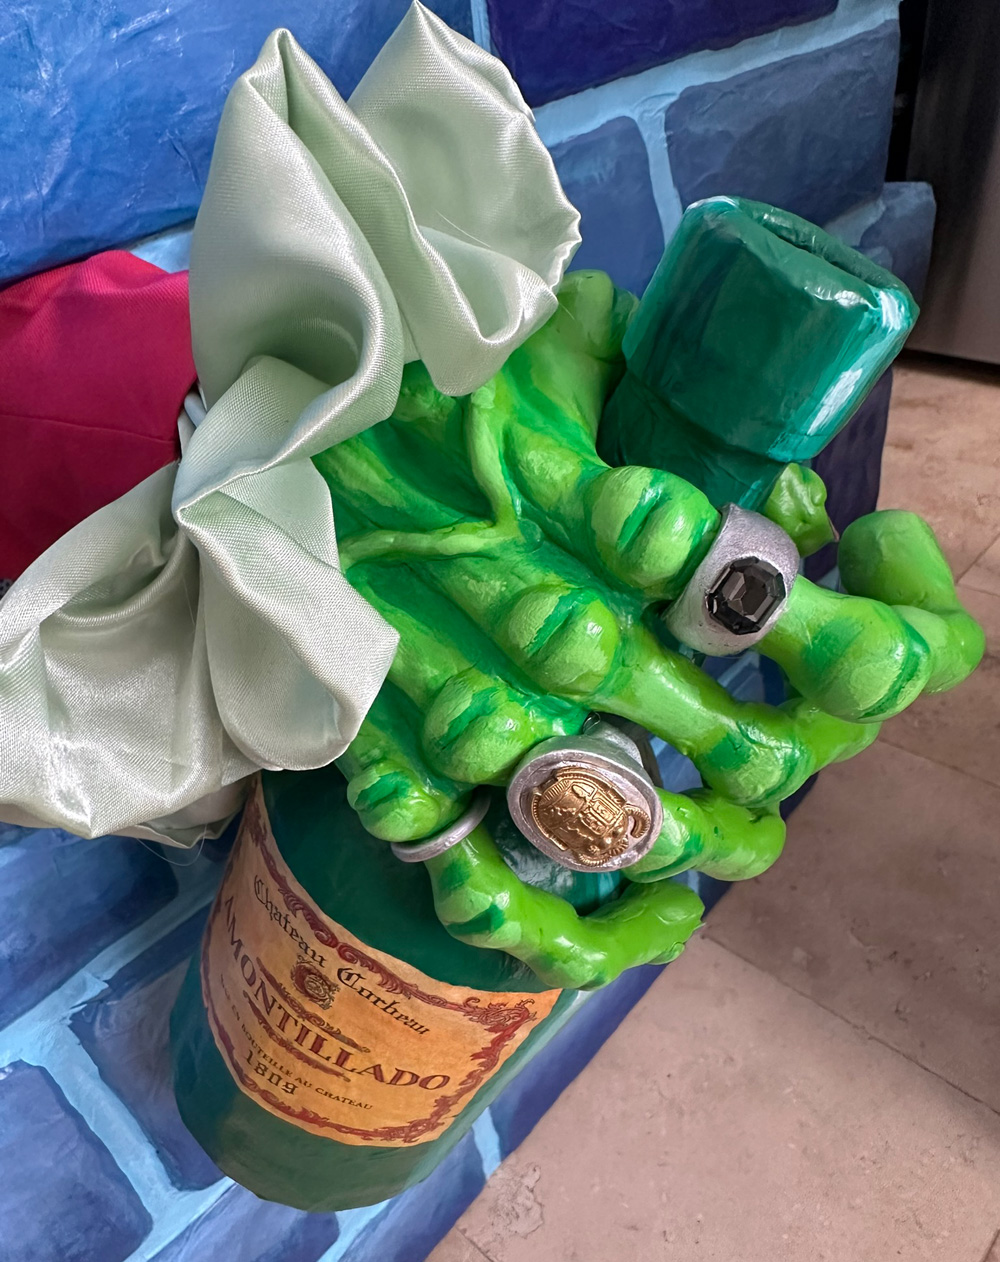
The hand that's holding the bottle of amontillado has a forearm on it; the other hand just has a very short wrist. These are really simple; just rolled up posted board, taped closed. They'll be concealed by sleeves/cuffs later so they don't have to look great. I glued/taped the forearms onto the hands at the correct angles, and then I just covered over the connecting areas with more tape and then foam clay to smooth them out. When this was all done, I covered the arms in a few layers of paper maché, and I worked some of the paper maché up onto the hand itself, just to create a smooth connection point. Mod Podge will help conceal this line where the paper is, a bit later on.
Painting
Okay, time for paint! First, I mixed up some Mod Podge (matte, but it doesn't matter) with a few drops of green acrylic paint and white acrylic paint. I covered the hands completely with this mixture. The Mod Podge does a great job of de-emphasizing seams and lines and imperfections. The acrylic paint I mixed in helps me see exactly where I've covered and where I haven't. It also serves as a nice light-color base coat before painting.
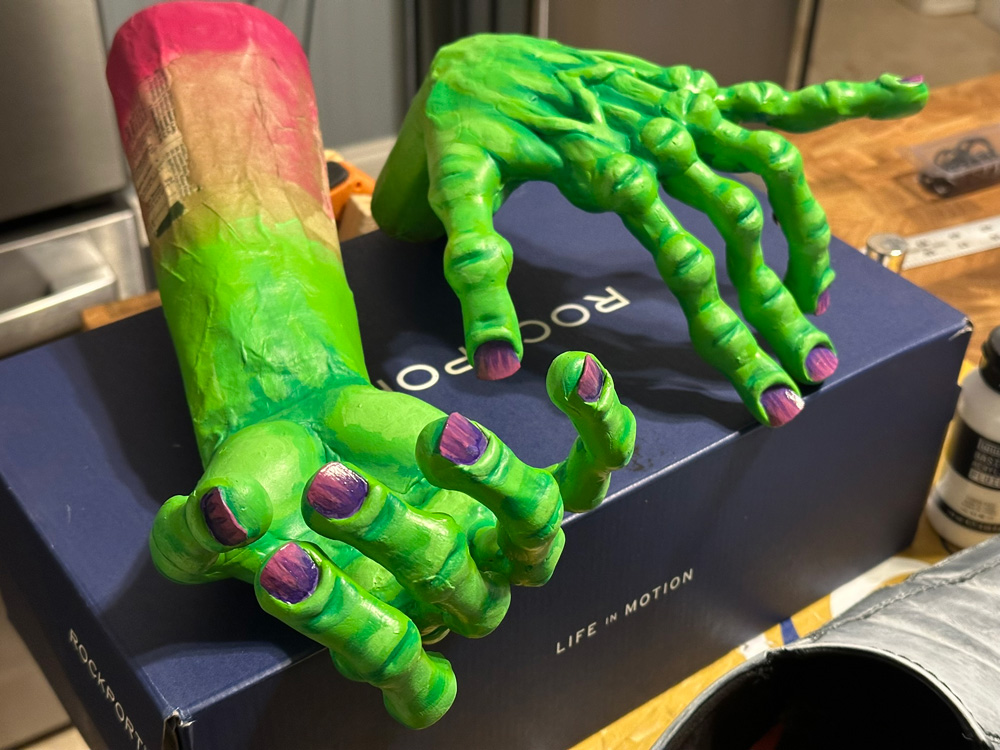
I spray-painted the hands green, and then I mixed up three colors of acrylic paint: one to match the base green color as well as possible, and then a darker/cooler version of the base color (with some drops of dark green and dark blue), and a lighter version of the base color (with some drops of white and a drop of yellow). I painted shadows all over the hand in the recessed area, and then I painted highlights on all the raised areas. I used the base color I'd mixed up to correct any errors and to blend the highlights and shadows here and there. I don't really know what I'm doing with any of this; it's just lots of trial and error.
I painted the nails a very dark purple, then I mixed a slightly lighter purple and a much lighter purple/pink to blend together and to give the nails a bit of a gradient from dark to light.
I covered the hands in a coat of matte Mod Podge to protect the paint job, and then I used gloss Mod Podge just on the nails, to make them shiny.
Rings
I used a bunch of different materials and techniques for the rings, I was really just winging it and experimenting a lot.
The gold scarab ring is a reference to the Poe story The Gold Bug, and I got the idea because I had this little metal scarab from the previous Mardi Gras; my friend Karin was dressed as an Egyptian mummy and this was the trinket she was handing out on Mardi Gras day. (These are called "throws," even if you're not throwing them.) The scarab was originally a darker bronze color.
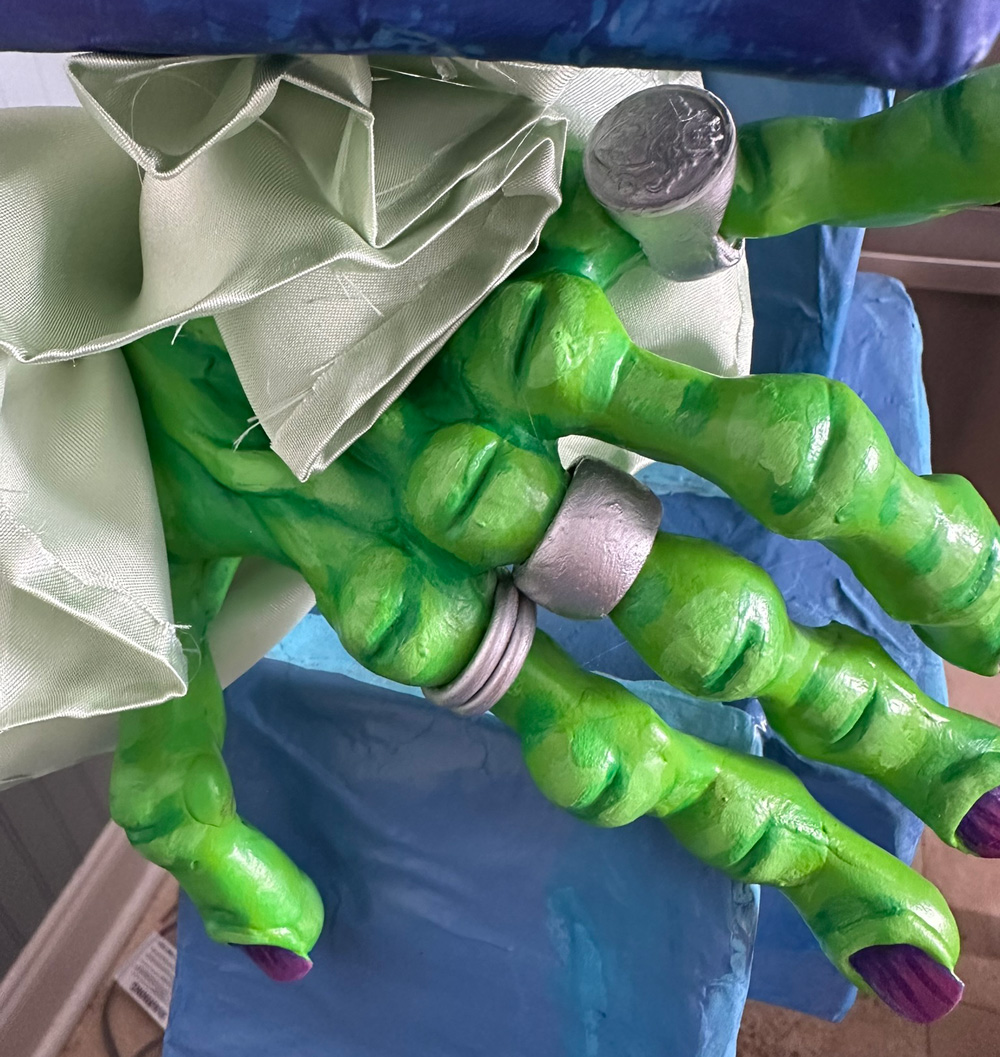
I traced the scarab onto pasteboard and then drew a tight oval around it and cut that out. I put the scarab away for now. I cut a little strip of craft foam to serve as the raised border around this oval, and I hot-glued that in place. Then I put some foam clay on top of the oval as a slightly raised sort of hill, and I pressed the scarab into that. I let it sit for about an hour and then I carefully removed the scarab, leaving a very slight impression of the scarab in the foam clay. I let the clay set completely, and then I worked on the bottom of the ring. I took a strip of craft foam, taped it into a ring shape, and hot-glued it onto the underside of the ring. Then I added a blob of foam clay to create the bottom surface of the ring, with a long-ways curved indentation for where the ring will sit on the finger.
When that was all set, I coated the whole ring (minus scarab) in Mod Podge, let that dry, and then spray painted the ring white, and then silver.
I spray painted the scarab gold. When all this was dry, I hot-glued the scarab onto the ring. I coated the whole thing with gloss Mod Podge to protect the paint job.
When this was all dry, I cut the ring open at the bottom with scissors, then worked it onto the finger and hot-glued it in place. Foam clay stays pretty soft for a few days after it's set, but it eventually becomes hard, and even brittle, so it would not be possible to stretch the ring open like this later on.
(If you're keeping track of this whole costume project, there's one step I did before gluing the scarab ring onto the finger: I took a long piece of wire and twisted it onto the finger, with the loose end toward the interior of the hand. I'll attach this wire around the neck of the bottle of amontillado later. I glued the ring onto the finger so that the hot-glue also locks this wire in place.)
I used similar processes for the other large rings; they're all craft foam strips rounded out with foam clay. One of them has a metal button from an old coat on top, kind of like a signet ring. Another has a small glass jewel that I had sitting around.
The smallest rings are just plastic O-rings from the plumbing section of the hardware store; they're the same rings I used for Fortunato's earrings. I snipped these with scissors, then painted them with white acrylic paint, then silver spray paint, then gloss Mod Podge. I hot-glued these in place on the fingers.
Attaching the hands to the brick wall prop
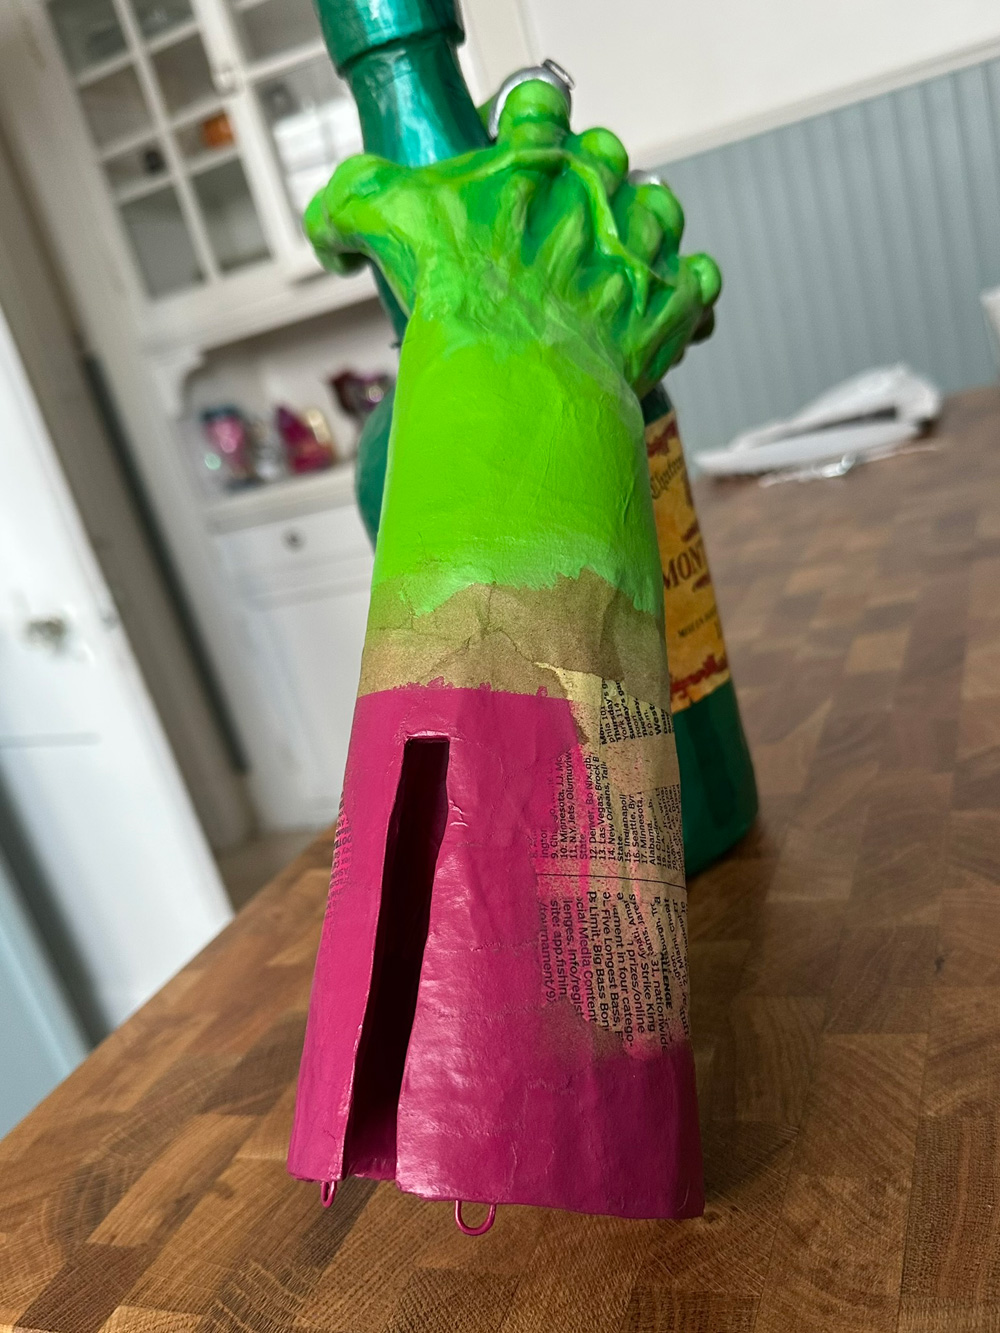
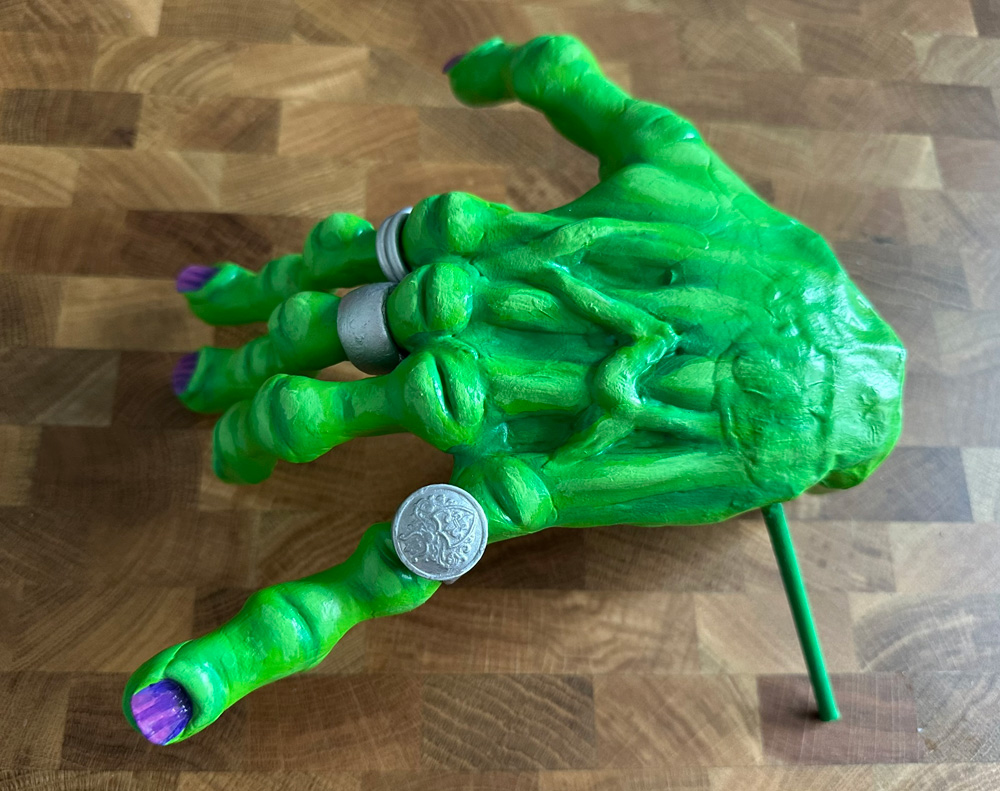
I made up some convoluted systems for attaching these pieces to the brick wall prop I would be wearing. It's probably way too much information and not very useful to anyone, so I won't go into a lot of detail. The forearm has a slit down the back that slides onto a sort of track that I built into the upper surface of a hole in the brick wall, so it can look like that arm is sticking out and holding the bottle. There are paperclips at the back of the forearm that get secured with twist ties that are attached at the back of the wall. The other hand just sits in place in the upper hole in the wall, and I attached a wooden dowel inside of it that can stick into a narrow hole in the wall to keep it in place, just held in with tension/friction. I'll post pics of the hands in place on the wall in my next part of this set of articles about my Fortunato costume.
And that's about it! I'm really pleased with how these hands came out!