
Paper maché alligator — work in progress
Published June 29th, 2015
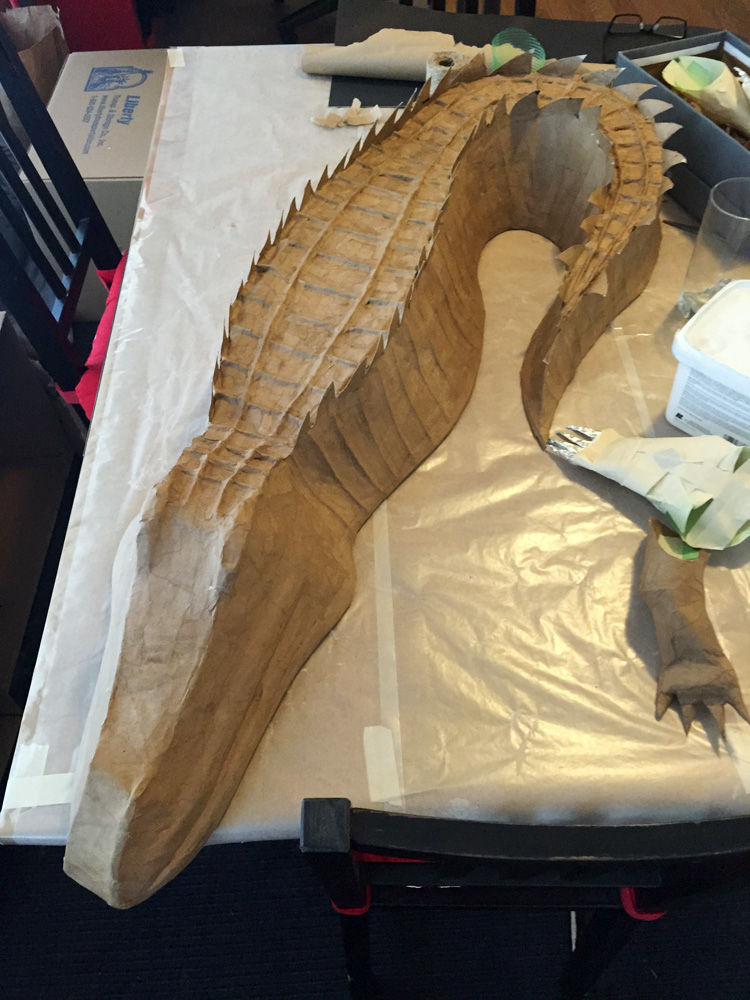
I'm currently working on a 4-foot paper maché alligator to go in my bathtub for this year's voodoo swamp-themed Halloween party. I'm excited about the progress I'm making on it, so here are some work in progress pics!
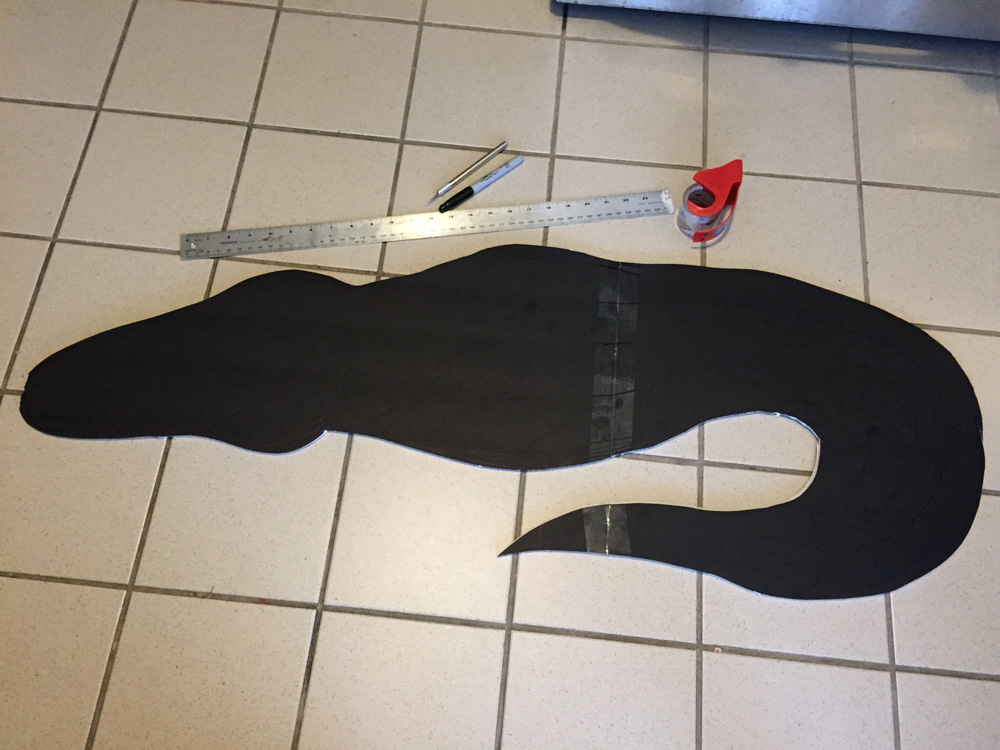
I started with two pieces of foam board, taped together and cut into a 4-foot alligator shape.
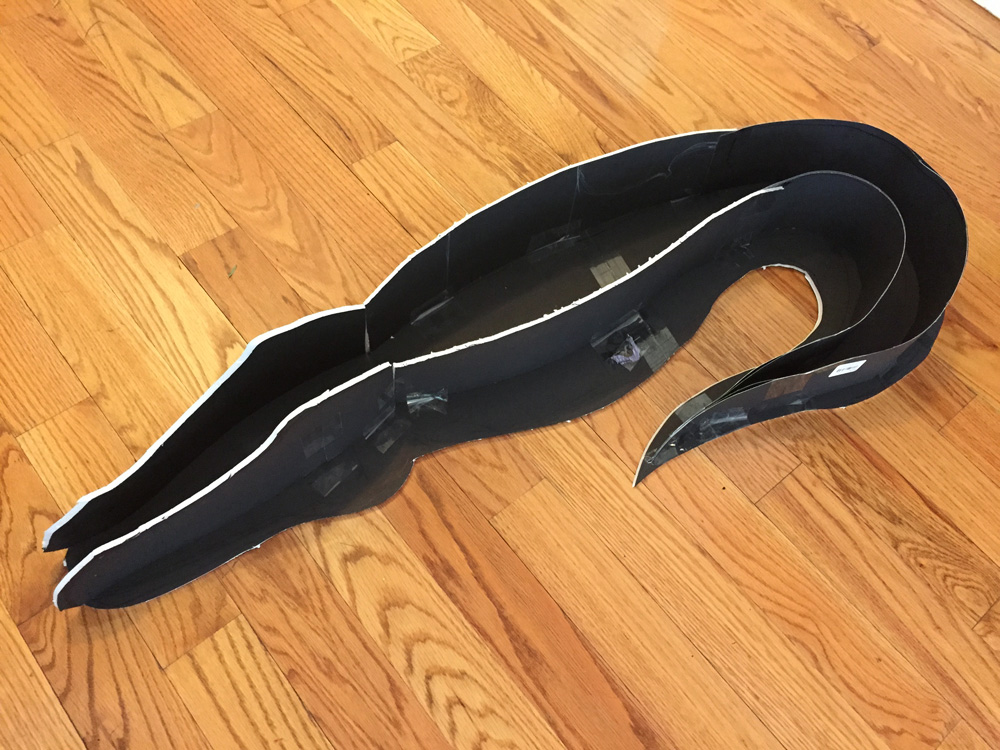
Then I used two strips of foam board and two strips of poster board to fashion these long ridges down what will be the alligator's back.
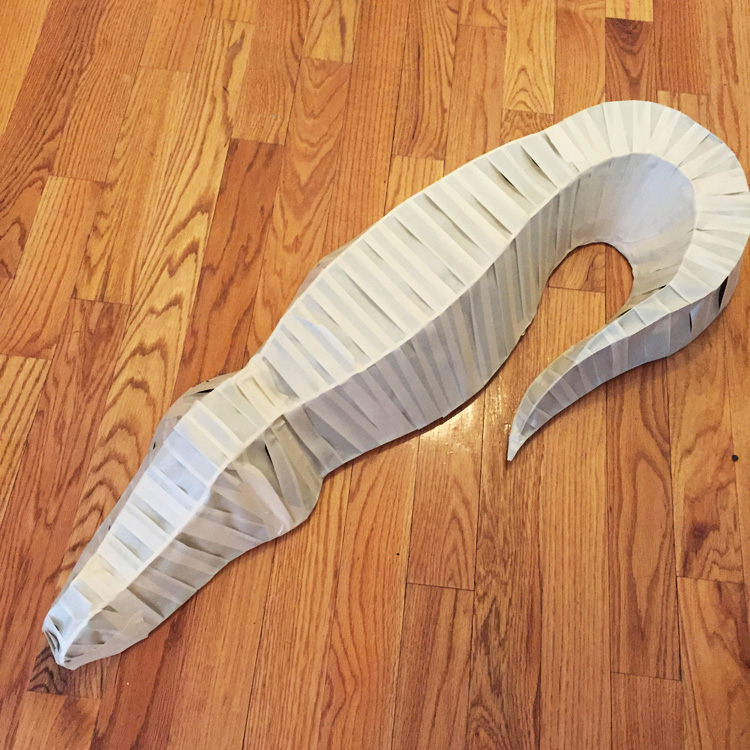
Then I wrapped the whole thing in masking tape.
Time for paper maché! See my post about my paper maché method here. The short version is: I use Roman PRO-543 universal wallpaper adhesive (paid link) and alternating layers of newspaper and brown wrapping paper.
I made those spiky ridges along the back out of poster board. I made the texture on the back and sides with pieces of string, cut to size and paper maché'd over. I did just two layers of paper maché for this whole thing. It won't need to be very sturdy or last very long.
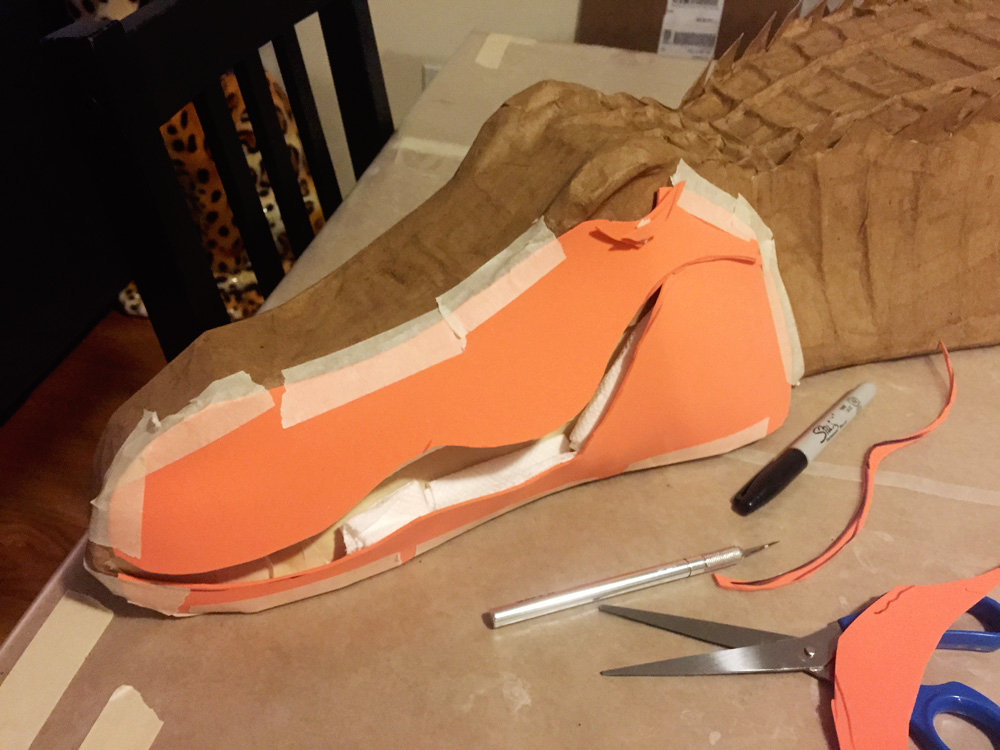
I created the shape of the face with craft foam (paid link). This stuff is great; it's soft and rubbery and lightweight, kind of like a much thinner version of a yoga mat. And it's very easily to cut nice smooth shapes with. It's also nice and cheap; just 80 cents a sheet at my probably-overpriced art store in Brooklyn.
I padded out the craft foam with paper towels to make the edges of the mouth stand out a bit, so I can put teeth in there!
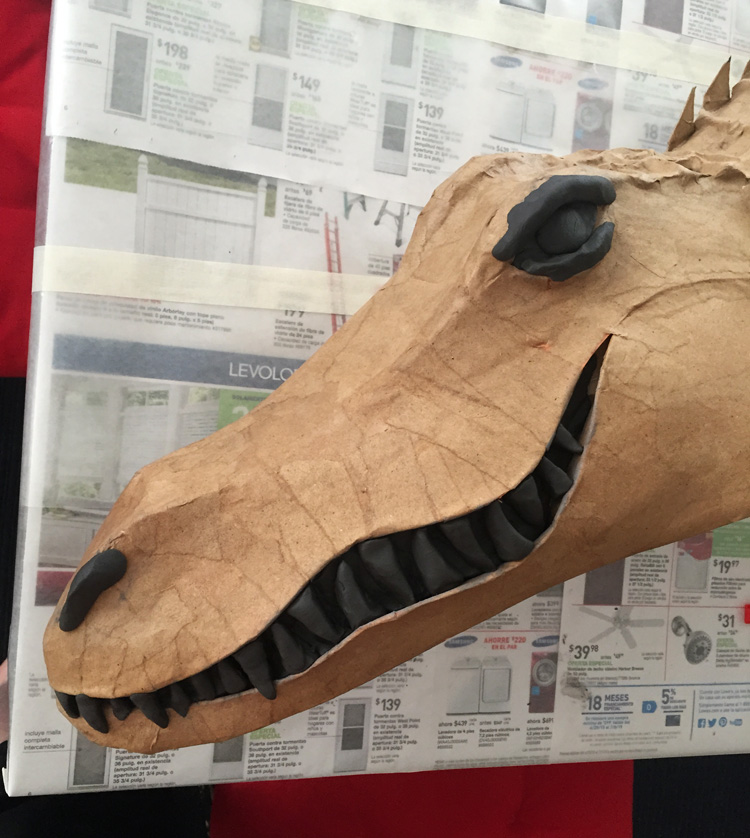
I paper paper maché'd over the craft foam, and then sculpted the teeth with Activa Plus clay (paid link). I also decided to sculpt out the eye sockets and nostrils with some more clay.
Next steps: More paper maché to cover the whole face, and then I have to make legs for this guy! I already made some legs but I'm not happy with them so I'm doing them over. And then of course when that's all done I have to paint the thing.
Ultimately I'm going to try to waterproof the alligator, at least so it will survive about eight hours partially submerged in water. I'm researching some methods and materials for that, but I'd love to hear if you have any ideas; please feel free to leave a comment below! Thanks!
Update: I've added part two! See how he's coming along!