
Sigil of Baphomet wall decoration with light-up eyes!
Published August 15th, 2026
I made this big ol' sigil of Baphomet thing as a decoration for our living room wall! I ain't a Satanist or nothin', I just like rock n' roll and iconoclastic/irreverent imagery. :) It's pretty huge; 40" in diameter! The eyes light up! And I can flip the eyes in their sockets so that they're gold during the day and then white and translucent at night, with the lights shining through.
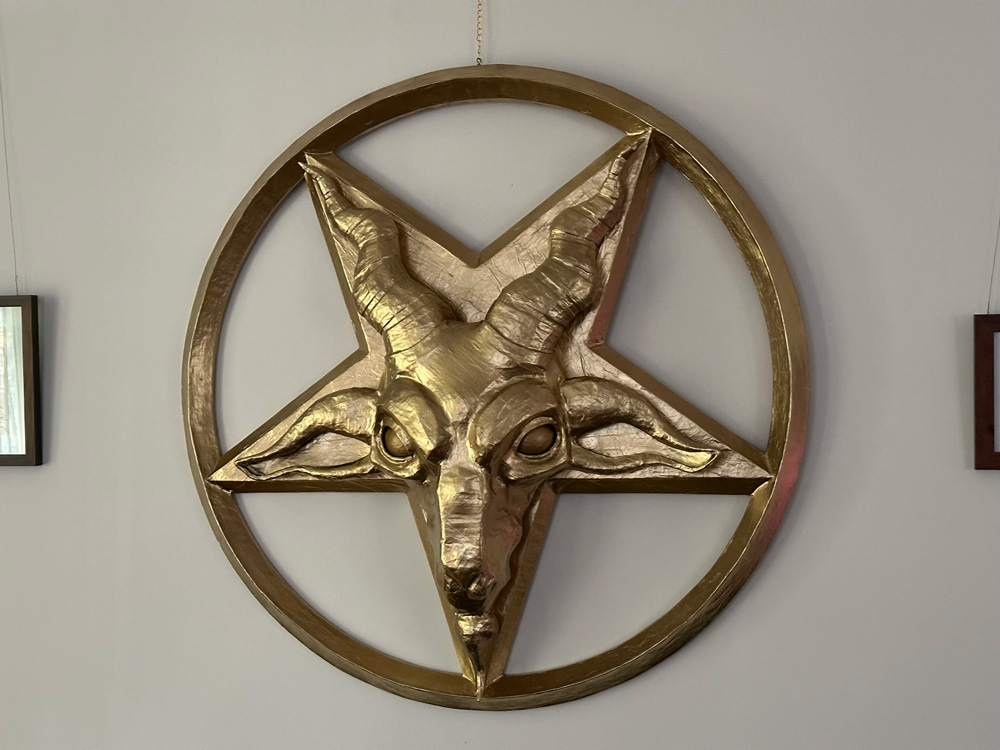
My process for making this sculpture involved ten million tiny steps to make all the various parts — so rather than go into tons of boring detail, I wrote up the shortest possible version of how I made all this stuff...
Pentagram
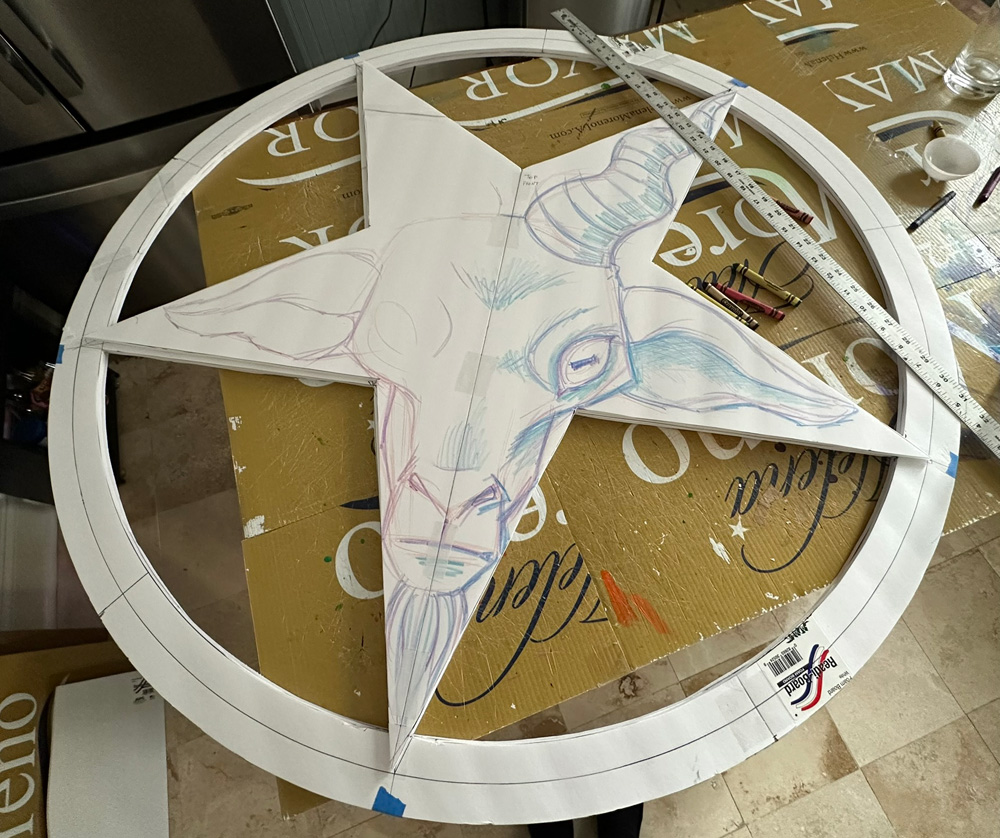
I drew the whole pentagram and goat head on foam board to figure out the design. The back surface of the ring and star are foam board, two sheets thick. For the outer ring, the raised edge is strips of posterboard, hot-glued in place standing up vertically, and then covered over with masking tape to make the two slanted sides of the ridge, kind of like a tent. For the 3D edge of the star, I made a smaller copy of the star shape, sat it on little foam board supports to raise it up a bit, and then I used masking tape all along the outer edge to make the slanted edges. The whole pentagram is covered with four layers of paper maché.
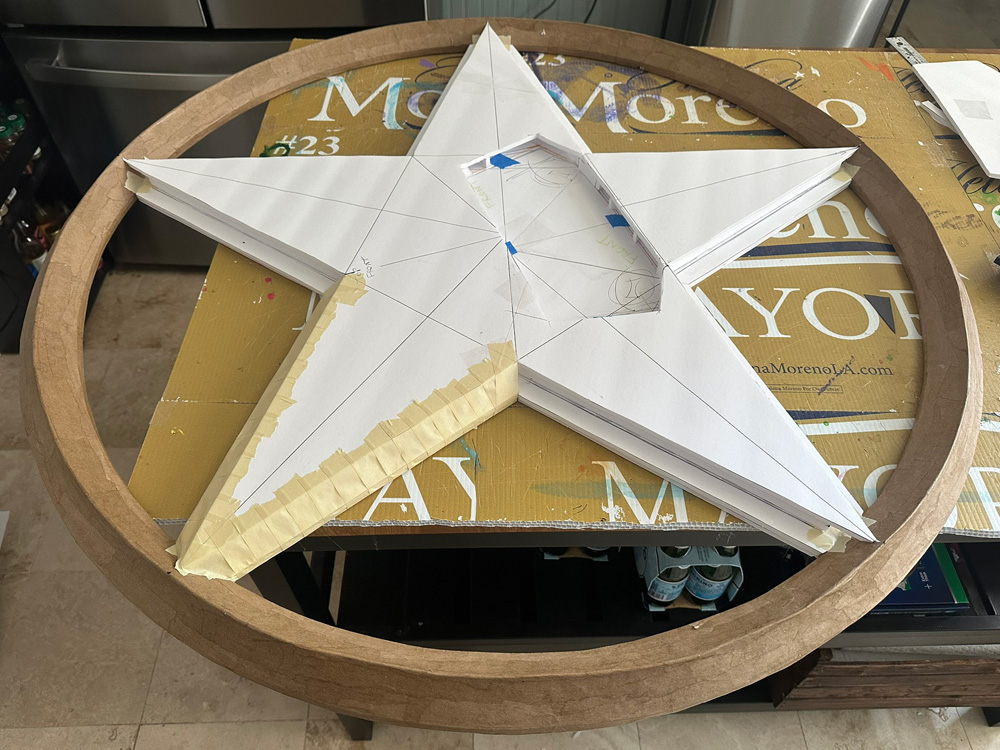
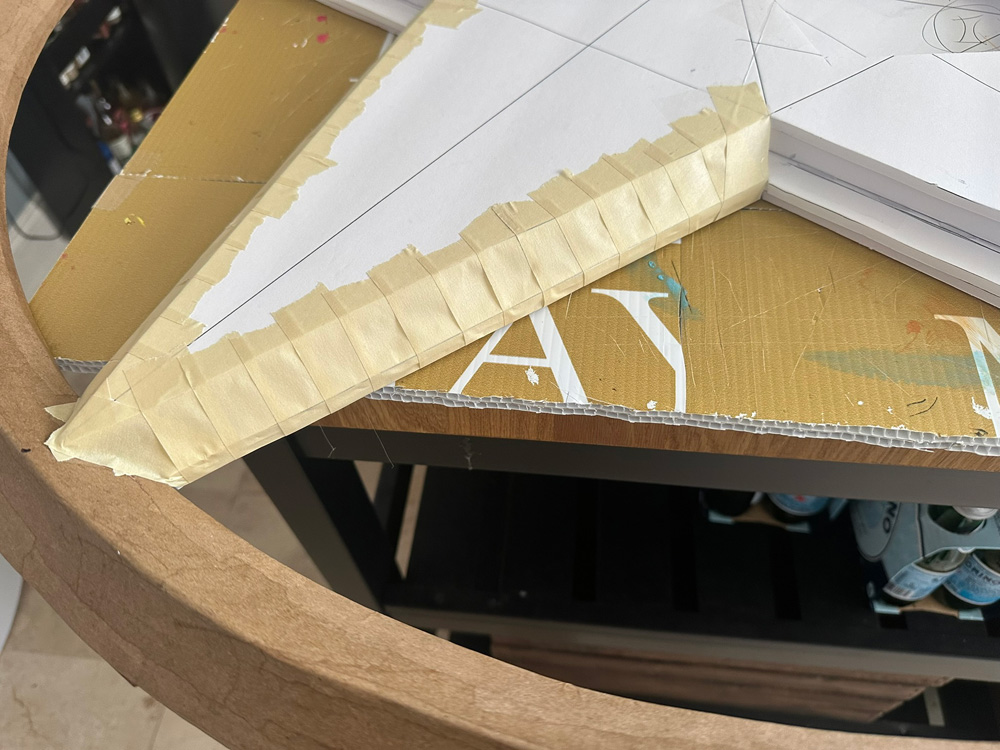
You can see I left a large hole in the star; that's so the eyeball mechanisms (coming up) can sit in the space, so they don't protrude too far out and cause the face to stick out from the star farther than I wanted — this didn't work out perfectly, as I'd wanted to keep the face sculpture relatively flat, but it just wasn't possible because the structures for the eyes needed to be a certain size. No big deal.
Eyes
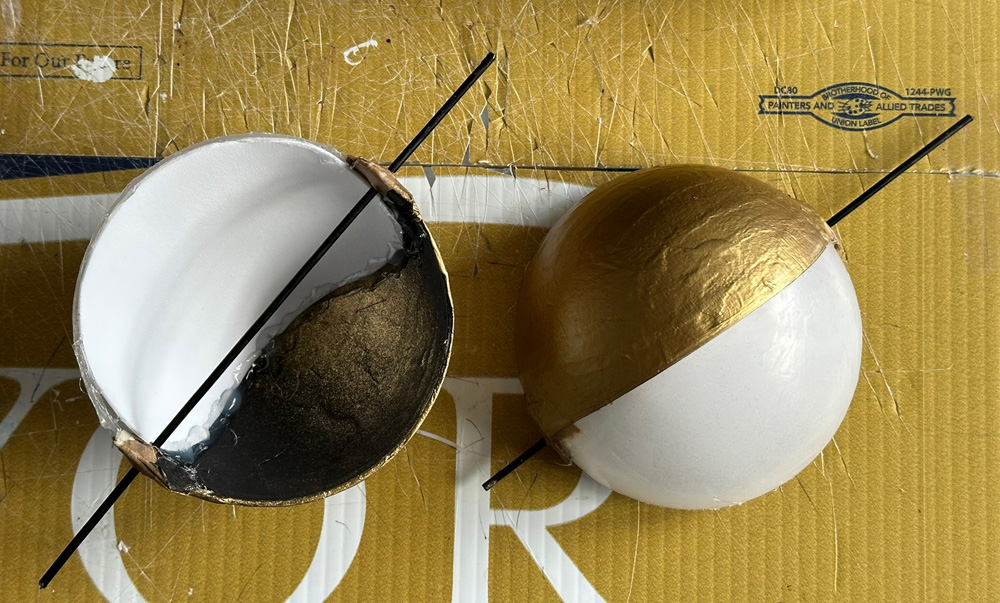
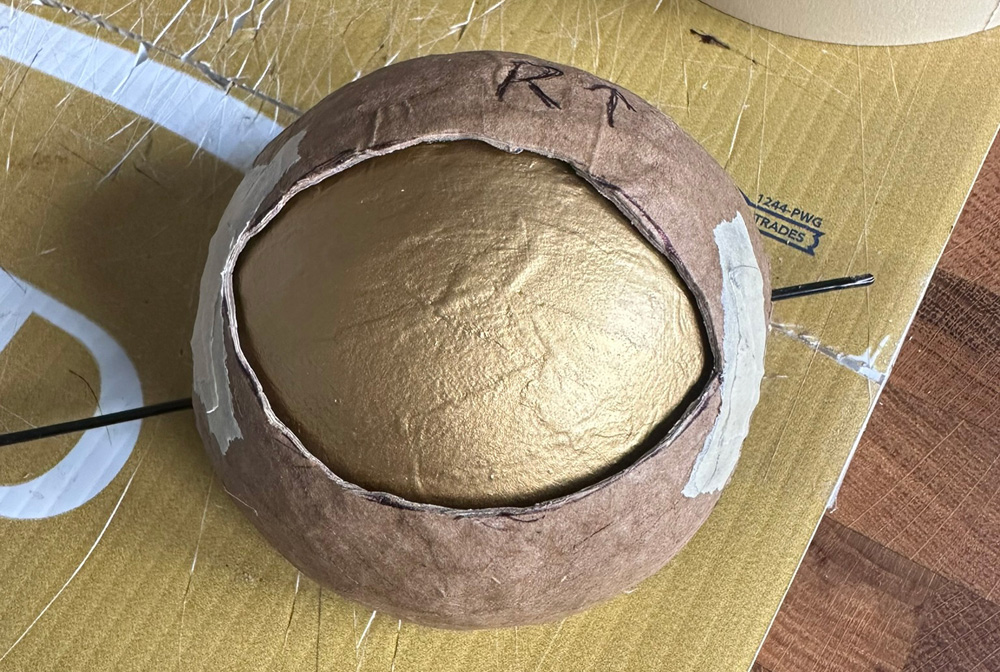
The eyes were the most complicated parts of this project! I feel like there's no way in hell anyone would want to read about my very long and convoluted process for the eyes, so here's the shortest version I can possibly tell you: I designed the eyes so that they could rotate in their sockets, so they could look like a solid part of the golden sculpture by day and then flip to glowing red at night. The eyes are half-domes of clear plastic; some packaging from dollar store toys. I painted one half of each eye gold, and I put white craft foam in the other half to diffuse the lights that are behind them. The eyes are mounted on axles made of thin, stiff wire. The wire is set into little bases I made out of foam board. I hot-glued tiny magnets in the eyes and inside the goat head so that when you flip the eyes they lock in place. Turning the eyes is nothing fancy, I just touch the eyeballs and roll them upward or downward until they lock into place. There's way, way more to all of this but I promise you it's not interesting.
I made these eye structures before I made the goat head, because I knew that the size of these pieces would inform the shape and size of the head.
Goat head
I sculpted the goat head around the eye mechanism, but I was careful to not actually attach the goat head to them, so I could remove them as needed, like while paper maché-ing and painting. I made the head from a ton of materials: mostly foam board shapes for the basic structure, and foam clay to round out the shapes. I covered the head in two layers of paper maché.
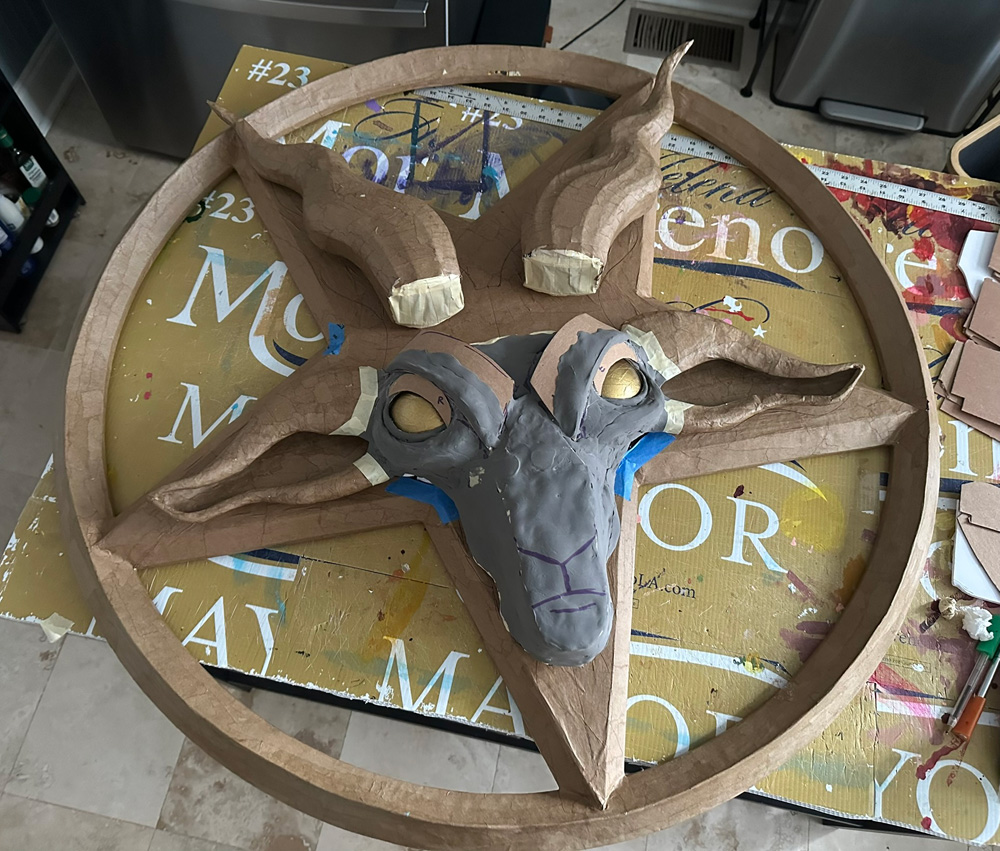
(The snout in the pic above didn't work out the way I wanted so I chopped it off and redid it.)
Ears
The ears are hollow paper maché shapes. I built the bases as solid sculptures, like without the opening in the front, then I covered them with six layers of paper maché. When they were dry, I opened up the shapes and removed the materials inside, and I cut out the openings in the front. And then I reinforced all the cut edges with a layer of tiny pieces of paper maché, just to smooth them out.
Horns
I made the horns from stacks of flat foam board shapes — I designed these almost like layers of a 3D-printed object, you know, like there's a central one that's the biggest and then the ones above that get smaller and smaller, and the ones toward the bottom get smaller and smaller too. Make sense? If not, don't worry about it. I then covered these shapes with foam clay to fill in the edges and smooth them out. I made the little raised ridges of the horns with strips of craft foam and some foam clay. I covered the horns in two layers of paper maché.
Goatee
I made the goatee separately out of some scraps of foam board which I then covered with foam clay to smooth everything out. I covered the goatee in two layers of paper maché and attached it with hot glue and more paper maché.
Lights
I bought this string of battery-powered, remote-controlled lights (paid link); you can set them to be tons of different colors, and make them blink and stuff. I laid the string all the way out in a straight line across my floor, then I counted the lights to locate the middle, and I separated them into two bunches, which I connected with twist ties. Each of these bunches sits behind an eye. I left a little bit of slack between the two bunches, and I left a long piece (18"?) that goes into the battery pack, so I have some slack to remove the battery pack and replace the batteries.
I made a big door in the back of the pentagram that's attached with magnets. On the inside of this door I built a little foam board box to hold the battery pack for the lights. So whenever the batteries die I can take the pentagram off the wall, remove the door on the back, and change the batteries.
Painting
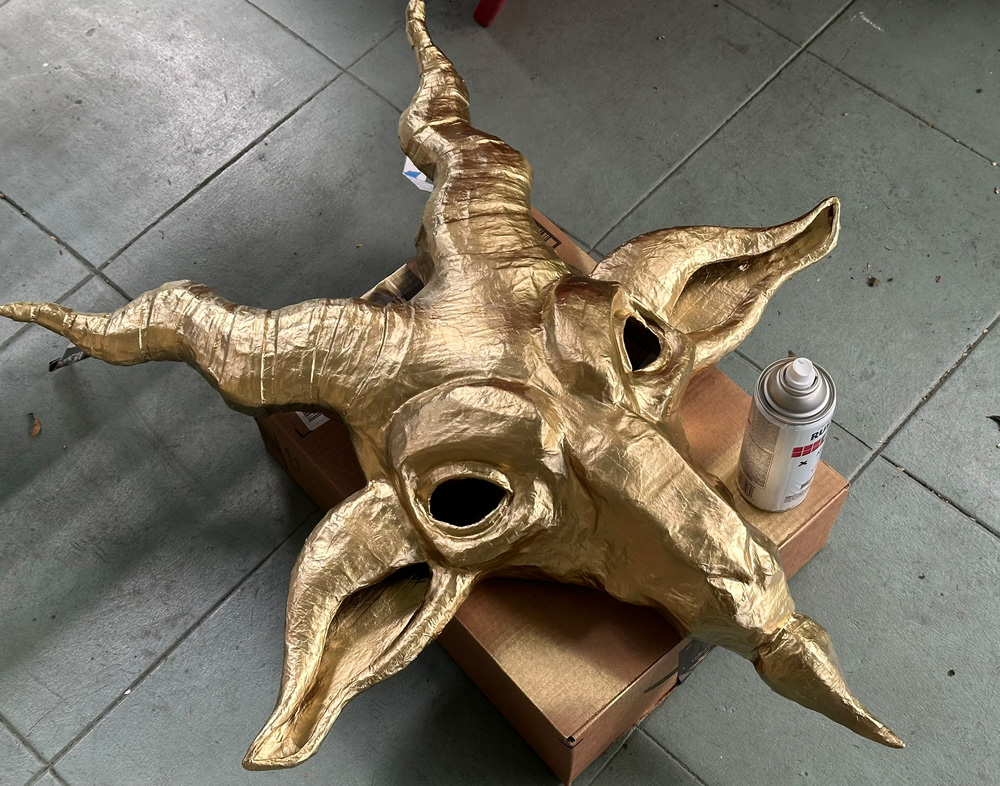
I painted the pentagram and the goat head separately before assembling. I covered both with a coat of Mod Podge mixed with a little bit of acrylic paint (a mixture of white, yellow, and brown), and then I spray painted them gold.
Assembling
To attach the goat head to the pentagram, I attached some wires at the back of the head and horns; I did this earlier in the process, before painting. The wires are anchored very firmly in the paper maché; I wound them around some little wooden pegs, cut some deep holes in the back of the goat head, and used a ton of hot glue to create a big solid blob to hold the wooden pegs in place, and then I covered everything over with paper maché. The wires run through some very thin plastic tubes that I attached inside the pentagram, and then at the back I twisted the wires around some little T-shaped needles to lock them in place. Then I covered those over with masking tape and paper maché.
Hanging
I was worried that the weight of the whole sculpture would cause the top segments of the pentagram's ring to sag and warp over time, so I reinforced those areas with some thin pieces of wood in the back. To hang the sculpture up, I used some twist ties and hot glue to attach a metal key ring very firmly in the back; it's wrapped around one of the horizontal wooden supports. In the house we're currently renting we're not allowed to put nails in the walls, so the key ring slips over a metal hook that's attached to a chain that's hanging on the picture-hanging rail on our living room wall.
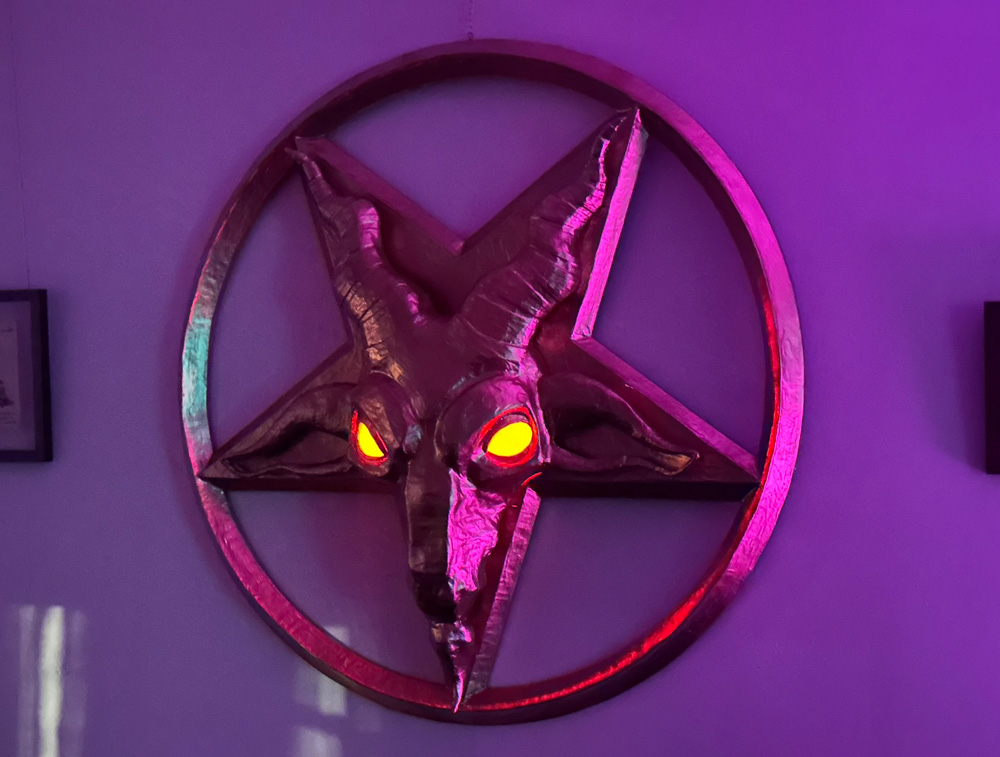
Like I mentioned, the lights work with a remote control, and they can turn a wide variety of colors, but we mostly just leave them red; seems like the most evil, probably, yeah? (Weirdly in the photo above the eyes look orange; in real life they're very red.) I'm really curious to see how long the AA batteries will last, since the device is switched permanently on. Like, when we use the remote to turn off the lights, I don't know if the batteries will continue to drain at all because the battery pack is switched on. Any electrical geniuses out there know anything about this?
That's about it for this sculpture! If I had to do it all over again I would find a way to make the eye mechanisms less bulky so I could make the whole face shallower/flatter; it ended up being a lot bulkier than I expected! But I'm very happy with how it came out. On to the next project! I'm already behind on Halloween AND next Mardi Gras!