
Witch head in a box with light-up eyes and more!
Published October 1st, 2026
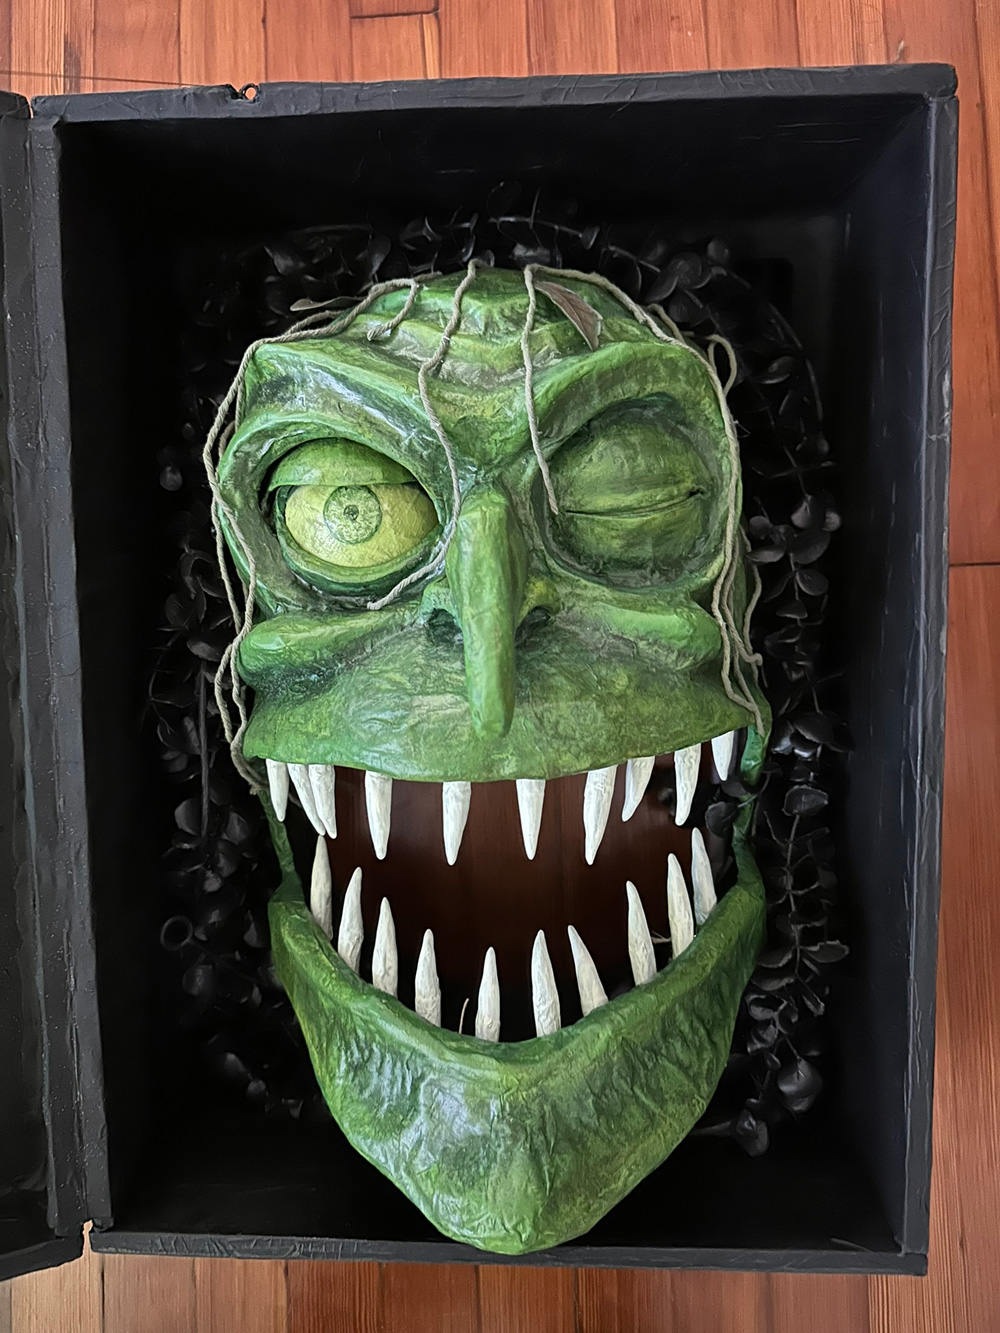
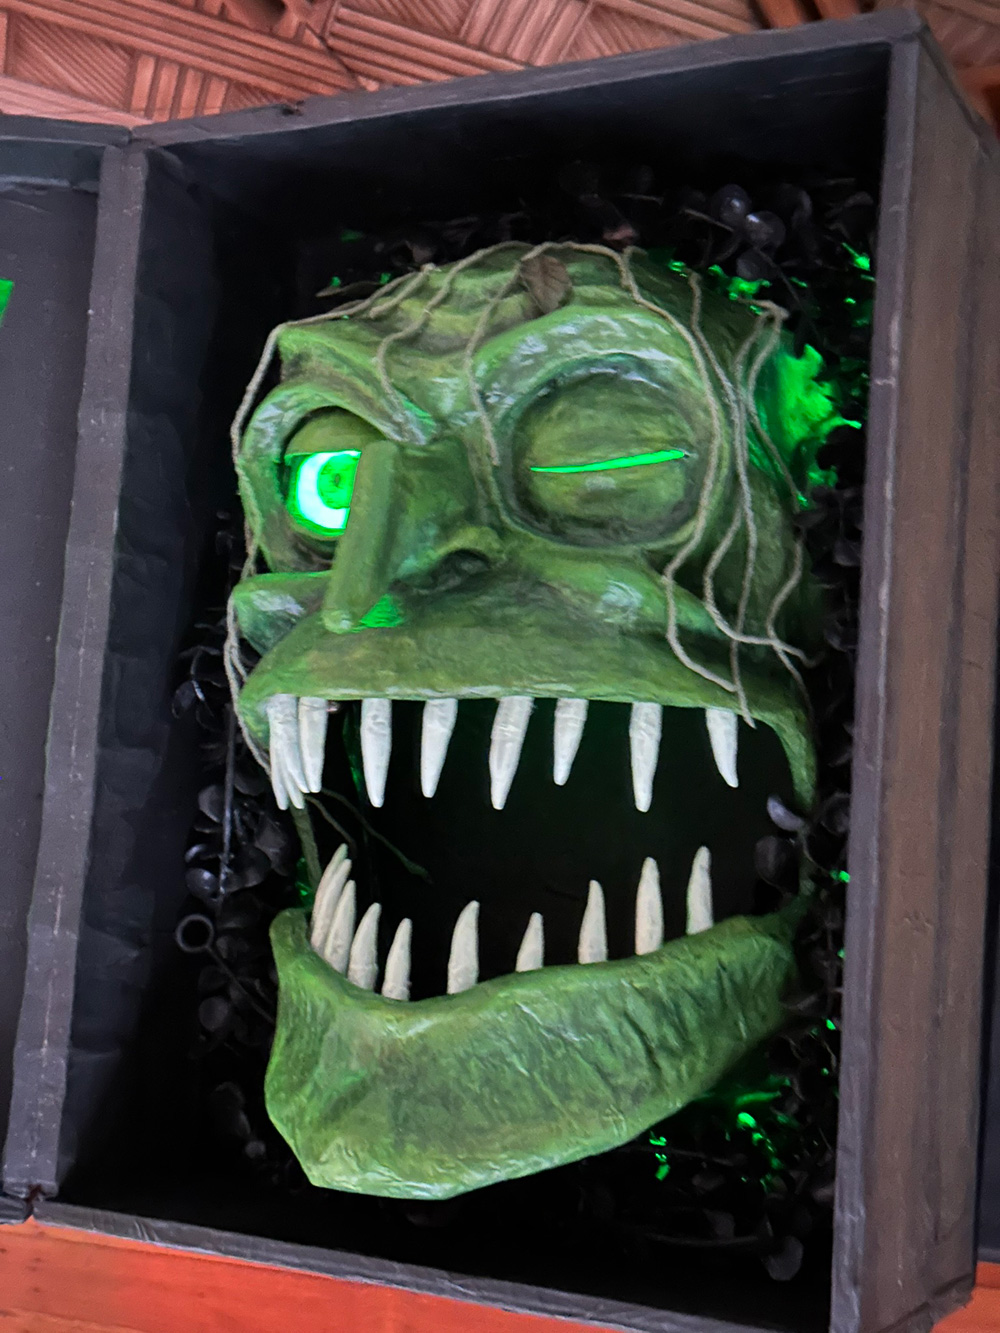
I made this swamp witch head in a box prop for a secret Halloween-related event! The main purpose of this prop was for guests to remove a tooth from the witch's mouth, break it open, and read a fortune that's inside.
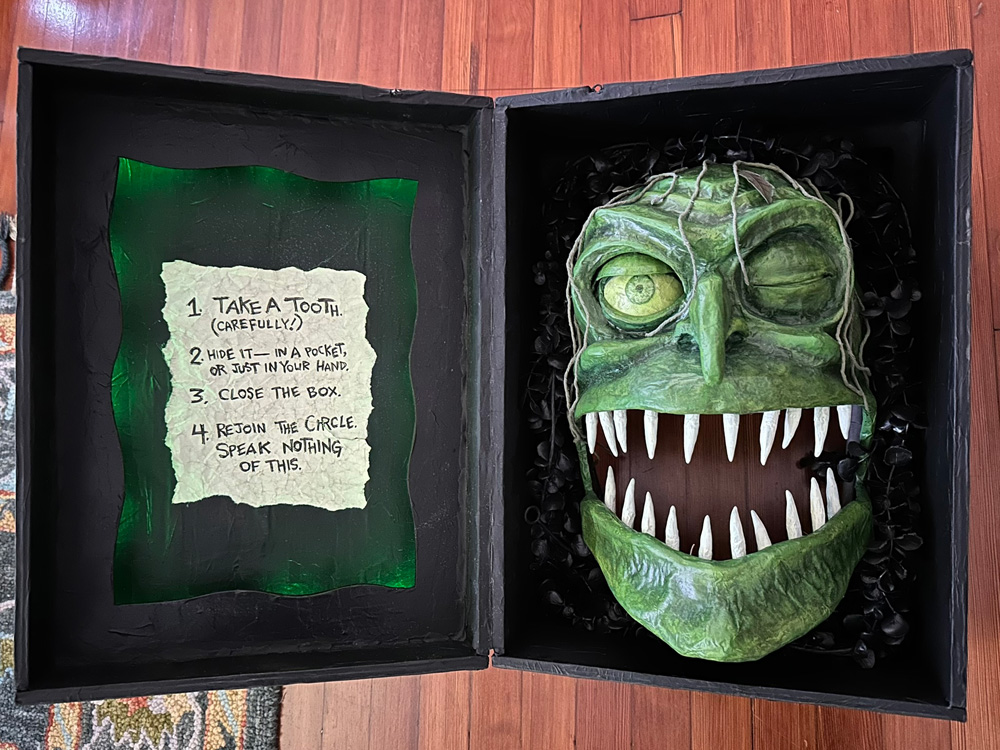
There are tons of parts involved in this prop: The box, which is basically a foam board and paper maché sculpture. The witch head sculpture itself. The teeth, which are hollow and can be removed. The eyeball, which does a few things (more on that below). Lights in several different places. Strings to make things move. Magnets to make things stick to one another. Some audio too! This was a complicated project! But extremely fun and satisfying.
The box
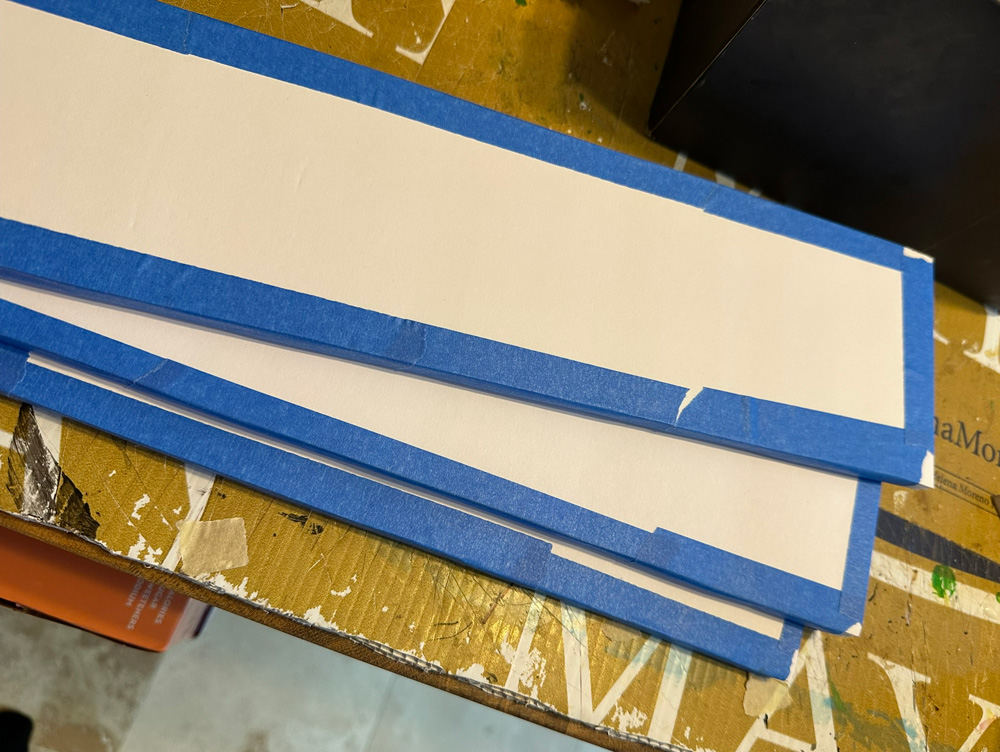
I built the box by making a bunch of individual slats of fake wood — rectangles of foam board, doubled up and covered in paper maché — which I hot-glued together. I lined the inside of the box with a layer of paper maché to firmly connect all the slats of fake wood and also to prevent any light from escaping. (More on lighting for this project below.) I made the hinge with pieces of string, hot-glued in place and covered over with masking tape and paper maché. I painted the box to look dark and old and dirty.
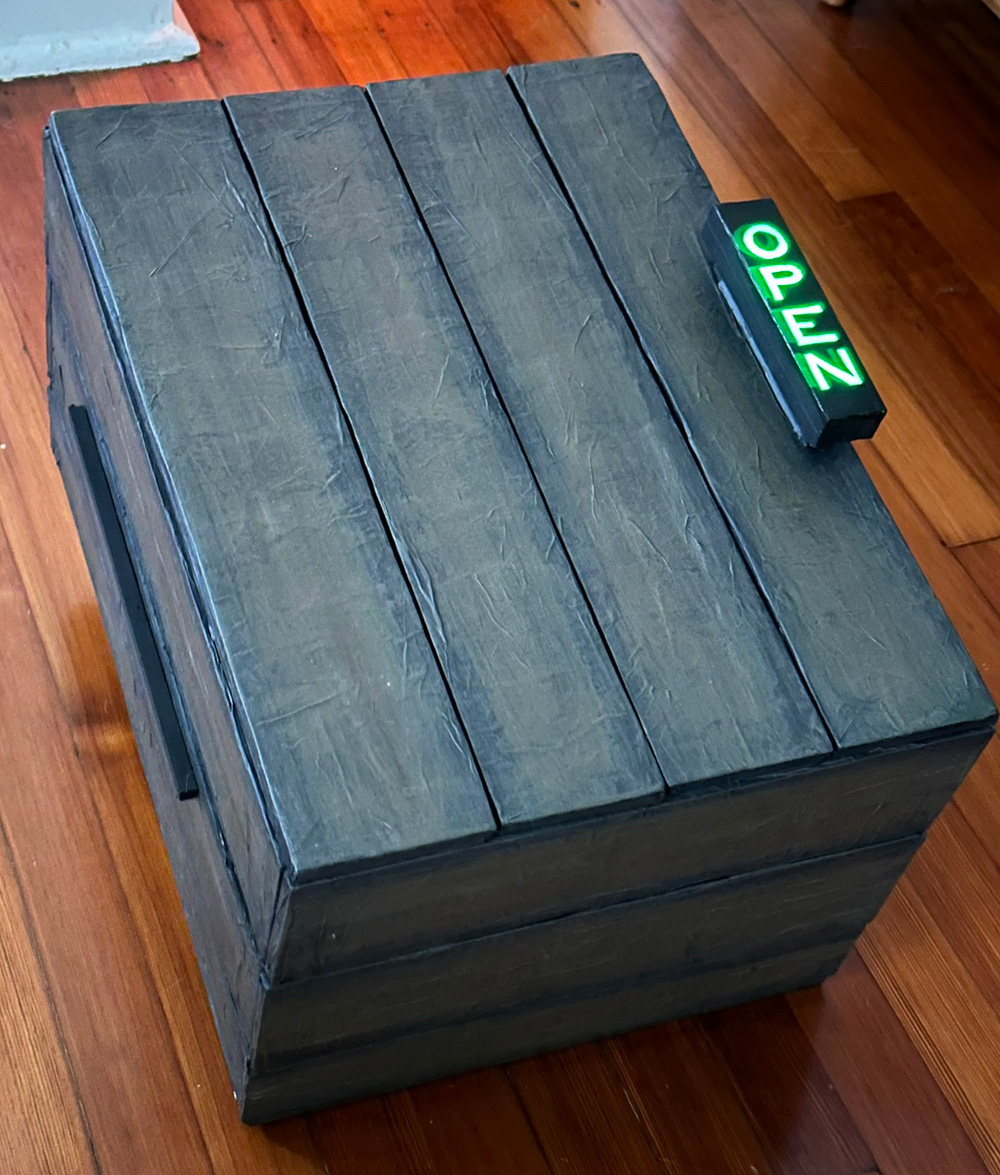
I built the handle out of bits of foam board hot-glued together to make a small box shape, and the top panel is a piece of pasteboard from a saltines box; I cut out the letters with an X-acto blade and placed a sheet of clear plastic behind them. There are four tiny lights from a string of lights inside the handle; the rest of this string is inside the lid to create recessed lighting. More on lights below. I put a sheet of 2mm white EVA foam (aka craft foam) over the lights to diffuse them. When this was all put together I was surpised by how bright and how even the glowing green letters are!
The witch head
I worked out the size for the witch head based on a few key elements. The mouth had to be big enough to fit twenty long teeth and to leave enough room for people to be able to reach in and pull one out without being blocked by the other teeth and the rest of the sculpture. The area for the eyes had to have enough room inside to fit the complicated structure that holds the eyeball; more on that below. So I designed the teeth and the eyeball structure before making the head. I'll get to those in a bit.
Once I had the dimensions for the head worked out, I used my typical technique for building heads, although this one would be flat on the back, since the witch's head needed to lay flat in the box.
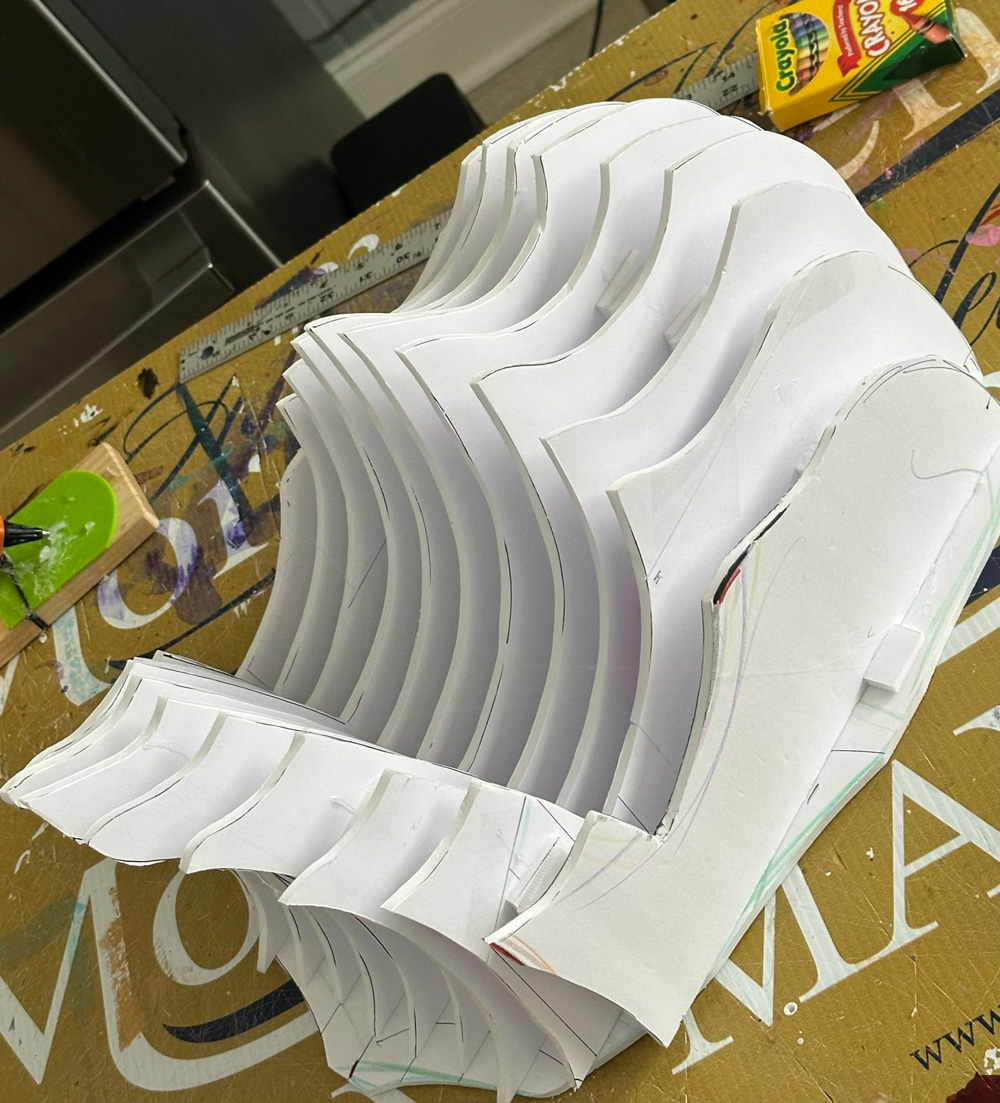
I built an armature out of slices of foam board that I designed and cut out and hot-glued together, with little support structures in between the slices to hold them apart at the right intervals.
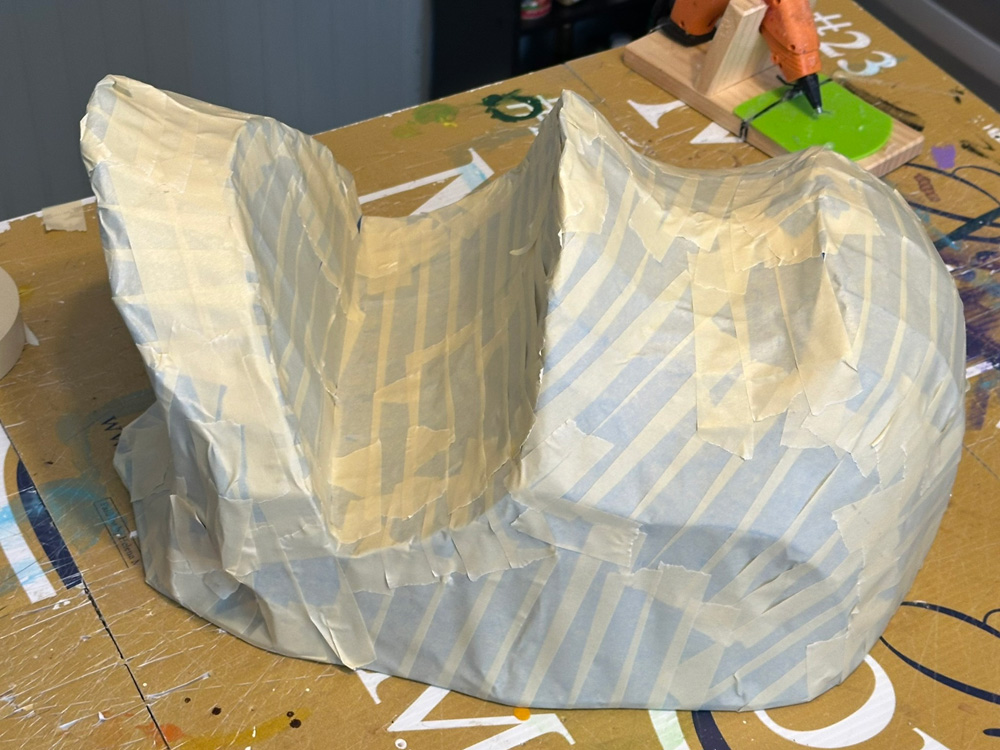
I covered this armature with masking tape, and then strips of construction paper to smooth it out, and then more masking tape.
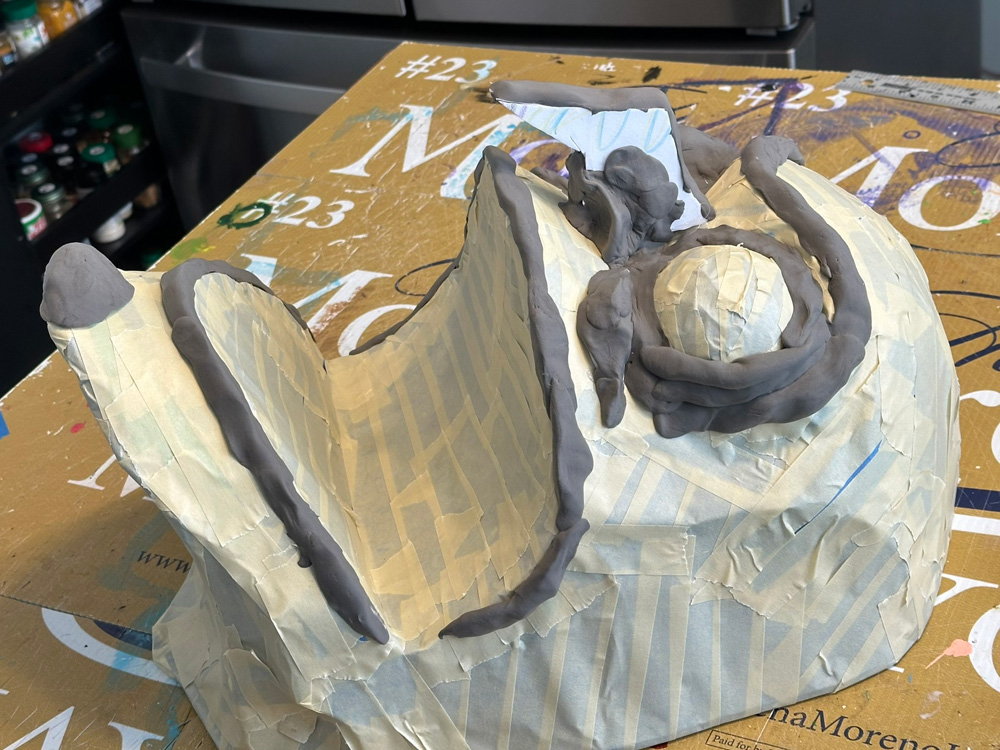
Then I sculpted the basic features onto the face using foam clay and other materials.
I covered the head in shipping tape to act as a release agent for the paper maché. Shipping tape is great for this because paper maché (at least with the materials I use) doesn't want to stick to it very much.
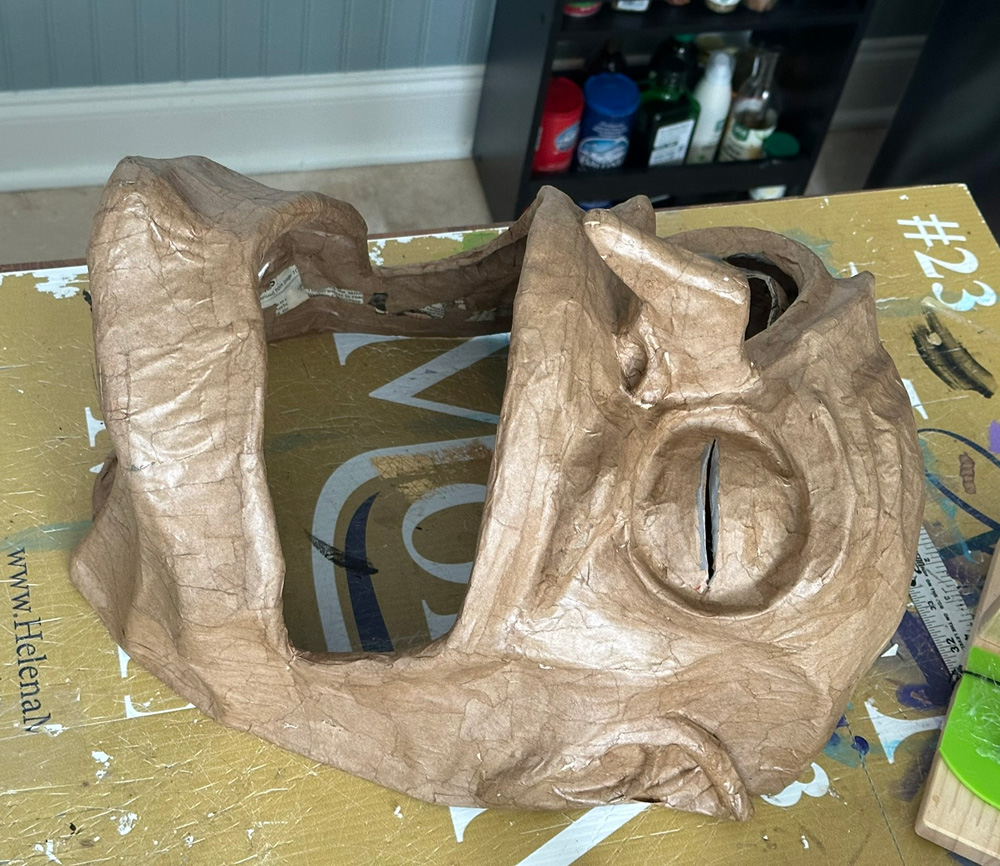
I then covered the head with eight layers of paper maché. You can read about my paper maché process and materials here.
When the paper maché was 100% dry, I cut open the head sculpture and removed all the interior junk, leaving me with just the hollow paper maché shape. I cut out the eye holes and mouth hole and reinforced the cut edges with tiny bits of paper maché.
Painting the head
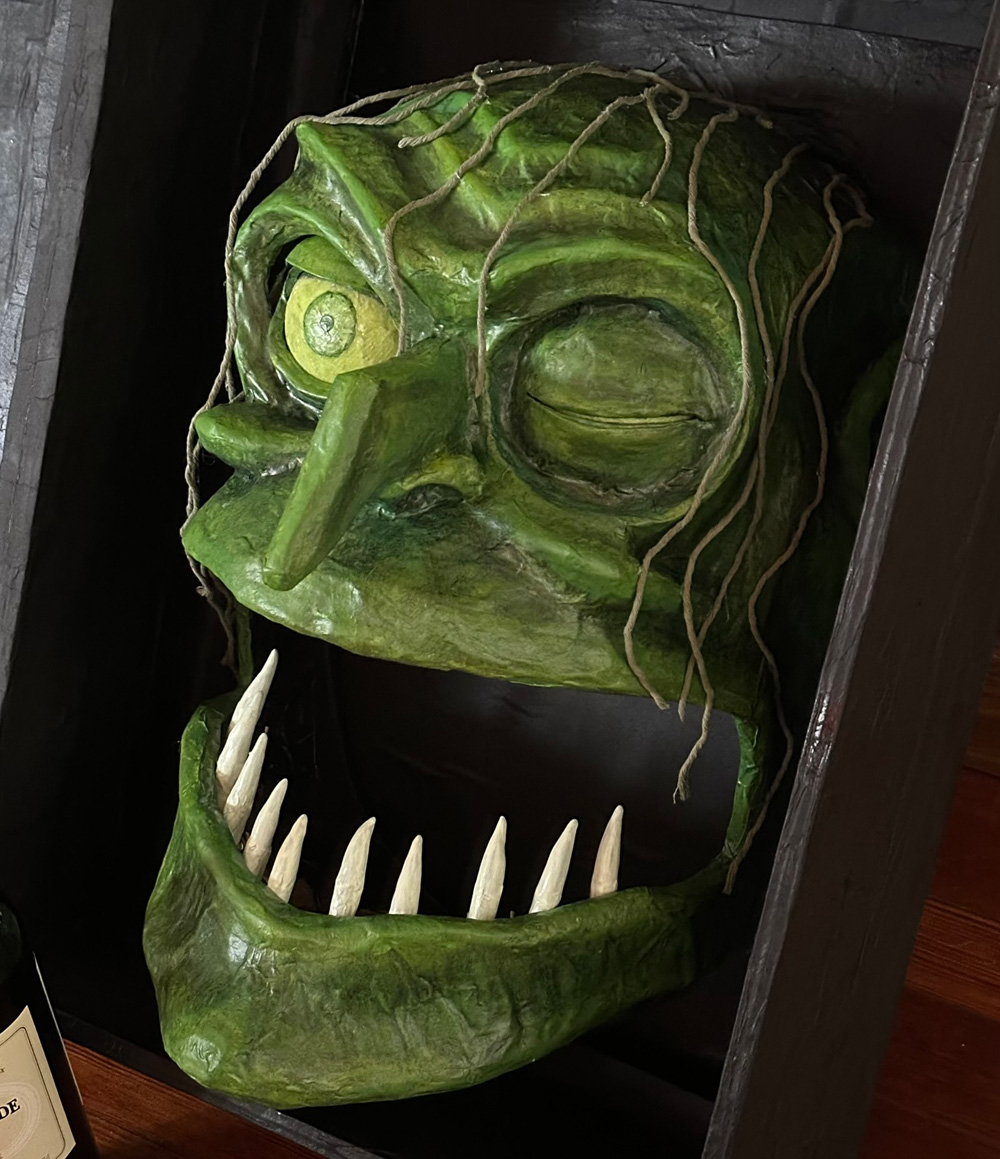
I applied a coat of Mod Podge over the whole head, mixed with a little bit of acrylic paint, so I could keep track of coverage. When that was dry, I spray painted the head a dark green color. I let that set for a day, and then I used acrylic paint to add highlights and shadows and texture. I used a dry brush technique for slightly lighter colors on the raised surfaces, and I mixed up a wash of darker colors with water to add shading in the nooks and crannies. I did two or three rounds of dry brushing and washes to get a layered and varied look all over.
I added the hair after painting. I put some acylic paint in a plastic bowl along with a bunch of cotton string, and I worked the paint into the string with my hands. I hung up the string to dry for a day, and then I glued it onto the head with tiny dots of hot glue here and there.
Teeth
Each tooth is a hollow tube; here's how I made 'em: I wrapped a long strip of construction paper tightly around a pencil and secured it with masking tape. (I left this paper tube longer than it needed to be for all the teeth because I wasn't sure what the perfect length would be; I snipped them all later.) Then I wrapped the point of the pencil in a tiny piece of newspaper, secured with masking tape onto the construction paper tube. Then I used foam clay to sculpt the tooth over this newspaper point, trying to keep the sculpted tooth no wider than the pencil.
I let the foam clay set by hanging the pencils upside-down; I taped them along the edge of my table. If you let a narrow foam clay shape set while it's standing up, it will sag and warp a lot.
When the teeth were dry, I pulled the pencils out, then coated the teeth with Mod Podge, and then I painted them with acrylic paint.
Later on I inserted some objects in the teeth, sealed up the open end, and attached them inside the head. More on that below.
The eye
I wanted to design the witch's eye so it would have four(!) important functionalities:
1. The eyeball is a hollow sphere that can be opened to retrieve stuff inside; trinkets, candy, etc.
2. The eyeball can be easily removed from the head.
3. The eyeball glows.
4. There's an eyelid that opens when the box is opened.
I'll try to explain all this stuff...
1. The eyeball can be opened. The eyeball is a hollow plastic sphere; some packaging from a toy from the dollar store. It's two half-spheres that connect together. So this part was easy!
2. Making the eyeball removable: I used magnets for this! Man, I love using magnets in my projects. I hot-glued some magnets inside the eyeball, near the front but not blocking the glowing area, and I matched up more magnets on the eye socket structure that holds the eye (described in part 4 below). The eyeball is held firmly in place by the magnets, but you can simply push down on it and it falls down into the head, and you can then pull it out of the mouth. Fun!
3. Making the eye glow: I bought some tiny individual battery-powered lights (paid link) and attached one inside the eye. The little light is very intense and it wanted to just create a small point of bright light, so I wrapped it in white craft foam to diffuse the light and make the whole eye glow more evenly.
4. The moving eyelid: This was very complicated! First, it's kind of important to know that the eyeball structure is really three objects, stacked and fitting together. The eyeball is a sphere (duh). Then there's a paper maché dome-shaped eye socket that holds the eyeball in place with magnets. This socket thing is open on the bottom so the eye can fall through it when someone pushes on it. And then there's the moving eyelid, which is like a partial segment of sphere that fits over the socket structure and can slide back and forth over the eye.
The eyelid has holes down at the sides, and these fit over two pegs that are on either side of the socket structure, basically like an axle. The eyelid can roll upward to open, and it can roll back downward to close. There's a thin elastic string that holds the eyeball in the closed position; this attaches inside the top of the witch's head. Then there's a separate string attached at the top/back of the eyelid. This string runs through some loops and attaches to the lid of the box. When the box is opened, the lid pulls the string, and the string pulls the eyelid up/back. The elastic string that keeps the eyelid closed is not very strong, so just a little bit of force in the other direction does the trick. When the box is closed, the tension from the string is released and the elastic cord pulls the eyelid closed again.
Whew!
I covered the visible part of the eyeball with a piece of tissue paper; I painted Mod Podge onto the plastic sphere, then laid the tissue paper in place, and then painted it over with more Mod Podge mixed with some green and yellow paint. To make the iris and pupil, I used two different hole punches (I have a ton of these in different sizes) and punched the circles out of white paper. I set these in place with Mod Podge and then painted them.
The eye that's mostly closed has the same kind of plastic half-sphere in it, also covered with tissue paper and Mod Podge and paint, and the same kind of light inside.
Lights
So, I described the light inside the witch's eyeball in the section above. There are four other lighted areas in this sculpture. There's the witch's other (mostly-closed) eye, which uses the same kind of tiny individual battery-powered light that the big eyeball does. Then there's some recessed lighting in the lid of the box, some more lighting in the main box around the base of the witch's head, and a light inside the box's handle to illuminate the word "open." I used strings of tiny battery-powered fairy lights (paid link) for these. I hot-glued the strings of lights inside the lid and the main box. Then I glued strips of white EVA foam over them, to diffuse the light. Then I added some thin slats of foam board to conceal the lights, so rather than seeing these intense little points of light, there's a nice recessed lighting effect.
Fortunes
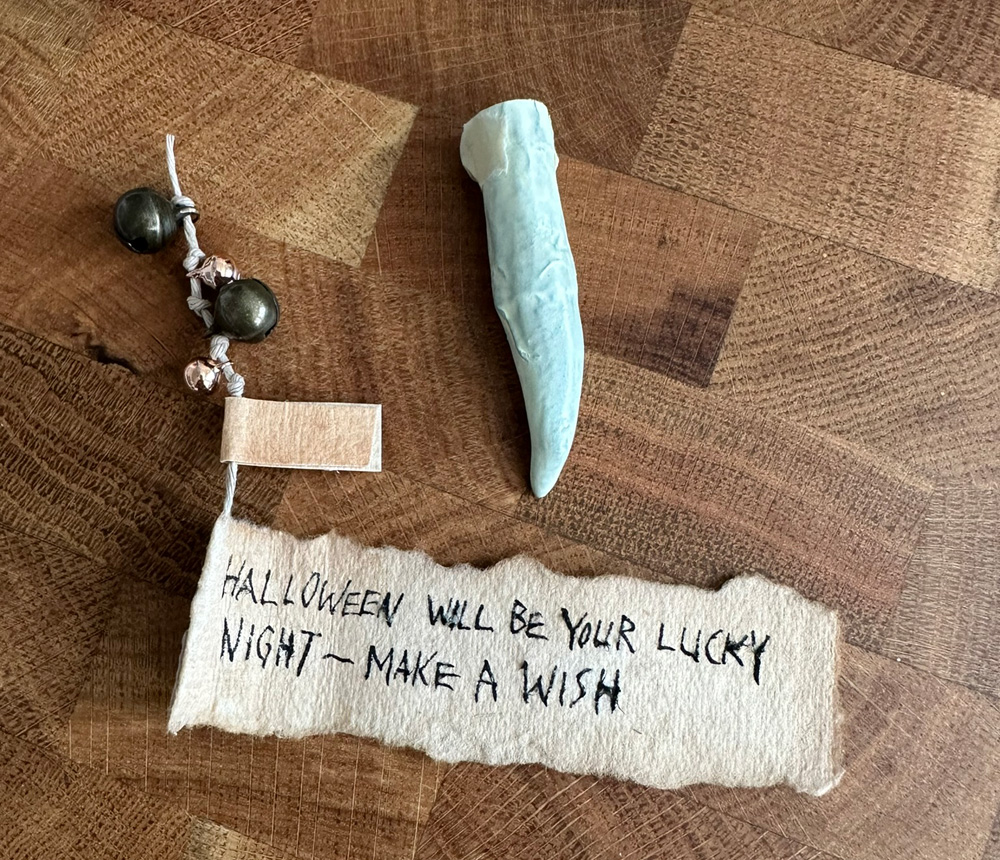
Each of the witch's teeth contains a fortune, which is a rolled-up piece of paper attached to a string.
I wanted the paper for the fortunes to look old and spooky, so I ordered these watercolor sheets (paid link). I tore these sheets into rough-looking strips, and I stained them with black tea. Then I wrote the fortunes with a dip pen and black ink. (I also drew a small symbol on the back of each fortune in red ink; more on that below.)
I glued one end of each fortune to a piece of string, and rolled them tightly around the string so they'd fit inside the teeth. At the other end of the string, I attached a few tiny bells; more on the bells below. I then sealed the open end of the teeth with a piece of paper pasted in place to create a little tab, so the fortune is inside the teeth and the bells are outside.
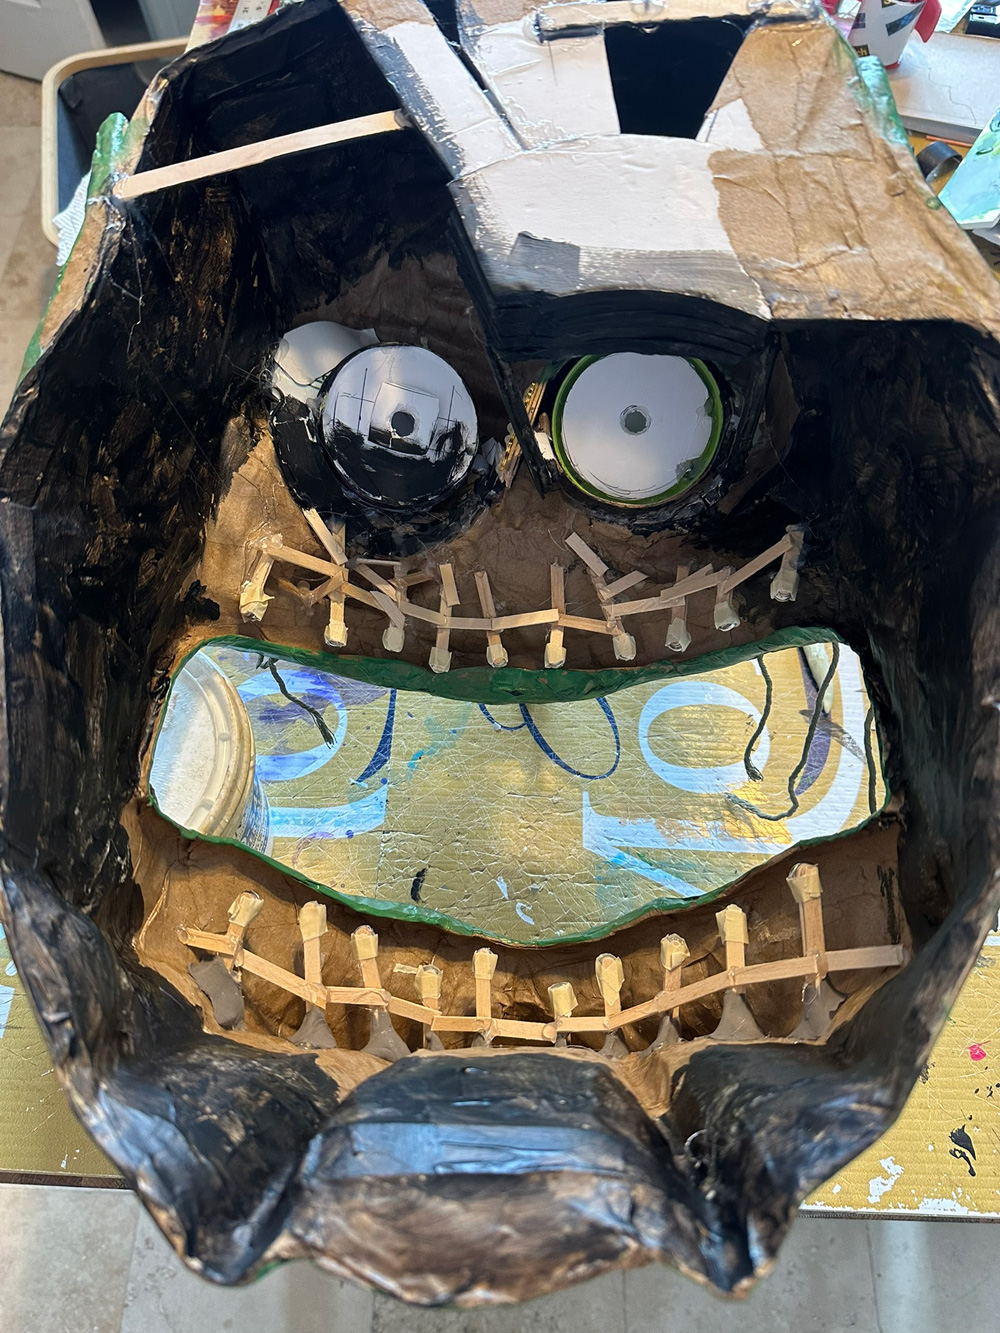
I wanted to attach the teeth in the mouth in a way where they are held firmly in place but can be pulled out fairly easily. To do this, I glued a tiny magnet to each tooth, and inside the mouth I built some little structures with wooden coffee stirrers, each with a magnet on it, to hold each tooth.
Here's a crazy view of the interior of the face, from behind:
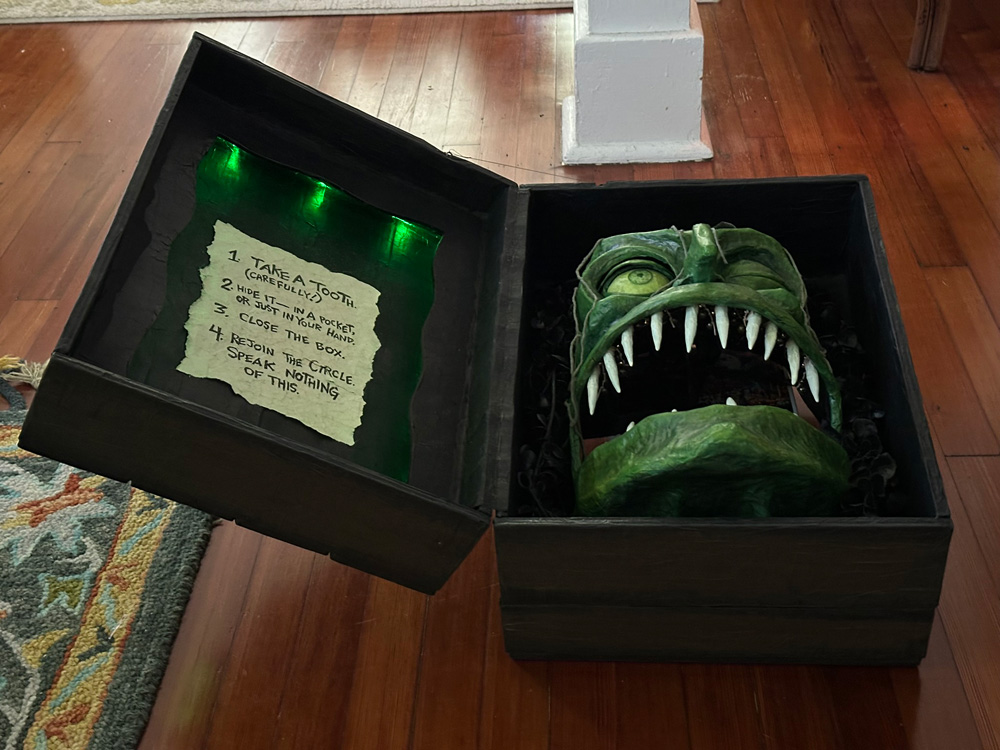
The idea was that each attendee to this event would have to walk off into the woods alone (not very far!) to visit the witch head. They'd open the box, hopefully be a little bit startled or delighted by the movement of the witch's eyelid as it opens, and all the lights inside. Then they'd read the instructions and remove one tooth, and get another little fright/thrill as the string of bells slides out and makes some noise — as I'd instructed them beforehand to do all of this in total silence, for their safety. Later when we were all together again everyone was instructed to tear the little tab off the top of their tooth and pull the string to receive their fortune.
After the attendees read their fortunes, I told everyone to look for the symbol on the back of the paper, as I asked one attendee to reach into a bowl and pull out a random slip of paper. This paper had a symbol on it, and whomever in the group had that symbol on their fortune, they were instructed to return to the witch and remove her eyeball by pushing down on it and retrieving it through the mouth. When they returned, they were instructed to open the eyeball and receive a prize, the nature of which I'm keeping a secret. There's so much more to all of this, but that's all I'm tellin'!
Other details about this project
On the bottom of the box, I created a door that opens, which is slightly smaller than the witch's head, so as needed I can flip the box over and open it up and access the inside of the witch's head, like for adjusting the placement of the teeth and the eyeball.
I added some fake vines and leaves in the box around the witch's head; the idea is that the green lights in the bottom of the box can shine through these and create a creepy effect.
I also built a sort of stand for the box, so it sits up at an angle rather than laying flat. The stand has a secret compartment at the back of the box that holds an old iPhone. I had an audio designer/editor create some creepy ambient sounds for the encounter with the witch — wind blowing, raspy breathing, etc, all very quiet. There's a small bluetooth speaker hidden inside the box, playing this audio track from the phone.
I love complicated projects like this that involve tons of steps and lots of different kinds of materials — paper maché, magnets, lights, sound, etc! This thing was really fun and extremely challenging to make; the moving eyelid alone was a really challenging project.
Here are some more pics, and a video at the bottom!

A dark blessing for spooky season
This is my third year hosting "a Dark Blessing for Spooky Season" — a clandestine late-night meet-up with about a dozen friends in a secret location in the woods where, at exactly midnight on September 30th, we toast the beginning of spooky season and usher in an auspicious October full of fun and frights. I've hosted the event each time and arranged a small bit of entertainment — stories and poems written around some group participation things; recitations of spells, conjuring of spirits, etc. I decided at the beginning of all of this that I wanted to keep the contents of the dark blessing mostly secret; the things I've written for it are just for the brave souls who attend. I've also invited the attendees to contribute their own spooky readings, and a few people have, and it's been truly fantastic.
Why did I create this weird event? Because I want the Halloween season to kick off as early as possible and start with a bang. And I don't want to be a spectator, or a participant, I want to be the person who's making (some part of) Halloween happen. I want to share Halloween with my friends and get them excited for the season. And, most of all, I want to be able to offer my friends just the tiniest fright, or thrill, or delight...
Something I really miss about being a kid at Halloween is being able to actually get spooked, and experience a little bit of genuine fear and trepidation — while also feeling brave for seeking it out, and proud that I survived it. I really wish I could still get scared like that at Halloween! And I don't mean jump-scares in haunted houses; sure, those work on me like they work on anybody. I want to feel the fear of believing, just for a second, that the ghosts and goblins really could be out there waiting to spook me.
So in creating this event my hope was to share a little bit of that with my friends, and I think it's worked pretty well so far. Just having people meet by candlelight in the otherwise pitch-black woods is already something that puts them outside of their comfort zones and gets their imaginations going. Adding some spooky activities — like sending each person off into the woods one by one to throw a pebble into the bayou as a prayer to a drowned witch — adds to the spine-tingling ambiance. It really is a lovely time, and this whole thing has become of my creative endeavors that I'm most proud of. I've basically invented my own little holiday! If you're as obsessed with the Halloween season as I am, I say why not give it a try yourself?