DIY wrestling championship belt props
Published March 8th, 2022
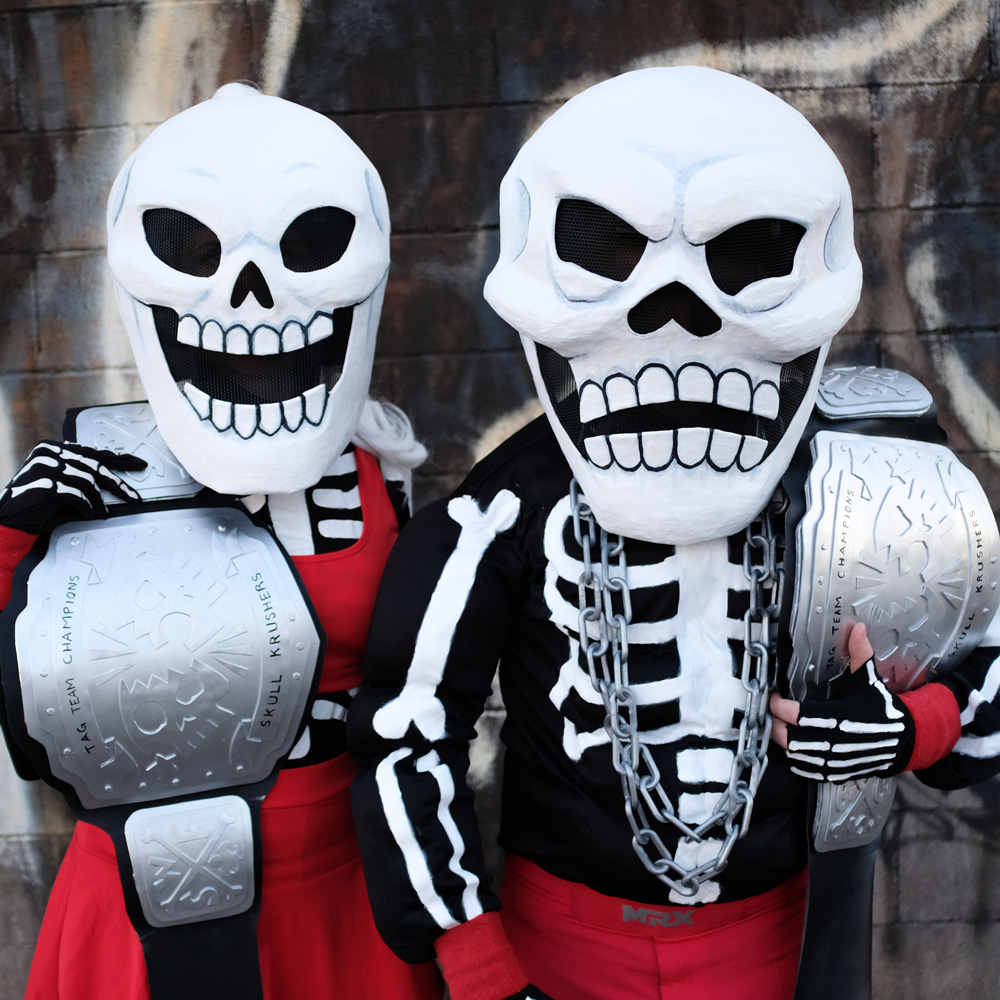
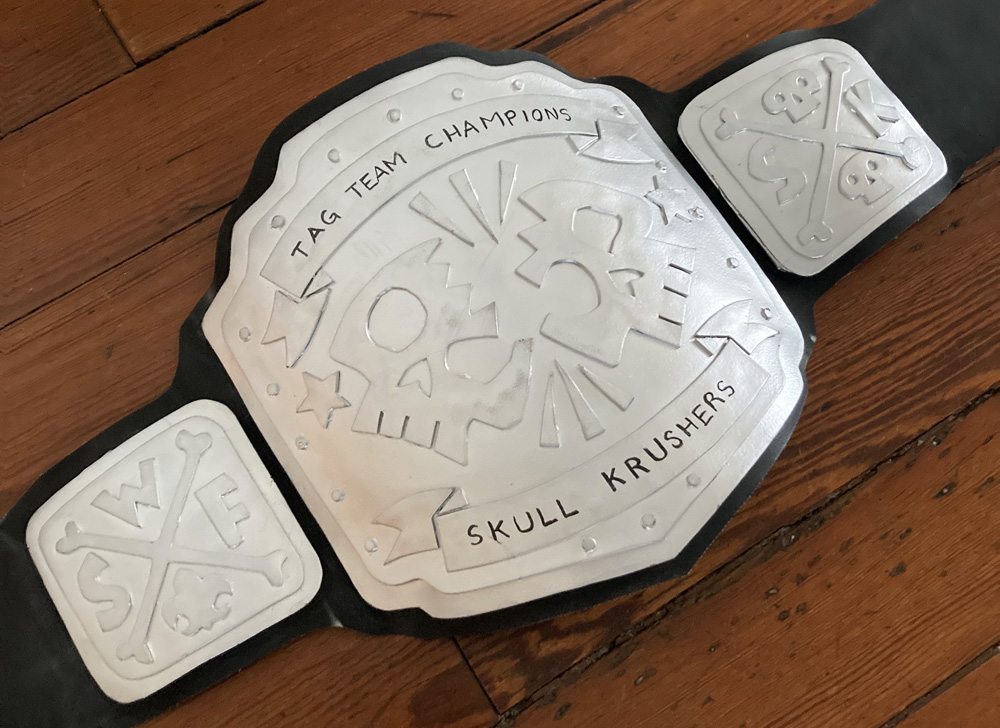
My wife and I made these fun pro wrestling championship belt props to go with our skeleton tag team wrestler costumes. Here's how we made 'em!
Designing the leather shape for the belts
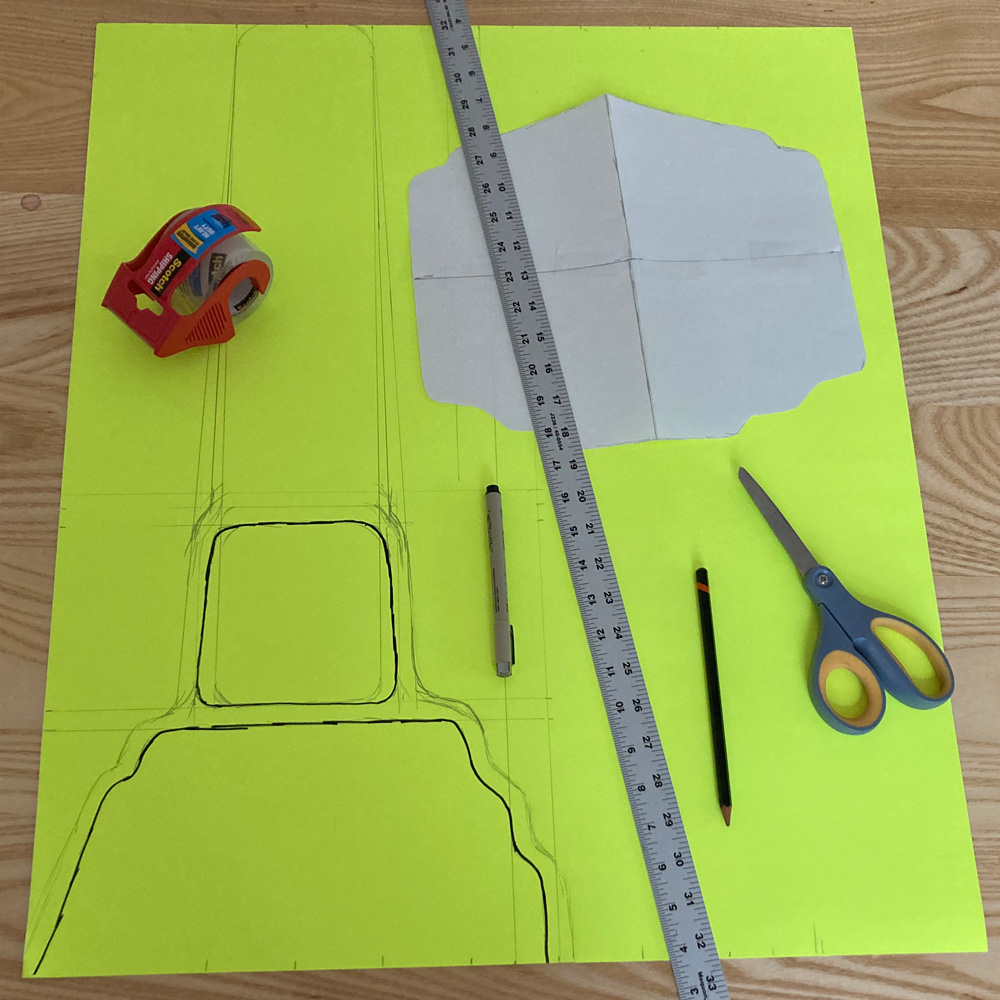
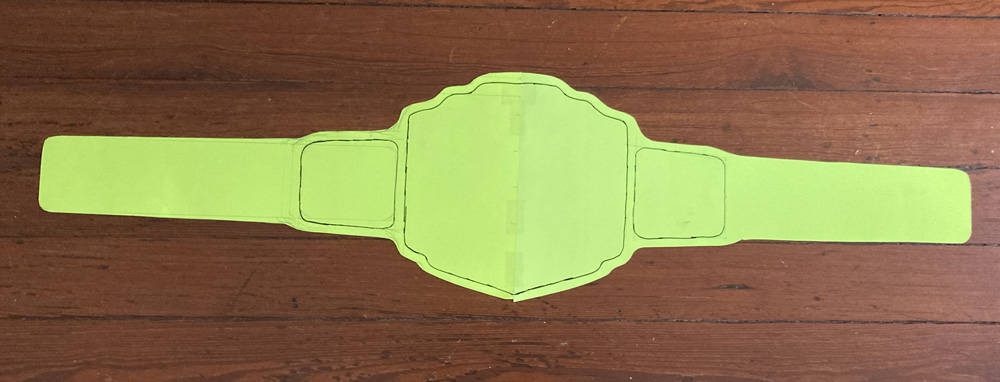
I researched pro wrestling championship belts online and made up a simple design, which I drew onto poster board and cut out; I measured and drew one half and then flipped it and traced it to make the whole design. I bought a couple yards of this thick synthetic fabric that kind of looks and feels like leather; it's nice and heavy and when you cut it the edges don't fray; perfect!
I traced the belt shape onto the back side of the fake leather with a Sharpie and cut it out. I forgot to take a pic of the fake leather by itself!
Base shapes for the belt buckles
I drew the belt buckle shapes onto poster board and cut them out, and then I traced those onto a sheet of foam board and cut them out with my X-acto knife.
I used my usual technique for curving foam board; I carefully bent and broke the foam in my hands, inch by inch, basically rolling the foam up on itself. This works great with cheap foam board from the dollar store; it doesn't work as well with fancy foam board from an art store.
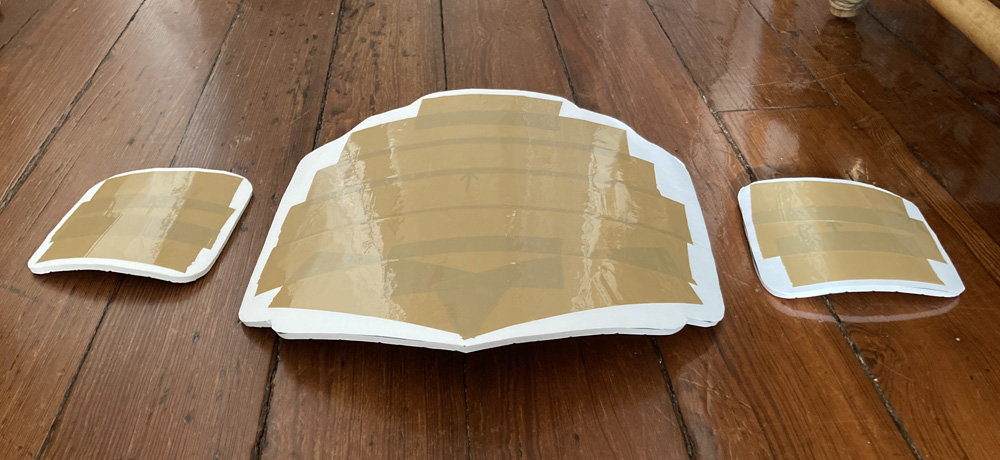
In order to get a nice uniform curve for each of the pieces, I took a big plastic trash can, laid it on its side, and then laid the foam pieces onto that. I used heavy duty shipping tape to cover the foam board shapes. The tape helps the foam to retain the curve shape of the trash can; when you lift the foam piece away it holds the exact curve from the trash can.
Next, I covered all the foam pieces with two layers of paper maché, for two reasons: The paper maché makes the foam shapes nice and solid, and it also gives me a good porous surface for glue and paint. I use Roman PRO-543 universal wallpaper adhesive (paid link) and alternating layers of newspaper and brown wrapping paper.
Something I suspected might happen, and it did: the buckle shapes became more curved when the paper maché dried. Paper maché tends to shrink as it dries and this can warp things in various ways. No big deal here.
Okay, so that's the base for all three buckle shapes (well, six, because we're making two belts at the same time).
Materials test
I knew I wanted to make the belt buckles out of a base of foam board and paper maché, but I wasn't sure how I'd be able to attach the buckles to the fake leather. I cut off a small scrap of the fake leather and did a test with two different kinds of glue: Gorilla Glue (the clear kind that doesn't expand), and my hot glue gun.
I cut out a small piece of foam board and covered it in three layers of paper maché. When that was dry, I tried gluing it to the scrap of fake leather with the Gorilla Glue. I let it set for 24 hours, and then pulled at it a bit, and... it peeled right off.
I tried the same thing with hot glue, and that didn't work well either. It definitely stuck, but when I thought about how these belts are going to be worn and handled all day, I could tell the connection that the hot glue made would not be strong enough.
So my solution was to sew the buckles onto the belts. I bought a leather sewing kit (paid link), which comes with really thick needles and thick, strong thread. This worked out perfectly! Weirdly this kit didn't have a thimble, which you really need for this kind of work, but my regular sewing kit (paid link) did.
Attaching the buckles to the belts
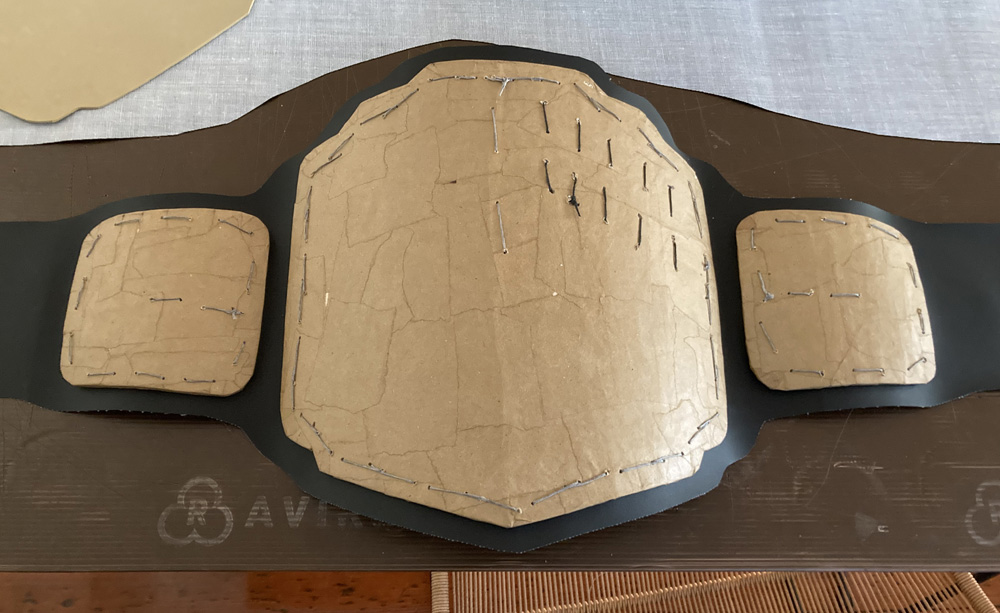
I started with the big buckle. I first taped it in place on the fake leather with a bunch masking tape on the back, just to hold it in the right position while sewing it on.
Then I used a big needle and some thick thread from the leather sewing kit to sew the buckles in place on the belts. I went around the big one twice to secure it really well. I was very pleased with how strong the whole thing felt once everything was sewn together.
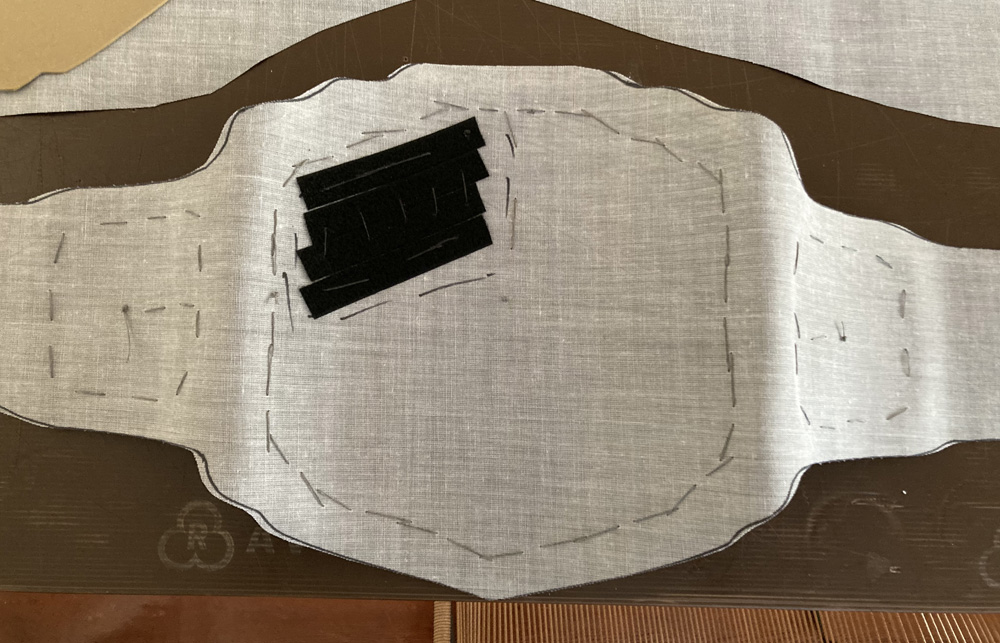
I also sewed some velcro onto the back of the belt. This is so I can wear the belt over my shoulder, hands-free, and it won't fall off. (Of course I'll sew the other side of the velcro onto the shoulder of my costume.) I just held the belt up on my shoulder to figure out which area needed the velcro, marked that with a marker, and placed the velcro there. The velcro I bought was 18" long so I cut that into four 4.5" strips and laid them in place. The piece of velcro on my shoulder will be really tiny—a 3/4" strip that's just 1" long—but I wanted to put a much larger velcro surface behind the belt so I can just throw the thing onto my shoulder and that little piece on my shoulder will easily connect somewhere on this big piece on the belt. If I were to use just a tiny piece on my shoulder and another tiny piece on the belt, then I'd have to carefully line them up every time I wanted to connect them. Make sense?
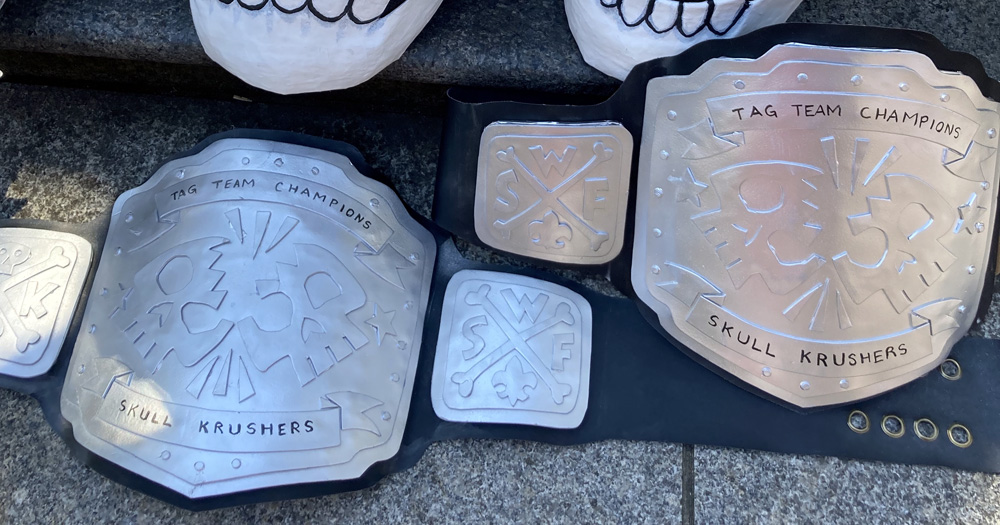
Belt buckle designs
The design for each buckle is made from craft foam (paid link); this soft, rubbery foam you can buy at the art store. I have a ton of tan craft foam left over from a big project from several years ago.
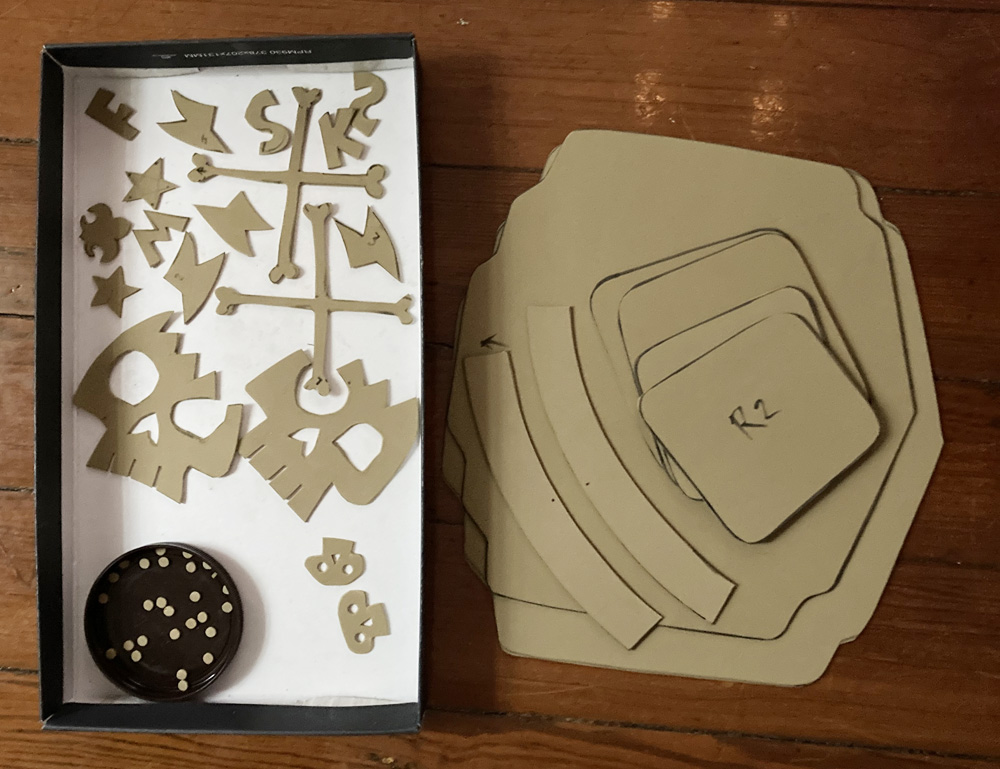
I first traced the base shapes onto the craft foam. I cut that out, and hot-glued it onto the base shapes.
Then I traced and cut out slightly smaller shapes for all three. I hot-glued them in place, to give the buckles a sort of border.
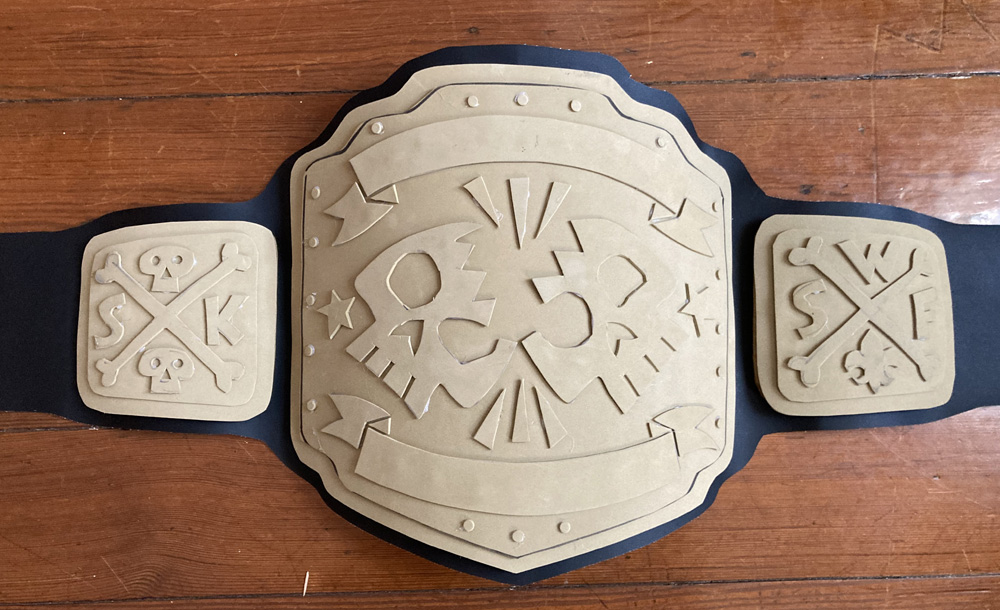
Then I drew and cut out all the other shapes—the skulls, the banners, etc. I hot-glued these into place. Easy! I used a hole punch to make the little dots.
Grommets
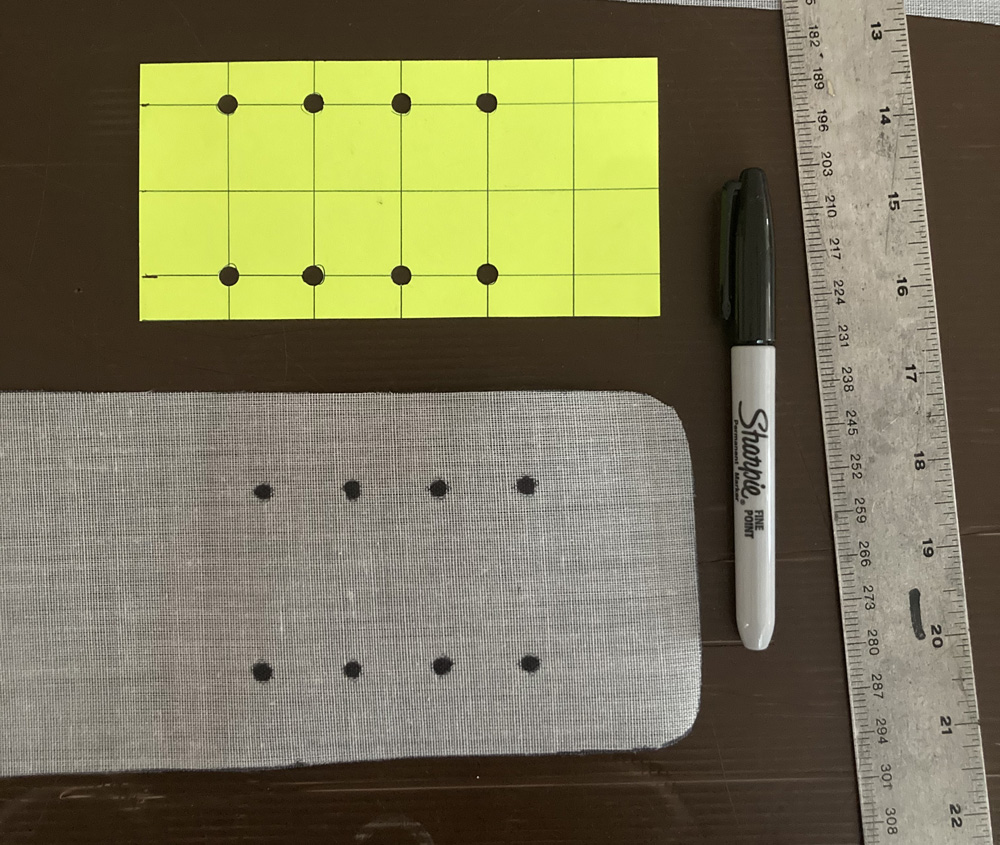
Real championship belts have snaps, but we didn't have any plans to actually wear these belts, so I just used grommets to mimic the look of snaps. I bought a grommet kit (paid link) that lets you pound grommets in with a hammer. It's fun, very noisy, and works like a charm.
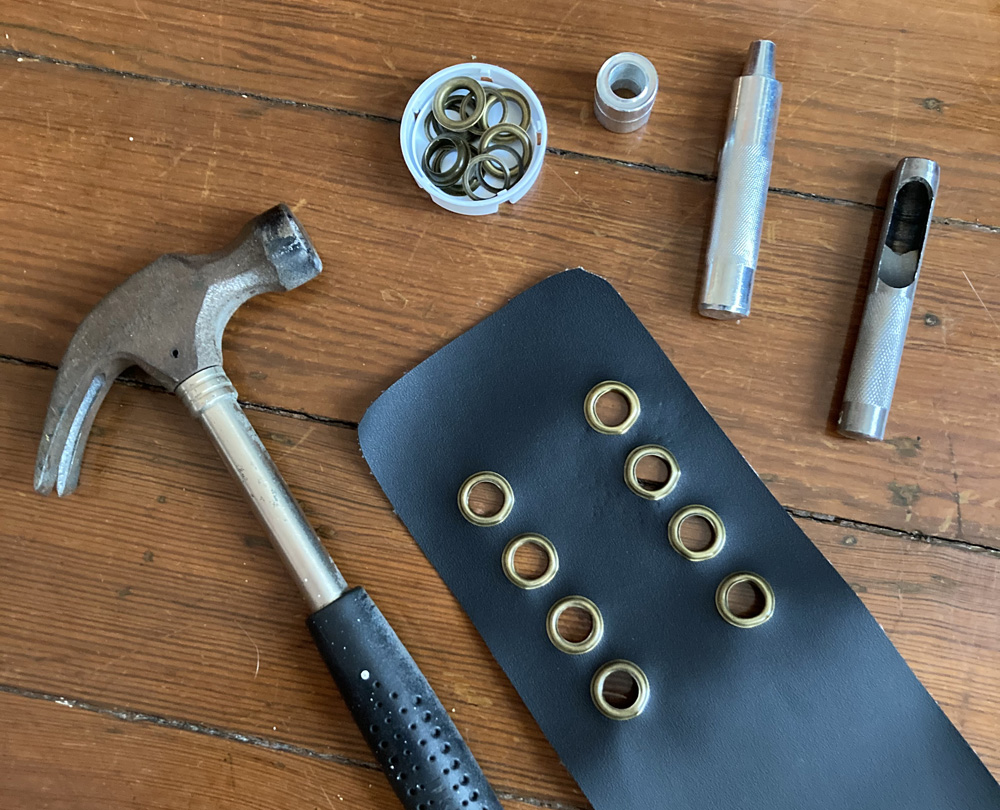
I first measured out the pattern for the two rows of gromments onto poster board and used that as a guide to mark the spots for all the gromments. Then I used the grommet kit to cut out the holes and hammer in the grommets. It turned out the tube-shape cutter thing had a hard time making holes in the fake leather, but I figured out that putting two layers of craft foam underneath while hammering made it work a lot more effectively.
Painting
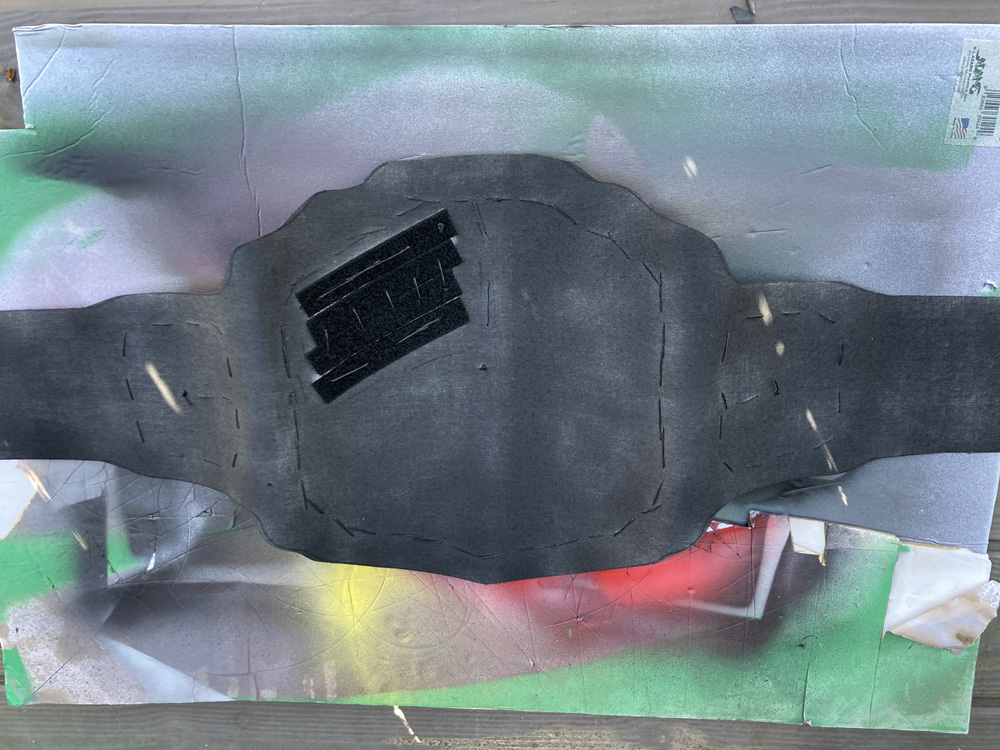
The fake leather is a sort of light gray fabric mesh on the back, so I decided to spray paint the back of the belt black. I protected the velcro area with some masking tape and paper before spray painting.
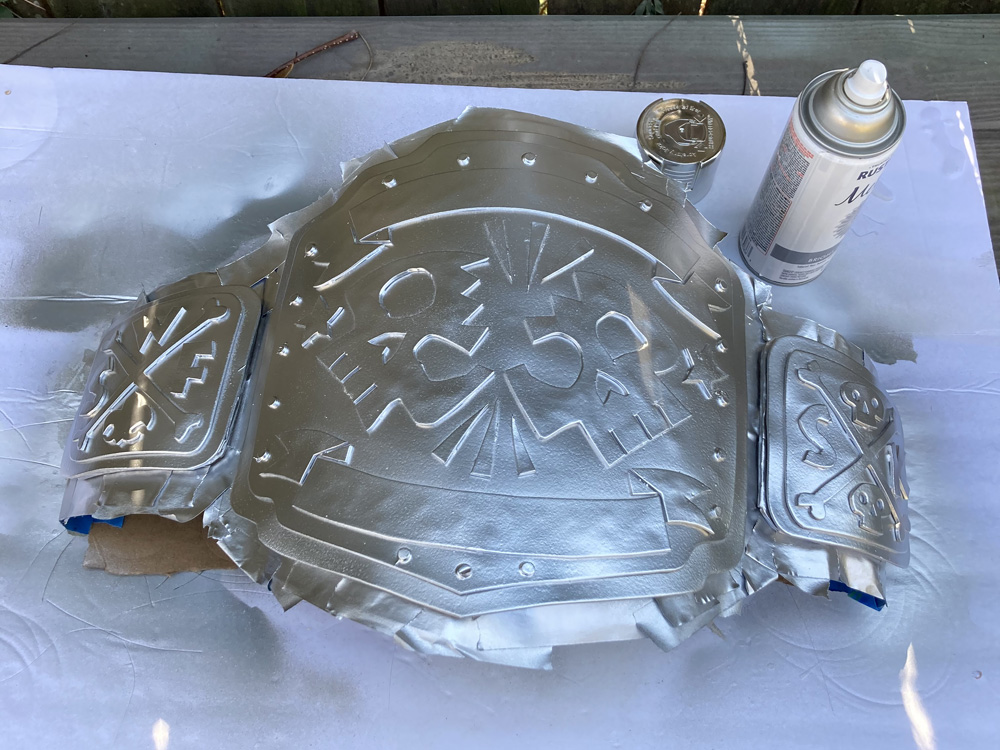
When that was dry, I placed newspaper and painters tape (paid link) all around the belt buckles, going underneath them a bit, to cover all the fake leather. I then sprayed the buckles with a coat of spray gesso, waited about six hours, and then did a couple coats of silver spray paint. This craft foam stuff doesn't take spray paint very well on its own, but the gesso really helps.
I used a Sharpie oil-based paint marker (paid link) to write the text on the banners.
Like I mentioned above, I sewed a little piece of velcro onto the shoulder of my padded muscle shirt so that I could easily throw the belt over my shoulder and have that big patch of velcro catch onto it. That worked out great.
These belts came out looking really cool and it was really fun to walk around with 'em and pose with 'em and stuff!