Paper maché violin skull mask, Mardi Gras 2015
Published June 18, 2015
I made this violin skull mask for Mardi Gras 2015. It was one of the most complicated things I've ever made. I bit off more than I could chew with this one, but I'm really happy with how it came out. Check out all these steps...
Set-up
- I drew the violin body shape (minus the neck) on poster board and cut it out.
- I traced the shape onto foam board three times, and cut out the three foam board shapes with an X-acto knife. These will be the front and back of the violin body (minus the face), and separately, the base for the face sculpture.
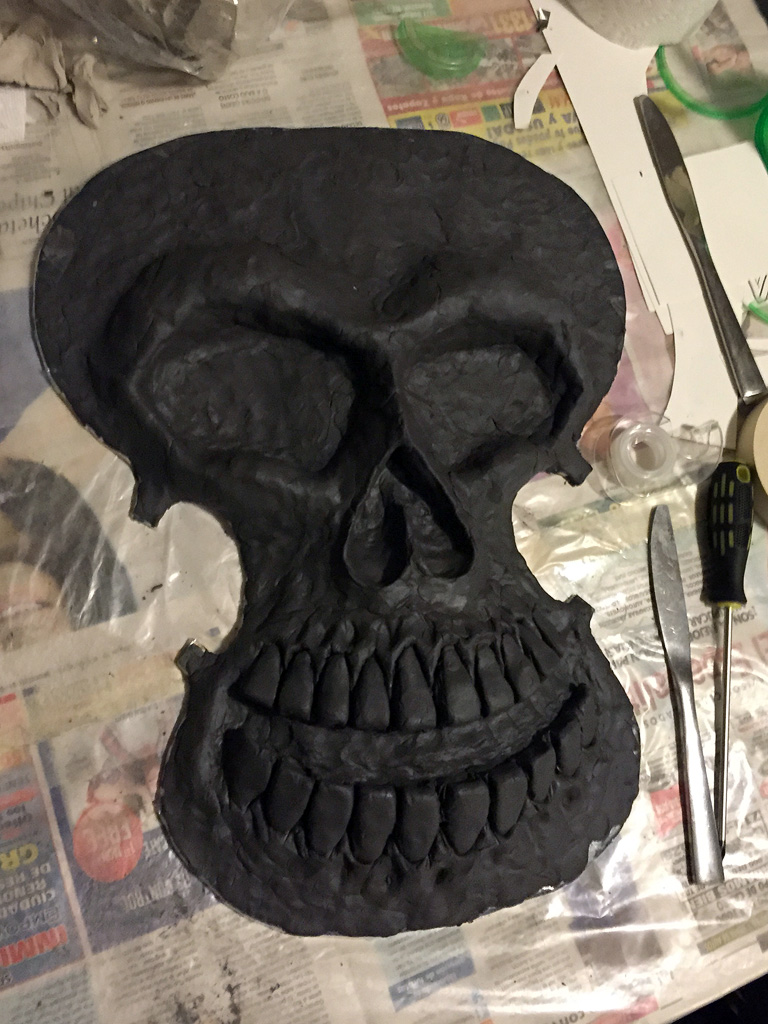
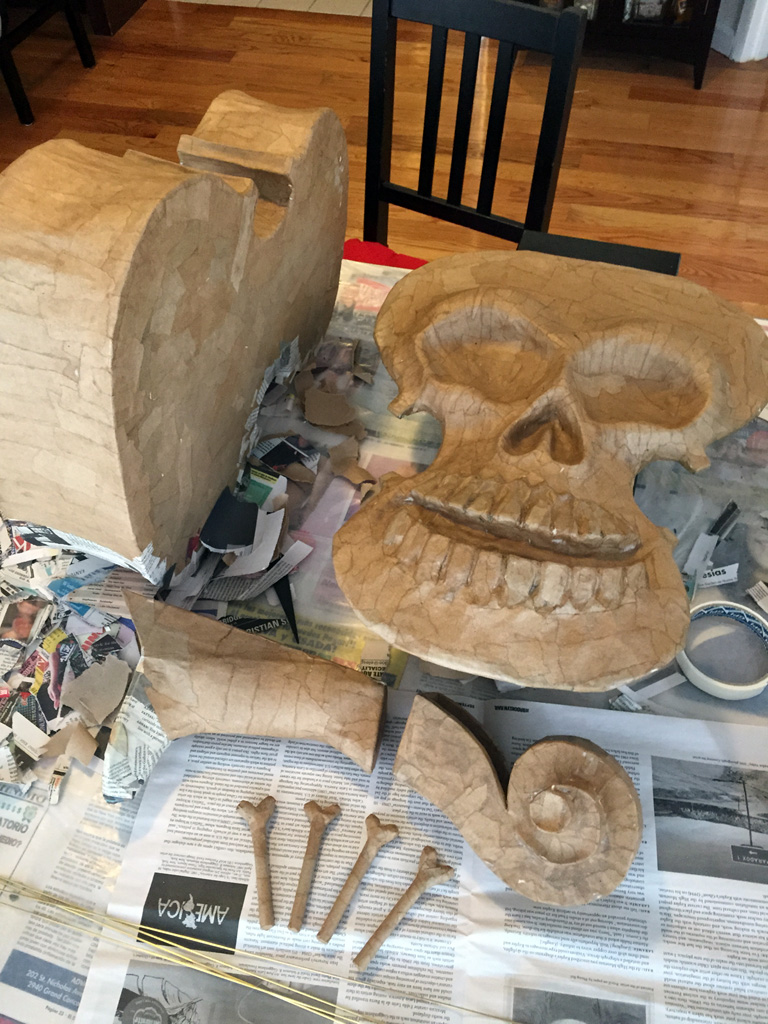
Face
- On one of the foam board violin shapes, I sculpted the face with wadded up paper towels, masking tape, and modeling clay. I used Activa Plus clay; it's very soft and air-dries pretty quickly. I used two 2.2-lb packs for this mask. Keep in mind, the larger shapes like the eyebrows and cheek bones are mostly paper towels inside, with just a thin layer of clay.
- I then covered as much of the clay as possible with masking tape. This makes it much easier to peel the finished paper maché off of the clay shape. I did not cover the teeth with tape, because this would have smoothed out too much of the detail.
- I then applied eight layers of paper maché to the face over several days. See my article about my paper maché method here. The short version is: I use Roman PRO-543 universal wallpaper adhesive (paid link) and alternating layers of newspaper and brown wrapping paper.
- When dry, I sliced open the foam board backing with an X-acto knife and carefully broke up and removed all the clay, as well as the paper towels and tape. It's easy to remove the clay chunks from the areas with the masking tape. It's much harder to remove it from the areas without masking tape, like the teeth. This must be done very carefully or you'll rip the mask. (I made a few tiny tears, which I repaired later with paper maché.)
- When all the clay is removed, you can then carefully peel all of the masking tape out of the interior as well. This is easy with the type of wallpaper paste I use; it may not be possible with other types of paper maché.
- The end result of all this is a very light-weight, sturdy skull face that's just paper.
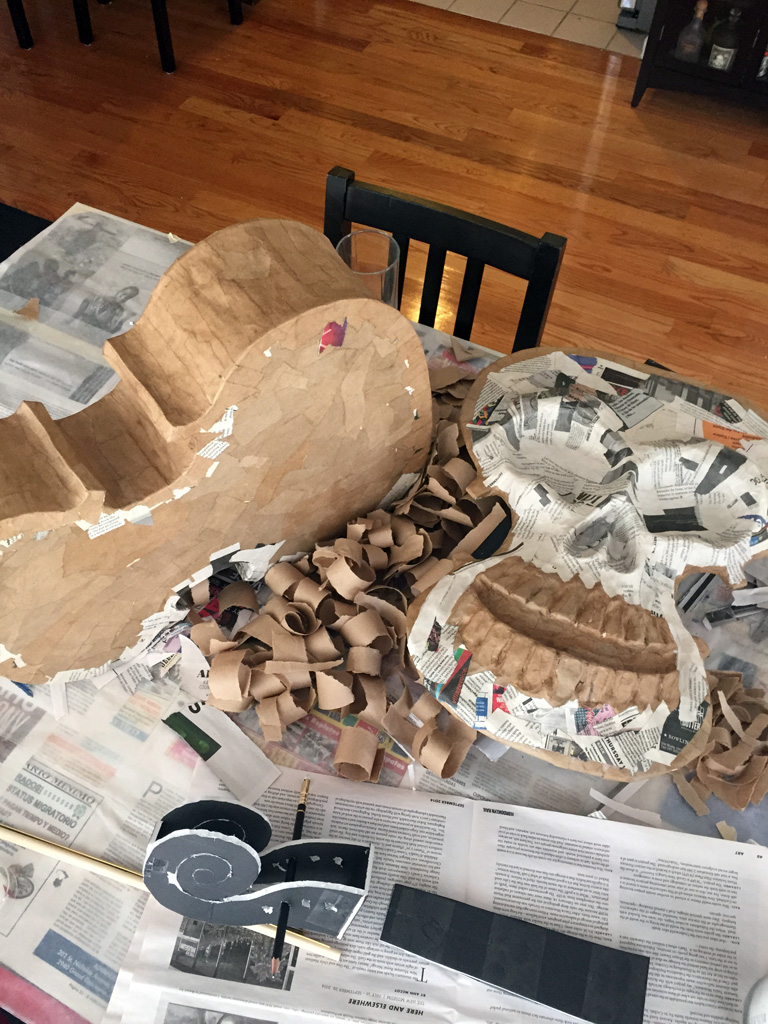
Violin body
- I took the other two violin shapes and taped a small cardboard box (about 4"x4"x8") in between them to hold them apart.
- I then built the walls of the body with tons of masking tape, all the way around. I used two layers of masking tape.
- I applied six layers of paper maché to the whole violin body. See my article about my paper maché method here.
Neck, scroll, and tailpiece
- I built the neck with foam board for the finger board and poster board for the curved tube shape, and taped it all together.
- I built the scroll shape with foam board, masking tape, and packing tape.
- The curled bits of the scroll are long, triangular strips of poster board curled up and taped on. This was one of the hardest parts to get right!
- I made the center ridge of the scroll with a piece of thick string, taped in place, and then covered with two layers of paper maché.
- I paper machéd the neck and scroll separately; two layers each. See my article about my paper maché method here.
- I then taped the neck and scroll together and added two more layers of paper maché on the whole thing.
- I made the tailpiece (the long triangular thing above the eyes) with poster board and about six layers of paper maché.
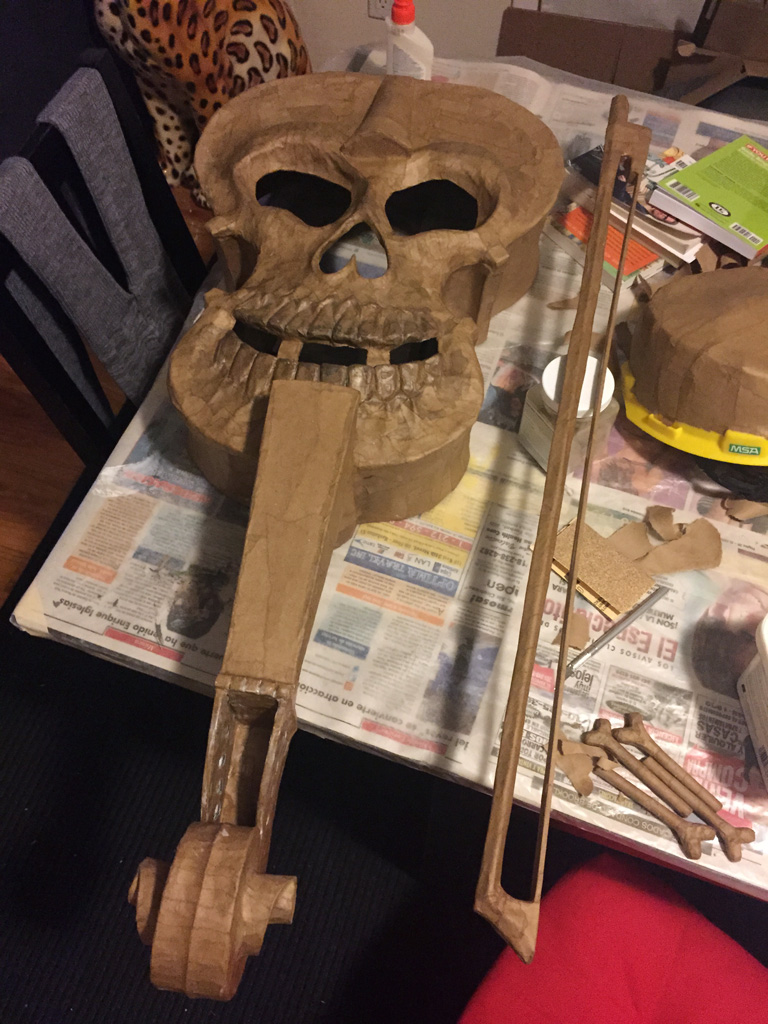
Assembling the violin
- I cut the body open on the front side, slicing out all the foam board on that side except for a one-inch border. I removed the cardboard box inside.
- I attached the face to the open side of the violin body with paper maché all around the edges (three layers, just on the edges).
- I attached the neck to the body with tape and then applied paper maché all around to hold it in place (six layers).
- I attached the tailpiece to the face with six layers of paper maché.
Bone pegs
- I bought a lightweight wooden dowel at the art store. I sawed that into four pieces.
- I created the knobby bone shapes with aluminum foil.
- I applied two layers of paper maché all over.
Bow
- I cut a slightly curved bow shape (minus the horsehair part) out of foam board.
- I placed two very thin wooden dowels on each side. Curved them along the shape of the bow and secured with masking tape. Then wrapped the whole thing in more masking tape.
- The horsehair part is a thin strip of balsa wood. Attached with masking tape.
- I covered the whole thing with two layers of paper maché.
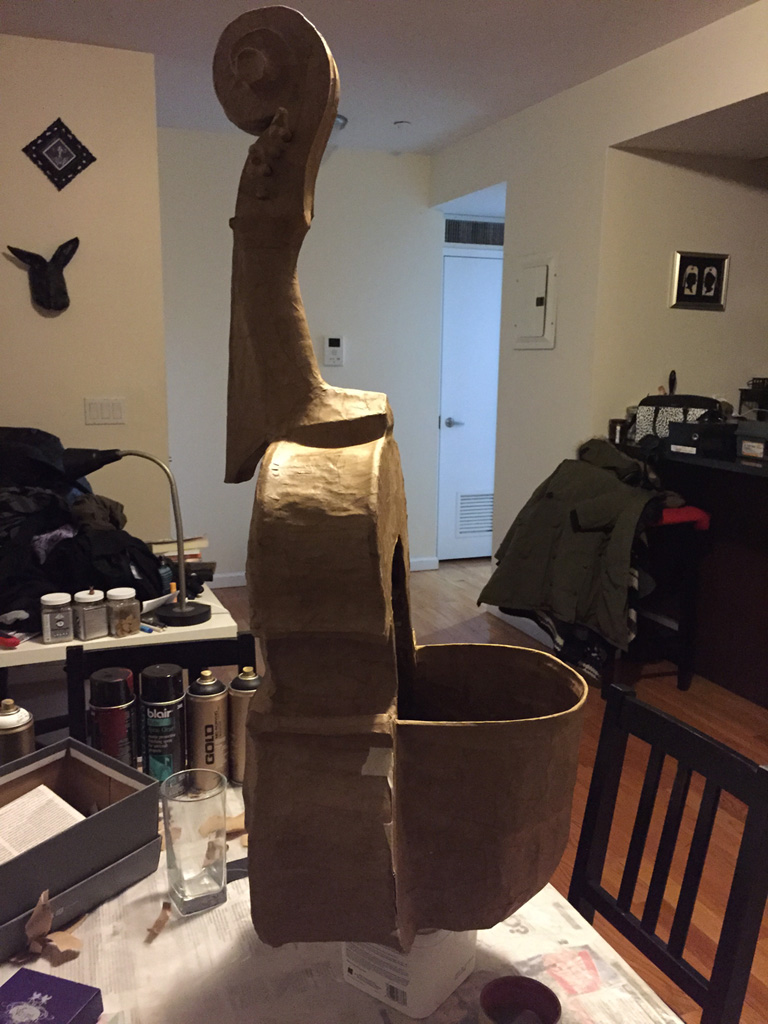
Turning the violin sculpture into a mask
- I cut out the back of the violin body and removed as much of the masking tape walls as possible.
- I cut out the eyes, nose, and mouth with an X-acto knife. I always leave a couple vertical strips in the mouth hole for support; I don't want that wide hole to start warping or collapsing.
- I reinforced the edges of the holes with a layer of paper maché.
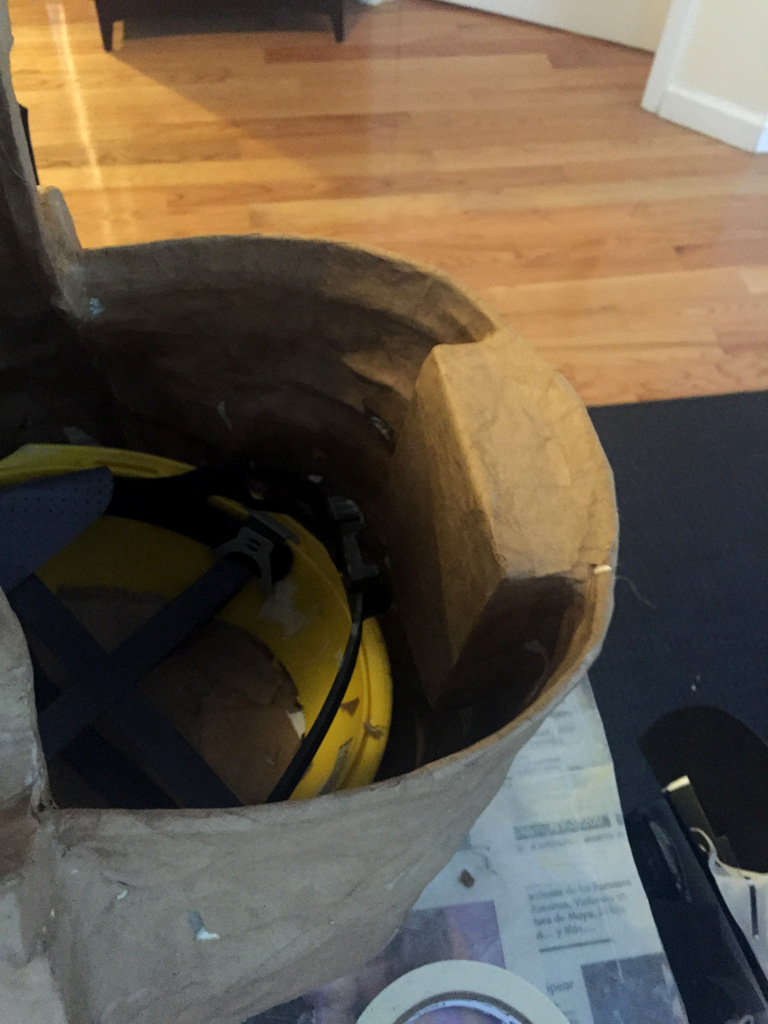
- I sawed the top off of a hard hat (to reduce its height) and applied a few layers of paper maché over the top.
- I then glued and paper machéd the hard hat into the violin body.
- I built the back shape of the mask with curved strips of poster board and masking tape.
- I then applied eight layers of paper maché over the back shape, all the way to the edges of the violin body.
- I reinforced the interior edge of the back of the mask with plastic zip ties with the ends snipped off. This is a trick I made up several masks ago. The zip ties are lightweight, flexible, and strong. I inserted two rows of zip ties along the inner edge and covered them with several layers of paper maché.
- I cut two additional holes in the bottom wall of the violin, on either side of the neck. This is to allow me to see the ground in front of me; very useful for not tripping over things.
Counterweight
- I wanted the violin neck to stand out from my chest a bit, so I added a counterweight in the back of the mask.
- I chose to use rolls of pennies for the counterweight. I need them to be removable (long story*) so I designed the following system…
- I started with a small chocolate box that was a good fit for the rolls of pennies.
- I rolled up the pennies in masking tape. The width of the box accommodates about 58 pennies. I made three rolls for starters.
- I put the lid on the box, sealed it with tape, and sliced open one edge.
- I inserted the box into the back of the mask, with the open edge on top (so the pennies can be dropped in from above).
- I applied many layers of paper maché to secure the box in the mask; at least ten layers.
- When dry, I tested different amounts of rolls of pennies to find the correct counterweight; this turned out to be two rolls.
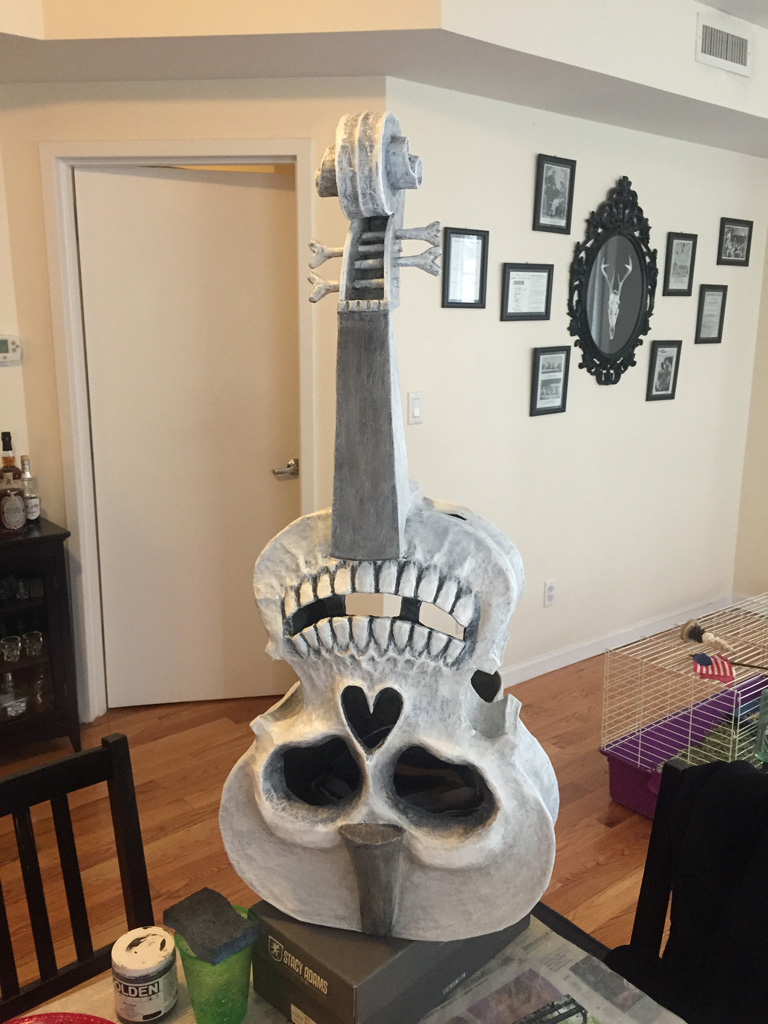
Paint
Strings
- The strings are some thin, rigid metal tubes I found at the art store.
- I curved them at one end with pliers to go around the pegs, and bent them at the other end to insert into the tailpiece.
- I punched the holes in the tailpiece with an awl.
- I inserted the strings and glued them in place.
- I then protected the rest of the mask with newspaper paper and tape, and painted the strings.
Mesh
- I glued black screen material (like you'd buy for a screen door) behind the eyes, nose, and mouth.
- For the holes at the bottom of the mask, I spraypainted two small pieces of screen white and glued them in there.
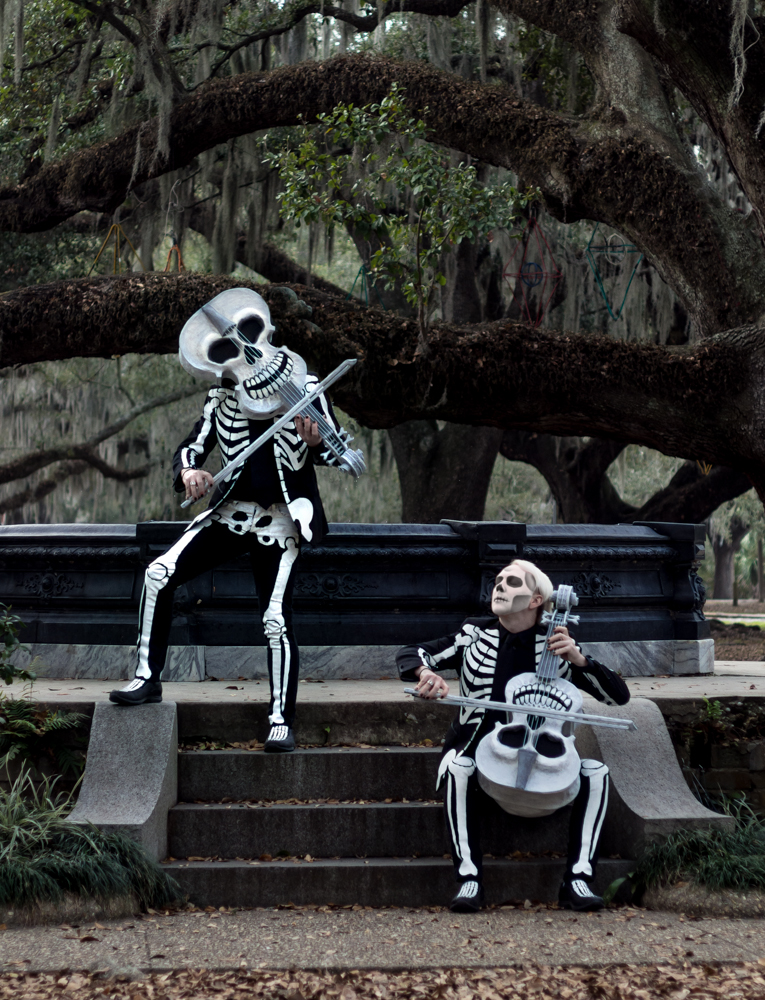
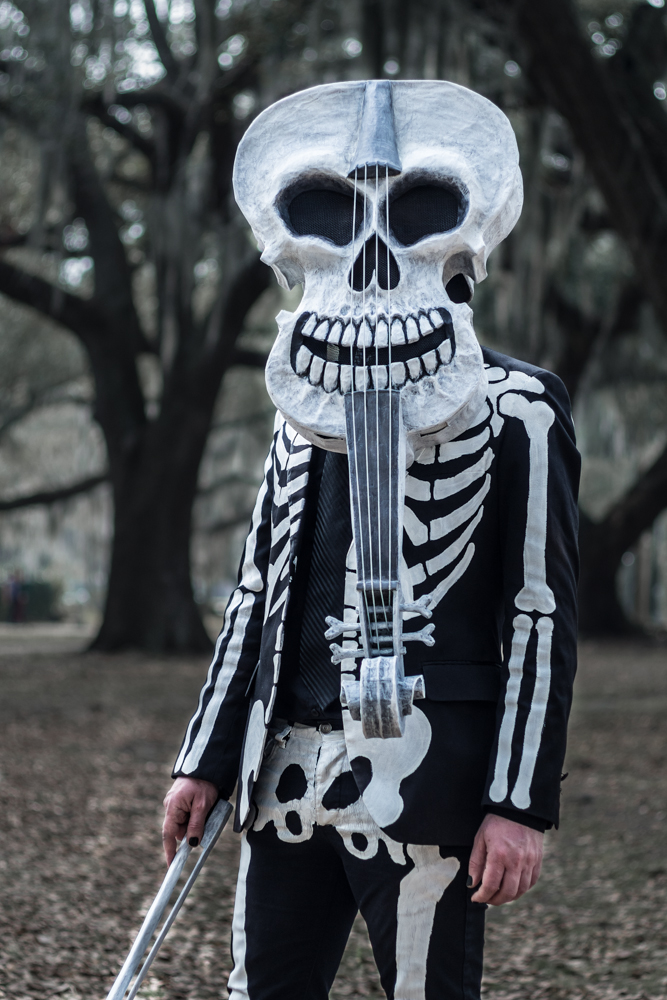
Clothes
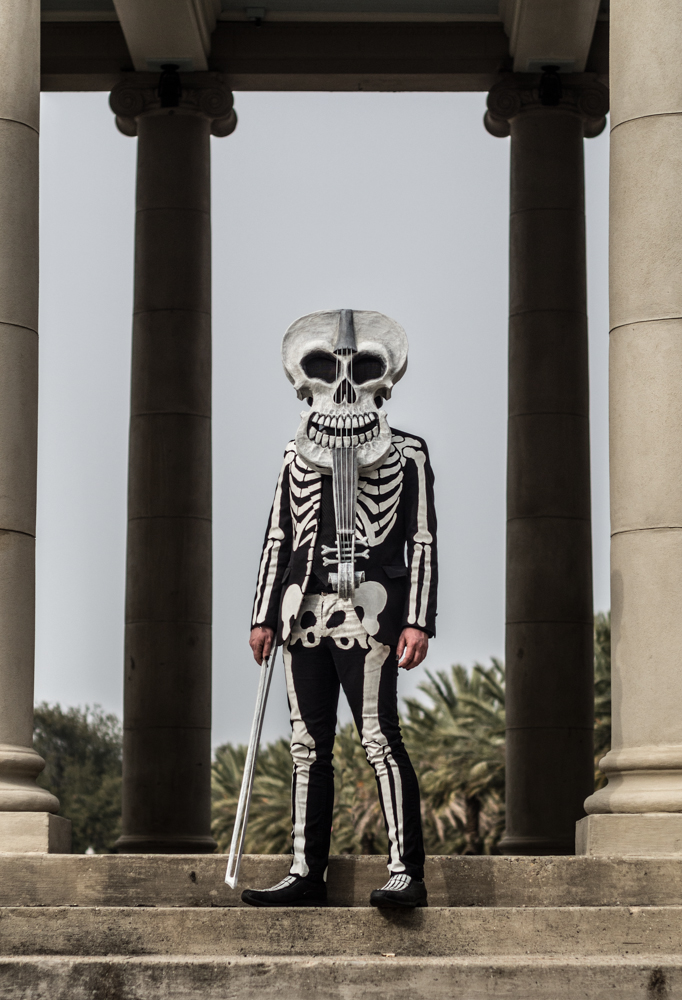
- I wear the same hand-painted skeleton suit every year. This year I made skeleton shoes as well.
*There are a couple reasons why I went with a counterweight that can be removed. I originally planned on attaching the pennies inside permanently with paper maché. However, I have to fly my mask down to New Orleans for Mardi Gras in a big storage container, and I realized that the rolls of pennies might look suspicious when the mask was x-rayed. The last thing I want is for airport security to rip open my mask. So I designed and tested the mask with pennies at home in New York, and then I traveled to New Orleans without the pennies, and got pennies from my friend's penny jar in New Orleans to recreate the weight there. I dropped the pennies in place, and stuffed a big piece of foam rubber in with them in order to lock them in place; the tension of the foam wanting to expand in the small box holds everything in place really firmly. Gravity will hold the pennies in place when I'm wearing the mask, but I want to be able to set down the mask in any orientation and not have the weight fall out.
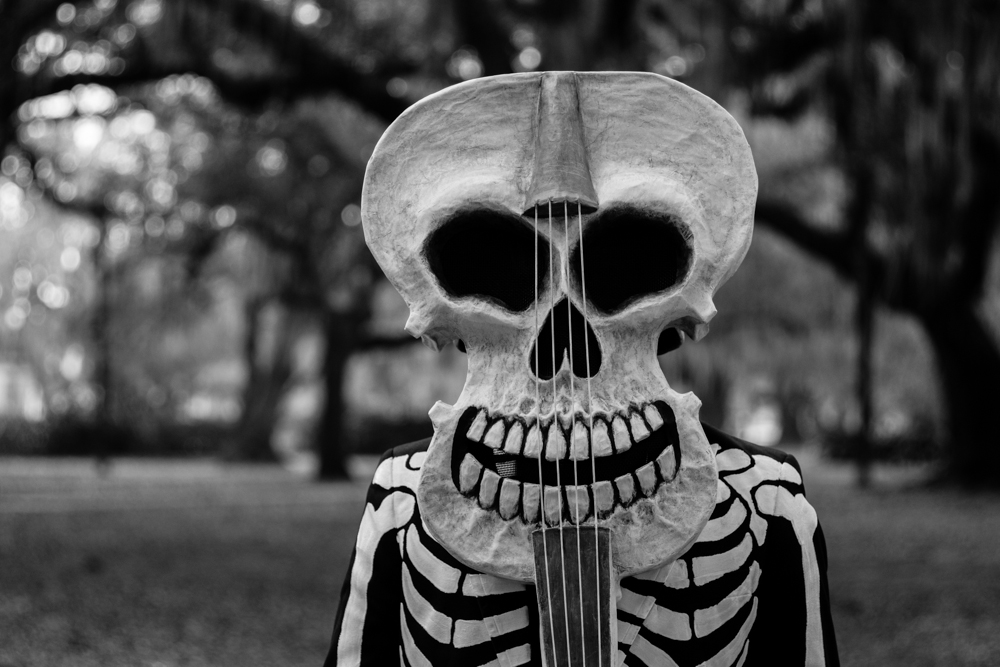
Pretty photos of finished masks by Kevin O'Mara. Work-in-progress photos by me.