
Easy method for symmetrical horns
Published November 11th, 2024
Experiment time! I've made horns for a ton of masks and things, and I've used different methods, which were all frustrating for different reasons; generally the problem is that it's difficult or impossible to make horns from scratch that are truly symmetrical. (I'll talk about those other methods I've used at the end of this article).
I had an idea for a new way of making horns that would hopefully give me some better control and let me make something really symmetrical, and I decided to give it a try, with the idea that I can use these horns for a hat to go with a small mask I'm going to make later on. Here's what I did!
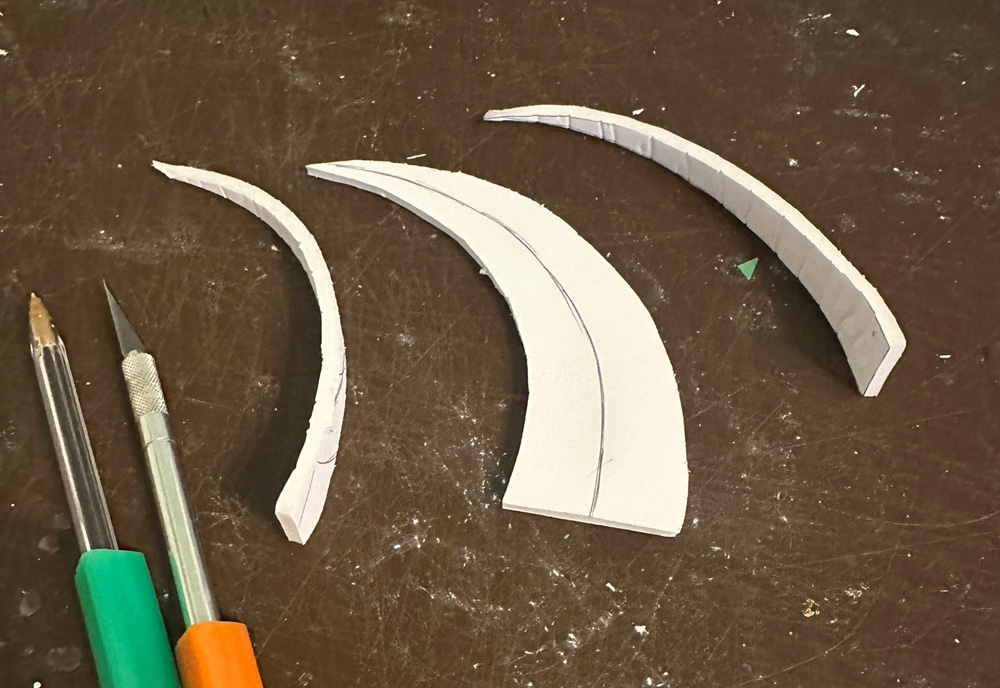
I drew the horn shape, a little skinnier than I want the final horns to be, onto foam board. I cut that out, and then I drew a line that's right in the middle, running along the length of the horn. (I then made a second copy of this, for the other horn, duh.)
I also drew and cut out two skinny triangles to be the crossing pieces of the horn. I made up a very convoluted method for determining their dimensions. Really, just skip the next five paragraphs; they're boring:
To make the crossing pieces, I needed to measure the length of that middle line in the horn shape. How on earth can one measure a curved line? I'm sure there's a smarter way of doing this, but I just held a piece of paper along the curved line, like, I held the paper standing perpendicular on the line, and then I curved the paper to follow the line as best I could, and then I marked the end with a marker. I then measured that edge of the paper, up to the marked spot. It was about 6.25"
I also measured the base of the horn: that was 1.75".
Next I drew a triangle that's 6.25" x 1.75". I modified this triangle a bit by making the slides slightly curved outward.
I found the middle of the wide part of the triangle and then drew a line straight down the middle.
(Way too much information: I also removed about an eighth of an inch of width from both of these skinny triangles, to account for the thickness of the main foam board horn shape, so that when the pieces are assembled they form an X shape that's pretty much the same size all around.)
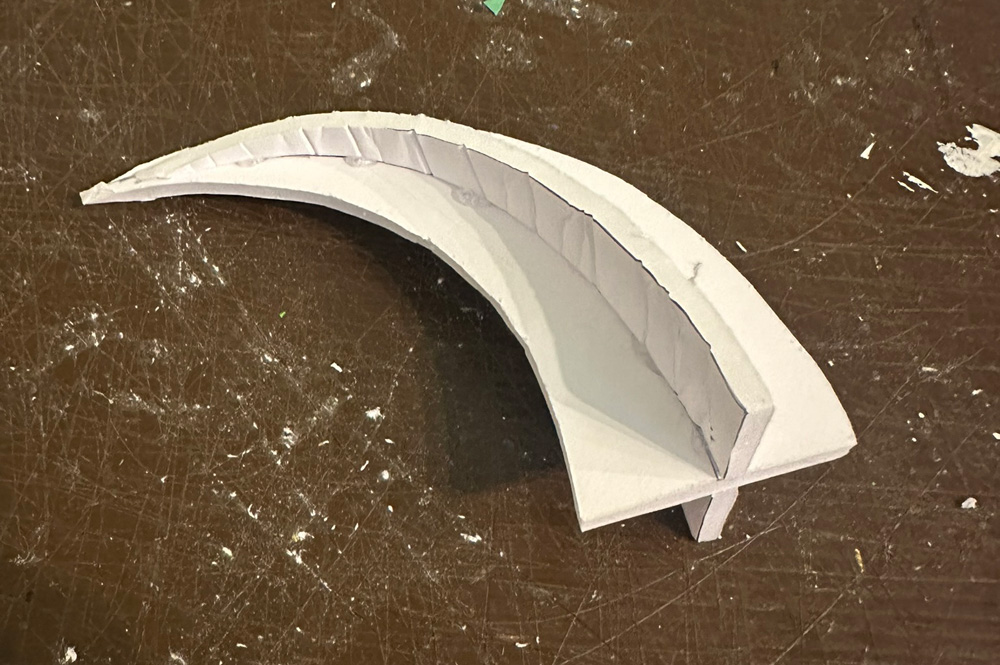
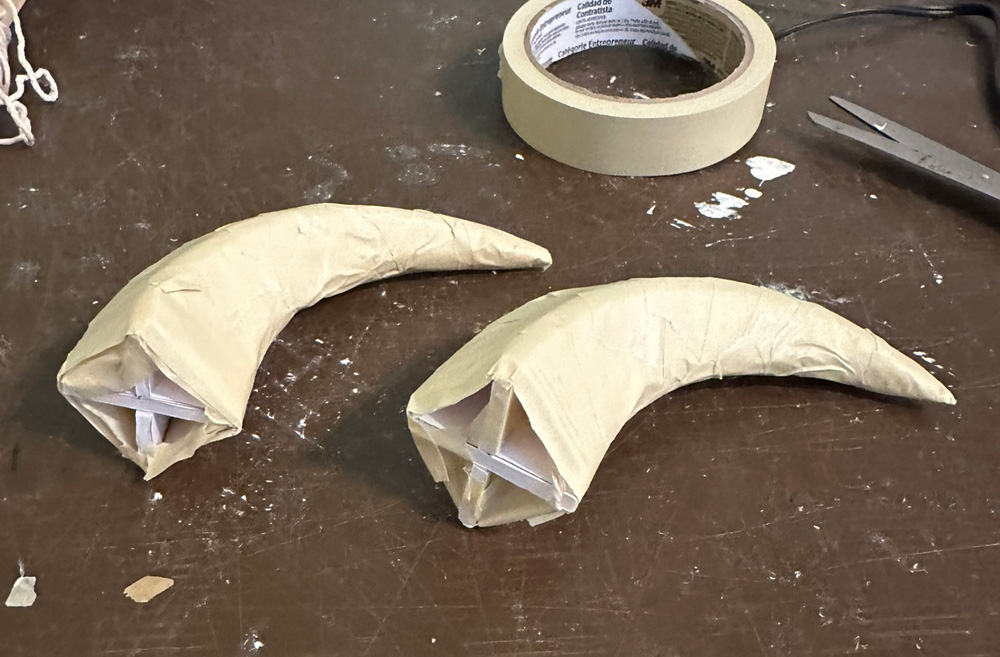
Okay, back to non-boring stuff. I cut out these two sinny triangles and curled up the foam board in my hands. And then I hot glued them in place on the main horn shape. (I did the same for the other horn, of course.)
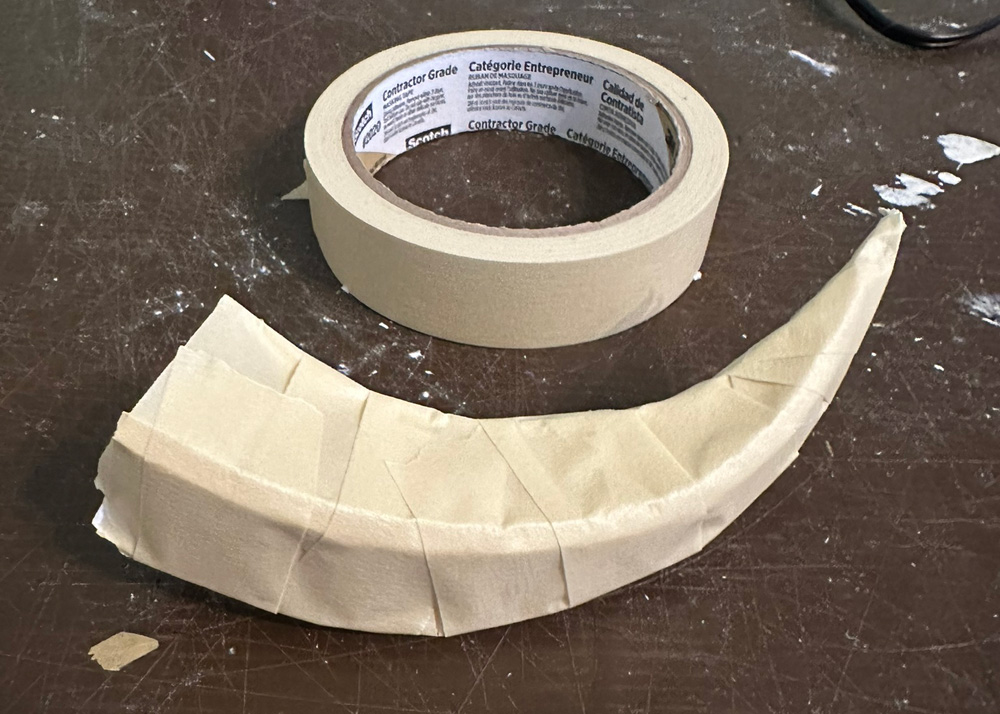
I then wrapped the whole shape in masking tape. You can see the edges of the foam board remain very visible and fairly sharp.
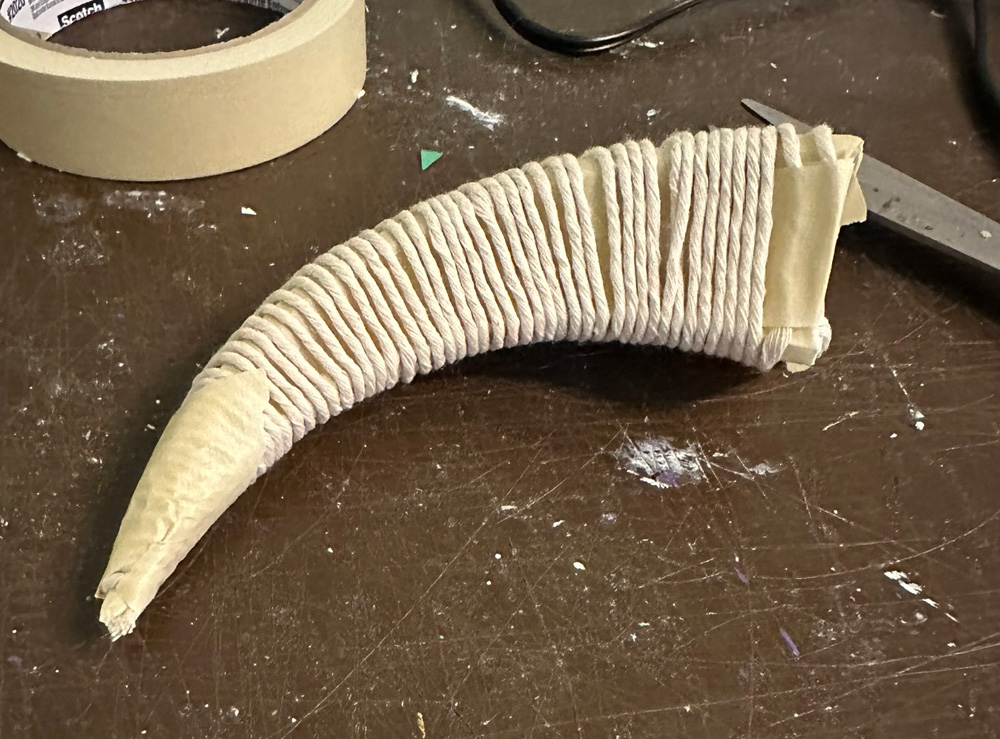
To smooth out the shape a bit, I tightly wrapped the whole thing in cotton string.
I then wrapped the whole horn in masking tape again. This looked great! I could have added a second (or even a third) layer of string to smooth it out and round it out even more, but I was happy enough with this look. You could also use much thicker string to get an even smoother shape.
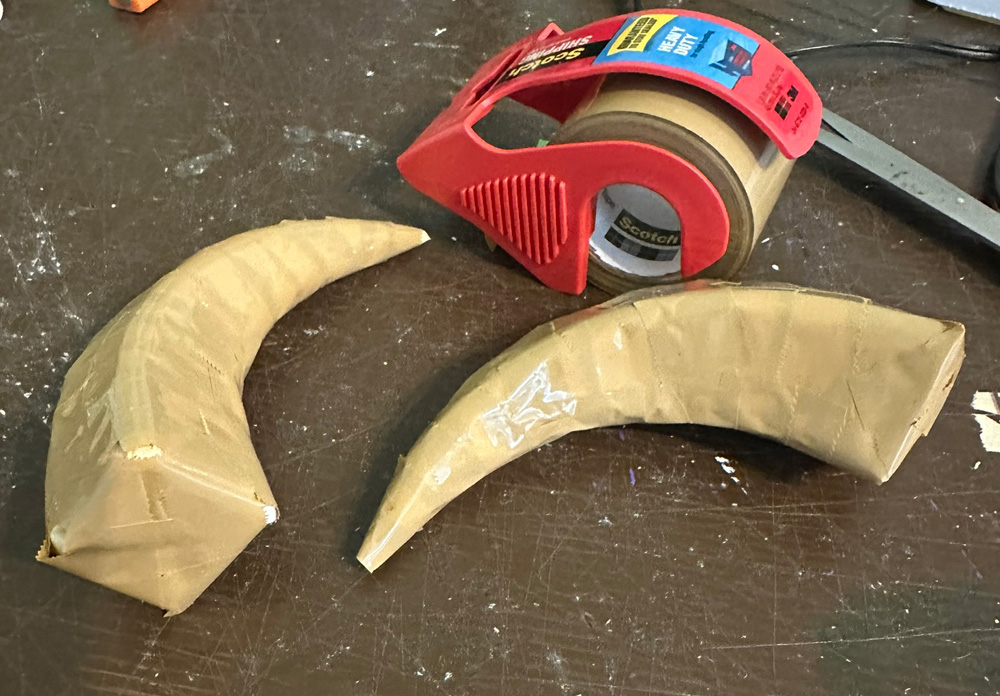
Almost time for paper maché! First, I wrapped both horn shapes in Scotch heavy duty shipping tape. I use this tape as a release agent for paper maché; the paper maché doesn't stick to it well, so when I'm done I can pretty easily remove the base shape.
Fyi, Scotch no longer makes the tan version of this heavy duty shipping tape, and that breaks my heart because I've used it for all my paper maché projects for many years. They still make the clear version, so I'll be switching to that. It sucks because the clear version is (obviously) hard to see when you've applied it, so it's really tough to make sure you're covering everything perfectly. The tan tape made this easy.
You know what, I'm going to go see if I can email Scotch about this right now. Stand by.
All right, I just did that!
Update: they wrote me back the next day basically to say, "like, sorry?" ¯\_(ツ)_/¯

So, next step for these horns was to cover them with four layers of paper maché, and when that was dry, I cut them open and remove the interior junk.
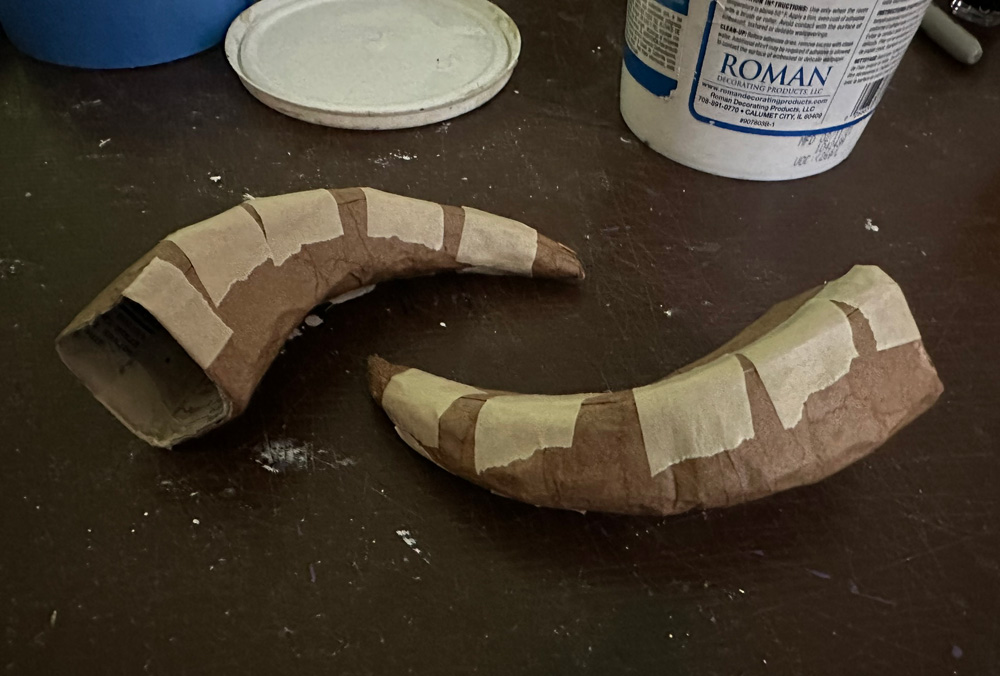
I then put the hollow paper maché pieces back together again with masking tape, and then covered those connections with two layers of paper maché.
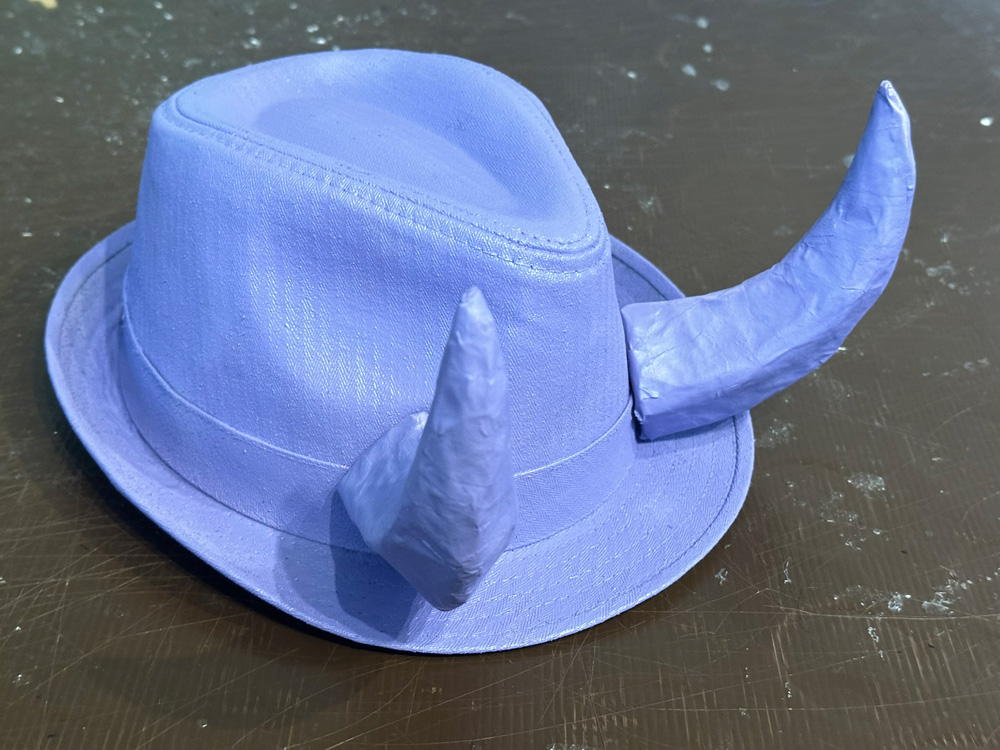
From there I prepared these horns to go onto my hat. Real quick, here's how I did that...
First of all, I'd bought a cheap trilby/fedora type hat off of Amazon — it was light gray, and then I applied a coat of Mod Podge to it and then I spray painted it purple.
I held the horns up to the hat and decided how I would need to trim the bases of the horns to make them sit correctly on the front of hat. I trimmed a little bit of paper maché off the edges using scissors, tried them again on the hat, and they were good.
Then I covered the open base of the horns with masking tape, and then I attached two twist ties to the base of each horn. I used heavy duty shipping tape to lock the twist ties in place, and then I covered over all this tape with two layers of paper maché. The shipping tape is there to make sure the twist ties (hopefully!) don't tear through the paper maché.

Oh yeah, at this point I spray painted the horns purple! By the way, finishing the paper maché on the horns with a layer of white paper meant I didn't need to do a base coat of white paint first.
I poked four holes in the hat for each horn, first by hammering a thin nail through the stiff fabric onto a piece of wood, and then I stretched the holes a bit with an awl. Then it was easy to just stick the twist ties through the holes and twist them together inside the hat. Boom, the horns are locked in place and very stable. And they're so lightweight they don't move at all when I'm wearing the hat.
All of this was easy and came out great! Nice when that happens.
Other methods for making horns
Okay, I mentioned at this beginning of this article that I've used other methods for horn shapes. Real quick I'll tell you about those...
Several times I've made horns by first cutting out the flat horn shape from foam board, and then using foam pipe insulation tubing to round out the shape. This is a lot of work and never ends up being very symmetric or neat. Anyway, when I add paper maché over horns made this way, I sometimes just left the base materials inside, or other times I've done the process with the shipping tape and then paper maché and then remove all the inside junk.
I've also used modeling clay to make horns. This is annoying for a bunch of reasons: clay is expensive, it's difficult to make two horns that match perfecetly, and then you've gotta wait a long time for the clay to dry. It's also heavy, so if you need the horns to be wearable you have no choice but to do the method with the shipping tape and paper maché and then remove the clay and tape and patch everything up.
For very large horns I've done an overly complicated method with, again, a flat foam board horn shape, and then I've cut out many dozens of little circles of foam board, and then split them in two, and hot-glued them along the main shape. Then a combination of masking tape and strips of construction paper to smooth the whole thing out, and then of course shipping tape and paper maché, and then remove the inside junk afterward.