
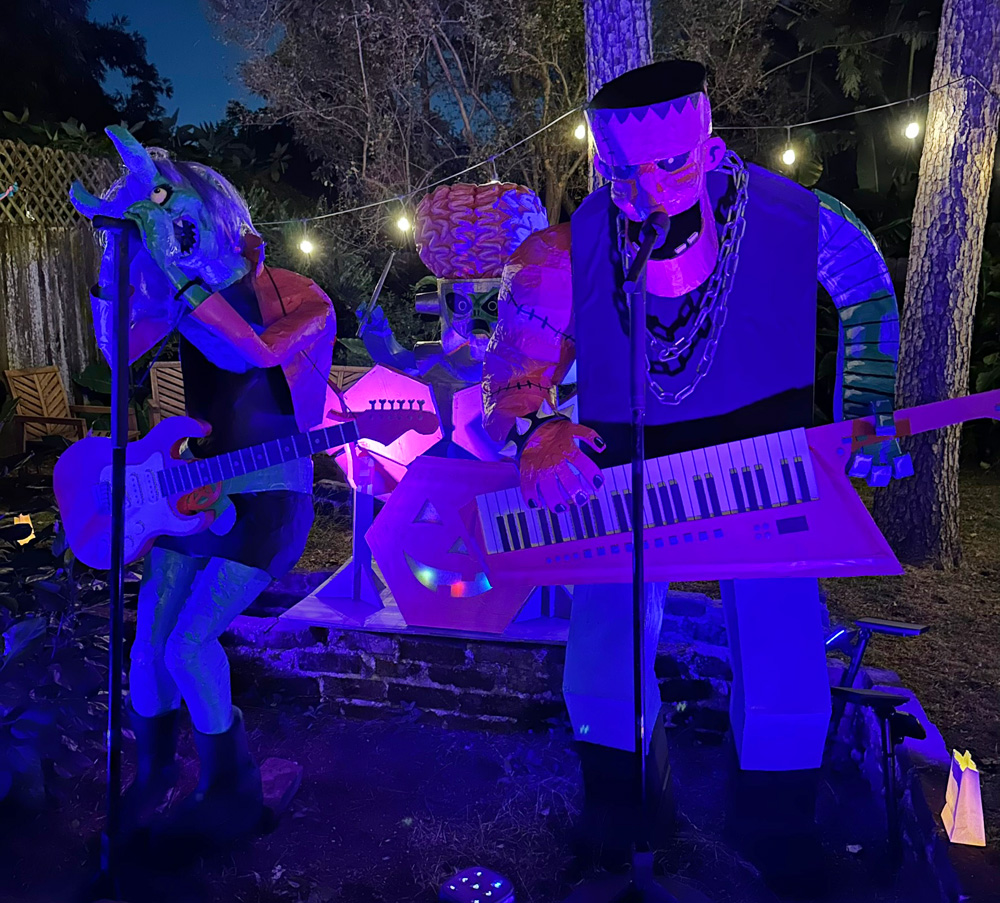
Monster Prom band, part 2: demon singer!
Published October 29th, 2024
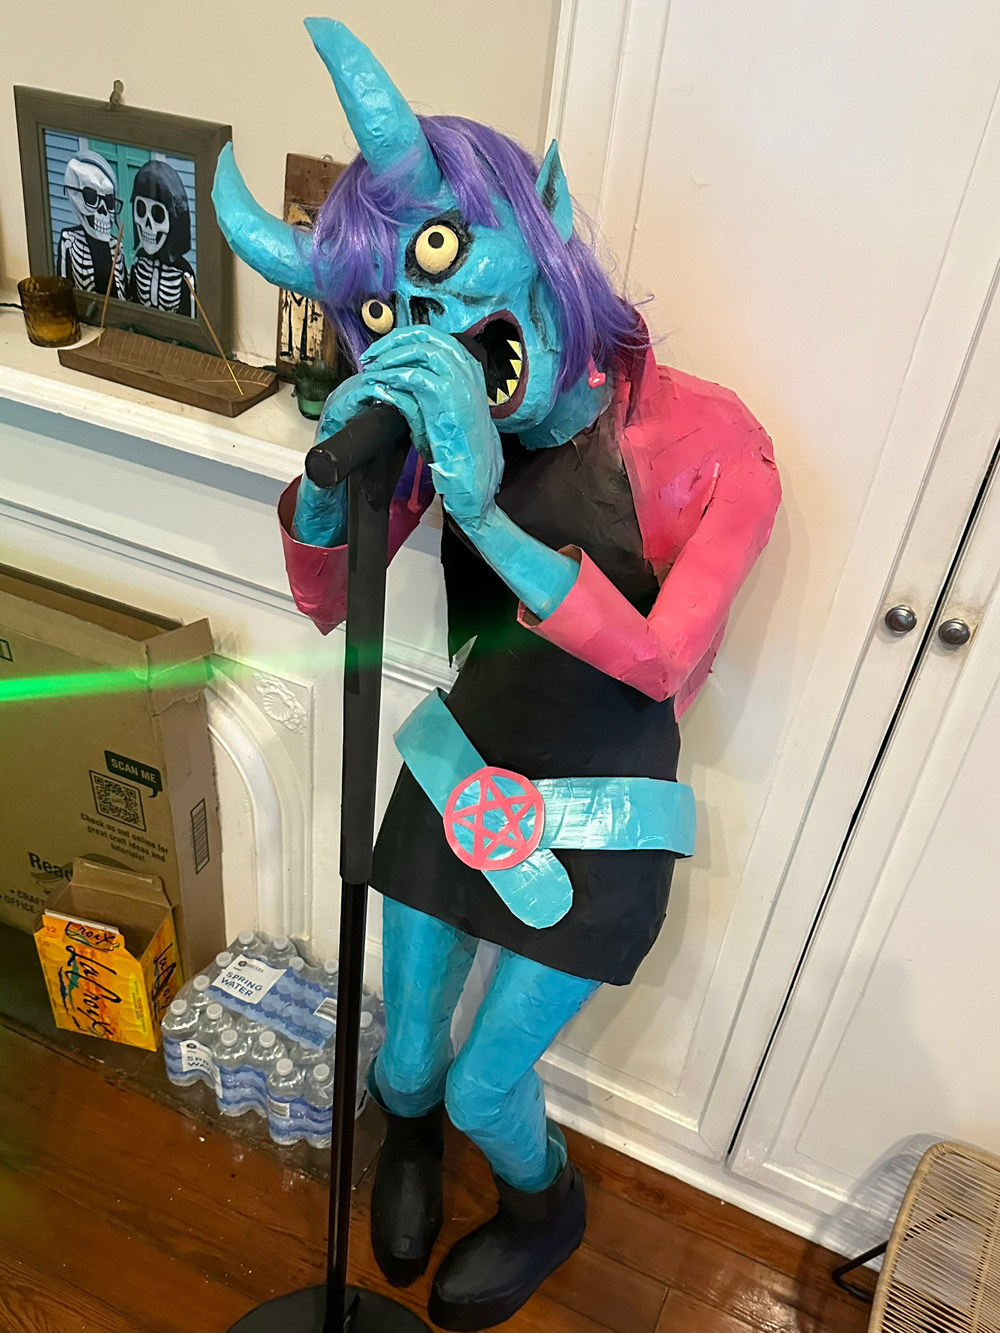
This demonic singer lady is one of the most challenging things I've ever made! I wanted to try to make a free-standing life-size human figure, using just my normal techniques with foam board and tape and stuff. This was a first for me and it worked out pretty well!
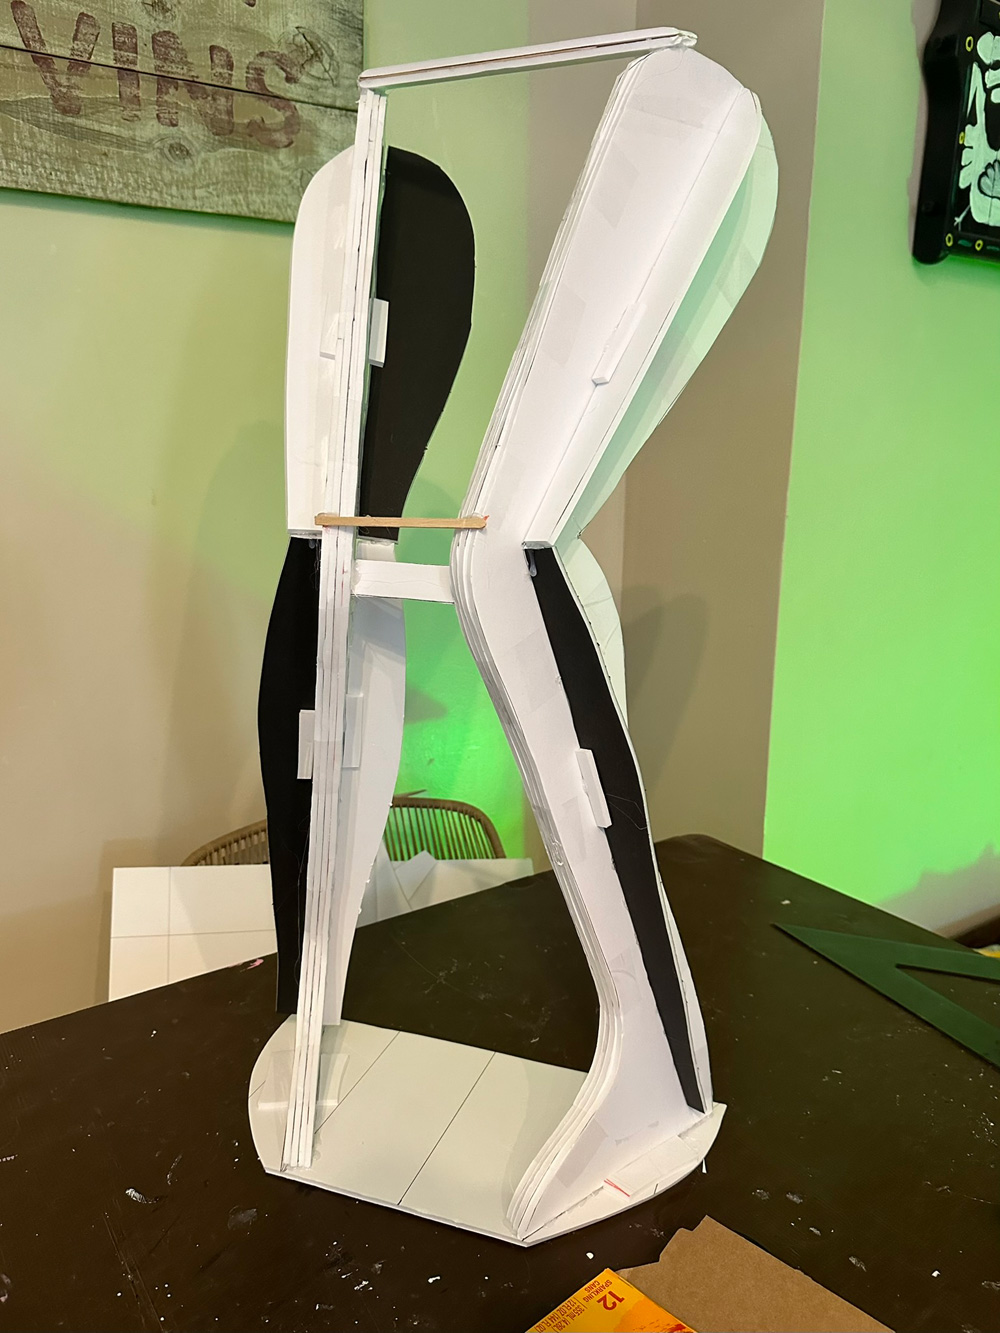
I started with the legs; it was critical to design these to be strong enough to stand up on their own and to support the weight of the figure. (Although I cheated a bit with the microphone stand; coming up.)
I'm putting this disclaimer on all my Halloween 2024 (Monster Prom) projects: I was in such a panic this year I did not take many progress photos of anything! And the pics I did take are at really random stages. So I'll dump all my pics for each project near the top, and just write up all my steps below those.
I drew a leg shape onto foam board, cut it out, and made seven more copies. I taped these tightly together into two groups of four, and they felt nice and sturdy.
I then hot-glued the feet onto a sheet of foam board, which I'll remove later, and I hot-glued a horizontal bar across the top of the legs. I reinforced this bar with a bunch of wooden popsicle sticks, because it needs to be strong enough to support the weight of the upper body.
I also hot-glued a piece of foam board and a coffee stirrer between the knees to hold them together while I work on the legs. Obviously these will go away later.
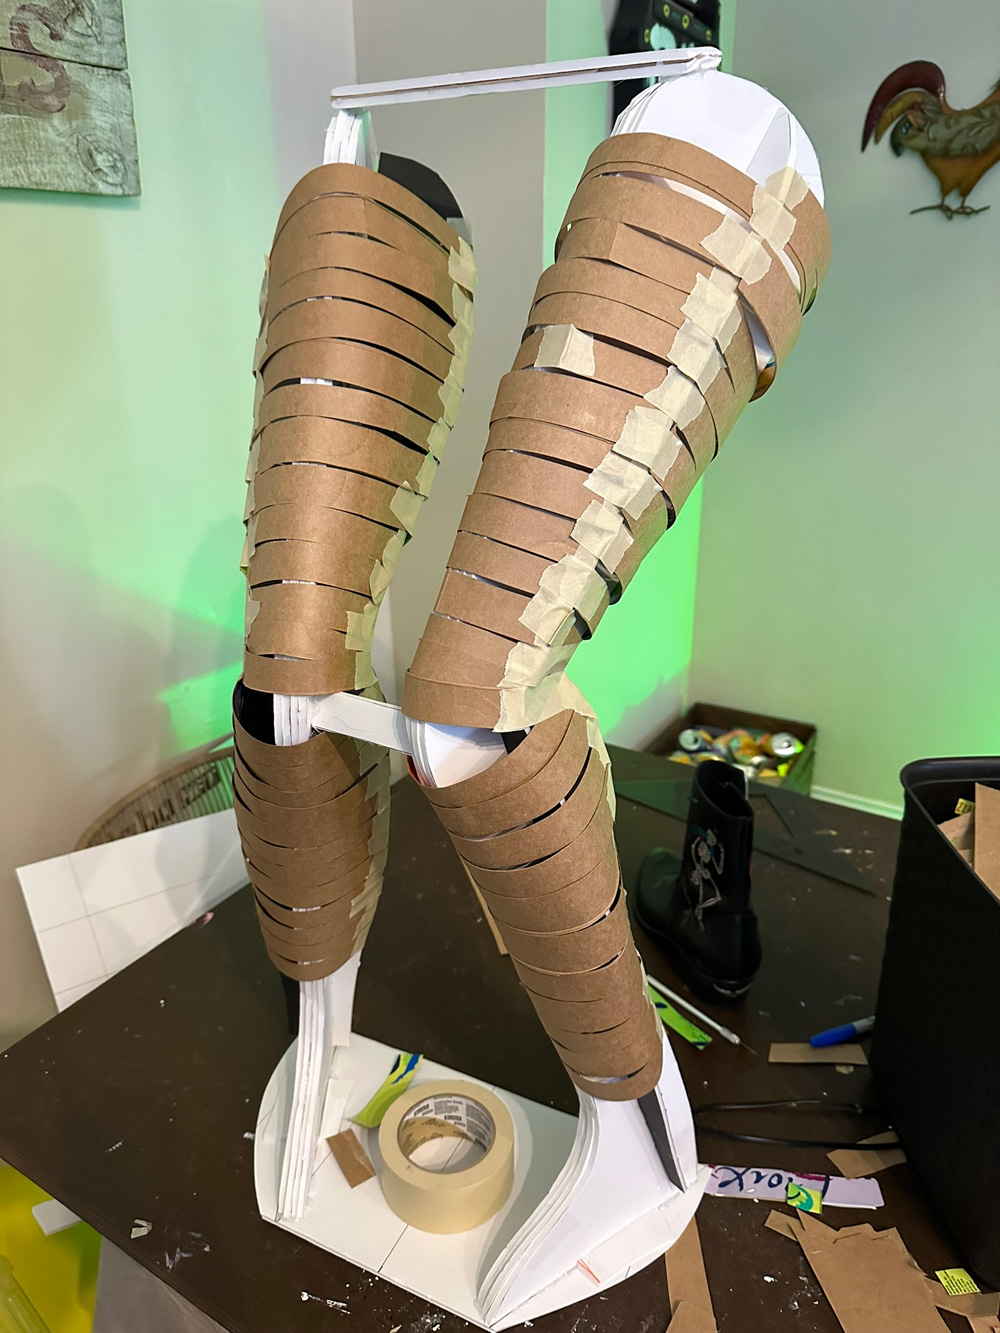
I then drew and cut out a bunch of shapes to hot-glue onto the sides of the leg pieces and sort of build out the 3D shapes of the legs. (They're black and white because I had a bunch of random scraps of foam lying around.) You might think the pose here looks a little like she needs to pee — think rock singer screaming into the mic.
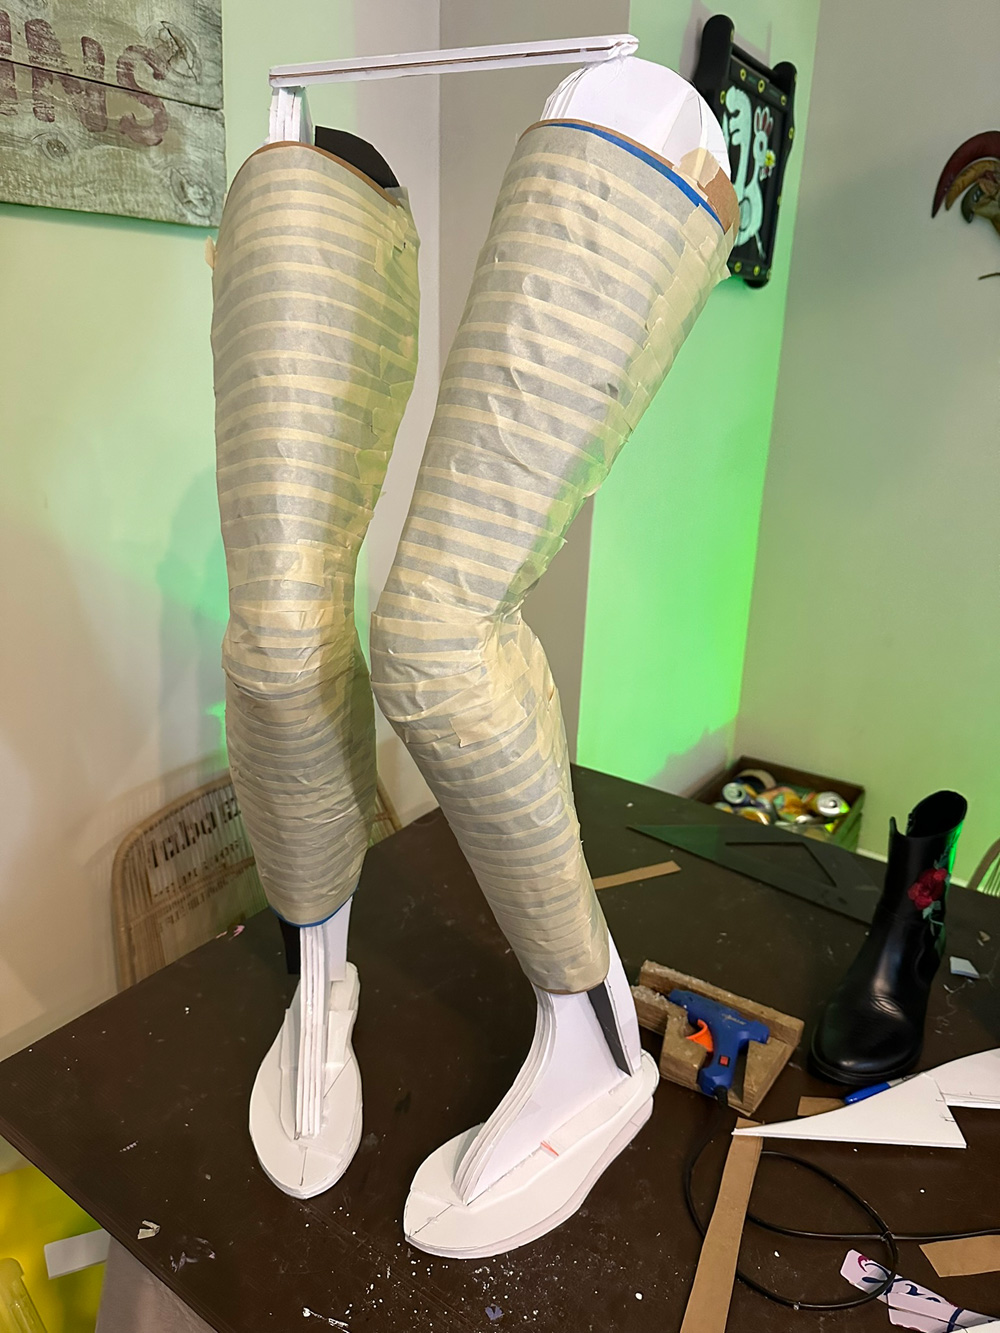
I then cut up a bunch of Lacroix boxes that I'd been saving, and taped them around the leg shapes. Right away this started to look pretty cool! When that was done I covered the legs with masking tape. Now, normally I would cover the masking tape with paper maché, but for a quick and dirty project like this I didn't bother. Later on I would just spray paint directly onto the tape, and that's good enough for this very short-lived Halloween decoration.
Note: I use Scotch brand masking tape, which holds really well over time. Cheaper brands of tape tend to curl and come un-stuck after a few days — and the same is true for blue painter's tape. If you're going to cover a taped-up sculpture in paper maché right away this isn't a big deal. But for a project like this where I'm not doing paper maché, it's critical to use Scotch brand masking tape so it stays stuck.
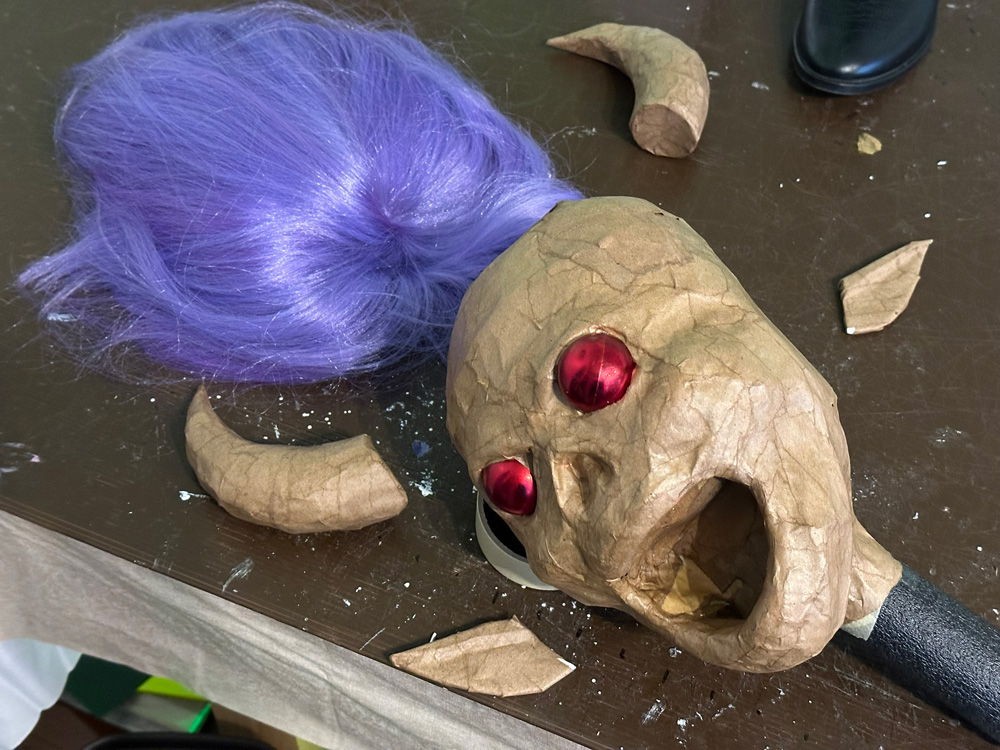

After the legs, I switched gears and built the head. I just cut out some cardboard shapes and curved them up and taped them together, and then covered the whole thing with a lot of masking tape. I've made enough monster heads that I can just sort of freestyle this stuff.
I used Christmas ornaments for the eyes. The horns are mostly foam insulation tubing. The ears are just scraps of foam board. I covered the head and horns and ears with one layer of paper maché, and when they were dry I hot-glued them together.
I later added teeth that I cut from a strip of poster board. The hair is the cheapest wig I could find online. I had to pin the wig in place onto the head with a bunch of little T-shaped pins. (Of course that was after painting.)
I made the hands from latex gloves which I stuffed with tons of pipe cleaners and some scraps of foam board, and then I covered them with thin strips of masking tape.
I made the arms the same way as the legs: foam board, wrapped in strips of paper and then masking tape.
The torso is also foam board and strips of paste board and lots of tape. Same for the skirt.
I made the belt from craft foam and masking tape. The buckle is foam board, and the pentagram is poster board.
My wife made the boots by taking a real pair of her boots and wrapping them in plastic shopping bags and then covering them with a few layers of tape. When they were done she cut them out, down the middle, and we taped these in place around the legs. Because of the way the ankles are bent, I ended up cutting off the top part of the boots — which were too straight — and making new cuffs for the boots out of poster board.
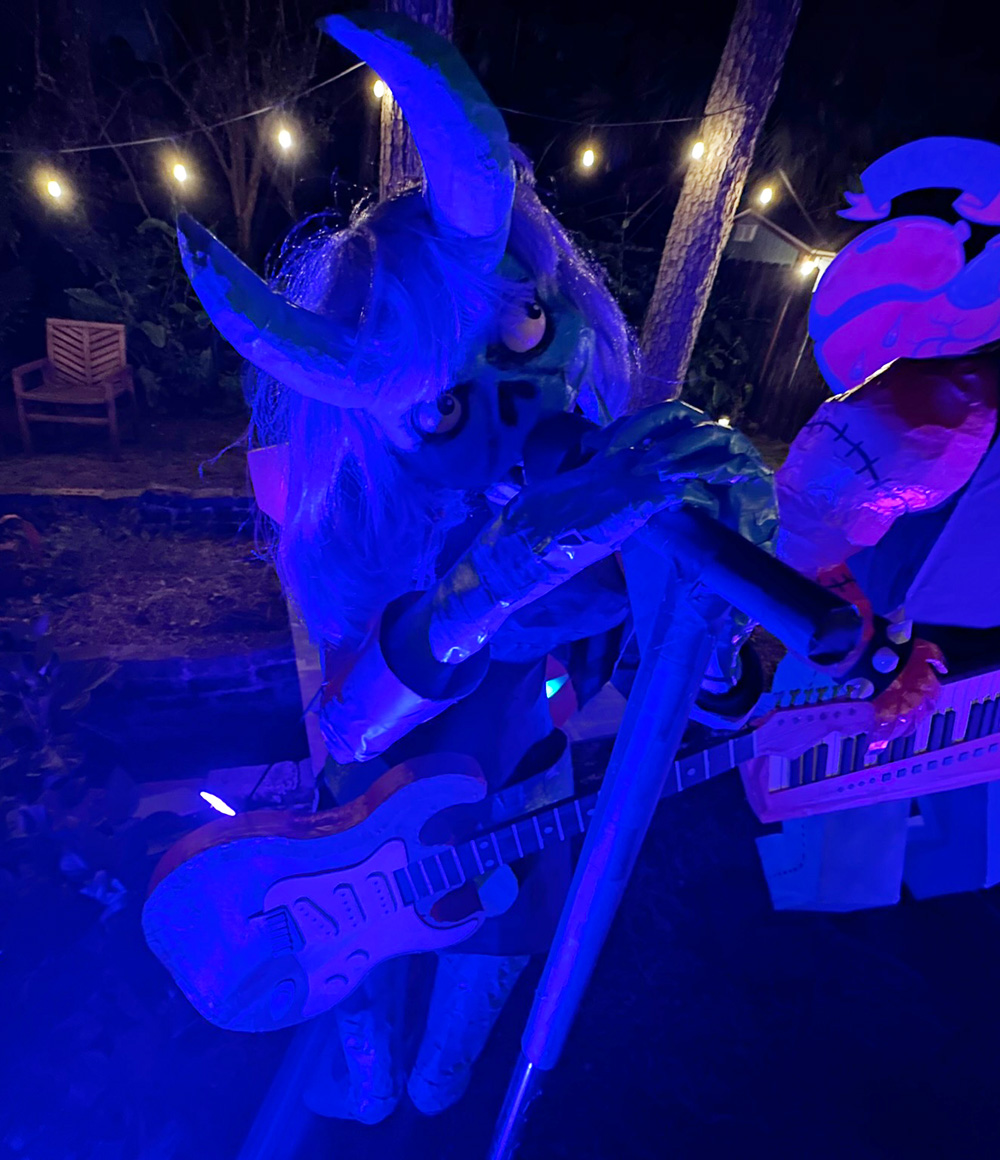
The microphone head is a piece of foam insulation tubing, and the handle is rolled-up poster board. Now, here's something important: There's a wooden dowel that's half inside the microphone, and the other half going into the roof of the singer's mouth and actually pokes into the back of her throat. It's hot-glued in there with a ton of hot glue — and I used Gorilla Glue hot glue sticks for this part, because they're much stronger than the cheap glue sticks.
So the idea here is that the weight of the singer's body is shared by the legs and by the microphone stand. This also means that rather than balancing on just her feet, she's much more stable because she's essentially standing on three points rather than two.
The microphone stand is a metal tube from a cheap broom. The base of the mic stand is just foam board and hot glue and tape; surprise.
That's about it! A neat thing about this sculpture is that almost all of the visible surfaces here are just masking tape covered with spray paint. The only parts you're seeing here that are not masking tape are the head, the metal pole for the mic stand, and the base of the mic stand. If I'd had more time and if I needed this statue to last longer, I would've covered the whole thing in paper maché — anywhere from one to eight layers, depending on how sturdy it would need to be. Anyway, I skipped all that and it saved me a ton of time.
That's it! Coming soon, I'll post an article about making the demonic singer's foam guitar prop.