
Skeletal swamp witch arm prop
Published by Manning on October 2nd, 2025
I made this big spooky skeletal swamp witch arm for a top-secret project. Here’s how I did it!
I kept this project nice and simple; this arm didn’t need to be perfect, no one would be looking at it very closely, and it didn’t need to be very sturdy or last very long. One thing it did need to be was flexible, so I could fold it up for easy transport. More on that below…
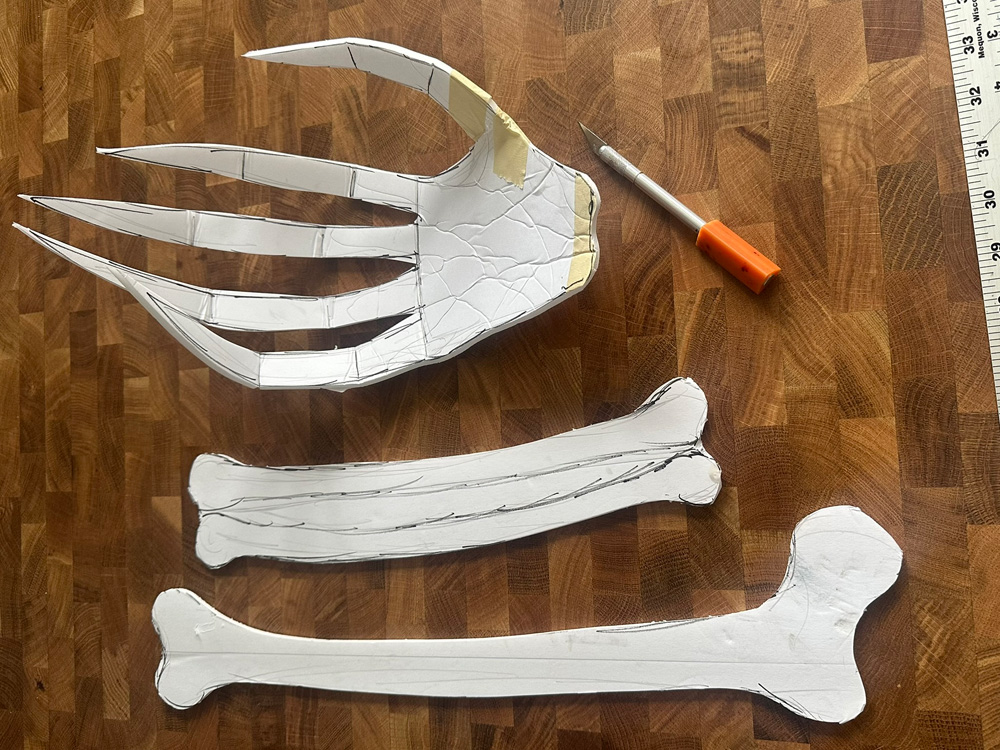
I started out by drawing the arm onto foam board in three pieces: upper arm, forearm, and the hand. I cut out the pieces with an X-acto knife. I then carefully folded up the finger joints. The foam started to crack and break in a few places, so I reinforced those areas with some tape.
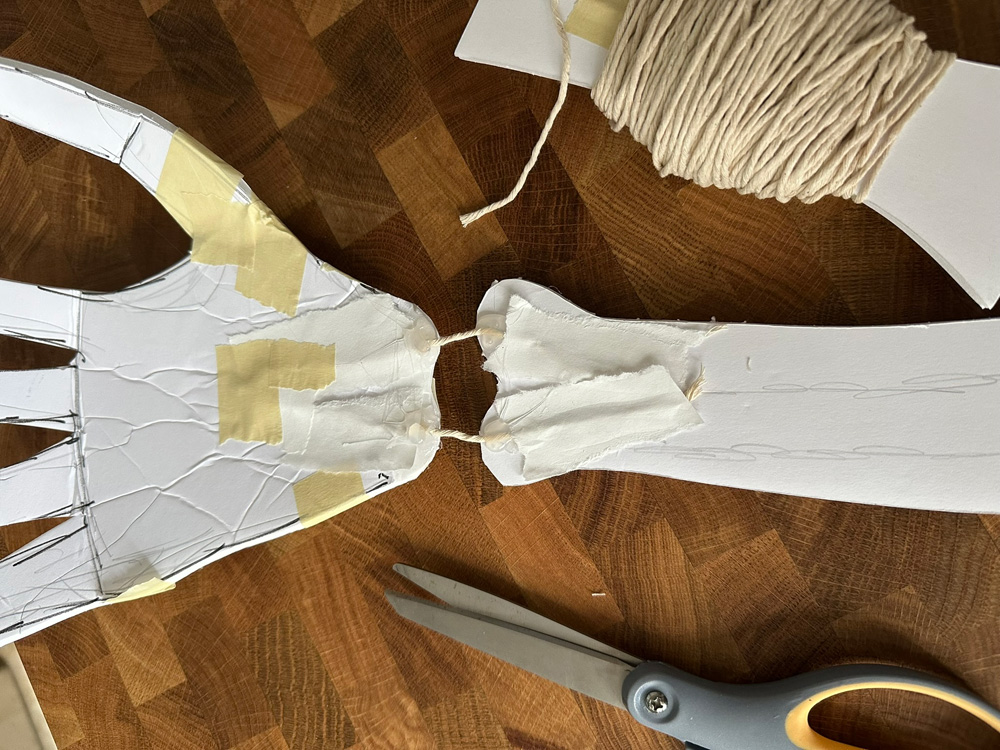
Next, I used cotton string and lots of hot glue to connect the individual pieces. I intentionally left the segments of string between the pieces a little longer than necessary, so that when these pieces are all padded out in 3D, I’ll still be able to fold up the hand and arm. Make sense? If the string were shorter, it wouldn’t be possible to bend the joints much. In the pic you can see some strips of white paper I put in place over the hot glue; I do this to squish the hot glue so it’ll go into the string a bit and really bond everything together.
Not shown: I added two long twist ties sticking out from the tip of the thumb and the tip of the index finger. These are so I can connect the hand around my ankle; I’ll get to that in a bit!
I connected the twist ties to the foam board with lots of hot glue, and I slightly bent them into a zigzag shape before gluing them down; this is to prevent them from being able to be pulled straight out.
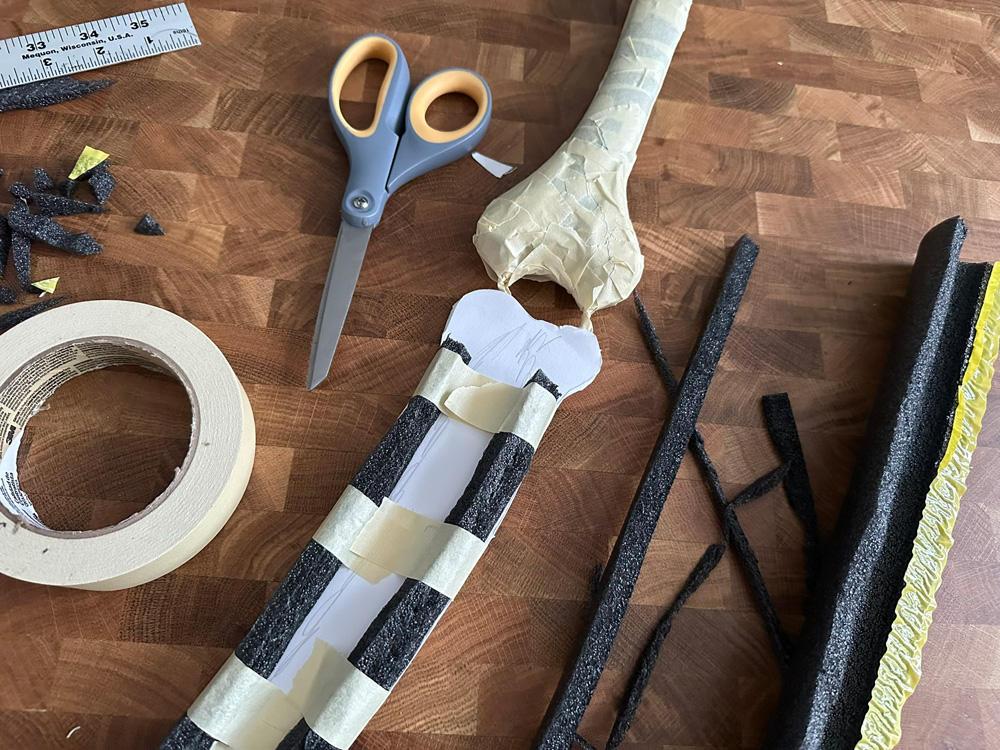
Next, I padded out the bones with lots of pieces of foam, all cut from a piece of pipe insulation tubing. I cut out tons of shapes with scissors and taped them in place with lots of masking tape.
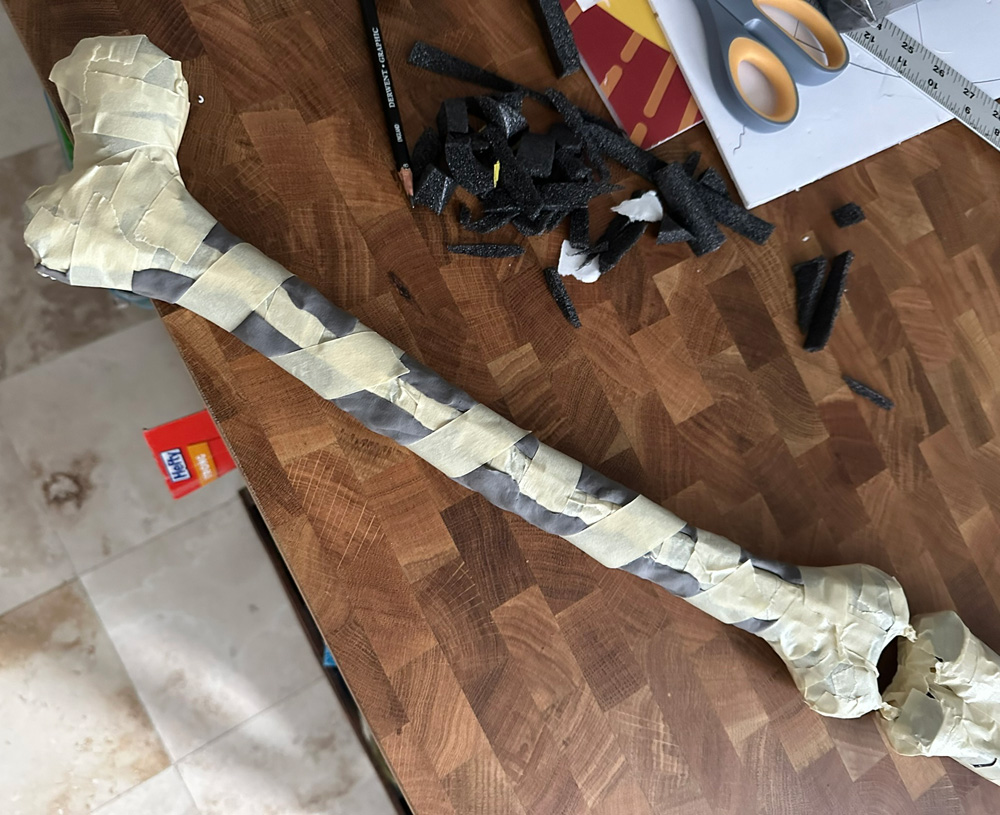
I then used foam clay to fill in and build up some additional areas. I really enjoy this method: starting with solid foam (like the pipe insulation) to build up bigger shapes, and then foam clay to fill in the gaps and smooth out some areas and create additional little shapes as needed. You can’t just use foam clay for all of this because it doesn’t do well with larger/thicker shapes; they tend to sag and flatten out as they set. Also using that much foam clay would be pretty expensive. So this combination method is a great solution.
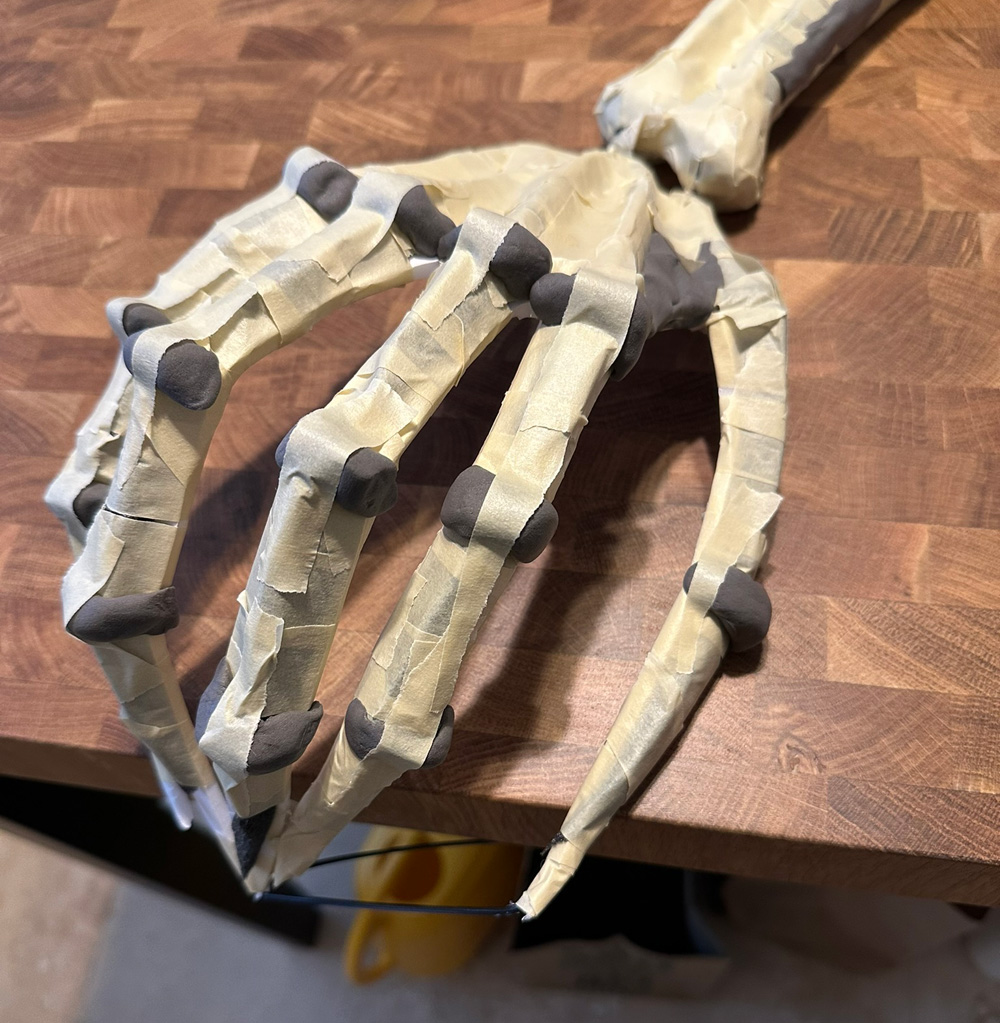
I used little blobs of foam clay to build up big ol’ bony knuckles on the hand. I laid some narrow strips of masking tape over them to prevent them from falling off as they set; it can happen!
Paper maché
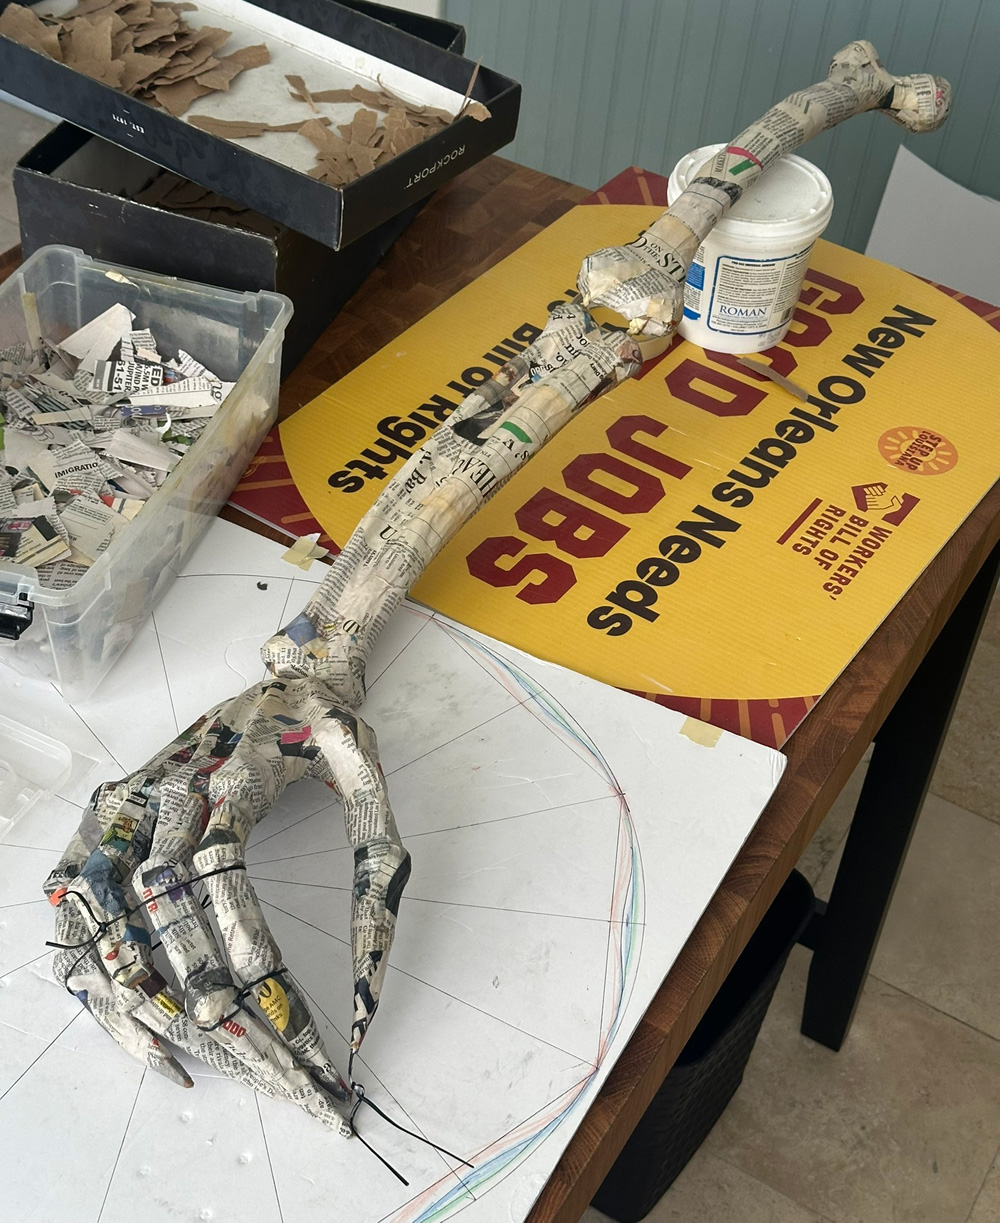
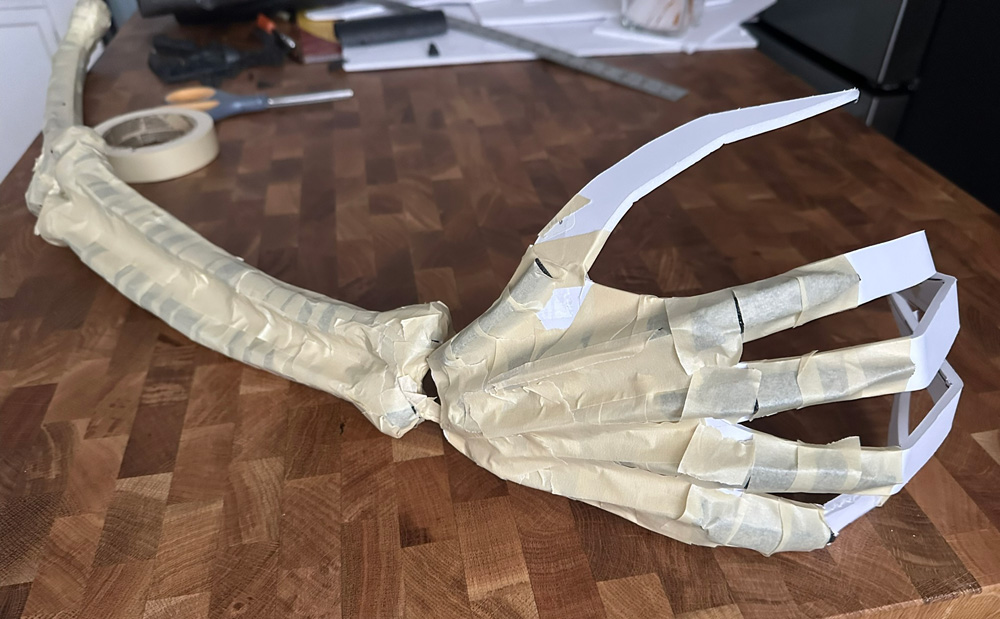
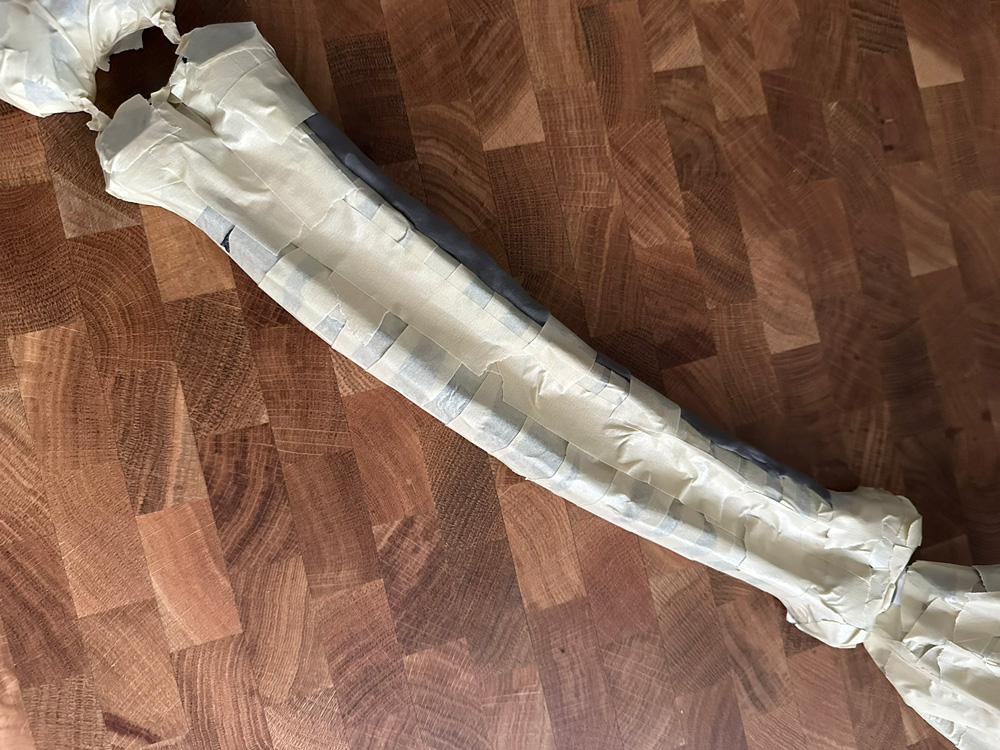
When all this sculpting was done, I covered the arm in masking tape, and then just two layers of paper maché. Oh yeah, in the pic above, you can see the twist ties sticking out from the tips of the thumb and index finger.
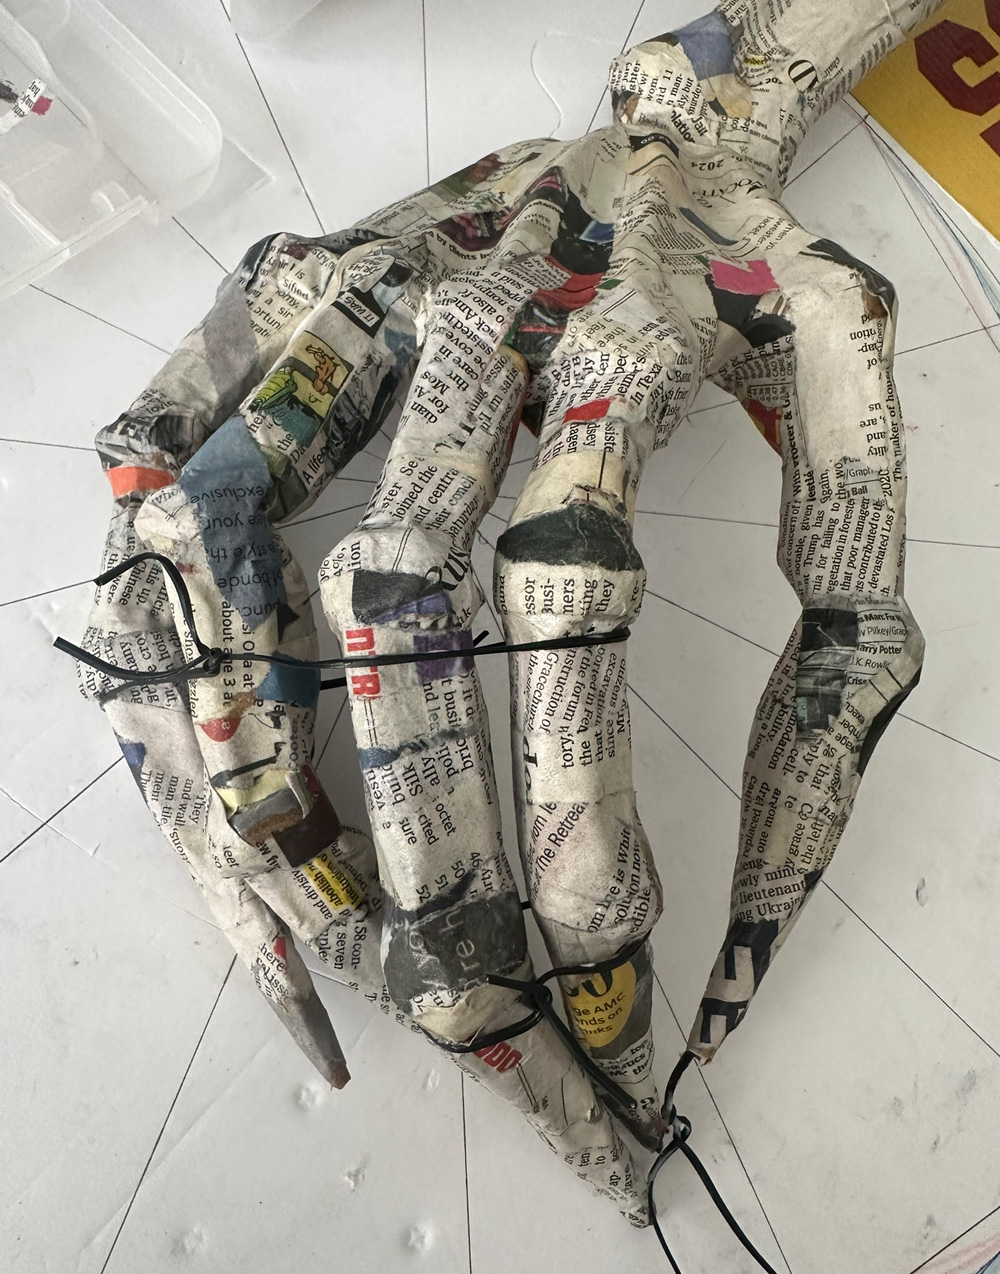
While the paper maché was still wet, I gathered the fingers together and wrapped them in some twist ties to hold them in that position while they dried.
Painting
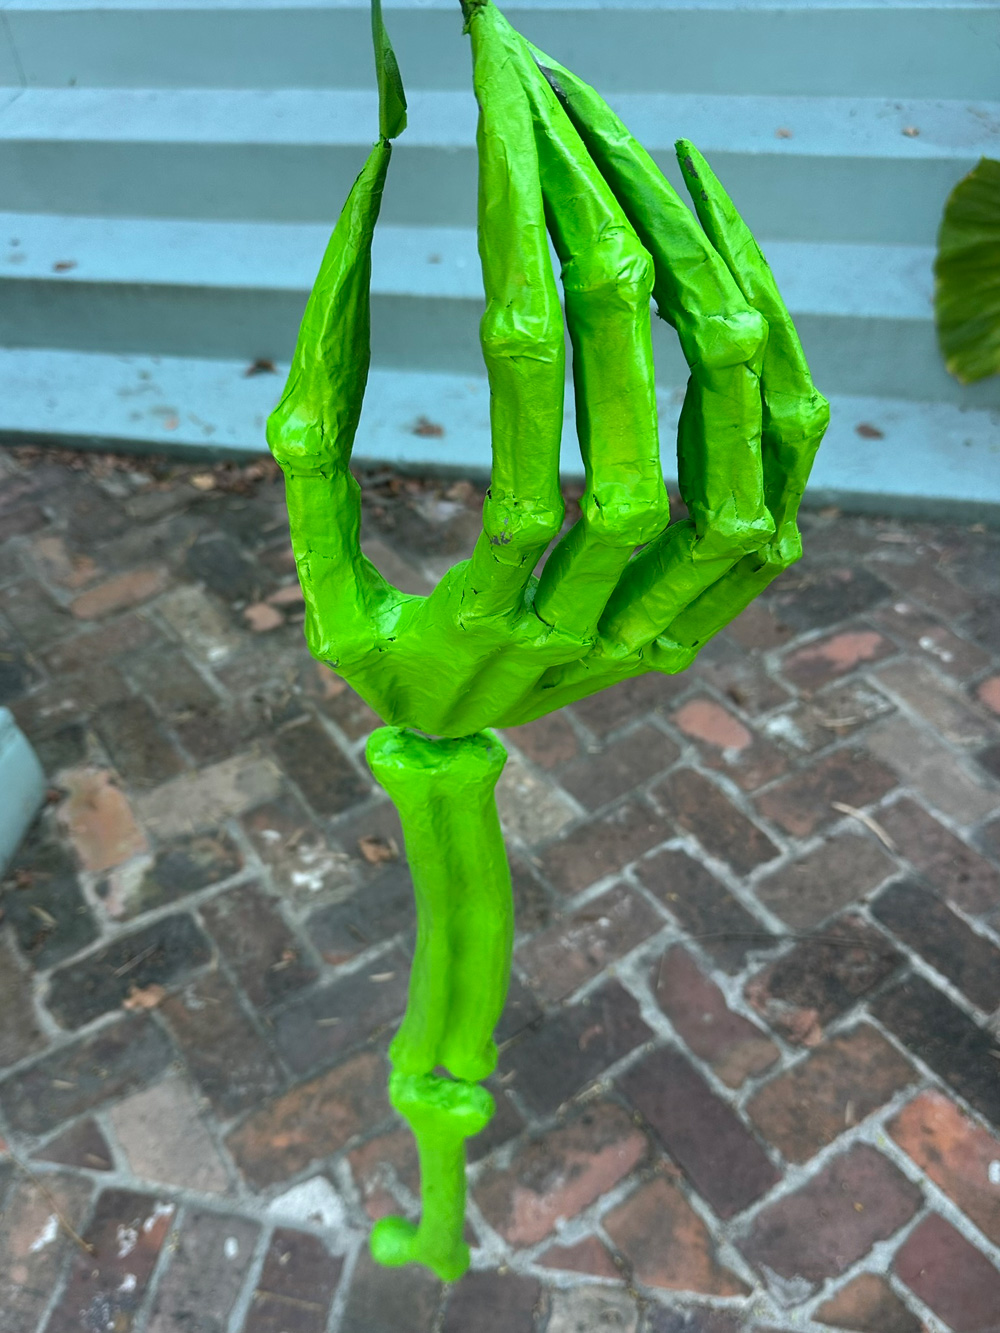
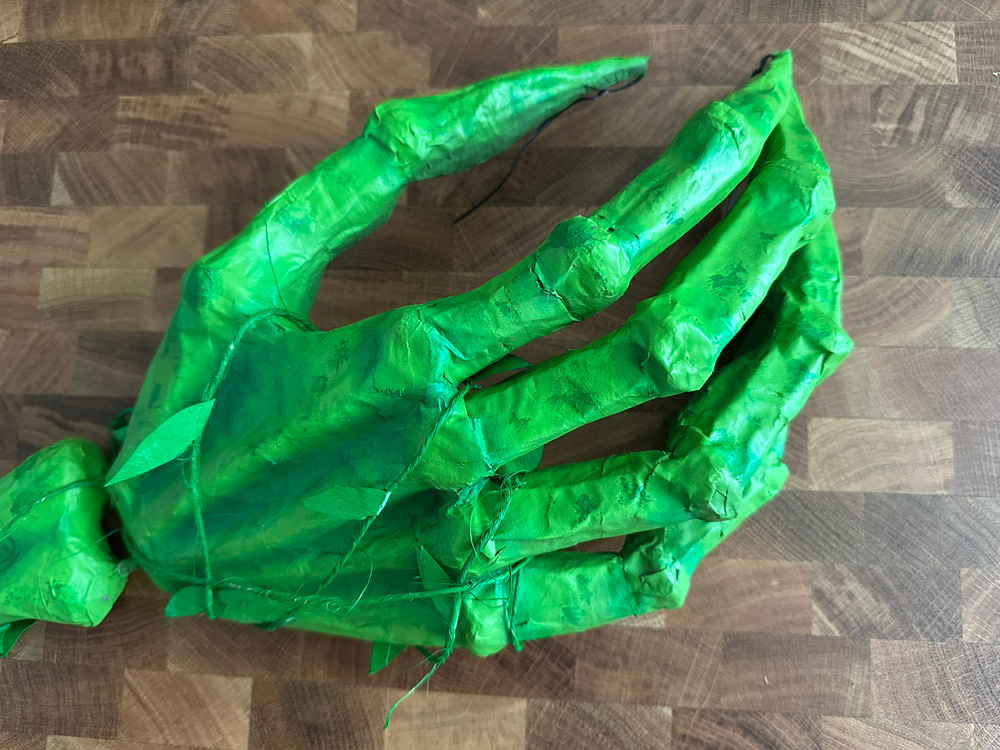
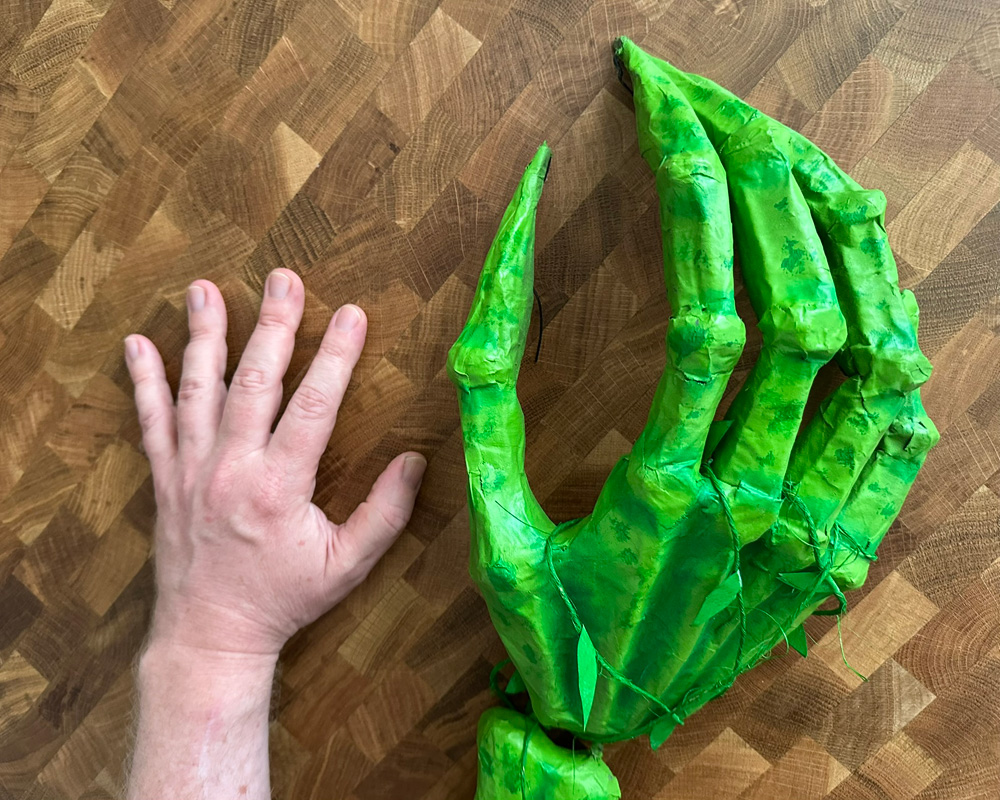
When the paper maché was dry, I spray painted the arm with dark gray primer first, and then bright green. I let that set for several hours, and then I did a little bit of shading with dark green acrylic paint and a rough paintbrush.
I also decided to hot glue the fingertips together, on the side that will be facing away from people; basically the palm side. This is so, when I’m wearing the hand around my ankle and walking with the arm trailing out behind me, the fingers will be less likely to get caught on something and break. Again, more on how I actually wore this thing below…
Vines and leaves
To make this swamp witch arm a little more swamp-y, I made some vines from scratch. I cut some lengths of twine — you know, the brown stuff with a sort of rough and frayed texture. I mixed up some green and yellow acrylic paint in a bowl, and then I worked the paint into the twine with my hands (wearing nitrile gloves). That’s really the best way to get the paint into the twine and covering it evenly; doing this with a paintbrush or even with spray paint just doesn’t work well. Anyway, I let the vines dry and I got to work on the leaves…
I cut out the leaves from folded up strips of green construction paper. They’re mirrored so that I could fold them around the vines and glue them closed. I used wood glue and a paintbrush to apply a little bit of glue and then I just smooshed ’em on there, folded closed. When the glue was dry, I used the same mixture of paint from the vines and quickly painted all the leaves with a paintbrush, right there on the vines.
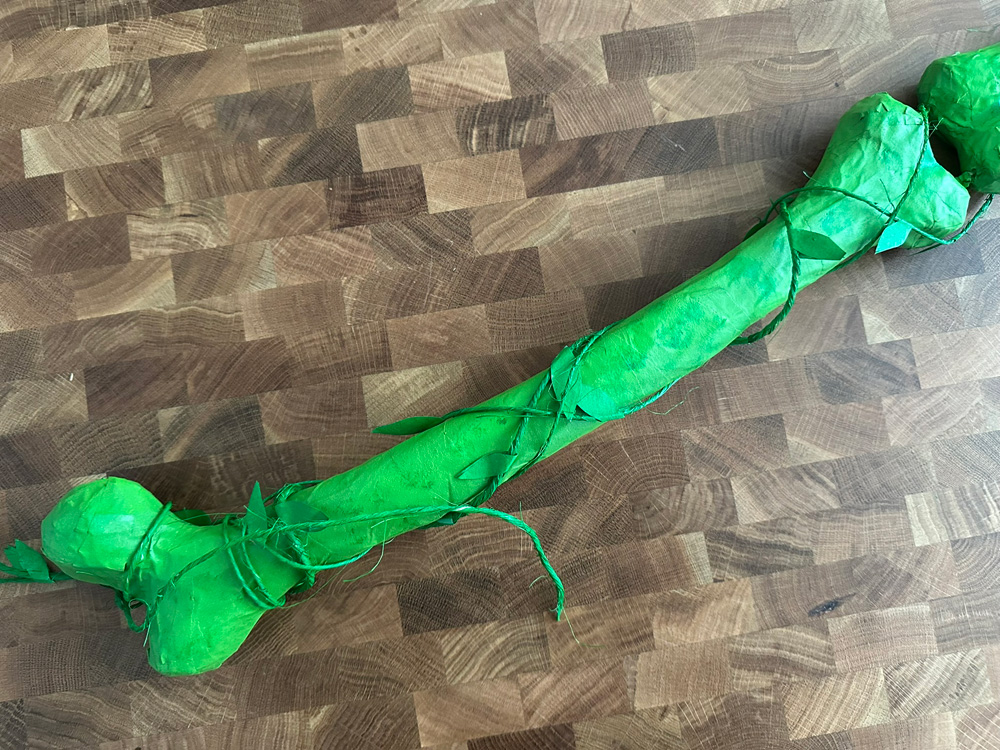
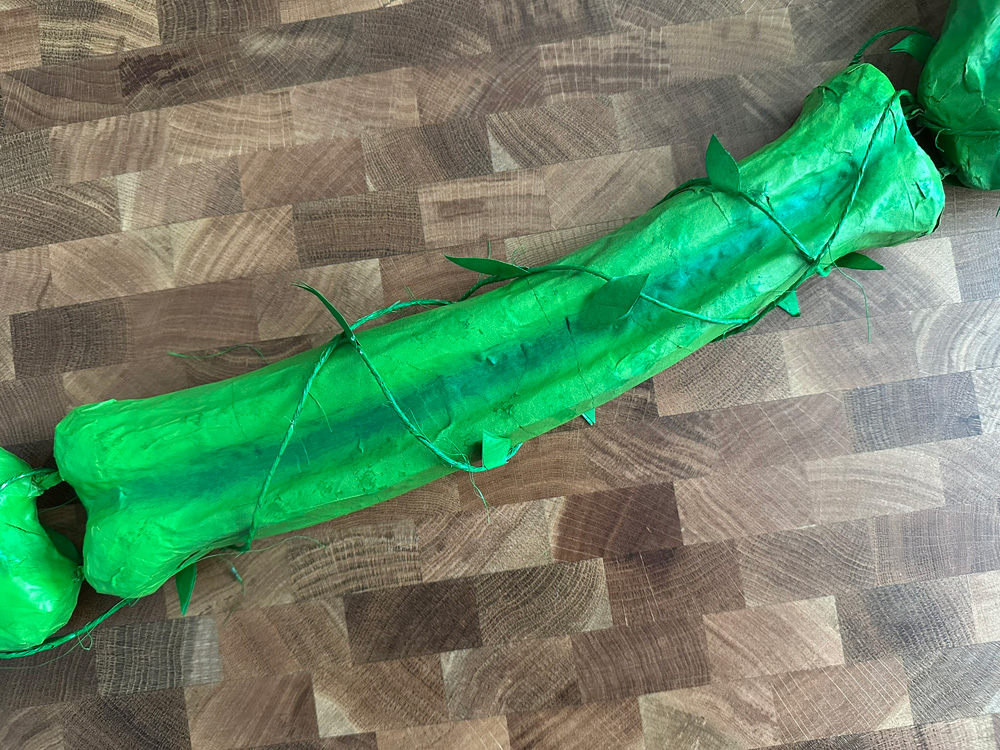
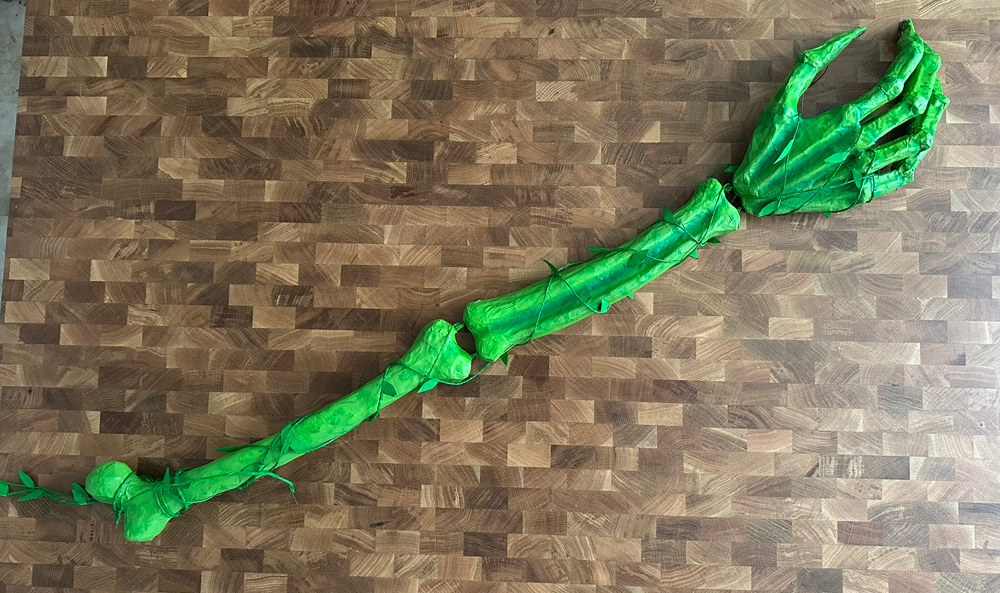
When the leaves were dry, I used hot glue to connect the vines in a few places on the arm and just wrapped the vines around. I put all these connection points of glue on the underside of the arm, as that’s the side that will be facing away from people.
When the vines were in place, I got the idea to take the paint mixture from the vines and leaves and dab some of it all over the arm, like spots. The vine/leaves color is slightly different from the green color of the arm, so this created a subtle mottled effect.
That’s all! Pretty easy! I’ve done various types of skeletal and monstrous hands enough times now that I feel like I’ve gotten the hang of it. And it just so happens I’ll need to make some more skeletal hands for an upcoming big project…
Wearing the arm
So what is this arm for? It’s kind of a long and weird story. This year I hosted my second annual “Dark Blessing for Spooky Season”; basically a creepy midnight meetup in the woods with a dozen or so friends to mark the beginning of an auspicious spooky season. I’ve intentionally kept the whole thing pretty secretive, so I won’t go into a lot of detail about what the event entailed, but at one point I told the group a little story about a drowned witch lying at the bottom of the bayou, not far from where we were standing. I gave them each a stone and had them go off into the dark to throw the stone in the water. I went last. I’d hidden the arm out there earlier, folded up and wrapped in a piece of black fabric and hidden behind a tree. When I went out into the dark alone to throw my stone into the bayou, I quickly unwrapped the arm, put the hand around my ankle, twisted the twist ties together, and walked back into our candle-lit gathering area with the arm dragging behind me; I announced, “Well that didn’t go very well!” It got a pretty good laugh from everyone!
 About Manning Krull
 How to make a 4-foot paper maché alligator
 My violin skull mask, Mardi Gras 2015
 Three-headed paper maché dragon sculpture
October 30th, 2025 at 1:33 am
Wow, Manning! I love the witch arm and the story behind it. Some of your previous work inspired me to create a “Voodoo Bayou” for my front yard this Halloween. I’ll send you some photos after the holiday. Cheers!