
"Gras-goyle" gargoyle costume, WIP part 2: wings!
Published January 3rd, 2025
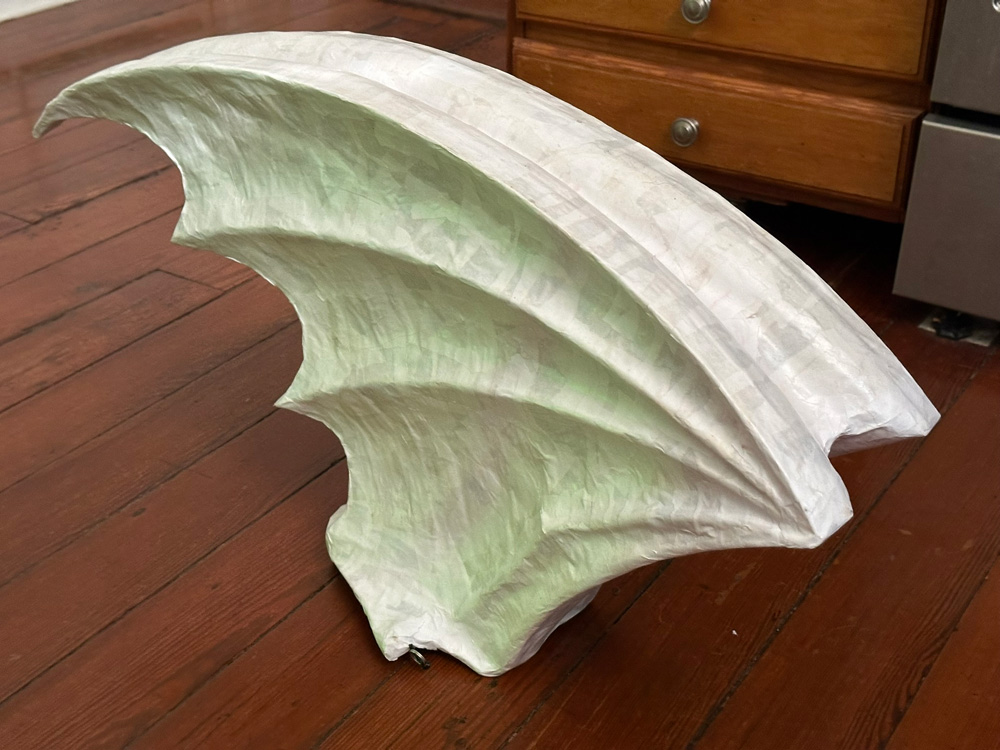
These here wings are the second piece I made for my gargoyle costume for Mardi Gras 2025; they're not painted yet! See part one here: making the stone column.
My goal with these wings was to make a lightweight wearable paper maché sculpture that looks like a pair of wings carved from stone, like you might see on a gargoyle on a church, or an angel statue on a tomb. So, one piece, wings together, sticking straight out from the back...
Making the wings
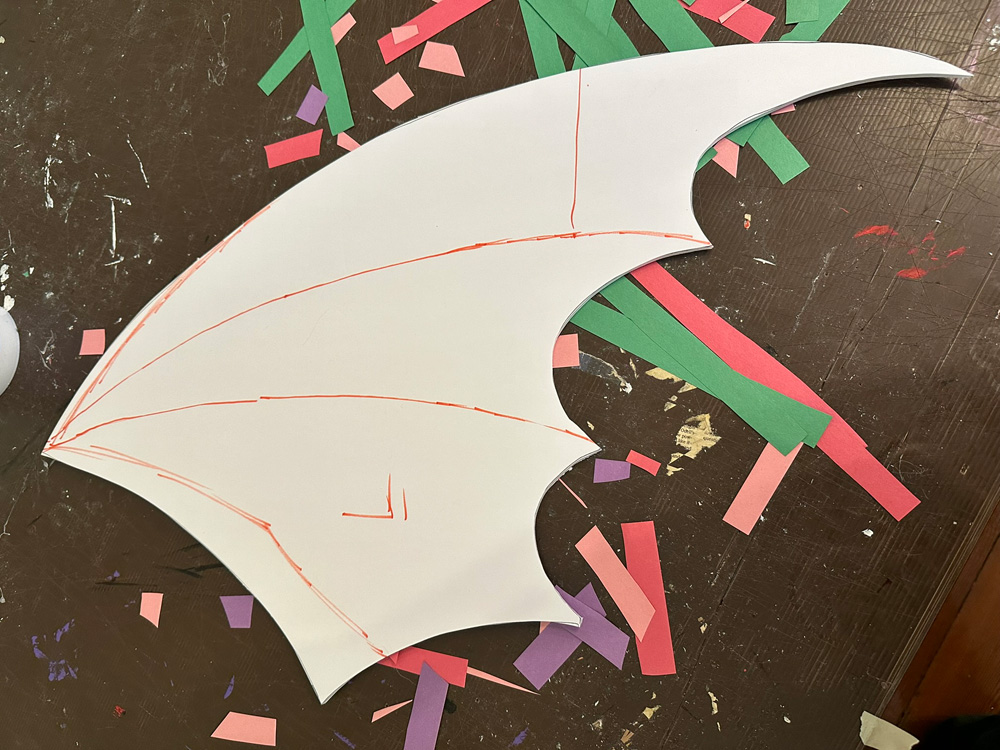
My first step in making the wings was to draw the wing shape on a piece of 20"x30" foam board, cut that out, and then of course trace it to make a second one, and cut that one out.
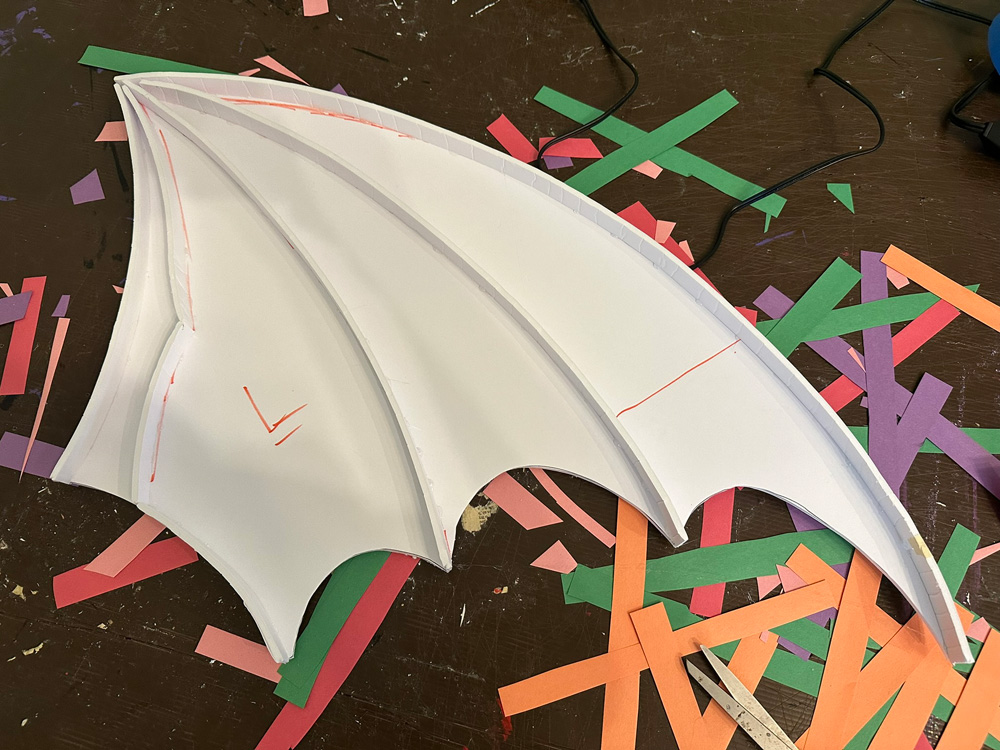
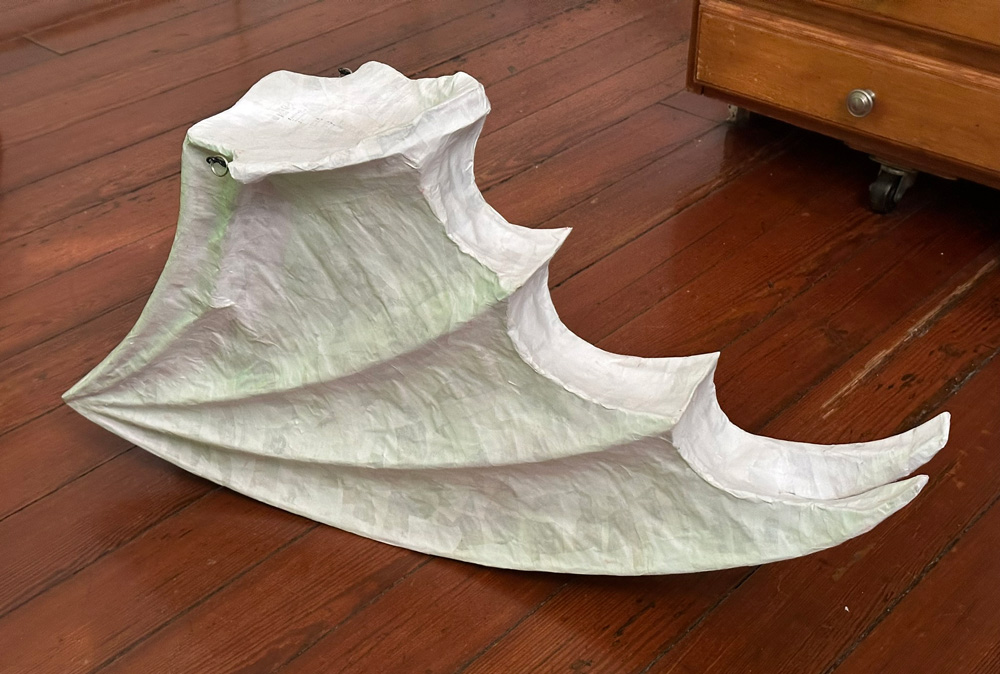
I then cut out a bunch of long straight strips of foam board, 3/4" wide. I used my fingers to curl and crunch up these strips all along their length, in order to make them somewhat curved, and then I hot-glued them along all the lines of the wings.
This next part was a pain! I cut out lots of narrow strips of construction paper and taped them into the spaces between the foam board strips. I attempted to make them all have the same amount of concave-ness (concavity? probably?) to them, basically so the middle of each strip just barely touches the flat surface of the wing shape. It's tough to do this with any real precision, but I did the best I could.
To tape each strip in place I first held it at the spot where I wanted it to go, then snipped the end with scissors to give it the correct angle, then taped that end in place, and then I looked at the other end to see where I'd need to cut it in order to give it the right length. Then I snipped that end and taped it in place. Whew! Pretty labor intensive, but honestly it goes pretty fast. I was able to do all six of these curved wing areas (three per wing) in a couple hours.
As I completed each big curved surface, a few paper strips ended up very wrong, so I removed them and did them again. Once everything looked kind of okay, I covered over all of the strips with masking tape. Once the layer of masking tape was on there, I could see a few places that still looked messed up, so I snipped through the masking paper and tape and re-did them. This was never going to be perfect but I did the best I could.
I've tried and tried to think of another method to achieve this same curved look that would be easier, but I just can't think of anything. Maybe that wire mesh you can get at craft stores, with a tight grid and very soft metal. I dunno. That stuff's expensive and I think it would be tough to get any real precision or symmetry with it. Another idea would be using a huge quantity of clay, which would then have to be removed, of course, because it's so heavy.
Anyway! Next steps...
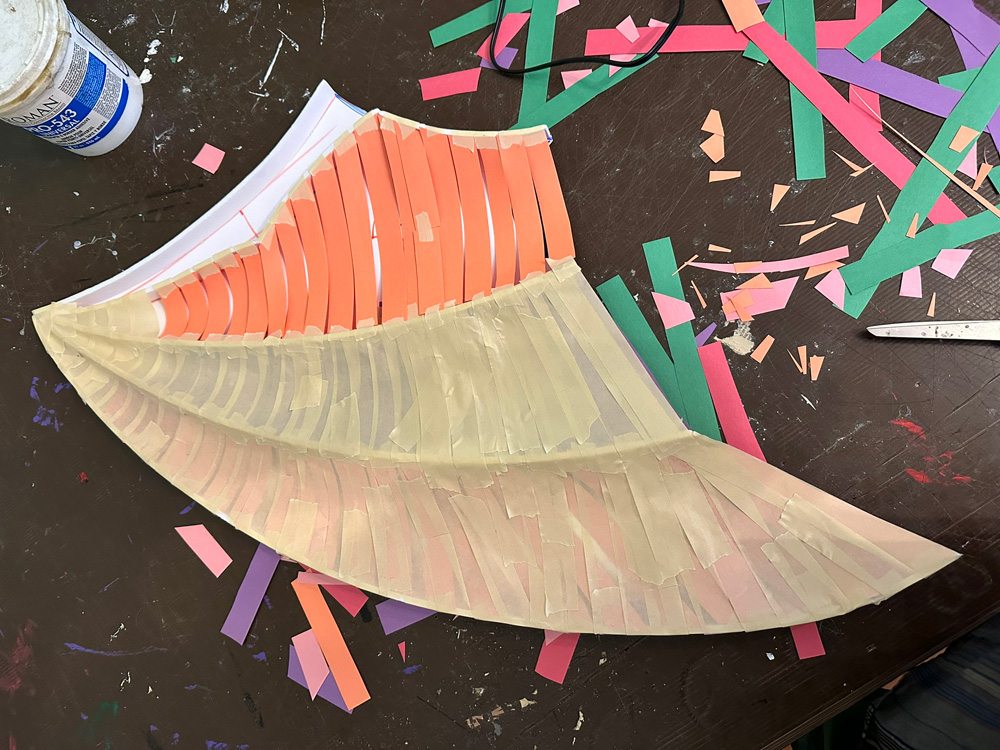
For the "arm" part of the wings, I used tracing paper to trace those open areas, and then I cut out the tracing paper shapes and traced them onto poster board. I cut out theses poster board shapes and taped them in place over the open areas. I then used foam clay to build up some rounded ridges at the edges of the arms, and then I covered over all of that with masking tape. (I forgot to take a picture of all of this!)
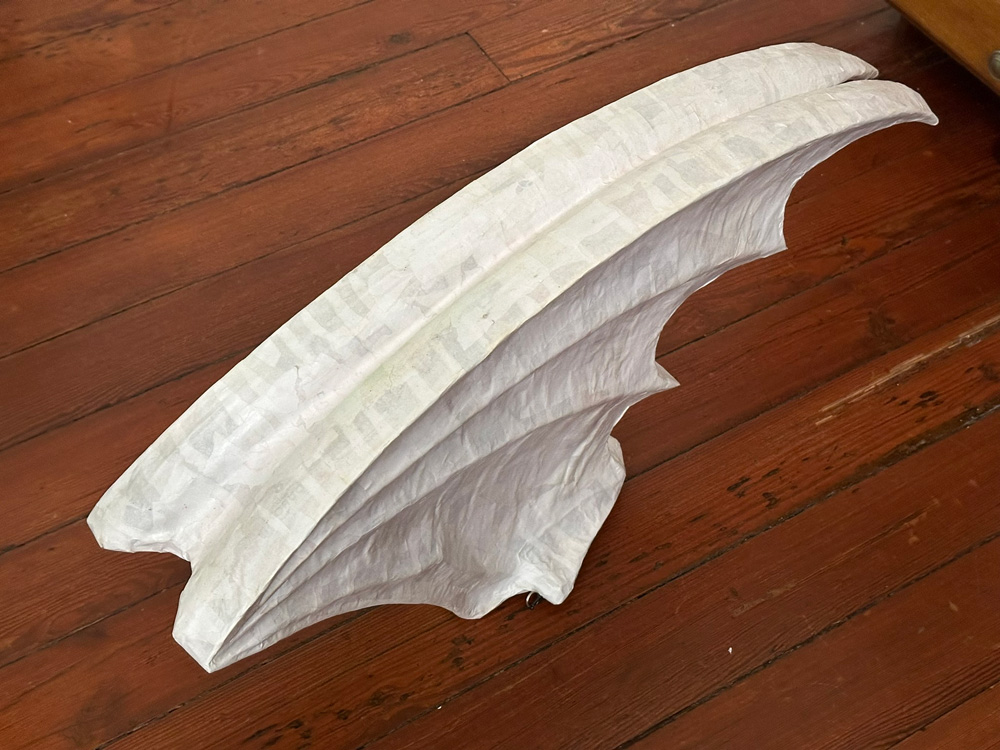
At this stage I decided to cover the front surface of the wings with two layers of paper maché, just to make them a lot sturdier so I can do the rest of the steps more easily. You can read about my paper maché process and materials here.
By the way, one thing I learned while applying the paper strips and tape and paper maché is that this would've been easier if I had not cut out the three curved shapes at the bottom of foam board each wing. I should've done that later on, after paper maché. Oh well! No big deal. So anyway, when the paper maché was dry, I cut out those little curved shapes a second time.
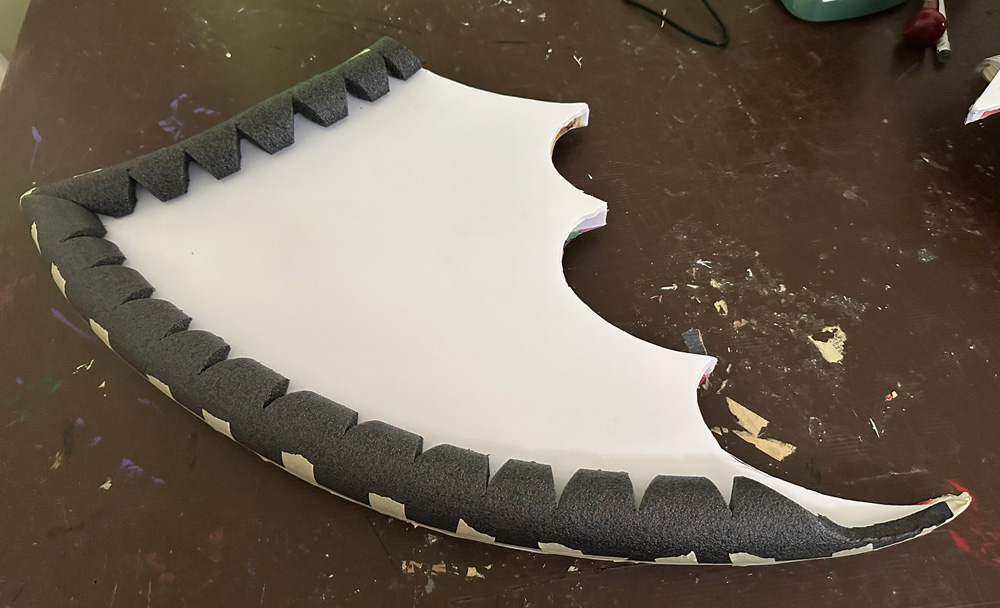
I wanted to make the wings nice and thick, like stone gargoyle wings rather than living wings, if that makes sense. So I padded out the back of each wing with some foam pipe insultation tubing. I sliced a foam tube down the middle, and then cut it into segments, and I cut out all these little notches to help the segments curve much more easily as I taped them in place. You can see I also cut the segments to be tapered toward the lower pointy part of the wings.
Next, I connected the two wings together with lots of tape, all around the outer edges. I then covered all of this with two layers of paper maché. To be clear, I'm doing way fewer layers on these wings than I would normally do, but I want to keep them as lightweight as possible. Since I'm leaving all the inside materials in there, two layers should be okay. (For most of my masks and costume pieces I do something like eight layers and then I remove all the inside junk.)
Okay! Wings are basically done. Now to make this sculpture wearable.
Connecting the wings to the jacket
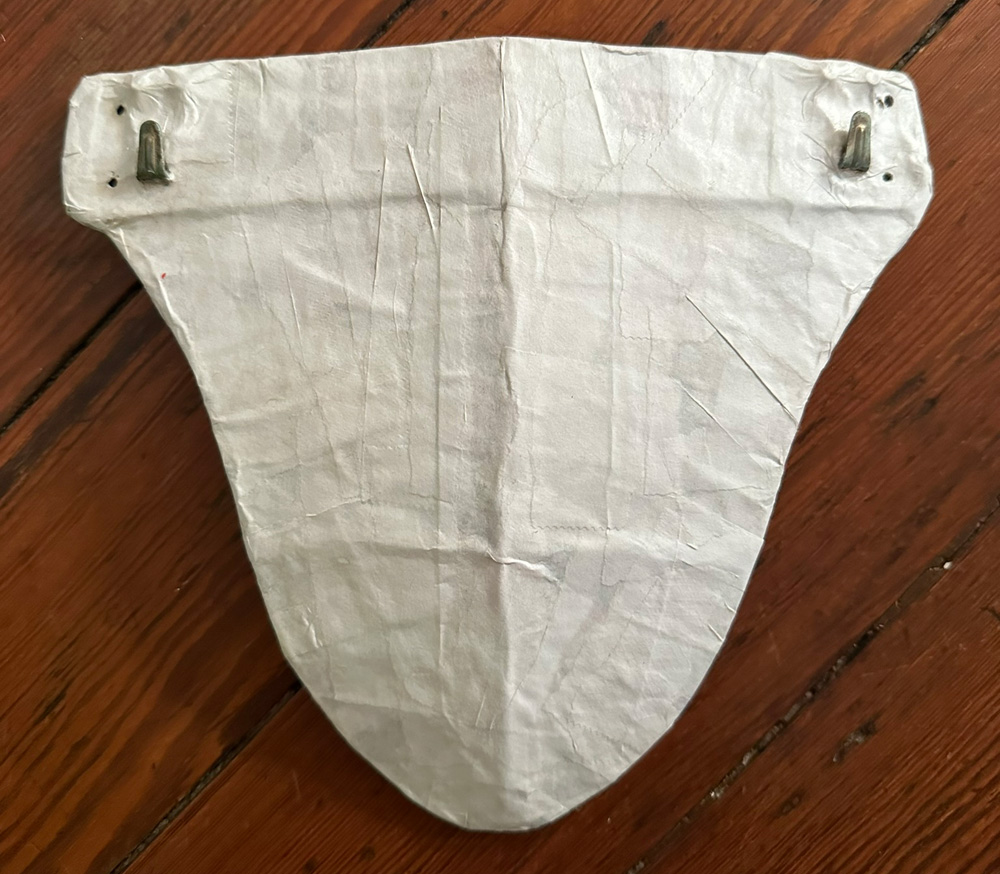
Here's how the wings will connect to my jacket: I created this sort of curved panel with hooks on it to go on the back of the jacket. The wings are permanently mounted on a similar curved panel that has two loops on it. The loops go onto the hooks; that's it! This way I can pretty easily put on and take off the wings as many times as needed — with the help of another person, of course.
So here's how I did all of this...
I started with the structure on the back of the jacket. First I figured out where exactly on the jacket I wanted to place the hooks. I marked these spots with a marker and then poked a nail all the way through the layers of fabric so it came out the other side. Four holes total; two pairs of two. (I'm not showing you the jacket yet while this whole costume is still a work in progress.)
I then used Gorilla Glue hot glue sticks to hot glue some ring shapes around the holes I'd poked; both inside and outside the jacket. This is to reinforce the fabric enough to (hopefully) not let the weight of the wings rip everything out of the jacket. Btw, Gorilla Glue hot glue sticks bond to various materials much better than the cheap glue sticks that I usually use. I reserve the Gorilla Glue sticks for important stuff like this.
I then poked twist ties through the holes in the jacket, from the inside out.
Next, I made the structure that attaches to the jacket. I neglected to take pictures of my process for this thing!
The main part of this structure is a piece of wood with two metal picture-hanging hooks on it; you can see it at the top in the picture above. I drilled six holes in the wood: two for each twist tie to go through, and one for each picture-hanging hook. I didn't nail/screw the hooks to the wood; I used thin wire to connect them. I just ran the wire through the wood and the metal hook thing and twisted it tightly at the back.
In working on this wooden thing I realized it didn't want to easily lay flat on my upper back; I realized it would sit better if I sawed the wood in half and then reattached the pieces at a slight angle, like to fit over my spine. So I sawed the wood in half, and then (for now) taped it back together with heavy duty shipping tape.
Consider this: this narrow shape, under the weight of the wings, will want to sag and twist outward and downward, away from my back, and that would make the wings sag downward. The way to prevent that is to build a taller structure that points down and rests against my back, below the wooden thing. Then, when the weight of the wings pulls down, the lower structure pushes into my back and can't go any farther, so the wings remain sticking out at the right position. Make sense?
I built that lower structure with some foam board, which I curved a bit to match the curve of my back. I taped it in place on the wooden piece, and reinforced the connection with some short pieces of wooden craft sticks, aka popsicle sticks. I then covered this whole structure with six layers of paper maché. Six layers on each side is enough to make a small structure like this very sturdy. Sturdy enough that it (hopefully!) won't break or bend as the weight of the wings puts pressure on it. It'll help if I can keep the wings pretty light-weight! I will try.
After I paint this thing I'll attach it to the back of the jacket with the twist ties.
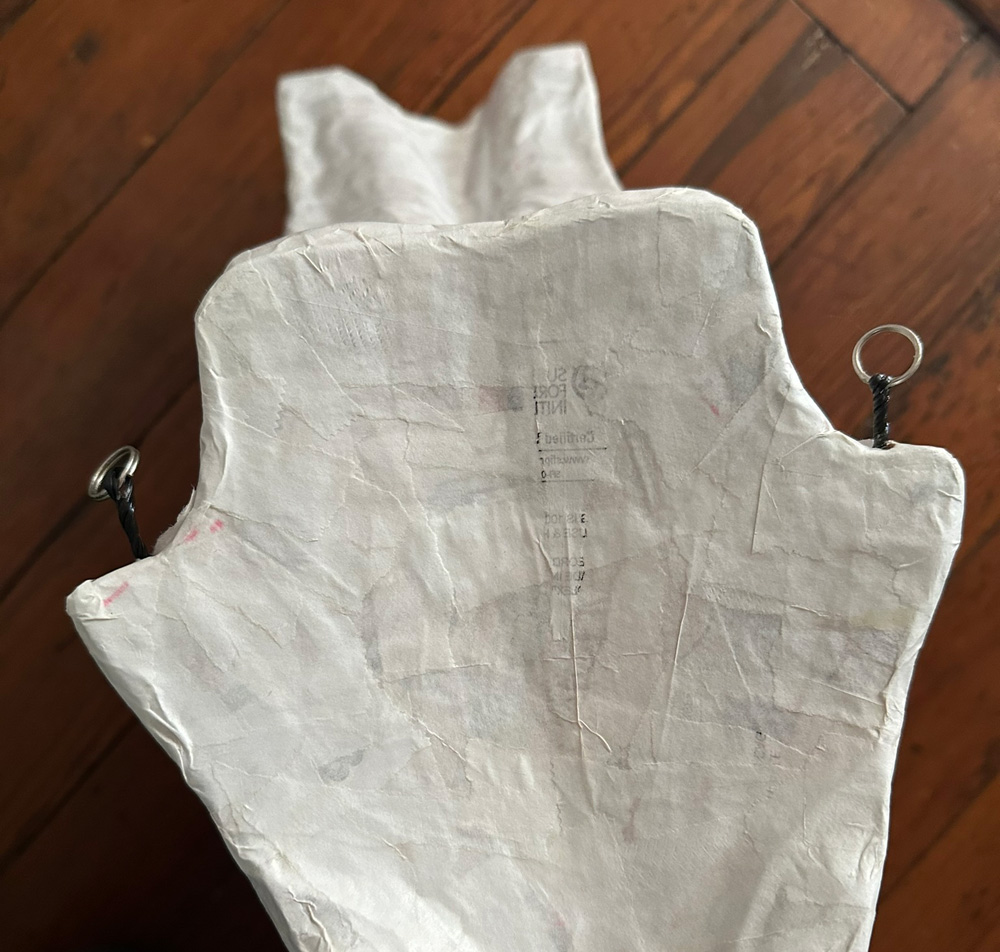
Next step was to make a similar piece that attaches to the wings. I basically just made a copy of the first structure, slightly modified. I left two cut-out parts below the hooks, so that's where the loops will go that hang on the hooks.
I used tiny key rings for the loops that go onto the hooks. These hang by twist ties. To anchor the twist ties very firmly into the base shape, I wrapped them onto a wooden coffee stirrer and hot-glued that onto the base. Then of course I covered all of this with paper maché.
Before permanently attaching the wings to this structure with the loops, I did some trial and error with lots of masking tape; I wanted to make sure the wings sat at the right position on my back — the right height, and the right angle in relation to my body. Once I figured this out, I attached the wings permanently to the structure with the loops. I started with some hot glue to attach the wings, and then I built up a structure around the base of the wings with foam clay, tape, and paper maché.
The wings are very lightweight, and the structure I designed holds them at the correct angle, but they still want to pull the back of the jacket downward, which means the front of the jacket wants to go up. To mitigate this a bit I added some rocks in the front pockets of the jacket. My back yard is full of these flat rocks which I collect and clean off and cover with tape; I use these for weight in all kinds of projects. I cut out some squares of foam board that are a little smaller than the front pockets of the jacket, and then I taped a bunch of flat rocks to the foam squares and wrapped them with tape. Easy!
I'll post pics of me wearing the painted wings on Mardi Gras day; that's March 4th, 2025!