
Making a light-up VOODOO sign with Christmas lights
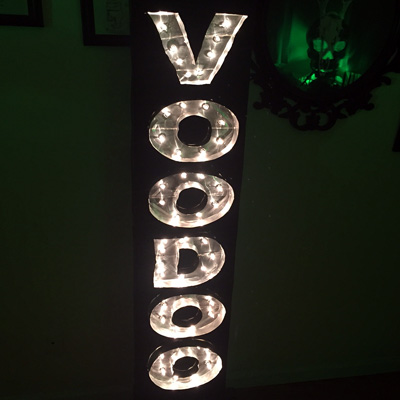

Check out my new VOODOO sign! This is for this year’s Voodoo Bayou Halloween party. This sign was easy to make and doesn’t involve any power tools or wood. The letters are made from disposable aluminum cookie trays with Christmas lights poking through, and the base is just foam board and paper. We hung the sign on our front balcony, sticking out so people could see it when they’re walking up our street. Here’s how I made the sign:
I decided to reuse the box shape that I’d made for last year’s sign. Last year I made a last-minute “ASYLUM” sign for our haunted asylum party. The letters were just plain white paper, and I set up a clip lamp with a red bulb in front of it to illuminate the sign a bit. Here’s what that looked like:
Making foam board antlers
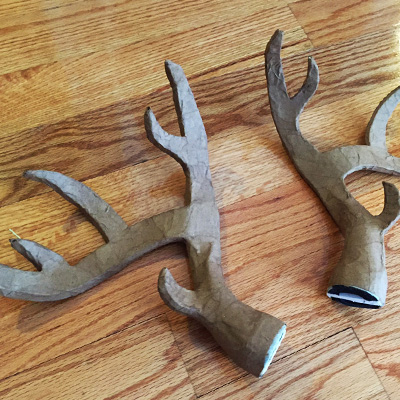
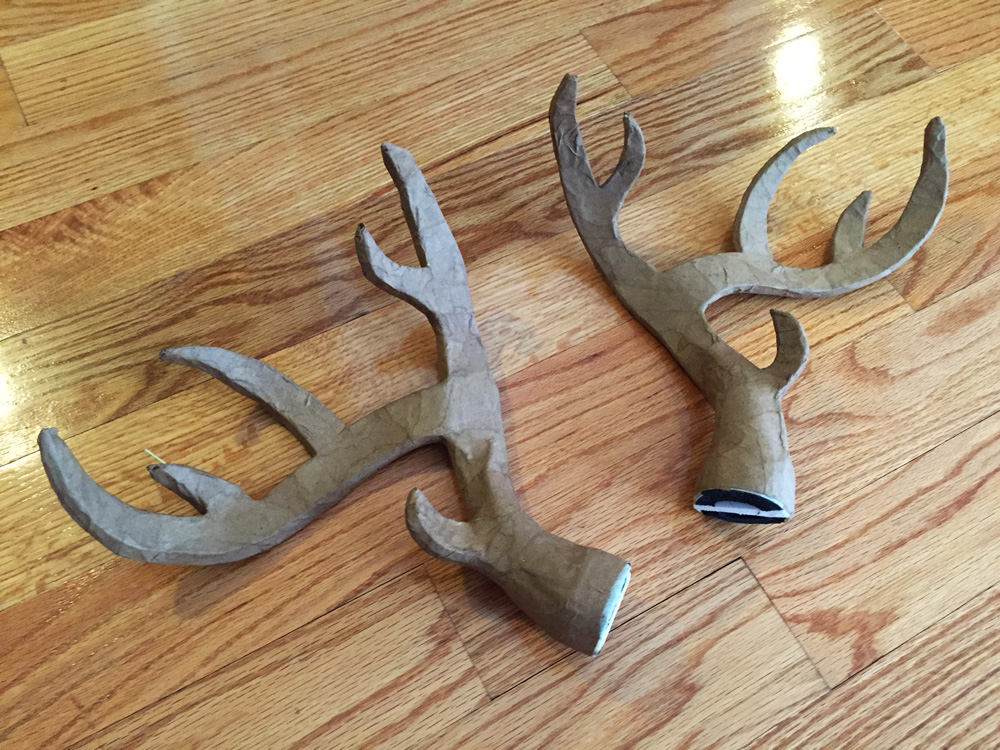
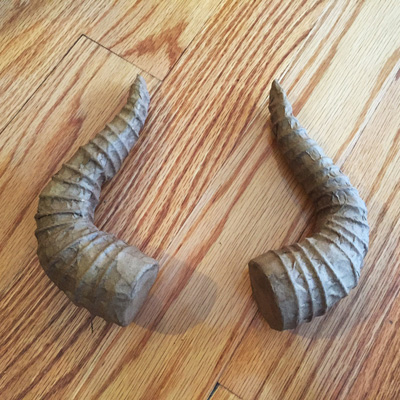
My fiancée needed antlers for her Halloween costume — swamp goddess; it’s a long story — and I made up this method that worked great!

First I drew an antler shape on drawing paper and got the lady’s approval. I kept the shape a little bit on the thick side; I thought this would be important in order to keep the antlers from being too fragile, but it turned out to be unnecessary. If I were doing this again I’d draw the antlers a little thinner.
9-foot paper maché snake prop!
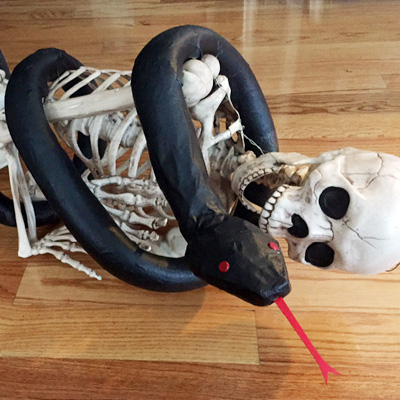
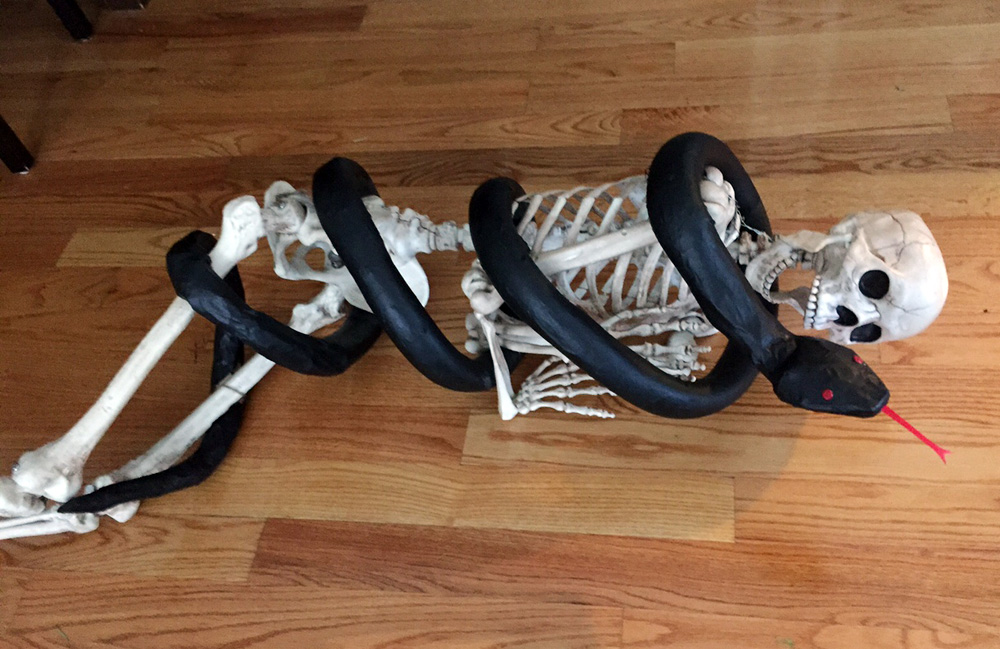
My latest project for my Voodoo Bayou Halloween party: I made this big ol’ snake! He’s made of foam tubing, wire hangers, tape, paper maché, paint, and a few other odds and ends.
I started with a package of black pipe insulation from Home Depot; four one-meter foam tubes for just $3! This stuff is fantastic to work with; extremely lightweight, sturdy, flexible, easy to cut, etc. It’s so great for creating organic-looking shapes that I ended up using a bunch of it on two projects before I tackled the snake: my six-foot bat decoration and a pair of horns for a devil mask I’m working on (pics coming soon). When it was time to start on the snake, I only had two and a half of the one-meter tubes left, so that’s about seven and a half feet for the snake. (I later added a tail made of bubble wrap for a total of about nine feet; more on that below.)
Giant paper maché bat — part 3
See part one and part two of my giant paper maché project. When we left off we were here:
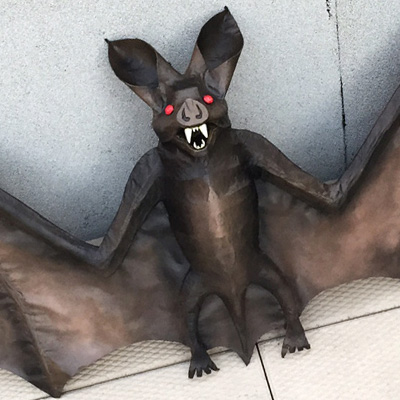
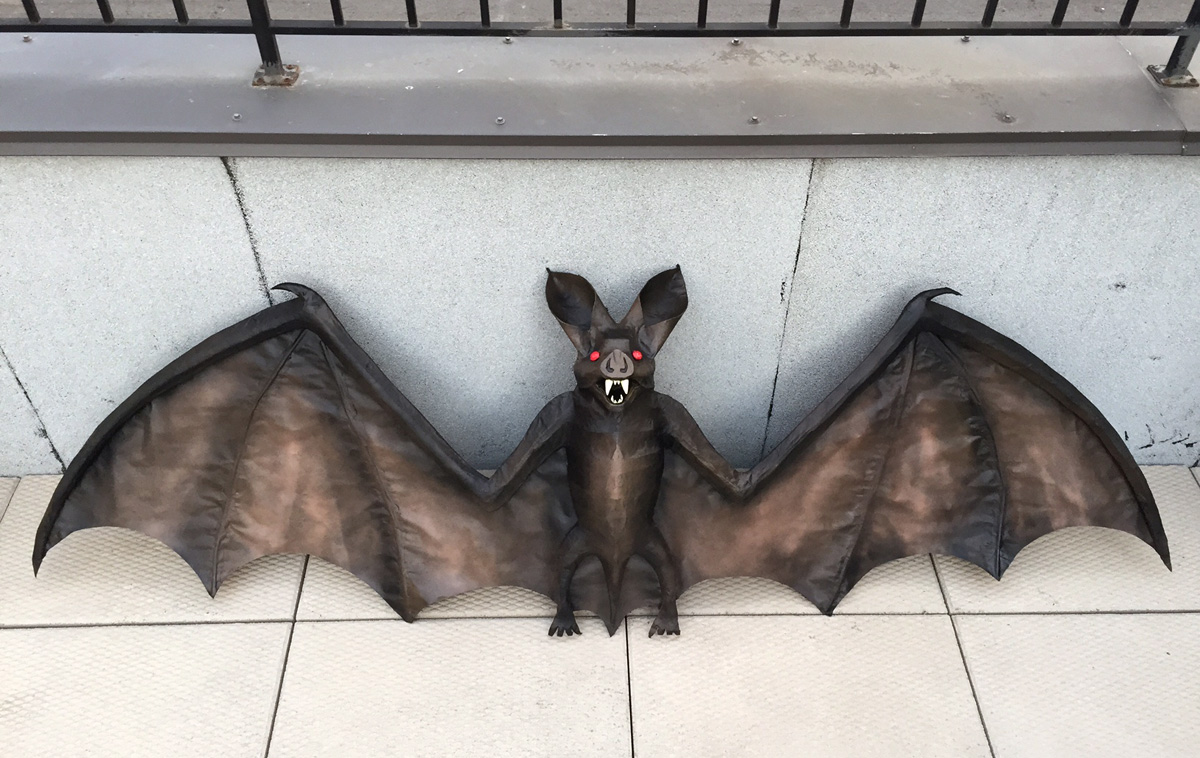
Now then, it’s time to paint!

I started my paint job on the bat by bringing him outside and protecting my work area with a cheap shower liner from the dollar store.
First, I simply applied a coat of black spray paint all over the whole bat.
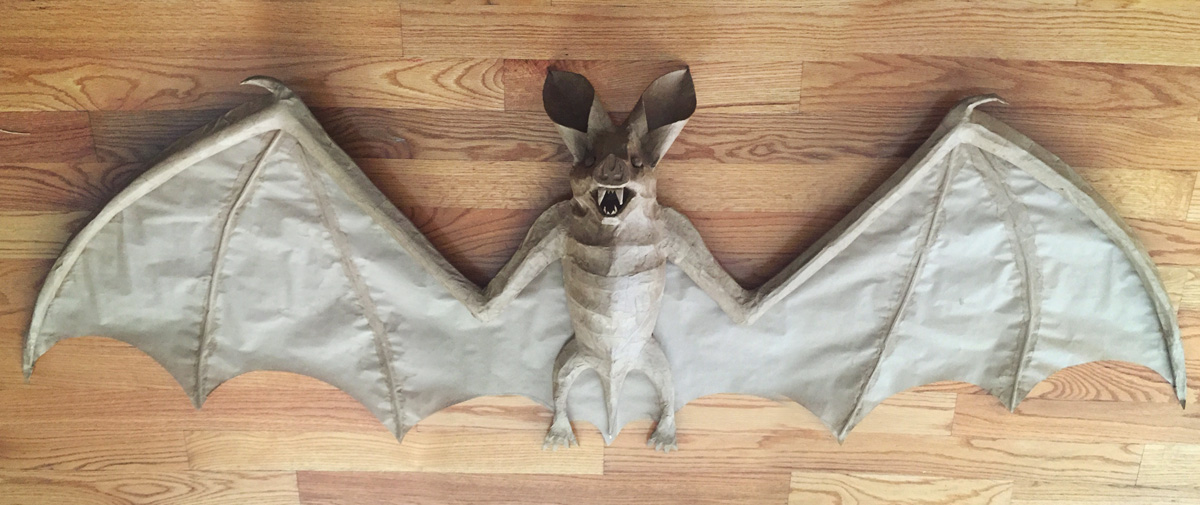
Making a giant paper maché bat decoration — part 2
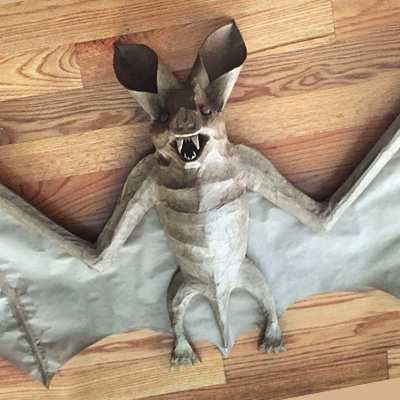
See part one of this paper maché bat project here. Now, where were we? When we left off, I’d just added the wing membranes, and the head was nearly finished but not yet attached to the body.
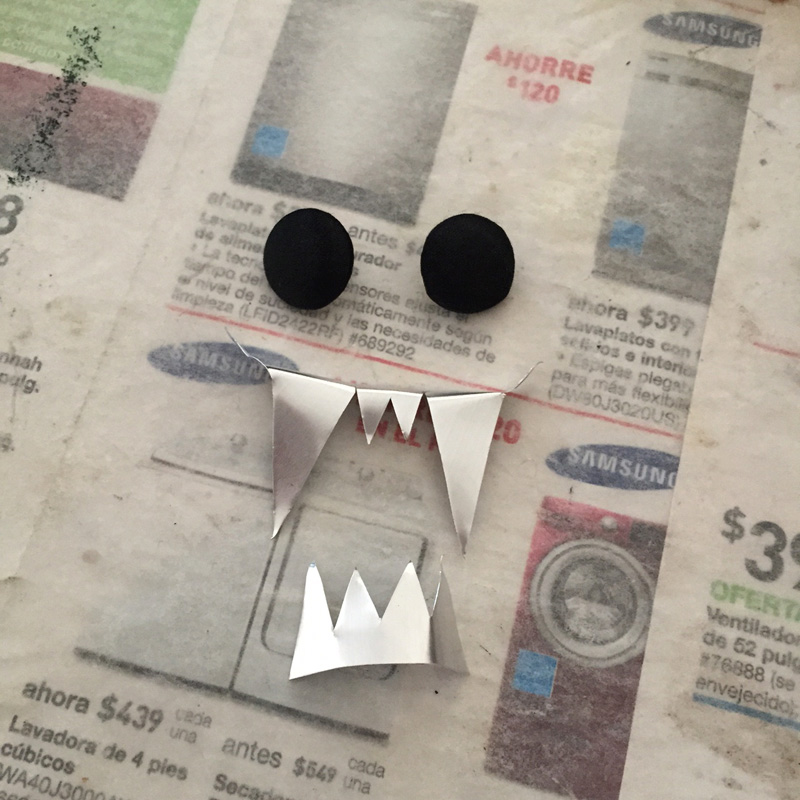
I cut the teeth out of an aluminum cookie sheet, and I put a layer of paper maché on them; this was very difficult and annoying because the shape was so small and intricate. For the eyes, I decided to stick with the buttons I’d been messing around with earlier, and cover them with paper maché so I can more easily paint them.
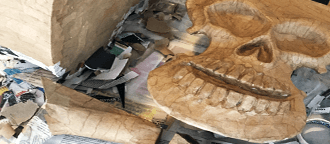
Devil Man mask with horns — part 1
(See the finished mask in part 2!)
For my Voodoo Bayou Halloween party, I’m going as New Orleans urban legend the Devil Man! The Devil Man struck fear into the hearts of New Orleanians in the early 20th century; he’s mentioned briefly in this great book called Gumbo Ya-Ya, along with tons of other bits of Louisiana folklore.
There’s very little info available about the Devil Man; the only three details about his appearance that are listed in Gumbo Ya-Ya are 1) he has black horns, 2) he has eyes like a chicken, and even weirder, 3) he has “ears like pink sunflowers.” What the heck? Nothing else is mentioned about the Devil Man’s appearance but I set out to make a costume based on these details. I’m making a mask with horns and sunflower ears, and I’ll be sporting yellow contact lenses. I’ll be wearing an ugly old suit and white gloves, and I’m adding a monkey tail to the suit — one other detail about the Devil Man is that he can transform into a baboon! Naturally.
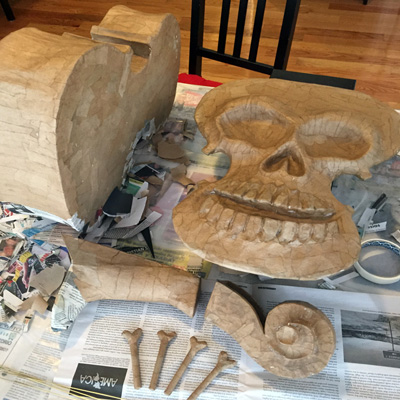
Voodoo skull staff

For our Voodoo Bayou party, my fiancée wanted to design a swamp goddess costume; basically a spooky nature spirit who protects the animals in the swamp and chases meddling humans away. She wanted to carry a staff with a human skull on top with various bones and beads and trinkets hanging off, and I put together this plan to create the staff for her.
Making a foam board coffin
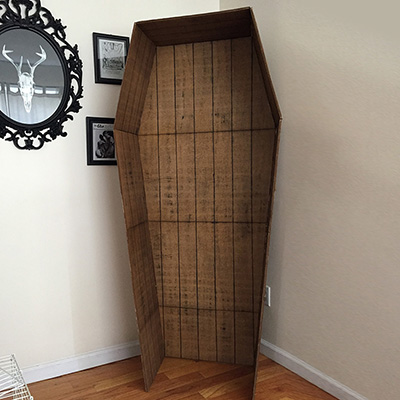
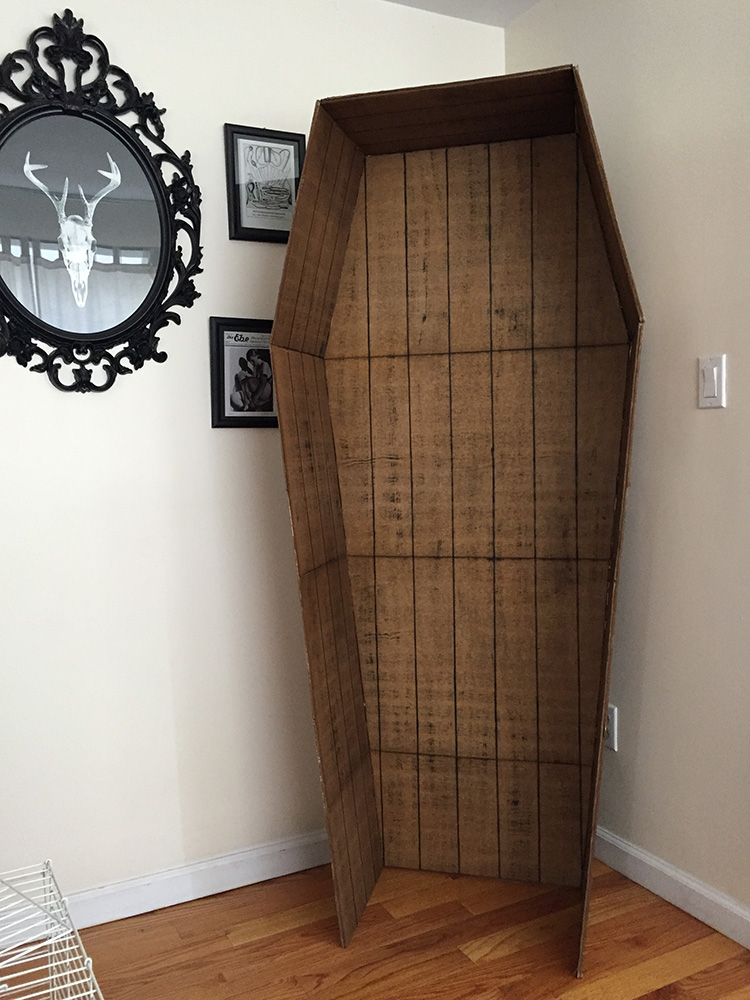
One of my main decorations for my Voodoo Bayou party was this fake wooden coffin; I wanted to have it standing in the corner of the living room so people could pose for pictures in it. The main material in the coffin is foam board — 17 sheets total. I designed the coffin in Photoshop based on how large each sheet of foam board is: 20″x30″. Here’s my basic design:
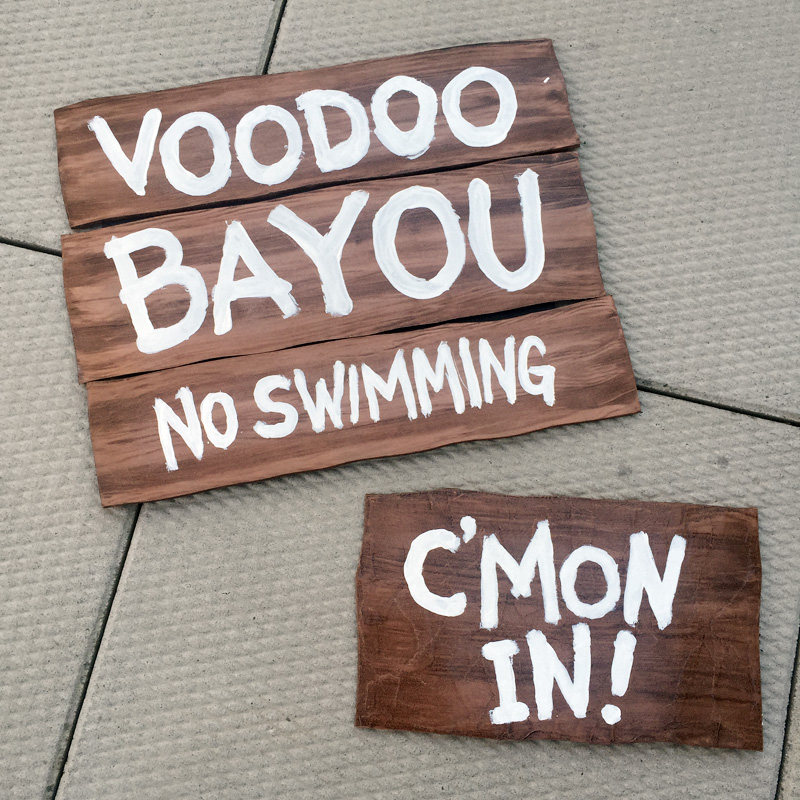
How to make a fake wood grain texture for signs and other projects
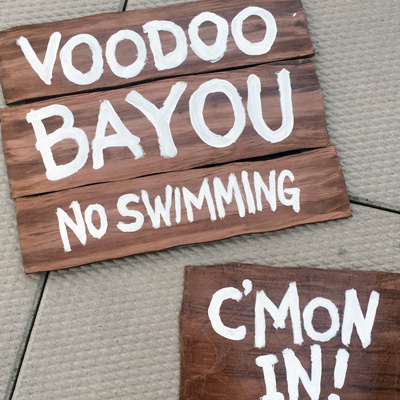
Believe it or not, these signs are just foam board! Plus a little spray paint and wood stain. I experimented with a few techniques, and here’s what I came up with…
For the big Voodoo Bayou sign, I started by cutting out my foam board shapes and spray painting them with a light tan color. You can see that color on the white foam board at left, below:
Six-foot Paper maché giant bat — part 1
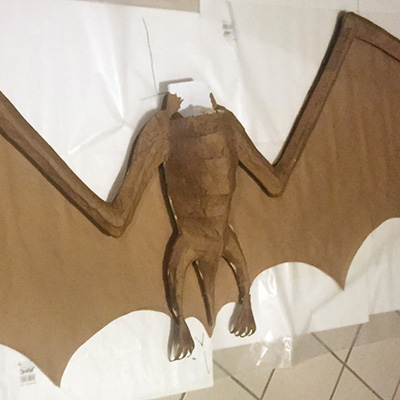
For our Voodoo Bayou Halloween party, my fiancée told me she wanted a giant bat decoration. Okay!
I started with a rough pencil sketch of a bat to figure out the proportions, and then I transferred that to two sheets of foam board. I started with just the wing bones and body; no head. I cut out those pieces with an X-acto knife.
Working with foam board for art projects; cutting, painting, etc
I use foam board (aka foam core) in almost all my big projects — masks, Halloween decorations, etc — and I’ve learned a lot of techniques that help make working with it a lot easier.
First, check out my article about buying cheap foam board in bulk. I’ve found that the cheap stuff is much easier to work with, and it’s less than half the price of the good stuff you’d buy in an art store!
Craft materials — choosing the right brands and saving some money

I use a few basic craft materials in all my big masks and decorations, and I’ve experimented with a lot of brands over the years. While I try to be cost efficient with all my projects, I’ve come to realize that for certain materials you can definitely use cheap stuff with great (or even superior) results, while for other materials you’re much, much better off buying high quality stuff. Here’s a rundown of the stuff I use and what I’ve learned about the various qualities that are out there.
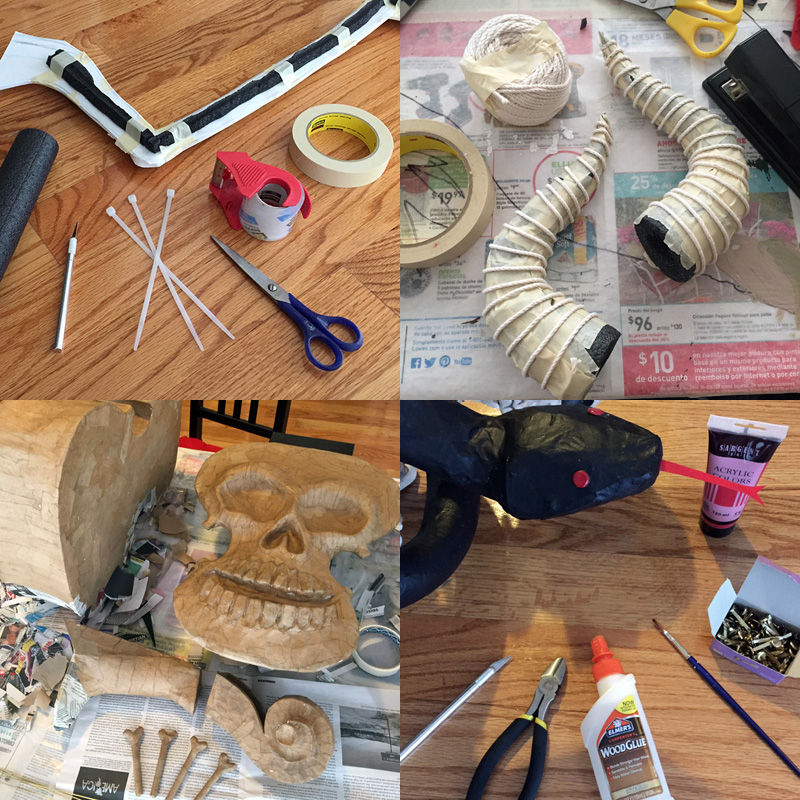
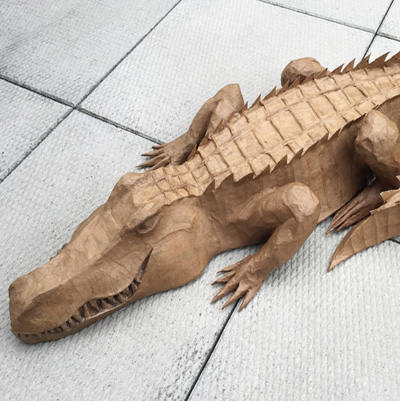
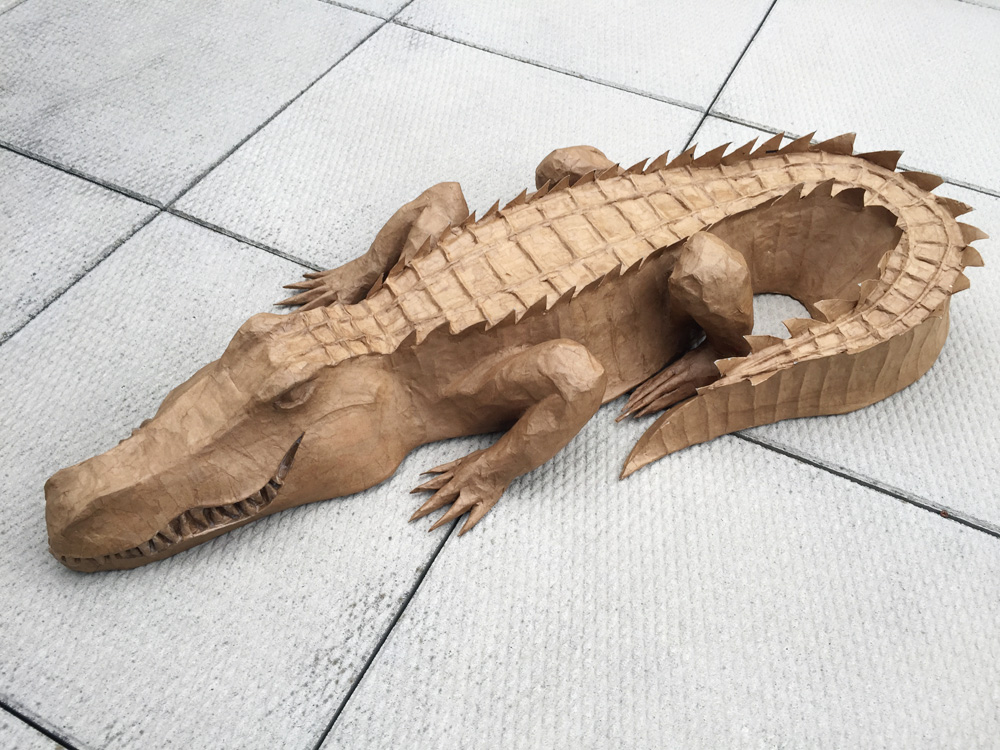
Paper maché alligator — waterproofing and painting

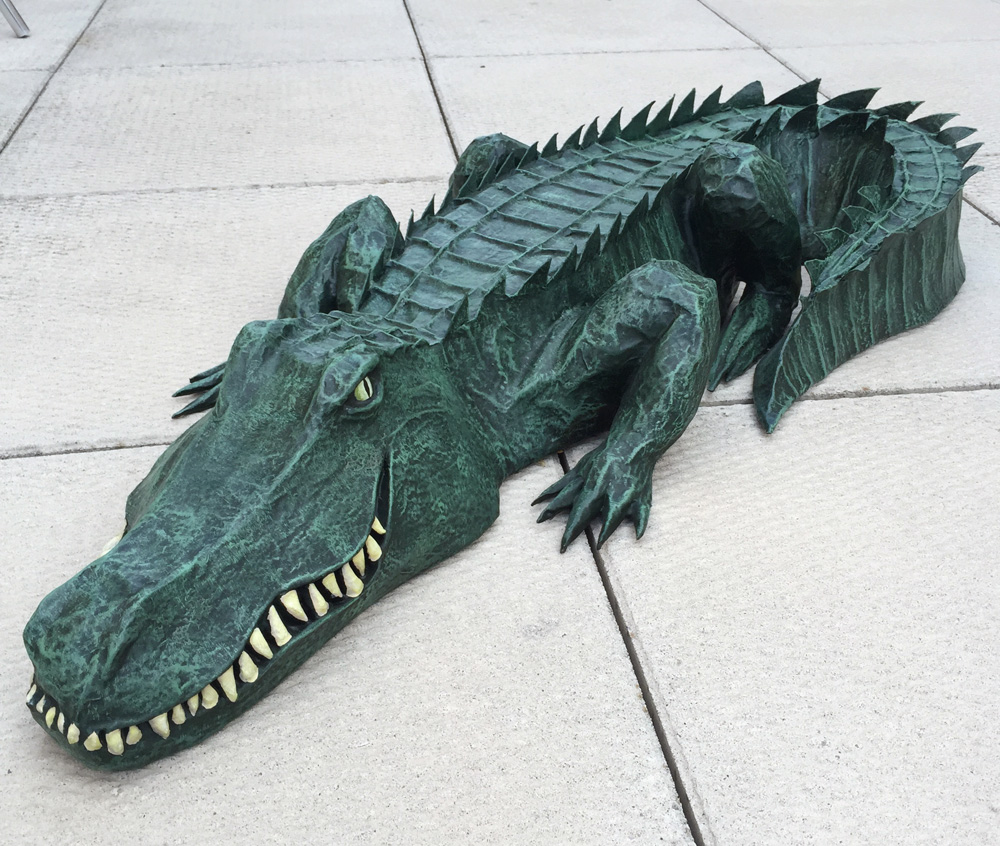
It’s finally done! This is part three of my paper maché alligator project. See part one and part two.
With all the paper maché done, it was time to waterproof and paint the alligator. Originally this guy was just meant to go in the bathtub during my Halloween party and then get thrown out, but as I made the thing I got pretty attached to it, so now I’m hoping to be able to waterproof it well enough so that it might not be in too bad shape after being submerged in water during the party, and maybe I can keep it and use it as an all-year-round decoration in my apartment, maybe on top of my bookshelf, or hanging on a wall. So I’m trying to approach decorating this thing like it needs to look good not just in the tub but anywhere.
Read more…
Making plastic bones look aged and dirty
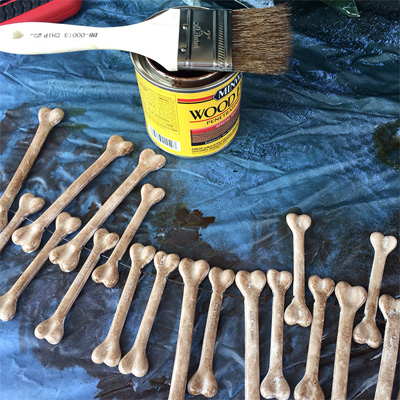
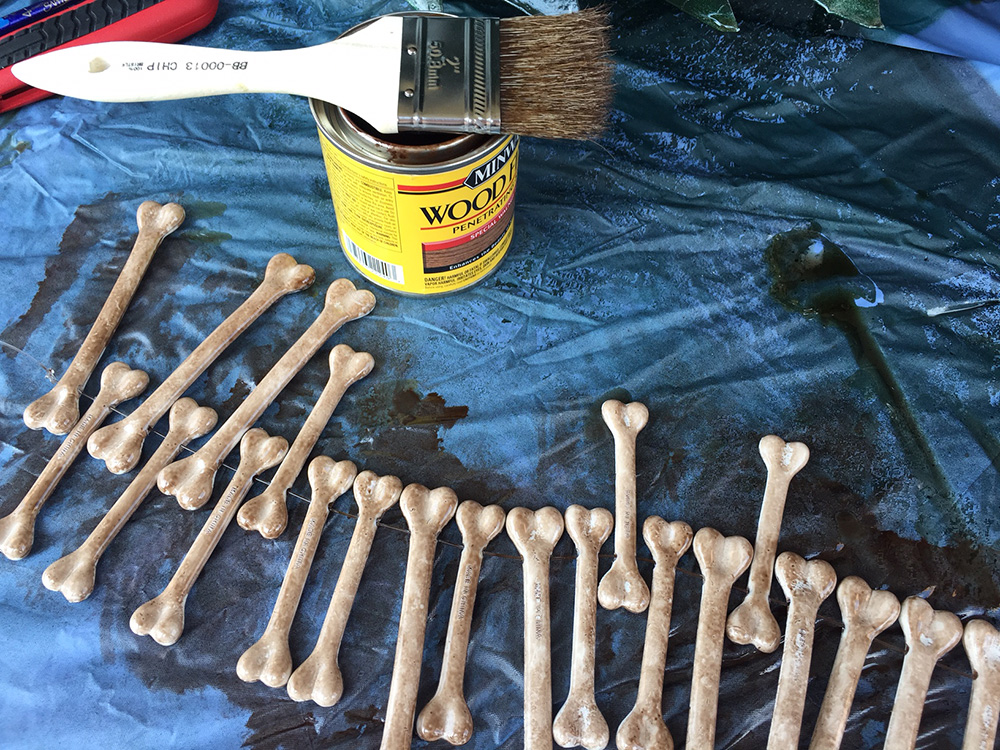
For my bayou/voodoo-themed Halloween party, I ordered a hundred little plastic bones; I wasn’t sure what I wanted to do with ’em, I just knew I wanted ’em! They were pretty cheap; I got ten packs of ten bones for a total of about $22 from some online party supplies store.
When I got the bones, they were pure white and smooth and shiny, and I wanted to make them look old and dirty before incorporating them into my decorations. This is what they looked like right out of the package:
Read more…
Evil mechanical dolls Halloween costumes!


These were my fiancee’s and my costumes for Halloween 2010. They were our first-ever his-and-hers couple’s costumes, and we threw them together pretty last-minute! The only complicated/time-consuming part was the paper maché turnkeys that went on our backs. I had never done paper maché before and had no idea what I was doing, so they ended up having really rough, uneven surfaces. The base for the keys was foam board and poster board, all taped together and then paper maché’d over, then painted silver with acrylic paint.
Read more…
Paper maché alligator, part 2
This is part two of my paper maché alligator project for Halloween. Part one can be found here. When I last left off, I had just applied Activa Plus clay to the alligator’s head in order to create the teeth, eyes and eyebrow ridges, and nostrils. So my next step was to paper maché over those bits; easy. See my article about my paper maché method here. The short version is: I use Roman PRO-543 universal wallpaper adhesive (paid link) and alternating layers of newspaper and brown wrapping paper. Read more…
Cabaret de L’Enfer Halloween party

The theme for my Halloween party in 2012 was the Cabaret de L’Enfer — a real Hell-themed café in the red light district of Paris in the 19th century. You can read all about it and see some amazing pics of it on my Paris website, Cool Stuff in Paris. Of course our color scheme was red/orange/yellow, and the centerpiece for the party would be the iconic devil mouth doorway that graced the entrance of the Cabaret. But first, here’s the animated invitation I made for the party. (It has audio, and it’s made with Flash so it won’t work on your iPhone/iPad.)
Read more…
Sunken ship Halloween party aboard the RMS Albatross!

This was my Halloween party theme in 2011! Halloween in a sunken cruise ship! Basically an underwater Titanic-type thing. Our color scheme for this party was blue and green, and we made tons of decorations to go with the theme of a formal ball underwater. Here’s the animated invitation I made. (It has audio, and it’s made with Flash, so it won’t work on an iPhone/iPad.)
Read more…
My nightmare-themed Halloween party

The theme for my Halloween party in 2013 was: nightmares! The name of the event was Night Terrors, and I chose purple and green as my main color scheme for the party. Here’s some info about the decorations we made, our costumes, the animated invitation, etc.
Invitation — I create a short animated invitation for my Halloween party ever year; it really helps set the mood and establish the color scheme and give people some inspiration for their costumes. Here’s the invitation I sent out for Night Terrors. Note: there is audio. Also, it’s made in Flash, so it won’t work on an iPhone/iPad.
Read more…
Haunted asylum Halloween party theme

The theme for my Halloween party in 2014 was: haunted insane asylum! I made up a name for our old-timey asylum: Tranquility Meadows Lunatic Asylum, and I chose red as my main color for the ambiance of the party. Here’s some info about all of the decorations we made, our costumes, and the animated invitation we sent out, all with the goal of fleshing out the theme and establishing a great spooky mood for the event.
Invitation — I make an animated invitation for each of my Halloween parties; it really helps set the mood and establish the color scheme and give people some inspiration for their costumes. Here’s the invitation for the haunted asylum party! Read more…
 About Manning Krull
 How to make a 4-foot paper maché alligator
 My violin skull mask, Mardi Gras 2015
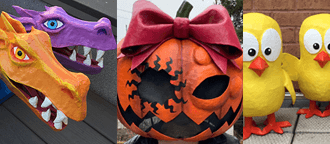
 Three-headed paper maché dragon sculpture