
"Gras-goyle" gargoyle costume part 7: thoughts on painting and color
Published March 8th, 2025
You may be surprised to hear this from me, but I'm nervous every time I'm painting a project, and I'm never very confident I can get the paint job to look the way I want. By contrast, when it comes to sculpting/building complex shapes, I can dive in with confidence and usually create something that's very close to what I've envisioned. But for painting, I'm always guessing, always nervous, and usually somewhat surprised with the result — often happily surprised; sometimes not.
I used a few different techniques for painting all the pieces of this gargoyle costume, and I learned a few things along the way, as always.
Thinking about color scheme
In designing the whole color scheme for this costume, the purple suit was my starting place. For whatever it's worth, almost all of my costumes are designed around a traditional men's suit. I knew I wanted the gargoyle and column to be mostly purple, with some accent colors, so I started by shopping for a purple suit, hopefully something vibrant and not too dark. I landed on this purple suit (paid link) and ordered it.
When the suit arrived, my next step was to find a color of spray paint to match the suit as closely as possible. I often use Montana Gold spray paint (paid link) because they have a very wide range of colors. Here's their color chart for the Gold series; scroll down a bit to find it.
I ordered two different shades of purple Montana Gold paint that I thought might match the suit. One was way off, but the other one, called Teen Spirit (ha), was close. So I ordered five more cans of Teen Spirit purple, for a total of six. This turned out to be more than I needed — more on that coming up — but I would definitely rather err on the side of caution, and I can definitely use the remaining cans for other projects.
The first part of the costume that I'd completed and spray-painted with the Teen Spirit purple was the gargoyle wings, and once they were painted I compared them with my purple suit. As I pretty much expected, the colors weren't a perfect match. I already had a plan for what to do in this case, and it was: to paint the suit. Wait, really? Yes.
If I were a really expert painter (see my first paragraph, above!) I might have tried to mix up a large quantity of paint that perfectly matched the suit, and then applied that to all of my many paper maché pieces for this costume. But I'm not an expert painter, so I did the opposite: I spray-painted the suit (well, just the jacket) with the Teen Spirit purple spray paint. This is a dumb solution, not an elegant one, but it totally works for a dumb monster costume.
Painting the jacket
So, I should mention, I ultimately decided to just paint the jacket and not the pants. The pants won't be visible most of the time, since my legs will be hidden in the column, and I don't really care if the jacket and pants don't perfectly match when I eventually take the column off. Also, painting fabric tends to make it much stiffer, and that's not too annoying for a jacket, but it would definutely be annoying for pants.
To prepare the jacket for painting, I hung it on a clothes hanger that I was willing to get paint on, and then I ran a long piece of foam pipe insulation tubing through both arms. This allowed the arms to stick out, not quite perfectly straight, but mostly straight and sagging down a bit. This step was important because if I'd just spray-painted the jacket as it hung normally on a hanger, the sleeves would have lots of folds that wouldn't get painted, and the paint would also miss the underside of the sleeve, as well as the sides of the jacket where the sleeves hang.
I didn't immediately spray paint the jacket with the Teen Spirit purple. I first sprayed it with a light coat of white spray paint. Then I let that dry for an hour or so, and then I spray painted the jacket purple. Why? Because spray-painting fabric this way doesn't create a totally opaque effect. So it's more like I started with a jacket in one purple shade, and then applied a semi-transparent coat of white to it, and then a semi-transparent coat of the final purple color. So the layered effect gets me as close to my Teen Spirit purple as possible; definitely closer than the original jacket color, and absolutely close enough.
Backing up: why start with a purple jacket if I was just going to end up painting it? Again, it's the layered effect. If I'd started with, say, a black jacket, the final color would've been a very dark purple. If I'd started with a white jacket, the final color would've been a very light lavender. The starting color of the fabric plays a big role in what the final color will be after painting.
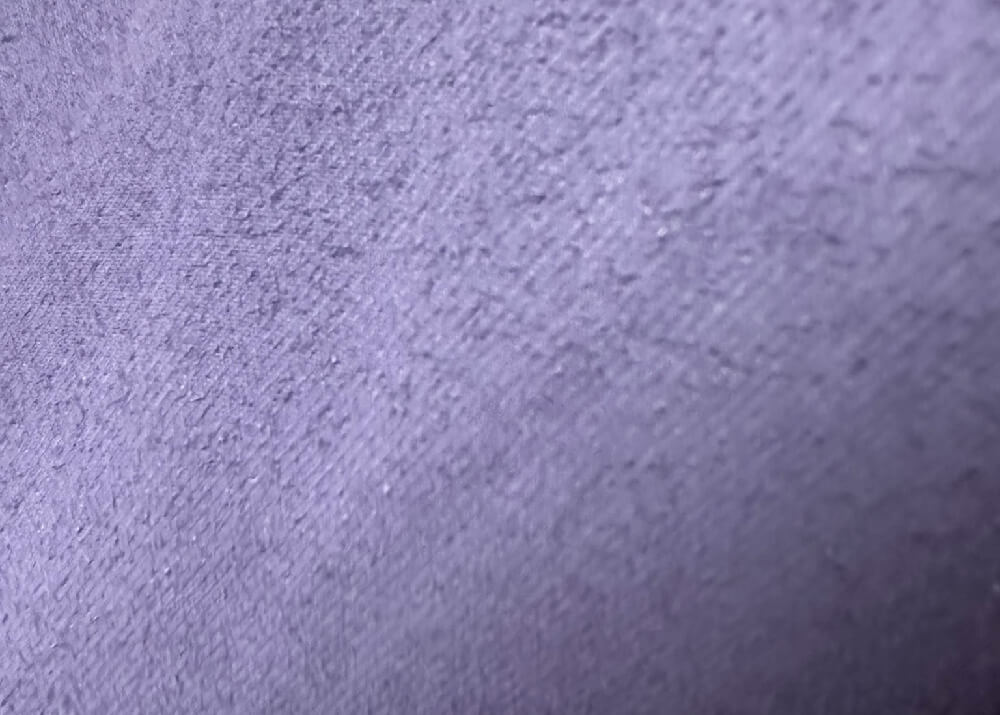
One thing that happens when you spray-paint fabric is all these tiny little shapes appear, covering the surface and maing it kind of rough-looking. This is because there are tiny fibers sticking out of the fabric all over; normally these aren't visible, but when you apply spray paint they get thicker and become visible; almost like tiny pills on a sweater. Like I'd mentioned above, painting a suit this way is not an elegant solution. I was okay with the rough texture for this costume.
Okay, that's all for the jacket; let's talk about painting the rest of this costume...
Painting the paper maché parts
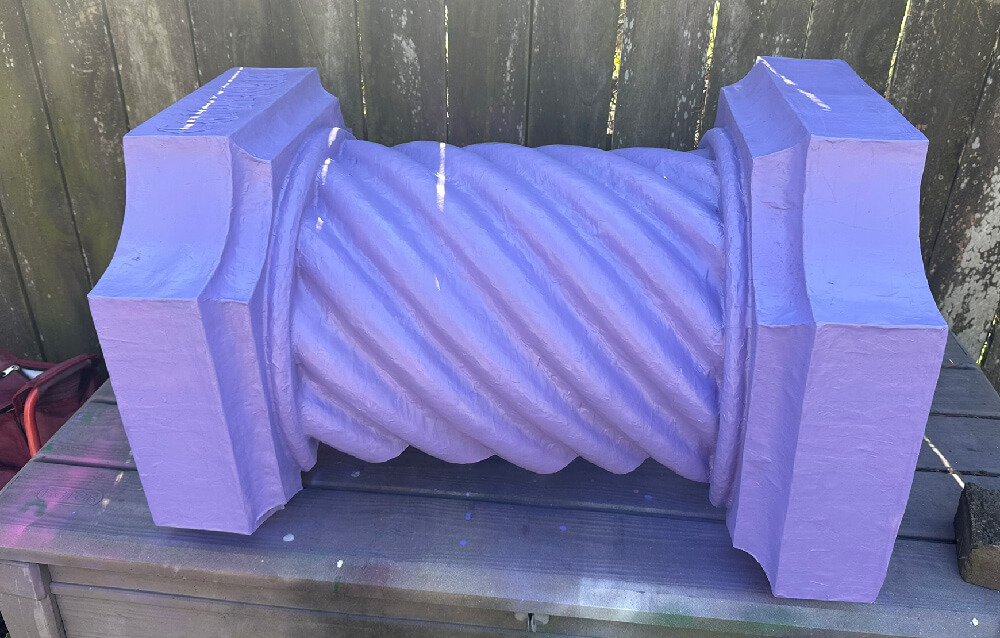
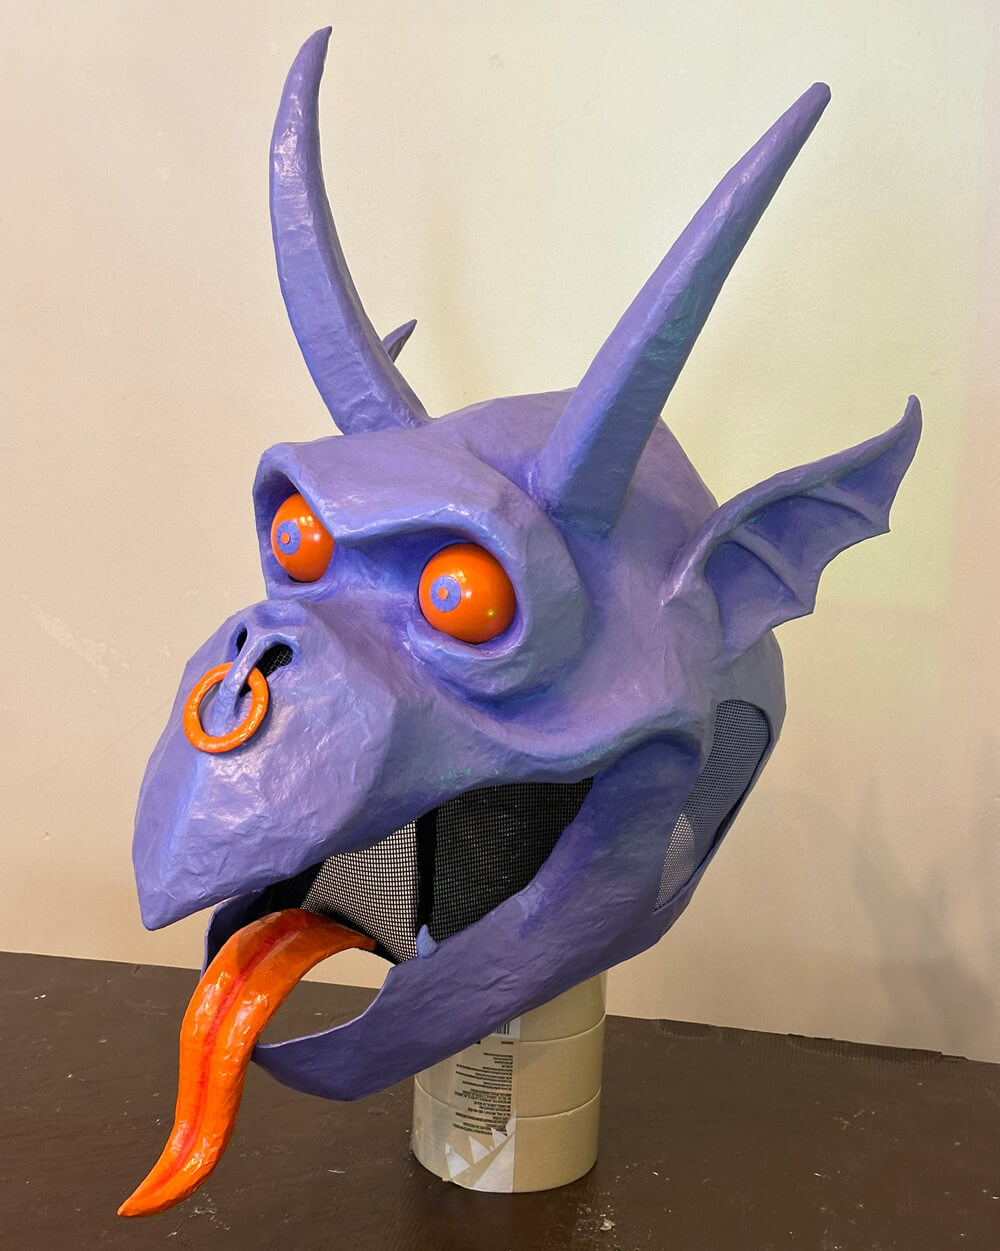
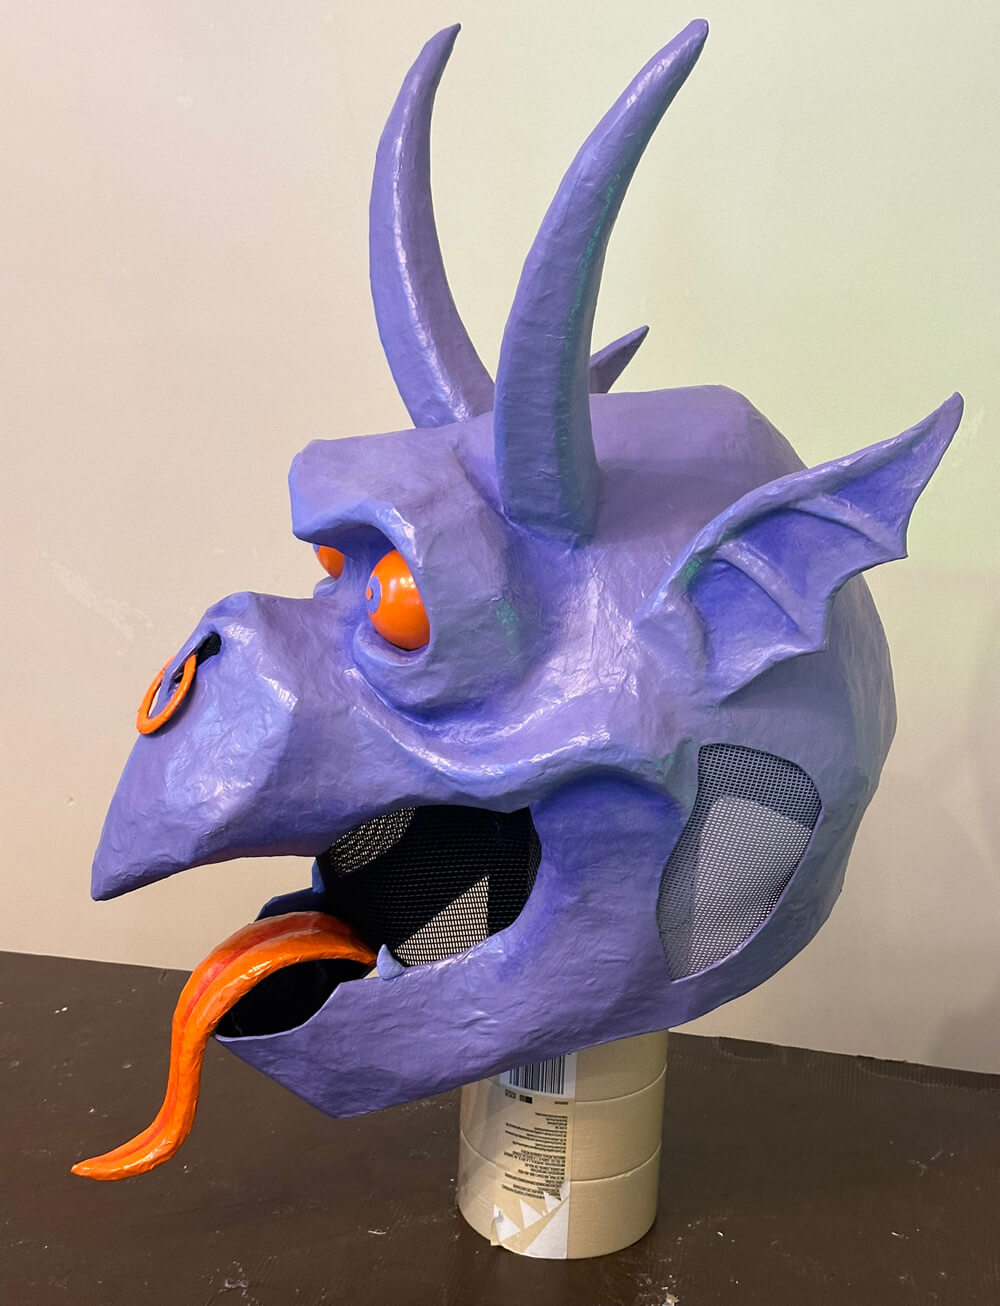
The other parts of the gargoyle costume are all solid paper maché sculptures: the gargoyle mask, the wings, the column, the legs/feet, and the hands. I'd strategized my paper maché process for all of these pieces to end with a layer of white paper, since a white surface is best for painting bright colors onto.
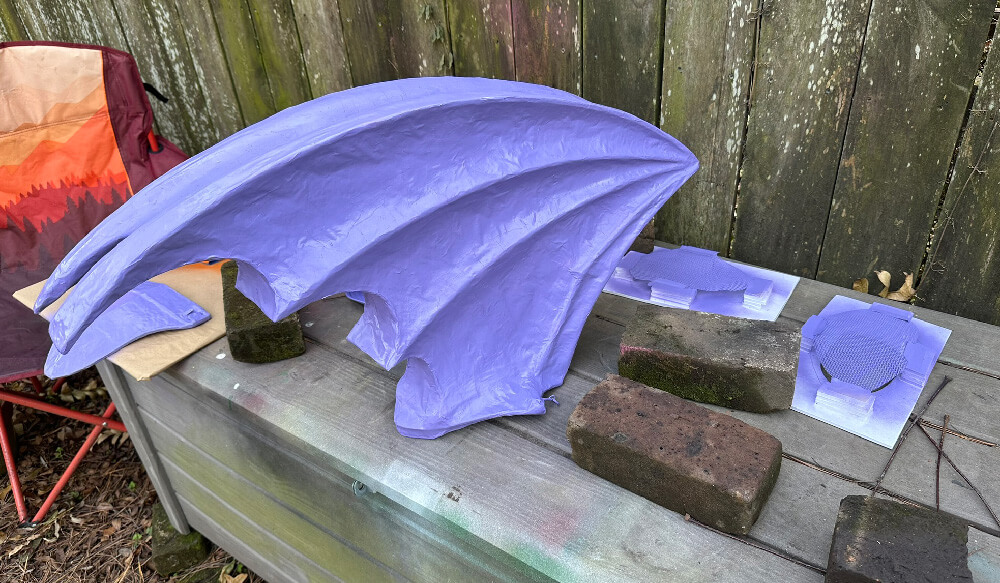
I started my painting process for all of these paper maché pieces by spray-painting them all over with the Teen Spirit purple color.
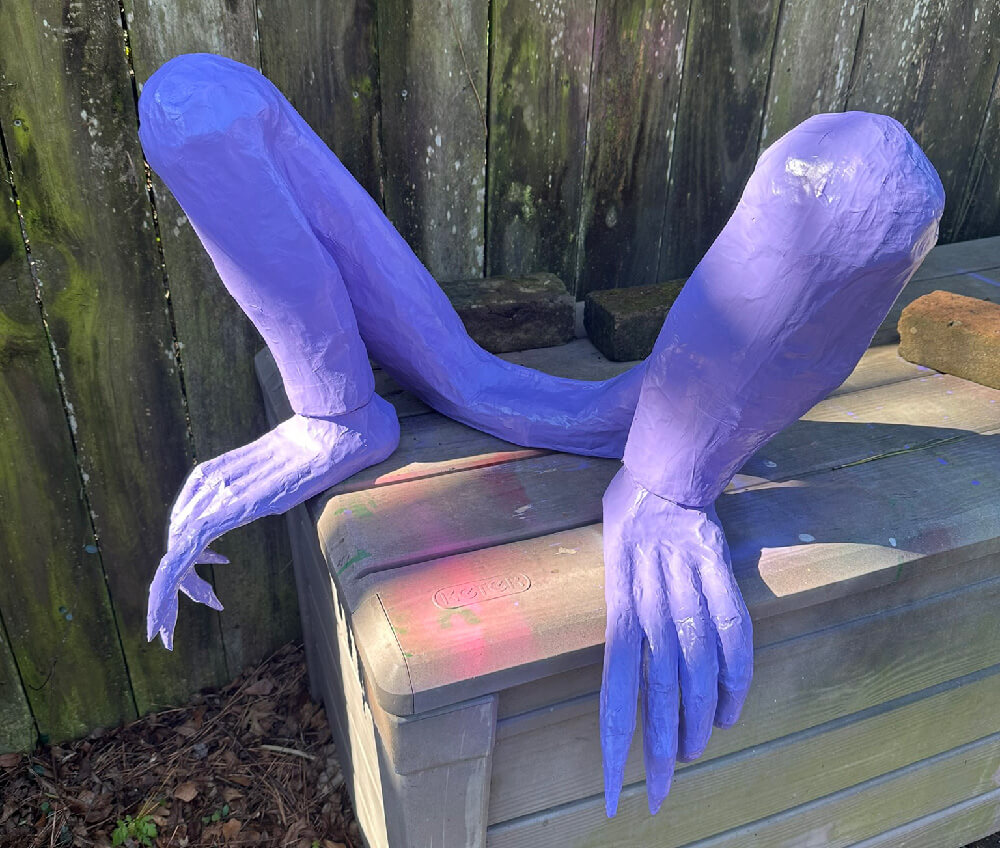
I let the spray paint set for a full 24 hours before continuing.
For my next steps, I used Liquitex acrylic paint (paid link). I bought a couple bottles of a light purple color, called Brilliant Purple (paid link), which was somewhat close to my main Teen Spirit color but definitely not a super-close match; the Brilliant Purple is quite a bit warmer. No worries, it was a good starting place for the next steps. I also bought this great set of twelve bottles of various colors (paid link). That gave me everything I needed to finish the paint job on the gargoyle costume, and then some.
My basic painting set-up involves a few little one-ounce disposable cups, some wooden coffee stirrers for mixing, and some scraps of foam board or cardboard for wiping paint onto.
I poured a little more than half an ounce of Brilliant Purple into each of three one-ounce cups. From here, I would be mixing three different color variations: one that's as close to the Teen Spirit spray paint as possible, another for shadows, and another for very subtle highlights.
To create the middle purple color, I added a few drops of Primary Blue and some white to the Brilliant Purple and mixed them up. A little bit of trial and error with more drops of both blue and purple eventually got me to a color that was pretty close to Teen Spirit; close but not perfect.
I then mixed up a similar formula in the other cups as a starting place for the shadows and highlights. Then, for the shadow color, I added some drops of Dioxazine Purple (a very dark purple) and some more blue. For the highlights color, I added more drops of white.
When I was happy with these colors, I started painting! I always do shadows first, then correct things a bit with the middle color, then I do highlights, and then correct with the middle color some more. And then, sometimes, I repeat these steps a couple more times as needed until I decide I'm done. How do I know I'm done? That is a very difficult question. It usually involves me being somewhat satisfied and somewhat frustrated and generally too exasperated to continue.
I generally work with large, fairly stiff brushes. I put some paint on the brush, then wipe it on some cardboard to get most of the paint off, and then I roughly work the paint onto the surface, attempting to let the rough brush create a shape with a blurry edge. Once 99% of the paint is off the brush, I then use the paint-less brush to really rough up the painted areas, smearing and blurring the edges even more. That's how I do my best to get nice soft shapes for the shadows and highlights. Sometimes it goes great, sometimes not!
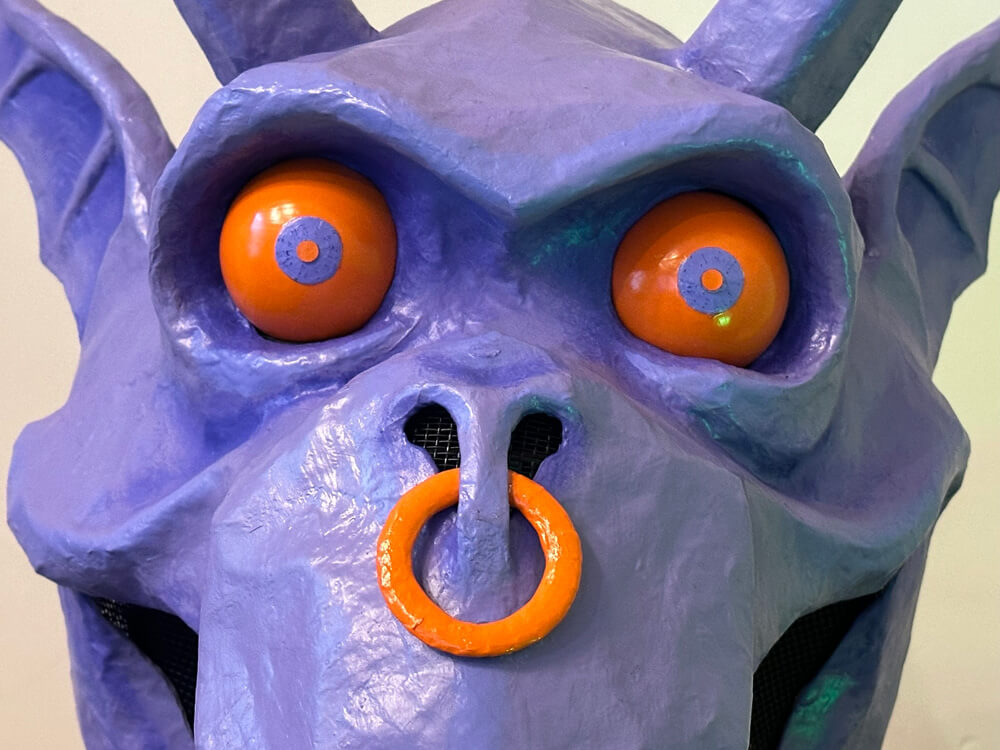
So, I applied shadows and highlights to all those solid paper maché pieces. My middle color ended up being weirdly a little cooler, i.e. a little more blue, than the Teen Spirit purple color. This actually gave a bit of unexpected depth and variety to all the pieces, so I just left it alone. The difference is definitely visible in person but may not be visible in these pics.
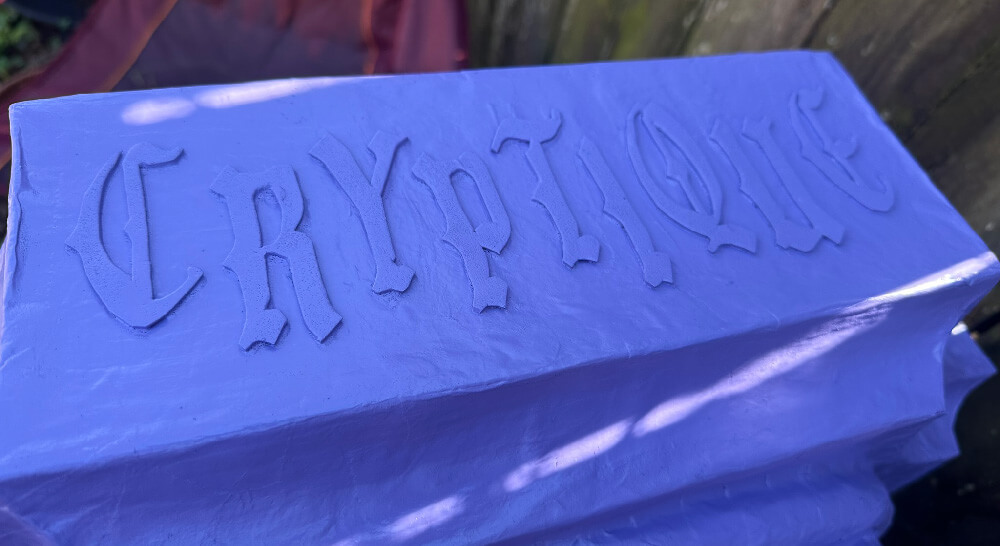
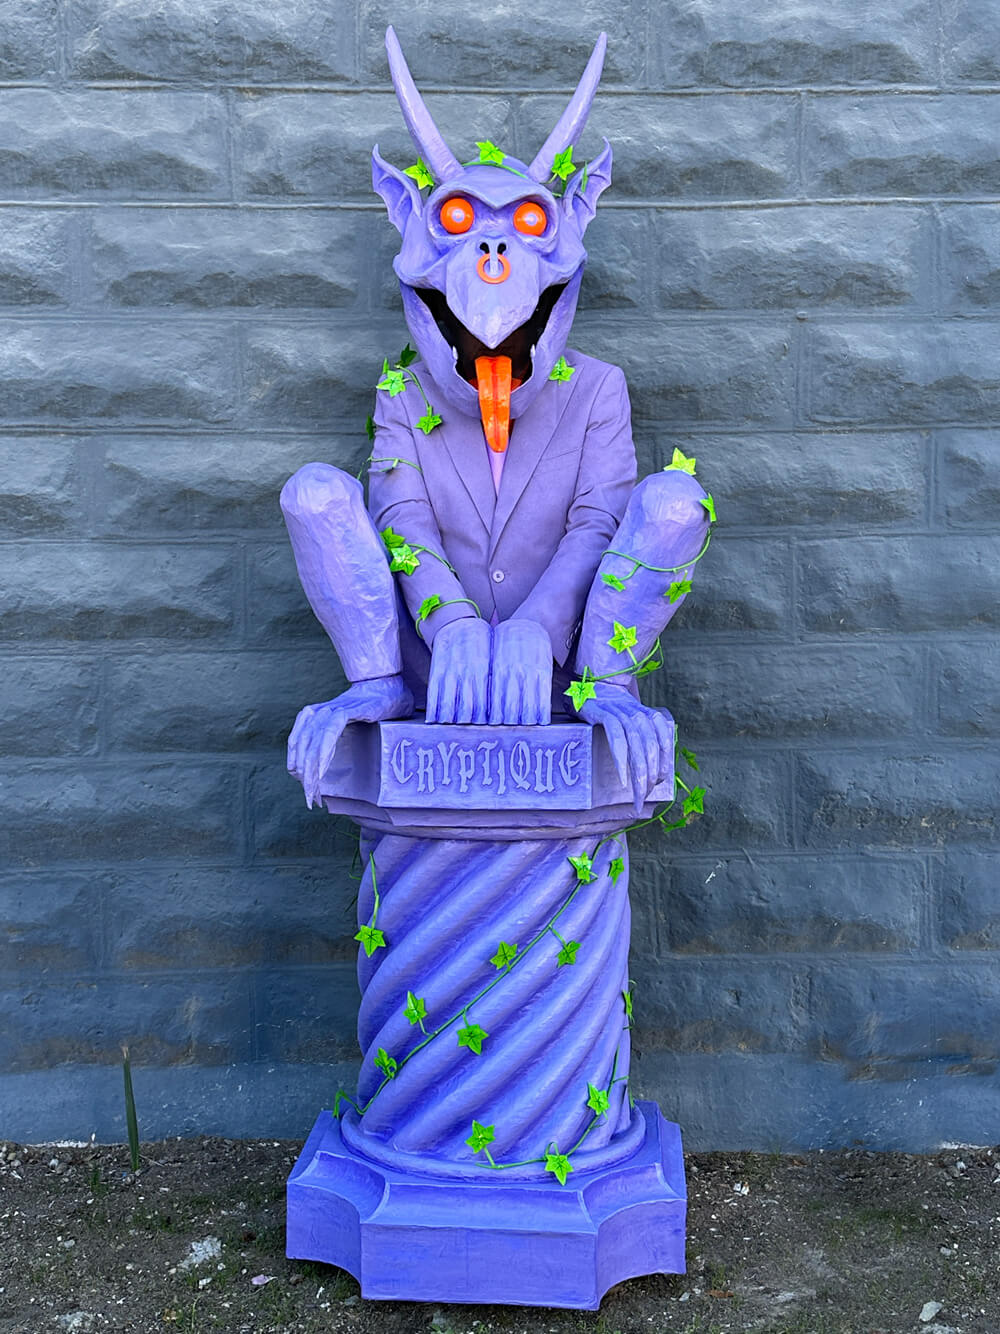
Painting the "Cryptique" letters
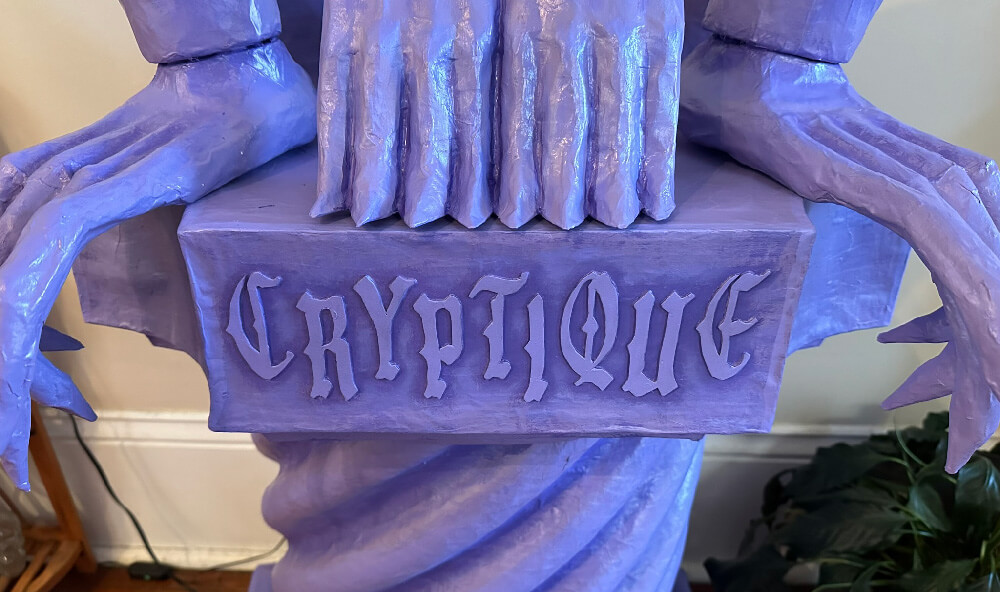
I'd cut out the letters from craft foam and glued them onto the column, so they have a nice raised surface with a very clean edge, and that made them easy to paint. I first painted the area around the letters with my shadow color, making sure to rub it all the way into the edges of the letters. A lot of the shadow color ended up on the letters themselves, which was no problem. Then I used my highlight color to carefully paint the raised surface of the letters. All of this gives the letters a nice crisp appearance, so they really pop even though the contrast is relatively low.
Secondary costume
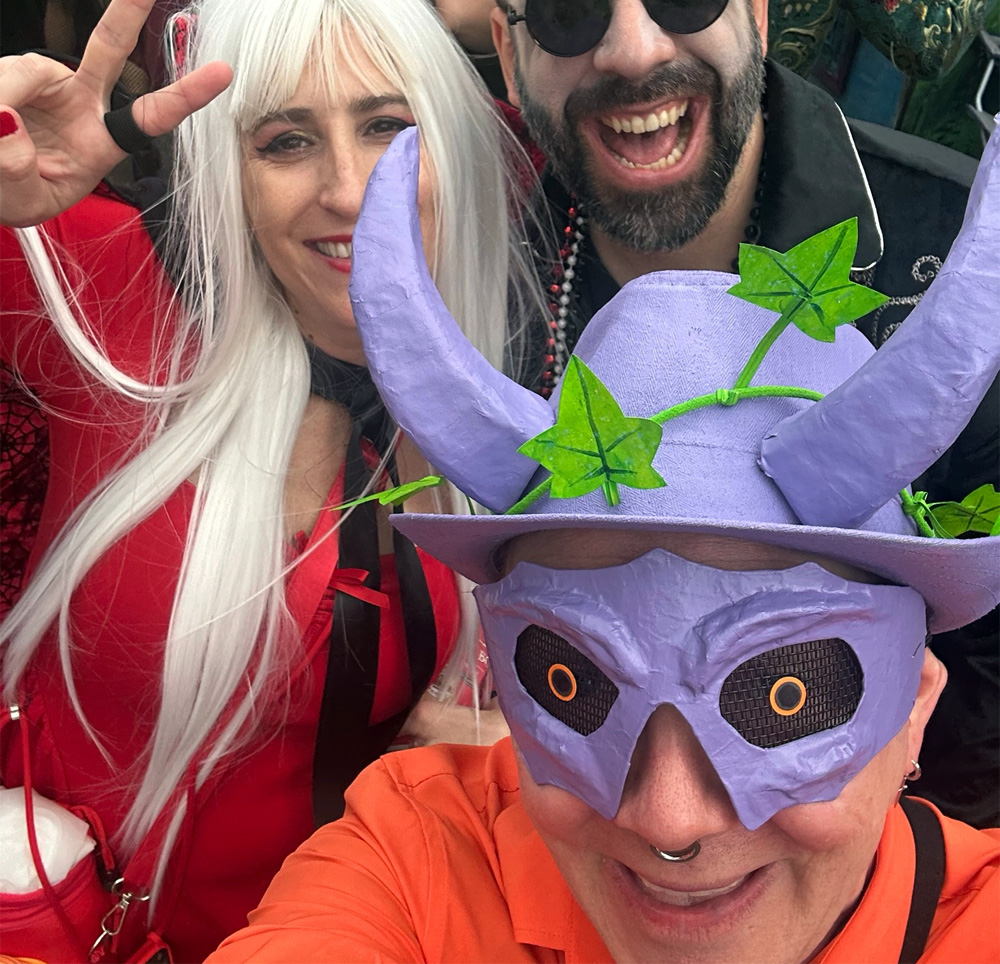
This year I made what I'm calling a "secondary costume," or parts of a secondary costume, to change into after Cryptique's parade. Here's the deal: every year I march with Cryptique on Mardi Gras morning in the French Quarter, but then we're done by like noon, and my wife and I go to a big street party in another neighborhood and spend the rest of our day there. We typically stage our car near all this stuff, so after Cryptique's march we can dump the big parts of our costume in the car and maybe change into different clothes if the weather is very hot or cold. Our secondary outfits always match our main costumes for the day, like in terms of color sceme, so this year we had the idea to also create some smaller, more practical costume bits to wear while we're out dancing and stuff for the rest of the day.
Anyway! I made this small mask, and I modified this hat. And as for a change of clothes, if it's hot I can ditch my jacket and I'll have a short-sleeved shirt (also orange) to change into.
Painting the hat
I'd ordered a light gray trilby off of Amazon, with the plan to paint it purple. I decided to try putting a coat of Mod Podge on it before painting, just to see if that might help keep the texture smooth; as noted above, when you spray-paint fabric, it tends to end up with lots of tiny little pill-like fibers all over it. So, Mod Podge, then a coat of spray paint. The Mod Podge did help keep the texture smoother, but not perfectly smooth. The Mod Podge combined with the spray paint also made the hat much more rigid, which was fine.
I wrote an article about the horns for this hat; it's here, and it also covers how I attached them. I spray-painted the horns before putting them on the hat.
The small mask I made is just a piece of LaCroix box, with some foam clay bits, all covered with just one layer of paper maché. When it was dry, I spray painted it purple.
I hot-glued some pieces of makeup pads behind the mask to make it more comfortable. I hot-glued some bits of screen in the eyes, and I used a large hole punch to make the orange dots; they come from an orange LaCroix box; no need for paint. I made the black dots with a smaller hole punch and black paper. Oh yeah, and I ordered some elastic off of Amazon that's specifically for masks; I stapled a length of it to the mask. Easy!
Purple stuff done!
Spray-painting all of the above pieces — the jacket, the mask (including the pieces of screen), the wings, the column, the legs/feet, the hands, the hat with horns, and the smaller mask — used almost exactly four cans of Montana spray paint. That stuff really goes far! I can't prove it but I feel strongly that the cheaper types of spray paint I use for most things — Krylon, Rustoleum, etc — get used up way faster. That might just be in my head though.
Additional colors
My vision for the overall color scheme for this costume was centered around purple, obviously, but also I wanted to include some orange and green pieces to give me a rough (very rough) approximation of the traditional Mardi Gras colors. More of a variation, really.
The traditional Mardi Gras colors are a purple that's much warmer than what I've used here, as well as gold, and a vivid middle green. I replaced the gold with orange and the green with a lighter, brighter green.
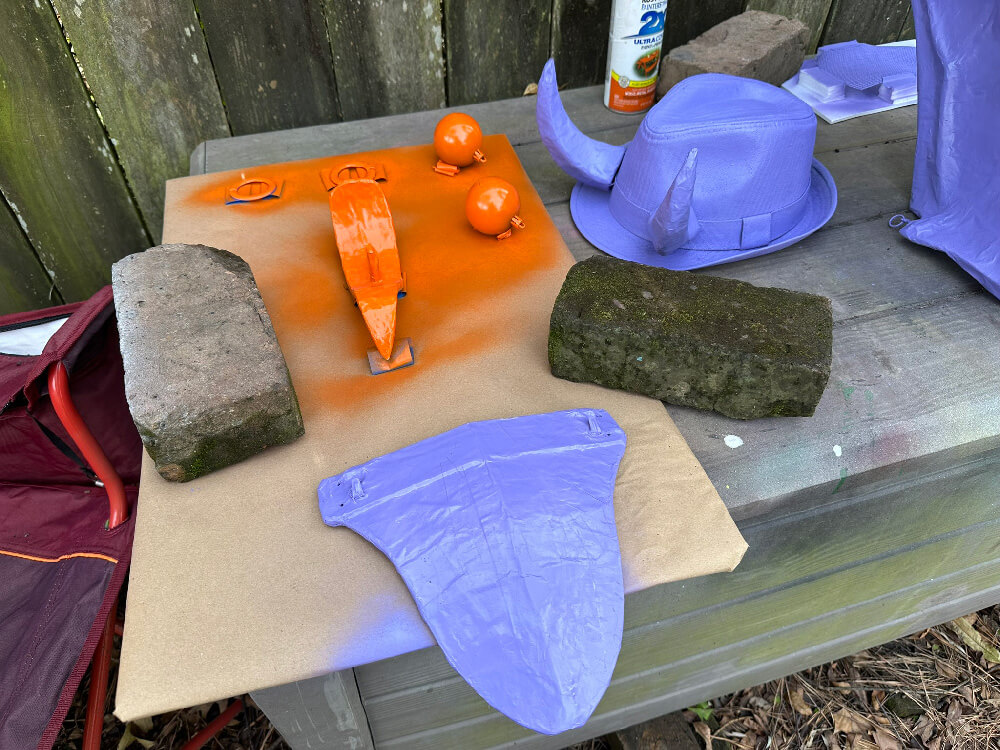
Orange stuff
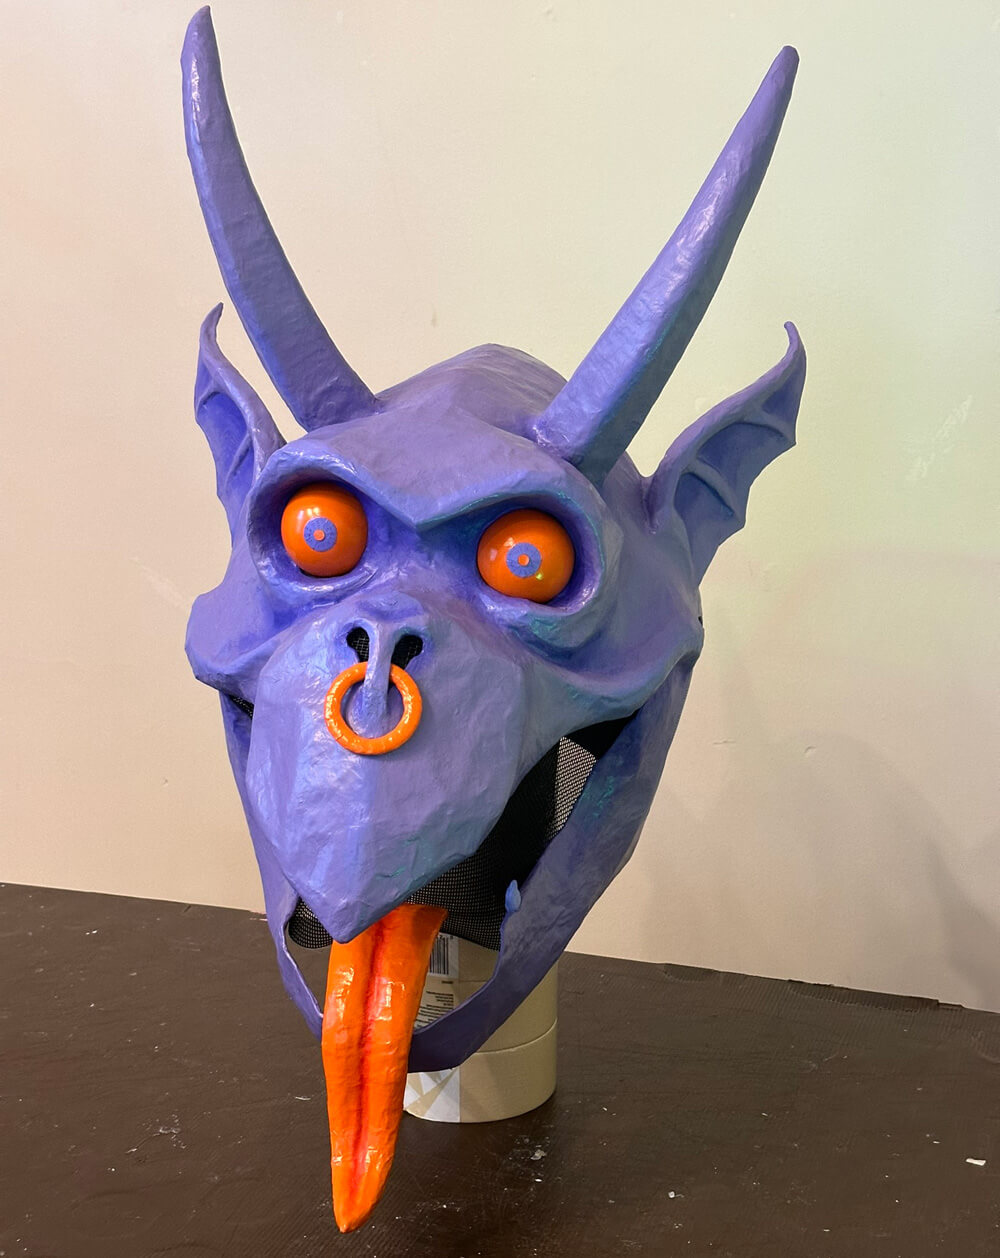
I used gloss orange spray paint for the gargoyle's eyes and nose ring and tongue; I talk about this in my article about finishing the gargoyle mask. I neglected to mention in that article, for the tongue, I dry-brushed a little bit of red Liquitex acrylic paint into the groove in the middle to create a shadow.
My costume included a bright orange shirt that ended up being basically invisible when I was wearing the full costume because of the way I had to squish my arms forward; this caused the jacket to be basically closed, so the lapels and my purple tie totally hid the orange shirt.
I also had orange fingerless gloves and orange socks. But I opted not to wear the gloves because it was a warm day, and of course the socks really aren't visible when I'm wearing the column.
Ivy
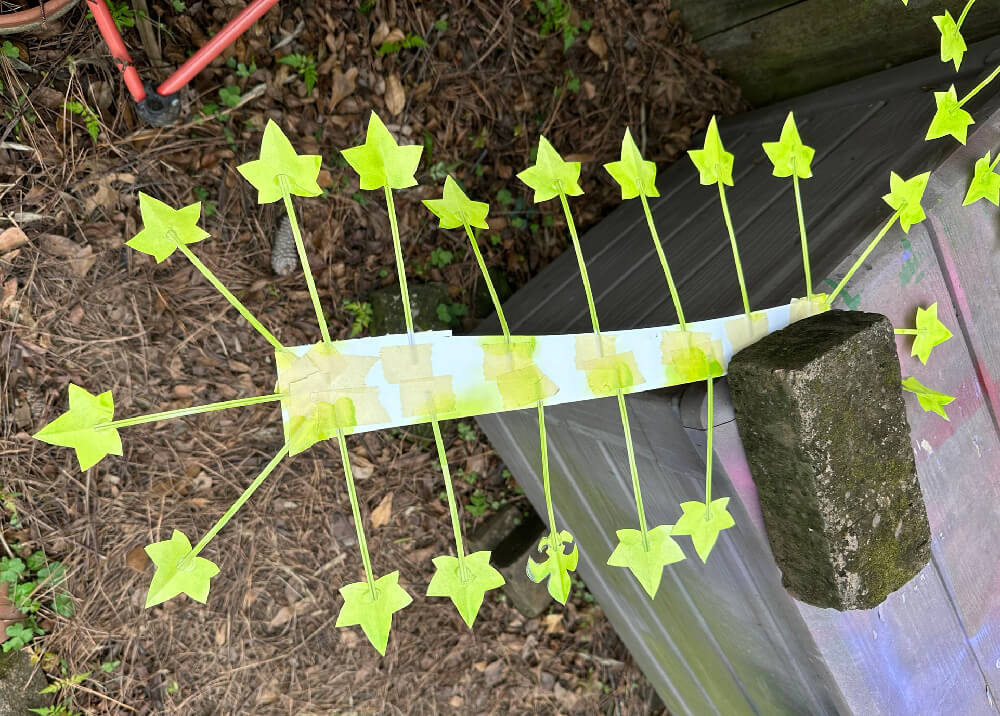
As mentioned in my previous post, I made the 90 stems and leaves for the ivy out of paper and twist ties. I taped these to pieces of foam board in rows so I could easily spray paint them. I spray painted both sides of the leaves and stems and let them dry. The spray paint didn't quite work out the way I wanted; the color was lighter and less opaque than I expected, so I let the leaves dry and then I re-painted them by hand with some acrylic paint I mixed up. I mixed a large quantity of paint because I'd also need it for the string (coming up).

I drew veins onto all the leaves with a darker green paint marker. I did this pretty sloppily and it went really fast! I let them dry a bit and then did the other side.
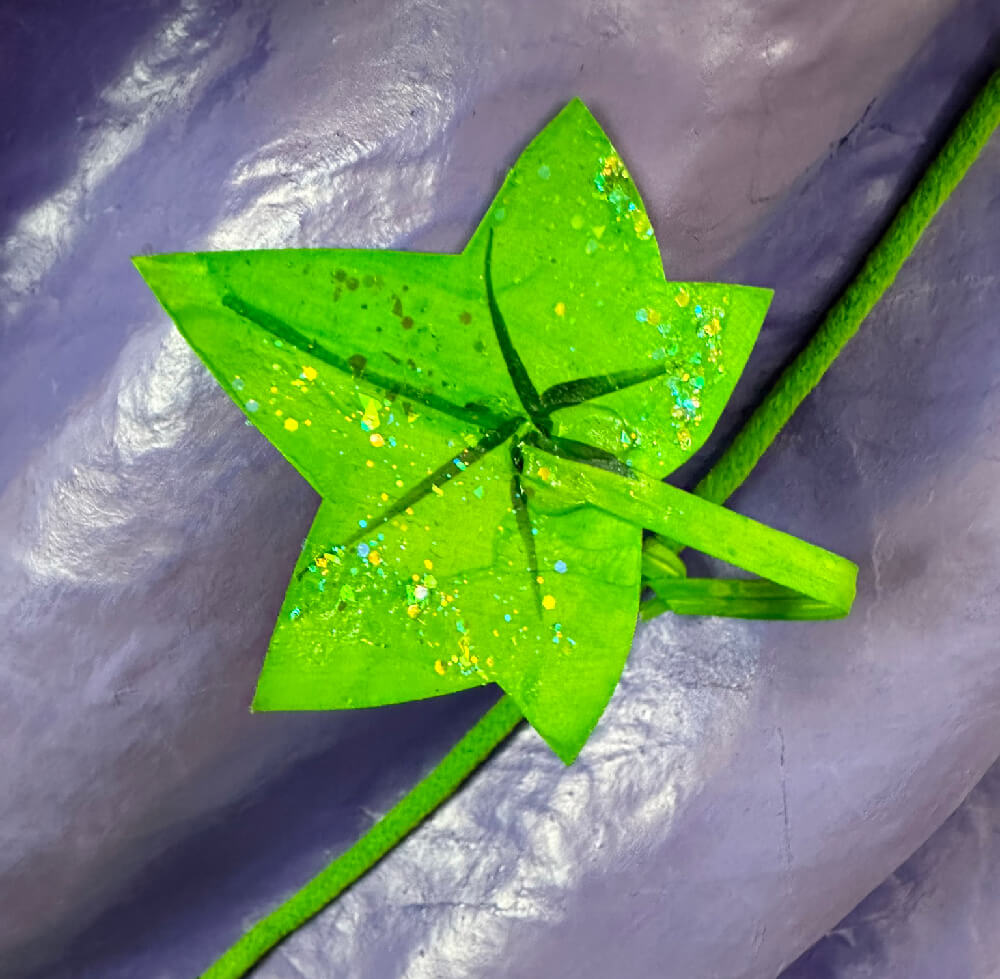
I painted glitter onto all the leaves by hand with this glitter paint stuff, which is really just green glitter suspended in a clear gel. I let them dry and then did the other side.
For the vines, I figured out ahead of time what lengths I'd need for the costume. I cut those pieces of macrame string (a little longer than I needed, just in case), and then I "painted" them green by putting a bunch of acrylic paint in a bowl and just using my hands (wearing nitrile gloves) to work the string through the paint and work the paint into the string. I then squeezed as much paint out of the string as possible and hung them on a clothes hanger to dry.
A nice thing about infusing (is that the word?) string with paint this way is that it also makes the string much more rigid; this helped when I was arranging the vines on my costume.
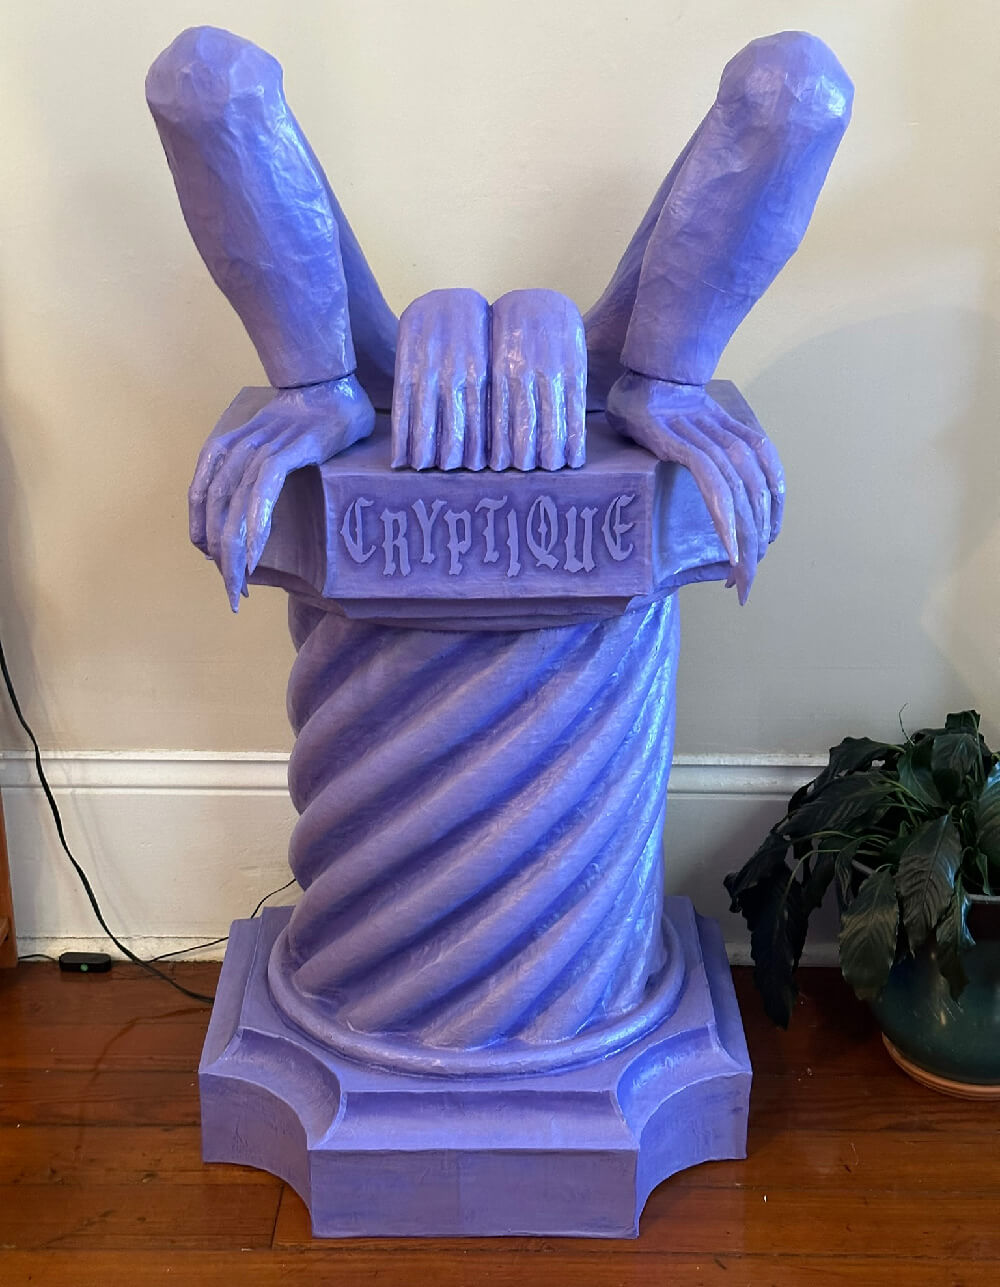
Am I finally... done?
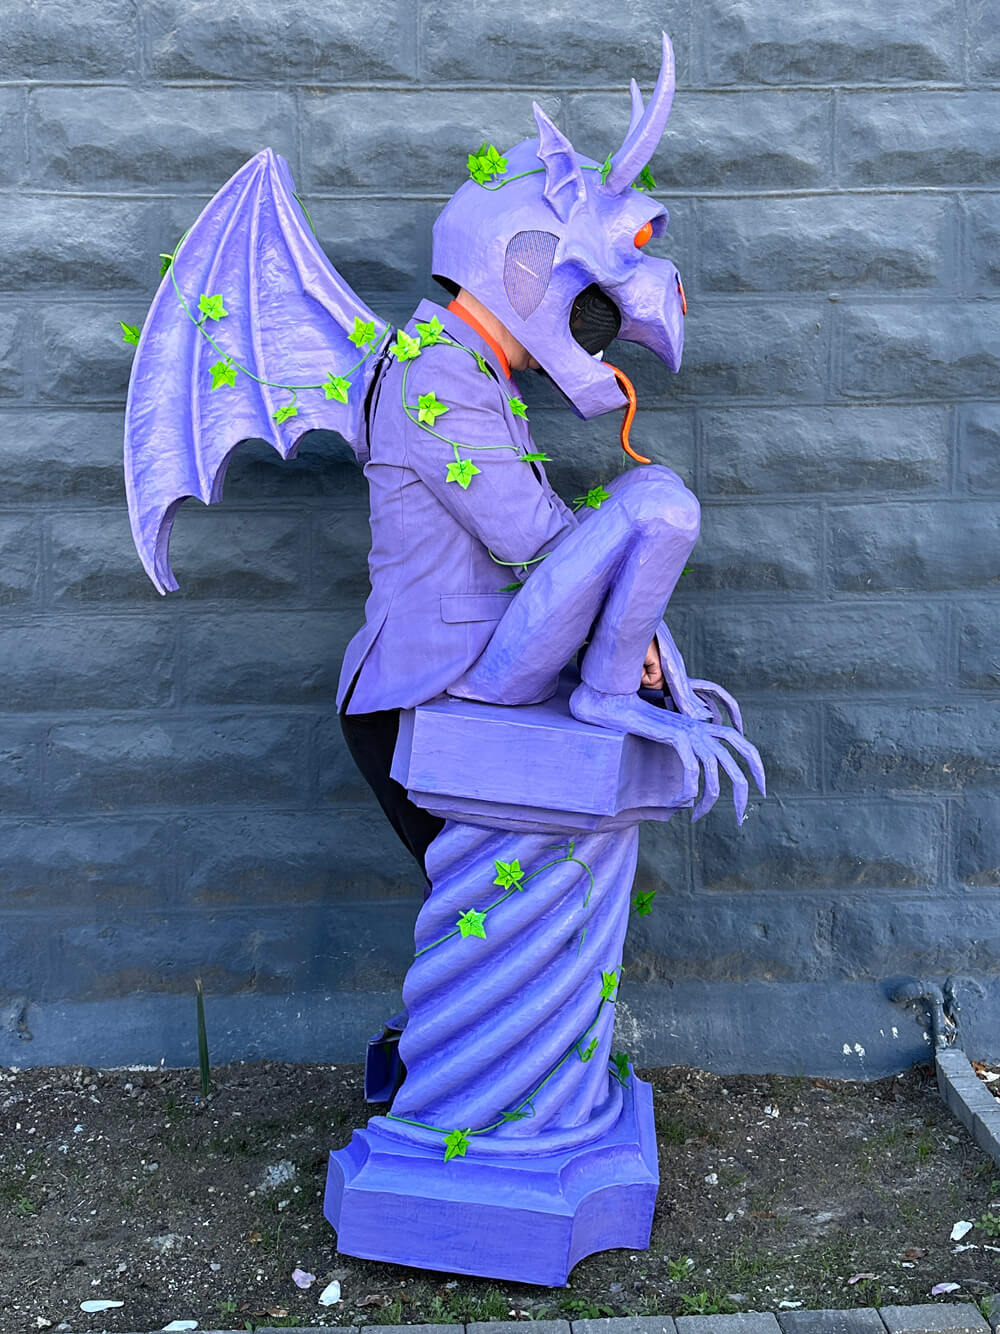
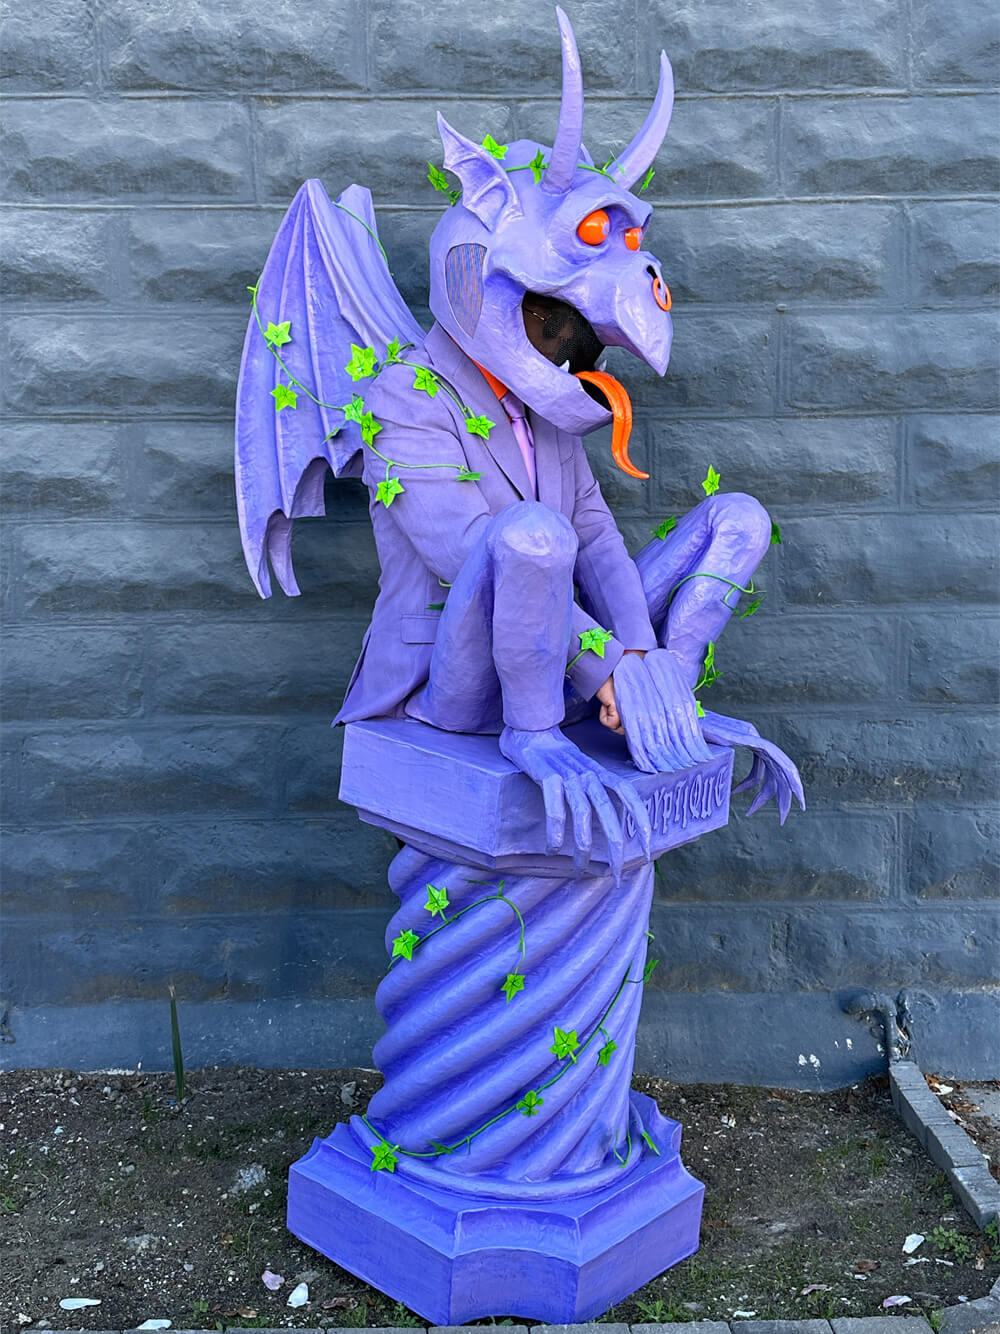
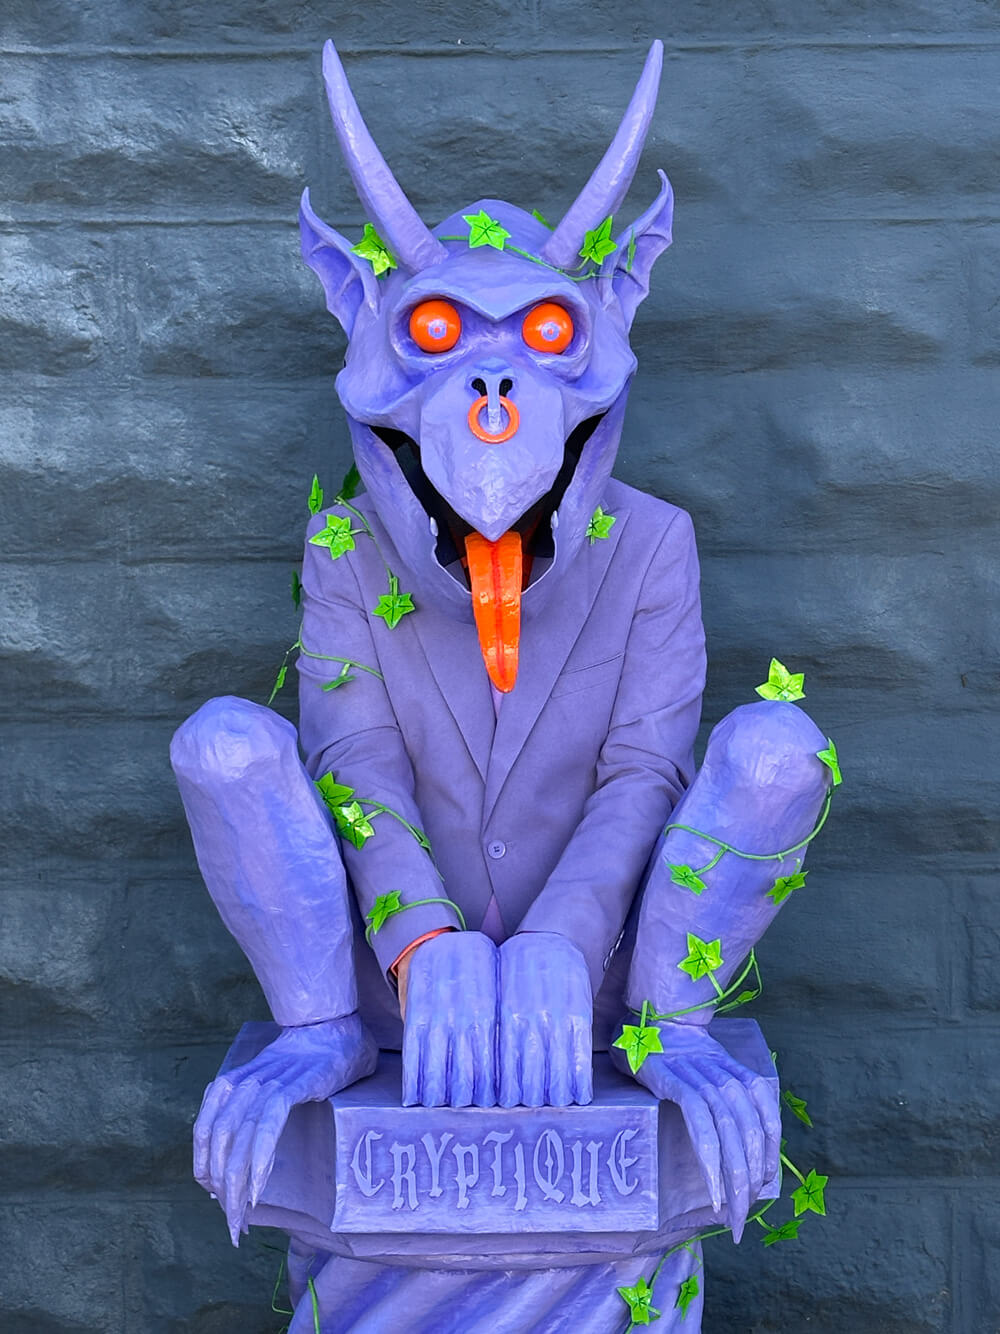
And yes, finally, this whole complicated gargoyle costume was done! This was definitely the most ambitious costume I've ever created, and I was very excited to show it off on Mardi Gras day! It ended up being a lot easier to wear than I expected: it was fairly comfortable and very lightweight, quick to put on and take off, surprisingly easy to walk in, and I had decent (but not perfect!) vision.
I intend to keep things simpler next year; let's see if I can hold myself to that...