
"Gras-goyle" gargoyle costume, WIP part 6: finishing touches!
Published March 7th, 2025
This is the final part of my gargoyle costume project for Mardi Gras 2025! If you wanna start at the beginning, check out part 1: column, part 2: wings, part 3: starting the mask, part 4: finishing the mask, and part 5: hands and legs.
Okay, just a few steps left!
Letters
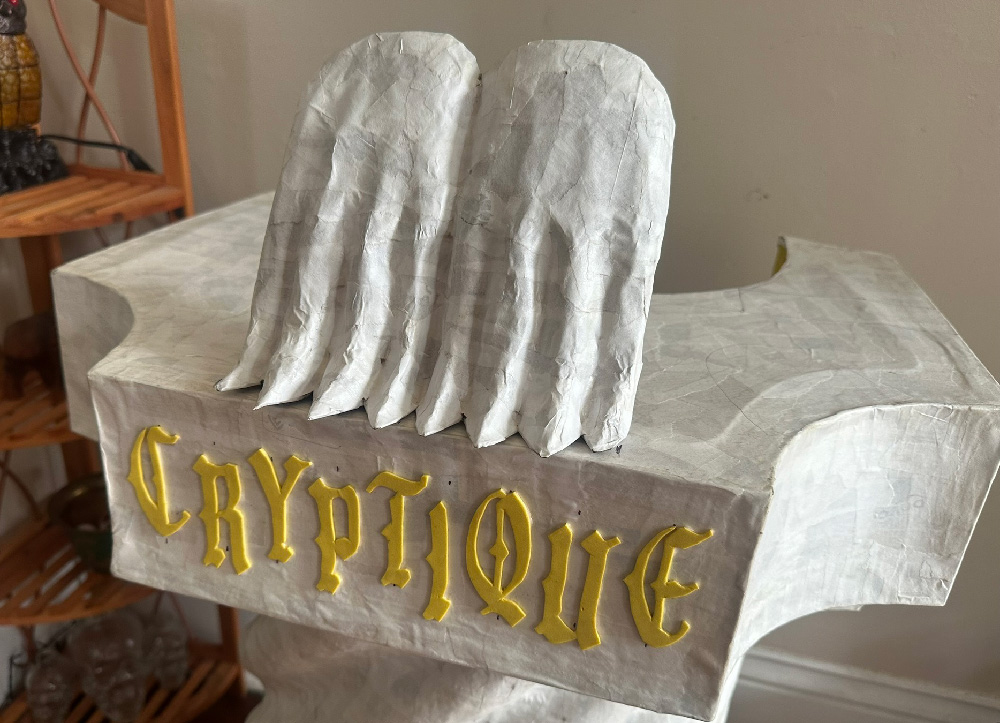
Here's my method for getting nice 3D letters onto a surface like this:
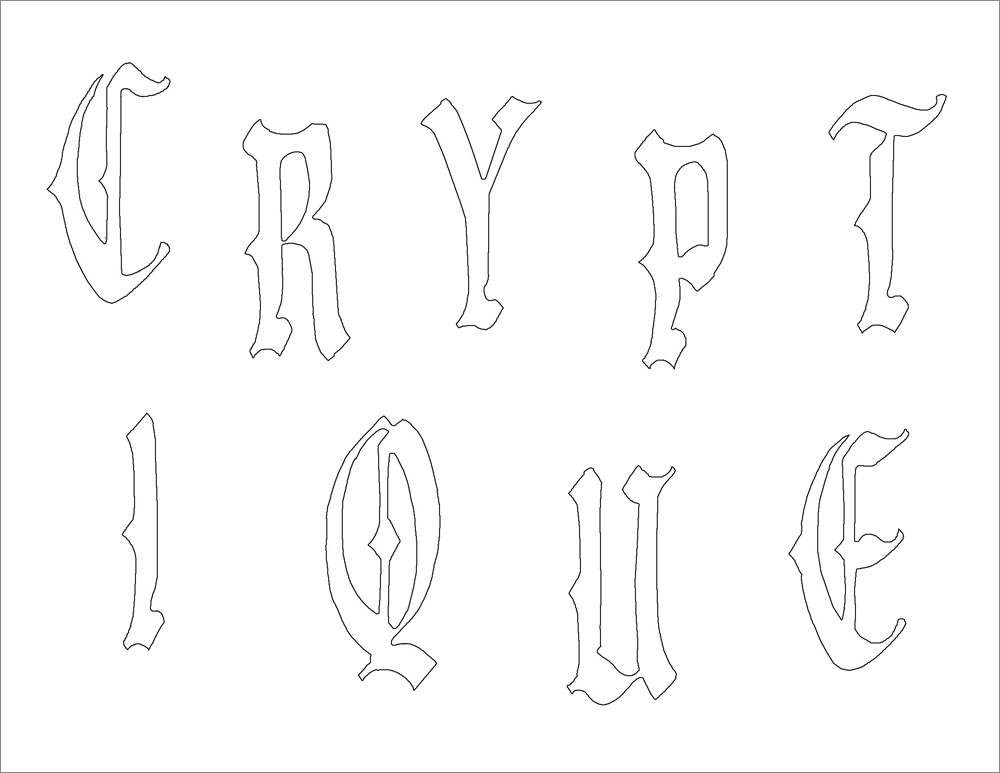
First I measure the surface and then design the letters in Photoshop at the correct size. Then, before printing, in Photoshop I drag all the letters apart so they have a lot of extra space around/between them. I print out the letters, and then I cut around them with scissors, leaving lots of extra space around them, like basically just cutting out big oval or rectangle shapes around each letter, with maybe half an inch of empty space around them. The actual letter shapes will get cut out later.
Then I take a sheet of craft foam (this soft, rubbery, colorful foam you can get at art stores) and spread a bunch of wallpaper adhesive on it, with a big paintbrush or just with my hand. I lay the letters in place on that, and then I spread more adhesive over them to really smooth them down and flatten them, and to let the adhesive absorb into the pieces of paper.
When the adhesive is dry, I use scissors and an X-acto knife to cut out the individual letter shapes. They'll still have the paper stuck on them, so I then lay them in a tray of water, paper-side down, for about twenty minutes, and then it's easy to slide the paper right off. The foam letters will be a bit sticky from the remaining adhesive, so I rinse them off a bit and let them dry on a paper towel.
Then, to put the letters onto the paper maché surface of the column, I spread a lot of wallpaper adhesive onto the surface and then lay the letters in place. I point a fan at them to speed up drying. Last thing: when they're dry, I brush a heavy coat of Mod Podge over the letters, making sure to work some Mod Podge into all the outer edges. This helps in two ways: Mod Podge will take paint much better than the clean surface of the craft foam would. Also, working the Mod Podge in around all the edges helps completely glue the letters in place.
The letters will get painted later along with the rest of the column...
Making the column wearable
Making the column wearable turned out to be a lot easier than I expected! For months while I was thinking about this project, I'd envisioned maybe something over my shoulders, or maybe some sort of vest-type harness with strings that hook into the sides of the column. What I ended up with was much simpler than that. The whole column is just hanging on one wire that's dead center in front of my stomach, and the wire hooks onto a lanyard I'm wearing under my shirt, with the clasp thing sticking out between two of my shirt buttons.
With the other ideas I'd had (shoulder harness, vest harness) I knew that keeping the column balanced would be difficult or impossible, and that's definitely the case with this single wire. However! I came up with a simple fix for that. This is actually why I added those fake hands; they're there to hide my real hands as I steady the column with a sort of handle I built (pic below).
Having the weight of the column suspended around my neck and using my hands to keep it steady worked out really well. In the early stages of this project I had a lot of worries about how this whole costume might be very difficult to wear and very difficult to move around in, but in the end I was pleasantly surprised with how it all worked out; it's pretty easy to wear and to navigate!

Okay, so here's how I modified the column to be wearable. I cut the thing open and removed a large panel from the back. I did some trial and error with cutting out a big curved shape from the top surface of the column where my waist/stomach will be.
I hot-glued a long wooden rod under the top surface of the column, running from side to side, all the way at the back, right where my waist will be (pic below). I attached a twist tie at the center of the dowel, and I twisted a little S-shaped piece of metal to the end of it. The S-shape hooks onto the lanyard that I'm wearing. And that's it!
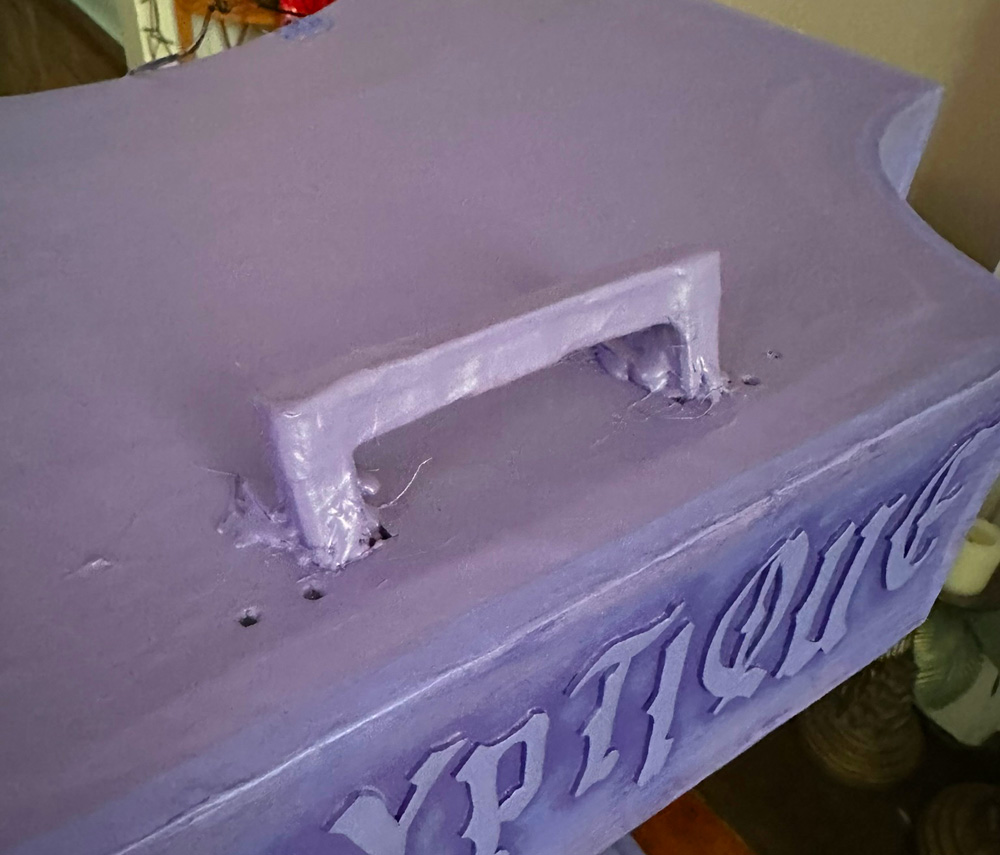
I made a little handle out of wooden coffee stirrers and paper maché; it's attached right behind where the hands are. I poked holes in the top surface of the column, pushed the handle down into that, and then put a lot of hot glue both on top and underneath.
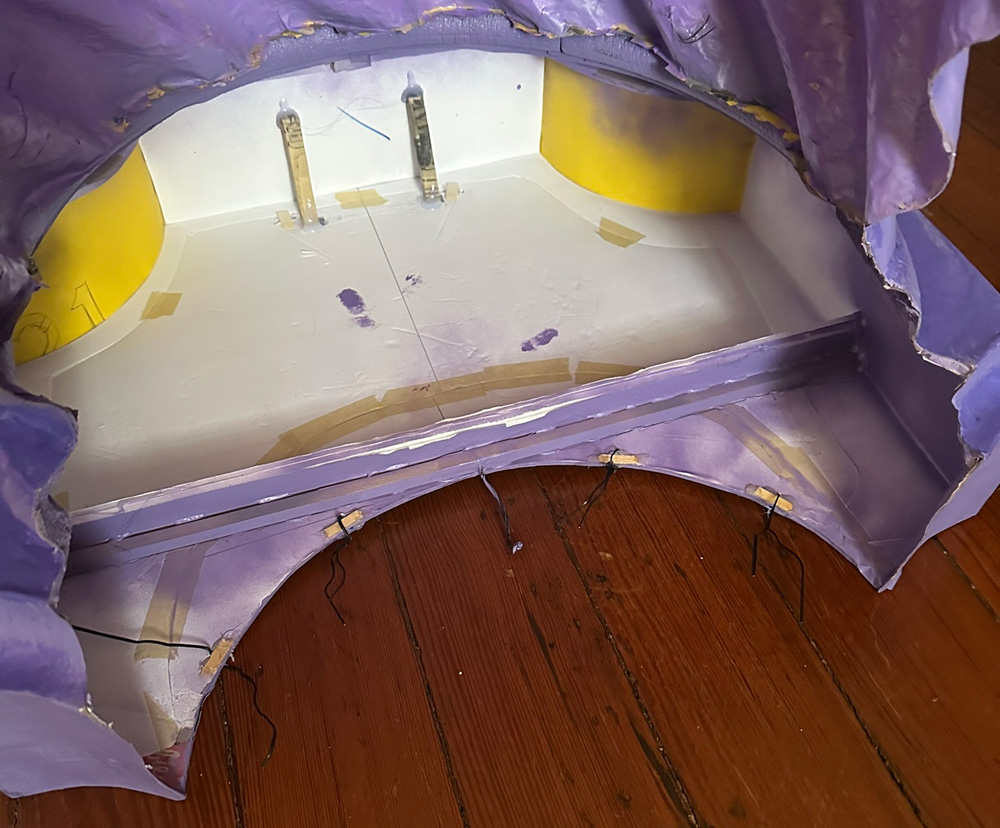
Above is a view of the column, sitting upside-down, and you're looking into the top part of the pedestal. The big cut-out curve shape is where my waist goes. You can see the square wooden rod and a strip of foam board, running horizontally. You can see twist ties attached at five points around the curve. Near the top of the pic you can also see two wooden shapes; these are the bottom part of the handle that's hidden behind the hands. I had it run through the top surface of the panel and so it could be hot-glued against the inner-front panel.
Connecting the hands and legs to the column
I haven't taken a pic of this but it's not very interesting; I just attached twist ties to the back edge of the legs that connect to the twist ties in the column at the back edge of where my waist goes. I poked some holes in the paper maché, stuck the twist ties through, and then reinforced those areas by hot-gluing little segments of wooden coffee stirrers in place to prevent the twist ties from tearing through. The twist ties allow me to connect and disconnect the legs as needed, like for putting everything in the car or whatever.
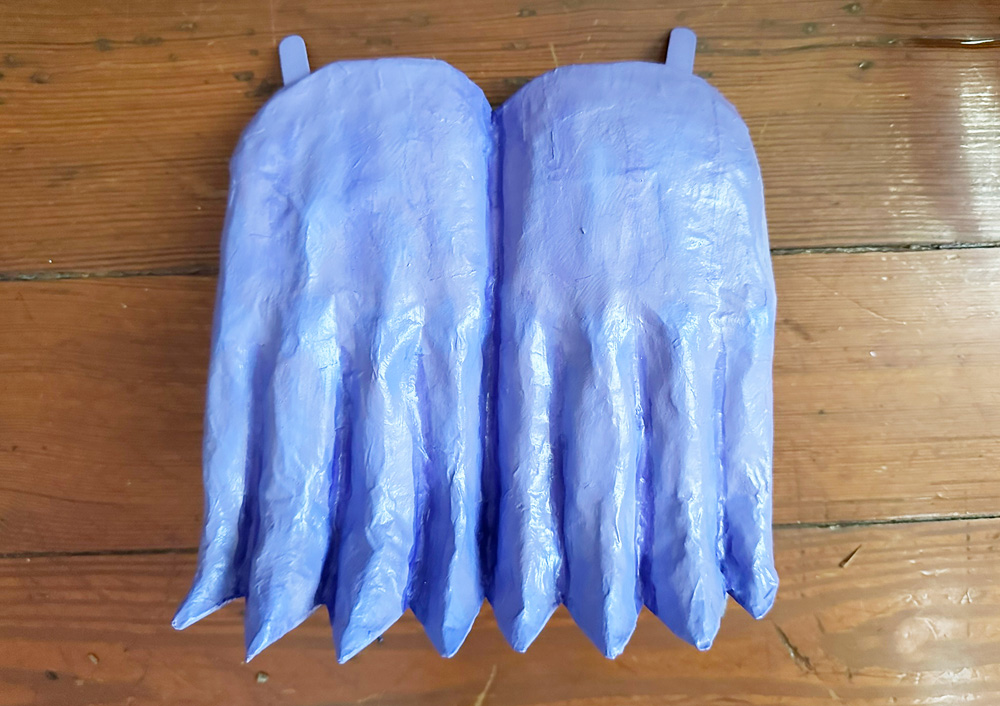
By the way, I hot-glued two little segments of popsicle sticks behind the hands. Why? Because when I tried on the whole costume, the cuffs of my jacket sleeves kept going behind the hands, which looked weird. So I added these popsicle sticks that allow me to guide my sleeves over the top of the hands. I swear I'm like a freakin' genius with this stuff sometimes.
Ivy
I had an idea about wrapping a few vines of ivy around the column and the rest of the gargoyle costume, and I looked at some fake ivy online and in stores and none of it quite looked how I wanted; all the types I found were way too thick and too busy with tons of little stems and leaves all bunched together. I wanted something much more simple, with leaves that are much more sparse. Also, all the fake ivy I found was pretty dark in color, and I wanted something more bright and festive, even if it's not realistic.
So, that's right, you guessed it, I decided to make my own fake ivy.
I designed a leaf shape in Photoshop, then printed out six pages of 15 leaves; 90 total. I printed these on sketchbook paper; a bit thicker than regular printer paper. (I had to cut the sketchbook paper by hand to fit my printer.)
Cutting out all 90 leaves went way faster than I expected! That was a relief. I then creased all the leaves down the middle, and then unfolded them again.
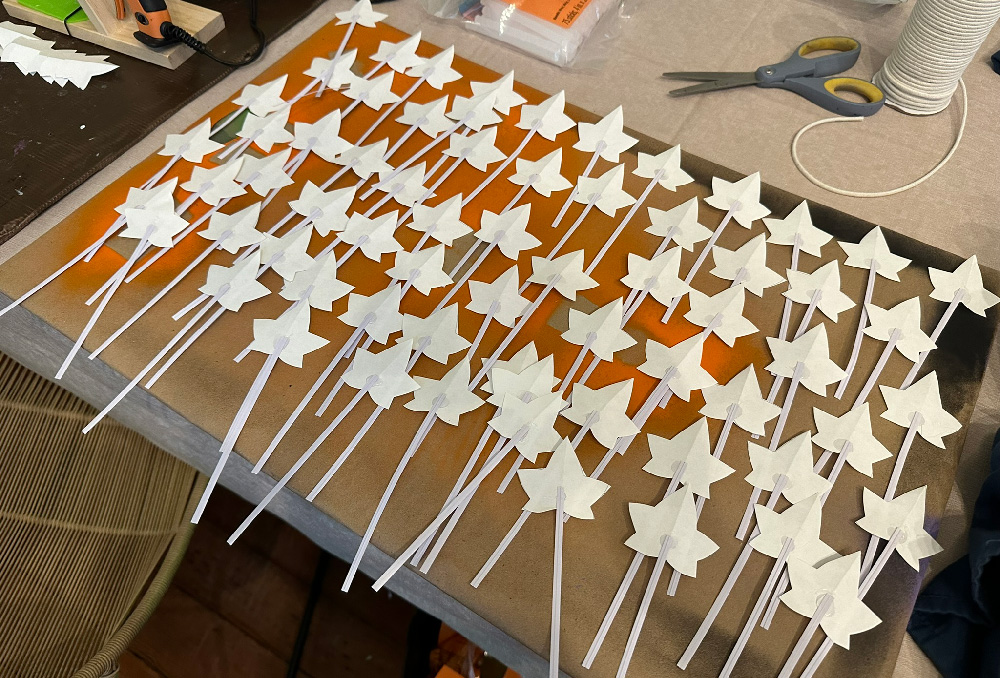
I hot-glued all 90 leaves onto 90 white twist ties. I used twist ties that are covered in paper rather than plastic; my hope was that the paper would take paint much better than plastic would.
I'll write about my painting and glitter process for the ivy in my next post, about painting the whole costume.
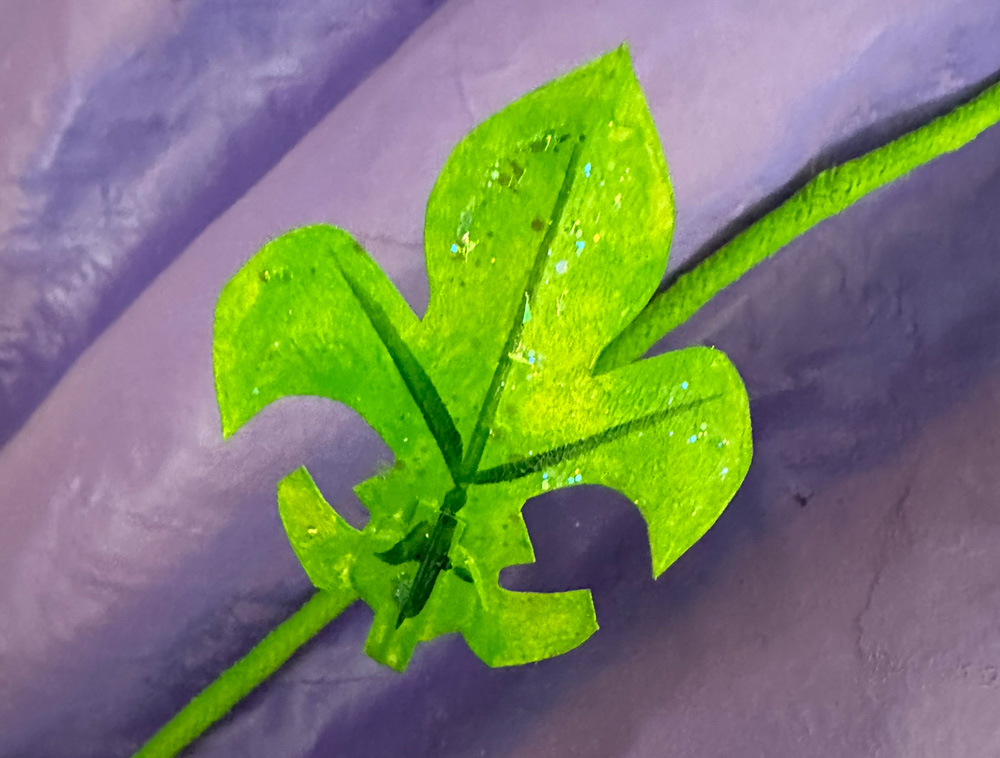
By the way, I also made one leaf that's shaped like a fleur-de-lis; kind of an easter egg for this costume.
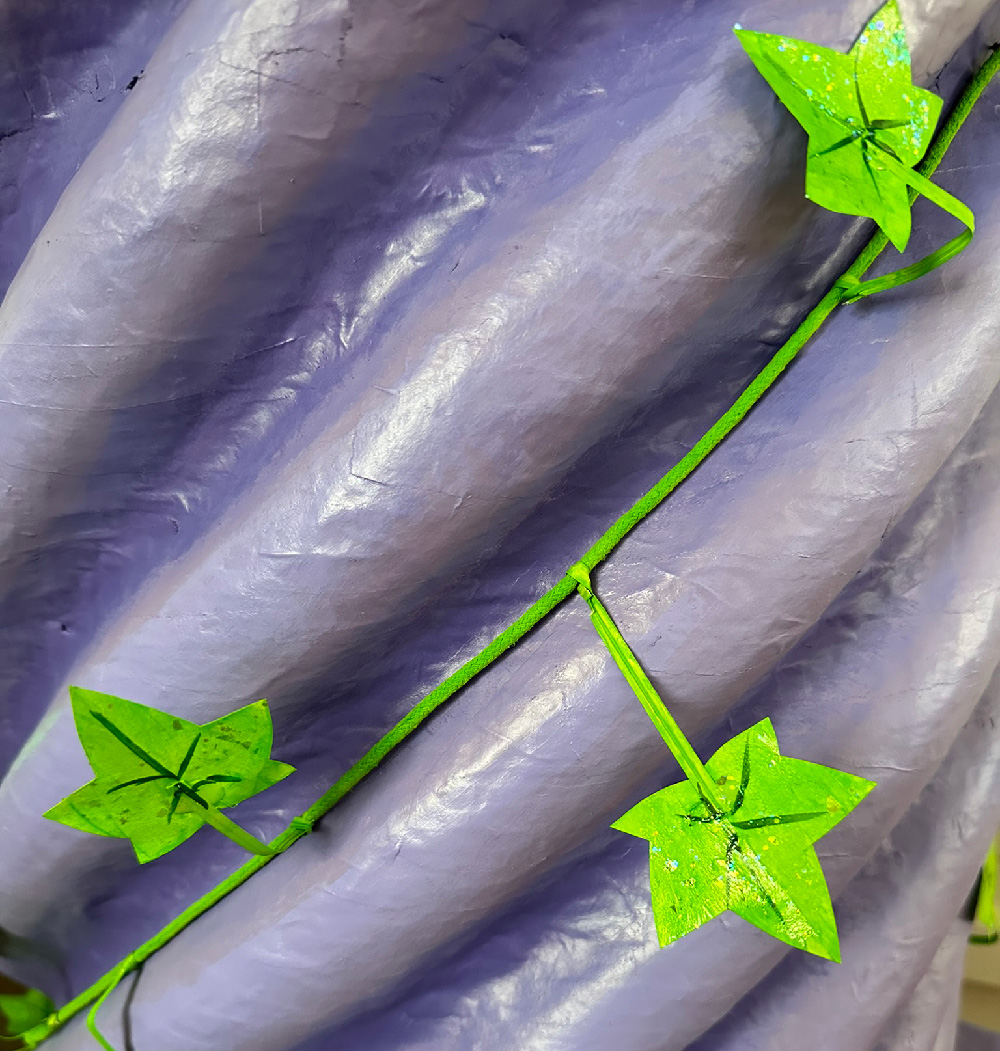
For the actual vines, I used thick macrame string; I'll talk about my process for "painting" string in my next article.
I connected the vines on my costume before attaching the leaves. I used a couple different methods for this. I hot-glued some of the vines in place on the paper maché parts of my costume. I also connected some bits with tiny loops of wire. For the places where I connected the vines to my jacket, I sewed them in place with a few tiny loops of thread here and there.
Putting the leaves onto the vines was easy! I just twisted the twist-tie stems onto the string, as tightly as I could. The held on really well, and the stems stood out at whatever angle I wanted to put them.
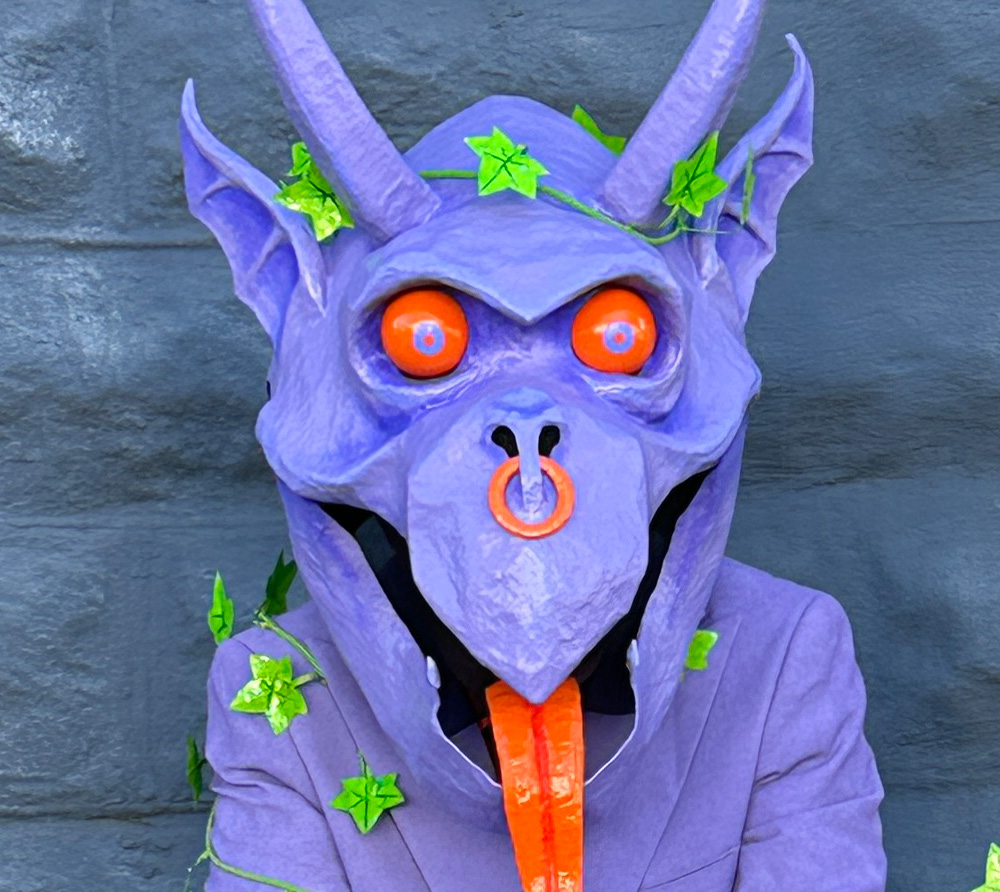
Oh yeah, I also had a somewhat last-minute idea of making a crown of ivy for the mask! That was an easy addition.
In the end I had too many leaves. Out of the 90 I'd made, I ended up using about 75-80. I expected this to happen; better to err on the side of caution!
And that's pretty much it for making all the pieces of this costume! Next up is some notes on painting all of this stuff...