
Custom paper maché sword piñata!
Published by Manning on August 2nd, 2019
My boss at my day job asked me if I’d be up for making a paper maché sword piñata for our company’s 10th anniversary, and I jumped at the chance! This thing is a giant-sized replica of a wooden sword that periodically changes hands among different teams here as a trophy for amazing creative work. Here’s a pic of the real sword and one of the winning teams, on our company’s Instagram. Anyway, I’d never made a piñata before, but I always wanted to try — it was fun!
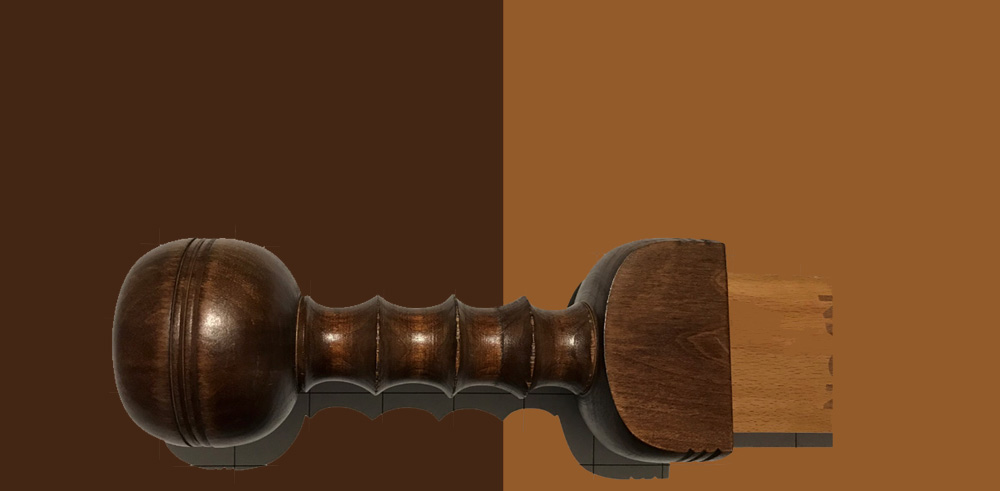
I started with some photos I took of the wooden sword.
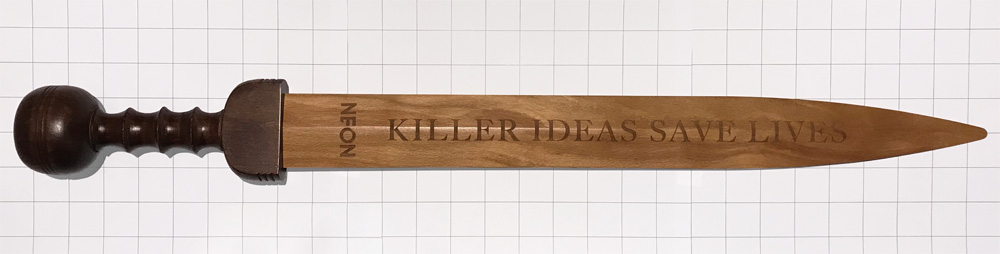
I photographed the sword on a printout of a grid of square inches; this is a trick I made up so I can easily eyeball the real-life dimensions once I’m in Photoshop. I scaled the whole thing up to make a graphic that’s about 65″ long, and then I exaggerated the dimensions to make the sword thicker and bulkier overall, to allow more room for candy and other treats inside!
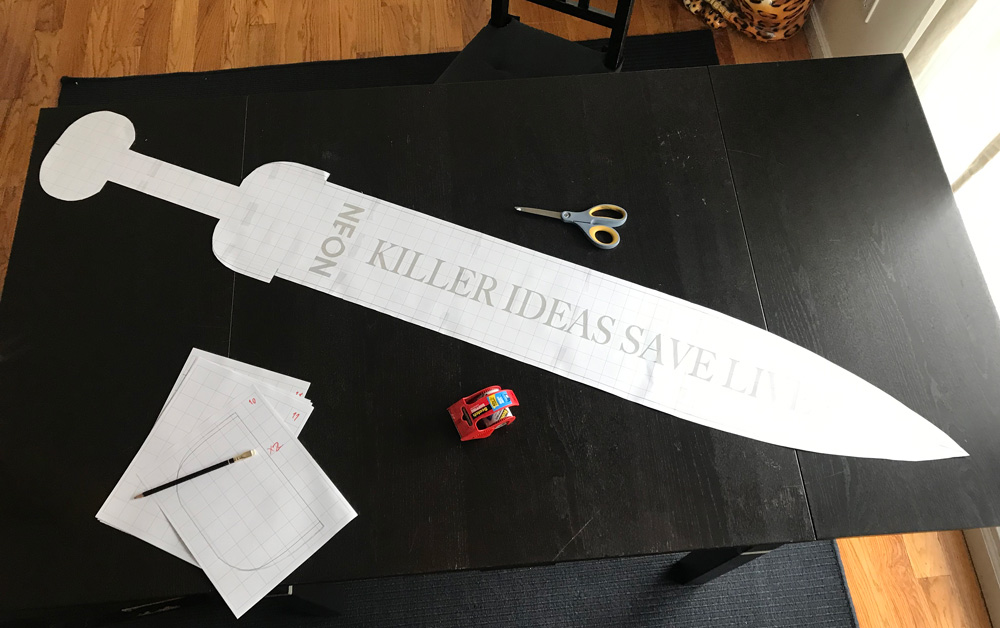
I printed out the graphic as several pages, taped ’em together, and cut out the sword shape.
I used foam board as the base for the sword shape. I taped three sheets of foam board together with shipping tape, and then I traced my printout onto them and cut out the shape with an X-acto knife. I set aside the big printout; I’ll need it later to use as a guide when placing the letters on the piñata.
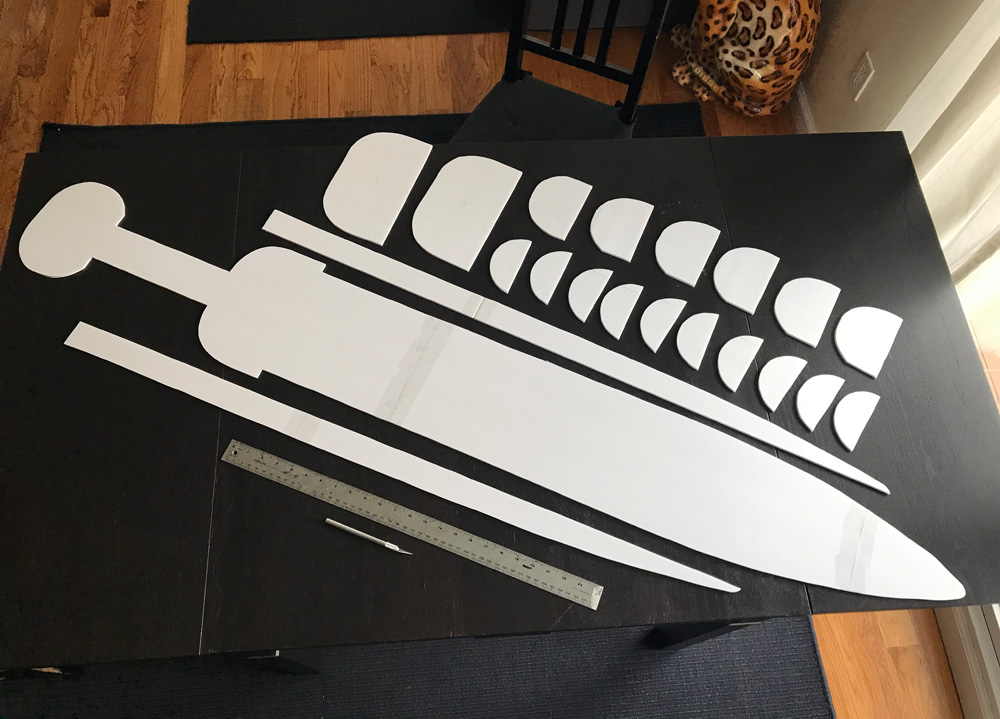
I designed a bunch of shapes in Photoshop to help build out the 2d sword shape into a 3d sculpture — two long thin pieces for the blade, and a lot of smaller half-ovals and other shapes for the rest. I traced these shapes onto foam board and cut them out.
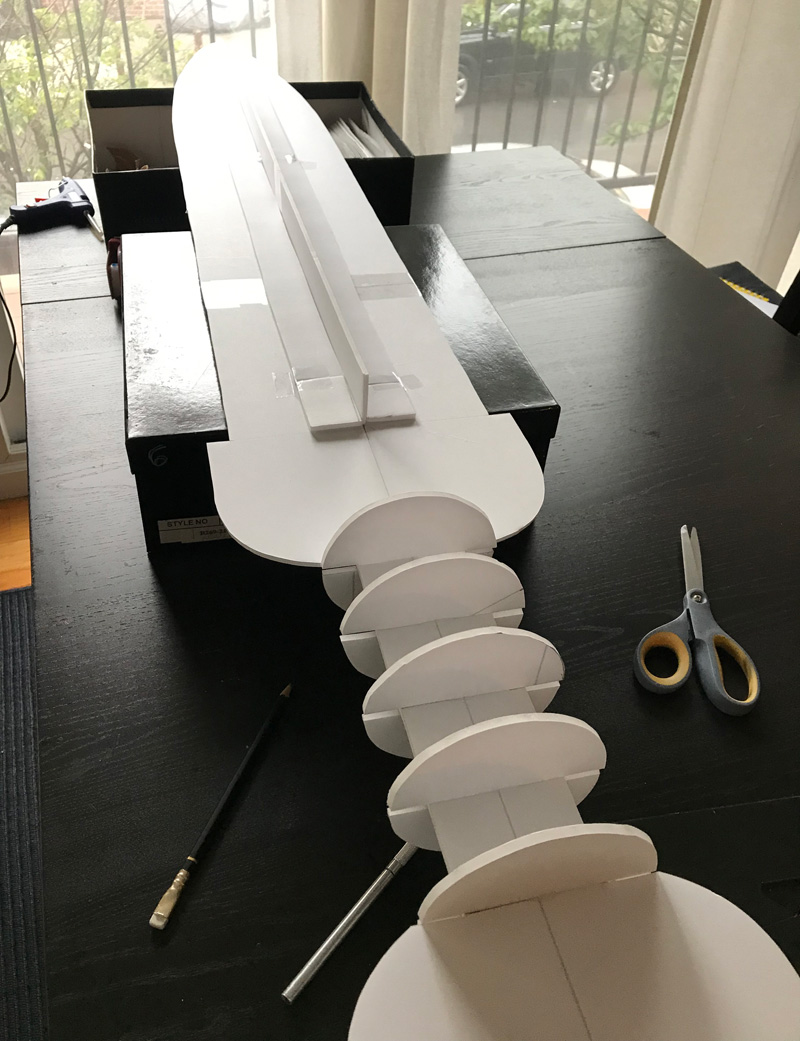
Then I hot-glued and taped all these shapes along the length of the base at the appropriate points.
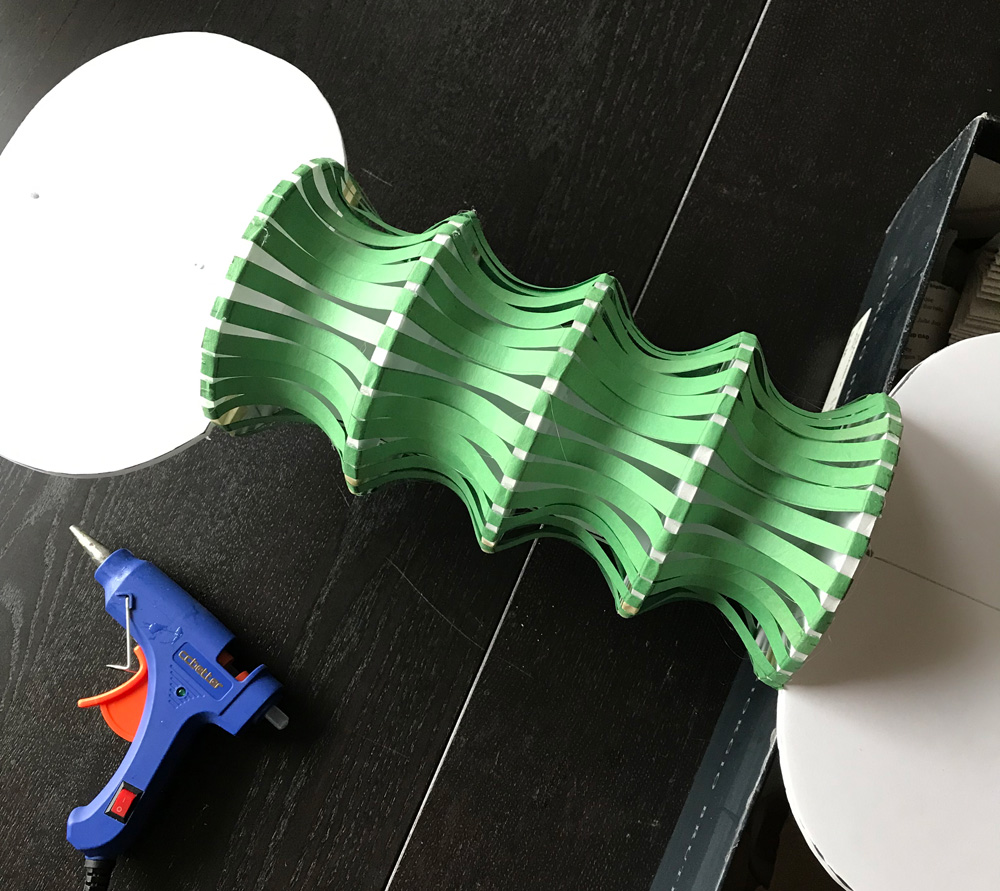
The sword’s handle (I learned this is called the grip) was the most intricate part of the whole sword, so I made up a more complicated method to create the rounded concave shapes there. I used thin strips of construction paper for this — this took lots of measuring and planning to get it perfect! Like, I drew tons of lines with a ruler to make sure that the parts of the paper strips that touch the edges of the foam were 1/4″, and the curved parts that span between the foam parts are 2 1/2″. That way the whole thing ends up looking very regular and geometric. I set all these paper strips in place with the tiniest dots of glue I could get out of my mini hot glue gun. This whole process was very tricky!
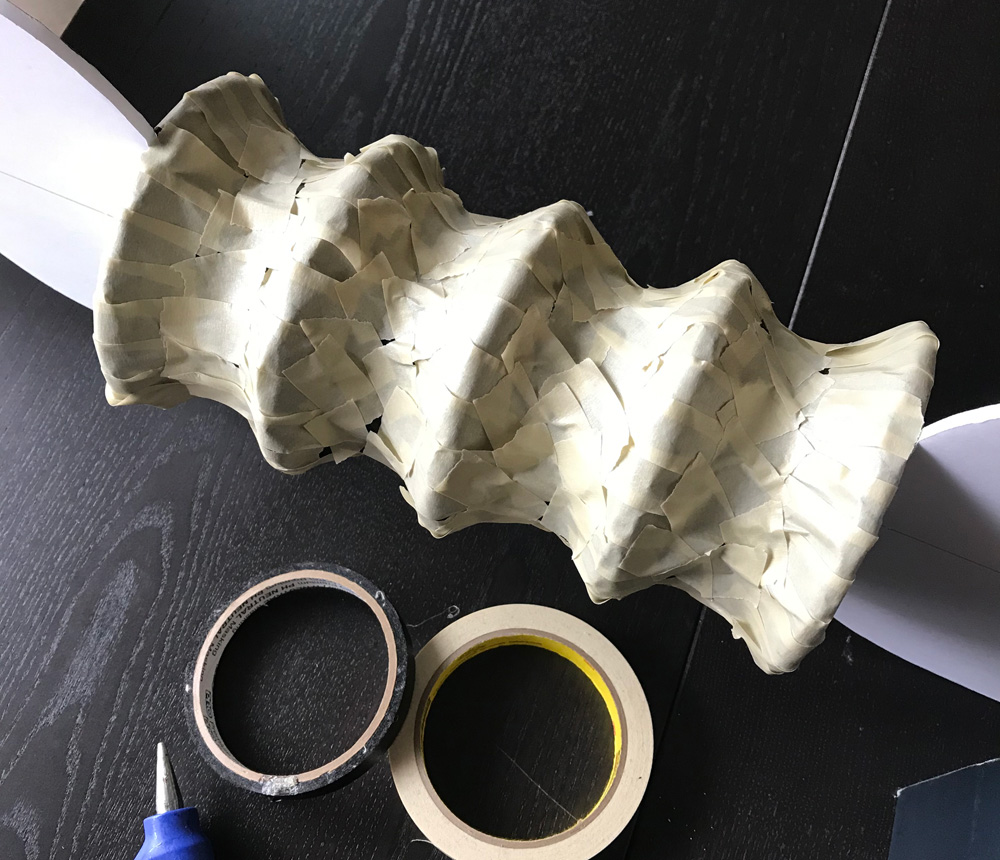
I then loosely covered the strips of paper with masking tape. This looks so much uglier than the paper strips! But it doesn’t matter; the following steps will hide all of that.
To further solidify the grip, I covered this area with one layer of paper maché. You can read about my paper maché process and materials here.
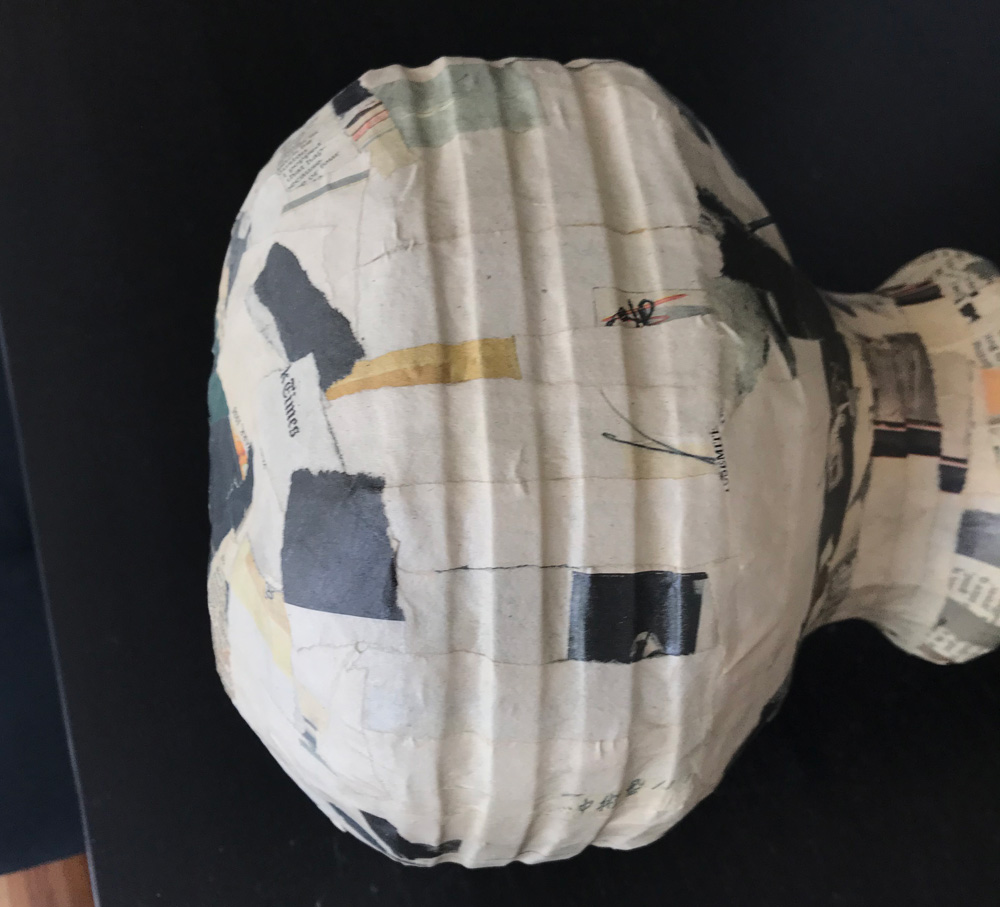
Next: the guard and the pommel (more words I had to look up!). The guard is basically just an irregular-shaped box, while the pommel is big and round like a smooshed irregular sphere.
At this point I forgot to take pictures of several big steps! This happens when I’m confused/distracted/stressed out!
I built the pommel in a similar way to the grip, with foam board edges and strips of paper. I then covered this shape with masking tape and then a layer of paper maché.
I’d already cut out the two big foam pieces for the outer surfaces guard a while back. I built a sort of box shape out of foam board to go in between these panels and hold them out at the appropriate distance. I then built a wall of poster board around all this and taped everything together.
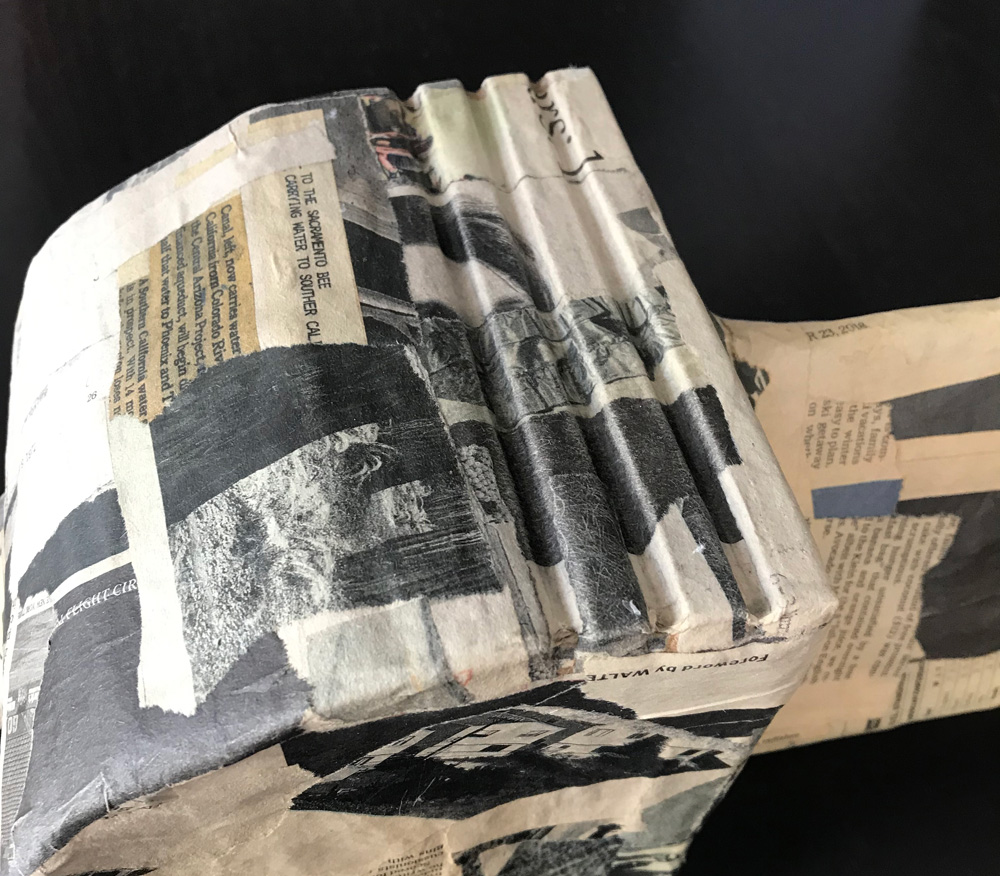
Now on to the blade area. I used lots of strips of construction paper to span over the long foam ridges in order to build the outer “walls” of the blade.
I covered over the blade shape with a layer of masking tape, and then a layer of shipping tape. This is to help solidify and stabilize the blade so it won’t get dented when I apply paper maché (coming up).
My base for the sword piñata was done! Before moving on to paper maché, I carefully added a layer of aluminum foil all around the sword, connecting it here and there with tiny pieces of tape. The foil will act as a release agent so I can easily remove the paper maché from the base when it’s done. The grip was impossible to cover neatly with foil, so I used plastic wrap on that part. I hate doing all of this! Attaching all the foil and plastic wrap is a real pain, and no matter how careful you are you can just feel how you’re covering up details and losing some crispness to the shape. It always feel like this part is going badly, but then once the paper maché is on there it’s totally fine. Speaking of which…
Paper maché
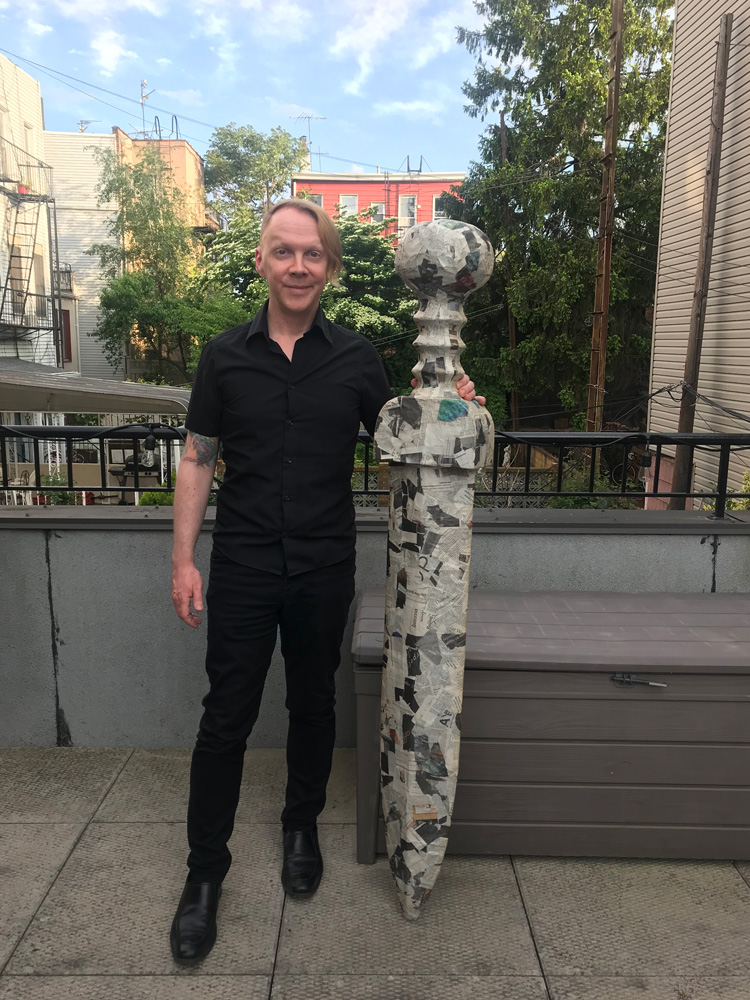
Finally it was time for paper maché! I covered the whole sword piñata with five layers of paper maché over several days. Look how big this thing is! Pictured with 5’8″ creep for scale.

When the paper maché was dry, I made three incisions with my X-acto knife: First, I chopped the whole sword in half with a line around the guard. Then I made a long incision all along one edge of the blade. Lastly, I traced a plastic cup onto the back of the pommel and cut out this circle. This will be the hole where the treats will go in!

I carefully pulled all of the interior materials out of the paper maché. This was pretty difficult! I started with the guard/grip/pommel; I reached in and started breaking up the foam board and tape and stuff with my hands, which really took a lot of physical effort. Some of the stuff was really locked in there and hard to pull out. This ends up being a little different for every project. Plus, something to keep in mind is that when you cut through lots of layers of paper maché with an X-acto knife, the cut edges of the paper maché can be surprisingly sharp! You can give yourself some pretty serious paper cuts when you stick your hands in there to work, and I sure did! Gardening gloves would definitely help here.
I managed to remove all the foam board and tape and stuff, and most of the aluminum foil. You can almost never get all the foil out of a project like this; some of it is just stuck in there too well. But this isn’t a problem.
Getting the stuff out of the blade segment was much easier; I could easily open up the whole blade thanks to the long incision I made along the edge. The inner materials came out in one big piece, and then I pulled out as much of the aluminum foil as possible.
I closed up the piñata by taping the pieces together and then covering the taped edges with another four layers of paper maché. I should mention, I’d use way fewer layers overall if I were making a piñata for kids; this thing was intended to be beat on by adults with a lot of stress to work out.
I didn’t close up the hole in the end of the pommel at this stage…
Creating the opening for treats
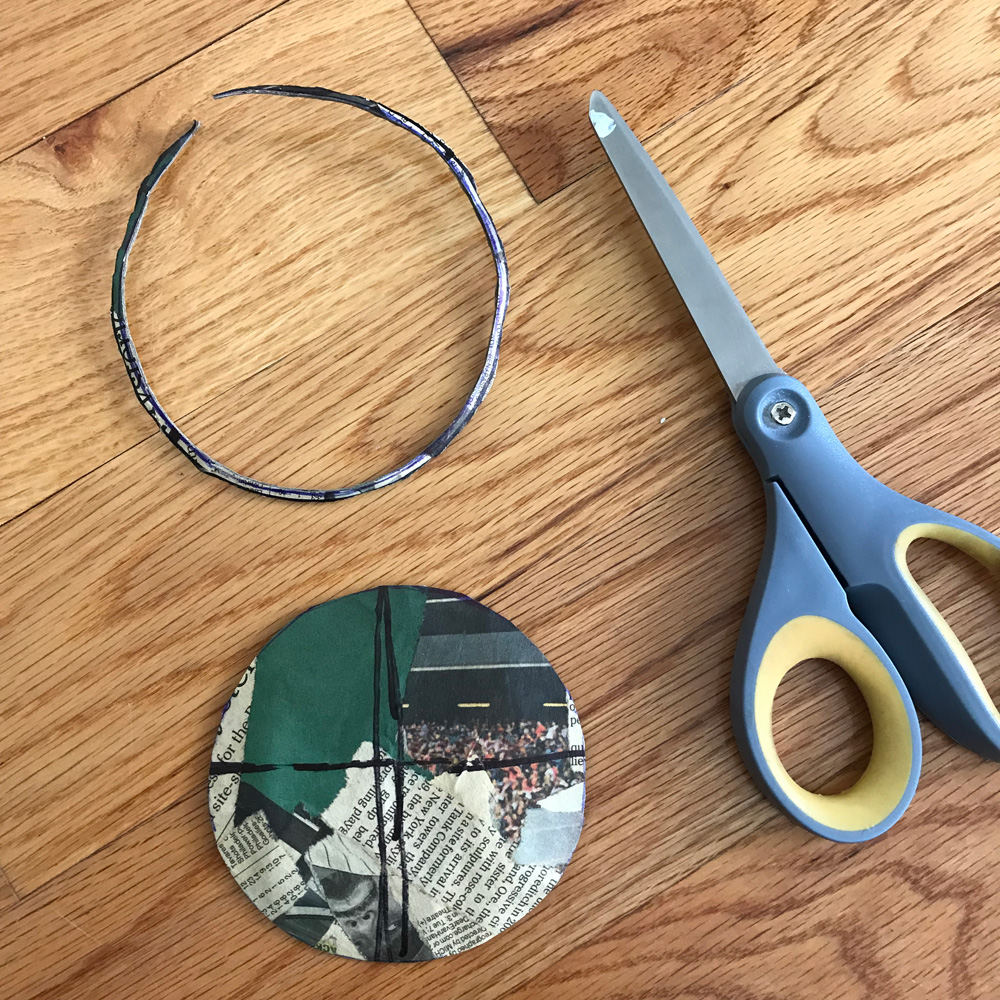
Back to the circular piece I cut out of the end of the pommel. I added some stuff to turn this circle into sort of a plug that could be used to close up the piñata at the very end when the candy and stuff is inside. To do this, first I trimmed a very thin piece off the edge of the circle, to make sure it’ll definitely fit back in, even if things warp a bit. Then I cut out a slightly smaller disk of foam board and taped it to the inner side of the circle. Then I added a ring of pasteboard (from a LaCroix box) on the outer side of this plug, to act as a lip to prevent the the thing from falling inside the piñata. I covered this whole plug shape with three layers of paper maché.
My plan was to hot-glue this plug very firmly in place after filling the piñata with treats. For now I just set it aside.
Adding grooves to the pommel and guard
I left these grooves for this late stage of the project just because I knew it would be a lot easier this way. It would’ve been much more difficult to build the pommel and guard shapes with grooves already in them, and then try to cover the whole thing with seven layers of paper maché without inadvertently smoothing out the grooves. So I decided to do the opposite and create the grooves after the fact, by building up the convex spaces between the grooves instead of digging out the concave shapes of the grooves.

For the guard, I used thin strips of foam board to build up these ridges, and I added a couple layers of construction paper and masking tape (not shown) at the back side of this to smooth that biggest foam shape onto the guard and create a nice curve.
I then covered over these areas with just three layers of paper maché. These details are just for show; they don’t have to contribute to the overall sturdiness of the piñata.
I did basically the same thing for the pommel, but with strips of soft craft foam rather than foam board. Then I added the construction paper and masking tape at the outer edges, and then covered all this with three layers of paper maché.
Reinforcing the piñata
With a piñata this narrow, I was worried that the first person who hit it might break the whole thing in half and/or knock it down off of the string it’ll be hanging on, so I took a few measures that would help keep the sword in one piece and hanging up even as it’s getting destroyed…
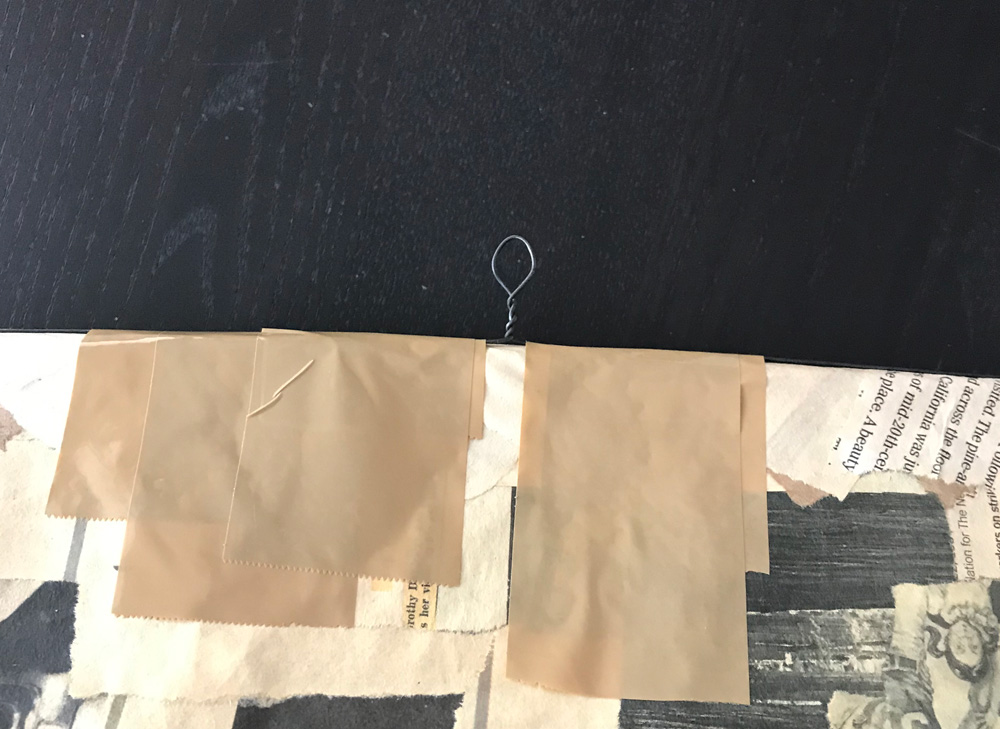
I used a long piece of thin steel wire to create two loops that’ll be used to hang the piñata. I measured the sword and the wire and figured out where to put the loops; I just twisted the wire around a pen a few times for each loop. Then I took taped the wire down on the sword with heavy duty shipping tape. This all goes on the edge of the sword that’ll be the “top” when it’s hanging horizontally.
I then covered the wire and tape with three layers of paper maché. The plan is that the thick plastic tape in there will (hopefully) prevent the wire from tearing through the paper maché.
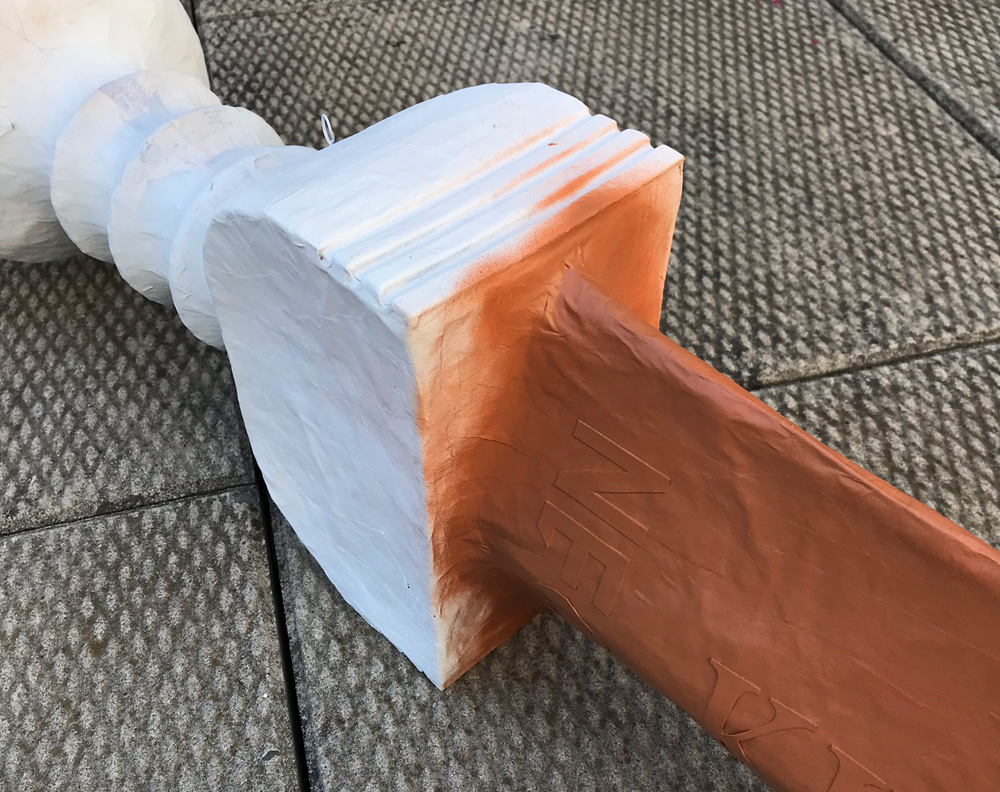
Adding the logo and text
I printed out the Neon logo and the text at the appropriate size, and then I cut out the letters, leaving plenty of space around them. I pasted the letters onto big strips of poster board using the same wallpaper adhesive I use for paper maché. I know from experience that when you paste paper onto poster board like this it’ll curl up a lot as it dries, so I weighed down the edges of the poster board with heavy books in order to prevent/reduce curling.
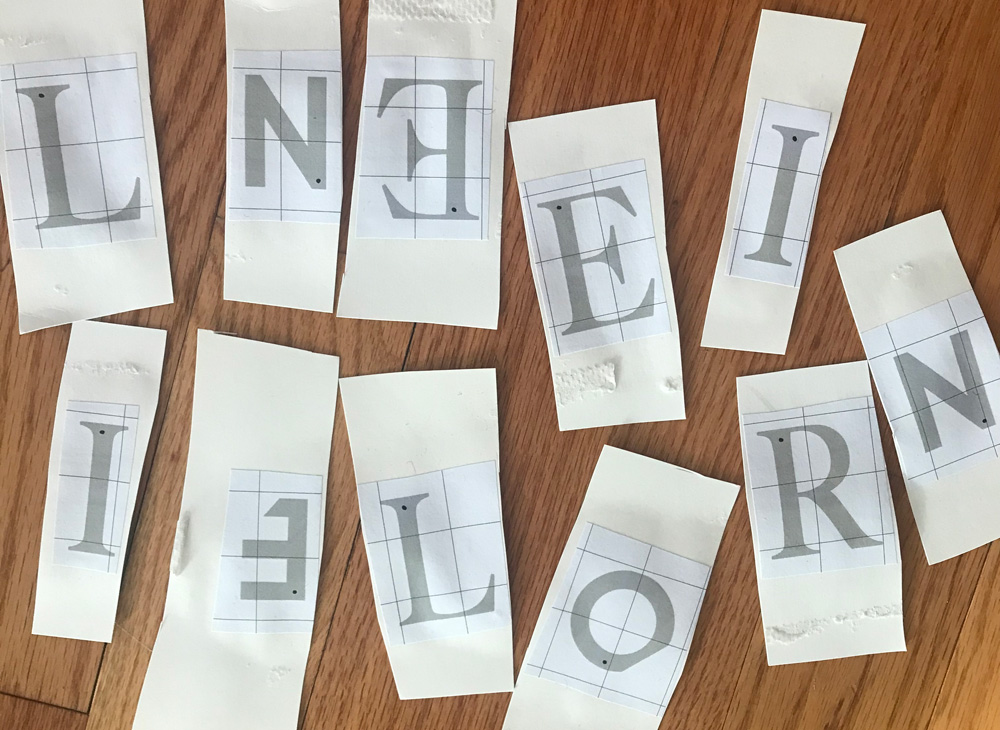
When the paste was 100% dry, I first cut the letters apart into big/loose rectangles (above), and then carefully I cut the letters out with scissors and an X-acto knife (below). You can see I marked a dot at the top of each one, to help me remember which way they all go.
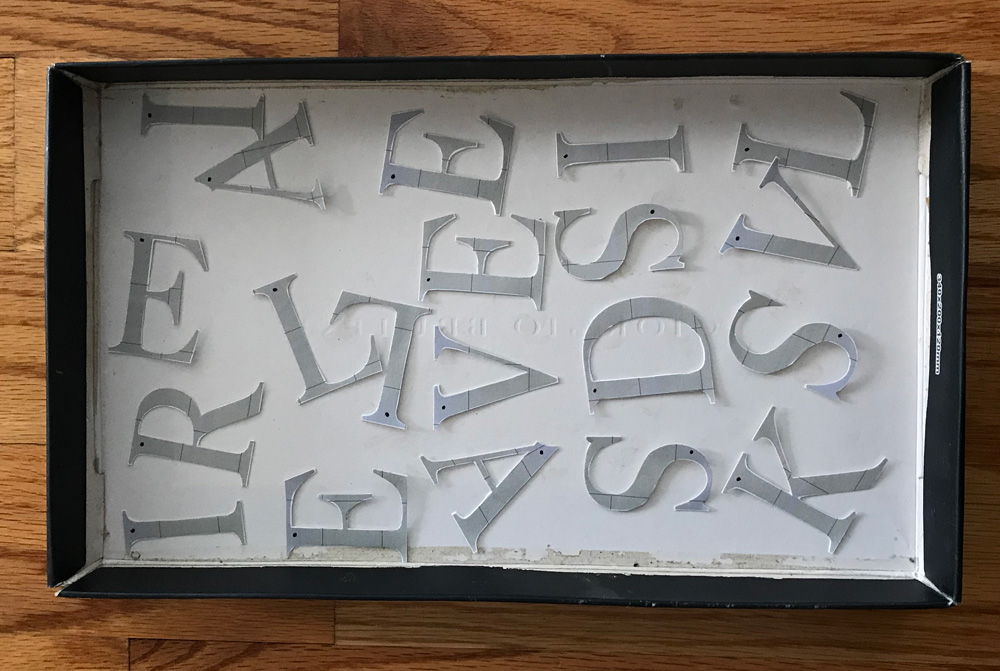
The letters were a little bit warped and curled, so I laid some heavy books on them and left them there over night. This made them nice and flat. The above pic is after they were flattened out.
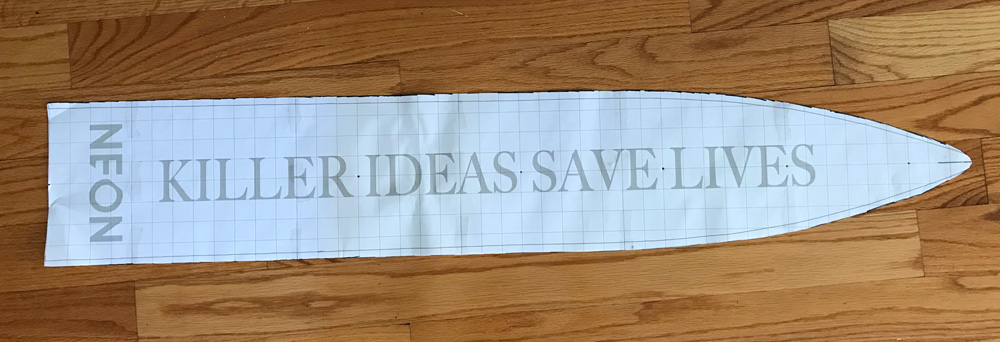

I grabbed my printout of the sword shape to use as a guide for placing the letters. I cut out the the space around the letters, leaving the tip of the sword and the space around the Neon logo at the back. I taped this onto the sword, and then I used a marker to mark where the tops and bottoms of all the letters should go.

When I removed this paper, I had a perfect guide for gluing all the letters in place.
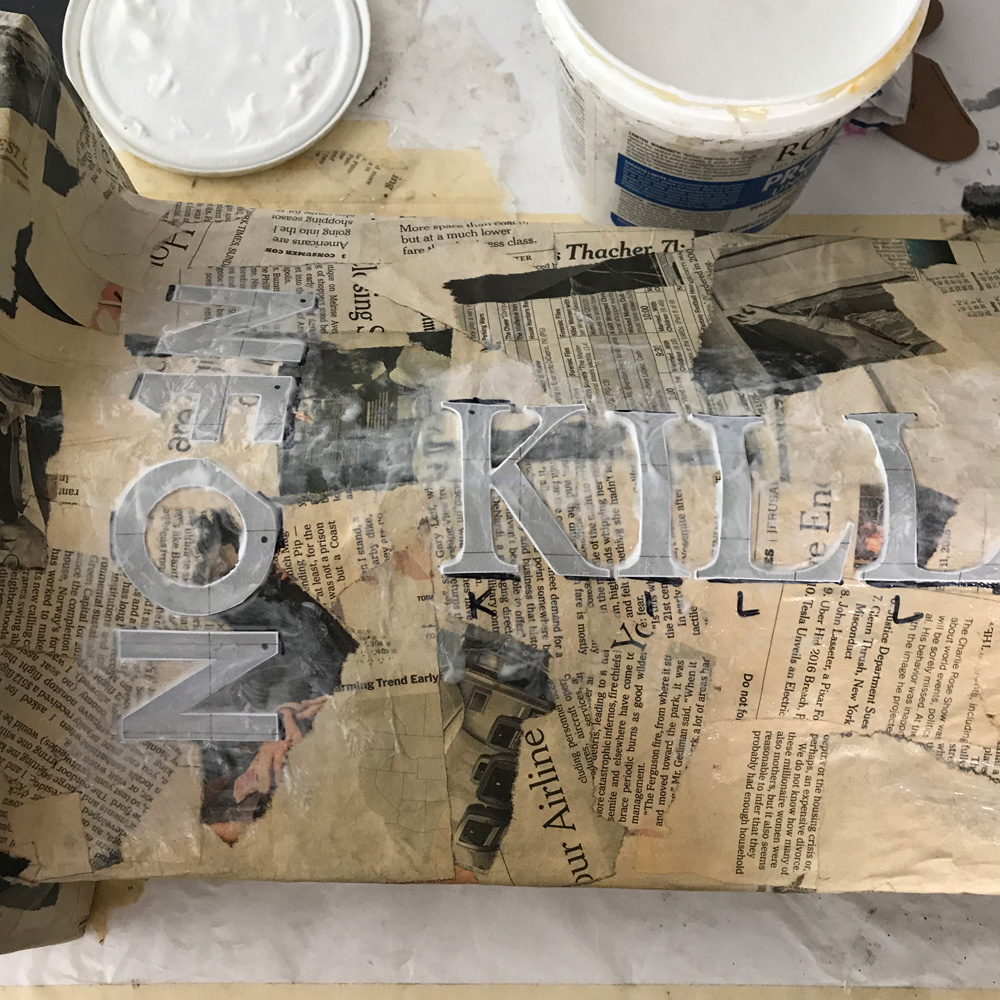
I pasted the letters on using the same wallpaper paste I use for paper maché; I smoothed a bunch of paste onto the surface, then set the letters in place. I let this dry in the sun for a couple hours. When it was all dry, a few corners of a few of the letters weren’t completely glued down, so I took some Tacky Glue and applied it in tiny blobs with a toothpick underneath the raised bits. I pressed the corners down into place and wiped away any excess that oozed out.
The finished letters aren’t very thick, so they don’t stand out very much on the blade, but they’ll provide an excellent guide for hand-painting the letters later.
Painting

I applied a coating of spray gesso to the piñata in order to smooth out the torn paper texture a bit. I let that set for a few hours. You can see that the letters have almost disappeared now that the whole thing is white on white.
Here’s a silly trick I use sometimes for choosing spray paint colors: I made this graphic (above) in Photoshop by sampling the colors from a photo of the real sword, and I sent it to myself so I’d have it on my phone. I went to the art store and I eyeballed this graphic in front of all the millions of colors of spray paint of they have so I could choose the closest ones. It’s always hard to be sure! But I think it’d be way harder to pick without a visual reference like this.
I always use Montana Golden acrylic spray paint; it’s the highest-quality spray paint I’ve ever worked with, and they have an amazing range of colors. The colors I ended up with for the sword were “nougat” and “cacao” — tasty!
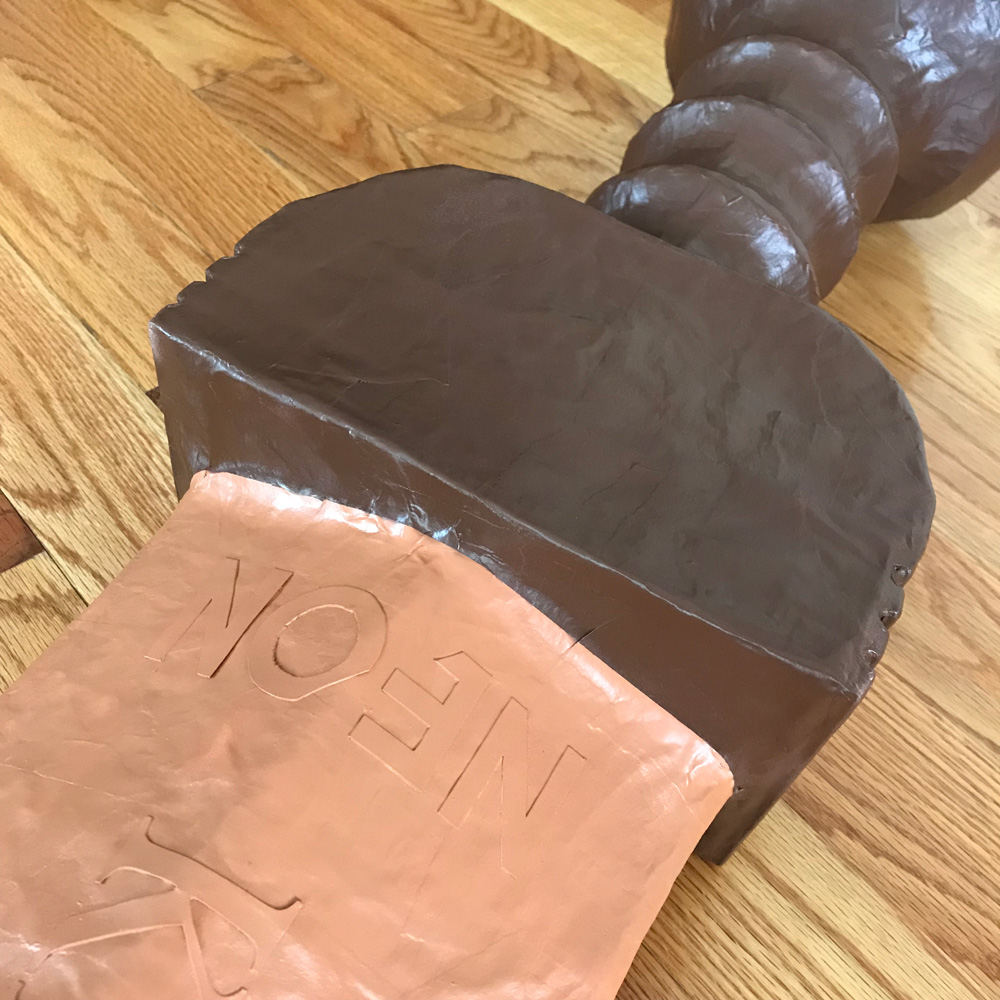
Anyway, I spray painted the blade of the piñata with the lighter of the two brown colors, letting the paint spill over onto the guard a bit.

I let that set for a day. Then I used newspaper and painter’s tape to protect the blade — you can see my usual technique above; first I apply the painter’s tape along the line I want to create (that’s the white line, dead center), and then I use regular masking tape (which is much stickier) to tape the newspaper onto the painter’s tape. I always use at least two layers of newspaper, because if you spray the paint on really heavy it can sometimes soak through one layer of paper.
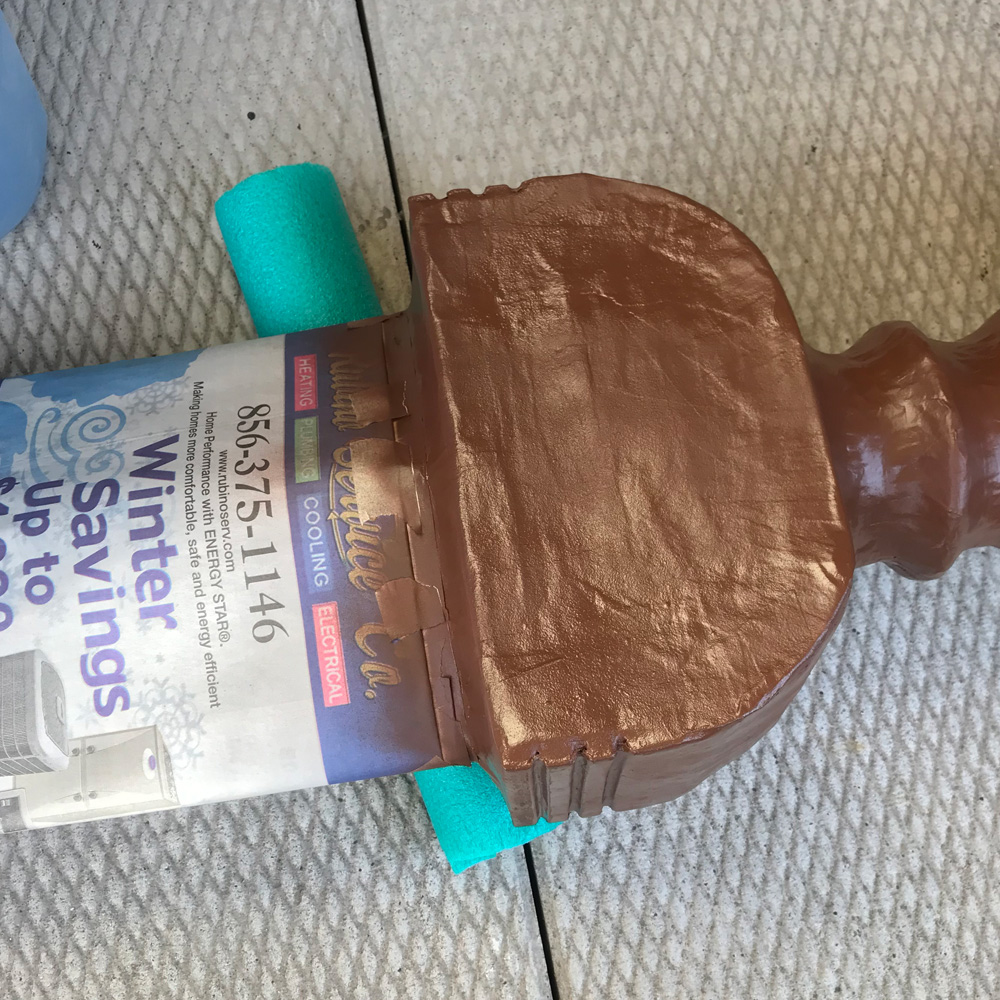
Now, with my surface protected, I spray painted the grip/guard/pommel with the darker brown color. Of course I also spray painted the little circular covering for the hole in the pommel. I let that set for a day.
It’s important to remove the tape slowly, so as to not peel any paint off!
I carefully painted the Neon logo and all the text by hand, using acrylic paint and some tiny paintbrushes. I mixed some brown, yellow, black, and white to get the right color.
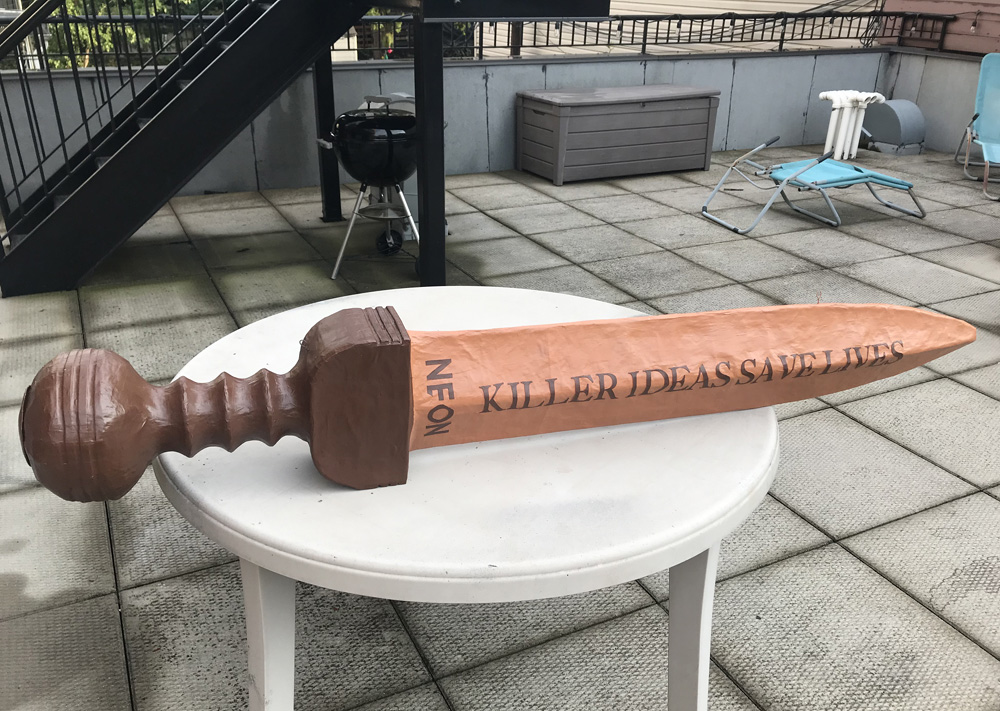
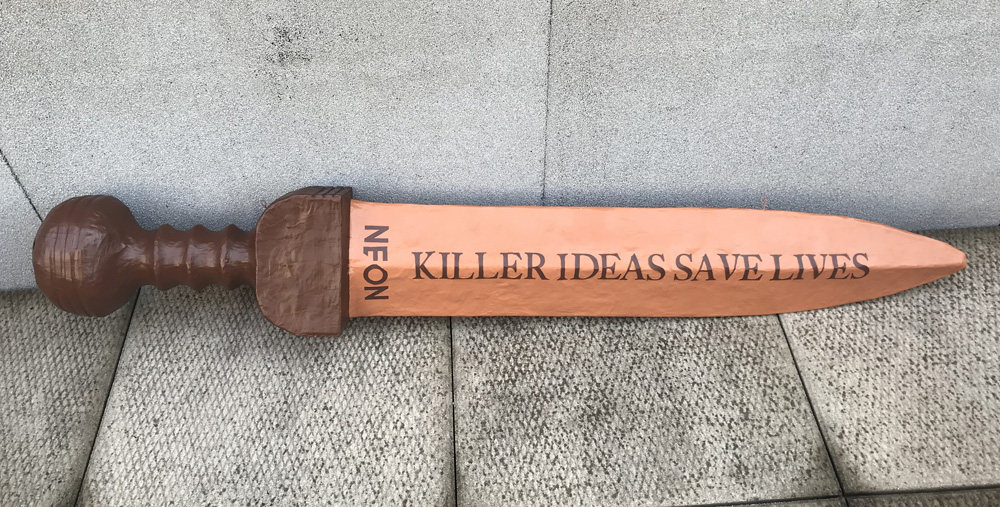
And finally, the sword piñata was done! All that remains is to fill it with stuff, hot-glue the plug onto the pommel, and then hang it up and watch people beat the crap out of it! I’ll try to get some pics/video of the thing in action at the work event where this thing will be displayed. I can’t wait to see how that goes!
 About Manning Krull
 How to make a 4-foot paper maché alligator
 My violin skull mask, Mardi Gras 2015
 Three-headed paper maché dragon sculpture
Leave a comment