
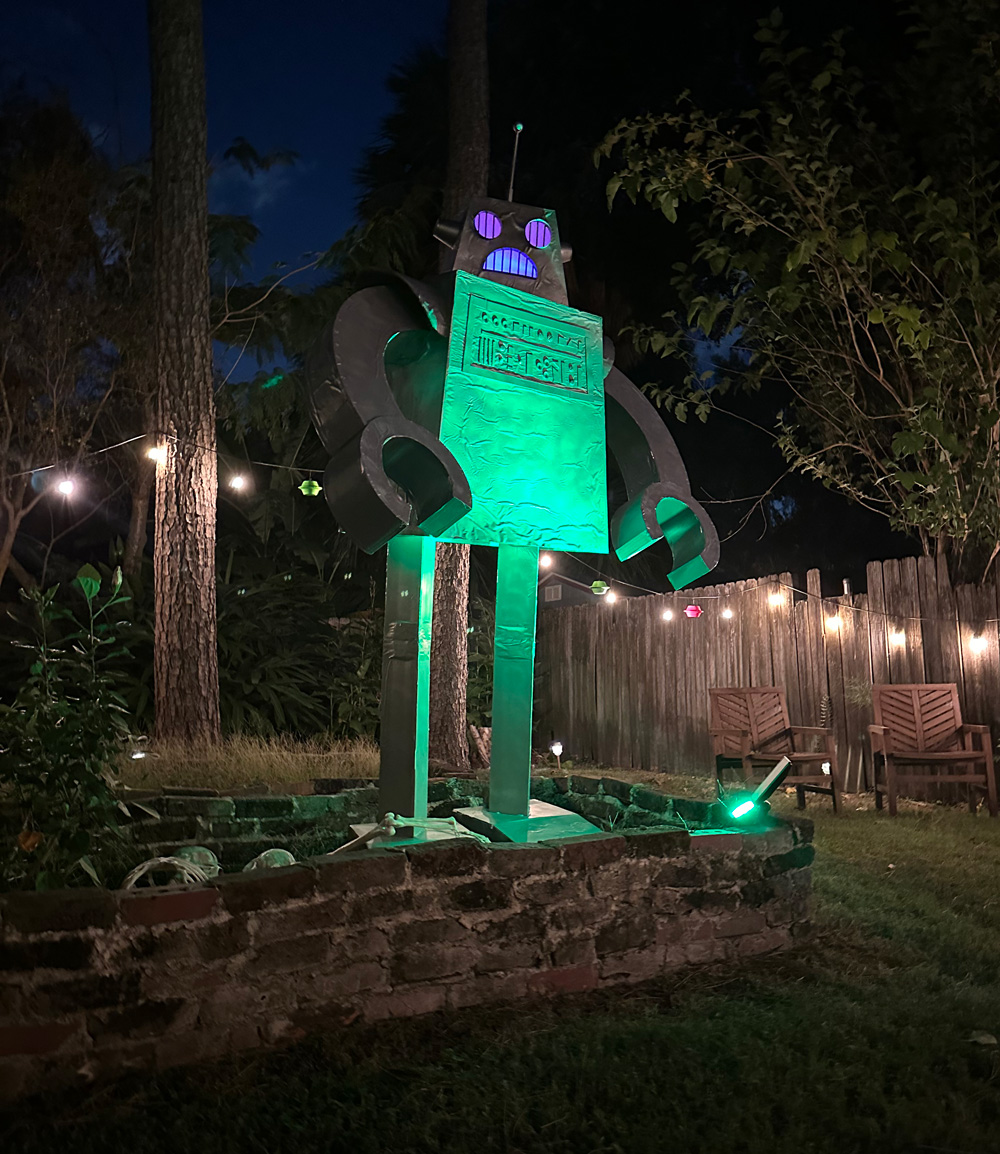
Giant robot Halloween decoration
Published by Manning on October 31st, 2023
With just a few days left before our 1950s-themed Halloween party I decided to make this simple giant robot statue, loosely based on the robot I drew for our animated party invitation.
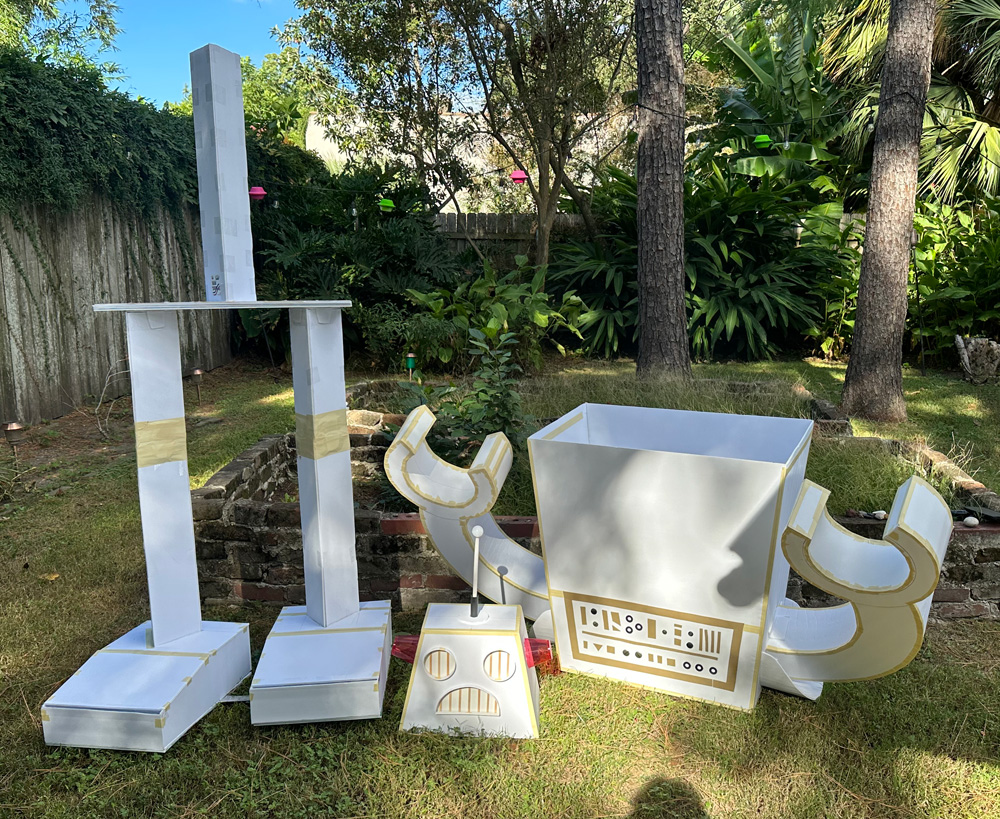
I first laid out the basic shapes in Photoshop just so I could measure them and see how big each piece needed to be. Then it was lots and lots of measuring and cutting foam board, and hot-gluing and taping everything together.
Most of the parts are just various box shapes, of course! Not much to it. The head, body, arms, hands, legs, and feet are all just irregular boxes.
For most of these box shapes, I first secured the pieces with blue painter’s tape, then I used some hot glue to connect everything more permanently, and then I removed the blue painter’s tape and covered each seam with long pieces of masking tape. The masking tape is to make all the edges look as neat as possible (although they’re far from perfect); they’ll look better after spray paint.
For curved pieces like the arms, I used two flat panels for the front and back, and then curved panels to make up the outer walls. The curved pieces are foam board as well, which I’ve cut out as plain rectangle and then curled and crushed in my hands. With the cheap foam board I use (from Dollar Tree) you can curl up a long piece, crushing the foam with your fingers as you go, and it will retain the curve pretty well; then it’s easy to just hot-glue and tape it along the edge of your flat pieces.
I inserted a metal ruler into and in between the feet, to help hold them at the exact right distance and angle. I covered this with paper and tape, and later painted it black to make it less visible. When the robot is standing in our yard I can put a brick or two over the ruler to help hold the whole thing in place and keep it from tipping over.
I used some coroplast signs to create a bottom layer on the feet that would be somewhat waterproof (probably overkill as we’re currently in a drought), and to add some stiffness to the feet so they can’t bend/buckle under the weight of the rest of the robot.
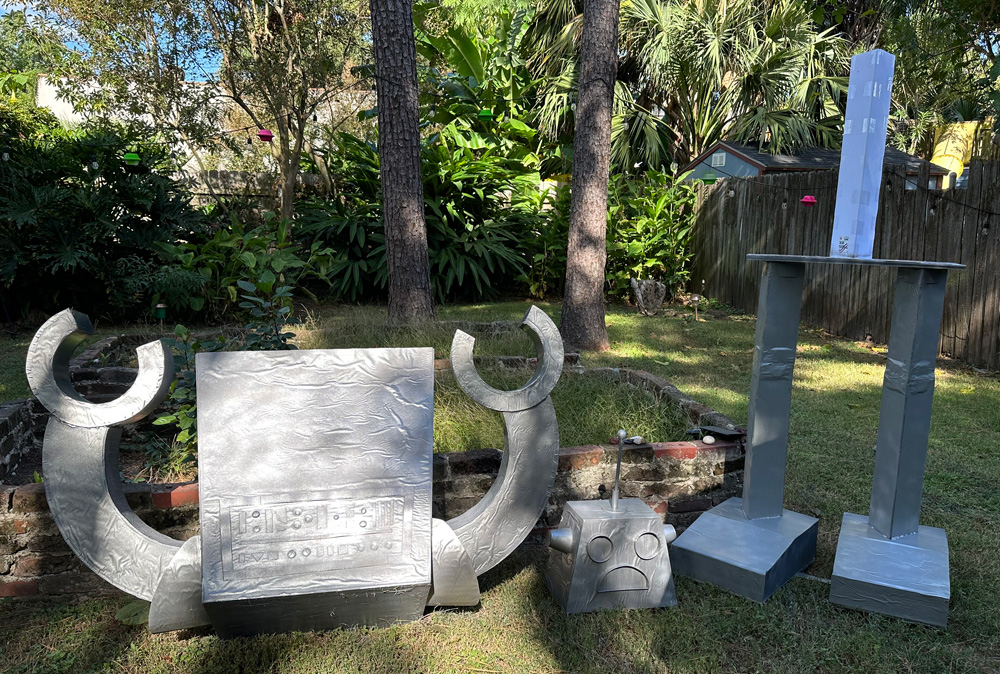
One important detail of my design: I wanted to be able to separate the top and bottom halves of the robot, to make it easier to get it in and out of the house. So I designed a really simple way to connect them:
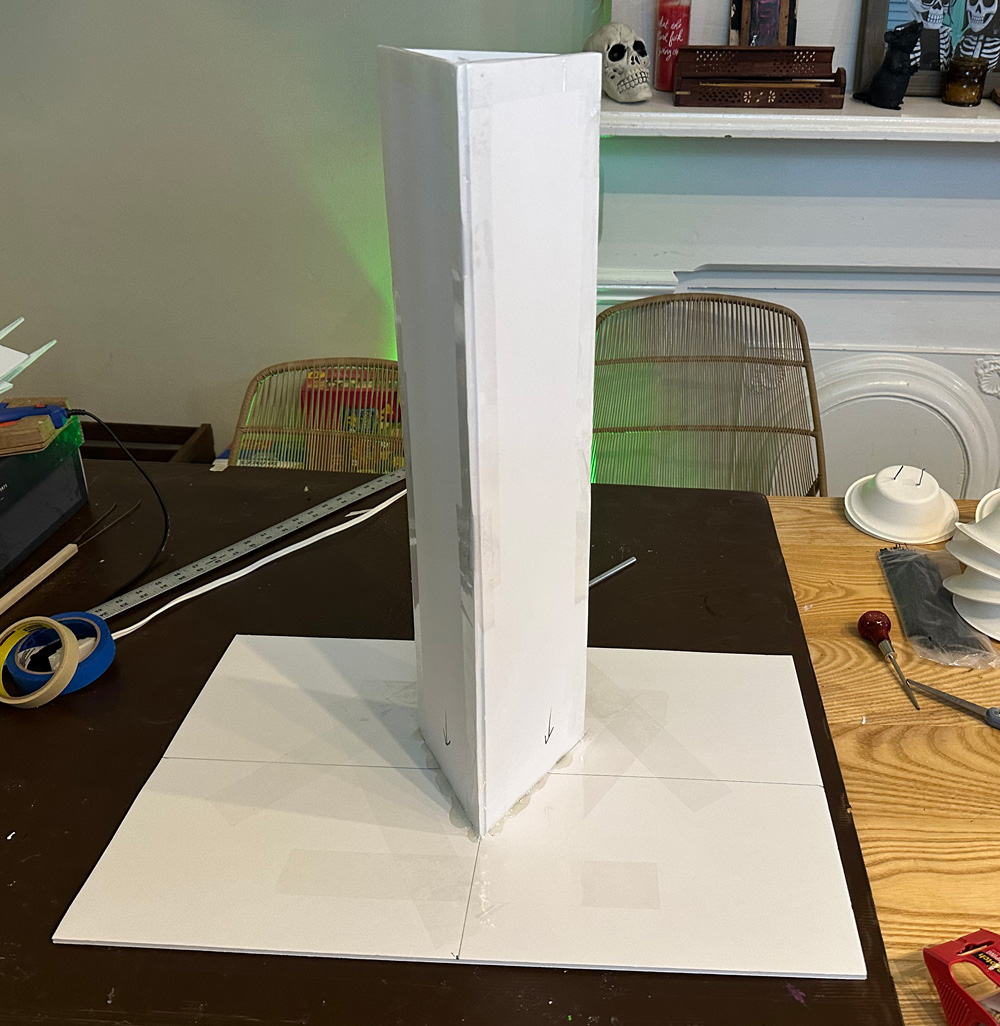
1. The body segment is open on the bottom, like a skirt. Inside, there’s a long triangle-shaped column, sticking downward from the shoulder area. I attached this to the shoulder area with a ton of hut glue, and then I put shipping tape on the surface around it to prevent it from tearing. (In the pic above you’re looking at the shoulder area, upside down, with the inner column sticking up. I built the walls of the chest/back/sides around this.)
2. The waist area has a similar triangle-shaped column, sticking up, also connected with tons of hot glue, with tape around it. I measured this to be a little smaller than the column in the torso, so it can easily be inserted. That’s it!
The torso is just big flat panels of foam board. I attached the arms with a ton of hot glue, and then I added some little folded foam board structures all around, also hot-glued in place. The arms are not heavy at all but they need a lot of support in order to be able to stick out from the body and not sag or fall down.
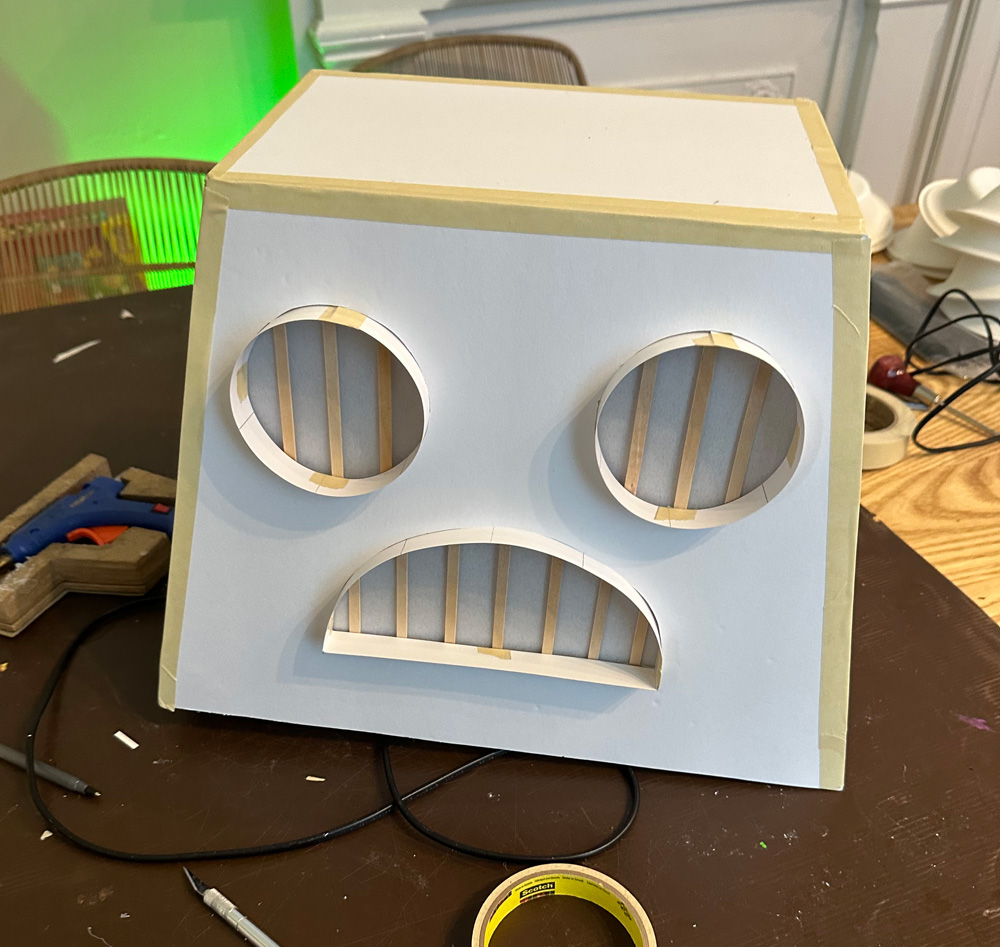
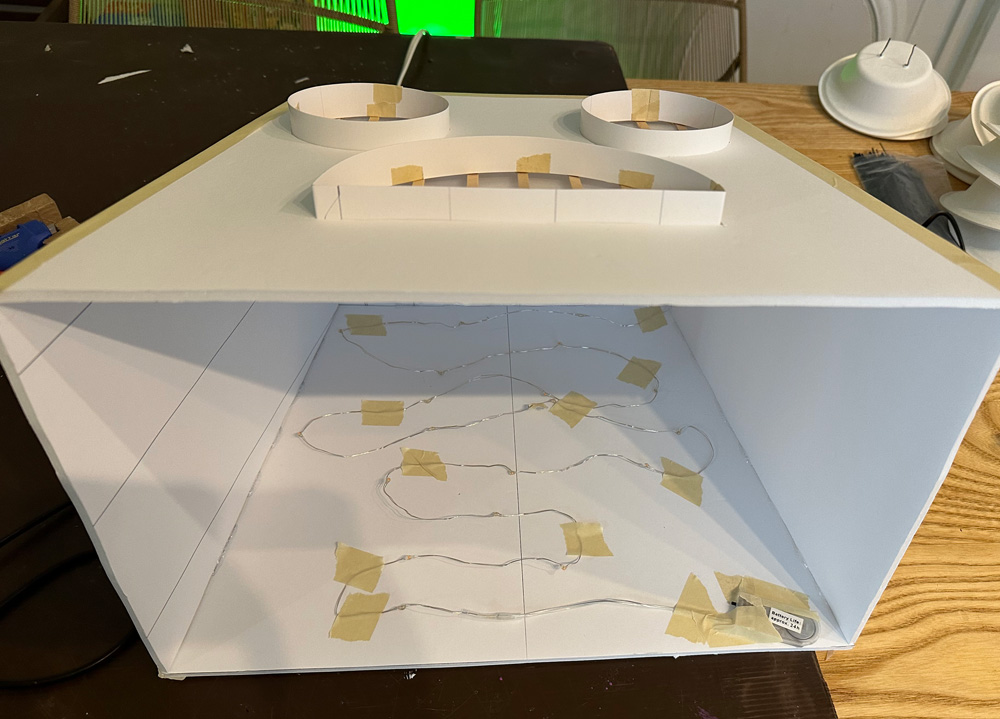
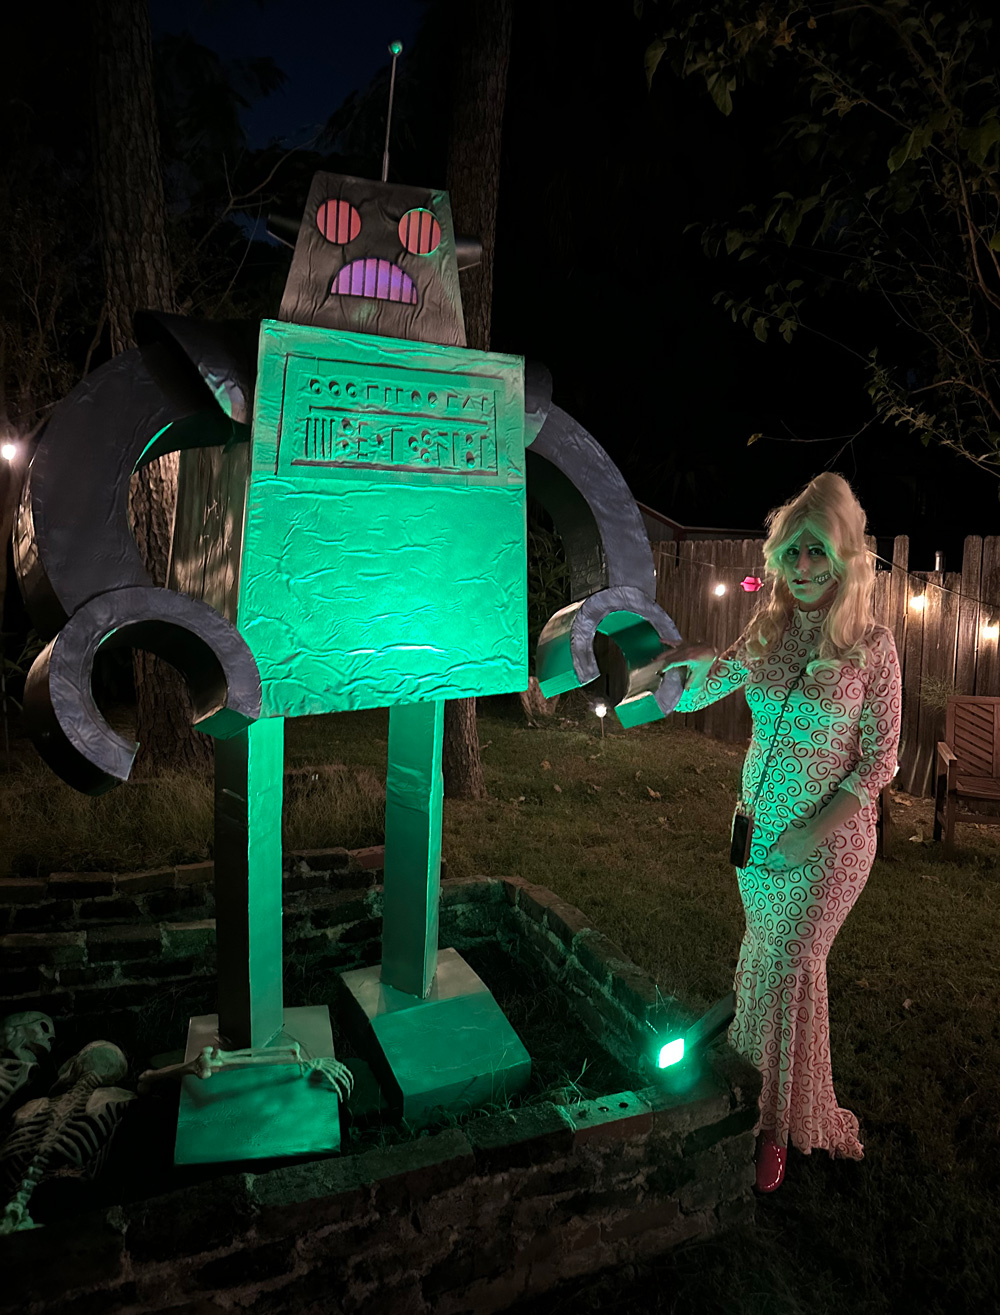
For the face, I used some strips of foam board to create the little edges that stick out from the eyes and mouth — what are these supposed to be? I have no idea. I used wooden coffee stirrers for the vertical bits behind the eyes and mouth. I knew I was going to put lights in the head, so after painting, I taped three layers of wax paper behind the eyes and mouth, to diffuse the light. I took a string of battery powered orange lights and taped them onto the inner back surface of the head. I later added a second light; a tiny single battery-powered blinking light, which I hung from a twist tie inside the head so it floats in the middle of the empty space.
I used plastic cups for the ear pieces, and a pencil and plastic eyeball for the antenna on top.
The structure of the legs is important to note, because these have to be the sturdiest parts of the whole sculpture. The legs are just triangular columns of foam board. Triangles are the strongest shapes! The lower part of the legs go all the way inside the feet and down to the ground layer, and they’re attached inside the feet with tons of hot glue. The foam board I work with is 30″ long, and I wanted the legs to be taller than that, so you can see I added an upper section as well. This upper section is 15″ tall. I connected the leg segments with tons of hot glue, then wrapped the “knees” with tons of shipping tape, and then I put masking tape around those — just because masking tape looks better than shipping tape once it’s painted.
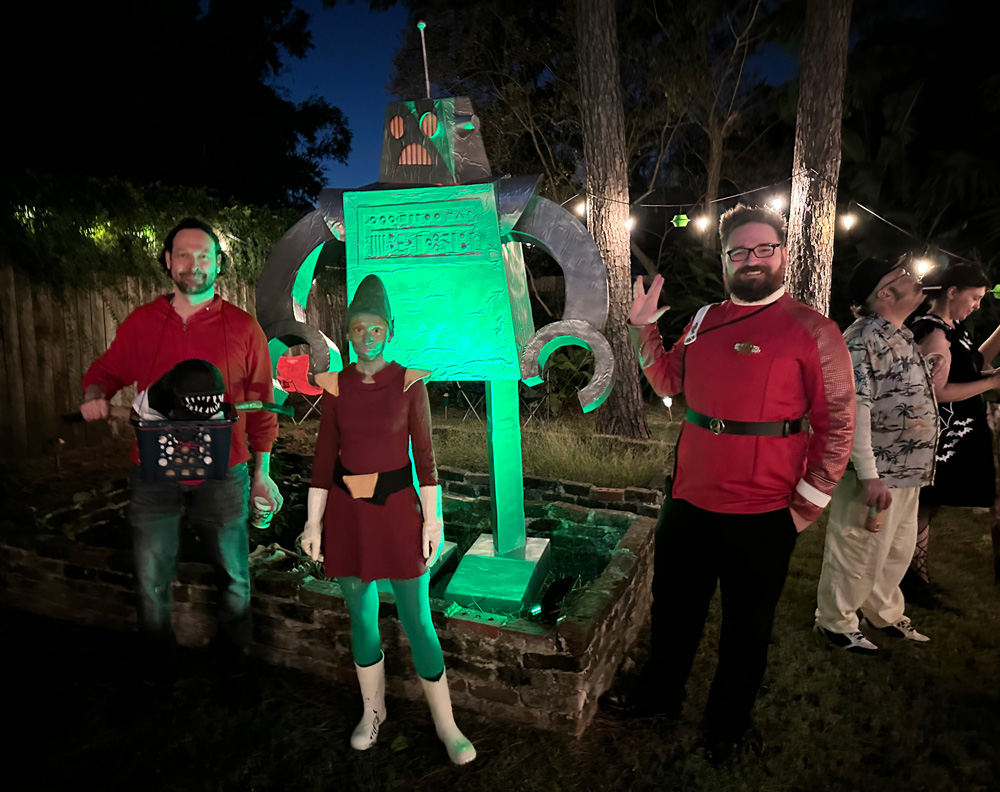
I decided to wait ’til the day of the party to paint the robot; that way I didn’t have to bring it outside, paint it, bring it back inside, and then bring it out again for the party. Our doorways are narrow and this would’ve been annoying. So all I had to do was wait for the day of the party, bring it all outside, paint the three big parts (head, torso, legs), and assemble.
Painting was easy: just a coat of gray spray paint (multiple cans!), let that set, and then a coat of silver spray paint. I tried to keep the spray painting as loose as possible, just to get almost perfect coverage without overdoing it. This was for two reasons: to prevent the paper on the foam board from getting soggy with paint, and also just to conserve paint. If you overdo it with the spray paint on foam board, the outer layer of paper gets saturated and can warp and create bubbles/wrinkles. It’s bound to happen a little away, but the less paint you use the more you can avoid this.
(Note: before painting the head, I slipped a folded up piece of newspaper inside to cover the wax paper.)
The head doesn’t actually attach to the body; it just sits on top. I briefly thought about engineering a way to attach it and make it removable, but then figured, why bother? This way when it was time for the party to start I could simply take the head off, switch on the lights, and set it back in place.
And that’s it! Not bad for a few days’ work.
 About Manning Krull
 How to make a 4-foot paper maché alligator
 My violin skull mask, Mardi Gras 2015
 Three-headed paper maché dragon sculpture
Leave a comment