
Experiment: Elmer’s Paper Maché Art Paste
Published by Manning on May 9th, 2018
After several years of doing all my paper maché projects with my trusty Roman PRO-543 universal wallpaper adhesive (paid link), I’ve decided to try some experiments with other kinds of adhesives. First up: Elmer’s Paper Maché Art Paste.
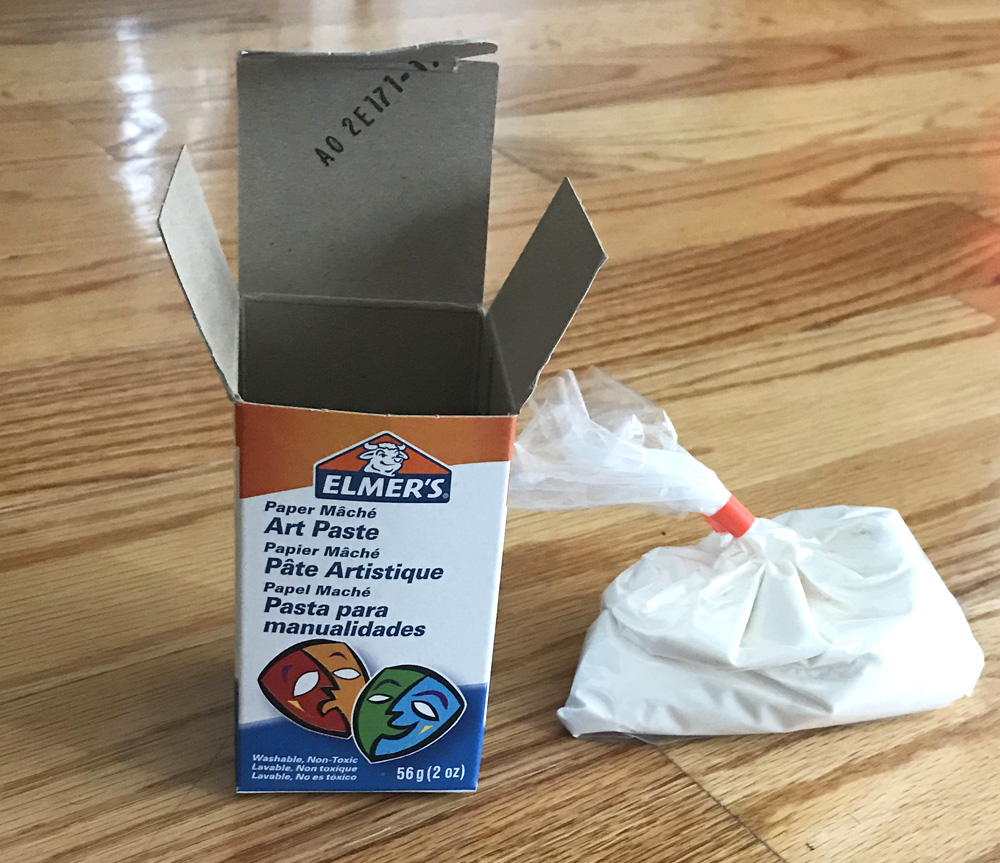
Elmer’s Paper Maché Art Paste (paid link) is a powder that comes in a small bag packed into a small box. As of this writing it’s around $5.50 on Amazon (sometimes available at 3 for $10.50!), and the instructions say to add one gallon of water, meaning you get about a gallon of paste after mixing, which is great! However, the math ends up being a little less favorable than that; more on that below.

The pre-mixed Roman paste I normally use fluctuates between $20 and $30 a gallon on Amazon, so that makes the Elmer’s paste much cheaper — if one were to take advantage of the 3-pack deal, that makes the Elmer’s paste like 1/6 the price of the Roman paste.
Mixing
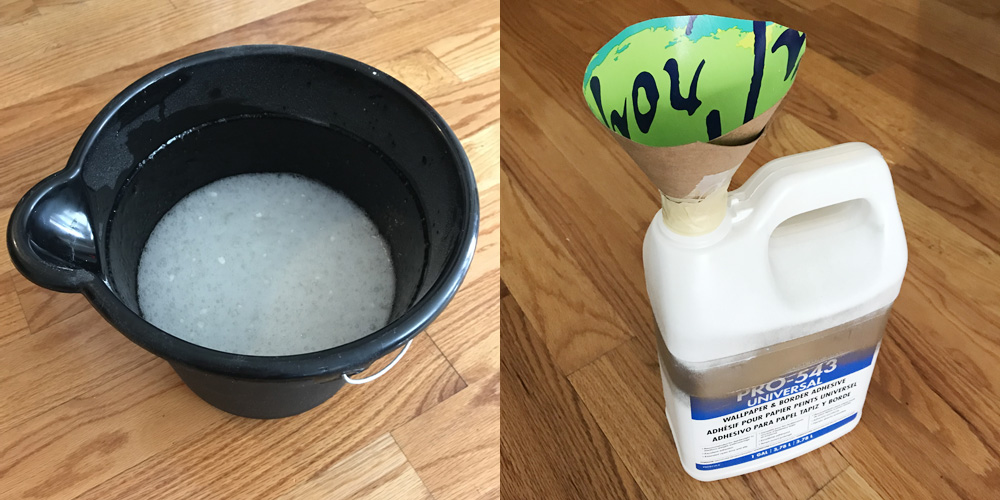
The instructions on the box said to mix the powder into 3.8 liters (1 gallon) of cold water, but I wanted to try something a little different. Normally I prefer my paste to be very thick for paper maché, so I decided to try adding water in increments and see where I landed to get the consistency I wanted. I filled five empty wine bottles (that’s 0.75 liters each) with water and had them at the ready. I started with two bottles of water (1.5 liters) in my bucket and as I mixed I could see I needed to add a third bottle, and then a fourth, and with four bottles of 0.75 liters of water I ended up with the consistency and thickness that I wanted. So in the end, rather than 3.8 liters of water, I used about 3 liters total. This means I ended up with 20% less paste than what was described on the box, but that was my choice; no big deal. In the future, I’d just start with 3 liters of water in my bucket and mix the powder right in. So if you know you want very thick paste, you can just do that.
Safety note
Always wear a paper dust mask when mixing! This stuff is non-toxic, but you probably don’t want to go inhaling powder that turns into glue on contact with moisture.
Mixing tips
This is important! You wanna start with a good amount of water in your bucket/bowl, and gradually pour small amounts of powder into the water and mix them in thoroughly before continuing. You do NOT want to just dump the whole bag of powder into your water, or dump the powder into a dry bucket and then pour the water in. Both of these will make it much, much harder to mix everything evenly. You’ll end up with tons of lumps that are really hard to get rid of. So, again: put at least half your water into the bucket, then a little powder, mix thoroughly, then a little more powder, mix thoroughly, etc. Add more water as needed.
Although I usually prefer working with my hands for everything, I recommend mixing the paste with a big wooden spoon, or a spatula, or a strong whisk. If you use your hands, you’ll end up with a ton of very thick paste coating them, and the only way to get rid of it is to rinse it off, and that means you’ll lose a huge amount of paste down the drain. As usual, I learned the hard way! With a spoon or whatever you’ll lose much less paste.
Lumps
After mixing up this paste a few times now and being a little more careful each time, pouring the powder extremely slowly, mixing with a spoon and whisk, I still get a lot of little white lumps in the paste! It’s frustrating! However, I’ve learned that even though you can’t get rid of the lumps no matter how well you mix, the lumps end up disappearing on their own after you’ve stored the paste away for a day or two. I think the water just needs time to seep all the way into the lumps and dissolve them. So don’t despair! And don’t think you need to use a strainer and get rid of the lumps; you’ll be throwing away a lot of paste. Just mix, store, and wait.
Storage
Anyway, when I was all done mixing, I poured some of my mixture into a small bucket with a sealable lid, with the plan to work directly from that for my paper maché projects. I poured the rest of the paste into an empty 1-gallon plastic bottle for storage — I made a funnel out of an old LaCroix box and taped it in place to help me pour the paste into the bottle without spilling any.
You can see I spray painted a silver line around this jug, so I can tell this one has the Elmer’s paste in it. (Silver was just the color I had nearby.)
With any kind of mixable paste like this, I’ve always read you can store it and use it for weeks or even months. The longest I’ve kept the Elmer’s paste so far is about a month, and it always feels and behaves the same way even after all that time. Important: you’ve gotta mix this paste a bit each time you use it; otherwise it feels like it starts to separate a bit into very watery paste on top and very thick paste on the bottom.
Update! I stored about half a gallon of this paste for about two months, and when I opened it up just now to use the rest, it smelled really bad! Like rotting food; I guess there’s an organic element to it. So I threw it out. Oh well! Now I know to only mix up a batch of this stuff when I know I can use the whole thing.
Time for paper maché
I did a simple test using the Elmer’s art paste to see how it compares to the Roman paste I’ve used for years. I’m currently working on a large number of paper maché severed heads for Halloween, and I’d already made the base for a few heads with the Roman paste and five layers of paper. I did two more heads using the same method but substituting the Elmer’s paste for the Roman paste, and let them dry for a day.
When they were done, the new heads with the Elmer’s art paste were noticeably less sturdy than the ones I made the same way with the Roman paste. They were fine though, and if I’d added one extra layer of paper they’d probably be just about as strong as the others. So, the Elmer’s paste is much cheaper, but the results are definitely less sturdy. I think it’s a fair trade-off.
Pros and cons
Some pros and cons of working with Elmer’s Paper Maché Art Paste versus Roman wallpaper adhesive…
Pros:
- Much cheaper than the pre-mixed wallpaper adhesive brands I’ve been using.
Cons:
- Resulting finished paper maché objects are noticeably less strong and sturdy than what you’d get with the Roman adhesive and the same number of layers of paper. You might have to do additional layers of paper to make up for this loss of sturdiness, which also means more time/effort, and more weight.
- The finished paper maché surface is much more wrinkled than what I get with the Roman paste — although it may be possible to avoid this by working slower, using smaller pieces of paper, and letting each layer dry completely before continuing.
- You gotta mix the Elmer’s paste yourself, which requires a little bit of time, as well as a bucket, a container for storage, etc.
- Seems impossible to avoid getting little lumps in the paste, and you’ve gotta let the paste sit for 24+ hours for the lumps to go away.
- Lots of cleanup after mixing.
- Once the paste is mixed, it goes bad after a couple months of storage.
And then there’s this other detail in the con column, regarding the low cost of this paste: Like I mentioned, a $5.50 box of this paste could yield up to a gallon of paste (whereas the Roman paste is $20-30/gallon), but I opted to use less water, giving me about 0.80 gallons of paste. So the savings get a little bit smaller there. Then, I realized in working with the Elmer’s paste, I had to use a significantly larger amount of paste to create a given project (for example, a paper maché head) than I’d use on the same project with the Roman paste. So, the savings shrink a little bit more. Then, the resulting piece was less solid using the same amount of paper, so I had to add an additional layer or two of paper and paste, meaning I was using even more paste. So, the savings shrink a little bit more.
I’m not smart enough to accurately calculate the real cost comparison with all these little factors involved, and I’m sure it still works out that the Elmer’s paste is much cheaper than the Roman paste. But, the savings definitely aren’t as extreme as I thought when I first read that one $5.50 box of Elmer’s powder yields a gallon of paste.
Other differences: The Elmer’s paste feels very slimy and slippery in one’s hands, and I thought that might make it unpleasant to work with, but it was totally fine. Surprisingly, washing my hands with an old sponge and water was actually a little easier than with the Roman paste.
In conclusion
I was a little disappointed to find that the heads I made with the Elmer’s paste felt somewhat flimsy compared to the ones I made with the Roman paste (and this has been true of all the other projects I’ve done with Elmer’s paste since), but for the low price I think it balances out. I was happy to finish using the rest of the three liters of paste that I made, and I’ve bough this paste a few more times since then. However, I always use it on projects where I have the luxury of extra time for additional layers of paper, or projects where I’m happy to leave them pretty flimsy. I don’t find the mixing and storing steps to be laborious or annoying at all; that part is kind of fun, really!
All in all I’m happy I’ve added this paste to my collection of art supplies, and it’s making my giant disposable Halloween projects a lot cheaper!
 About Manning Krull
 How to make a 4-foot paper maché alligator
 My violin skull mask, Mardi Gras 2015
 Three-headed paper maché dragon sculpture
March 22nd, 2023 at 10:21 pm
Thanks so much for this post. Your work is amazing! I am an elementary art teacher and would love to do some paper mache projects with my students. The problem is that all the recipes I’m finding only last a few days. I am expecting this project to take us several weeks to allow for drying and adding layers. Having to remix a batch for every class is just not practical. Based on what you wrote, I’m thinking of using the roman pro-543. I’m doing this with 4th and 5th grade, so I’m not worried about them eating it! Is there anything I should know about this product that would be relevant to using with kids? I was thinking wearing kitchen gloves might be a good idea. Any thoughts???
March 23rd, 2023 at 4:01 pm
Hi Rachel! Happy to help. The Roman paste is fantastic, and it keeps for months/years. I do have a note about safety on my article about my paper mache method, here; just scroll down to “Do you wear gloves?” So, I think if you can instruct the kids to wear gloves that would be ideal. One more idea: why not try regular Elmer’s glue and water? Very cheap, lasts a long time, completely non-toxic, and it’s a pretty popular adhesive for paper mache, although the finished work might be a little less solid than something made with the Roman paste. Anyway, some very talented paper mache artists prefer Elmer’s glue and water. I’d love to hear what you end up doing! Good luck!
March 23rd, 2023 at 5:16 pm
Thanks for getting back to me so quickly. I didn’t realize that elmer’s and water would last. That definitely sounds like a good option. Right now I have Elmer’s school glue, I’m guessing I may need to do all purpose glue instead. I’ll do some more research. Again thank you for sharing your expertise with me!
March 24th, 2023 at 8:34 pm
Elmer’s School glue would work! Elmer’s wood glue works great too. I haven’t compared the results to see if one works best.
September 17th, 2023 at 5:33 pm
I just started my first project with Elmer’s paper mache paste yesterday.. The last time I did paper mache was in high school , about 60 years ago. Only read your post today. Thank you for posting that info.
I knew I would not use a gallon, so I weighed the bag of powder, then added 1/8 of it (.26oz) to 2 cups of water. I doubt that I will need that much for my current project. I decided to use a brush to put a generous amount of the paste on my form in an area slightly larger than my paper piece, then add one piece of paper, then brush more on top, and add more paste for my next piece of paper. That seems to be working and seems less messy than dipping the paper. Maybe on a larger project, dipping will be less time consuming.
I did about half of one layer yesterday, let it dry for almost 24 hrs, Finished my first layer today, and then started my second layer on the dry part from yesterday.
One tip I read elsewhere which I think is a good idea, is to use different colors on the layers. So my first layer is from AAA newspapers which have a lot of color. My second layer is from a black & white newspaper. I think that will help to make sure I’m not missing any parts on my second layer. I can alternate color & black and white. I also have a pad of blank newsprint I have no other use for, so will use that, too.
After sanding & painting, do you use a clear top coat? What do you use? Spray? Liquid? Mod-loodge?. Poly-coat? Or does it depend on your project?
September 18th, 2023 at 4:54 pm
Hello CJ! My painting/finishing method is usually: spray paint, then acrylic paint for details, and then I finish with either matte spray or gloss spray. Most of my sculptures don’t have to survive outdoors, but when I need to try to make a piece (somewhat) waterpoof I use one or two coats of spar urethane. (And I usually don’t sand anything; for most of my projects I like the rough texture of the paper mache.)