
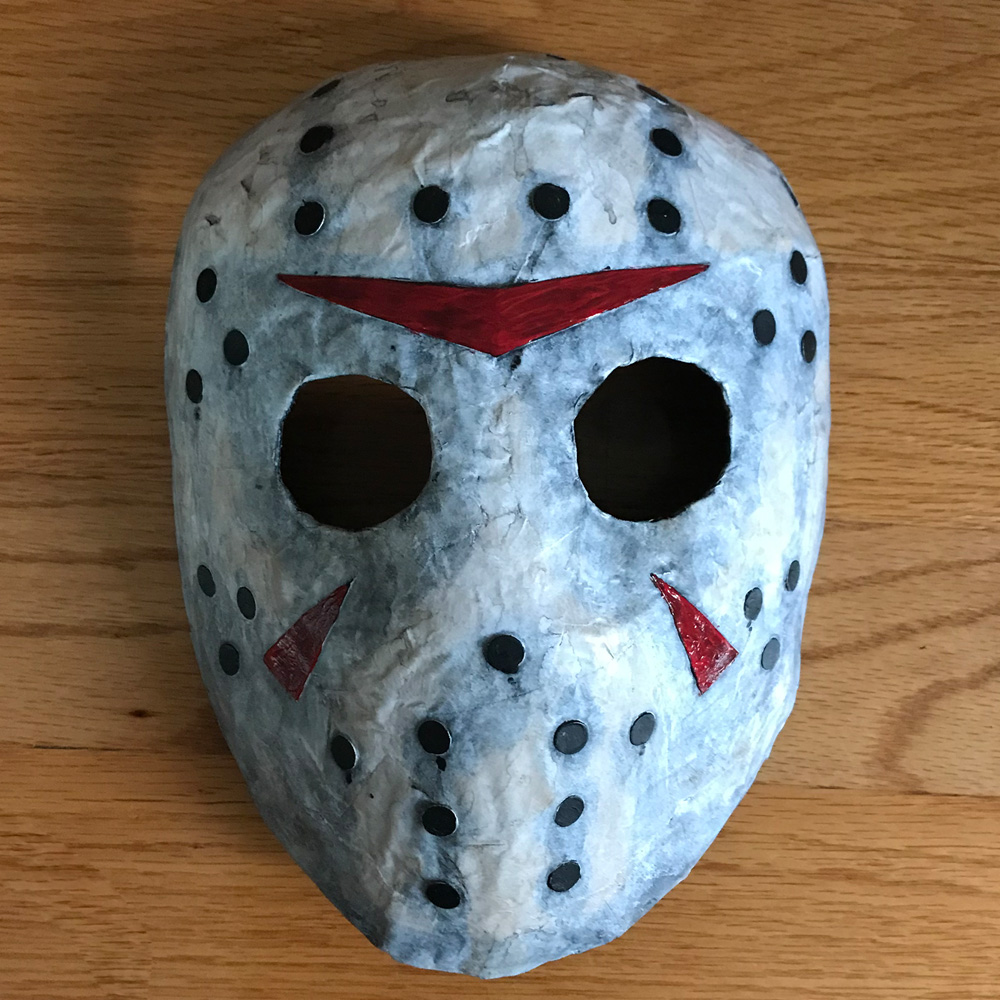
Home-made Jason Voorhees mask!
Published by Manning on September 30th, 2019
I made this very quick and easy Jason Voorhees mask prop for Halloween 2019. Sure I could’ve bought one for a few bucks, but it’s always more fun to make my own, and I like for all my Halloween decorations and props to have a really rough DIY look to ’em.
For this project I actually started with a crappy Halloween mask from the dollar store — their masks are always junk, but this one had a few good characteristics that were right for this project: it was generally the correct shape, it was pretty large (strangely wide like an adult mask, but not-very-tall like a kid’s mask), and it was made of fairly thick, rigid plastic. Also good: one dollar.
I did a few quick things to reshape and smooth out the plastic mask in order to get it ready for paper maché.
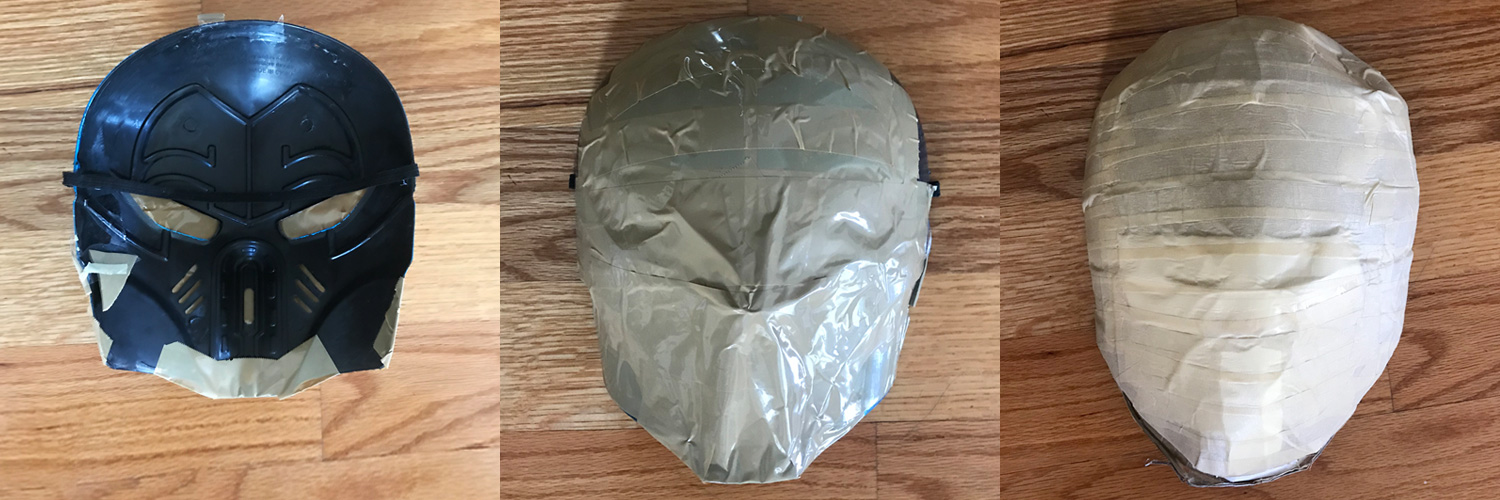
First, I covered the front of the mask with shipping tape in order to smooth out some of the big details. You’re actually seeing the back/inside of the mask in the pic below; I forgot to photograph the front before putting all that tape on there. The mask was basically some sort of metallic warrior-lookin’ dude. Oh hey, I found a pic on the dollar store’s website!
Then I built out a bigger chin area with some strips of craft foam and more tape. You can see that in the middle pic.
Next, I covered the whole mask with a bunch of horizontal strips of craft foam that I cut out (not shown ’cause I forgot to take a pic). These helped smooth out the face even further and make the whole thing thicker. I taped the craft foam strips in place, and then I covered the whole mask with a layer of masking tape. This got me to exactly where I wanted to be: the features of the face were completely smoothed out, with just a vague impression of a nose bump sticking out. Perfect.
Paper maché
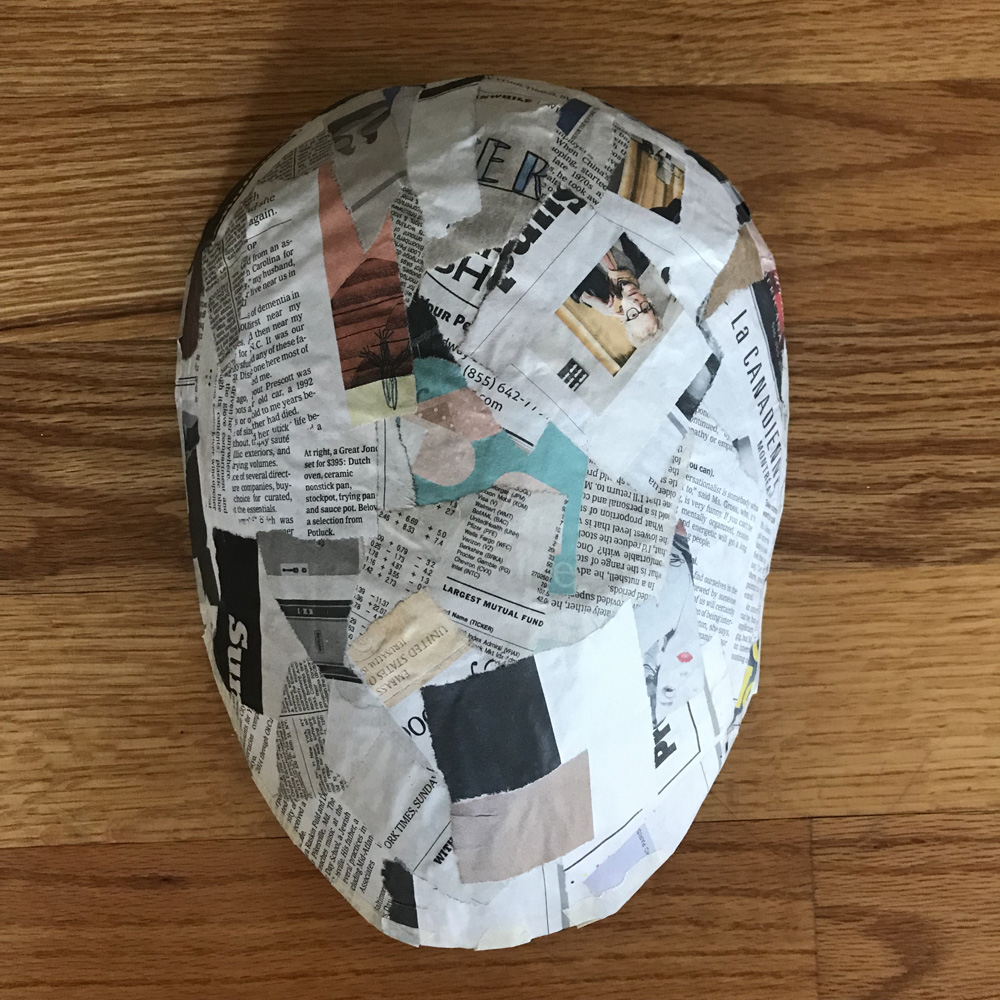
Next, I applied six layers of paper maché to the mask, all in one shot; here’s some info about my paper maché process and materials. The short version is: I use Roman PRO-543 universal wallpaper adhesive (paid link) and alternating layers of newspaper and brown wrapping paper.

I only did six layers of paper maché because this mask will just be a prop hanging on the wall; if I’d wanted to make this thing a sturdier, wearable mask, I would’ve done eight or ten layers of paper.
I let the paper maché dry for a full two days before continuing. I used my X-acto knife to slice all along the edges of the mask, so I could carefully remove the paper maché from the tape. (I set the plastic mask and junk aside to maybe use again for something else later.) I then used scissors to trim the edges of the mask a bit, just to make it nice and symmetrical.
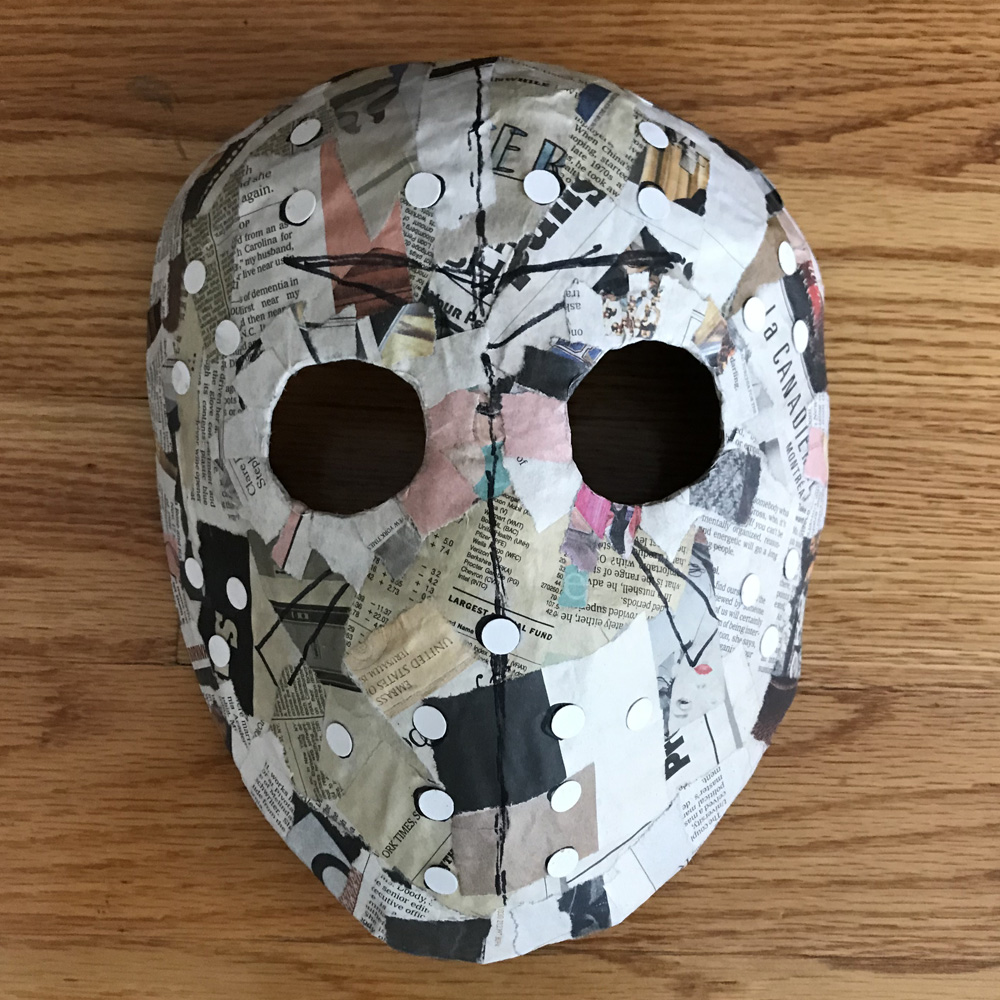
I took a Sharpie and sketched a bunch of guidelines on the mask — for the eye holes, all the little air holes all over the place, and the pointy shapes on the cheeks and above the eyes. When I got these figured out, I cut out the eye holes with an X-acto knife. I did not cut out all the little round holes — more on that later.
I reinforced the inner edges of the eye holes, and the outer edge all the way around the mask, with one more layer of tiny strips of paper maché.
For the little round holes, I cheated. I don’t have a good way to poke a bunch of perfectly circlular holes in a mask like this, so I did something else. I used my fancy 3/8″ hole punch to punch out a few dozen circles from very thin pasteboard — some packaging for a fancy chocolate bar. I glued these all in place on the mask with tiny drops of Tacky Glue. The nice thing about making the circles slightly raised and 3D like this is that it gives you a great guide for painting later. It would be impossible to paint all those dots to be perfectly round and perfectly the same size just by hand.
I cut out the three pointy shapes from the same chocolate bar packaging. I glued these in place (not shown) with the same wallpaper adhesive I use for paper maché; I spread some paste onto the mask and also worked some into the pointy shapes themselves to get them nice and saturated with paste; this helped them lay flat on the mask and really take on the curvature of the face. I let all this dry for a few hours.
Painting
When all the glue was dry, I spray painted the mask black, both on the front and back. When that was dry, I painted it again, a little more lightly, with this off-white color I had leftover from other projects.
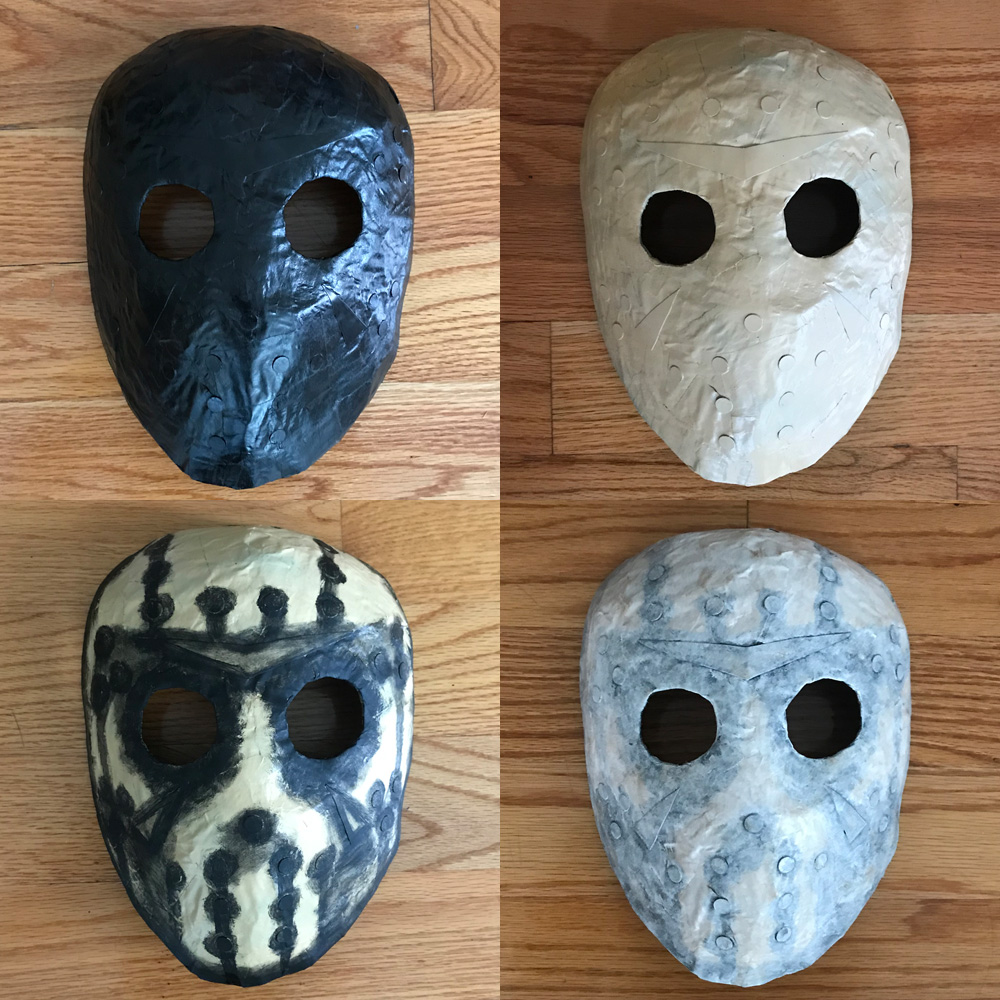
I did the rest of the paint job by hand with acrylic paint and various brushes. I painted dark shadows all over the place, particularly around all the holes and in vertical lines running down from all the details, like drips.
I then painted the whole mask with a thin layer of white, which let all the shadows and grossness show though. When that was dry I mixed some very watery black paint and did a wash over the whole mask. Then I painted all the little holes/dots black, and the pointy graphics red. Like I mentioned, having the raised pasteboard shapes on there helped me paint these details really precisely, and in the low light of the Halloween party you won’t be able to tell that the circles are not actually holes.
Another neat trick you can do to dirty up a surface like this: put a tiny drop of black acrylic paint in your hands, rub it all around in your hands until it’s barely there, and then just handle and smudge up the piece with your fingers. Easy and fun!
And with that, this thing was done! Definitely one of the less overly complicated projects I’ve taken on lately. On to the next one…
 About Manning Krull
 How to make a 4-foot paper maché alligator
 My violin skull mask, Mardi Gras 2015
 Three-headed paper maché dragon sculpture
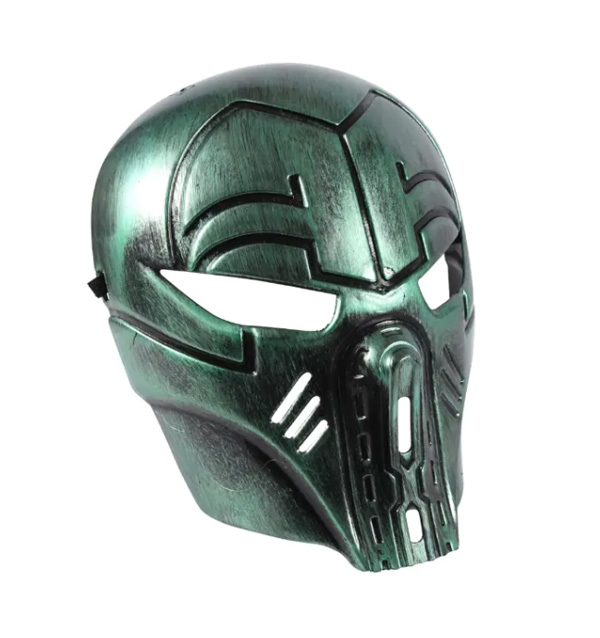
Leave a comment