
Making a light-up VOODOO sign with Christmas lights
Published by Manning on October 30th, 2015

Check out my new VOODOO sign! This is for this year’s Voodoo Bayou Halloween party. This sign was easy to make and doesn’t involve any power tools or wood. The letters are made from disposable aluminum cookie trays with Christmas lights poking through, and the base is just foam board and paper. We hung the sign on our front balcony, sticking out so people could see it when they’re walking up our street. Here’s how I made the sign:
I decided to reuse the box shape that I’d made for last year’s sign. Last year I made a last-minute “ASYLUM” sign for our haunted asylum party. The letters were just plain white paper, and I set up a clip lamp with a red bulb in front of it to illuminate the sign a bit. Here’s what that looked like:
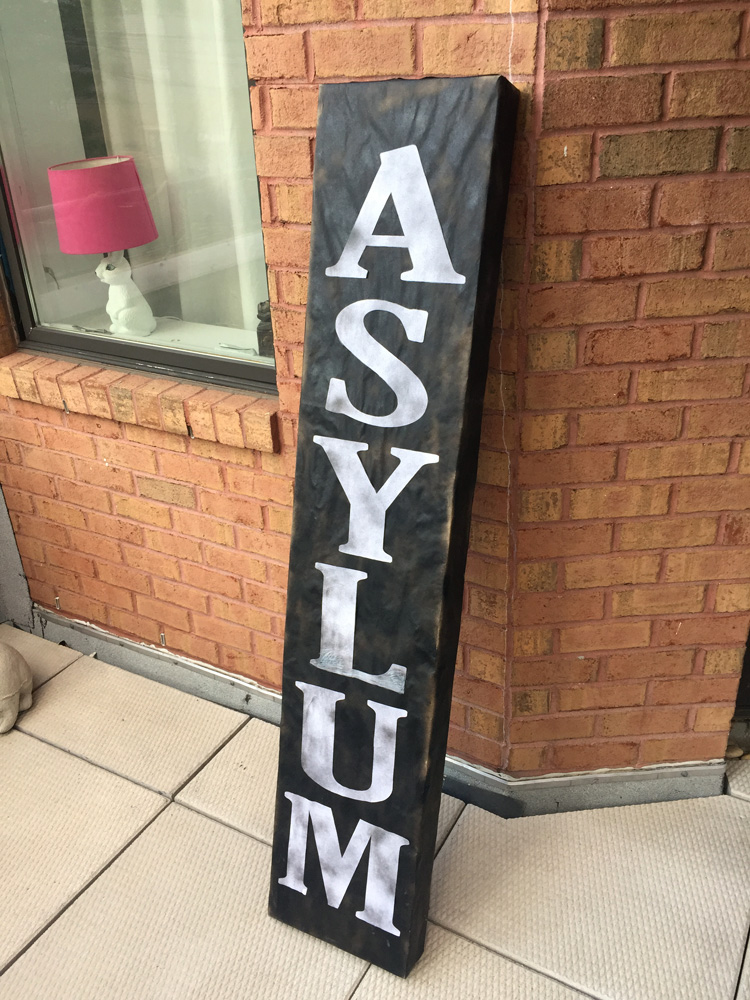
I’d made the box shape from scratch, using foam board and Scotch heavy-duty packing tape; you can build very strong shapes with just those two materials if you’re pretty precise with the fit. I then wrapped the box shape with brown wrapping paper (just like you’d wrap a package), and spray painted it all over with black spray paint, not to cover it completely in black but just to make it look very old and dirty. I printed out the ASYLUM letters and cut them out and glued them onto the sign and gave them a light dusting of black spray paint as well.
So, for this year, I started by trying to remove the ASYLUM letters from the box shape. This turned out to be impossible; they were glued on too well. So instead, I created my VOODOO sign on the back of the box, and worried about the ASYLUM letters later. The back of the ASYLUM sign was pretty ugly; all the paper edges and tape were on that side, like the underside of a present. No good for what will now be the front of my VOODOO sign. So I covered this side with some black poster board.
To design the letters for my VOODOO sign, I first laid out the sign shape in Photoshop; I do a lot of my measuring and planning for a lot of my projects in Photoshop. I measured the box shape (it’s 12″ x 58″) and made a rectangle of that size in Photoshop, and then added the letters and played around with their size and positioning. When I was happy with that, I added dots for where the holes for the lights would go. When all that was done, I printed the letters out individually as black outlines so that I could trace them onto the aluminum cookie sheets.

I traced the letters onto the cookie sheets with a marker. (Of course, you want to trace the letters onto the aluminum sheets so that they’re backward — this way the ink won’t be visible on the front of the letters.) I then traced my ruler all around the letters to draw the “walls” that will be folded up around the letters. They’re about an inch and a half wide. Most of the walls were attached to the letters so they could be folded up, but a few didn’t fit so I drew them floating by themselves off to the side so I could attach them separately.

When that was all done I cut out the letters and walls with scissors. BE CAREFUL cutting the aluminum! I sliced my finger open three times while cutting out these shapes. If you’re kid, get a grownup to help!
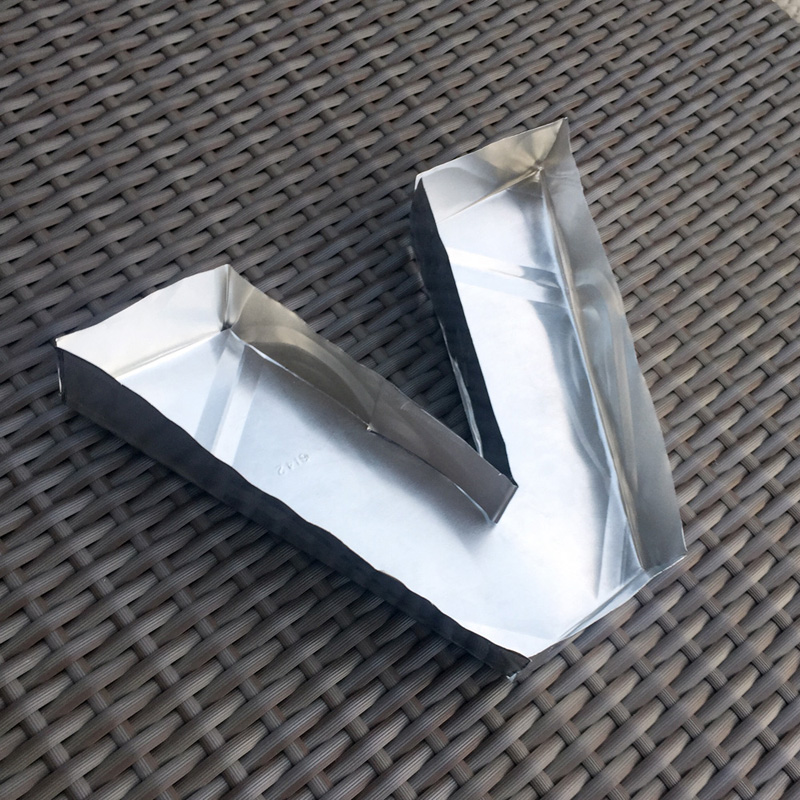
Okay, once the shapes were cut out, I scored the lines that needed to be folded, using a butter knife and with a magazine underneath the metal to let it bend a bit. Scoring the lines like this makes them much easier to fold neatly. I folded up the walls of the letters and curved them as needed, and attached them in several places with heavy duty packing tape. The letters already looked pretty cool just like that!
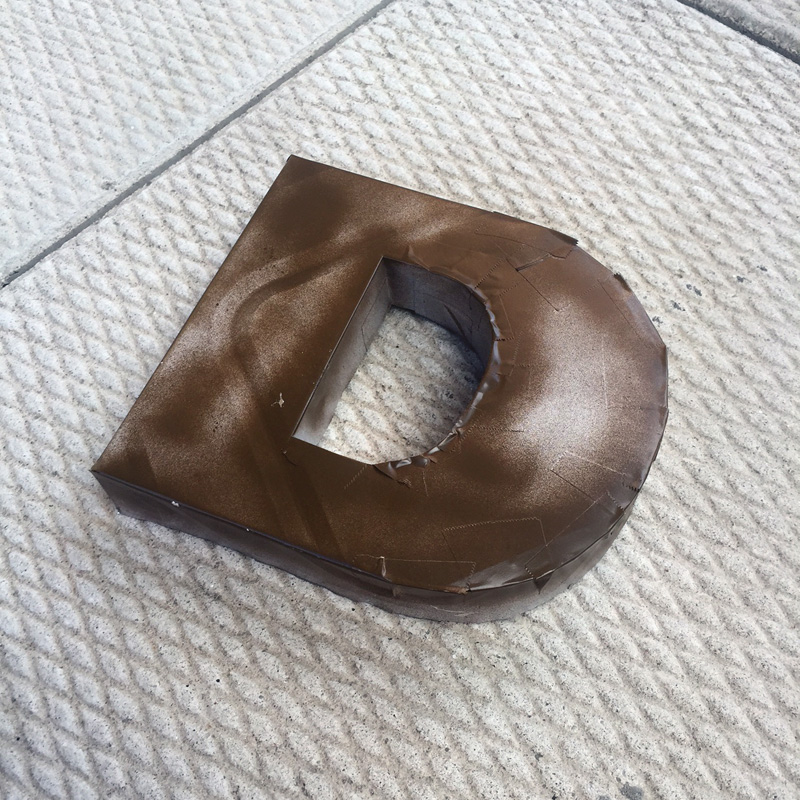
When my letters were assembled, I noticed there were a lot of little gaps in the areas around the base of the letters where the pieces didn’t fit perfectly. I didn’t want light to spill out of the letters onto my black background, so I came up with a method to prevent that. First I placed packing tape all along the outer edge of the letters, to build up a clear wall over all those gaps. Then I spray painted the edges and back to make that clear tape tur opaque. If I’d had silver spray paint laying around I would’ve used that, but I ended up using brown (which was handy) which was great because it made the exterior of the letters look old and rusty. Of course, most of this brown won’t be visible since this is the back of the letter you’re looking at. It’s the edges and sides we’re talking about here, where you can see the tape.
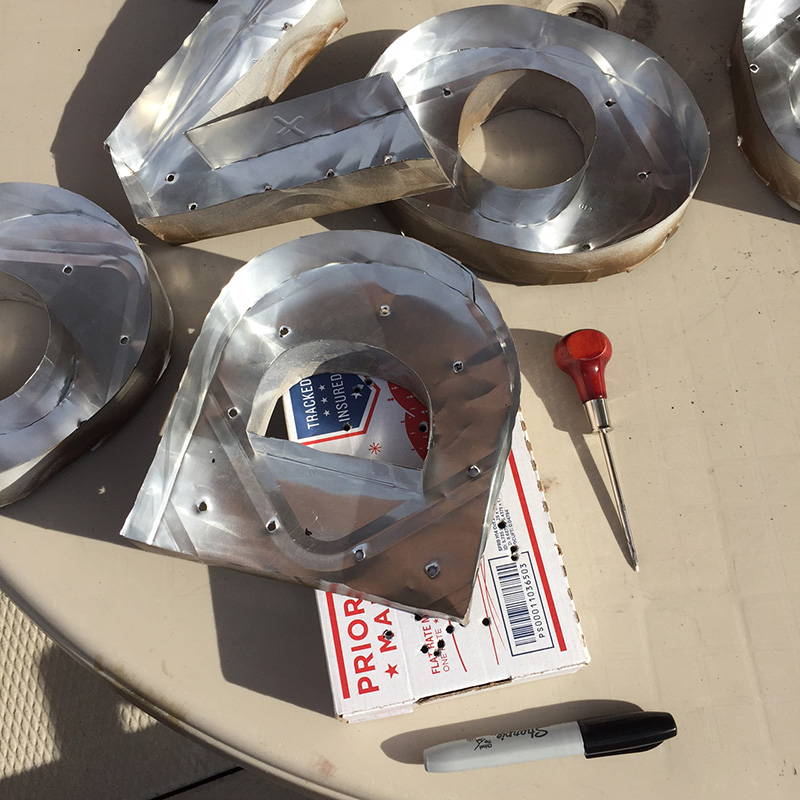
I cut the holes for the lights with an awl, using a cardboard box behind the letters so the awl had something to punch into. The holes were too small for the lights, so I stretched them with the tapered round handle of a small paintbrush.
Back to the box shape of the sign. I laid my letters onto the front of the box and used a white grease pencil to poke through the holes and mark where all lights would go. I then removed the letters and punched holes in the sign with an awl, and stretched the holes out with the handle of a paintbrush (just like making the holes in the letters themselves). I then sliced open a huge panel in the back of the box with a box cutter, so that I could easily get at the inside of the thing.

I inserted the string of Christmas lights into the open back of the sign and stuck them through all the holes. It’s important you plan this part out before doing it! My string of lights had 70 bulbs, and I made a plan to have eight lights in each letter, with two lights worth of cord between each letter. In sketching this out, I realized the most efficient way to insert the lights was to go all the way up the left side of all the letters and then all the way down the right side of the letters. This used up about 68 of my 70 lights; perfect.
I made sure the plug was sticking out of the corner of the box, and then I taped the panel onto the box with packing tape. Oh yeah, and the “Asylum” letters were easy to remove; when I sliced the shape of this panel the letters and wrapping paper mostly just fell away, leaving me with just the black foam board of the box shape.
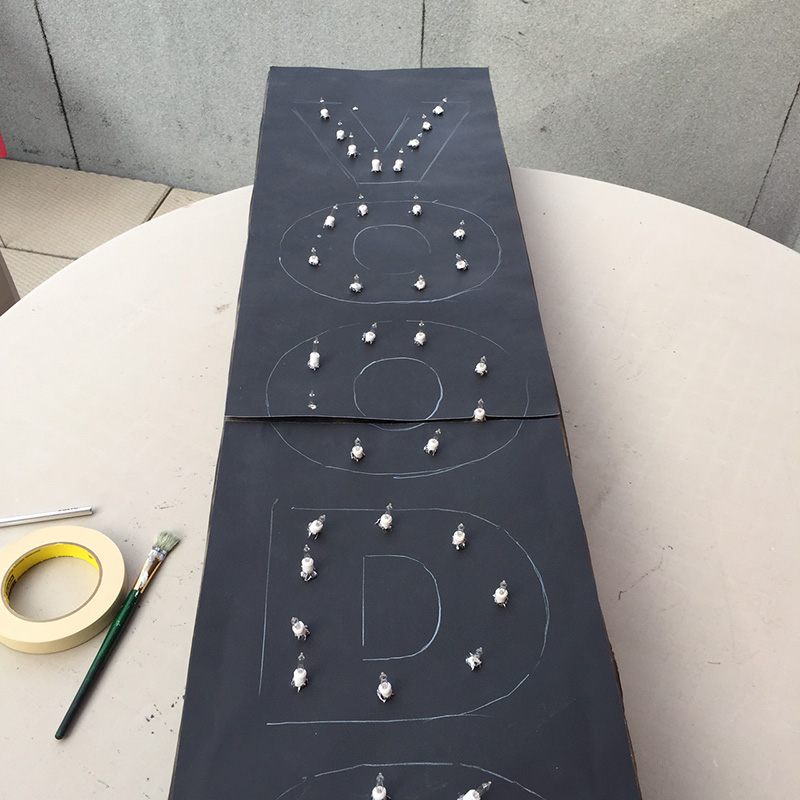
Back to the front of the sign! Here are the lights poking through, before adding the aluminum letters.
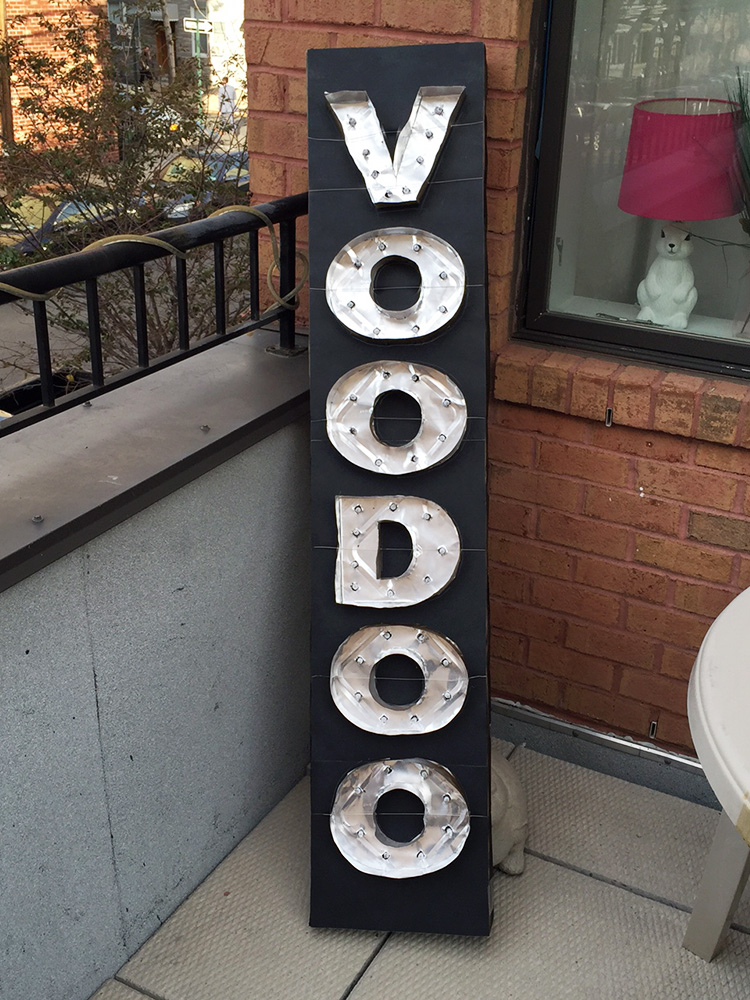
It was easy to slip the letters over the lights; the holes lined up pretty well. But then I was faced with the biggest problem of this whole project: How to attach the letters permanently to the sign? It’s extremely windy on my balcony for some reason, and glue or tape wouldn’t hold metal letters onto paper very well at all. If this were an indoor decoration, packing tape would’ve been fine. But I needed something much more secure for this sign.
The solution I came up with is effective if not pretty. I poked tiny holes in the letters with an awl, near the base of the walls of the letters, and ran some thin, strong wire through them, and twisted them together around the back. Now the letters can’t lift away from the lights, and the lights lock the letters in black so they can’t slide around. They’re very secure now, but I’ve got these ugly wires on the sides of the sign now. Fortunately, in the dim evening light, and with the bright glowing letters, I don’t think the wires will be visible at all. I actually painted some black acrylic paint on the wires to conceal them a bit! I also plan to put some fake vines on the sign to make it look like it’s on a run-down building that’s overgrown with vegetation. That’ll help cover the wires a bit more.
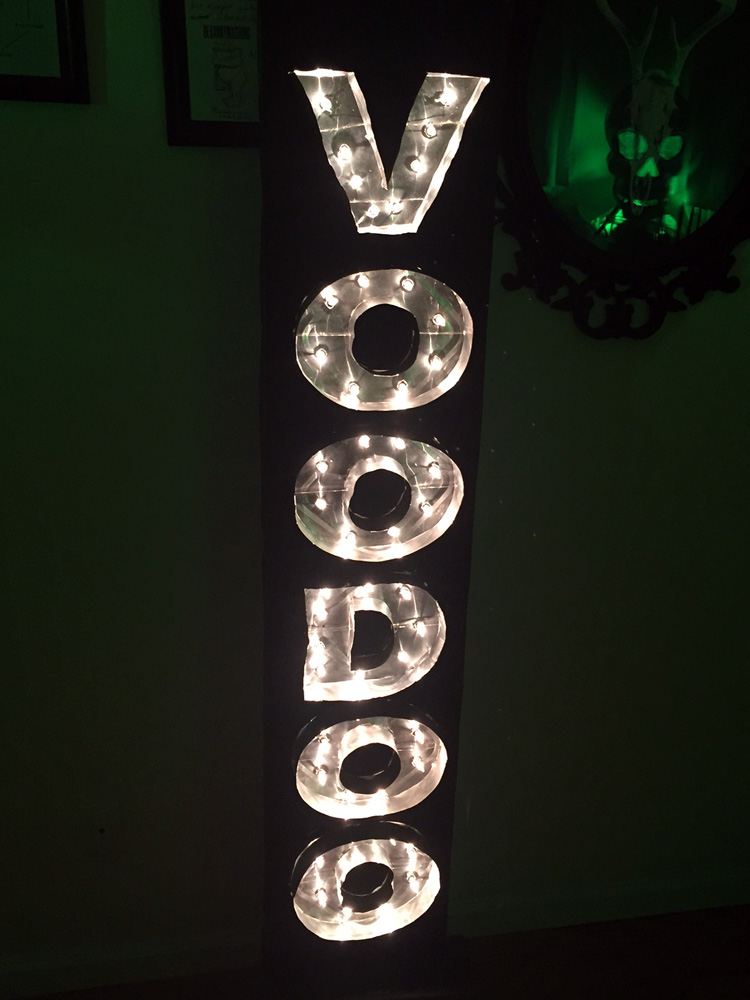
I’m really pleased with how this thing came out! Here’s how it looked when plugged in in my apartment for the first time.
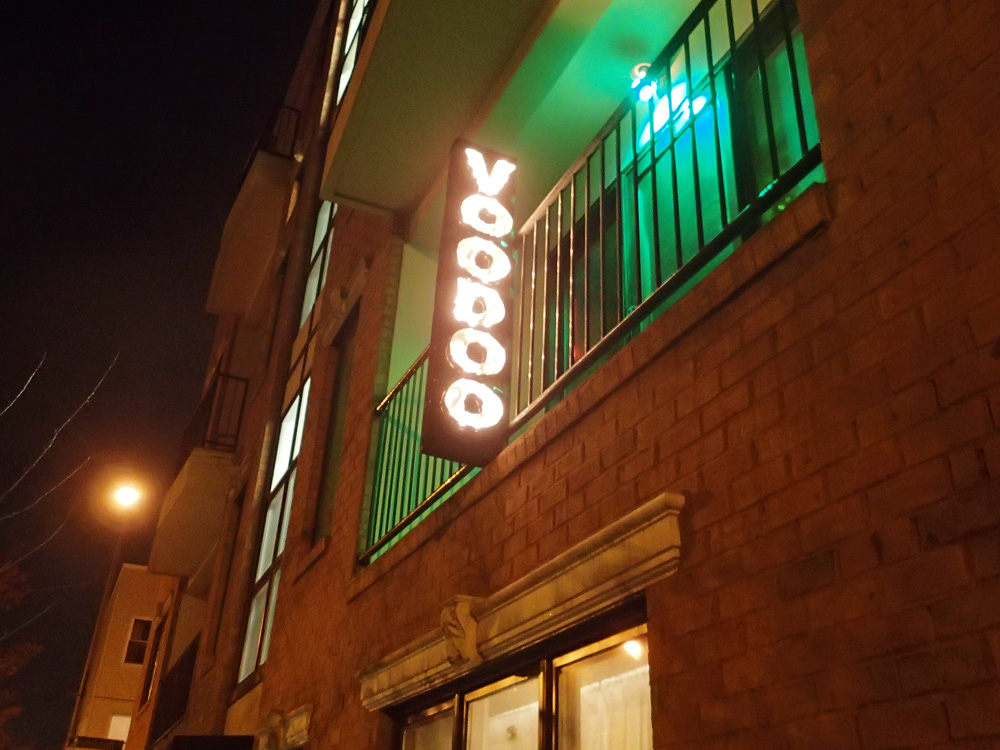
And here it is on our balcony during the party!
Cost of materials for this project:
Foam board (4 sheets) – $4
Brown wrapping paper (1 roll) – $1
Black spray paint – $9
Poster board (2 sheets) – $2
Aluminum cookie sheets (6) – $6
Christmas lights (one string of 70 lights) – $5
Packing tape – $3
Wire – $3
Total: $33 — However, most of these items were things I already had lying around for my other projects, and I only used a little of them (like the tape, wire, etc). So $33 would be the price if I had to buy everything at the beginning of this project. Really the only things I had to buy for this were the cookie sheets, since I already had the old sign lying around, and we’ve had the Christmas lights for years — we usually use them, for, you know, Christmas. I also could’ve skipped the spray paint and wrapped the whole sign shape in black paper or poster board rather than paint it. So this whole sign project could really come in at under $20. And if you don’t need it to be so three-dimensional with the sturdy box shape, like if you want it to be flat and hanging on a wall, you could just mount the whole thing on a sheet of foam board without building a box. There are a ton of ways to simplify this project; the important parts are just the cookie sheets and the lights.
This project was really fun and easy and I’m looking forward to doing new variations on it in the future!
Update: I have an idea for a simpler but less sturdy version of this, using poster board rather than aluminum sheets, and then silver spray paint and gloss spray to make it nice and shiny and reflective. As I mentioned, my balcony and terrace are unbelievably windy all year round, so I’d only use this method for a sign that stays indoors. But, the poster board would be easier to work with — easier to cut and fold with precision — as well as easier to attach to the base — glue would work just fine. I may try this idea next Halloween, or even for an all-year-round decoration for my apartment.
 About Manning Krull
 How to make a 4-foot paper maché alligator
 My violin skull mask, Mardi Gras 2015
 Three-headed paper maché dragon sculpture
Leave a comment