
Making an oversized paper maché axe
Published by Manning on December 28th, 2017
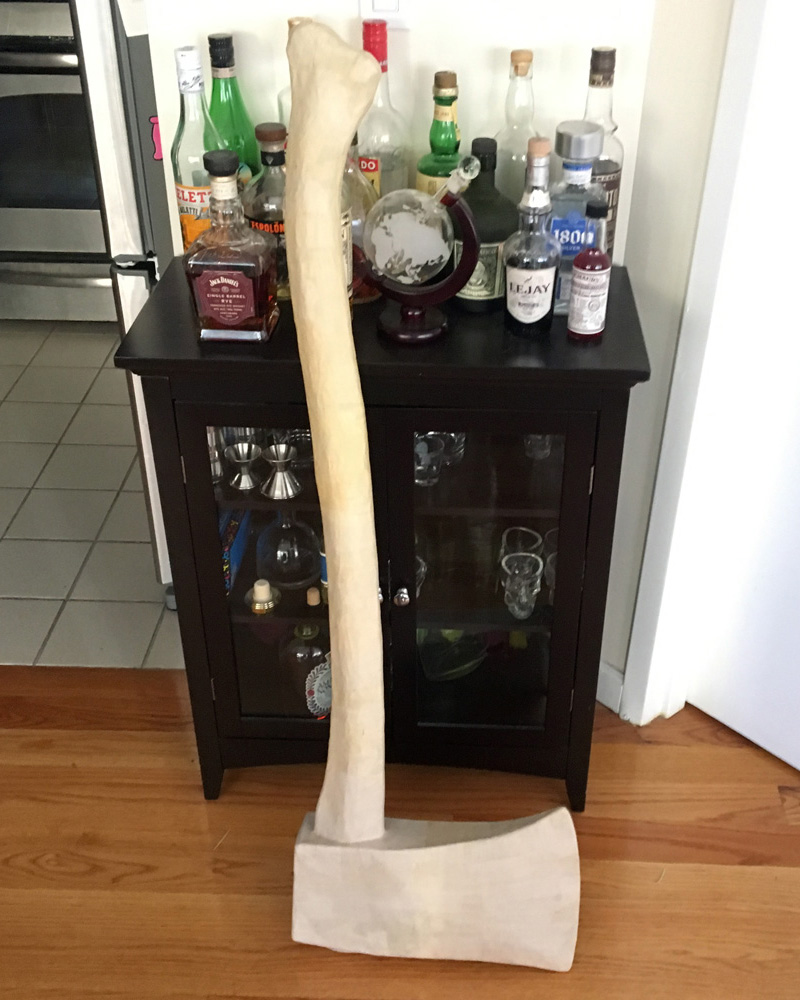
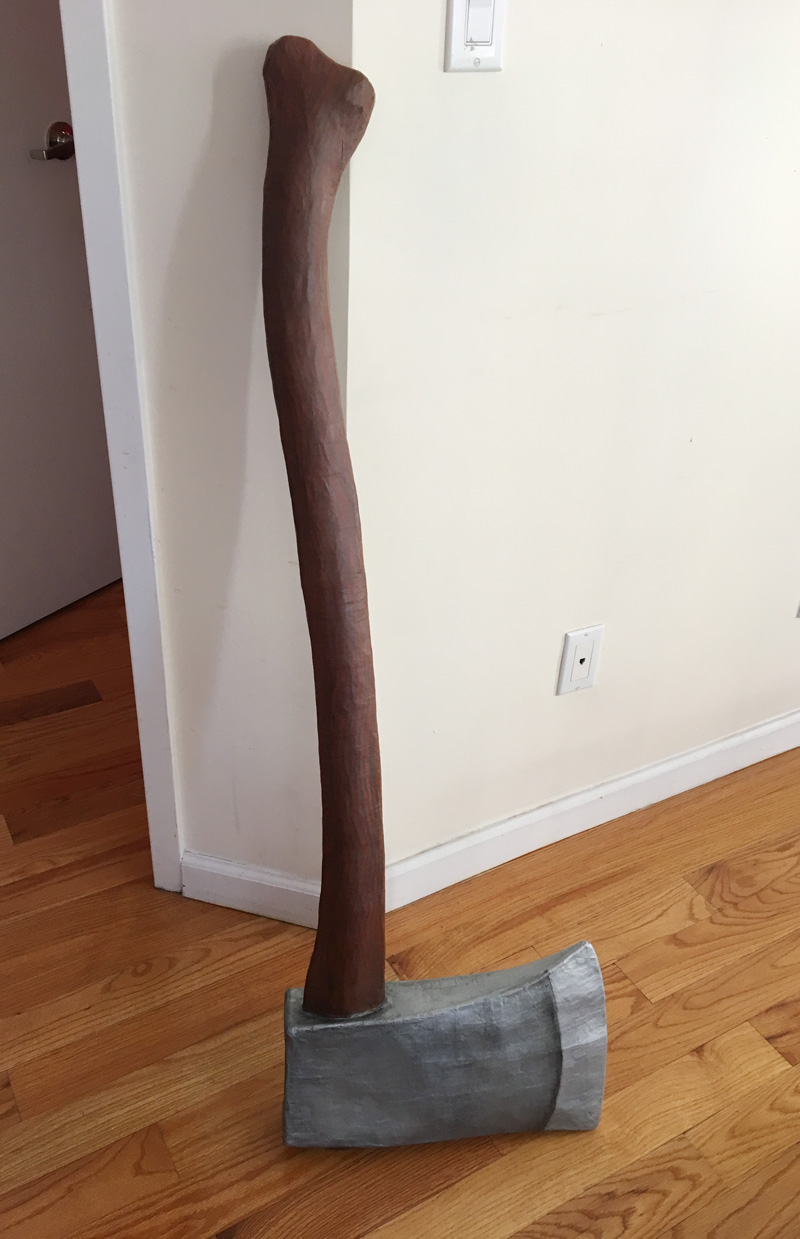
I made this big ol’ paper maché axe prop for my Axe Man skeleton costume for Mardi Gras 2018 (read about the real Axe Man here!). It was easy to make! Here’s how I did it…
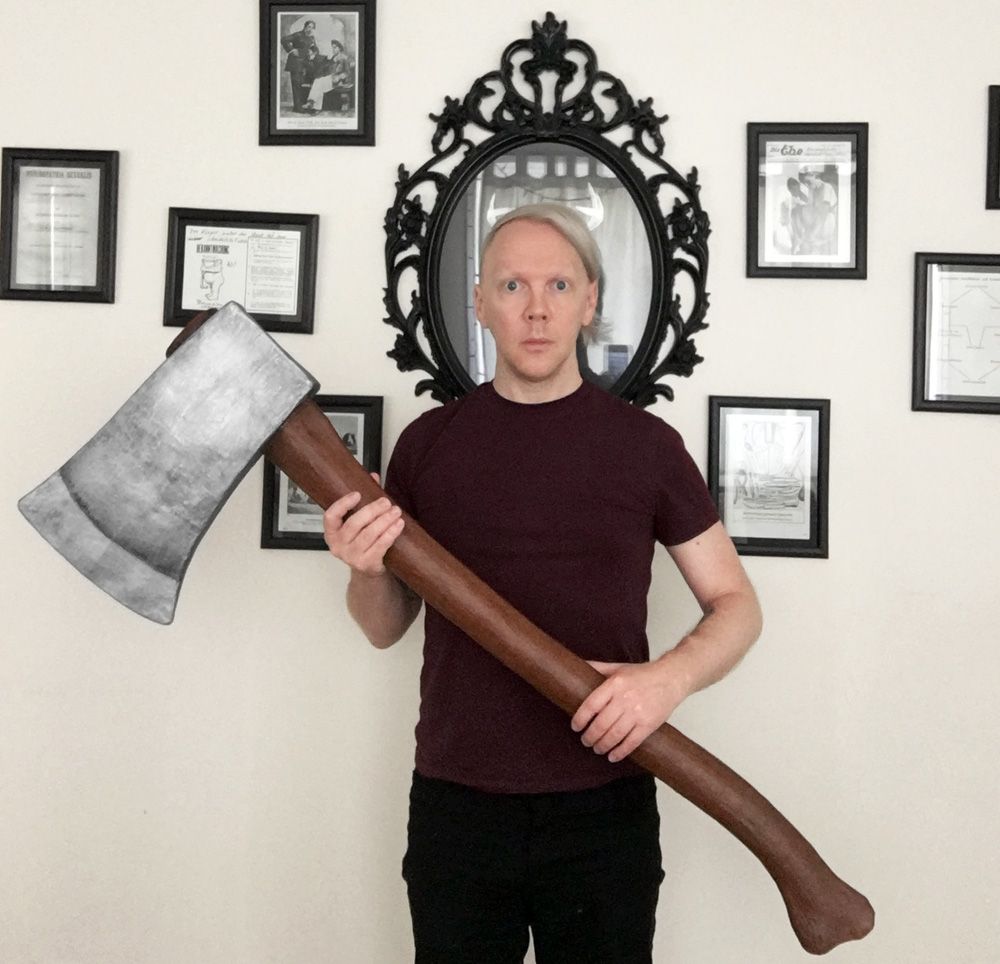
(Wax mannequin for scale.)
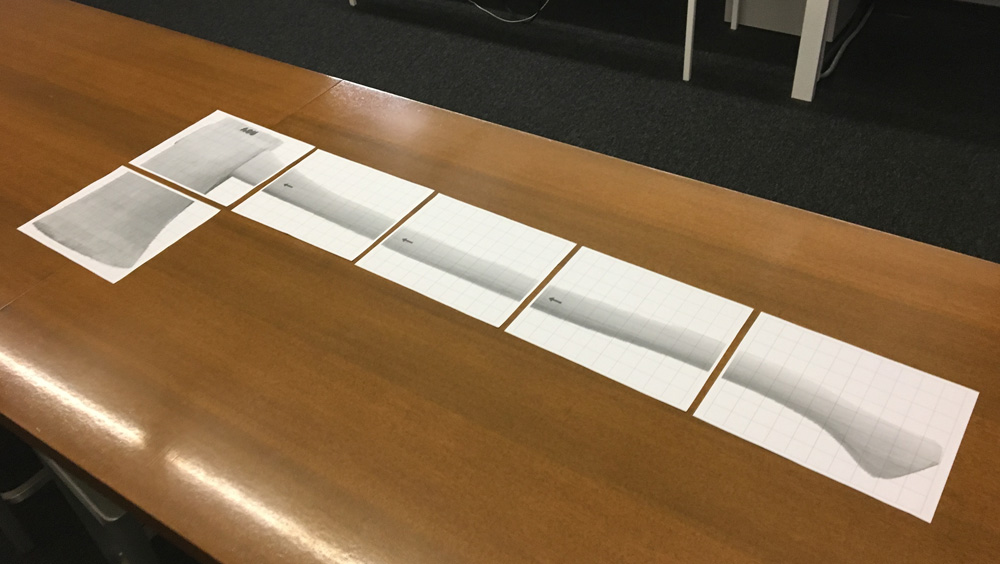
I started by grabbing a photo of an axe online and editing it in Photoshop to be the size that I wanted; about 48 inches long total with an oversized blade that’s about 16 inches long. I changed the proportions of the axe in Photoshop a bit to exaggerate both the relative size of the blade and the thickness of the handle. When that was all laid out, I arranged it into a 6-page pdf and printed it out to use as a guide.
Making the axe handle
I cut out and taped together the pieces of the axe printout and traced them onto foam board. For this first part, I omitted the axe blade when tracing and just drew the handle itself; I ended up making the blade separately and attaching it later.
The oversized handle I designed was too long for one piece of 30″ foam board, so I ended up tracing it in two pieces, which I cut out with an X-acto knife and attached with heavy duty shipping tape. I then traced/cut/taped a second copy of the foam board handle and taped it firmly to the first one. Doubling up the foam board here helps make the handle nice and strong.
I padded out the handle on both sides with foam pipe insulation tubing. I buy this stuff in bags of four 30″ tubes for like three or four bucks at Home Depot. It’s great to work with; very firm, lightweight, and flexible, and easy to cut/tape/etc. I sliced a tube down the middle with an X-acto knife; these half-tubes ended up being a little too thick so I used scissors to trim the halves to be a little bit thinner. I taped these in place on both sides of the handle. I ended up needing to use about one and a half tubes to cover the length of the handle on both sides.
I then used strips of soft craft foam to round out the handle a bit more and de-emphasize the edges of the foam board before applying paper maché. I cut a few sheets of 18″ x 12″ craft foam into 1.5″ strips, taped them together at the ends to make one really long strip, and then wrapped that around the handle very carefully, covering the surface as evenly as possible and not letting the strip overlap itself. I secured the strips here and there with masking tape as I went.
Here you can see the end of the handle with all of these steps visible: two sheets of foam board inside, then the black foam tubing, the tan craft craft foam strips wrapped around, and lots of masking tape.
I built out the knobby end of the axe handle with some wadded up aluminum foil and capped it off with an oval of foam board, which I curled and bent up a bit to match the weird curve of the end of the handle. I secured this stuff with lots of masking tape. I then covered the other end with a flat oval of foam board and lots of masking tape.
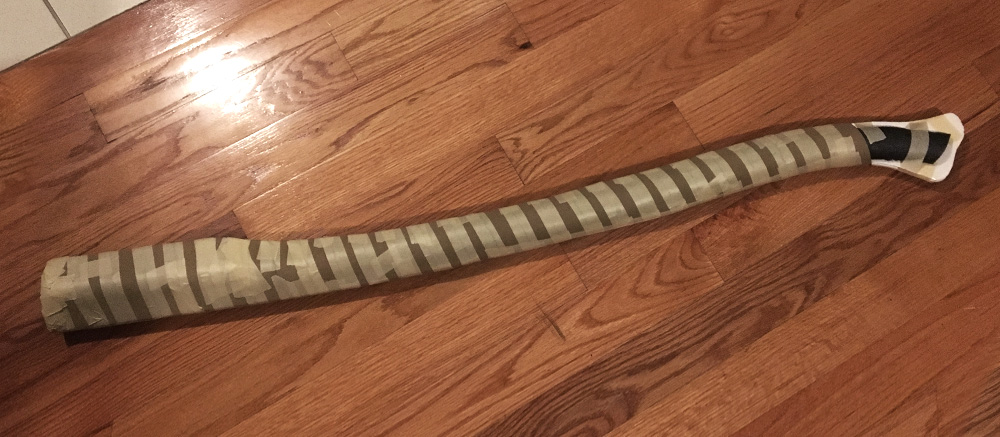
I then covered the entire handle with a layer of heavy duty shipping tape (not shown), and then an entire layer of masking tape (not shown), in order to smooth out the surface as much as possible and conceal the little spaces between the craft foam strips. Finally, the handle was ready for paper maché! But first I needed to build the axe blade…
Making the axe blade
I went back to my printout and traced the axe blade onto poster board, twice, for the two sides of the blade, and I added some extra length at the back of the blade to account for the curvature of the blade when I put the thing together.
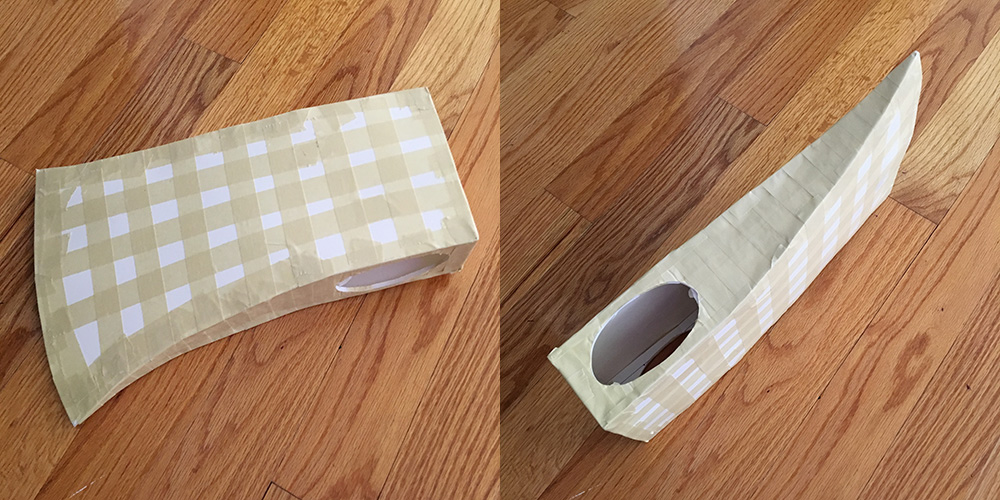
I measured and cut out a small rectangle of foam board for the back of the axe blade. I also measured and cut out two long foam board triangles for the top and bottom surfaces of the axe blade.
For the curved top and bottom surfaces, I used my usual trick for making curves in foam board; I covered the foam board with masking tape and then slowly rolled it up, crunching up the foam inside bit by bit with my fingers as I went. The masking tape helps prevent the foam board from breaking as you bend and curl it. The result is a curved shape that’s very flexible.
I cut oval holes in the top and bottom surfaces of the axe blade where the handle goes through, and then I taped all five pieces of the axe blade together with lots of masking tape. I stuffed a bunch of wadded up paper newspaper into the blade to help pad it out a bit; the paper maché I add later will make it nice and strong, but it helps to have some padding in there while working on it.
I cut the oval holes in the blade to be larger than necessary to let the handle go through; it’s important to let this connection be very loose, pre-paper-maché, because after all those layers of paper the fit will get much tighter.
The grid of masking tape in the pic above is there to make the thin poster board walls a tiny bit more sturdy, and also to help prevent warping when the paper maché goes on.
Paper maché
I covered both the axe handle and blade with eight layers of paper maché over the course of a few days; check out my article about my paper maché process and materials. The short version is: I use Roman PRO-543 universal wallpaper adhesive (paid link) and alternating layers of newspaper and brown wrapping paper.

In this case I finished with a layer of white packing paper; basically blank newspaper.
I worked on the handle and blade separately. With any large piece that needs to be covered entirely with paper maché, I always do one half, let that dry, and then flip it over and do the other half. I keep a scrap of paper handy where I can write down which halves of which pieces have been covered with how many layers; it’s easy to lose track if you don’t write it down!
When all that paper maché was finished, I placed the handle through the blade — it was now a pretty tight fit due to all those layers of paper. I then covered that connecting area with masking tape to smooth it out a bit, and then covered the taped area with five or six layers of paper maché in order to make the whole thing nice and strong. When all that was dry, the axe felt very sturdy! No wobble at all when you handle it or swing it around. Eight layers of paper maché is enough to make the axe feel very solid and hard, almost like wood.
Painting
As usual, I failed to take a lot of pictures of my steps here! My process for painting the axe went like this:
First, I spray painted the whole thing black, and let it dry and set for two or three days.
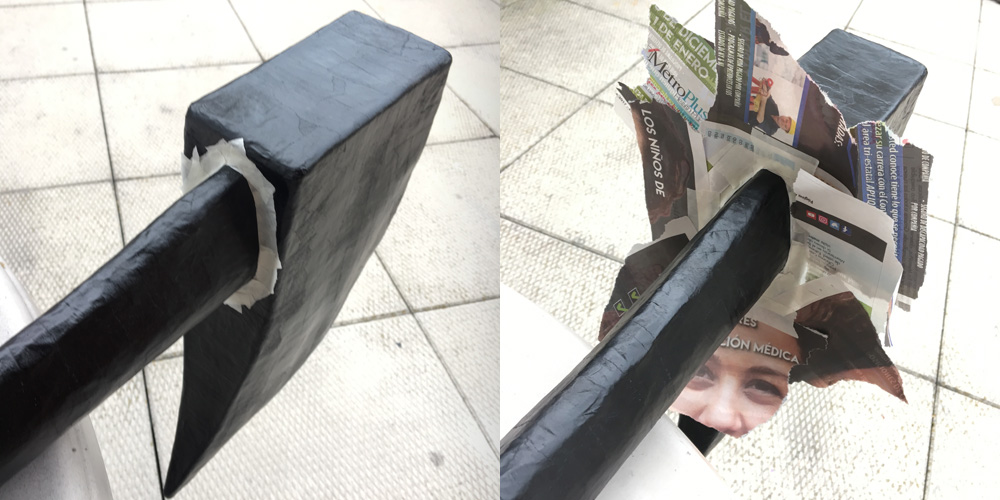
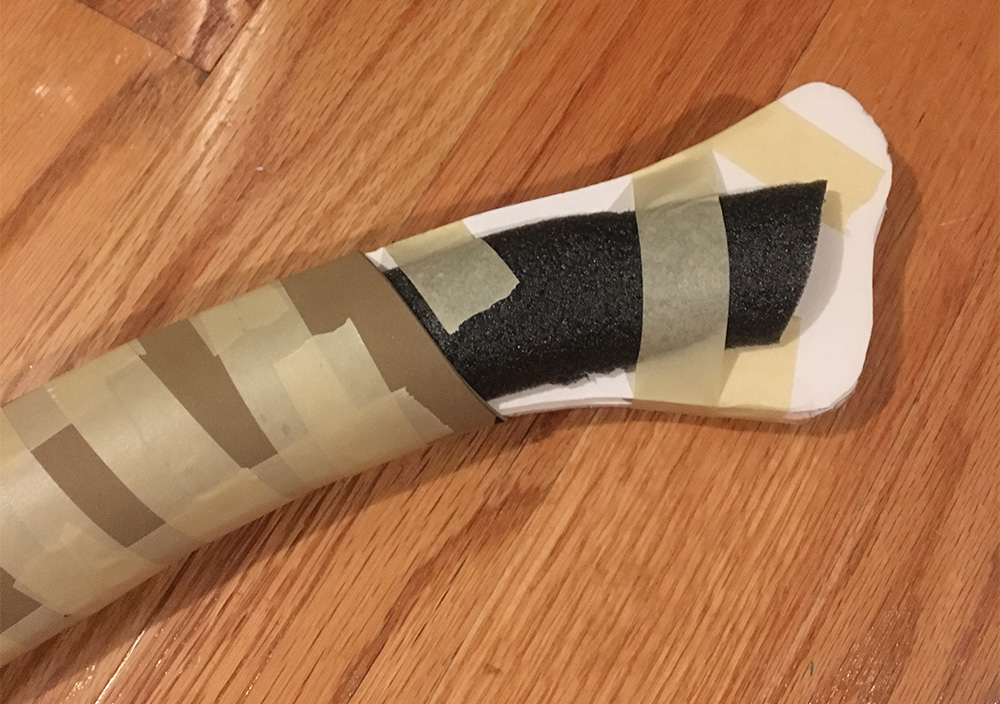
The above is a pic of the axe as I prepped it with masking tape and newspaper so I could spray paint the handle brown. I start by being very precise with the line of tape, and then I just stick big pieces of newspaper around that, enough to make a wall to protect the other surface; in this case the blade. I spray painted the handle an orange-brown color (left over from my paper maché Necronomicon sculpture!), waited a couple hours and then removed the tape and newspaper, and then I let the paint set for a few days.
I then did the reverse; I protected the handle with masking tape and newspaper, and spray painted the axe blade silver. The silver was brighter than I wanted, so I waited a couple hours and then did a very light dusting with black spray paint on the blade to dirty it up a little. I removed the tape and newspaper and let the paint set for a few days.
I then masked out the front edge of the paper with masking tape and newspaper and did another dusting of silver spray paint, to make that front part of the blade a brighter silver. I removed the tape and newspaper and let the paint set for a couple days.
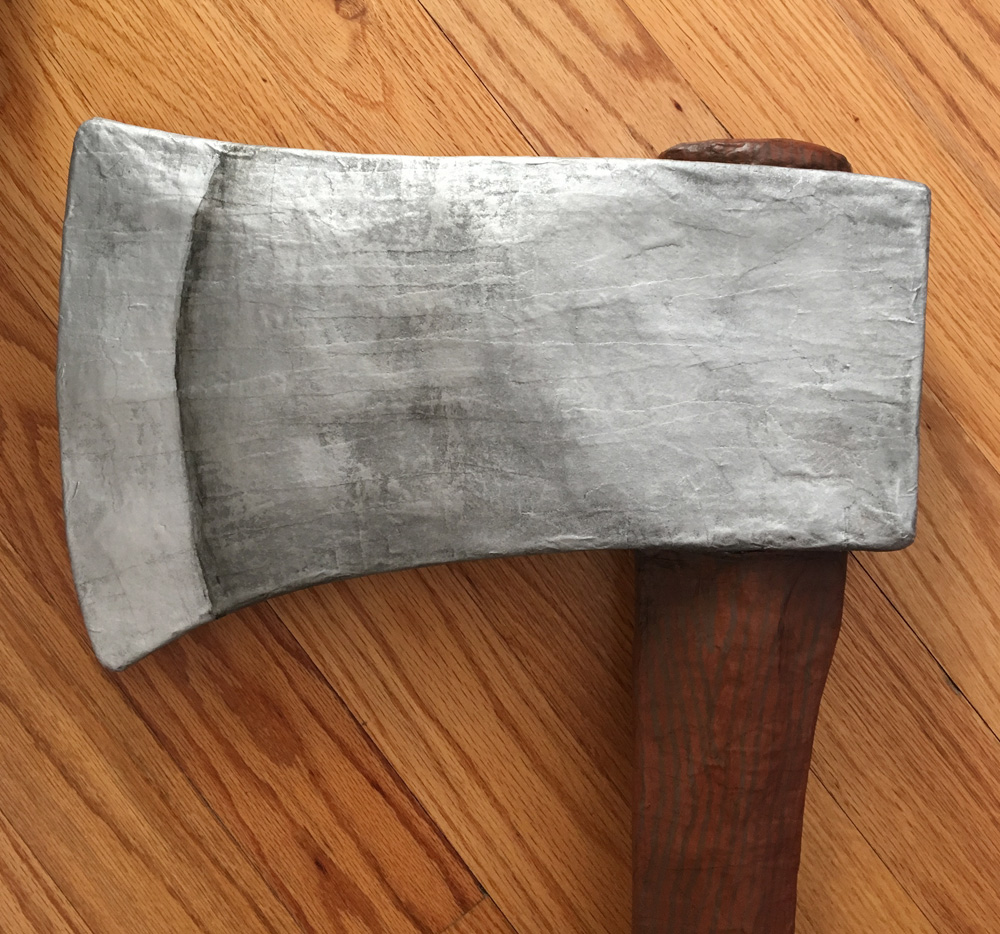
With all the spray painting done and the chemical smell totally gone, I brought the axe inside. I dirtied up the blade even more using a damp sponge and black acrylic paint, applied very lightly — you can always go over it again and add more, but you can’t subtract!
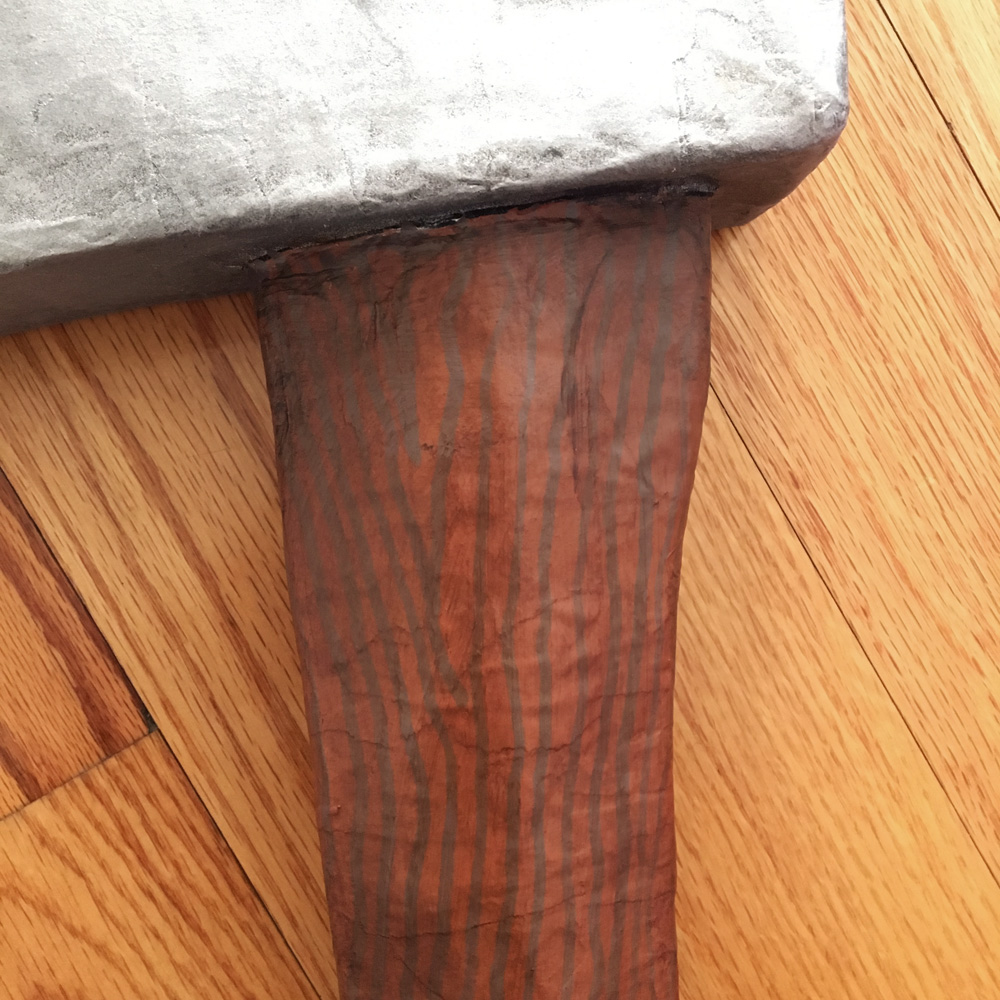
I used a dark brown oil-based paint marker to draw a simple wood pattern all over the handle, and let that set for a day. The contrast was a little higher than I wanted, so I used a slightly damp sponge and some brown acrylic paint to lightly cover the whole thing and reduce the contrast a bit.
When all of this was dry, I protected the paint job with a coating of matte spray and let that air out outside for a day.
(Of course if you want to make an axe with a shiny new blade, you can use gloss spray; I wanted mine to look old and worn. You can also make the blade look rusty with brown paint and water, applied with a sponge, but I thought that might be overkill.)
And that was it! The finished axe is huge and sturdy, and very fun to run around and scare people with! More info on the costume that this axe goes with coming soon…
 About Manning Krull
 How to make a 4-foot paper maché alligator
 My violin skull mask, Mardi Gras 2015
 Three-headed paper maché dragon sculpture
January 22nd, 2018 at 2:11 pm
Wow! Amazing job.
January 22nd, 2018 at 5:39 pm
Thanks Ivan!!
February 13th, 2018 at 6:27 pm
I love all your work you are so talented!! Thank you for sharing your talent with us and giving us a step by step. Keep up the awesome work!
February 16th, 2018 at 3:47 pm
Thank you so much, Bernadette!
April 4th, 2023 at 2:34 am
Hi!!! thank you for making this tutorial im making a leviathan axe for a class and this really helped with basic shapes and how to build the handles. I’ll update on the grade and if it works!!!
April 4th, 2023 at 10:44 am
Cool! I had to google leviathan axe and now I’m excited to see the results!
January 10th, 2024 at 7:26 pm
This is amazing! Just wondering if you had a cost estimate?