
Pro wrestler skeleton costumes for Mardi Gras 2022!
Published by Manning on March 7th, 2022
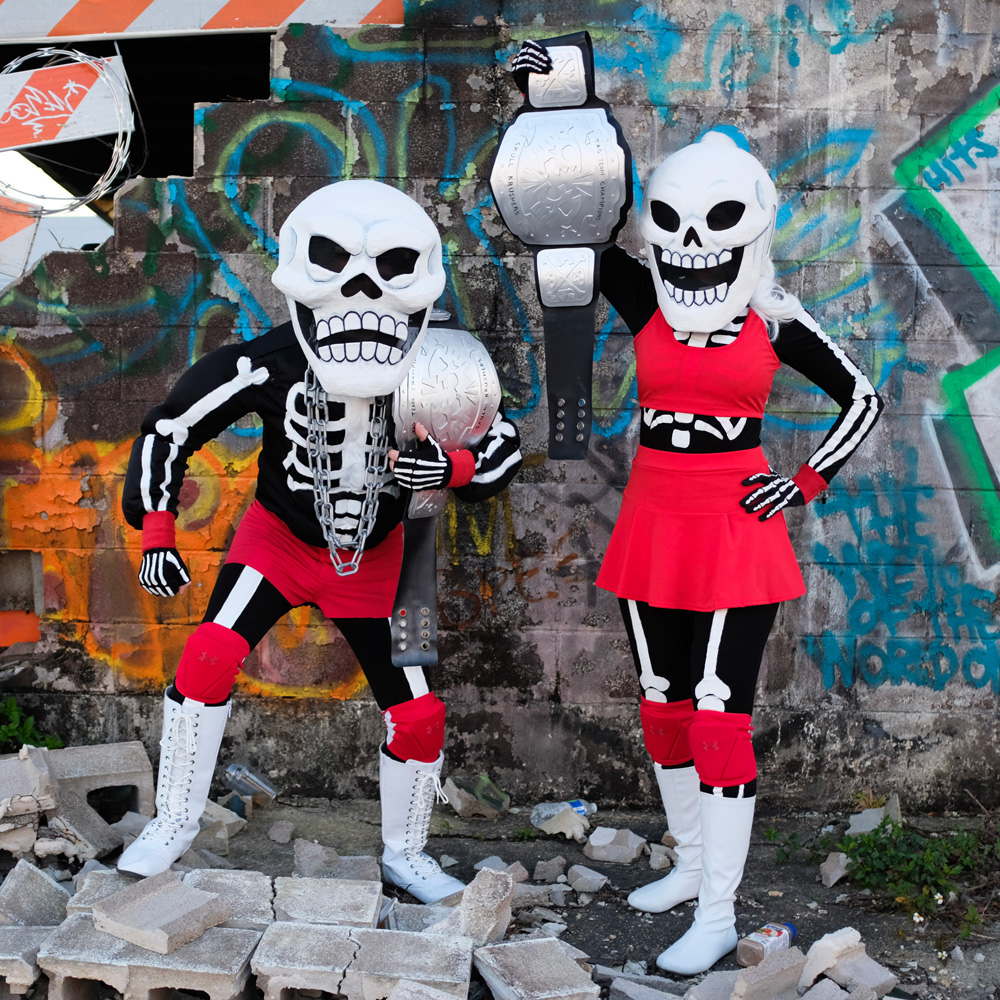
Many months ago while brainstorming ideas for our new Mardi Gras skulls/costumes, my wife had the great idea for us to be skeleton pro wrestlers; we decided to be a tag team, and I came up with the name The Skull Krushers! These costumes were extremely fun to wear for our first march with Cryptique! Here’s how we made our skull masks…
Making the base
This time around we used inflatable bouncy balls as the base for our masks. I bought a set of four 12″ bouncy balls (paid link) that came with a little hand pump. After inflating them and trying to tape other materials onto them, we realized that tape doesn’t stick to this kind of plastic at all. Like, really, not at all. It just falls right off. I even tried cleaning them with Windex to see if that would help, but no dice.
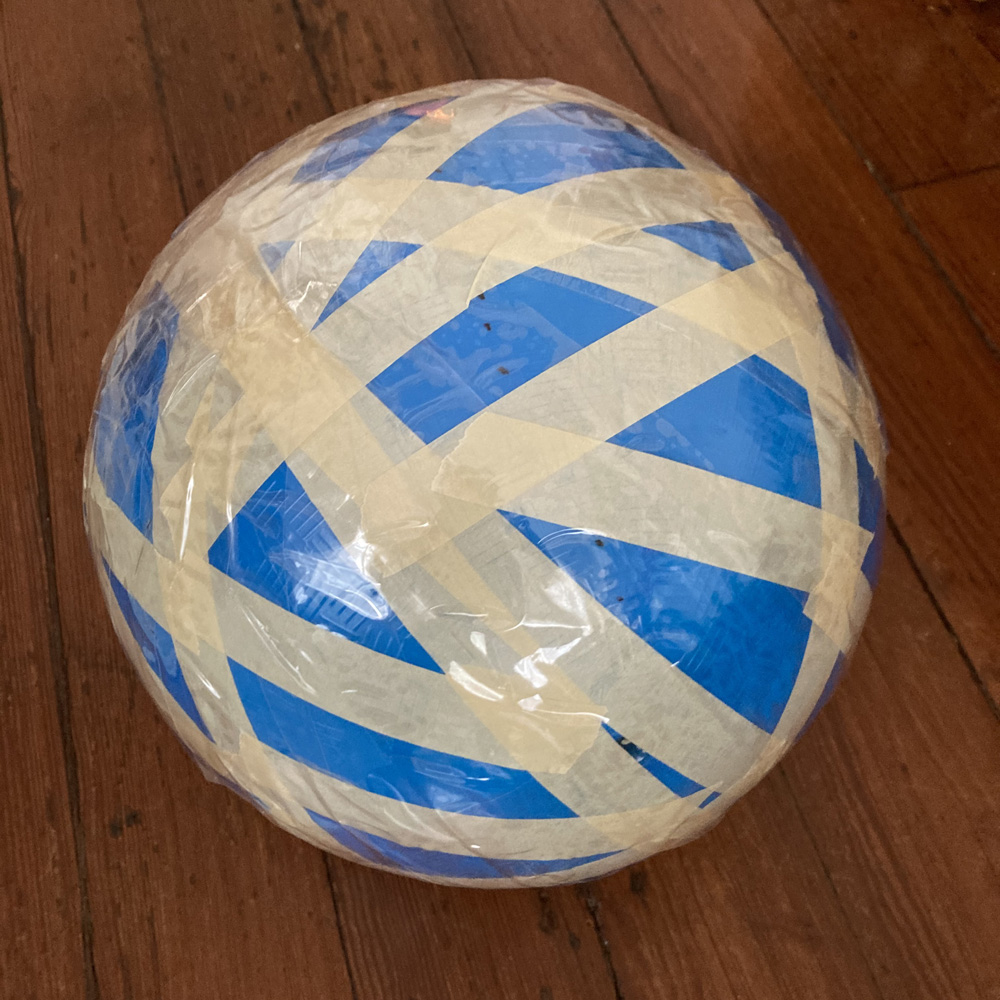
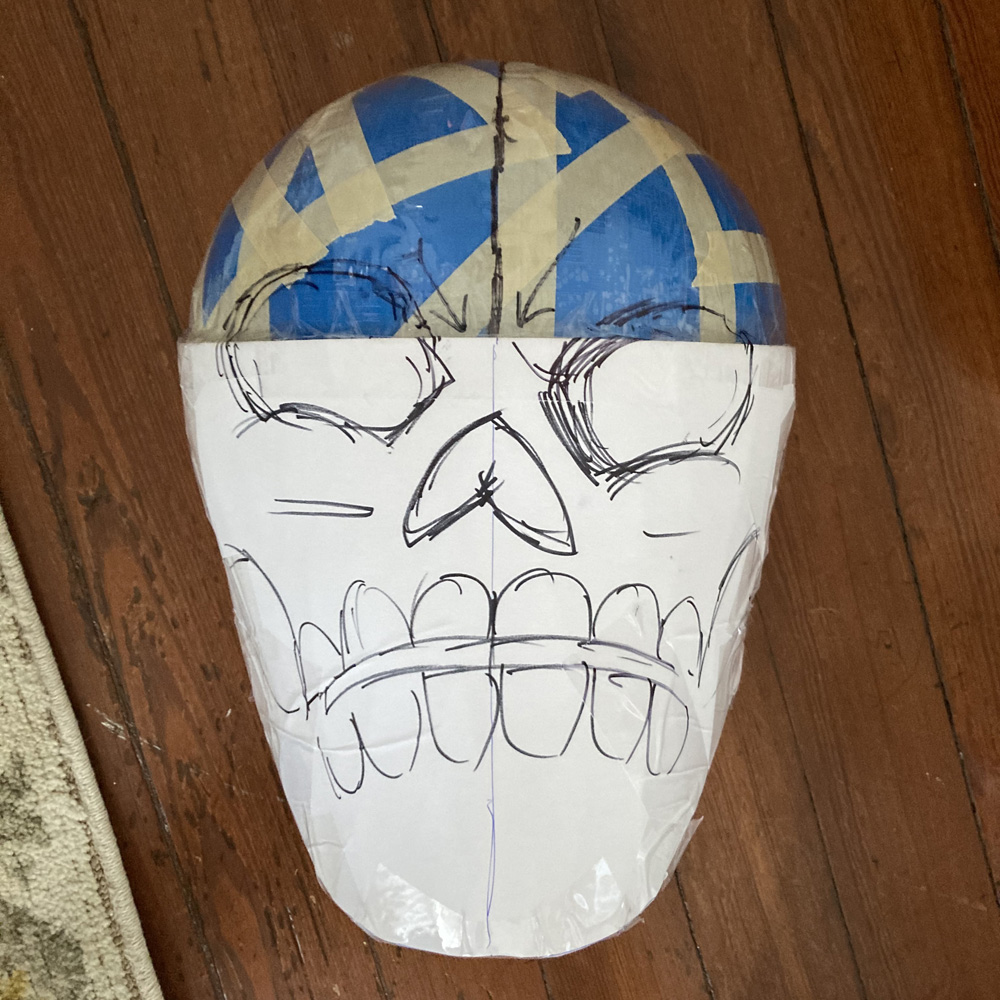
So I came up with this silly plan to let us tape things onto the bouncy balls. I wrapped a long piece of masking tape all the way around the ball so it could stick to itself. I then did a couple more like this, and then I just started putting lots of shorter pieces of tape all over the ball, with the ends sticking to other places where there was tape. Once that was done, I was able to wrap the entire ball in clear shipping tape. The masking tape gave the shipping tape enough of a surface to hold onto. Anyway, once the ball was wrapped in shipping tape it was easy to stick other stuff on it with more tape. Tape generally sticks to tape pretty well.
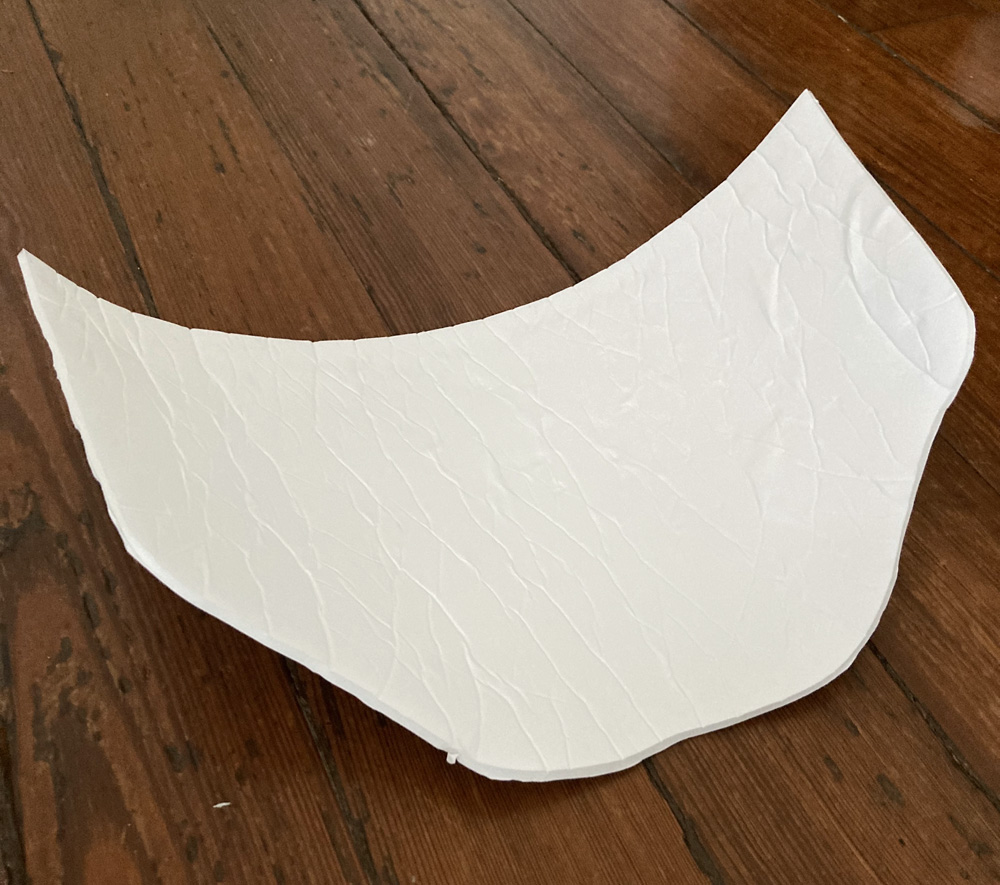
Next I made a jaw shape out of foam board. I first made the shape with just a big piece of paper (not shown), so I could figure out the jaw line for one side, and then fold it and trace it to draw the other side. I cut out the paper version and traced it onto foam board. I cut out the foam board jaw with an X-acto knife, and then I carefully curled and rolled it up to give it a permanent curve shape. This is easy with the cheap foam board I buy at the dollar store; it does not work well with good quality foam board from an art store.
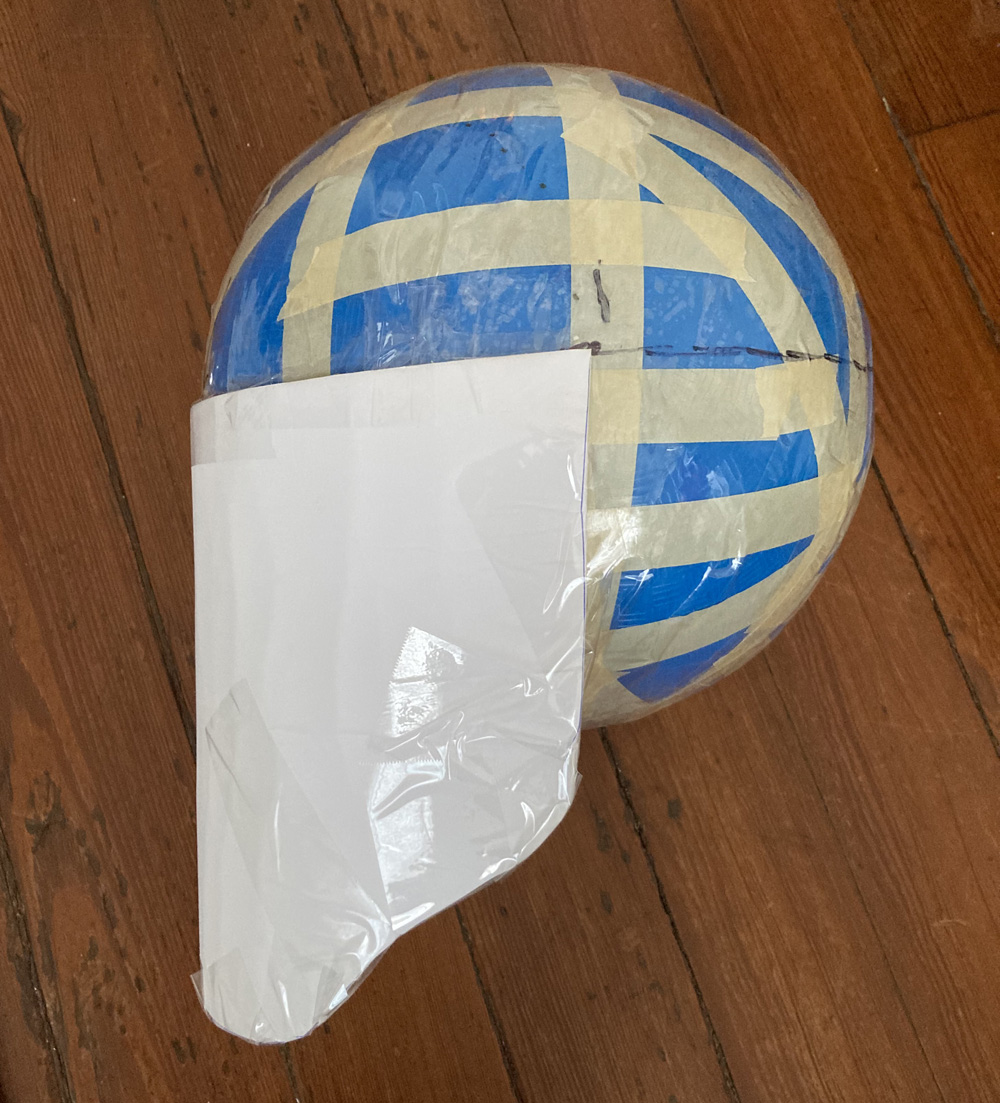
I taped the foam board jaw onto the tape-covered bouncy ball, and sketched a face on it with a marker, just to get a sense of how the finished skull mask might look.
The underside of the jaw was just an open space, so I stretched some pieces of tape across that space, to create a thin bottom surface.
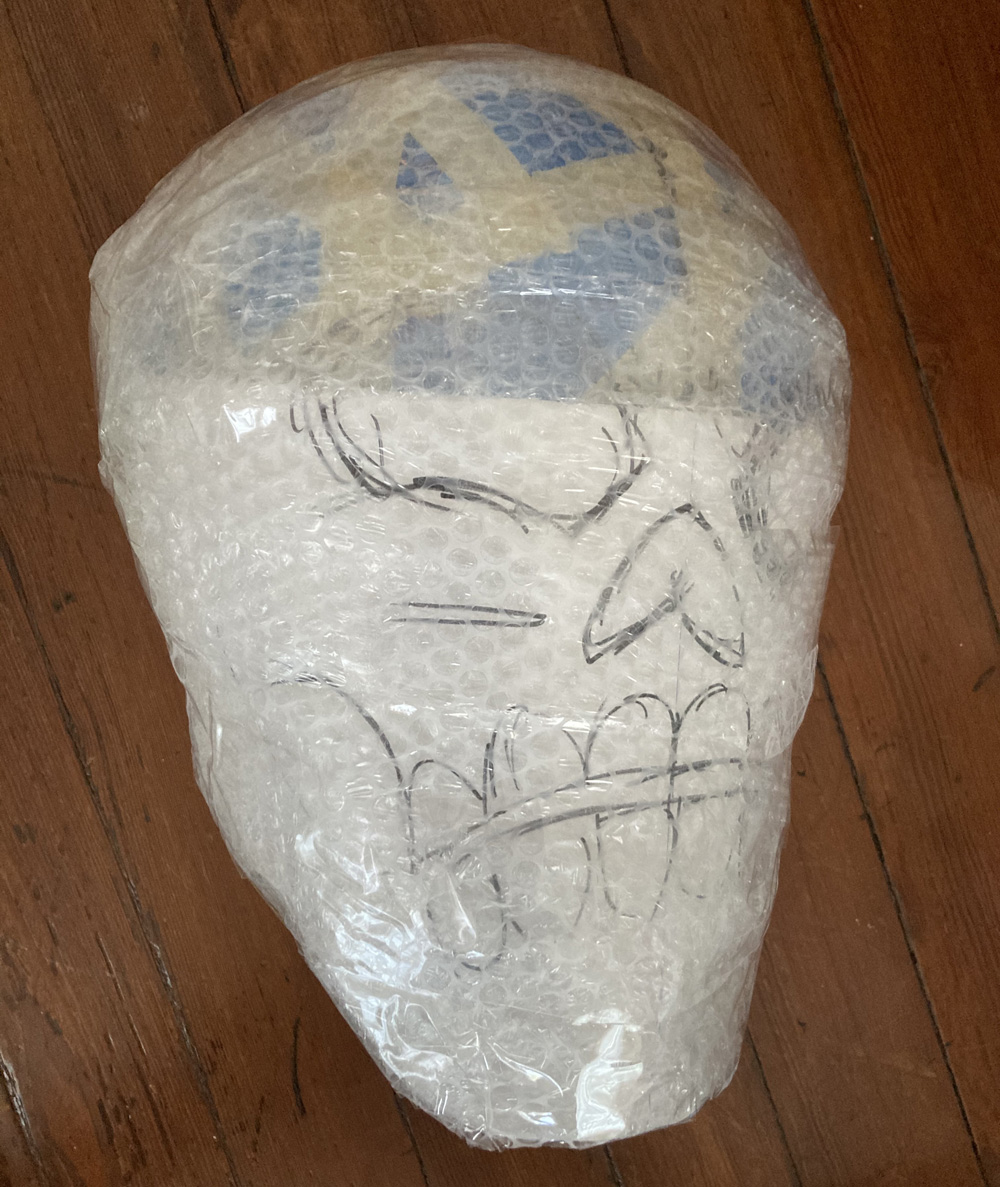
Next, I padded out the skull shape with strips of bubble wrap. I took a 12″ wide roll of bubble wrap, cut off a piece that was about four feet long, and cut that piece into two 6″ strips, and then I cut those two 6″ strips into four 3″ strips. I taped one end of a strip in place on the skull base and then carefully wrapped it around, making sure to make the strips overlap themselves, and connecting them with tape here and there.
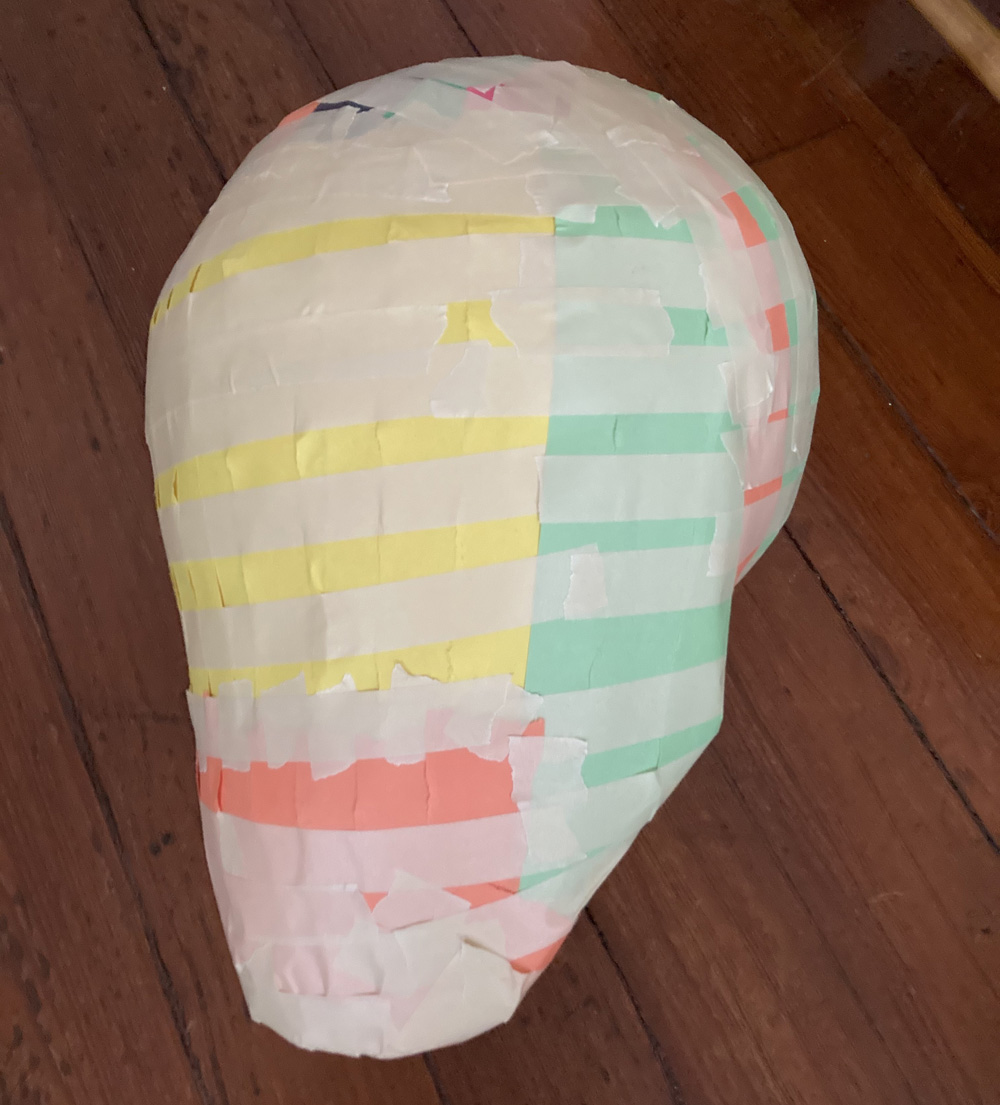
This step with the bubble wrap always helps make the base shape nice and smooth and somewhat organic looking, but it leaves some weird ridges where you can see the shape of the overlapping strips. My next step helps fix this. I tore up tons of thin strips of construction paper and taped them vertically onto the skull, to cover the horizontal ridges of the bubble wrap strips. I taped these in place with masking tape.
Sculpting the face
Finally, the main base shape was done! Time to put a face on this thing!
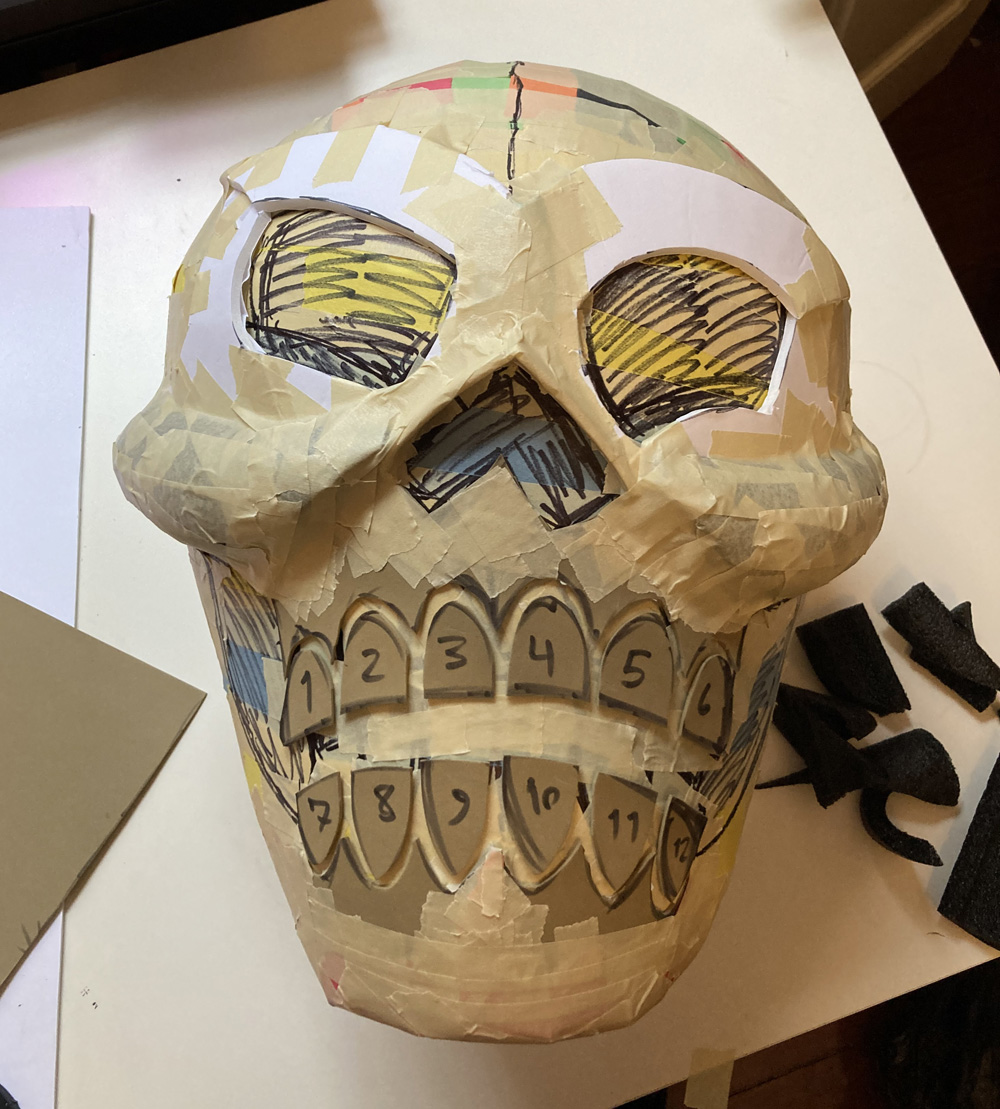
I drew a face onto the skull base again with a marker, so I could use the drawing as a guide when attaching all these other pieces.
I used tan craft foam to make the teeth and gum lines; I always cut these out with tons of space in between, because the paper maché I’m adding later will mostly fill in those gaps. If I were to make the teeth too close together, the paper maché would end up erasing the gaps entirely.
I made the cheekbones out of pieces of foam pipe insulation; I just cut them to shape and taped them in place. I made the ridges around the eyes with foam board, and I built up the eyebrow ridges with more foam and lots of tape. I made a simple bridge for the nose out of small strips of foam board.
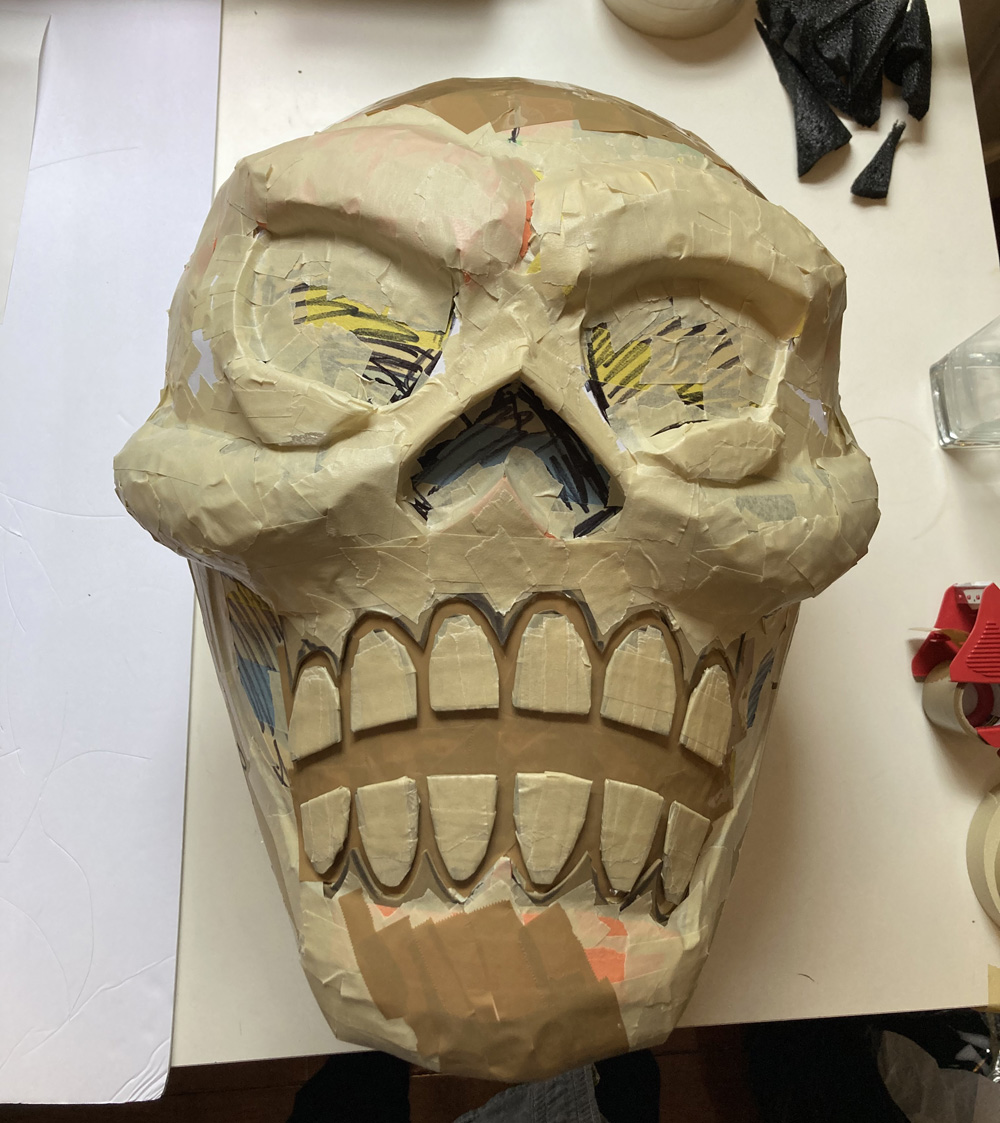
I removed the teeth and wrapped them with thin strips of masking tape, to give them a little more depth and make them more solid.
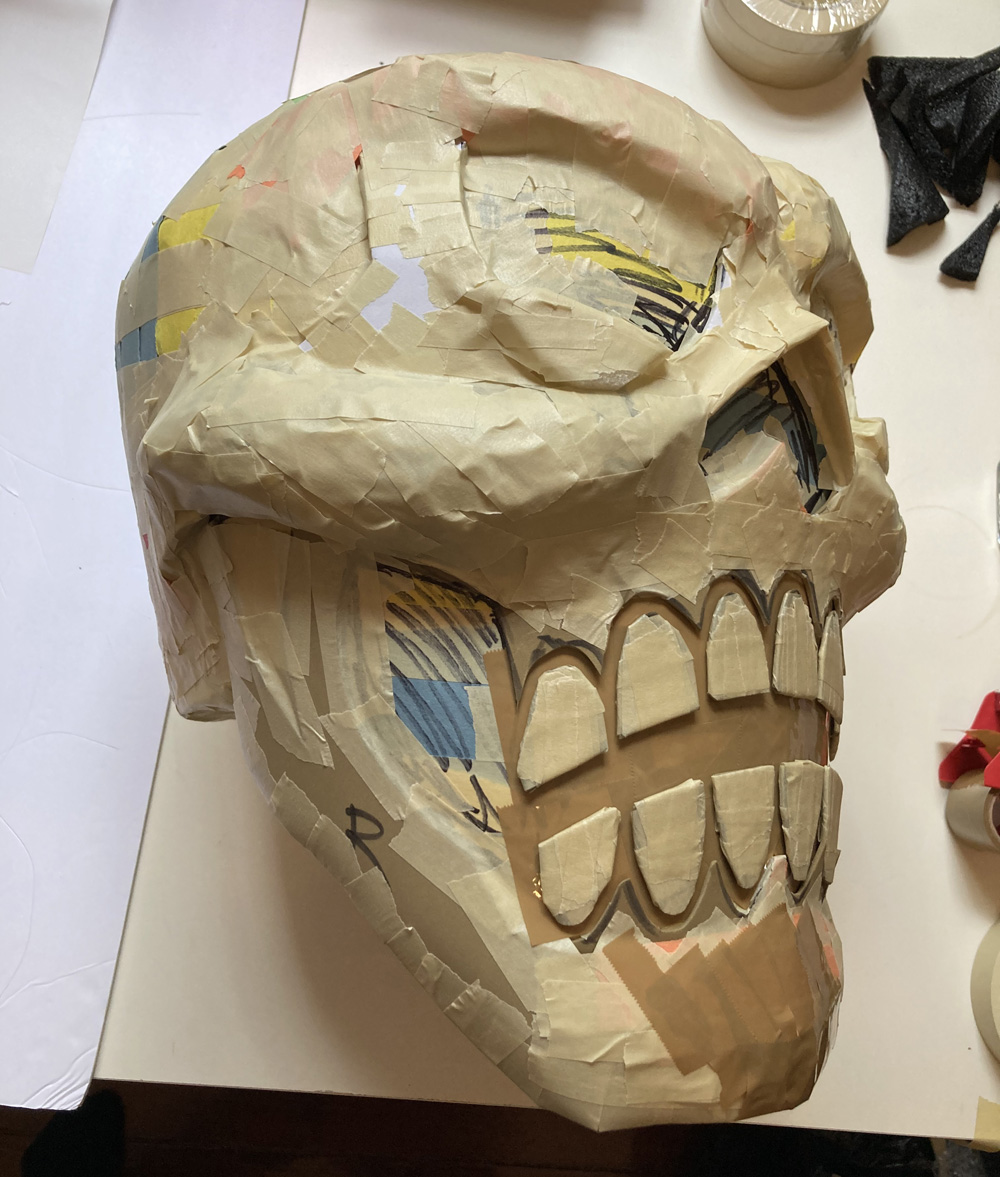
My next big step was to cover the entire skull head with brown packing tape. This tape is there to act as a release agent for the paper maché. Paper maché doesn’t stick to this kind of tape, so when the paper maché is done it’s easy to remove the base materials. Covering an irregular shape with tape is a lot of work; I had to cut the 2″ wide tape into much thinner strips in order to fit it around all the shapes of the face while trying to avoid wrinkles. Still, covering the whole head took probably less than an hour.
Finally, the skull base was all done, so it was time for…
Paper maché!
I covered the skull with eight layers of paper maché over the course of several days. You can read about my paper maché process and materials here; the short version is: I use Roman PRO-543 universal wallpaper adhesive and alternating layers of newspaper and brown wrapping paper.

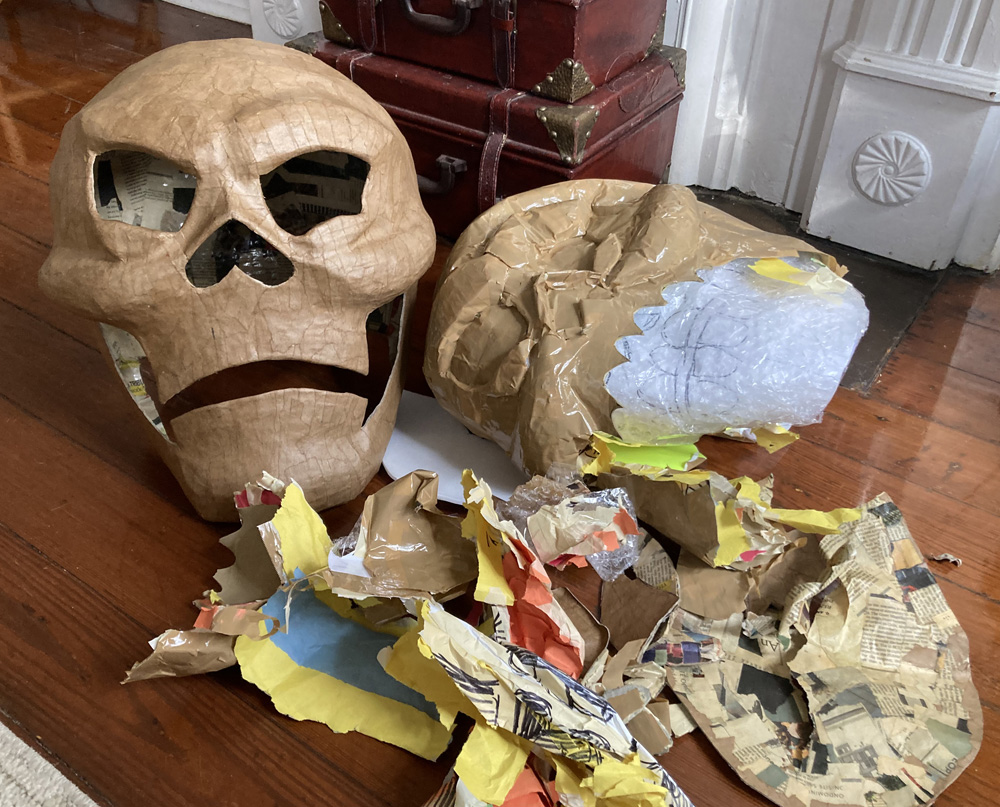
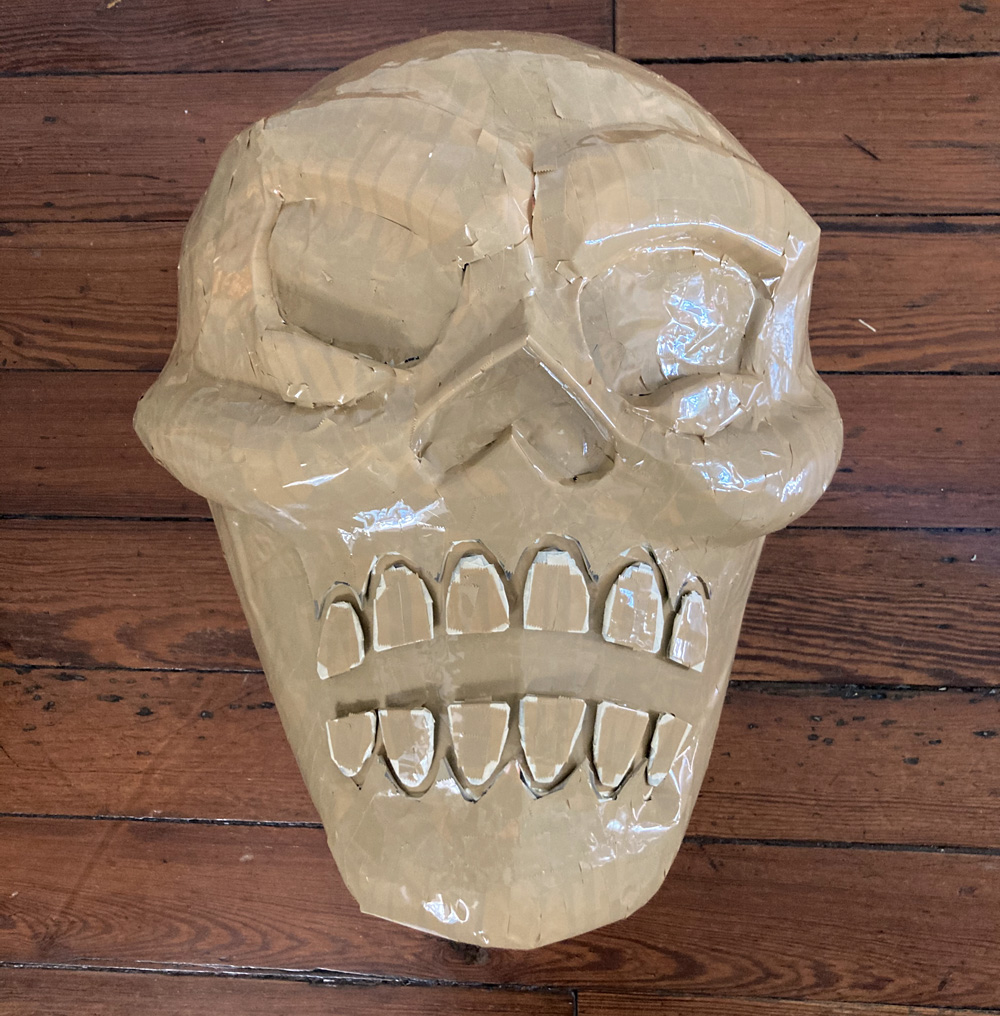
When the paper maché was finished and 100% dry, I cut the bottom of the skull mask open and removed all the base materials. This step is always fun! And the layer of packing tape makes it easy. You can see that most of the base came out in one big tape-covered blob.
I cut out the eyes, nose, and mouth holes with an X-acto knife. I also cut out ear holes, which I’ll conceal later.
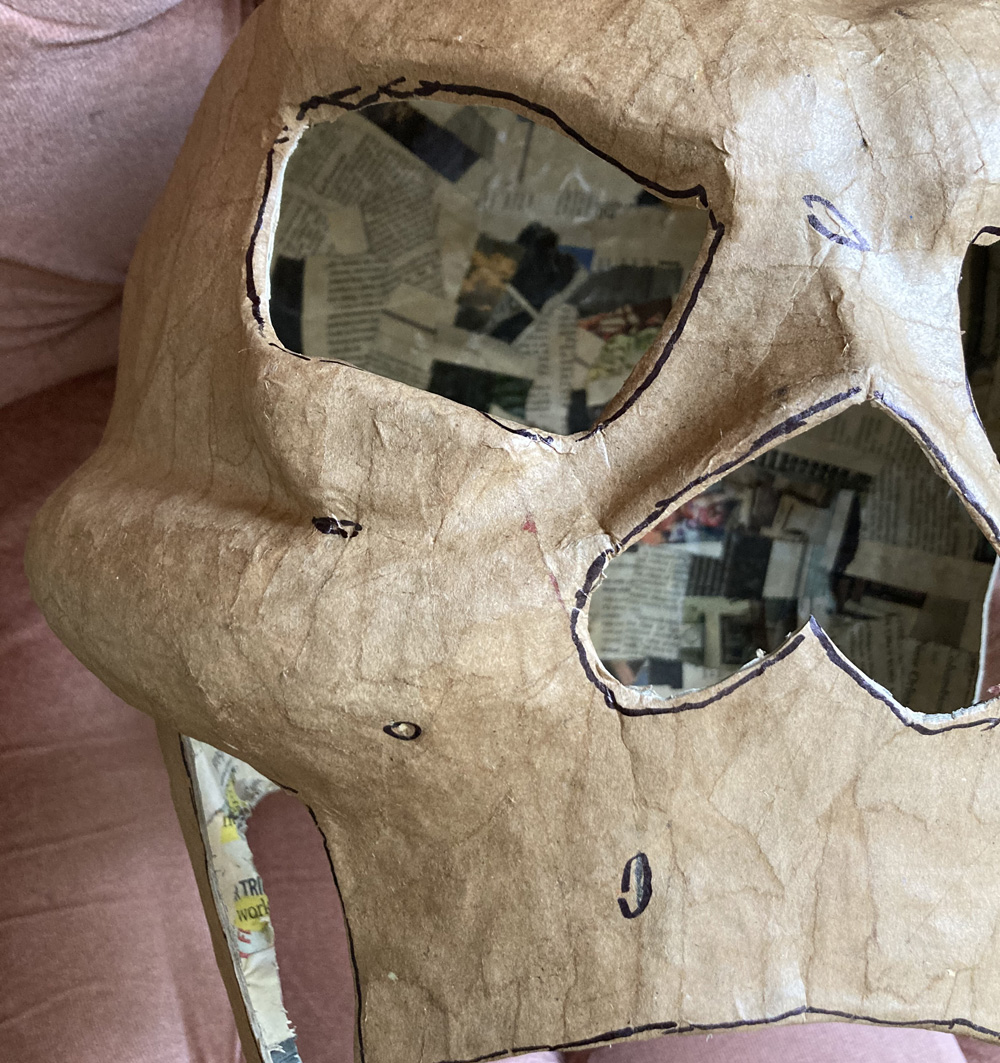
Next step is to reinforce all the cut edges with more paper maché. You’ll see I marked all the edges with a Sharpie; this is so I can make sure to cover each edge completely. I also marked some little areas of the paper maché surface that had wrinkles or other imperfections. I do this so that while I’m covering all the edges with paper maché I can also go cover up all these little mistakes.
Note shown: I reinforced the interior bottom edge of the mask with plastic zip ties; I snipped off the square-shaped opening things on the zip ties and taped them in place with masking tape. I then covered them over with two layers of paper maché. If you were to pick up the skull before the zip ties were in there and gently squeeze it, you could compress it pretty easily; it felt a little flimsy. Once the zip ties are in there the whole head feels much more stable. I made up this technique for my second-ever skull mask, after the first one had some bad warping on the bottom edges, and I’ve used it in every big mask project since then.
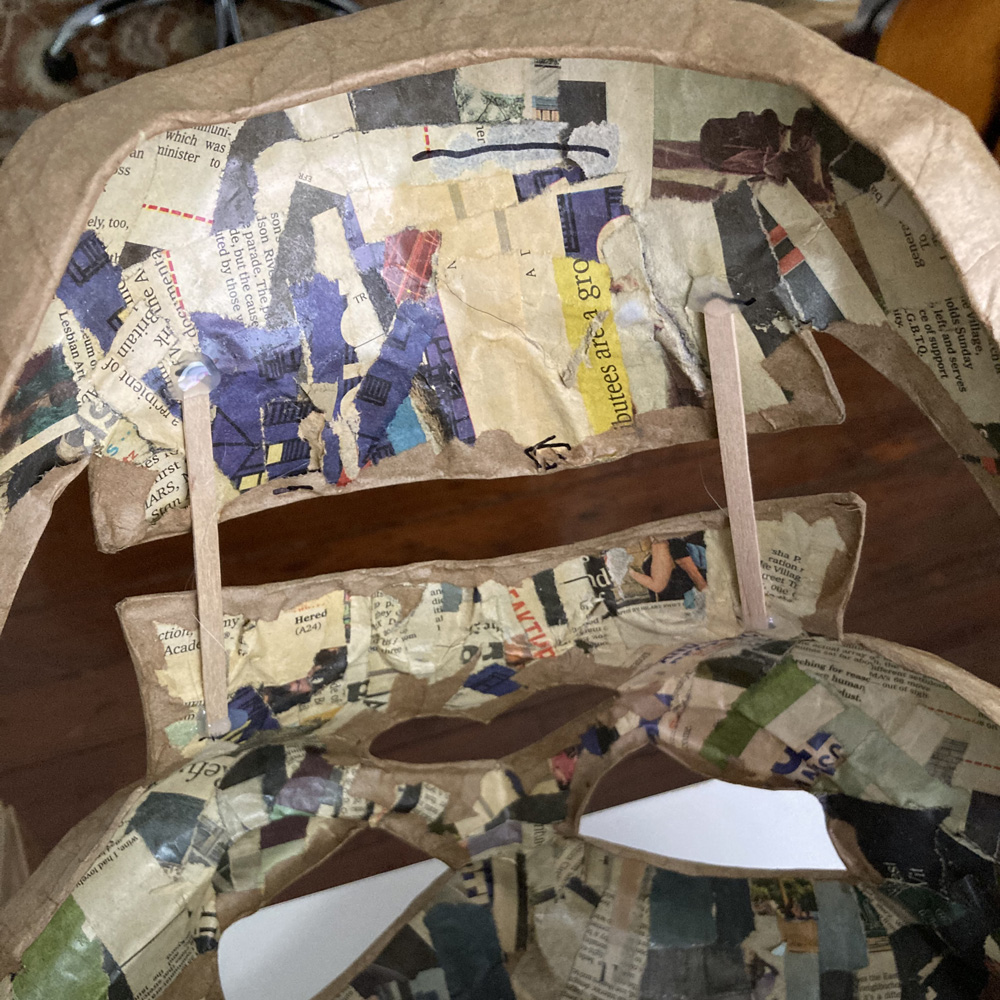
Once all that paper maché was dry, I hot-glued wooden coffee stirrers vertically behind the mouth opening in order to prevent the mouth from sagging closed. This kind of thing can happen when a mask like this sits on a shelf for months/years; the paper maché can start to sag under its own weight, especially in humid weather.
I don’t trust hot glue to last for a long time, so once the stirrers were in place I covered the hot glue areas with three layers of paper maché. That’ll keep ’em locked in place forever.
Preparing the hard hat
I used my dremel tool to saw off three sections of the hard hat: two semi-circle panels on the sides, and the front brim. This is partly to reduce weight, partly to enhance air circulation, and partly to give me this nice crest shape that I can easily wrap paper maché around. I sanded all the jagged plastic edges by hand with some sand paper, and I also sanded the crest shape a little, in order to scratch it up and create a surface that paper maché will stick to a bit better. I then covered the crest with six layers of paper maché. The reason for this is that the paper maché surface on the hard hat will be much easier to glue into the paper maché interior of the mask. Glue doesn’t stick to a hard hat by itself very well at all.
Painting
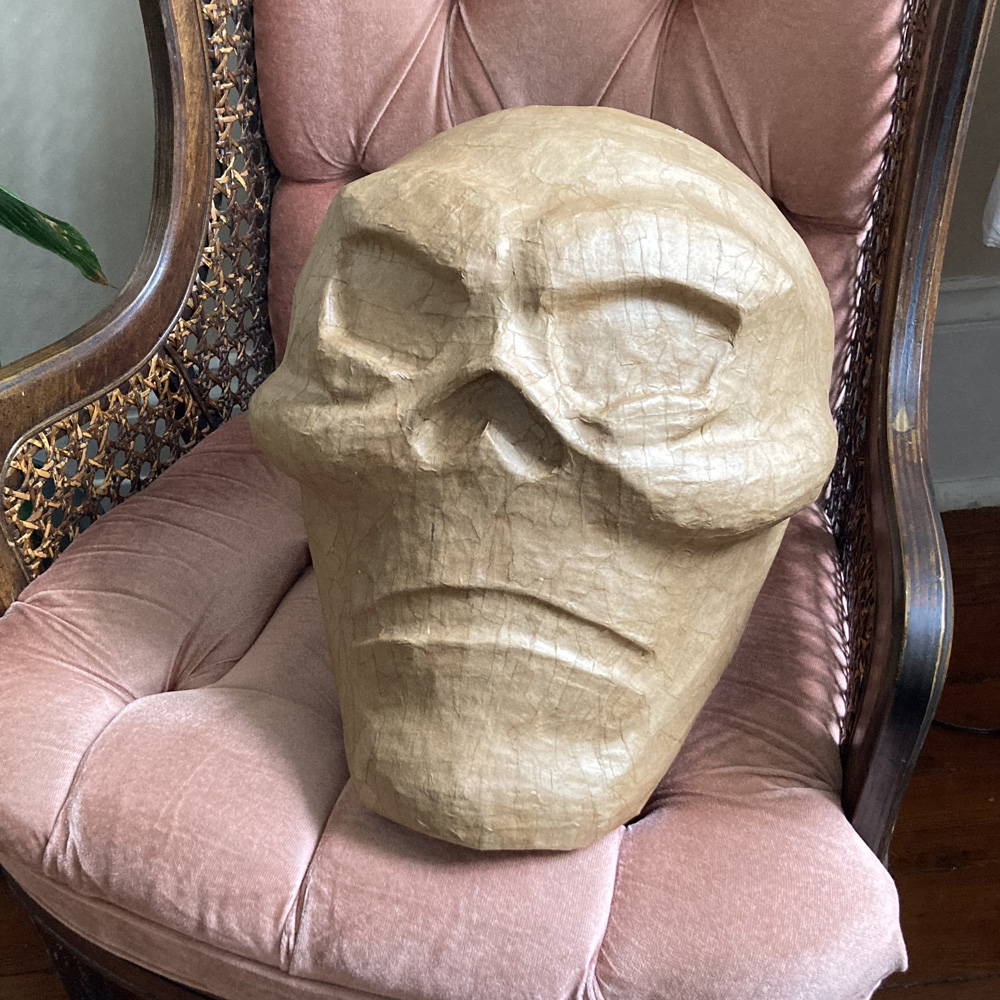
Painting this mask was pretty easy; I’ve painted a million skull masks in the same way. First, I spray painted the interior of the mask with black spray paint, and let that dry for a few hours. Then I hung a drop cloth on one of our tiki torches, placed the mask on that, and applied one coat of spray gesso.
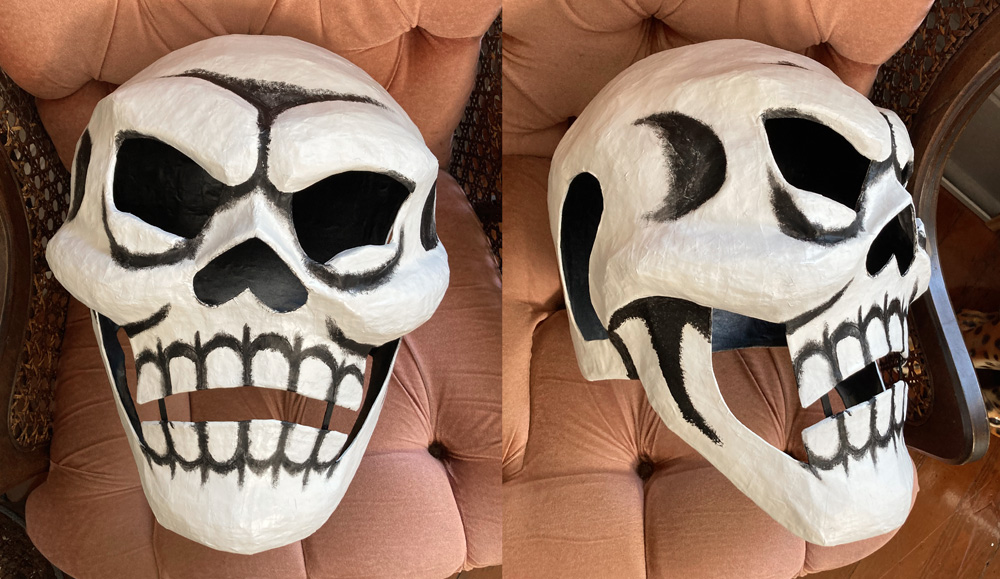
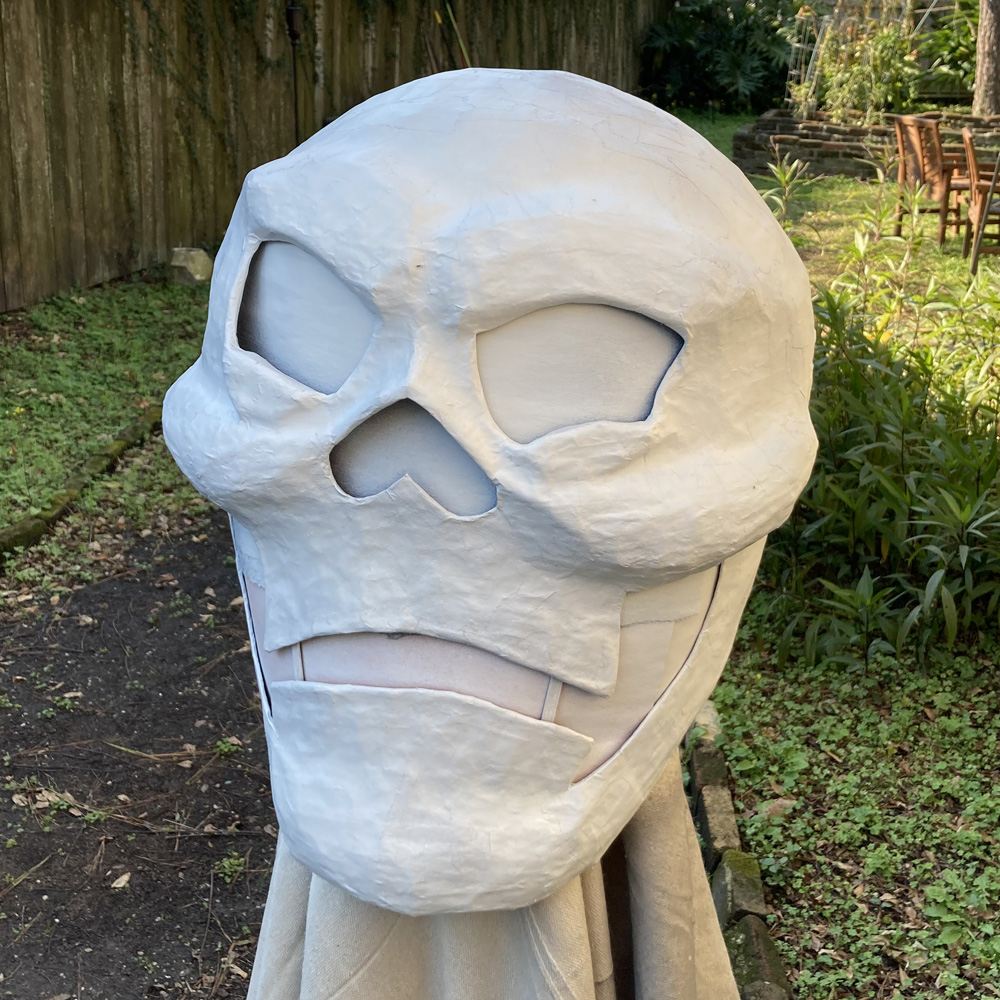
I let the gesso set for a full 24 hours, and then I did a coat of white spray paint. I let that set for 24 hours, and then I did all the rest by hand with acrylic paint. First, I used a stiff brush to apply very dark shadows and lines all over the place. I’ll be dialing this effect back in the next step.

After letting the black paint set for few hours, I then used an old sponge to cover the entire skull with white acrylic paint, and I dabbed at that shadowy areas to fade them back and make them more subtle.
I let the white paint dry, and then I used black acrylic paint and a fine brush to outline all the teeth. I also used a little bit of watered-down black acrylic to accentuate the edges of a few of the shadows — at the temples, under the eyes, and under the eyebrows toward the middle.
I let all that set for a few hours, and then I covered the whole skull with one coat of matte spray.
Installing screen
I cut out pieces of black screen door material for the eyes/nose/mouth and glued them in place inside the mask with my hot glue gun. A head lamp (paid link) is extremely helpful for this!
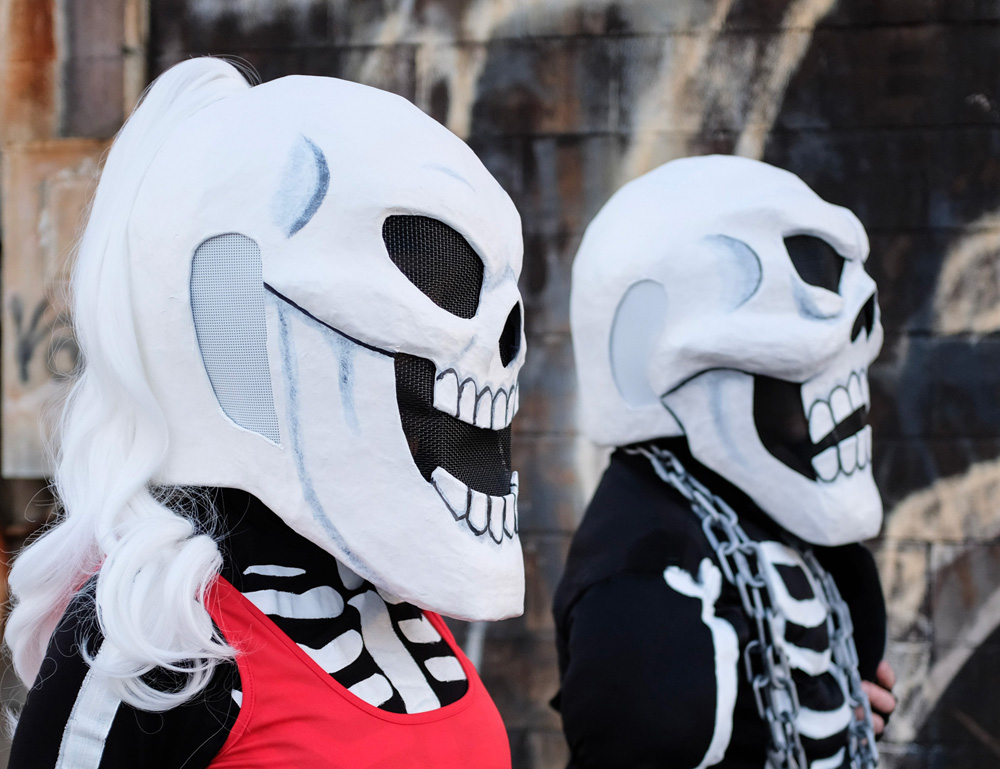
For the ear holes, I used a type of thick white plastic screen material (paid link). Here’s a pic of both my skull and my wife’s skull from the side so you can see the ear holes. You can also see that she added a ponytail to hers!
Installing the hard hat
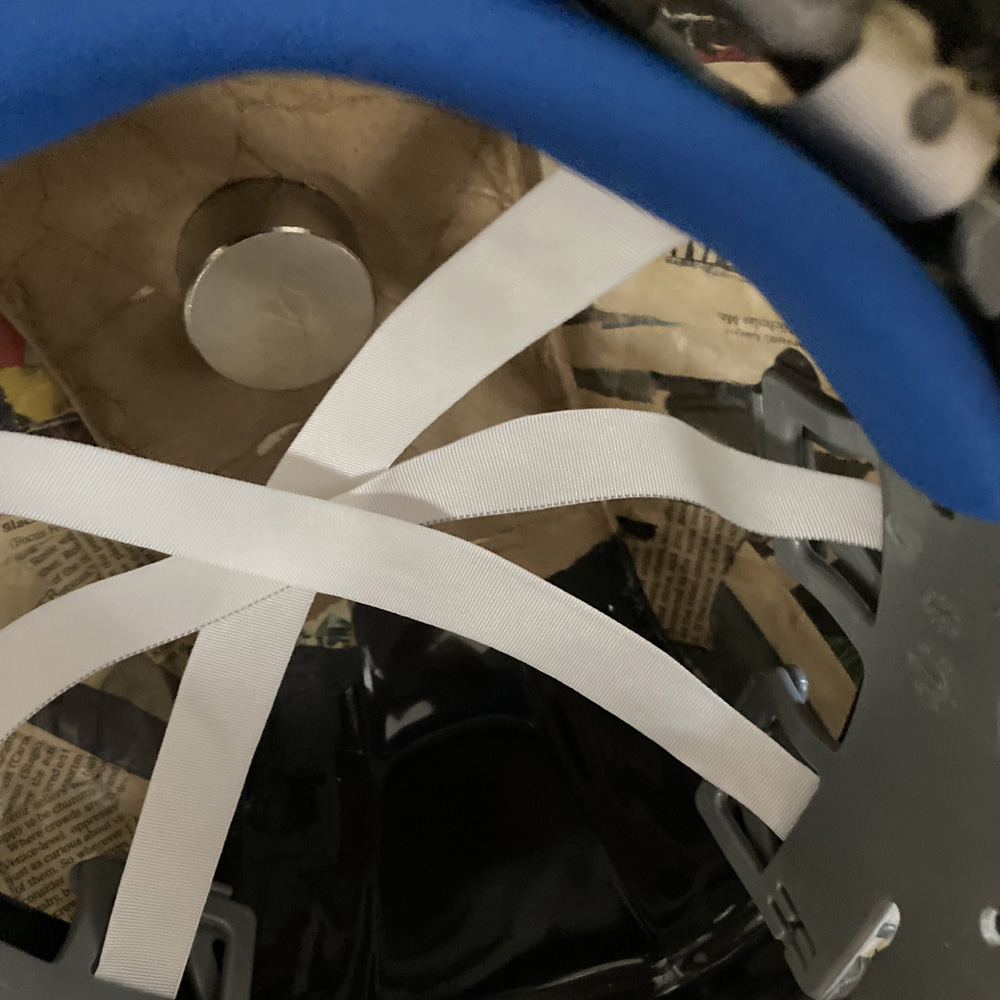
Installing the hard hat in this mask was a bit easier than in most of my others. Usually I’m dealing with a mask that’s large enough that the hard hat doesn’t go all the way up into the top of the mask; I have to add some kind of object between the hard hat and the inside top of the head to connect them. But for this smaller skull I was able to glue the hard hat (covered with paper maché) right into the top of the head.
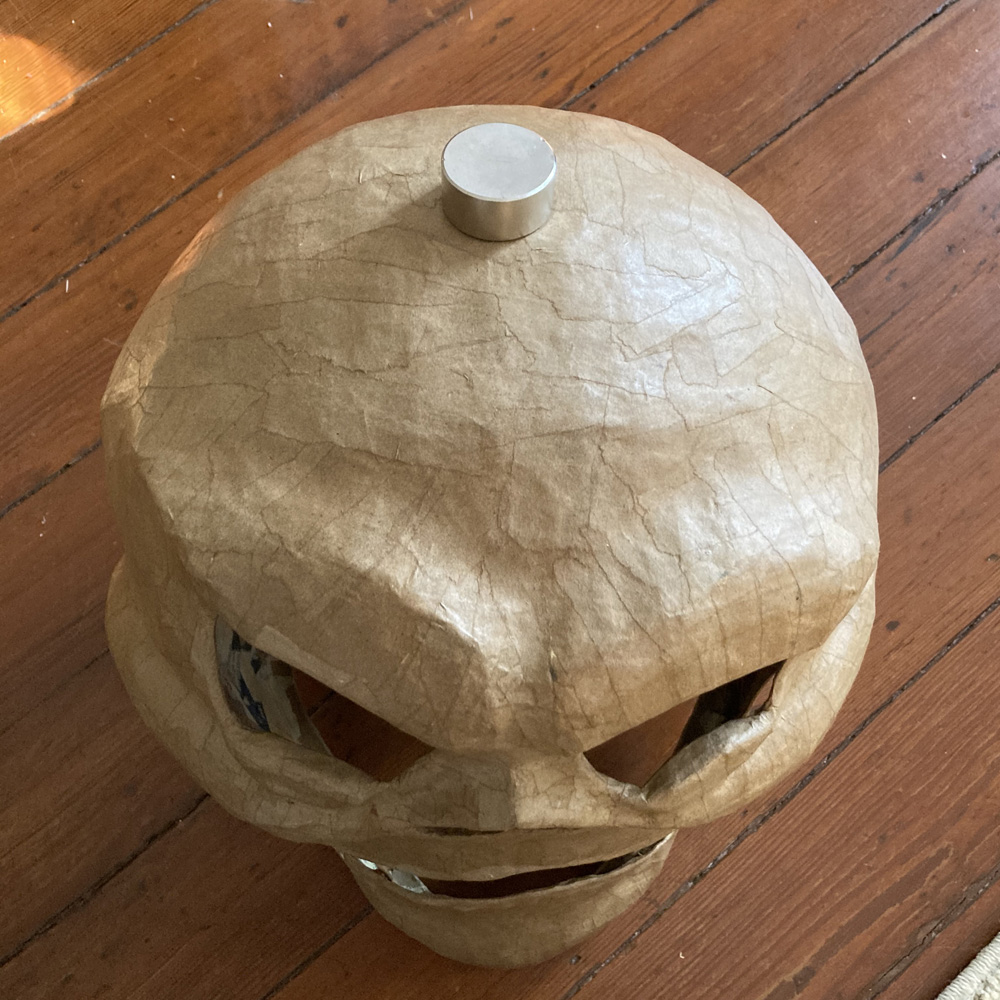
I started out by using these extremely strong 20mm magnets (paid link) to figure out the correct placement of the hard hat in the skull. Warning, these magnets are very dangerous! You can easily pinch your fingers and do some serious damage, like, I mean the kind of damage where you go to the hospital. Use caution with these things. Like, just the fact that they’re strong enough to hold a thick hard hat and thick paper maché mask together should tell you how insanely strong they are.
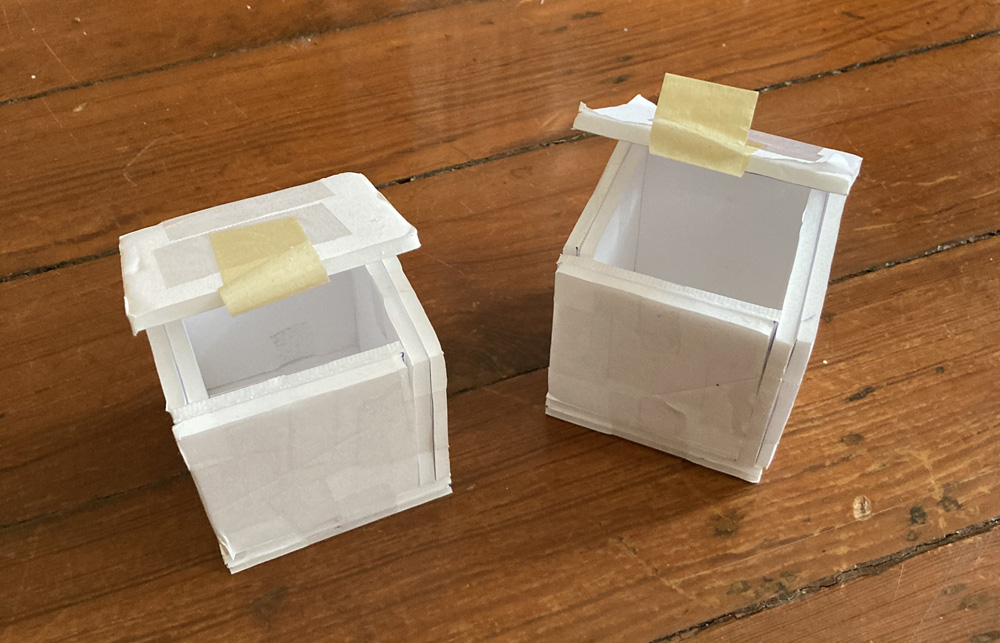
These magnets are so strong that they’re practically impossible to separate if you let them connect to one another, so I’m careful to never let them touch. I built these little custom foam board boxes to store them. Even with four layers of foam board between them, the magnets cause the boxes to stick together really firmly.
Anyway! Once the hard hat was in the right position, I set the skull upside down and poured tons of Gorilla Glue all around the hard hat, which allowed the glue to ooze downward into the very top of the skull. I let the glue set for about four hours, then picked up the skull, and the connection felt very strong. Just to be safe, I also added a little connection at the back of the hard hat to the inside back of the skull, using a small pieces of foam which I hot-glued in place and then covered with four layers of paper maché, covering the foam piece plus the areas where it connects to the hard hat and to the skull.

And that’s it for the skull!
Everything else
The rest of the costume was easy! I just ordered a bunch of stuff and put it all together; I just had to paint bones on the padded muscle shirt and the longjohns. Here are all the other items I ordered; these are all paid links:
Black padded muscle shirt (got this on eBay)
Black long underwear
MMA shorts
Costume wrestling boots
Wrist bands
Knee pads
Plastic chain! — this stuff was great, and I only used a small length for this costume; I’ll definitely be using the rest for various Halloween decorations.
I trimmed the shorts to be much shorter; otherwise I just threw all this stuff together as-is. It was so fun to stomp around as skeleton wrestlers on Mardi Gras with Cryptique!
Coming soon: how we made our DIY pro wrestler championship belts!
 About Manning Krull
 How to make a 4-foot paper maché alligator
 My violin skull mask, Mardi Gras 2015
 Three-headed paper maché dragon sculpture
Leave a comment