
Attaching a hard hat in a paper maché mask
Published by Manning on April 4th, 2018
Hello! I’m just putting this long boring article here so I can link to it from other posts rather than explain the same thing every time. I mount almost all of my big paper maché masks on a hard hat. Obviously all my masks are very different shapes and sizes, so a lot of this can vary, but this is my basic method that I’ve settled on…
Preparing the hard hat
Often I’ll trim certain parts of the hard hat off with a saw and/or dremel tool before attaching it in the hard hat — I do this to reduce weight and sometimes to change the shape of the hard hat so it fits better in the mask. Always wear a dust mask and eye protection when sawing plastic! I almost always saw off the front brim, and I often saw off two side panels (here’s a pic) leaving me with just a crest across the top — perfect for attaching in a mask!
I also scratch up the surface of the hard hat with an awl or a screwdriver, to give it a better surface for paper maché and/or glue.
Sometimes the hard hat is too tall for the mask, so I saw off the top couple inches — here’s a pic of one where I sawed off the top off and then built up a flat roof with foam board and paper maché.
After I’m done sawing the hard hat, I always permanently attach the suspension — the rigging/straps/padding — in the hard hat with a couple drops of Gorilla Glue at all the connection points. I also usually paint the front foam padding black; it’s usually a bright color and I wouldn’t want people to be able to see that through the eye holes.
Propping up the mask with foam
If your mask sits perfectly on top of your hard hat, you can skip this next step; I would simply cover the hard hat with 3-4 layers of paper maché to give it a good strong porous surface, and then Gorilla Glue this right into the mask.
However, usually there’s a lot of empty space in the top of my masks, and I need to put something on top of the hard hat to lift the mask up to the correct height. I usually use a segment of a foam pool noodle for this. Here’s a dumb sketch:

I’ll start by doing some trial and error to figure out the height — I take a foam pool noodle and cut off a segment (maybe about 3-4 inches long) and tape it vertically on top of the hard hat with masking tape. Then I put on the hard hat and put on the mask over it and see if it’s too high or too low. I’ll trim the pool noodle a few times until I get the height right. Obviouisly you don’t have to use a pool noodle for this; any kind of firm foam could work.
In attaching the pool noodle to the hard hat, you might think you should place it dead-center on top of the hard hat, but you probably want it much closer to the front. Try this: put on the hard hat, stand up straight, and take a photo of yourself in profile. You’ll see the hard hat leans back on your head; the front edge is much higher than the back edge. If you stuck the pool noodle on dead center it’ll lean backward quite a bit. So putting the pool noodle about one third back from the front of the hard hat will let it stand straight up and touch the top-middle of the interior of your mask.
When I’ve trimmed the pool noodle to the perfect height, then I attach it permanently to the hard hat. I glue the pool noodle down with a hot glue gun and then I cover the whole top of the hard hat and the pool noodle with 4 layers of paper maché — this really locks the pool noodle in place and it gives a good porous surface to glue into the mask.
Then it’s time to attach all this into the mask…
Finding the right spot to glue the hard hat — method 1
It can actually be really hard to know where exactly to attach the top of the pool noodle into the mask. When you’re wearing the mask you can’t see where the pool noodle is touching inside. If you glue the thing in there permanently and it’s in the wrong position, you’re kind of screwed! So I’ve made up a few ways of making sure to get the position right.
One dumb method I’ve used: I’ll put a small blob of thick acrylic paint on top of the pool noodle, then I’ll put on the hard hat, look in the mirror, and very slowly lower the mask down onto it, so that the mask touches down on the pool noodle in exactly the right place. Then I’ll carefully lift the mask straight up and take it off, and then I’ll look in the mask to see where paint has stuck, and that’s the spot where you want to glue the pool noodle.
I also do my best to measure the distance from the front edge of the hard hat to the front inner wall of the mask. This is so when I glue the pool noodle in place, I can make sure the hard hat is leaning away from the inner wall at the exact right distance.
It’s worth taking your time to work all of this out! If you mess up you might end up with a mask that doesn’t sit right on your head, or the eye holes aren’t lined up right for you to see well, or the inside of the mask bumps into your nose, etc.
Method 2 — An even more precise method for finding the right spot
This is probably overkill but I’m just so terrified of accidentally gluing the hard hat into the wrong place, I think it’s worth the extra effort. So, skip the part above with the blob of paint. Instead of that, I’ll build a little hollow tube of foam board, about 1.5 inches tall, and just wide enough to fit around the pool noodle with a bit of space around it. I’ll cover this shape with 4 layers of paper maché to make it really sturdy.

When it’s dry, I’ll tape this shape in place inside the top of the mask temporarily with masking tape. Then I’ll put on the hard hat and lower the mask in place, so the pool noodle gets inserted into the foam tube. I’ll check the positioning, and if it’s not right I’ll remove the mask and hard hat, reposition the tube in the mask a bit, and try again.
When I finally get the positioning right, I’ll mark a line around the tube inside the mask, remove the tube (remember it’s just been held in there with tape), and then I’ll permanently glue the tube in place. To do this, I turn the mask upside down and prop it up between chairs or stacks of books or whatever. I dump a bunch of Gorilla Glue into the top of the mask inside the circle I’ve drawn, and then I set the tube in place in the mask. I weigh it down with a water bottle or something; it’s important to note that Gorilla Glue expands a huge amount as it dries, and it can push objects apart as it expands! Adding weight will help avoid that.
Anyway, I’ll let the glue set for 3-4 hours before continuing.
Gluing the hard hat into the mask permanently
Time to glue in the hard hat! I dump a bunch of Gorilla Glue into the top of the mask — either around the paint spot if I used that method, or into the foam/paper maché tube if I used the other method — and I put some Gorilla Glue on the top of the pool noodle as well, and then I set the pool noodle/hard hat in place in the mask. The glue dries very slowly so you’ve got plenty of time for the next steps…
I wedge in a bunch of little pieces of cardboard (or foam board, or sponges) all around the edge of the hard hat to hold it in the right position — I’m especially making sure the front edge of the hard hat is the right distance from the front of the mask, and that the hard hat is centered so there’s equal space on the left and right.
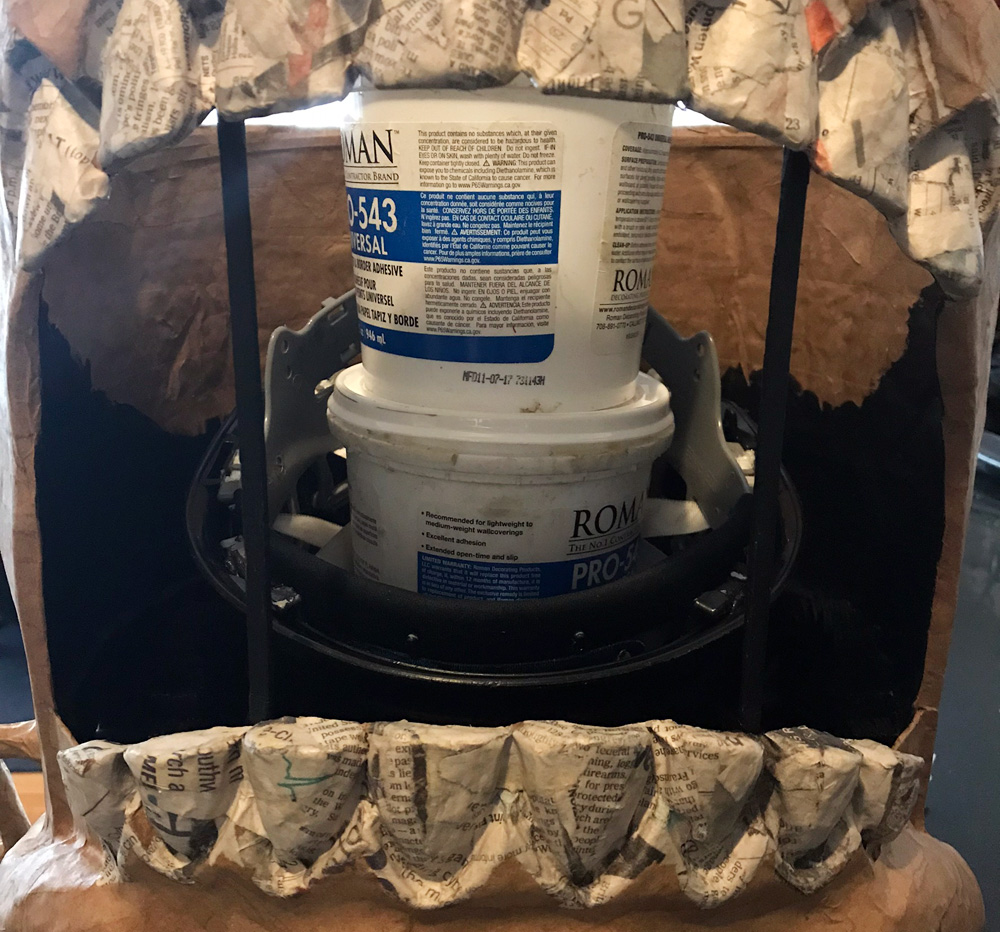
Also, important: I put something heavy in the hard hat, like a couple bottles of water (or buckets of paste like in the pic above), to weigh it down. Remember, Gorilla Glue expands a huge amount as it dries, and it can push the hard hat up! Not good! With the weight there, the glue will expand around the pool noodle and really lock it in place.
You want to leave this alone for at least 3-4 hours! That should let the glue completely set.
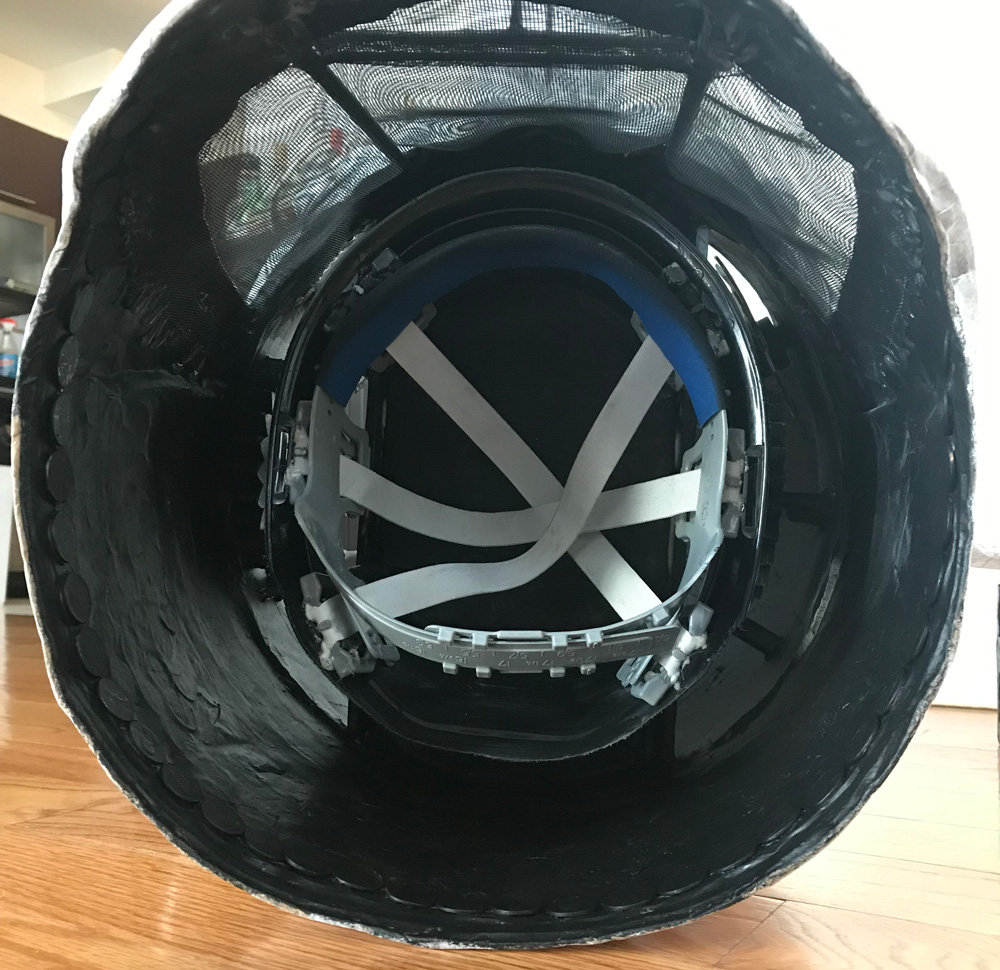
Here’s a look inside this mask after the hard hat has been glued in:
Horizontal supports
Next, if needed, I add some small horizontal supports to attach the edges of the hard hat to the inner walls of the mask. Sometimes I do these on the left and right, sometimes the front and back, sometimes all four — it depends on the shape of the mask and how wobbly it feels.
I’ve used a lot of different materials to make these supports; sometimes wooden coffee stirrers, sometimes plastic zip ties, sometimes blocks of firm foam. Some of my skeleton colleagues use thick copper wire for this.
Let’s use wooden coffee stirrers as an example. I’ll measure and cut these to size with pliers, and I’ll stack up three at a time and glue them together. That will give you a really strong post that you can connect to the hard hat and the inner wall. I’ll set these in place and attach them to the hard hat and the inner mask walls with a hot glue glue, but that’s probably not strong enough for a permanent connection. I’ll then do the best I can to cover these connection points with 3-4 layers of paper maché. It can be really hard to get in there with your fingers and the paper maché! But that’ll give you a very strong, permanent connection.
Good luck, have fun!
 About Manning Krull
 How to make a 4-foot paper maché alligator
 My violin skull mask, Mardi Gras 2015
 Three-headed paper maché dragon sculpture
May 16th, 2019 at 9:29 pm
Hi, thanks for all your great articles and tutorials! I’m trying to attach a hard hat in a large mask that I’ve built. My husband and I just tried to do the thing with the big glob of acrylic paint, and realized that the pool noodle segment won’t have an even surface inside the mask to attach to. To solve this problem, I’ve ordered an adhesive putty – the plan is to put the putty on the foam noodle segment, lower the mask down, and basically mash it down until there’s a good bond (and hope that my sight isn’t affected too badly). Then I plan to reinforce the putty with E6000 and horizontal supports. If you get a chance, could you tell me if you think this plan will work and if you have any other suggestions? Thank you!
May 16th, 2019 at 10:58 pm
Hi Erin! I love this kind of technical nerdy question! I’ve totally had the same problem where the top surface of the mask isn’t even/level enough. I think the putty could be a good solution but I’d be a little bit concerned that it might not hold onto the paper mache surface — and the pool noodle — well enough. You mentioned reinforcing all of this with E6000, and I think that might do the trick! You could also use hot glue for this, all the way around the connections. Then there’s the nuclear option, if you have the time: put the putty in there and smash the pool noodle into it, but then remove the pool noodle, let the putty harden, and then cover the putty with four layers of paper mache, and let that dry. Then use Gorilla Glue to connect the pool noodle to the paper mache in there. That should create an extremely strong connection, but of course it’s more steps and more time. Good luck!!! I’d love to see what you’re making!!!