
Axe Man skull mask for Mardi Gras 2018
Published by Manning on February 12th, 2018
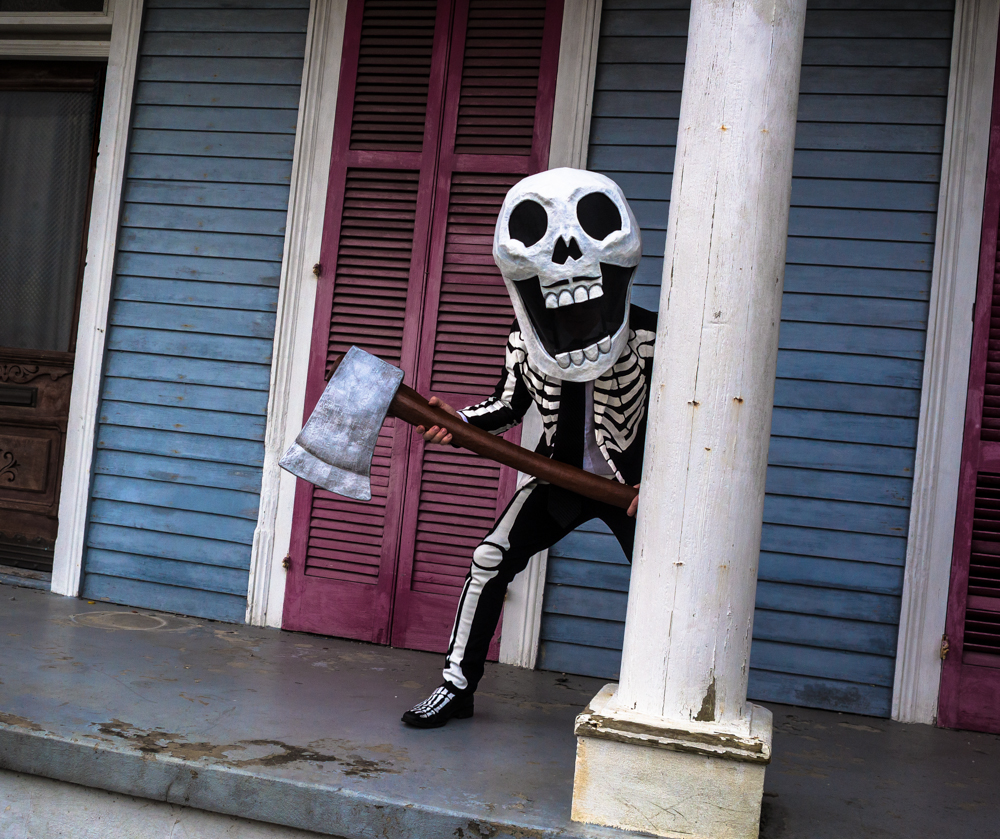
Here’s my Axe Man skeleton costume for Mardi Gras 2018! The Axe Man was a semi-legendary serial killer in New Orleans in 1918-1919; you can read all about him here. This year our skeleton group designed skulls and costumes based on figures from New Orleans history, to celebrate the city’s tricentennial, so of course I picked the creepiest guy I could find. Here’s how I made his skull mask, and don’t miss my other article about making the oversized paper maché axe prop.
Designing the Axe Man costume
This year the skeletons had to submit drawings of our costumes ahead of time for a booklet that was to be handed out during our parade on Mardi Gras day. This added some pressure! I always sketch my skull masks ahead of time, but I’ve never had to worry about committing exactly to a design on paper and then being stuck trying to build that exact design! Anyway, I enjoyed the challenge of this. After a few sketches, this is the Axe Man skeleton drawing I submitted, way back in October:
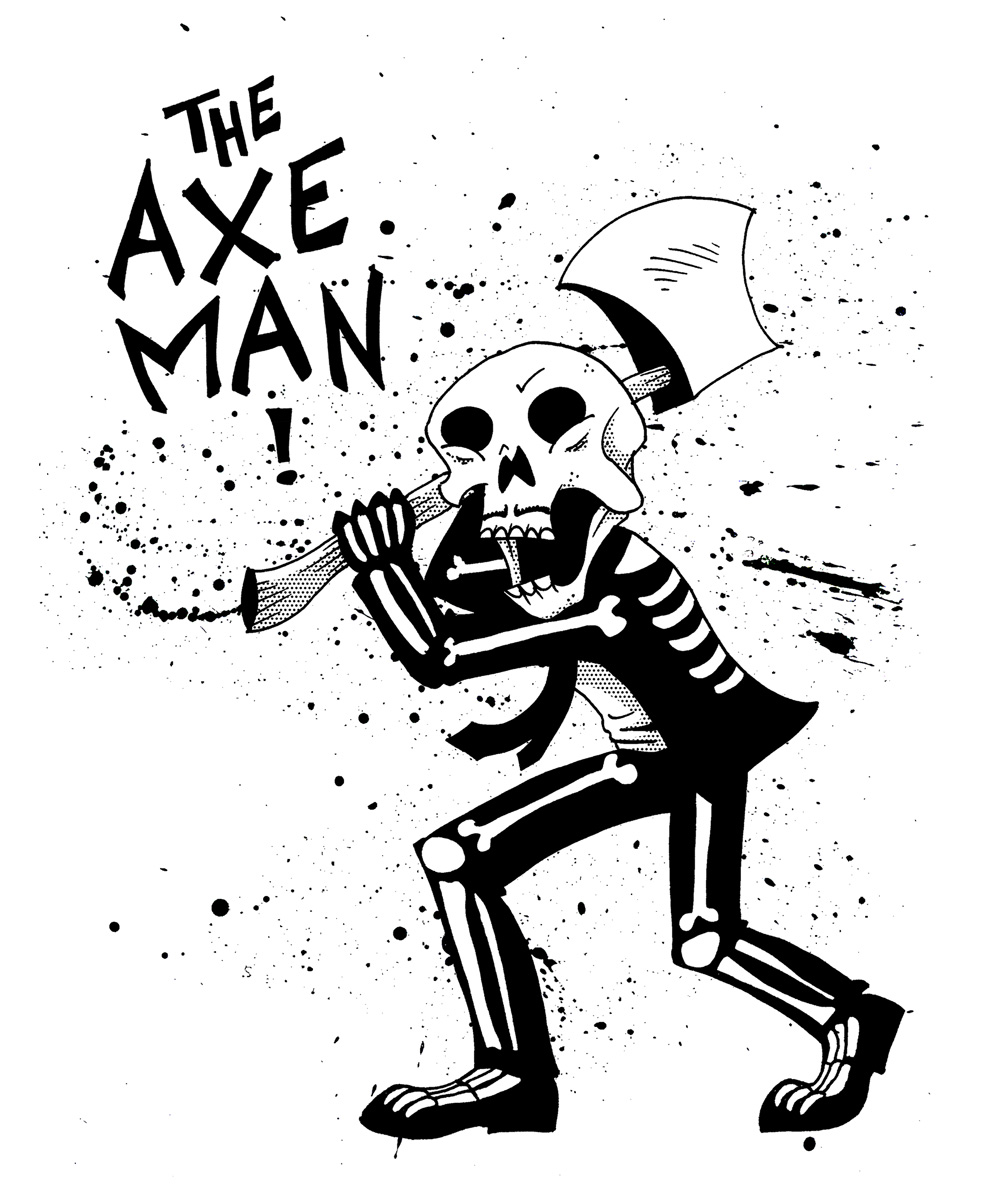
I wanted to go for a skull design that was a little bit scary and exaggerated but still fun and kind of cartoony; I didn’t want to be too terrifying. Rather than go for big evil-looking eyebrow ridges that slope way downward, I wanted big wide open eyes, with scrunched up eyelids underneath, making the expression look stressed and wild and crazed rather than evil and calculating. I wanted the skull to look like it was crazed and screaming, and I decided to try to mount the skull on my hard hat to be leaning back a bit, to enhance the wild, screaming effect. I wanted the features to all be asymmetrical, with slightly different-sized eyes, a nose that’s tilted and irregular, and rows of teeth on an angle rather than straight. Okay, now how to make this thing?
Building the base
To make the base for my axe man skull mask, I started with a big plastic bowl from the dollar store; this would be the top of the skull. The bowl had a thin protruding lip around the edge which I trimmed off with scissors.
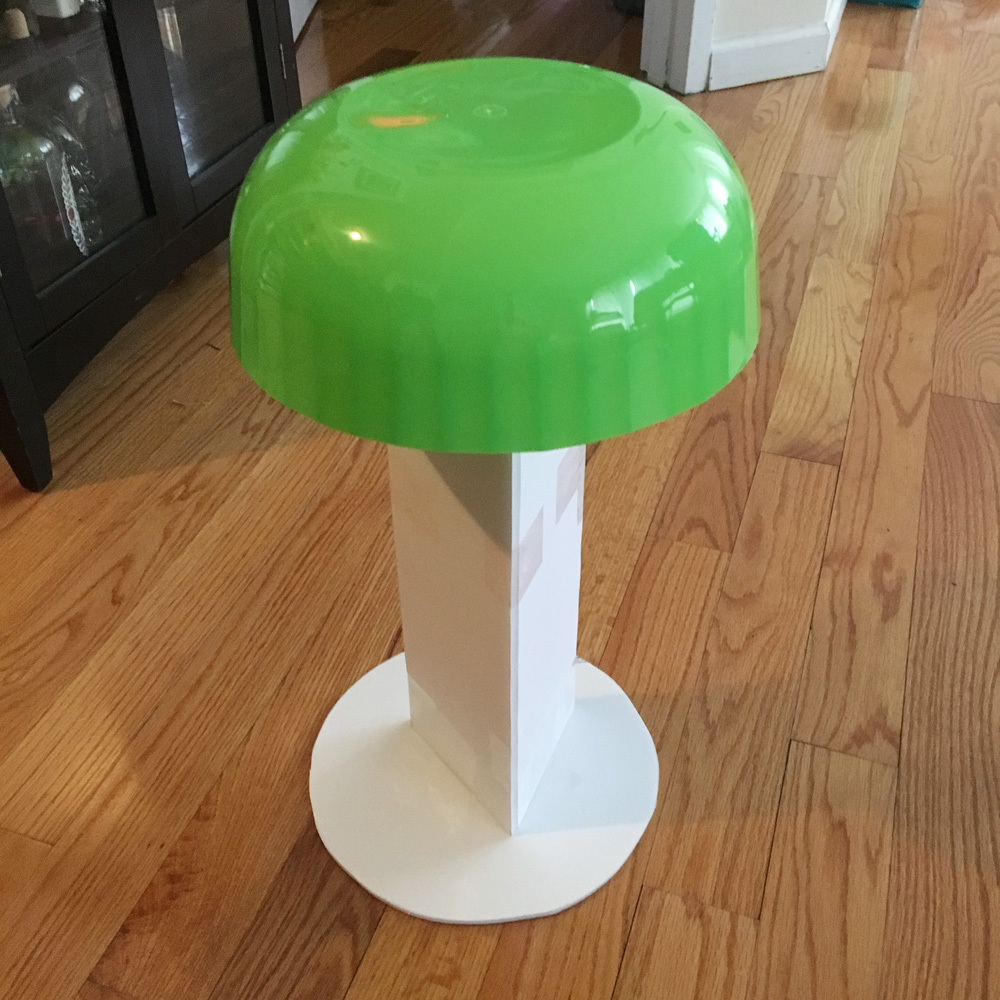
I cut out a circle of foam board to serve as the bottom surface of the skull base. This will get cut off and discarded later, but for now it’ll give me a base to help build the overall shape of the skull onto.
I built a triangular tower structure out of foam board, about 18″ tall, to hold the top and bottom parts of the skull apart at the right distance. I taped all this stuff — the bowl, the tower thing, and the base — together with shipping tape.
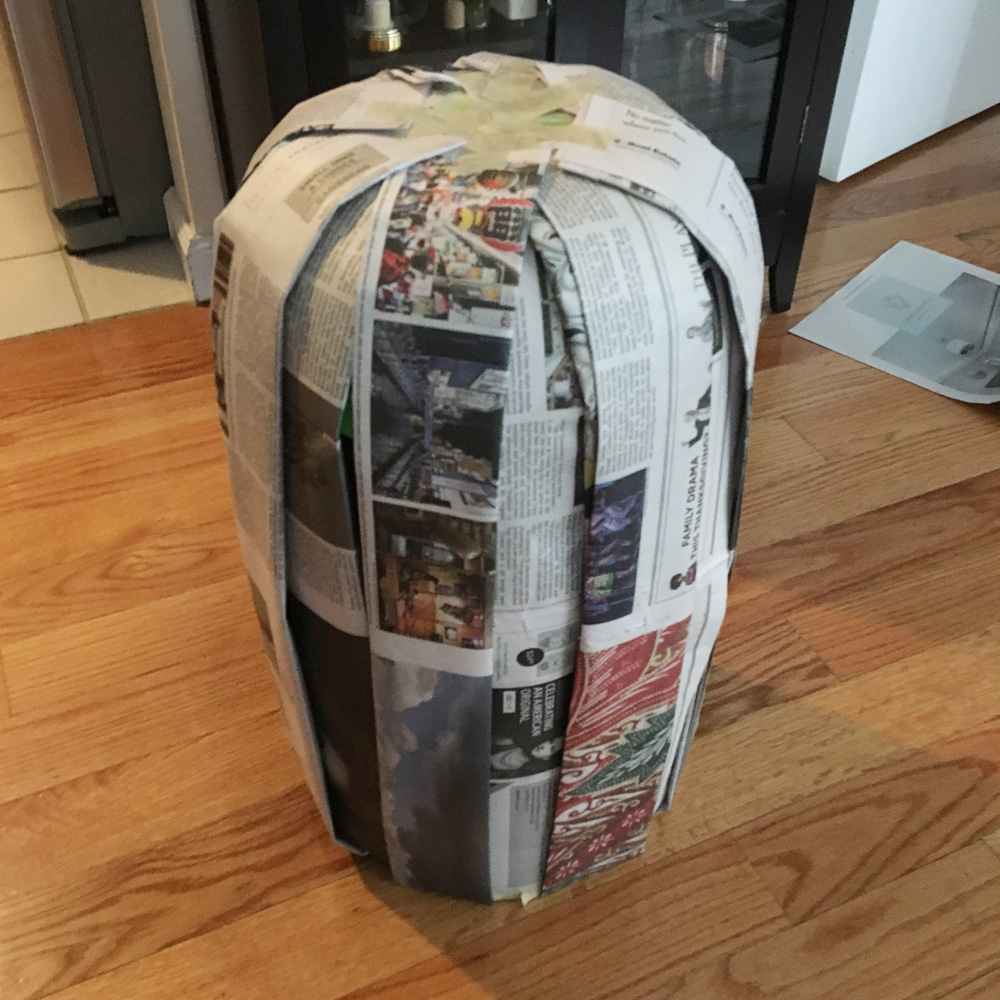
I then used a couple dozen pieces of newspaper, folded into thick strips, to flesh out the shape of the skull between the top dome and the bottom surface. I taped these in place, running vertically all around the shape, and allowing them to retain a gentle curve. I’ve used a similar method with strips of poster board a few times to create gently curved walls, and this worked just as well, maybe a little better — the newspaper strips were better for building volume and roundness, but they’re a little less sturdy than poster board strips. In all of my projects like this, these walls always start out feeling way too flimsy, but step by step, as I add layer after layer of material, the walls take shape and become sturdy enough to put paper maché (or other materials) on.
I didn’t take a picture of this step, but I added two rings of foam around the middle section of the skull to give it a lot more width where the cheekbones will be, giving the base a sort of lightbulb shape. I used a long piece of foam pipe insulation tubing, sliced down the middle with an X-acto knife; this gave me two long half-tube shapes. I wrapped these around my newspaper base and taped them in place. After these foam tubes were in place I added another layer of folded up strips of newspaper.
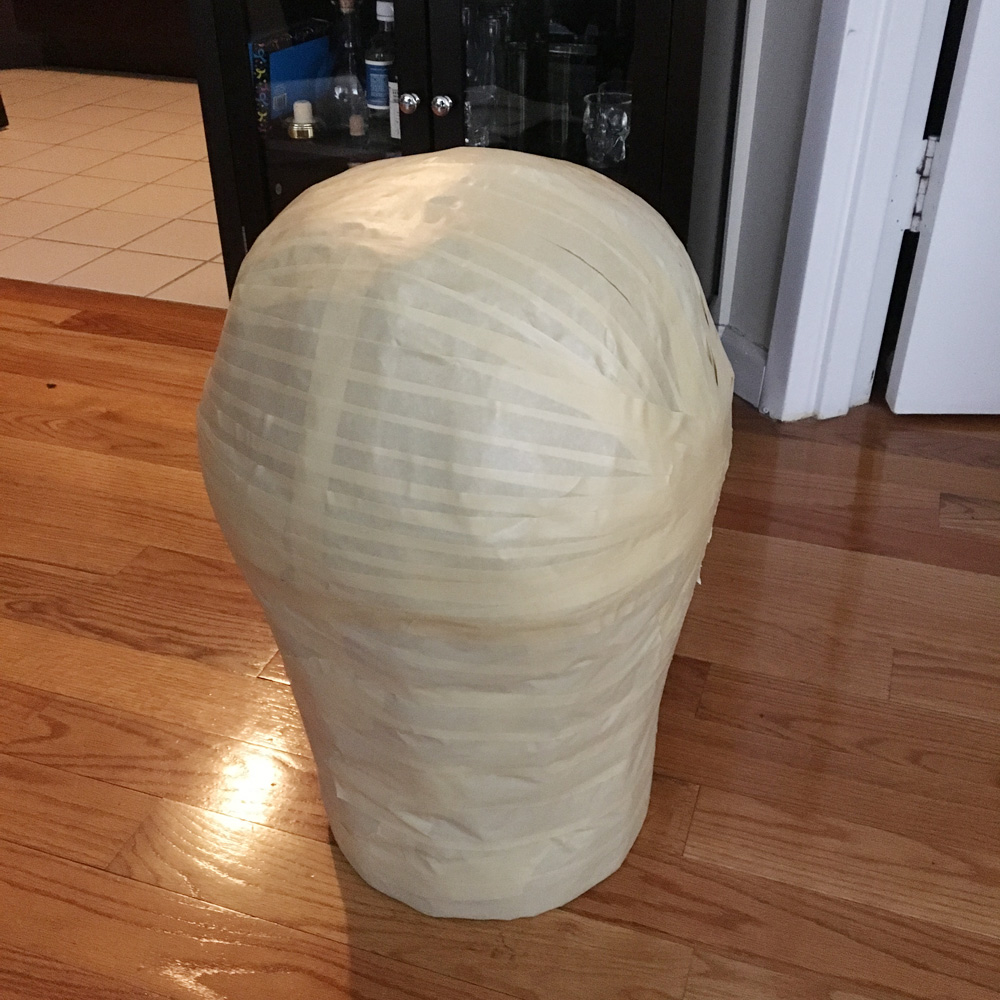
After the newspaper strips, I wrapped carefully the shape in a few other materials: first, a layer of bubble wrap, cut into long 3″ strips and carefully wrapped around, to pad out the shape even more; then a layer of heavy duty shipping tape over the whole thing, to lock the bubble wrap in place and make the whole shape sturdier; and then a layer of masking tape over the whole thing, to really smooth out the surface. Little by little as you add all these layers of material, the base shape gets much sturdier and you end up with a nice natural-looking curved structure.
A note about chickenwire, and why I don’t use it
I get asked about chickenwire a lot! Basically, this whole laborious base-making process that I do with the newspaper strips/bubble wrap/tape/etc is the method I’ve developed on my own after not having much success with chickenwire. If you’re less of a perfectionist than I am, chickenwire can save you a lot of time! I always describe it like this: If you want to design a specific mask shape on paper and then try to build something very close to that, chickenwire is too just inexact (in my opinion), which is why I’ve made up these other control-freak kinds of methods. If you’re fine with starting with only a general idea and messing with the chickenwire and seeing what kind of neat shape you can get with it and then deciding, this looks cool, this will be the shape for my mask, then chickenwire is a good/fast/fun method to use! You can make amazing stuff with chickenwire; I just don’t feel like it offers the fine control that I want for my masks, most of which I design on paper way ahead of time. It’s also very hard to make something truly symmetrical with chickenwire, which is another reason I use my control-freak methods.
I will say this: the base structure I made for this mask ended up being the least solid shape I’ve ever worked with, so I was taking a bit of a risk by committing to using it as my base for the paper maché. I’m used to starting with materials that feel flimsy at first but get sturdier with every layer of material, and that was true for this one as well, but it didn’t end up very sturdy at all by the end. This is probably because of the folded newspaper strips; they were pretty soft and flexible, and the tape and other stuff helped them become only a little bit firmer. Anyway, after all the tape and stuff the shape did feel somewhat sturdy and I deemed it ready to go. It worked out fine! I just had to be careful, and I applied the first layer of paper maché very gently without pushing on the surface of the base too much, to avoid denting it; once that first layer of paper was dry the whole thing finally felt pretty solid. More on all that coming up.
Sculpting the Axe Man’s face
Next, I built out the big features of the face. I wanted the eye sockets, nose, jawline, etc, to appear thick and raised, to create a kind of cartoony effect, so I built these parts out of pieces of foam board, cut out with an X-acto knife and taped in place. To smooth out the outer edges of these pieces — e.g. the outer parts of the eye sockets — I taped little strips of thick paper in place, to bridge the gaps between the raised foam board edges and the base itself.
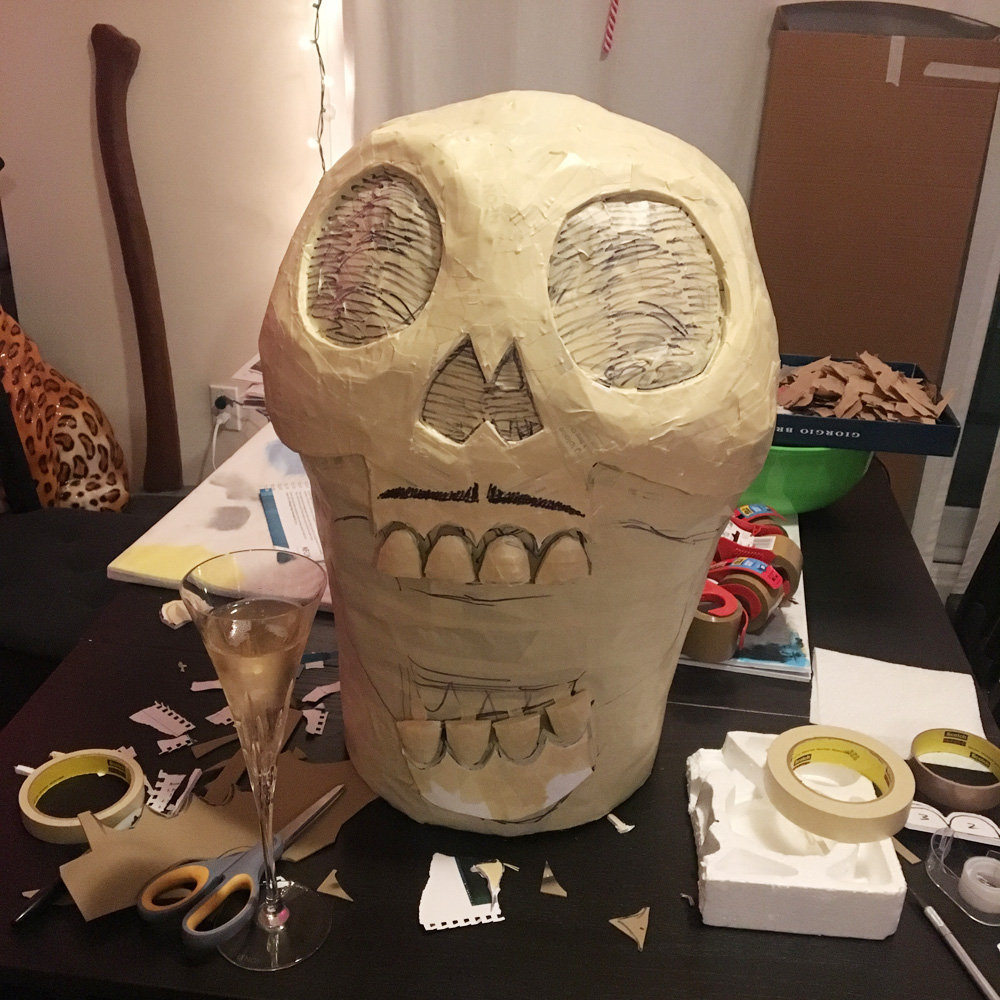
You’ll see in the pic above I haven’t added the lower eyelids and the little angry eyebrow ridges yet; the eyes are just circles here, which gives the face a very different expression. (I lightly colored in the eyes and nose with a Sharpie marker just to get an impression of what the finished face would look like.) I sculpted the lower eyelids out of Activa Plus modeling clay. I used the same clay to build up the upper edge of the nose hole a bit, and also to make small, asymmetrical eyebrow ridges. When all these parts were just about dry, I covered them with thin strips of masking tape.
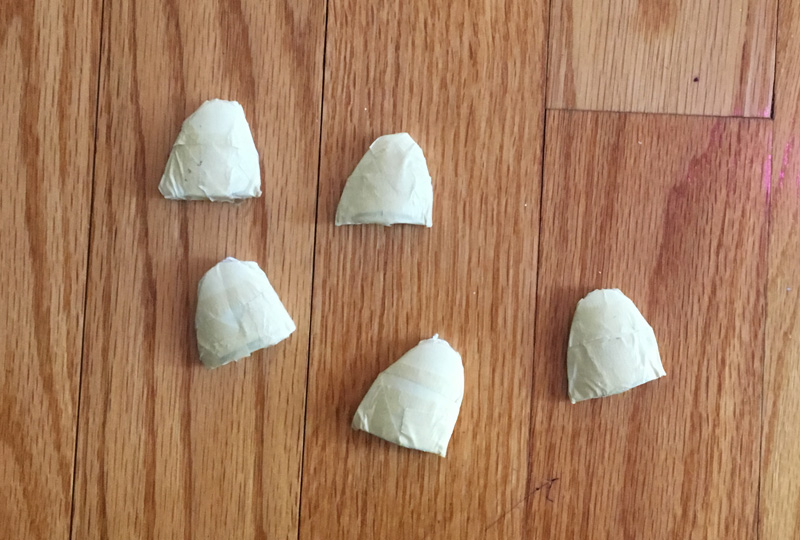
I made the teeth from plastic spoons; I’ve used this method a few times now and I get a little better at it each time. I always wrap the spoons with clear tape before cutting them, to prevent them from splitting or shattering (I also wear glasses while cutting them, just in case). Once the spoons were cut, I traced them onto foam board, cut the shapes out, taped the foam board pieces into the spoons, and then wrapped the spoons and foam board in masking tape. This helps build out the edges of the teeth at the open end of the spoons, so the finished teeth are nice and thick and cartoony.
I built a gumline by tracing my completed teeth onto foam board and cutting that shape out. When tracing the teeth, I leave a little extra space between them, as this will get filled up a bit by paper maché later on.
I taped the gumline onto the skull with masking tape, and smoothed out the edge that’s away from the teeth by taping some strips of thick paper over it. I then taped the teeth in place with little loops of masking tape behind them.
Finally the base was finished, and it was time for paper maché — almost. At this point I carefully covered the finished base with tons of strips of shipping tape, being very careful to not create any wrinkles, and even cutting the tape into thinner strips to help fit it onto the smaller details. The shipping tape helps make the base easier to remove from the finished paper maché; the paper maché doesn’t stick to the smooth plastic tape very well, so it’s easy to pull everything out. Masking tape works for this as well, but you’ll always end up with some of your masking tape stuck permanently inside your mask; not a big deal. Anyway, I don’t cover the base 100% with shipping tape, as that would take forever. I mostly cover the big smooth areas, and then I add smaller pieces here and there where I can; even without covering everything completely, the shipping tape gives you something to grab onto and peel away when you’ve opened up the mask, and it helps bring the other materials out with it. Anyway, the base with all the shipping tape on it looks really ugly when it’s done! Fortunately it’s all about to get covered with…
Paper maché!
I applied eight layers of paper maché all over the skull base over the course of several days; check out my article about my paper maché methods and materials. The short version is: I use Roman PRO-543 universal wallpaper adhesive (paid link) and alternating layers of newspaper and brown wrapping paper.

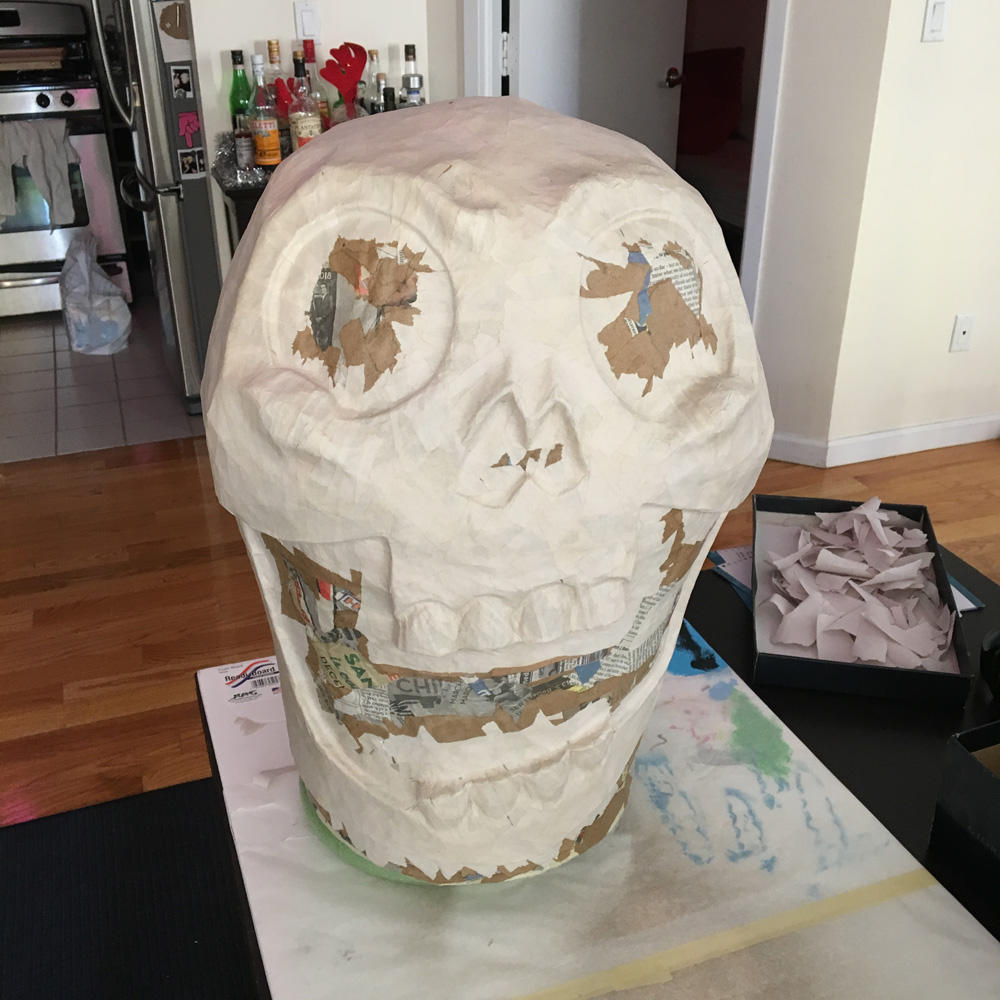
As always, I used brown wrapping paper for my first layer, so that when I’m finished the inside of the mask will be a solid brown color, rather than ugly newsprint. I ran into a funny problem here; the shipping tape I used and the brown paper were almost exactly the same color, so it was hard to see exactly what parts I’d covered. Not a big deal, but it made me wish I’d used a different combination here; either a different color tape or a different color of paper.
I alternated brown wrapping paper and newspaper for my first seven layers, and then for the eighth and final layer I used packing paper — essentially blank newspaper.
I should note, I cheated a bit with the teeth and only put six layers of paper on them, so as to not cover up too much of the detail of the teeth and gumline. The rest of the skull got the full eight layers.
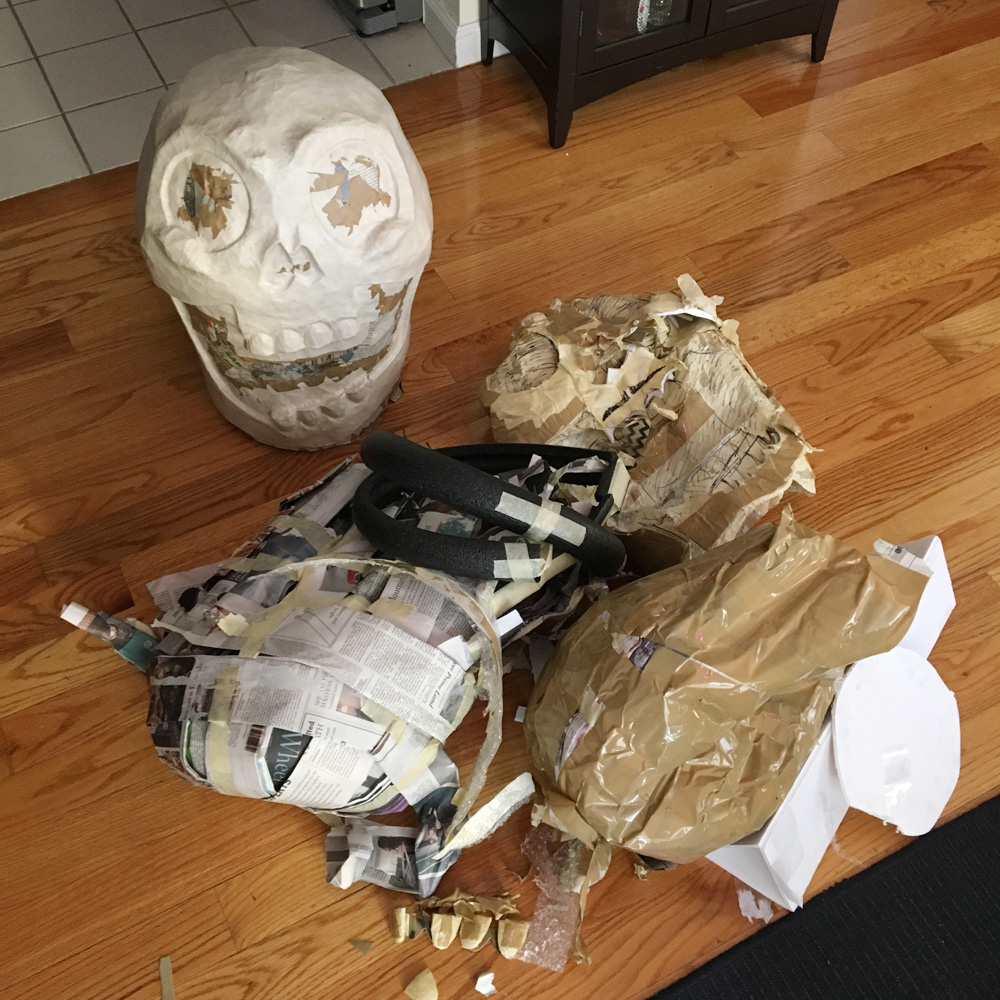
When the paper maché was 100% dry, I carefully cut open the shape on the bottom with an X-acto knife and removed the base materials. It’s always surprising to see the mountain of junk that comes out of there! Oh yeah, you can see the two rings of black foam insulation tubing that I mentioned above; these were wrapped around more or less where the skull’s cheeks are.
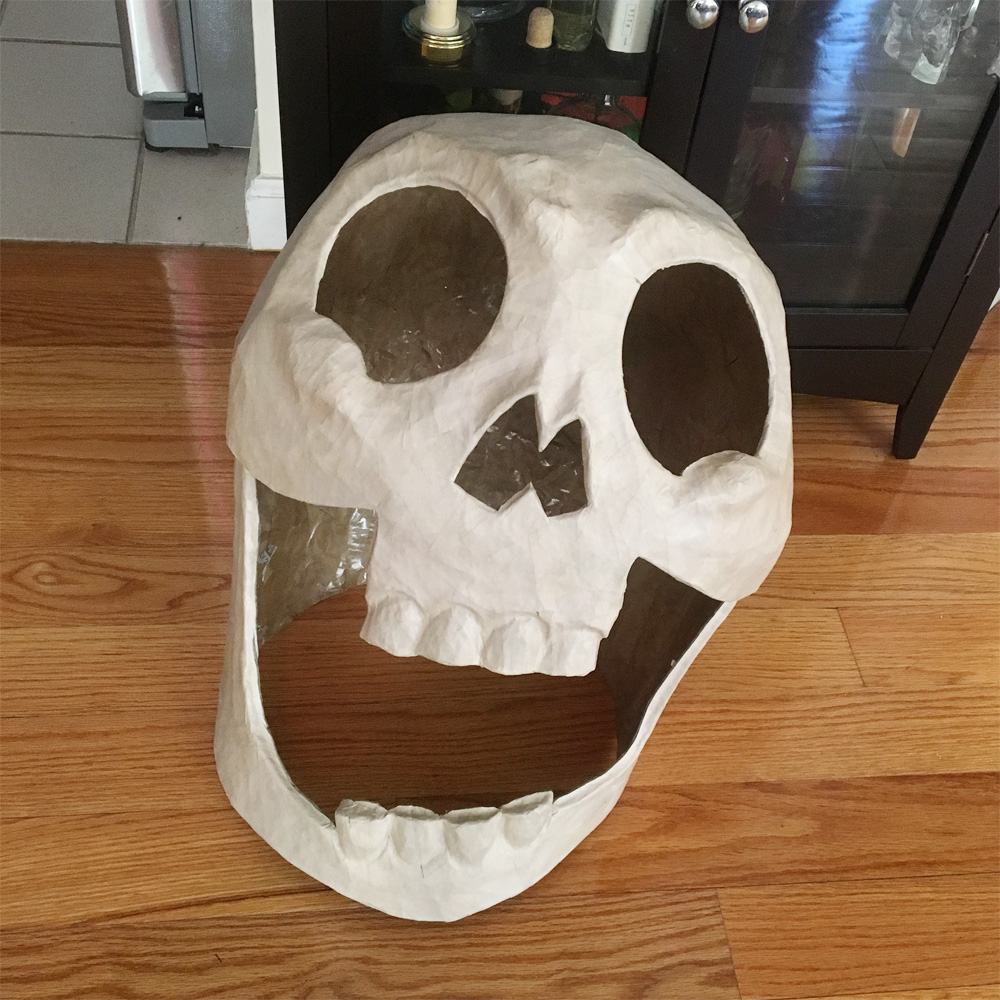
I trimmed the bottom edge of the mask with an X-acto knife to create the jawline shape. I then carefully cut out the eyes, nose, and mouth holes with my X-acto knife as well.
With a large mask like this with such a large opening on the bottom, the whole shape can feel a little bit wobbly, so I always reinforce the inner edges of the bottom opening with plastic zip ties, taped in place and covered with a couple layers of paper maché. For this mask, I did something a little bit different. In looking at the completed paper maché shape, I realized that the bottom half of the mask was much wider than I wanted it to be; I wanted the the jaw to taper toward the bottom, but instead the jaw looked wide and kind of square. I decided to see if I could adjust this, using a few techniques at the same time.
First, I set the mask upside down on a ring of floral foam, and I squished it into the narrower shape that I wanted. I then put a long piece of shipping tape over the opening to hold it in place that way. Shipping tape doesn’t stretch or give (unlike masking tape) so it’s great for this kind of thing.
Next, I opened up my bucket of wallpaper adhesive and took a big handful of paste and rubbed it all over the interior of the mask, concentrating on the interior of the back and sides. I then did the same thing on the exterior of the mask, applying lots of paste all over the back and sides. The idea here is that the paste will seep into the paper maché and make it softer, and then it’ll dry in this new narrower position and stay like that when I remove the tape.
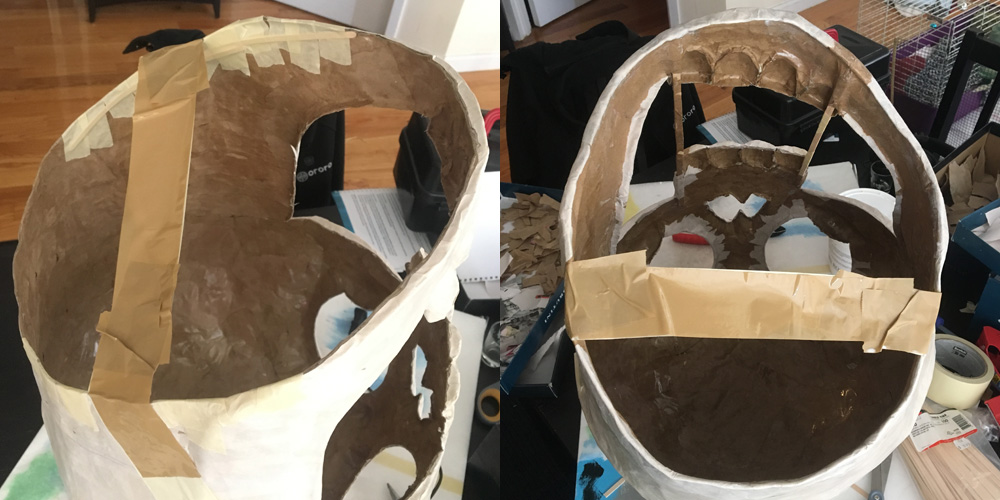
I usually install plastic zip ties all around the interior bottom edge of my masks, to reinforce the wide opening; the whole mask can feel a little flimsy if you don’t do this. For this mask, instead of zip ties, I installed wooden coffee stirrers along the interior bottom edges at the sides on the mask, to help encourage those side walls to retain a straighter shape. I covered the stirrers with masking tape and then two layers of paper maché. (You can see them taped in place in the above-left pic.) I then used my usual zip ties for the back and front edges of the mask, as usual. Before using the zip ties I snip off the square opening part with pliers, and then I tape them in place and cover them with two layers of paper maché, just like the coffee stirrers. So, wooden stirrers on the sides to hold those edges somewhat straight, and flexible zip ties inside the back and front of the mask along the curves.
All of this totally worked! When everything was dry I carefully peeled the strip of tape away and the mask perfectly held this new narrower shape. Whew! I was afraid when I took the tape off the whole thing would pop back into its wider shape from before, but it really didn’t budge.
Incidentally, in any big mask like this, reinforcing the bottom opening with zip ties, and/or wooden stirrers, and/or copper wire, etc, doesn’t just protect the bottom edge; it makes the entire structure of the mask feel a lot more solid and less wobbly. You can really feel the difference before and after.
While I was waiting for that stuff to dry, I also reinforced the edges of the eyes/nose/mouth openings with one layer of small bits of paper maché. This makes them look a lot smoother and neater; much nicer than the exposed edges of the paper maché where I cut it with the X-acto knife.
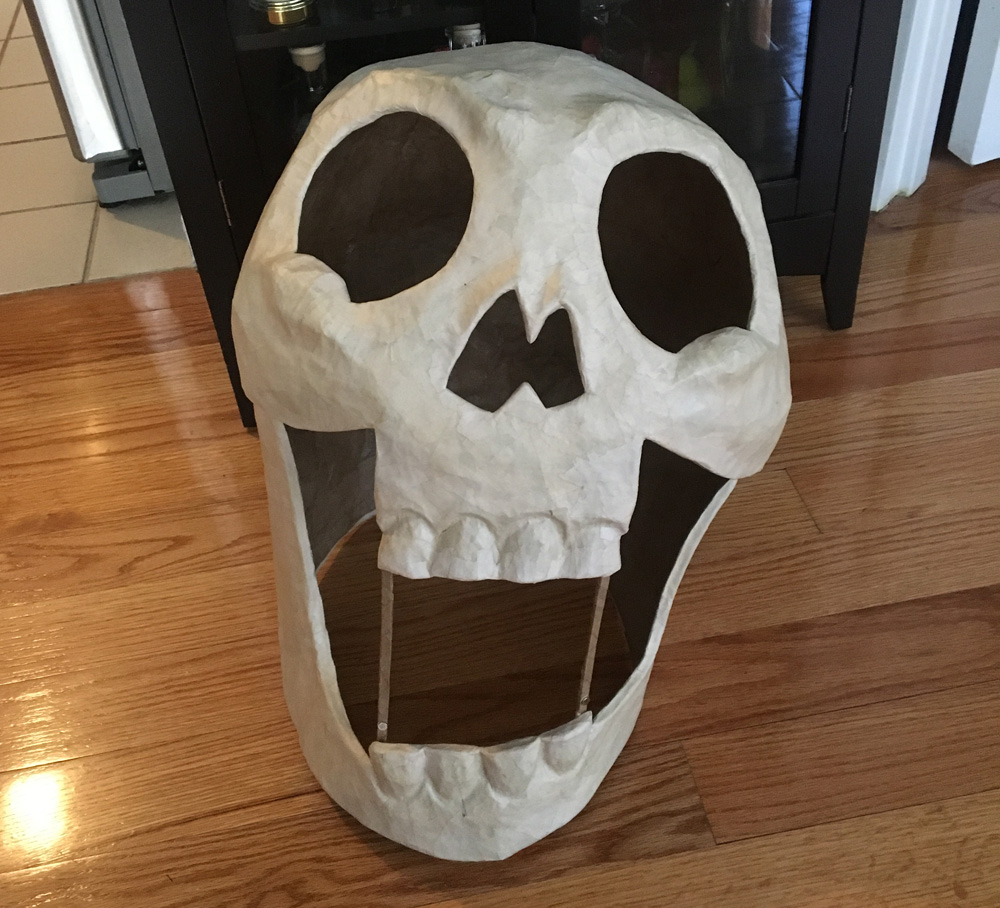
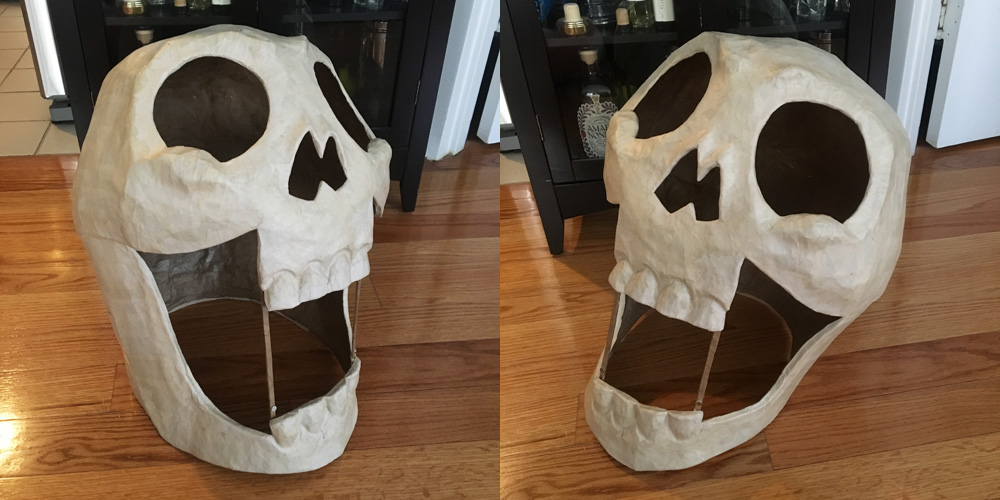
I also installed vertical supports in the mouth made from wooden coffee stirrers. With a large mouth opening like this there’s a risk of the jaw warping over time; if the mask is set on a flat surface for a long period of time, the mouth can begin to collapse and close, and if the mask is set onto a stand of some kind, the lower jaw can begin to sag and stretch under its own weight. So installing these supports prevents all that. I simply took a bunch of coffee stirrers and figured out how many I’d need for the height of the mouth, I trimmed them with pliers and taped them together to make them two layers thick, and taped them in place inside the mask. I then covered the connections inside the mask with five or six layers of paper maché, and I covered the wooden supports themselves with one layer of paper maché, just to hide the tape and give them a consistent texture for painting.
The supports look weird when they’re exposed like this, but they’ll be hidden when the mouth opening gets covered with black screen material later on.
That’s it for the paper maché, and that concludes part one! On to Axe Man skull part two: painting, adding a mustache, etc!
 About Manning Krull
 How to make a 4-foot paper maché alligator
 My violin skull mask, Mardi Gras 2015
 Three-headed paper maché dragon sculpture
January 4th, 2019 at 4:58 am
I want to make a paper mache skull as part of my band’s Marid gras show! we have like 45 big dates….
I need a really easy design… I have the skeleton PJ’s that glow!
Need an easy one! any ideas?
January 4th, 2019 at 1:22 pm
Hey James! Whenever this question comes up, the easiest base for a skull mask I can recommend is a plastic trash can and a big bowl that fits on top. If you’re going for very simple, that’ll do it; you can just paint the teeth and other details. If you’re willing to leave the trash can and bowl in the mask (like you don’t care about the weight) then you can just do two layers of paper mache. If you want to be able to remove the trash can and bowl, it’s best to cut them into quarters and reassemble with tape before you do the paper mache. Also cover the whole thing with tons of shipping tape; this will make the paper mache easy to remove. Then do seven layers of paper mache. When it’s dry, you can pull out the pieces of trash can/bowl/tape from the bottom. Cut out the eye/nose/mouth holes, glue a hard hat inside (with some foam to hold it in place), paint, and you’re done!