
Egyptian hieroglyphs wall decorations
Published by Manning on October 30th, 2017
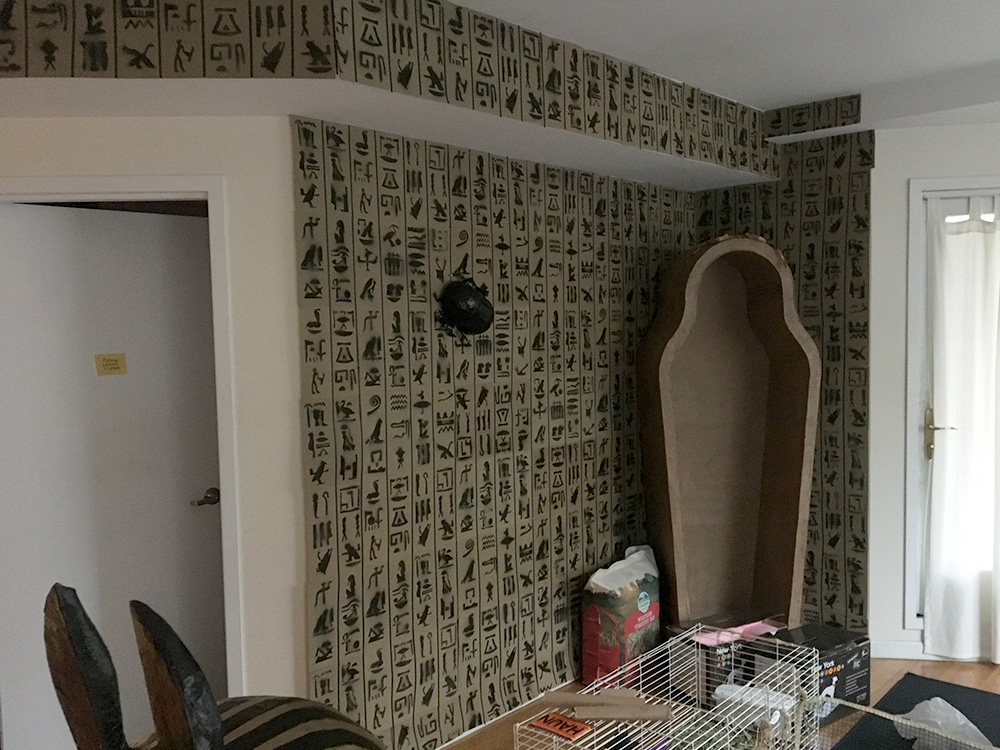
I made these craft foam wall coverings with hieroglyphics stenciled on them to create the look of ancient Egyptian tomb walls for my 2017 Halloween party. They were fun and pretty easy!
I’ve experimented with making big wall coverings for previous Halloween parties, using different materials that all come with different pros and cons… I’ve tried hanging big rolls of craft paper and applying a pattern with a giant stamp and tempera paint; the paper didn’t want to hang straight and the paint made it get all warped and wrinkled. I’ve bought flimsy table cloths in bulk from the dollar store and taped them up to cover the walls — this worked fine but I just don’t love the plain solid-colored shiny plastic look. I’ve made striped walls by taping up hundreds of strips of crepe paper ribbons — this looks cool but is a ton of work! And I made padded walls out of big rolls of thick foam — this was very expensive so I couldn’t cover as much area as I wanted to, and they ended up being much heavier than I would’ve liked.
Anyway, I came up with the idea of using 18″ x 12″ craft foam sheets with the hopes of solving most or all of these problems. I knew that the craft foam would take spray paint really well and would be super lightweight; my main question was: will it hang nice and flat on the wall once it’s painted, or would it warp and curl like paper does?
I did a ton of shopping around online and found a good website to buy craft foam in bulk pretty cheap — these things change all the time but the site I used was Consumer Crafts; check ’em out, my order was in August 2017 and the sheets were just $5 for a pack of 10. I ended up buying 300! About 180 went into these stenciled walls and the rest went into other projects.
I started with just 20 sheets so I could do some tests, but I later bought a couple hundred more. I’d already measured all the walls in my apartment and calculated how many 18″ x 12″ sheets I’d need to buy in order to cover them. I wasn’t sure exactly which walls I’d want to cover, or how long it would take to paint and hang all of them, so I bought the sheets about 50 at a time and worked that way. The more walls I could cover, the better, but I was prepared to leave some of them uncovered.
Making the hieroglyph stencils
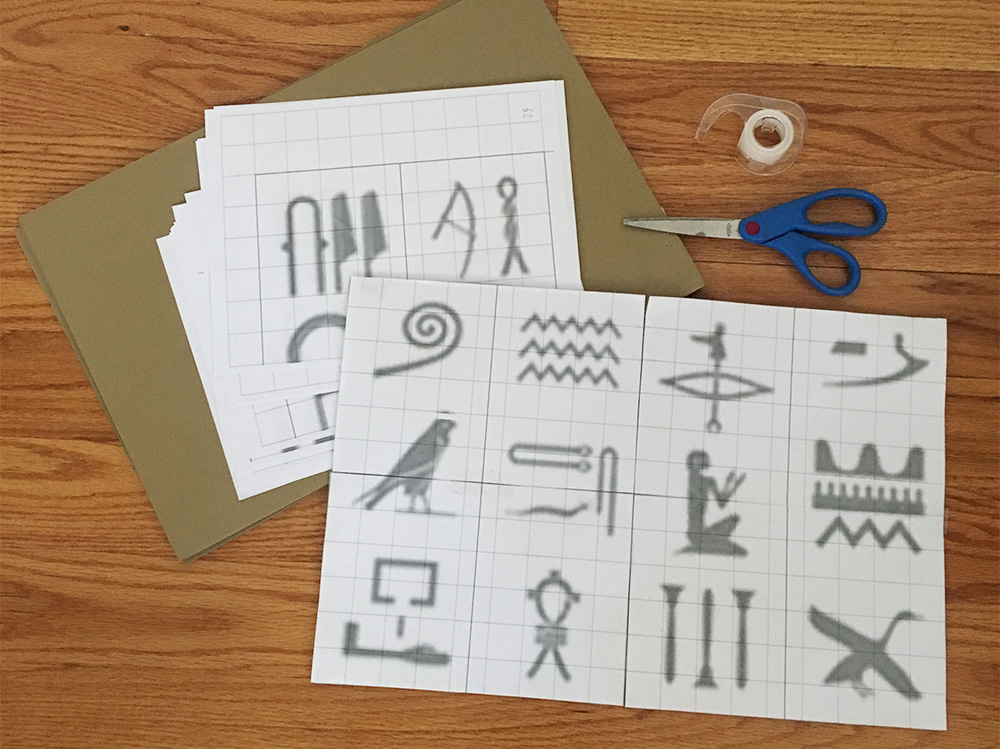
I designed my stencils in Photoshop and printed them out. Each “brick” would have four columns of three hieroglyphics stacked up. They look blurry in the printouts because they’re enlarged from very small images; this was no big deal and it was easy to figure out where to cut.
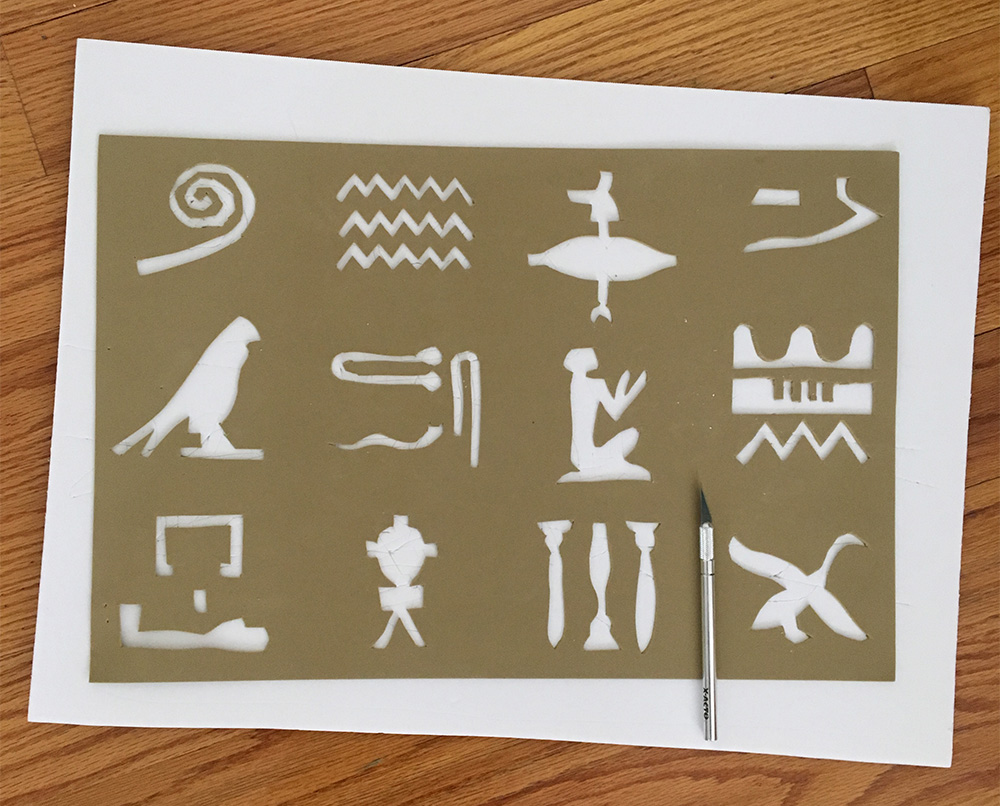
I cut the stencils out of the same kind of craft foam I was using for the bricks. I simply taped my print-outs in place and used an X-acto knife to carefully cut out the shapes. I put a sheet of foam board underneath to protect my table. I made ten different sets of hieroglyphs in all, so ten stencils total. This would give me enough variety so our guests hopefully wouldn’t see a repeating pattern to the hieroglyphics; I could arbitrarily hang these ten different designs and hopefully they’d look truly random and non-repeating.
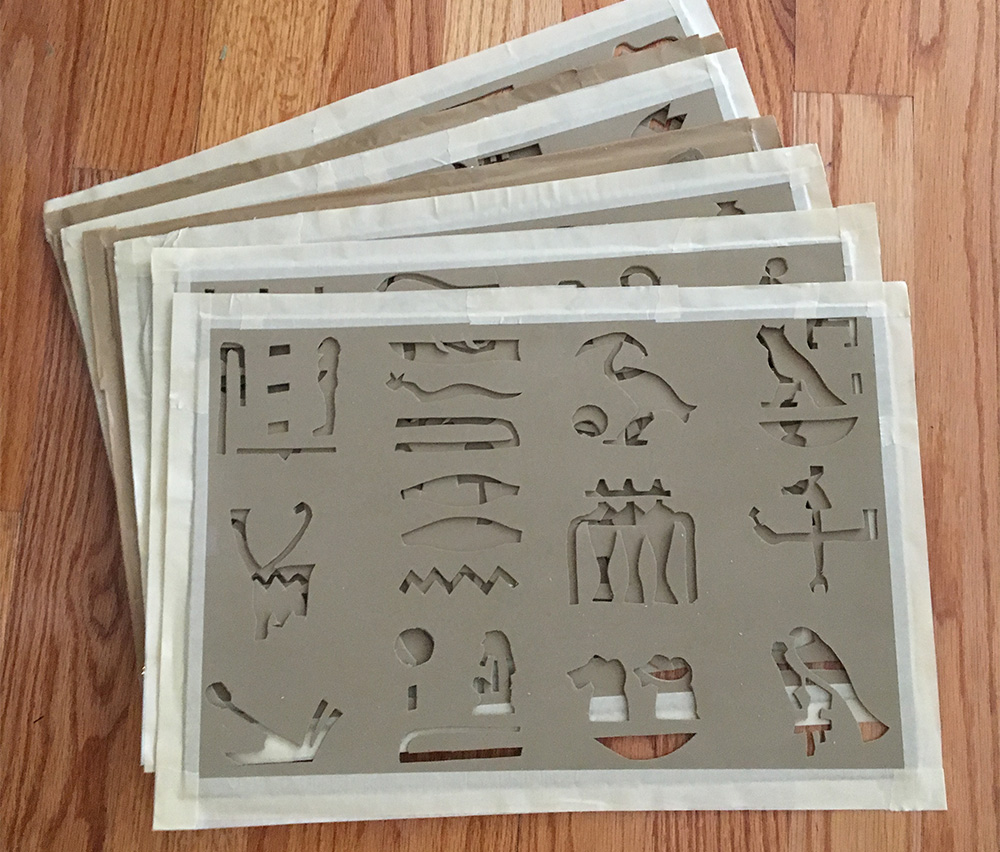
I created a border of masking tape all the way around the outer edges of my stencils — this will help with the spray painting station I used, coming up. I tried packing tape for a few of these, but masking tape ended up being much easier to work with.
Two things not shown in these pics: I put small strips of packing tape all over the big empty areas of foam, to help prevent warping from the many coats of paint. I also taped pennies onto the empty areas of my stencils to weigh them down; this helps the stencil lay perfectly flat so the painted symbols come out nice and crisp. If the stencil isn’t weighted down it could curl up a little bit in some places and then the spray paint would get underneath, creating soft/blurry lines — a graffiti artist friend of mine told me that’s called underspray. It’s gonna happen a little bit here and there anyway, but the pennies really help.
Making a custom spray painting station
I rigged up this spray painting station to help me speed up the work of painting my stencils onto my “bricks” — i.e. about 180 sheets of craft foam — and to help keep them all lined up nice and straight. To make this thing, I basically started by cutting two big big sheets of foam board at 24″ x 18″ — I chose that size based on the 18″ x 12″ craft foam sheets, adding 3″ all the way around. I cut an 18″ x 12″ window in one, and covered it in packing tape to prevent warping when it gets paint all over it. I taped the two boards together with packing tape to make a hinge at the top, and I added a little handle at the bottom with a scrap of foam board and tape. I taped pennies around the frame to help weigh the stencil down flat on the craft foam that’s being painted.
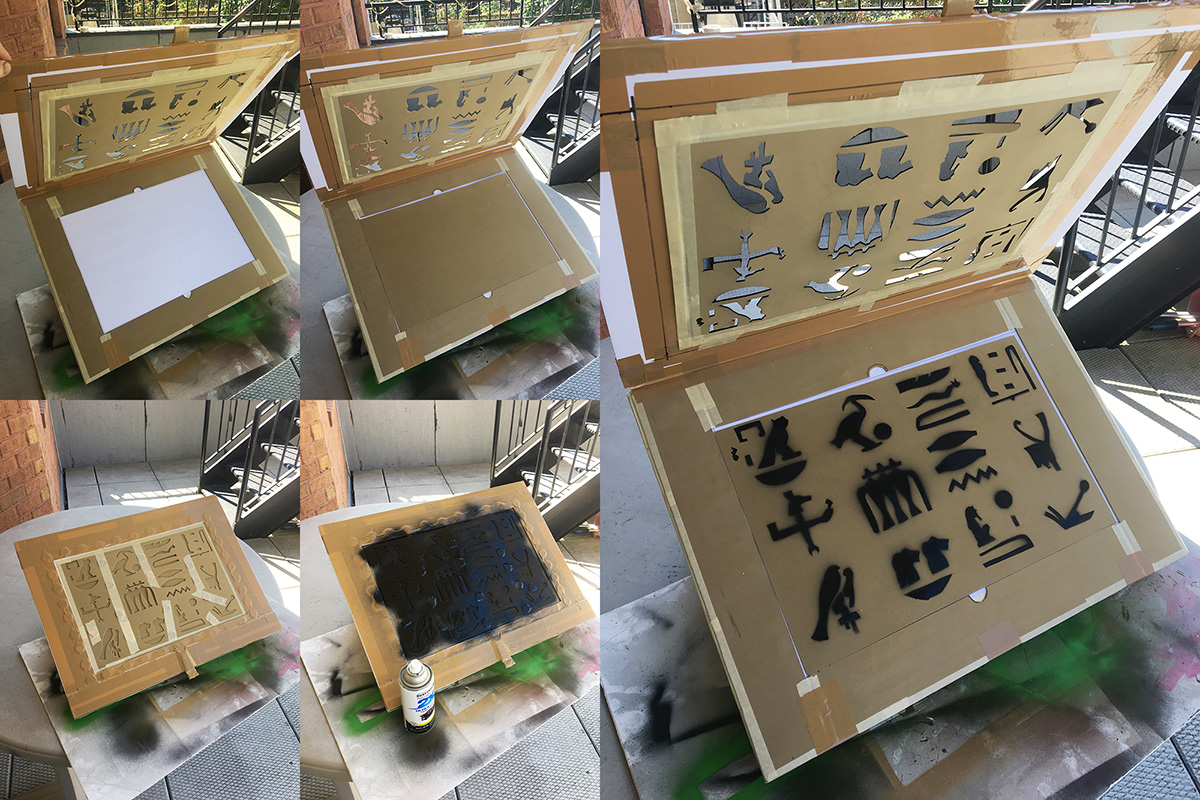
On the bottom layer of foam, I taped long strips of foam board in place to create an 18″ x 12″ frame to hold my craft foam “bricks”, and I cut a couple little notches out of the strips to give me a place to hook my finger in and lift the painted sheets out.
The cheap craft foam sheets I’m using are supposed to be 18″ x 12″, but they’re really not cut to be very precise, and they can vary in size by a quarter inch or so. The set-up I built takes care of that; 18″ x 12″ is the absolute largest the pieces can be, so everything is sized for that, and the border of masking tape I put around the stencils means that the edges of of my craft foam “bricks” are always covered no matter what size they are.
I measured and cut four triangles of foam board and taped them between two big rectangles in order to make an inclined base for the thing. The incline is there so I don’t have to point the spray paint straight down, which, if you’ve worked with spray paint, you know makes the paint not wanna come out. Painting would be even easier if the stencil were more vertical than this, but then I’d lose the benefit of the weight of the pennies pushing down on the surface, and that means the finished stenciled pieces might come out a bit blurry. So I chose this angle as a happy compromise. I left the back of this base open so I could books in there to weigh the whole thing down so it doesn’t move around.
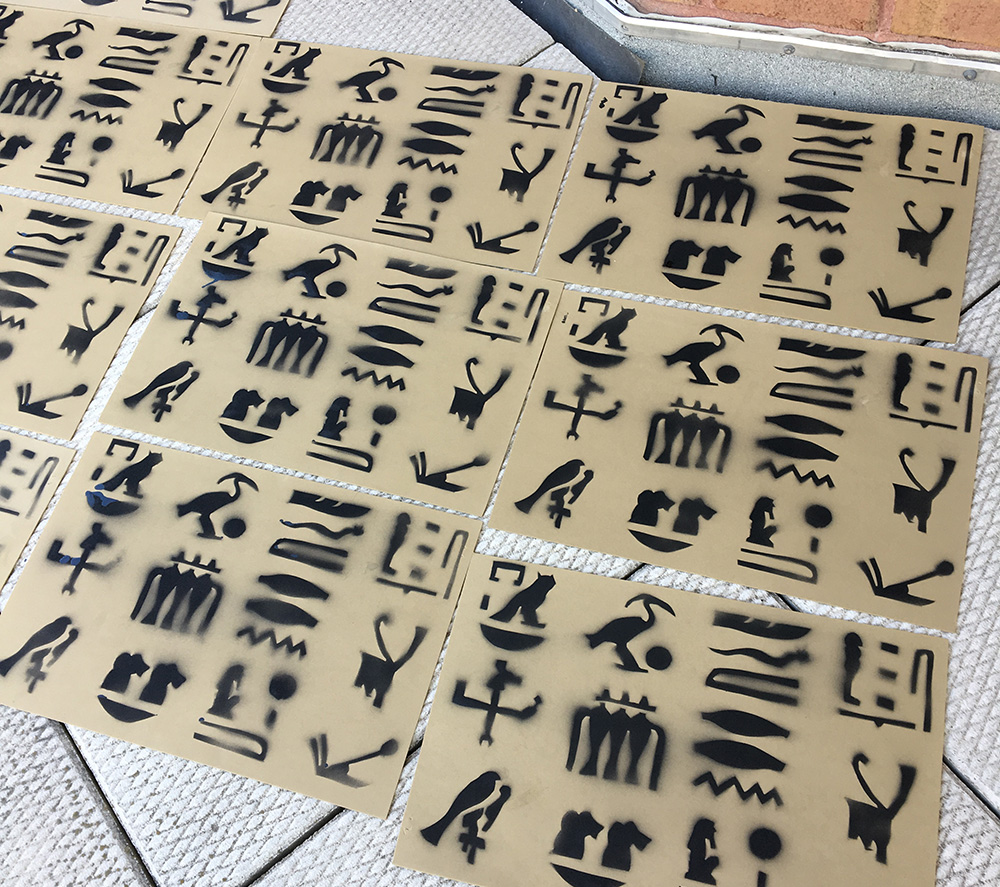
To use this set-up, I just attach one of my stencils inside the frame with some masking tape, and I’m good to go. This let me make paint my heiroglyphs on hundreds of bricks very quickly and accurately. Here’s the first batch; still getting the hang of it!
Hanging the bricks
I used masking tape to assemble the painted sheets in columns, and I taped them up on the walls with little loops of masking tape in the back (about five tiny loops per sheet). After they were up, one last finishing touch: I added long vertical lines of 1/4″ black masking tape between the columns of hieroglyphs. I’d considered adding these lines as part of the stencils, but I realized it would be impossible to get the lines to lines up right on all the sheets of foam, especially when I realized the sheets weren’t all exactly the same size. Doing it after the fact was better, and really completed the look of the the tomb walls.
These pics are in normal daylight; it was tough to get clear pictures of the walls in the dim lighting of the party.
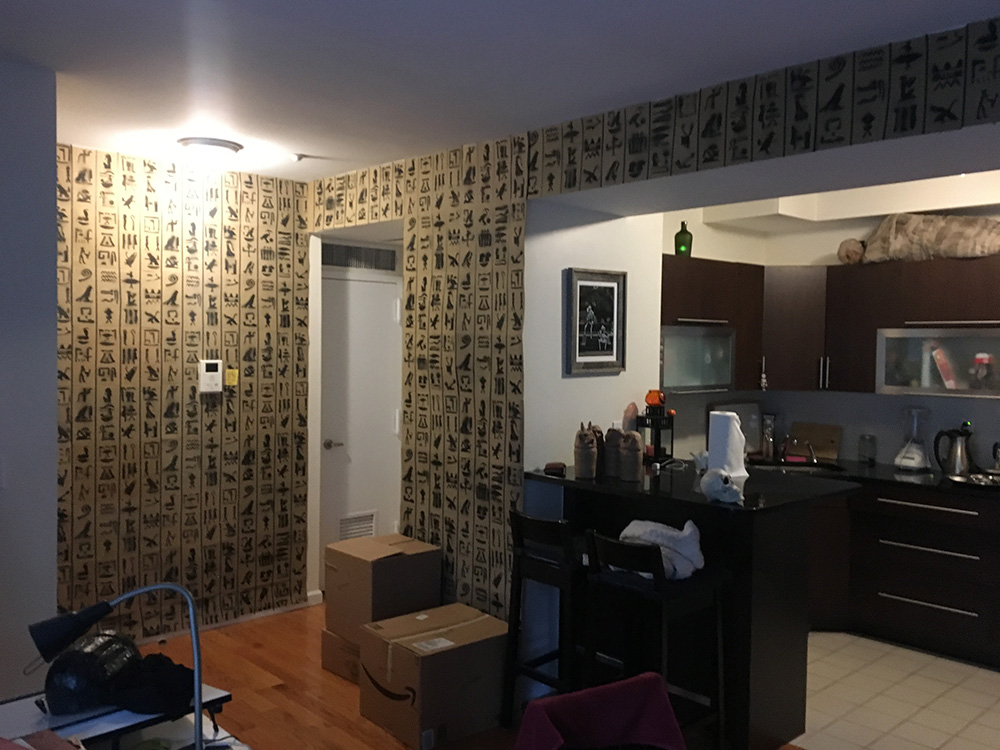
These craft foam sheets proved to be the best wall covering material I’ve ever worked with, so I’ll be looking for ways to use them again for future parties.
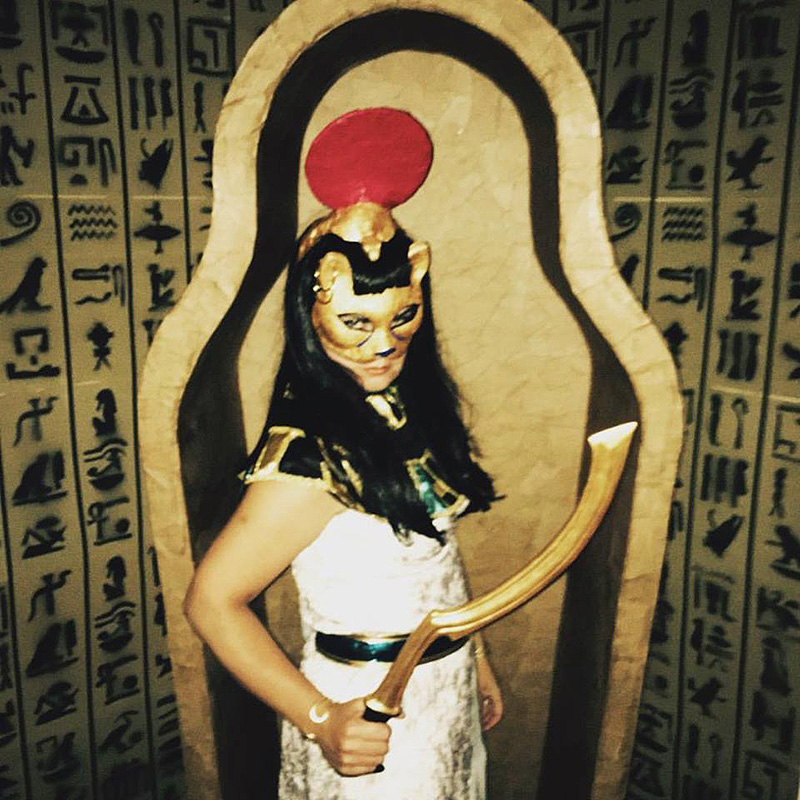
Here’s our friend Collie in her Sekhmet costume at the party, posing in the sarcophagus in front of the hieroglyph walls.
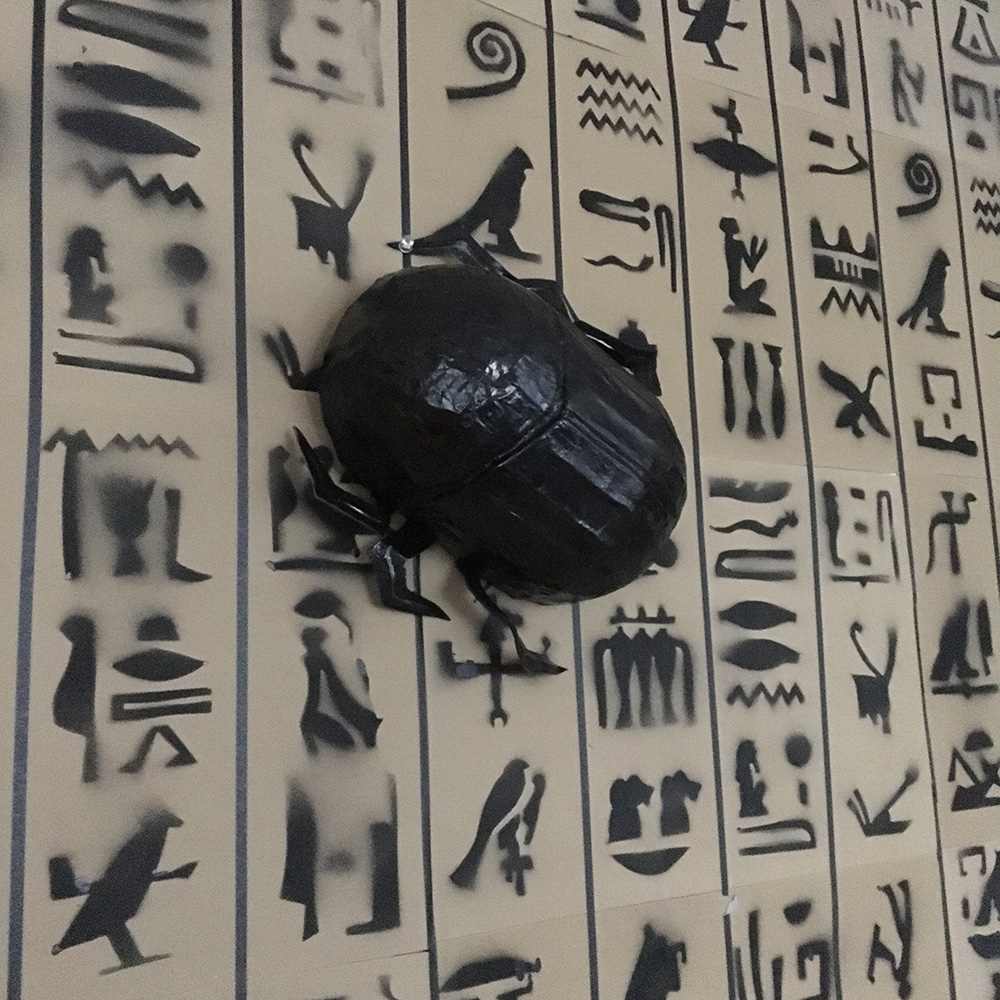
Now that we’ve taken the craft foam sheets down, I have basically an unlimited supply of craft foam for future projects! I use the stuff in some way in almost all of my projects, so it’ll be fun to know there are secret hieroglyphs hiding in all my masks and decorations for years to come.
 About Manning Krull
 How to make a 4-foot paper maché alligator
 My violin skull mask, Mardi Gras 2015
 Three-headed paper maché dragon sculpture
November 14th, 2017 at 11:34 am
i’m so fucking impressed!!!!
November 15th, 2017 at 12:23 am
Thanks Rhienna! Wish you were here!
April 18th, 2018 at 6:15 am
Hi
This is Anil Here from India, I need these stencils, can u please provide.
Pls pls pls
April 18th, 2018 at 12:41 pm
Hello Anil! I wish I still had the stencil images, but unfortunately I don’t. The actual foam stencils got ruined after I painted over them dozens of times, and I no longer have the graphic files. Sorry! You can try doing what I did; just do an image search and enlarge the hieroglyphs to full page size, print and cut out.
October 4th, 2018 at 5:15 pm
This is such a wonderful idea, thank you for Posting it!!!!
October 5th, 2018 at 11:38 am
Thanks, Rachel!!!
April 27th, 2019 at 9:06 am
we are going to develop on natural stone for one of my client. thanks for idea