
Padded walls decoration for an asylum-themed Halloween party
Published by Manning on June 21st, 2015

I was planning an asylum-themed Halloween party in 2014, and I really wanted to figure out a way to make realistic padded walls as a main decoration for the party. I wanted something with a nice 3d quilted effect, not just a flat painted texture, and I needed to keep it lightweight enough to hang on drywall and sturdy enough that it wouldn’t fall apart if people touched it. I was really pleased with how it came out! Here are the main materials I used:
- several rolls of polyurethane foam
- hundreds of screws, nuts, and washers
- an awl
- black spray paint
- black and red acrylic paint
- picture hanging hooks
- strong flexible wire for hanging
I started with half a dozen sheets of 3″ thick polyurethane foam that I ordered from Home Depot. (In hindsight I think 2″ thick foam would probably look just as good and be lighter and easier to work with.) With a ruler and a marker I decided where I wanted the dents to go, and marked those spots. I used an awl to punch holes through all the dots.
Then I took a screw, put a washer on it, pushed it through the hole in the foam, and put another washer and a nut on the back. This was hard! The foam was pretty dense and it was physically pretty hard to squeeze it enough to get the screw all the way through and get the nut onto the back. I did some of these myself but then enlisted the help of a second person; it was much easier with two people. In the end my fingers were pretty torn up; a small price to pay for an amazing Halloween party.
The end result of the foam with all those screws/nuts/washers is surprisingly heavy! I was a little worried about hanging these things on my walls, which are just crappy drywall — the studs are metal so I can’t drive nails into them. Before I put all the work into painting these things, I tested them on the walls.
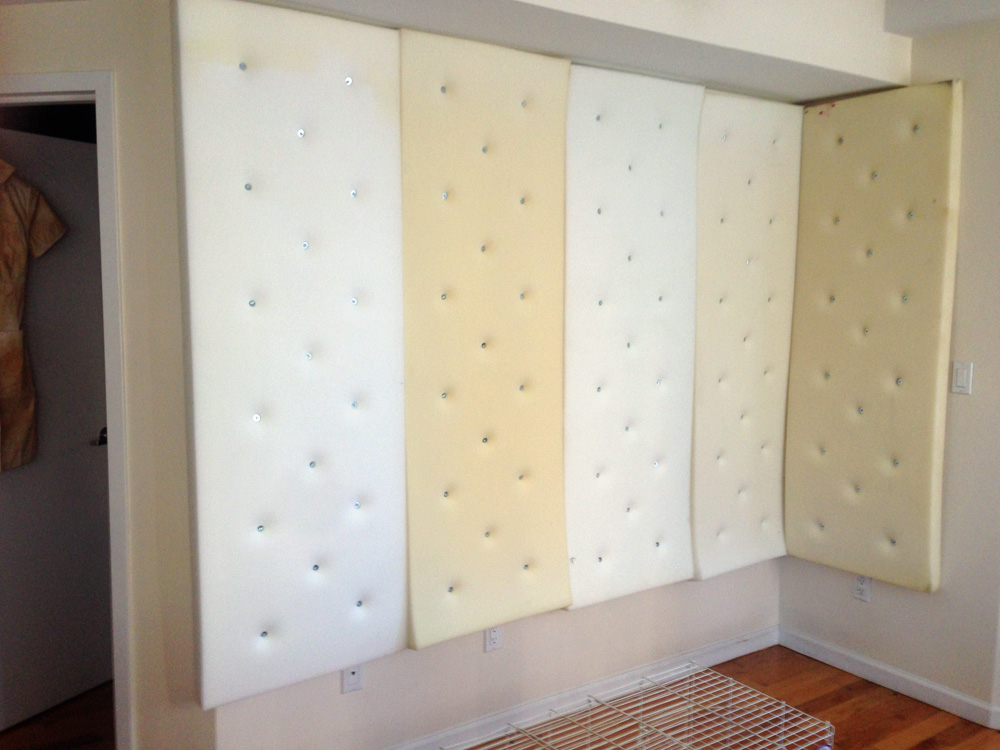
I installed some picture hanging hooks in my wall — you know, those little bent brass things that you nail to the wall at an angle — I used two for each piece of foam, spaced apart at the same width as the top two screws in the foam. I then took some thick flexible wire, wrapped it around the two screws, and created a sort of rectangular loop shape above them. I then carefully hung this on the wall. It worked fine! The two picture hanging hooks easily supported the weight of the foam padding and all that hardware. I ended up leaving the finished padded walls up for over a week, and there were no problems. When I took them down and removed the picture hanging hooks, the area around the nail holes hadn’t stretched or deteriorated at all. (Note: I take no responsibility if you destroy your walls! Ha!)
Incidentally, I suspect plastic drywall anchors and screws would be even stronger, but they’ll leave much bigger holes in your walls. I wanted holes that I could easily spackle over, and the picture hanging hooks worked fine.
Once I was sure my hanging system worked, I took the foam pieces outside so I could paint them. I used a can of black spray paint as as sort of giant airbrush, lightly spraying over the foam from a height of about twelve inches, just to make the foam look dirty and worn. I also concentrated some light bursts in each of the dents created by the screws and washers, to accentuate the shadows there.
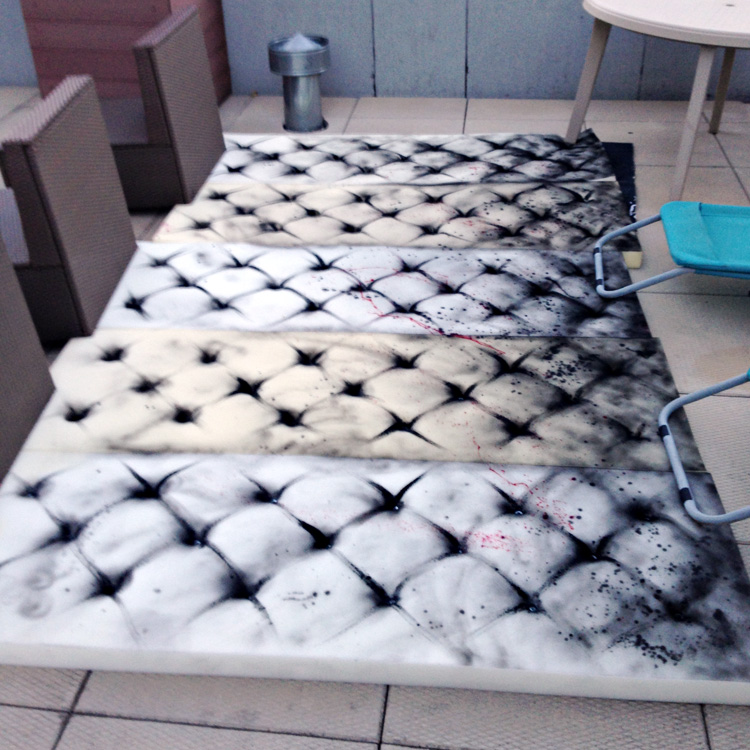
Then I took a paintbrush and some black acrylic paint, heavily watered down, and did two neat effects. First, I painted diagonal lines outward from each of the dents; this accentuated those shadows even more and helped create that nice quilted effect. I also splashed lots of very watered-down black acrylic paint all over the padding, mostly at the bottom, to make the surface look really stained and dirty.
I then did a similar treatment with some slightly-watered-down red acrylic paint, to create blood stains and splatters.
The foam became pretty saturated with all that watery paint, so I everything outside for about a day and a half to dry out. When it was time to bring them in I learned something really interesting! It had been really windy when I did all the painting, so I’d used some patio furniture to weigh down the pieces of foam. When I removed the furniture, I could see that the foam had gotten darker in the sun! The parts under the furniture were much lighter than the parts that had been exposed to the sun; you could clearly see the white shapes of where the corners of the furniture had been. I wasn’t thrilled about this but there wasn’t much I could do about it. Now that the wind had died down I decided to leave all the pieces out in the sun for the rest of the day with no furniture weighing them down, to see if the lighter parts would “catch up” to the darker parts. And they partly did! So in the end the weird uneven discoloration in some parts wasn’t too noticeable. I knew that the relatively low lighting of the party would help. In the end it was fine.
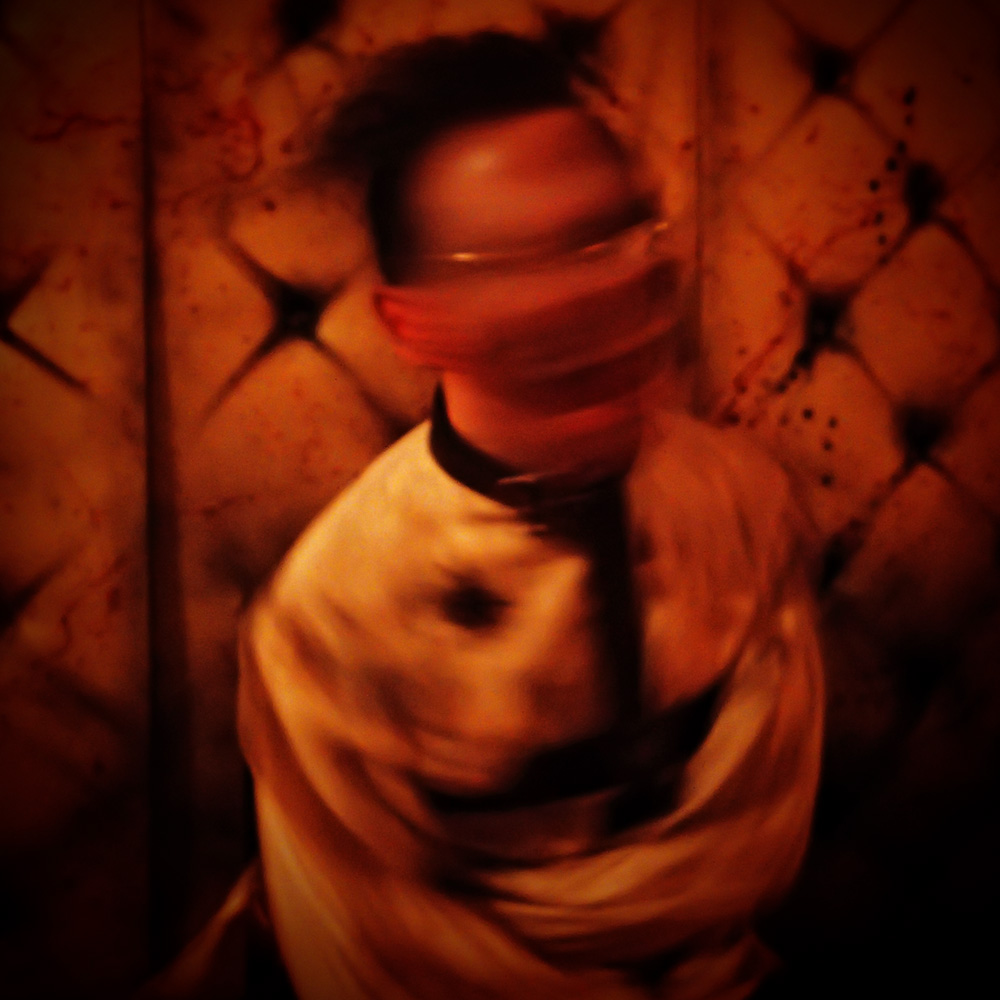
Once the pieces of foam were dry and appropriately sun-burned, I brought them in and hung them all up, and they looked great! They really held up well; they were attached to the walls firmly enough that people could lean against them to take photos with no problem. Nothing budged.
Here are a few pictures of me in my Renfield costume (you know, from Dracula!) in front of the finished padded walls.

 About Manning Krull
 How to make a 4-foot paper maché alligator
 My violin skull mask, Mardi Gras 2015
 Three-headed paper maché dragon sculpture
August 9th, 2017 at 6:34 pm
This is so awesome! You did a great job with both the paint and the photography! I really love this!
August 11th, 2017 at 11:49 am
Thank you, G@bz! Your comment made my day!
September 11th, 2017 at 3:46 am
How much did all of that foam cost you?
September 11th, 2017 at 6:25 pm
Too much! I don’t remember exactly, but the same 3″ rolls are currently $25/each at Home Depot! So probably in the $20-$25 range at the time. Which is why I only did five of ’em.
October 5th, 2017 at 6:51 pm
This looks awesome! Did you buy or make the straight jacket?
October 5th, 2017 at 7:05 pm
Hi Toni! I bought a cheap costume straight jacket and modified it; I have an article about that here.
January 22nd, 2018 at 11:44 pm
Would upholstery foam work
January 23rd, 2018 at 3:29 am
I dunno, had to Google it. Looks like yes!
July 1st, 2018 at 2:08 pm
Amazing! You did a great job and your photography is very professional.
July 2nd, 2018 at 12:51 pm
Thank you Becky!!
August 9th, 2018 at 1:13 am
Your walls look great! I’m stealing (ahem “borrowing”) your idea but buying 2 inch foam from my local material store…comes in 180 in sheets that she said she’d cut for me. Also instead of screws I think black buttons attached by waxed thread will be much lighter but still give the dimpled effect. Starting these as soon as the foam comes in. Thanks for the inspiration!!
August 9th, 2018 at 11:53 am
Hey Kim, that sounds awesome; I’d love to see pics! I was surprised to see how much physical force it took to get the 3″ foam to compress into those dimpled shapes; I hope you’re able to do it with thread and buttons in the 2″ foam! It totally sounds do-able but you might wanna have a back up plan just in case. Even having a second person to hold the foam squished between their fingers while you tie off the knot in the back would probably help a lot, and you may need a second button (or some other kind of anchor) in the back, or the knot might tear through. The buttons will definitely look much better than my screws; I just covered the screws with black paint so they’d be more or less invisible in the low lighting. Good luck!!
September 12th, 2018 at 9:43 am
I looked for the foam on Home Depot website, I didn’t see any. I saw polyethylene sheet(underline)?
September 12th, 2018 at 10:42 am
Hello! I just did a search on Home Depot’s site and I found what is probably the same product I used or something very similar; the dimensions and price are correct — just search for “Future Foam” and the first result, “Future Foam 3 in. Thick Multi-Purpose Foam” for $25.00, is it. Good luck!
September 20th, 2018 at 5:08 pm
hey there!
Great work on the walls! We are producing Dracula at our school and I am making 3 12ft x5 ft walls for Renfield…thanks for your work on this project…it really will help with the “how” to do our set! Thanks again!
September 20th, 2018 at 5:13 pm
Hey Elise! That is awesome, and I’d love to see pics! For a stage set I bet you could even keep the walls 2d and just paint the 3d padded effect and it might look realistic from the audience. Good luck with it!!
October 8th, 2019 at 7:40 pm
I’m so impressed!!! I’m in the middle of trying to create these myself and am having trouble figuring out my mounting system. Could you send a picture of the picture hanging hooks you used or the back of one of your panels so I can try to copy it? Super cool!
October 8th, 2019 at 10:04 pm
Hi Jill! I don’t have any more pics of the actual foam panels, but I’ll try to explain how I hung them a little better. these are the kind of picture-hanging hooks I used — two per panel. I ran a strong metal wire across the back of the foam panels, just like you would for a heavy picture frame. And then I carefully set that wire onto the two hooks. Good luck!
November 1st, 2020 at 4:10 pm
These are awesome. I was looking for inspiration to create a padded cell in 1:6 (action figure) scale. Even though I won’t be using the same method, your panels were definitely inspiring and fun to read about. Thanks for sharing your work!
November 4th, 2020 at 2:40 pm
Thanks, Rae! I’d love to see how you make a miniature version!