
Fake wood summer camp sign decoration
Published by Manning on October 11th, 2019
Here’s a quick and easy one; I made this summer camp sign mostly by re-using techniques I made up a few years ago for these fake wooden signs. Here’s how I did it…
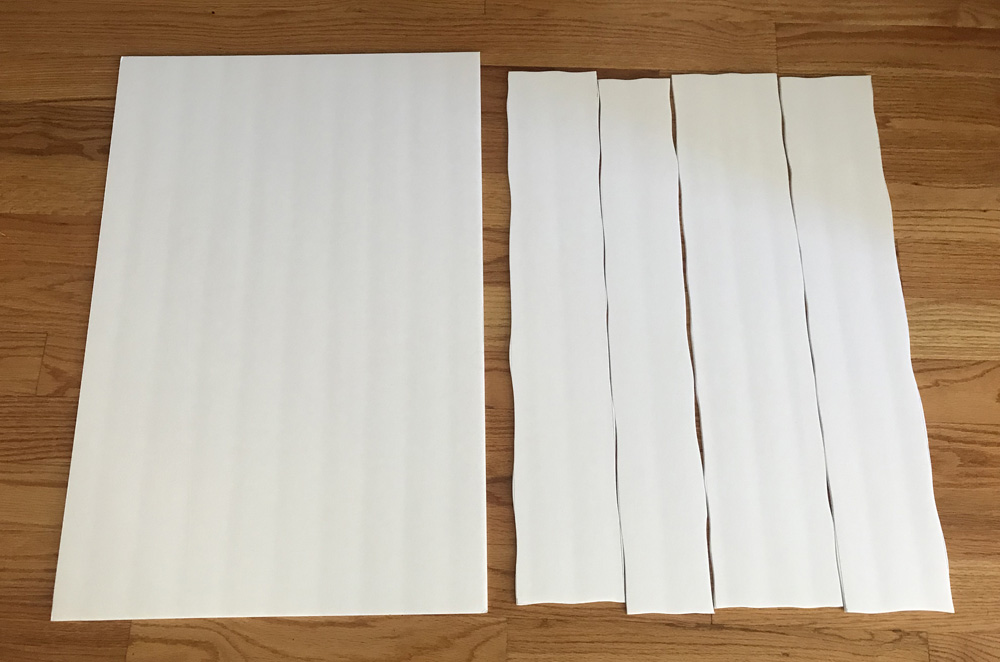
I started with two sheets of foam board; one for the wooden planks and one for the background. I cut wavy lines with an X-acto knife to make the four planks, and I trimmed the background piece to be a bit smaller.
I spray painted the planks light brown, and the background black. I let them dry, and then I hot-glued the planks onto the background. This ended up a little warped, which is normal when you’ve got paint drying and shrinking on just one side of the foam. I laid some heavy books on top of the sign for about 24 hours, and then it was nice and flat.

I used some leftover wood stain and a big wide brush to sloppily paint the stain onto the planks (protecting my work area first with several layers of newspaper, of course). The stain quickly got absorbed into the paper surface of the cheap foam board and caused it to warp a bit, making the stain collect in pools and puddles, which looked great! This created a nice natural, irregular look. The stain takes forever to dry, and I re-brushed it a few times to drag and spread it out over the planks some more. Little by little it started to settle and dry. The end result doesn’t really look like realistic wood, but I’m totally happy with it.
When all this was finally 100% dry, the only thing I didn’t like about the look of the finished planks was that they were very shiny, so I applied a coat of matte spray. That helped a lot.
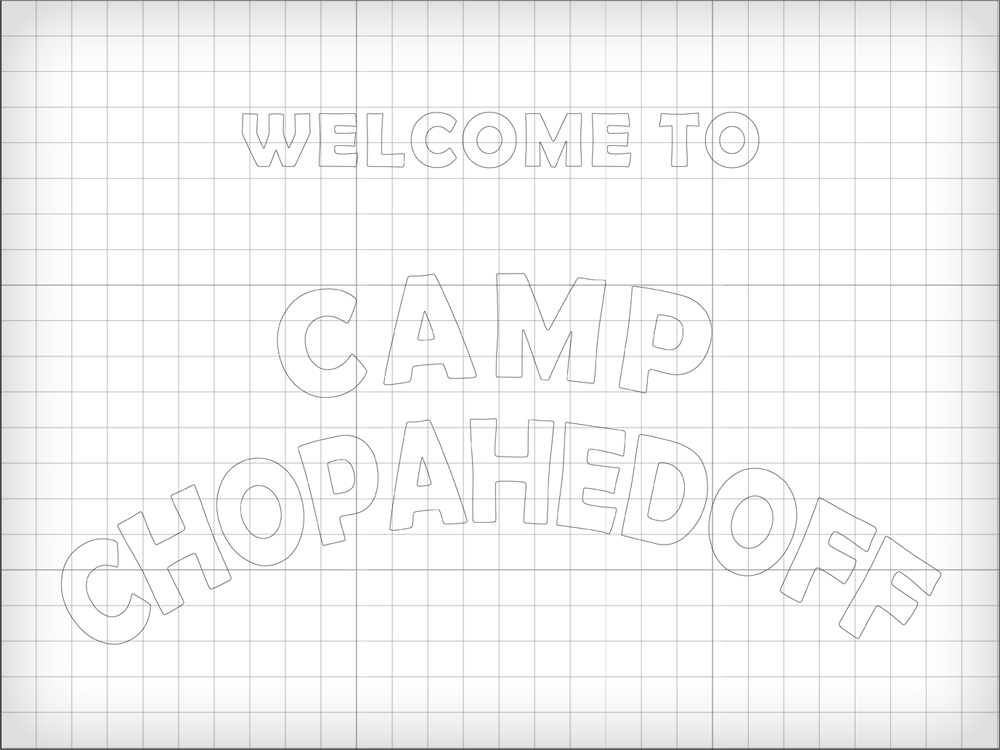
I laid out the letters for the sign in Photoshop and printed them out to use as a guide for painting. I printed these out at real size and taped ’em together.
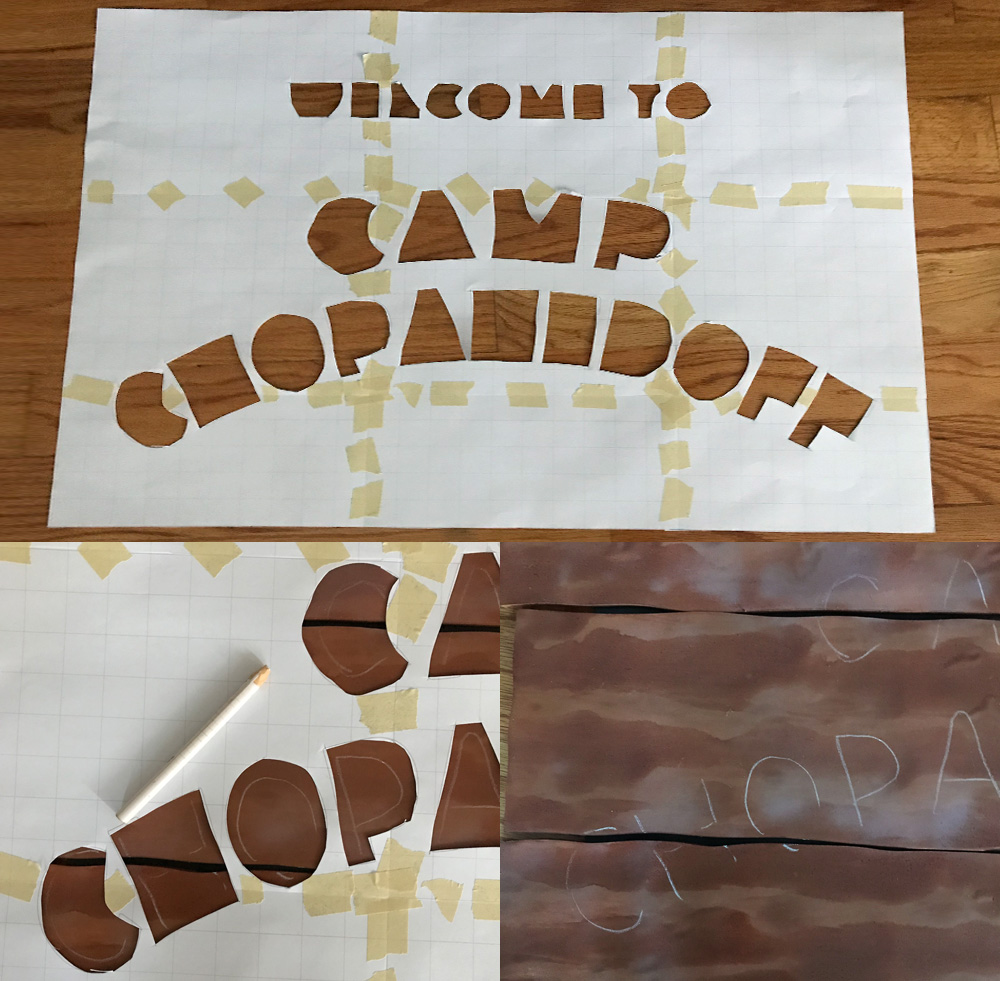
I cut some holes through the words in the printout — loosely, not trying to cut out the exact shapes — laid this over the sign, and used the holes as a guide to lightly mark some lines for where each letter goes on the sign.
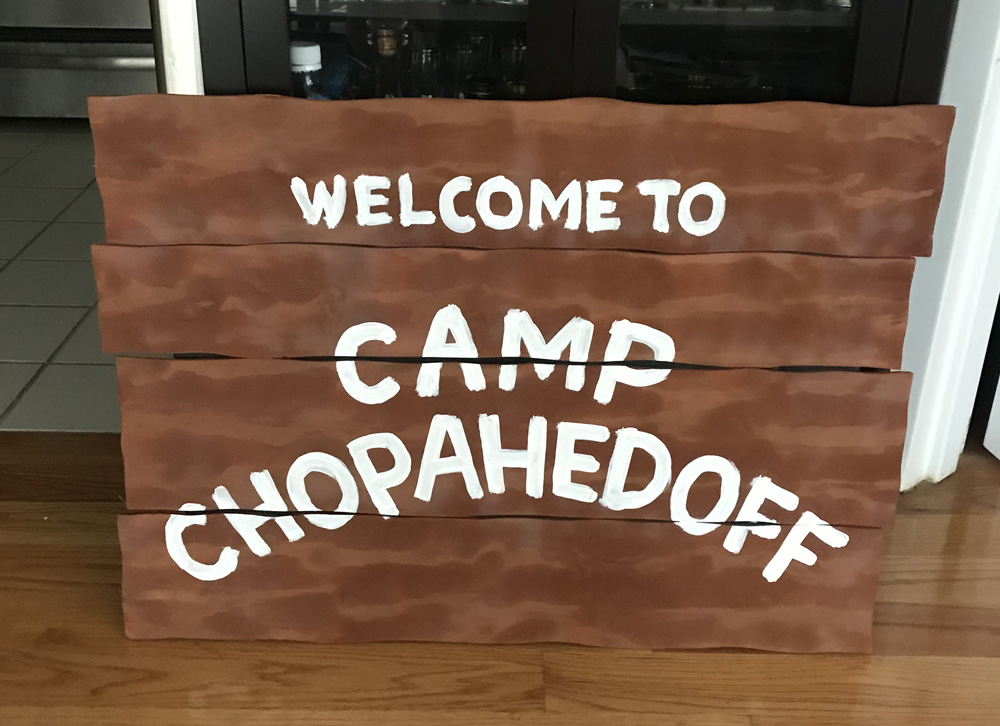
I discarded the printout and hand-painted all the letters with a big brush and acrylic paint — obviously I was fine letting them be pretty sloppy. The important thing was that the guide helped me get the curvature and placement of the words right, and the letters nice and balanced.
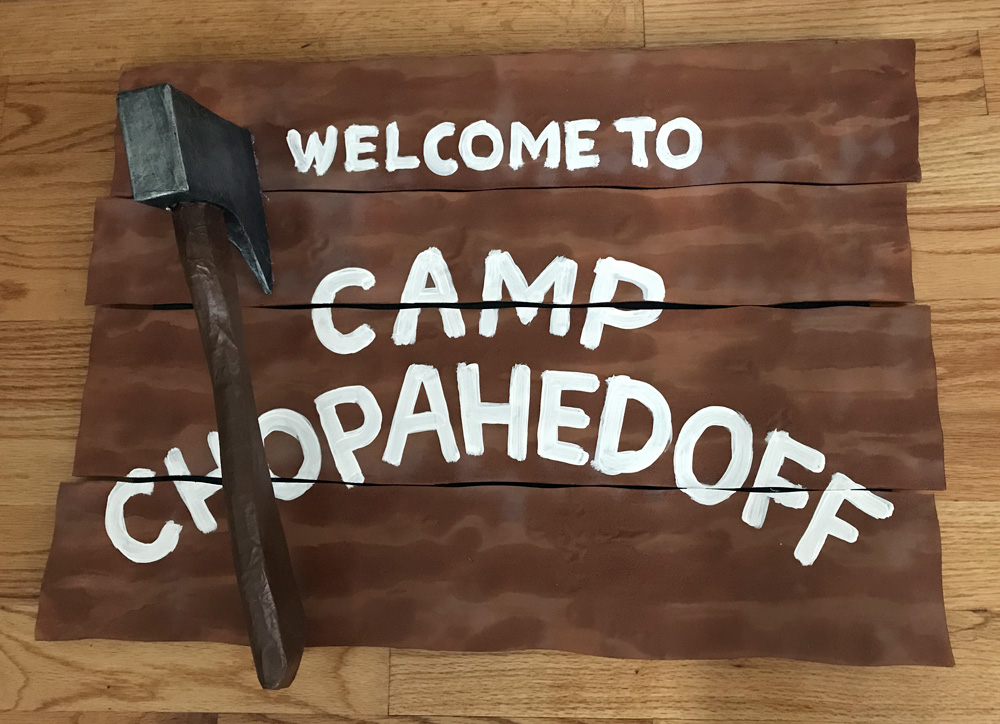
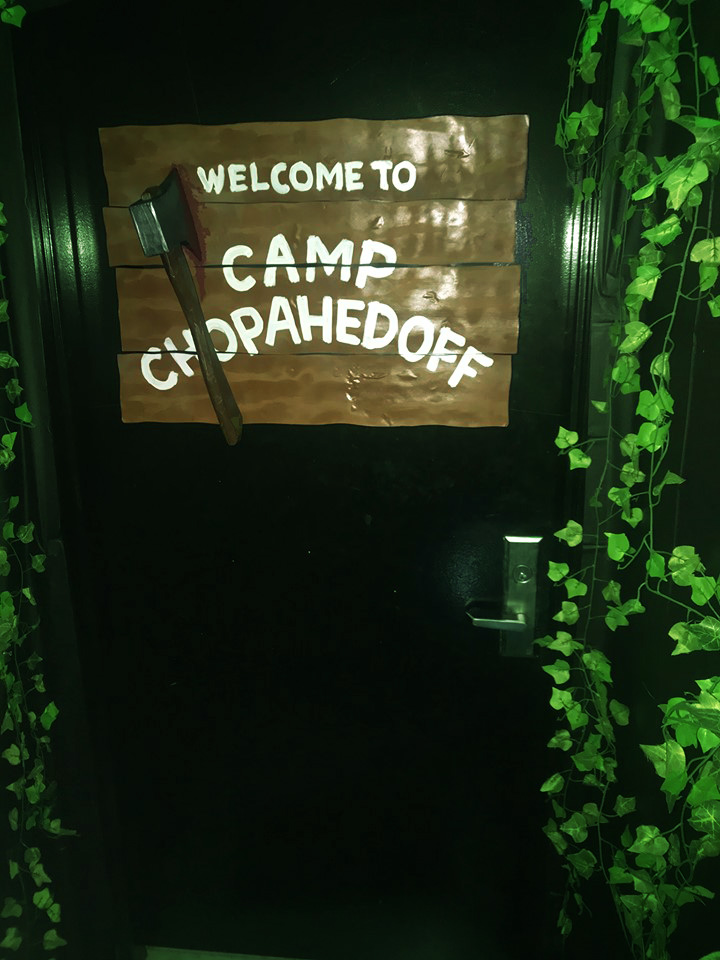
I took one of the hatchet props I’m working on (article coming soon), sliced a bit off the front, and hot-glued it in place on the sign. I added a ton more hot glue on the left edge, which will be mostly hidden from the viewer.
I rigged up a complicated thing to hang this on the front door of my apartment (no pics of this yet). The door is metal, so it’s very hard to get anything to stick to it — however, I’ve discovered the top edge of the door has a huge empty space in it; if you reach up there you can poke your fingers down into a hollow space about an inch deep all along the top of the door. So, I decided to hang the sign on two pieces of black string, and anchor those onto rolls of pennies that are sitting in that space on top of the door; I used 200 pennies but this was probably overkill. The weight of the pennies is plenty to hold the sign in place. Worked like a charm!
The weight of the hatchet made the sign want to twist outward on the lower-left side, so I taped about 30 pennies behind the lower-right corner to balance it out. That helped stabilize the sign a bit, but I’m okay with it being a little bit wobbly!
Here’s the sign on display in our front hallway during the Halloween party; we hung black plastic table cloths on the walls and added lots of fake ivy, and we put a green lightbulb in the overhead light. Oh yeah, and as an afterthought I painted some fake blood around the hatchet blade.
That’s it! Probably the least stressful Halloween project for me this year. On to the next one!
 About Manning Krull
 How to make a 4-foot paper maché alligator
 My violin skull mask, Mardi Gras 2015
 Three-headed paper maché dragon sculpture
Leave a comment