
Posts tagged "decoration":
Paper maché bear trap prop

I made this paper maché bear trap prop as part of my Halloween costume for my Summer Camp Slasher party. It was pretty easy!
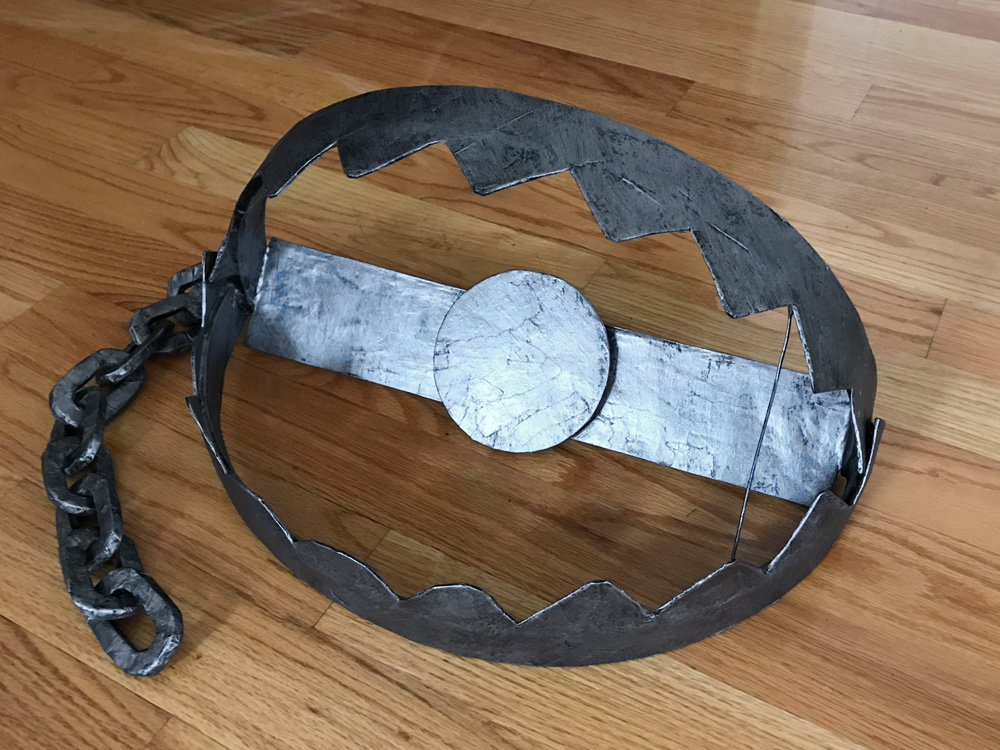
99% of my projects start with lots of foam board and tape and end with paper maché and paint, and this one was no different. I started out by building the “jaws” of the bear trap. I measured and cut out a few 1.5″ strips of foam board to serve as the jaws, minus the teeth; those will come later. Read more…
Paper maché machete, hatchet, meat cleaver, sickle, etc props
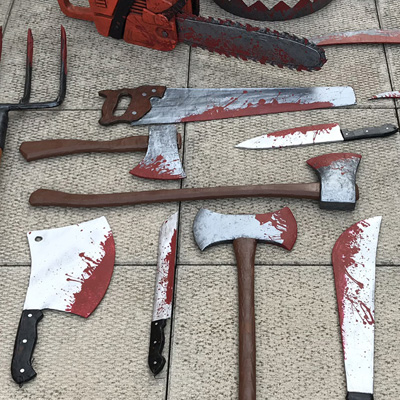
I made all these paper maché weapon props for Halloween 2019 — a machete, a meat cleaver, a sickle, a scythe, two hatchets, a hand saw, a pitchfork, and a few knives. They were easy!
I used a lot of the same process for these that I did for my paper maché kitchen knife prop last year and this paper maché axe that I made a few weeks ago, so check out that article if you want some more details and pics. Read more…
Paper maché archery target decoration
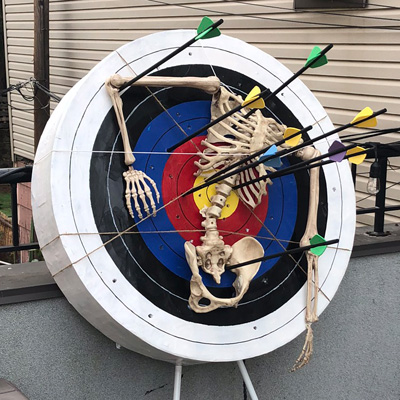
I made this paper maché archery target decoration for my 2019 summer-camp-slasher-movie-themed Halloween party! Here’s how I did it…
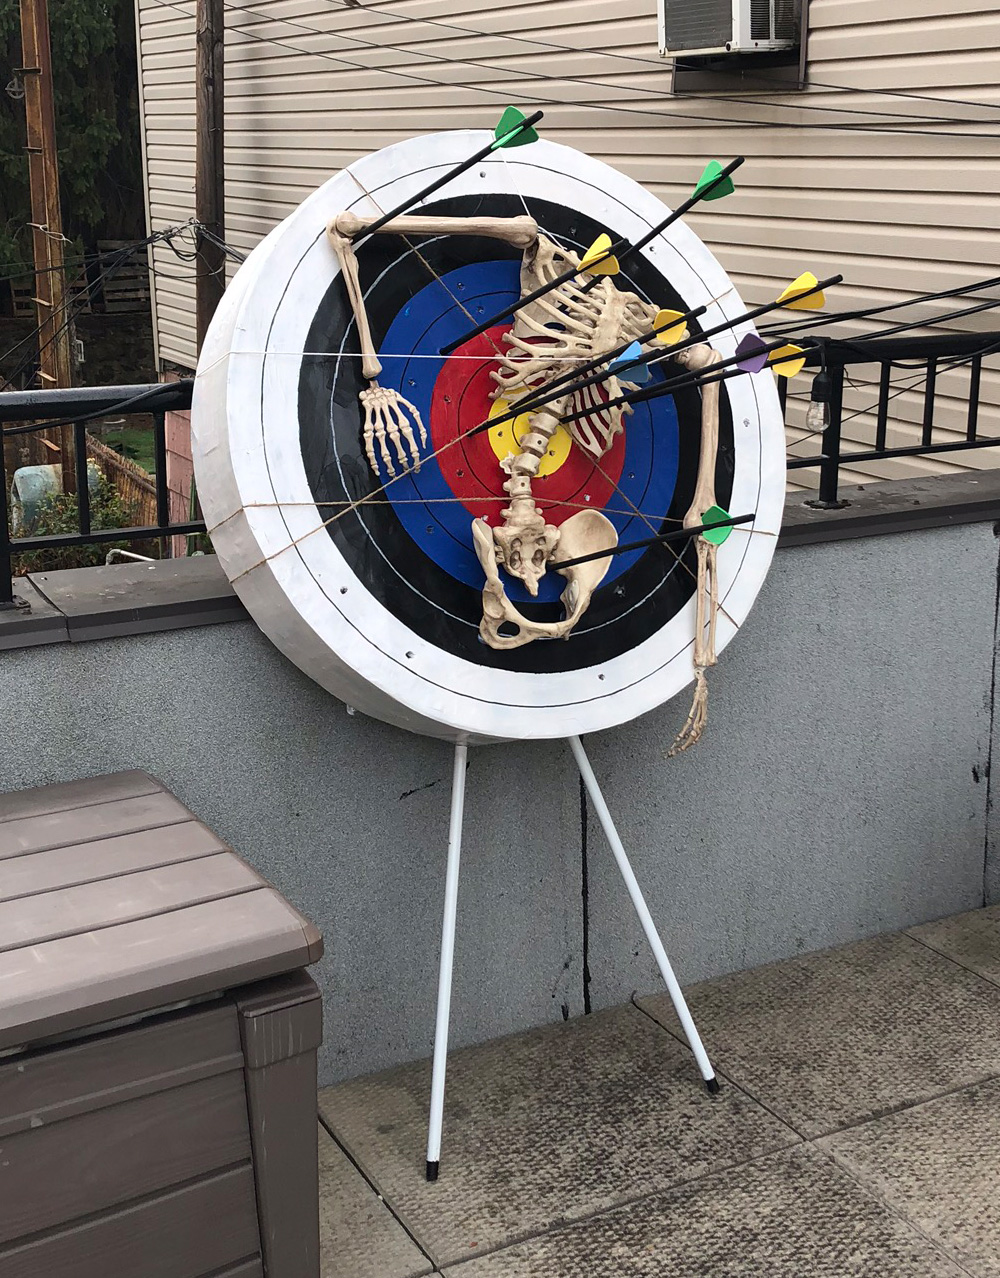
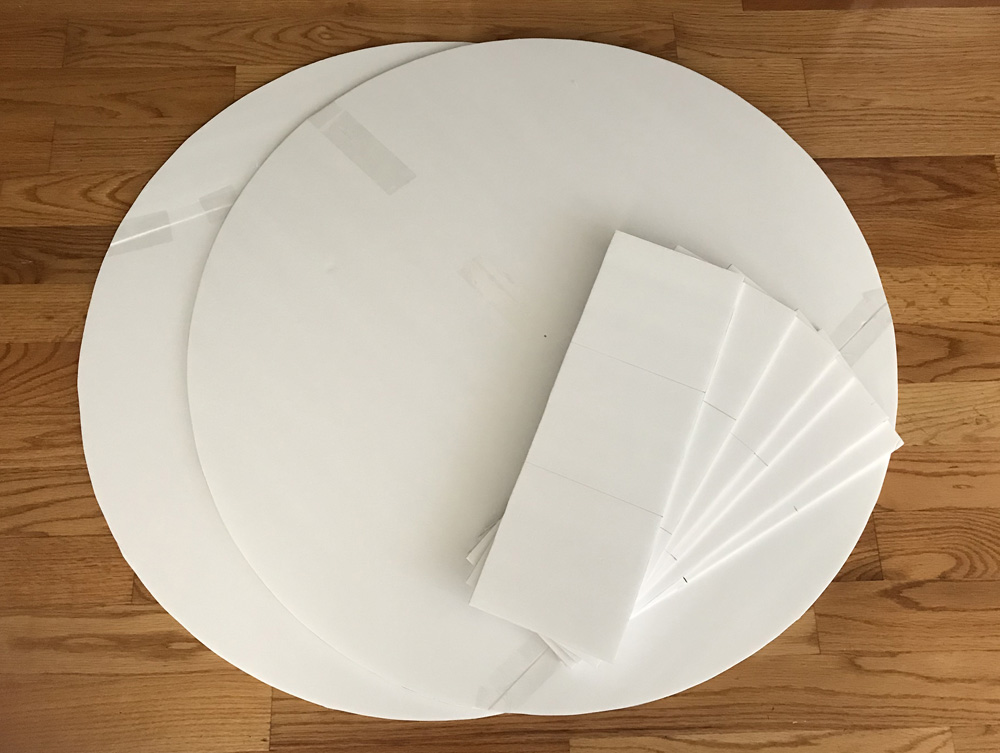
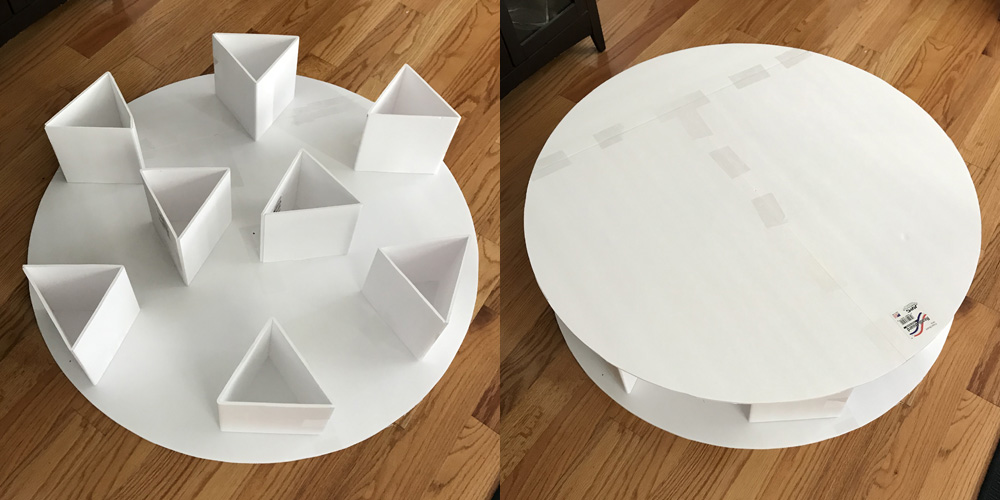
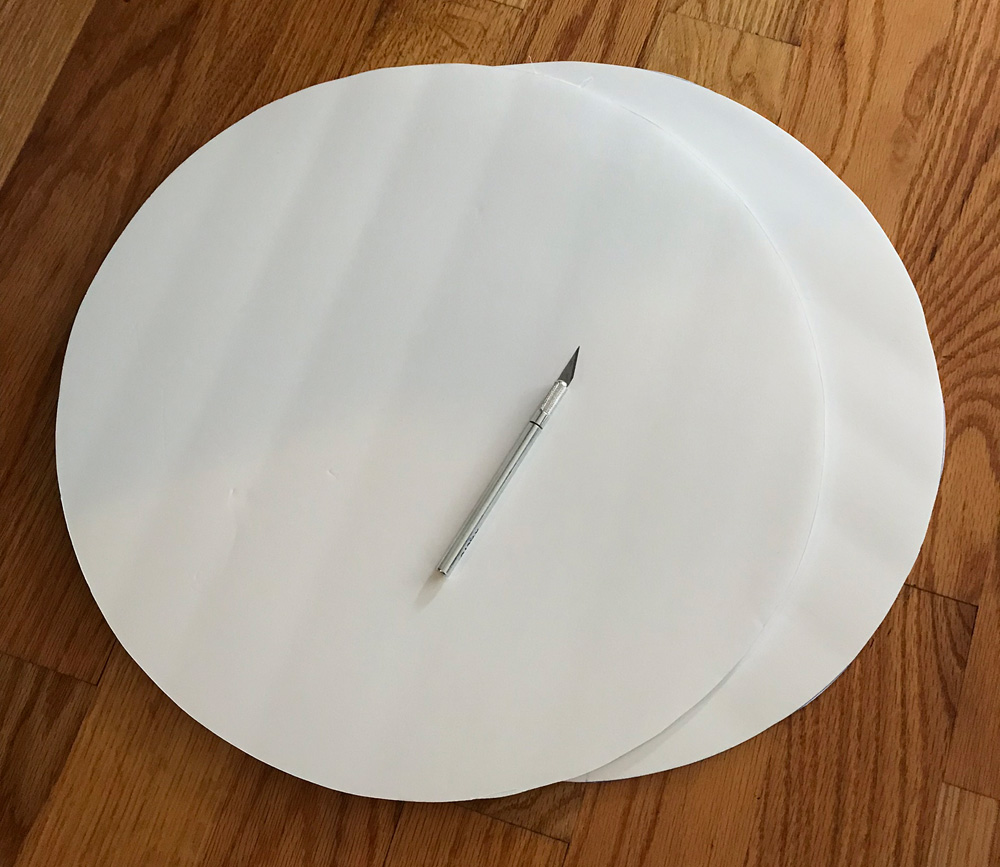
I started by deciding on a size for my target — 36″ in diameter. I taped two 30″ x 20″ sheets of foam board together with heavy duty shipping tape, and drew a 36″ circle on ’em. (See my article about drawing precise circles here.) I cut out this circle with an X-acto knife. I then made a second copy of the same thing.
Skeleton bunkbeds!
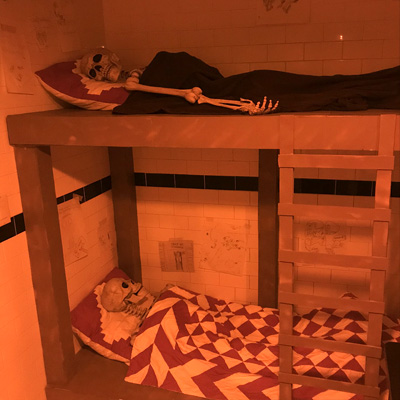
I made these skeleton bunkbeds to transform my apartment’s bathroom into a summer camp dormitory for my 1970s-summer-camp-slasher-movie-themed Halloween party. They were easy!
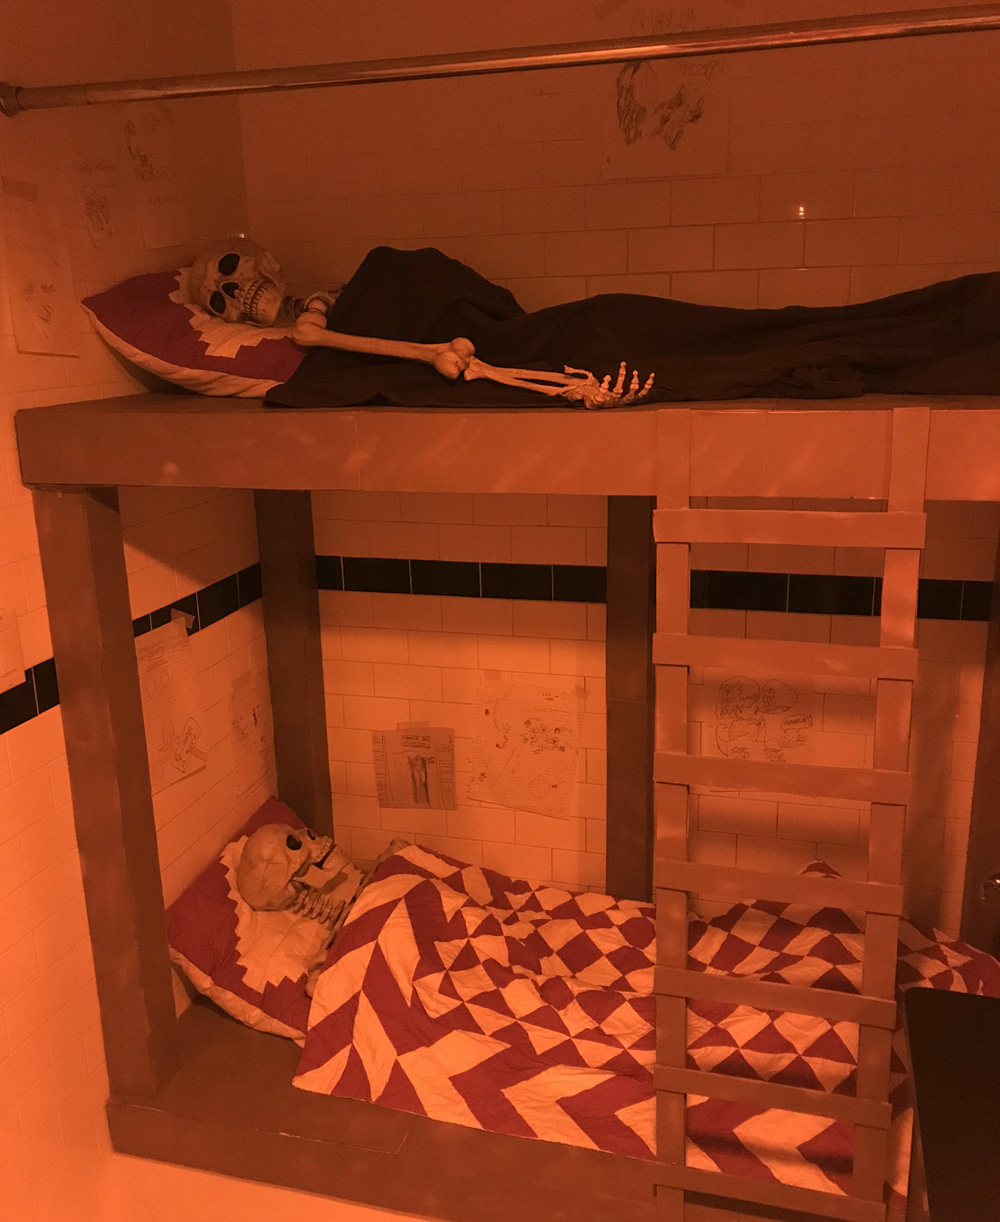
The bunkbeds consist of a few main parts: the beds themselves, the ladder, and the vertical supports holding up the top bunk. I made all of these out of just foam board, tape, and hot glue, using my usual techniques Read more…
Paper-maché severed head props!
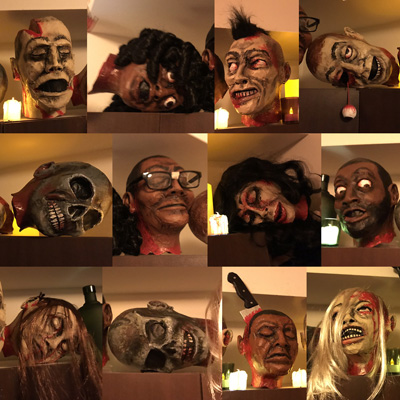
I made these severed head decorations for Halloween 2019, using paper maché and clay and a bunch of other stuff. They were fun! Here’s how I made ’em…
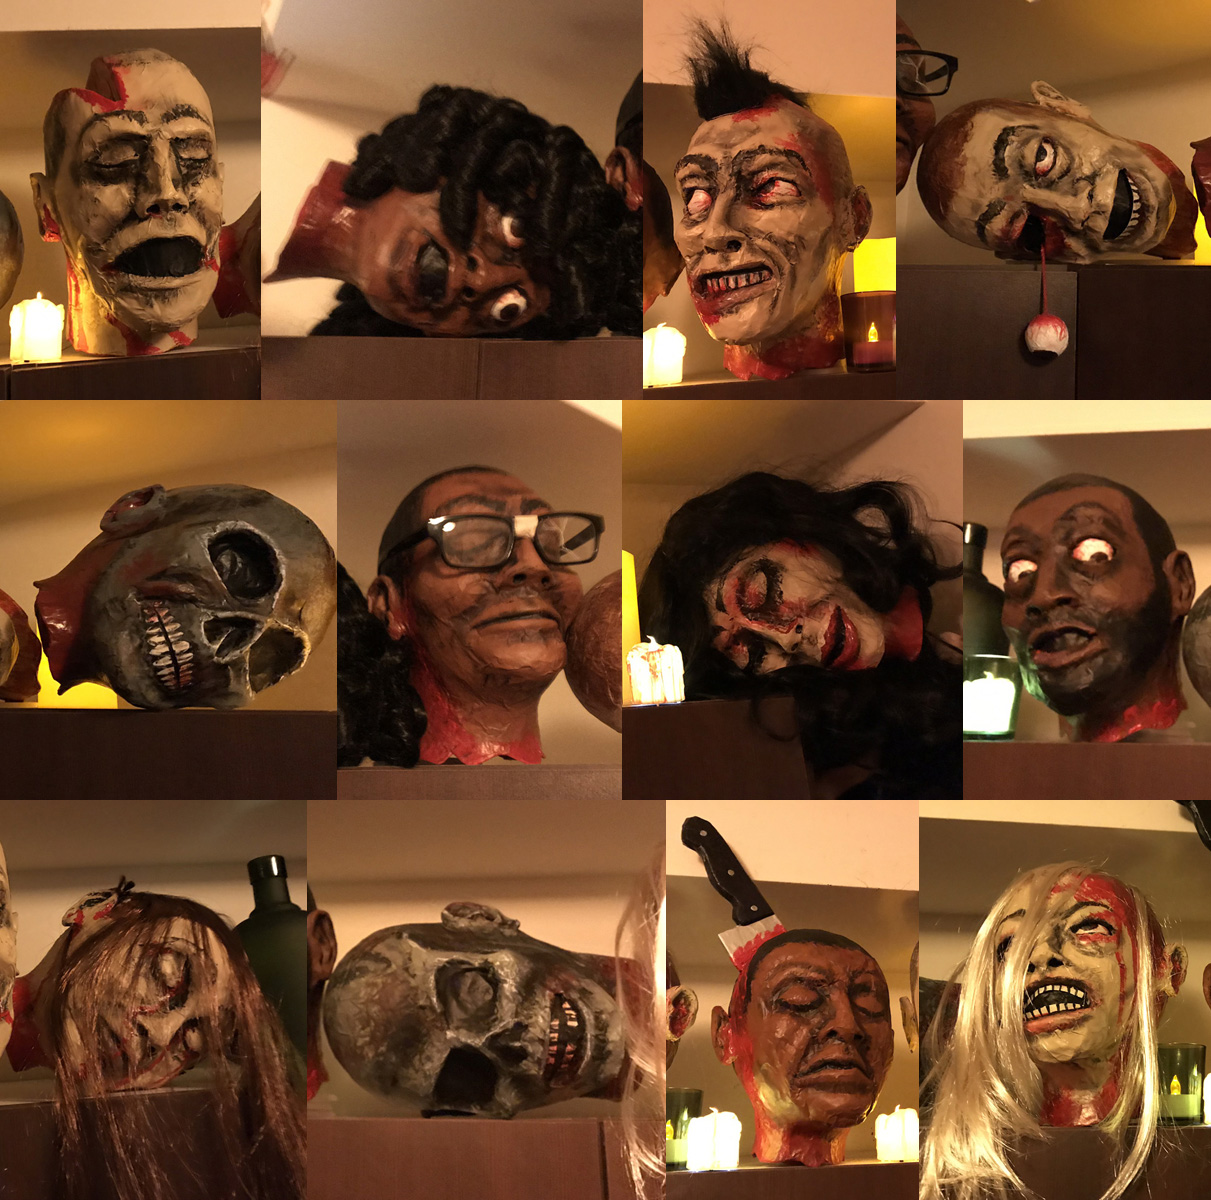
I started with a couple of styrofoam heads I already had laying around; one dude and one lady. I’d bought these ages ago for some project or other; I don’t even remember what it was specifically because I’ve ended up using them for a million different things — as a stand for masks I was working on, as a base for other Halloween head props I’ve made, etc. Read more…
8-foot foam board rowboat prop
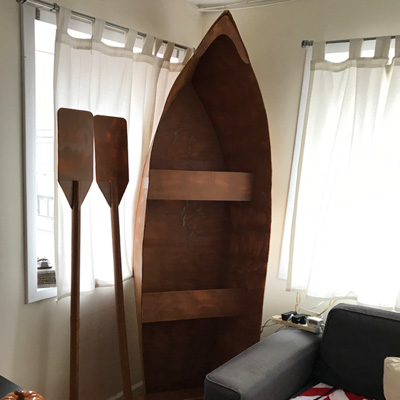
I made this big rowboat prop for my 2019 Halloween party — Summer Camp Slasher! It was a somewhat complicated project but I tried to simplify everywhere I possibly could and take every shortcut I could find. I made this whole thing in one afternoon!
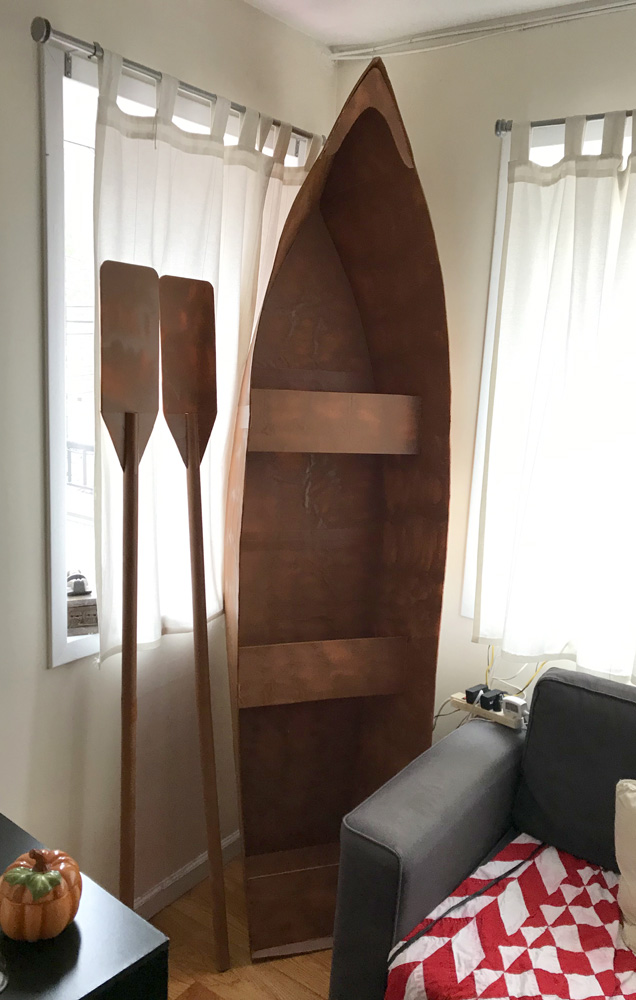
Here’s my weird idea I came up with for creating this slightly complex boat shape: I started with two giant foam board panels — one to be the bottom surface of the boat, and one to span across what would be the open upper surface; this one would be removed when the shape was done. Read more…
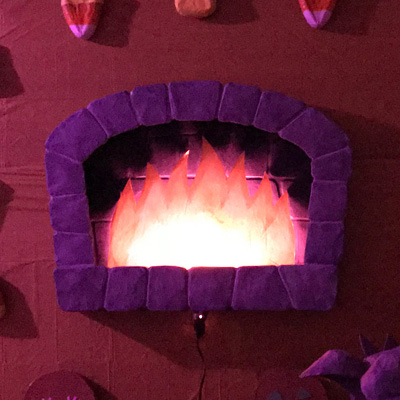
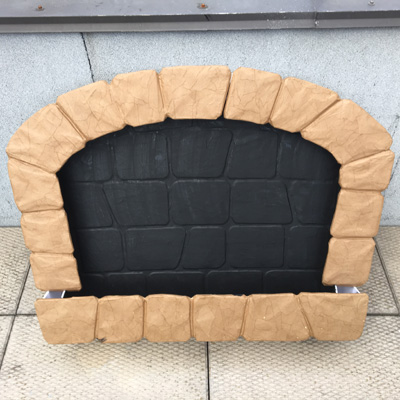
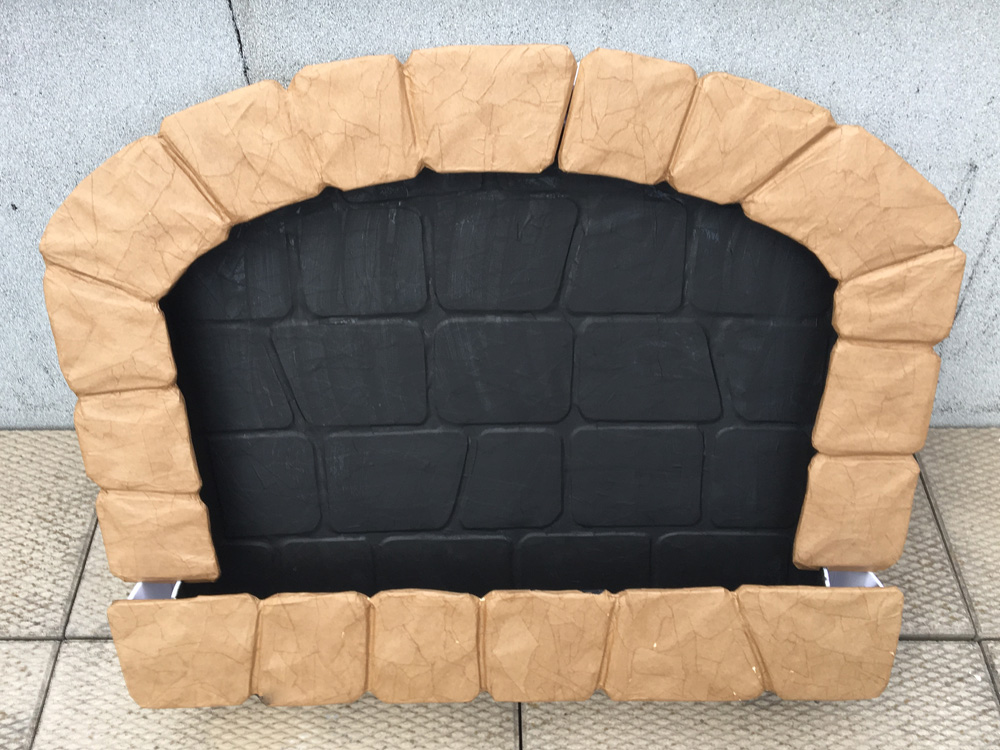
Paper maché fireplace prop
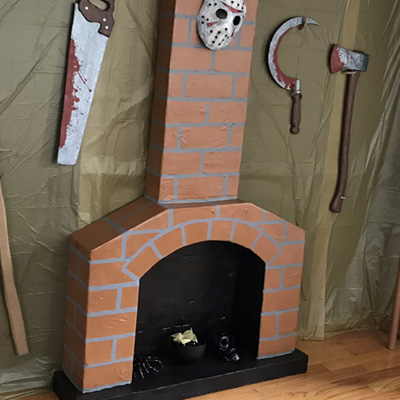
I made this paper maché fireplace for my 2019 Halloween party — Summer Camp Slasher!
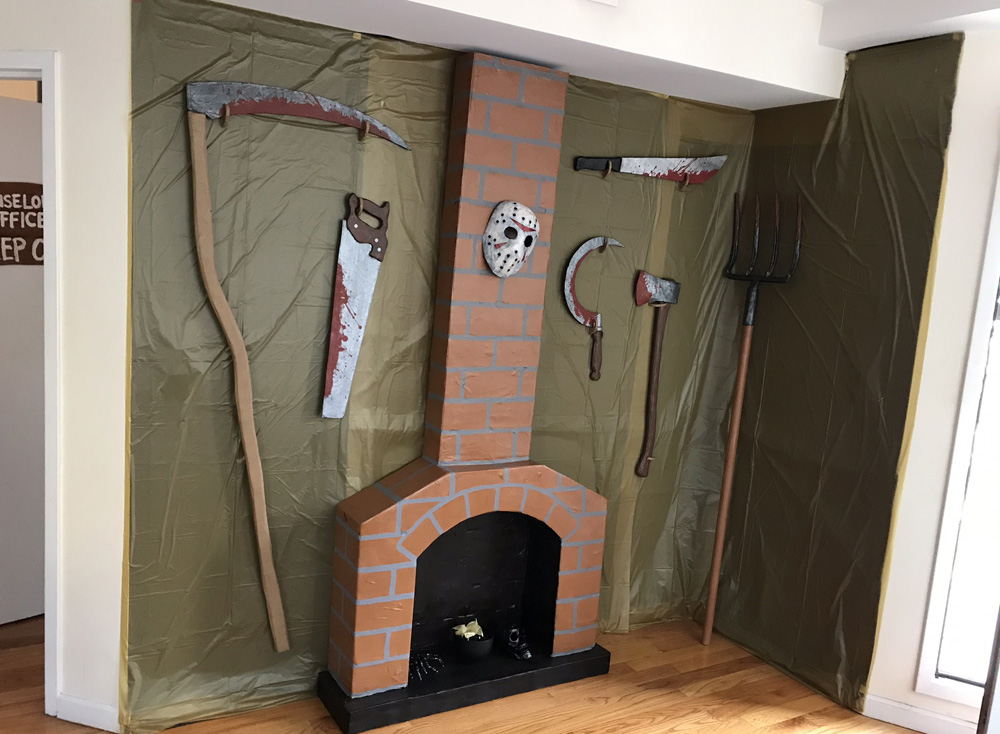
Of course I started by measuring and sketching the fireplace to make sure it would be the right size for our wall and tall enough to reach our ceiling. I built the basic big shapes using my usual method for building box shapes out of foam board. Read more…
Fake wood summer camp sign decoration

Here’s a quick and easy one; I made this summer camp sign mostly by re-using techniques I made up a few years ago for these fake wooden signs. Here’s how I did it…
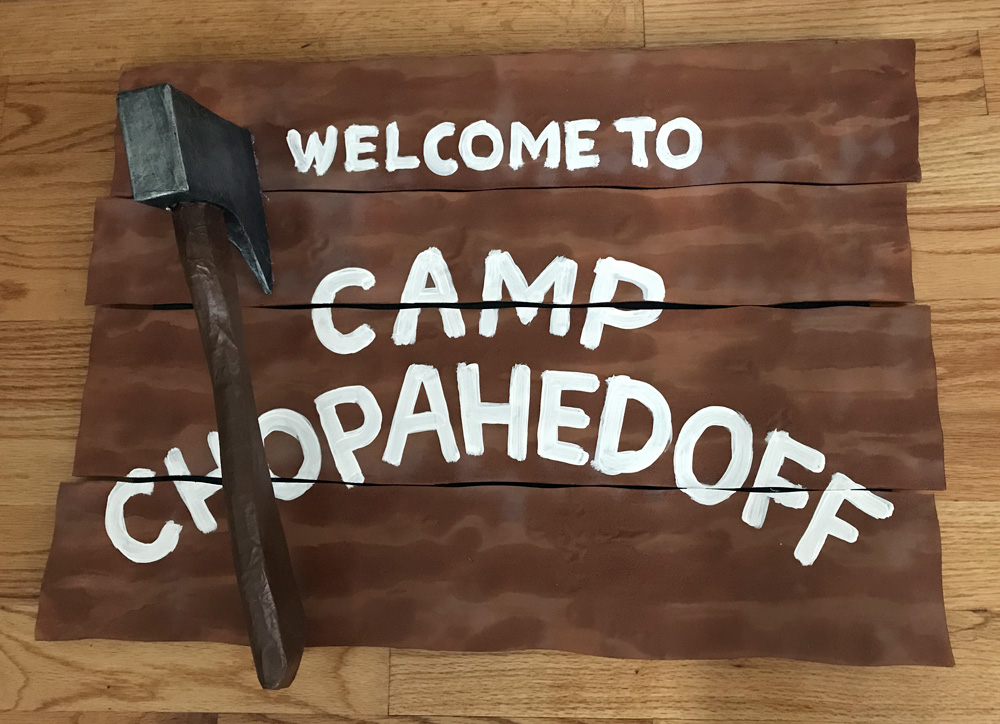
I started with two sheets of foam board; one for the wooden planks and one for the background. I cut wavy lines with an X-acto knife to make the four planks, and I trimmed the background piece to be a bit smaller.
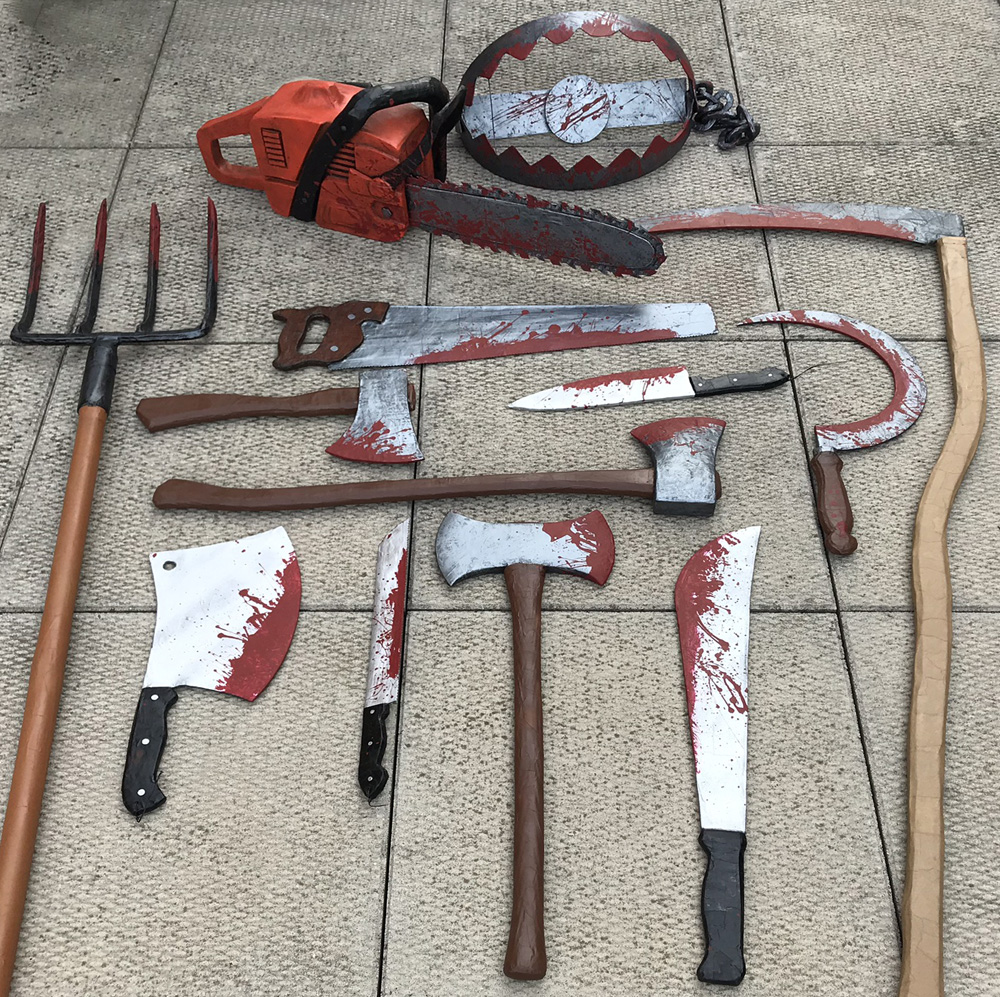
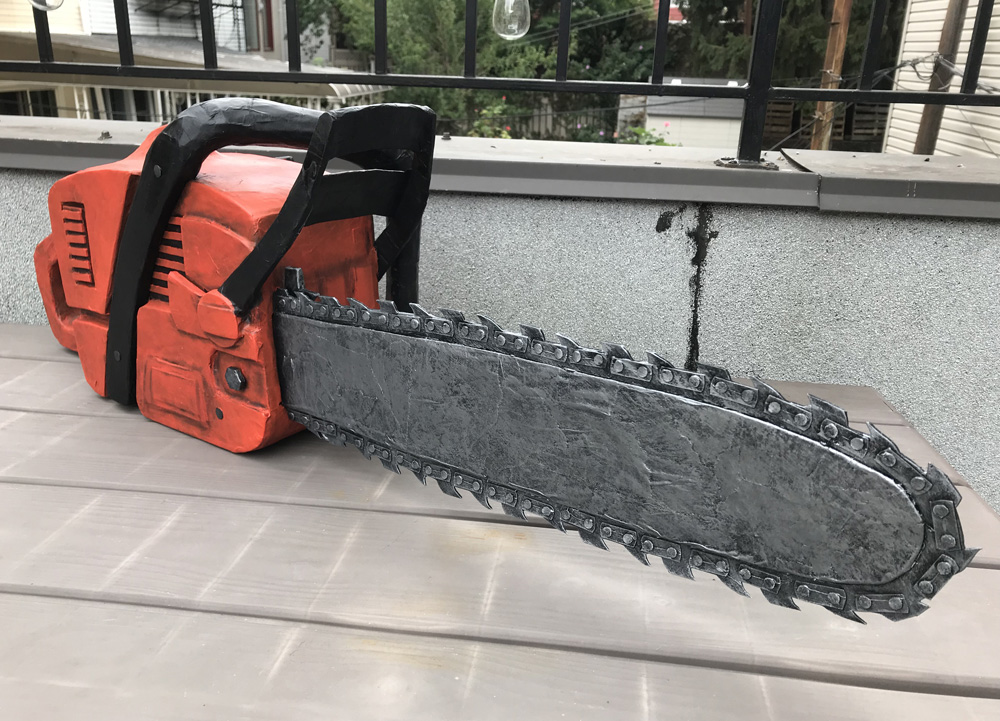
Paper maché chainsaw prop
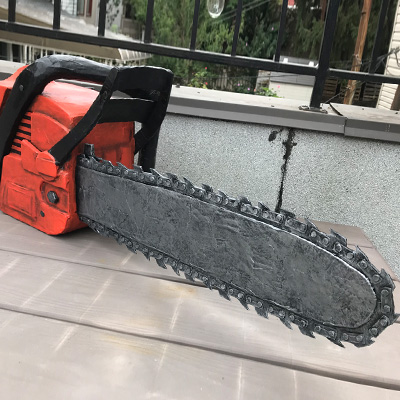
This thing was fun! And relatively easy, really! I made this paper maché chainsaw prop as a decoration for my 2019 Halloween party. There are so many different little shapes to this thing, and I was really winging it along the way, so there’s no way I can accurately write about every single step or this article would be twenty pages long. But I’ll show you some of the broad strokes…
Making a paper maché rifle and gun rack prop
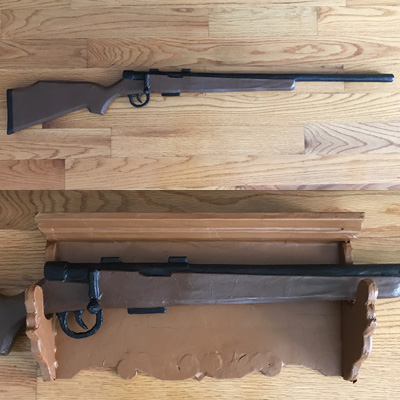
I made this paper maché hunting rifle and gun rack as a wall decoration for my summer camp slasher movie Halloween party. It was easy!
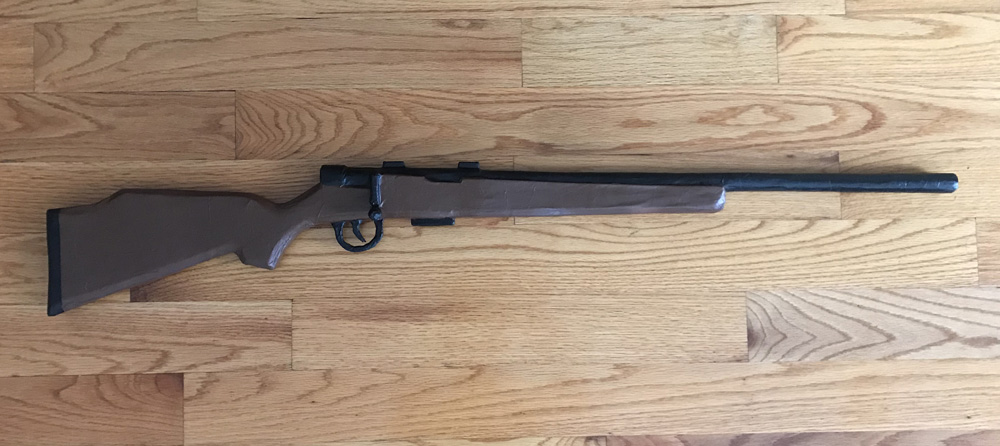
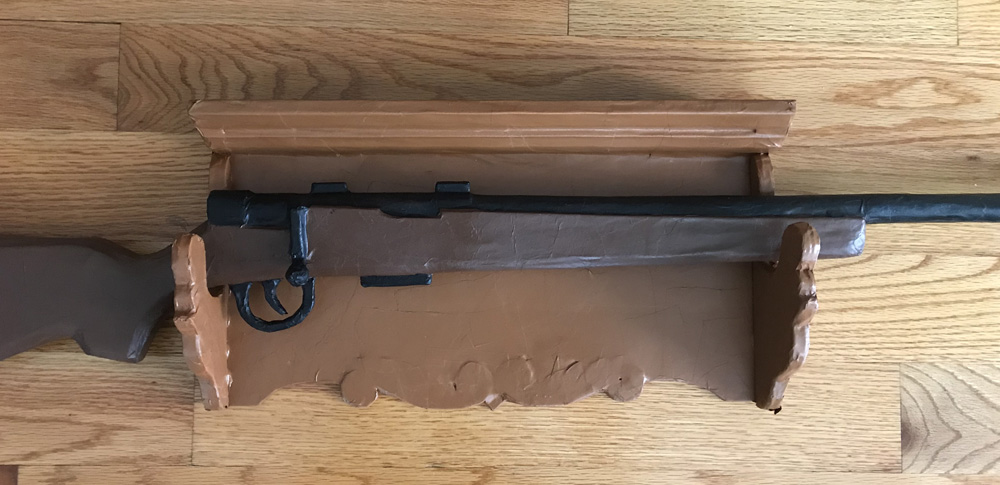
I started by doing some image searches for old hunting rifles, to get an idea of the shape and size. I found an image I wanted to use, scaled it up in Photoshop and printed it out as several pages, then taped the pages together and cut the rifle shape out.
Paper maché gingerbread men!
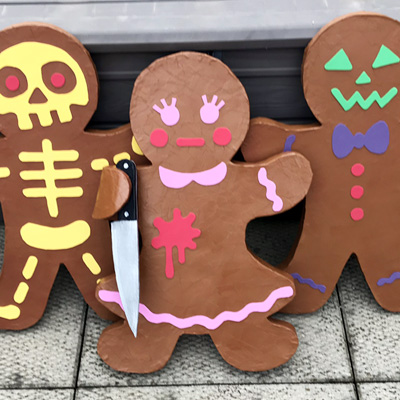
I made these evil paper maché gingerbread men (excuse me, gingerbread people!) for Halloween 2018. They were easy!

I started by designing a basic gingerbread man shape in Photoshop so it would fit on a sheet of 20″ x 30″ foam board (aka foam core). I printed it out as several pages, taped ’em together, and cut the shape out.
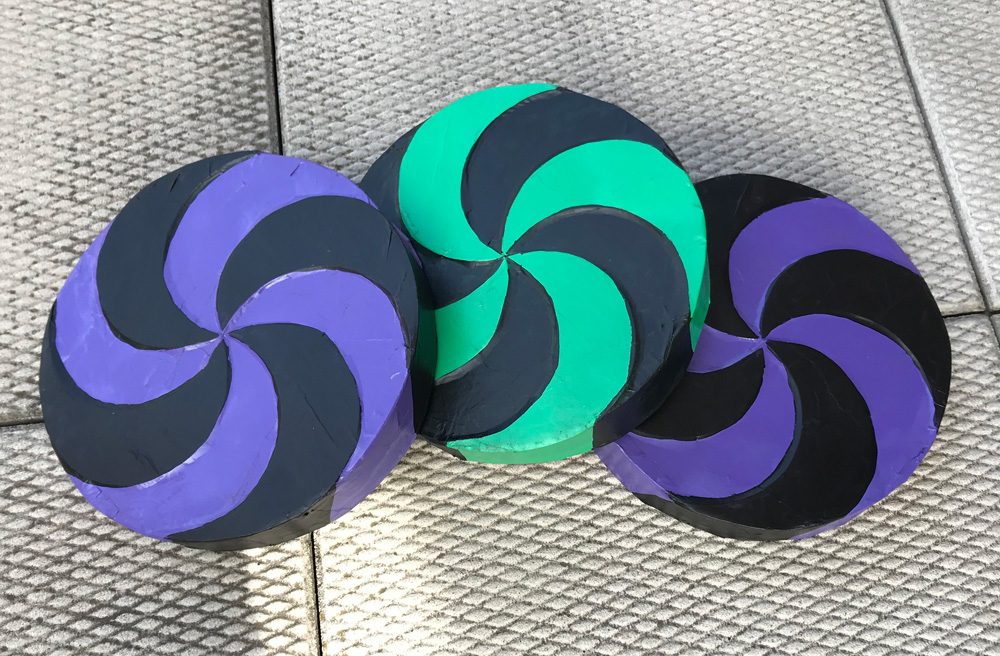
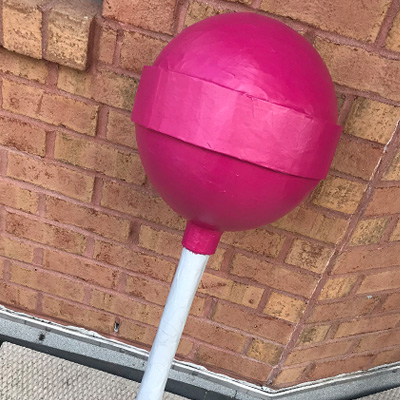
Another giant paper maché lollipop
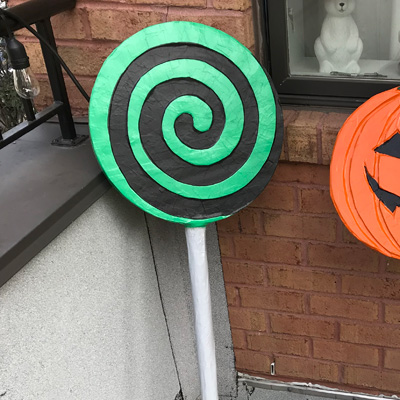
I made this giant paper maché lollipop with a spiral design (the one on the left, duh) as part of a group of giant candy decorations for my gingerbread house Halloween party. Here’s how I did it…
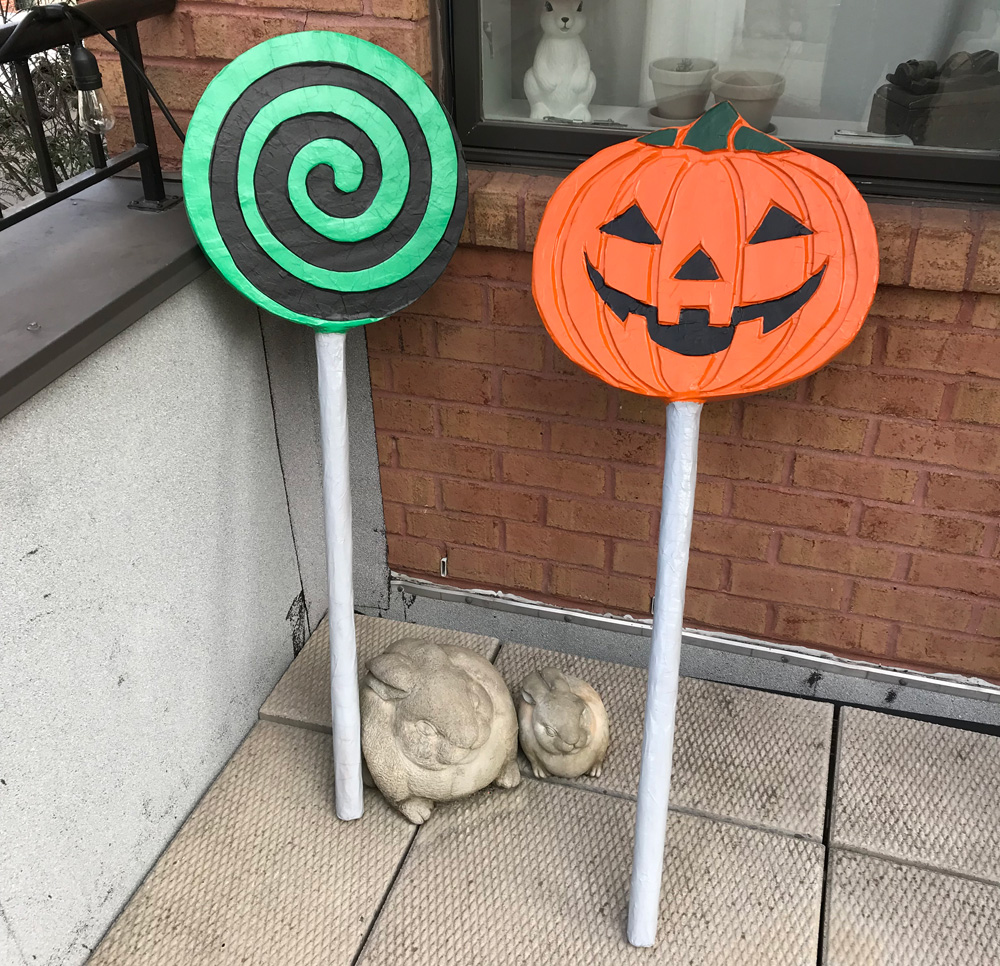
Jack o’ lantern lollipop prop
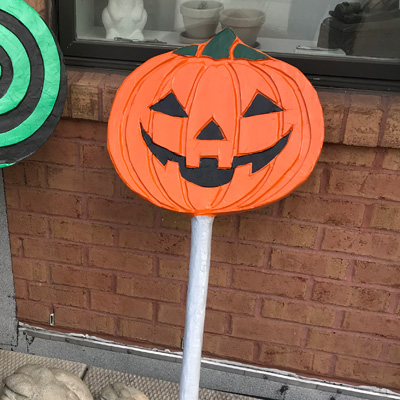
I made this big jack o’ lantern lollipop decoration (the one on the right, duh) for my Halloween party in 2018. It was easy!

I started by drawing the shape of the jack o’ lantern on a piece of foam board and cutting it out with an X-acto knife. I then traced and cut out two more copies, for three total.
Paper maché peppermint decorations for Halloween

I made these oversized paper maché peppermint decorations as part of a set of giant candy props for Halloween 2018. Here’s how I made ’em…
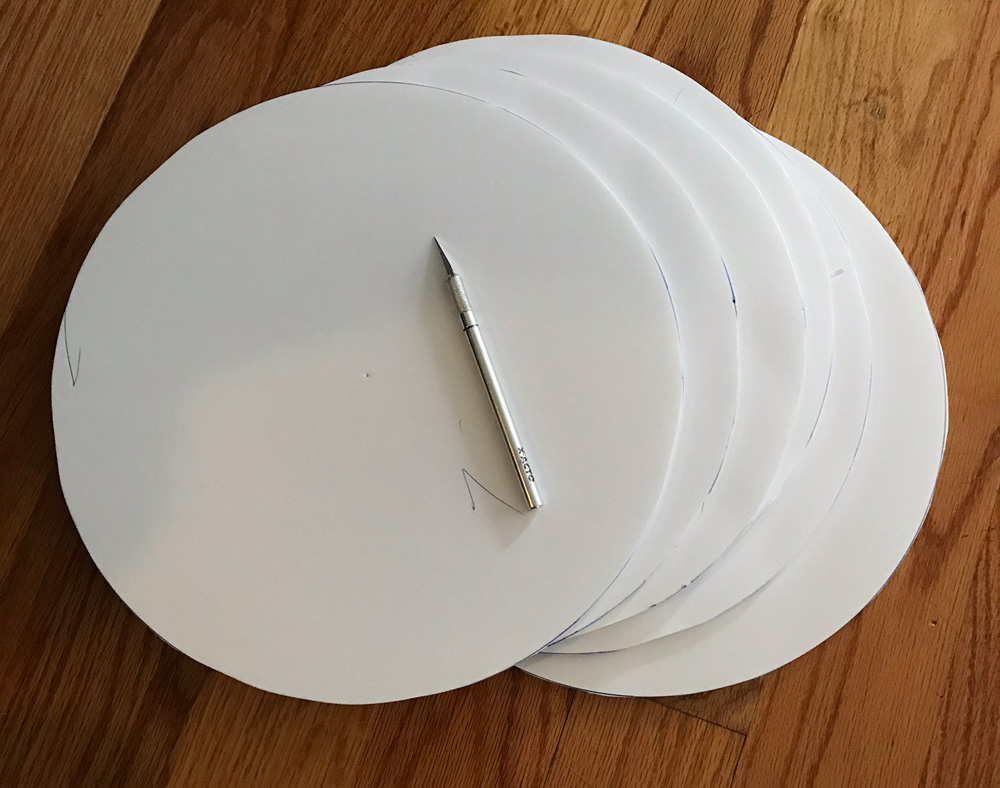
I gathered materials to make three peppermint candies at the same time. I cut out six 12″ circles, two for each candy. See my article about drawing precise circles! I cut the circles out with an X-acto knife.
Making a giant paper maché lollipop
This giant paper maché lollipop was the easiest project in the world! I made this along with a bunch of other types of giant candy for my gingerbread house Halloween party. Here’s how I did it…
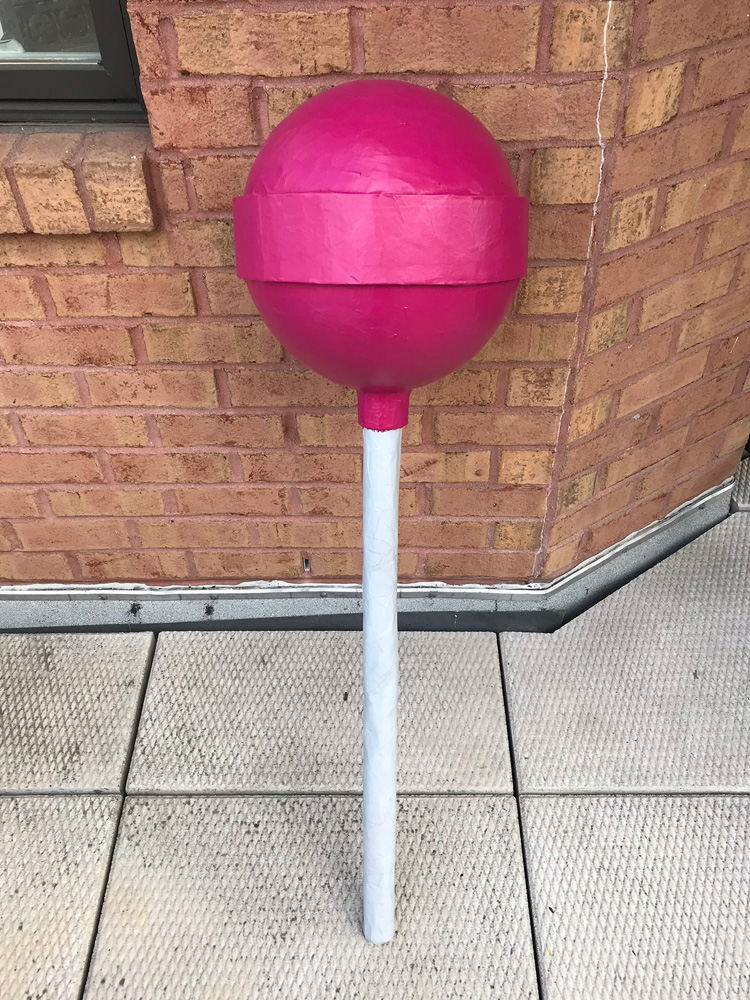
I started by searching Amazon for “inflatable ball” and bought the cheapest one I could find in the 15″ – 18″ range; it turned out to be a globe, which is kind of funny because the last time I ordered inflatable balls it was to make two paper maché globes!
Hansel and Gretel light-up oven prop! — part 2
This is part 2 of my paper maché oven prop for Halloween 2018; see part 1 here.
Making the fake flames
Making the fire was an interesting challenge! I needed to find a material that would be translucent enough to diffuse the light properly, and also rigid enough that it could stand up in the oven. One thing I thought of ahead of time was that if I curved the material for the flames, that might help it stand up better; think about holding a piece of paper vertically and curving it a bit so it’s somewhat rigid. Make sense? More on this coming up.
Hansel and Gretel light-up oven prop! — part 1
I’m making this big light-up oven prop for my haunted gingerbread house Halloween party in 2018! It will eventually be a lightweight wall hanging with some battery powered lights and one Hue light inside. So far so good! Here’s what I’ve done so far…
Building the oven base
First I designed the basic shape of the oven in Photoshop — it’s 40″ x 30″; I chose this size out of convenience because it allowed me to base the design on two sheets of 20″ x 30″ foam board connected side by side. Read more…
Giant scary clown Pez dispenser — part 2
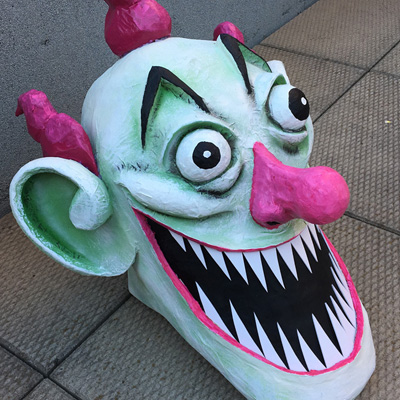
This is part two of my giant scary clown Pez dispenser project! See part one here.
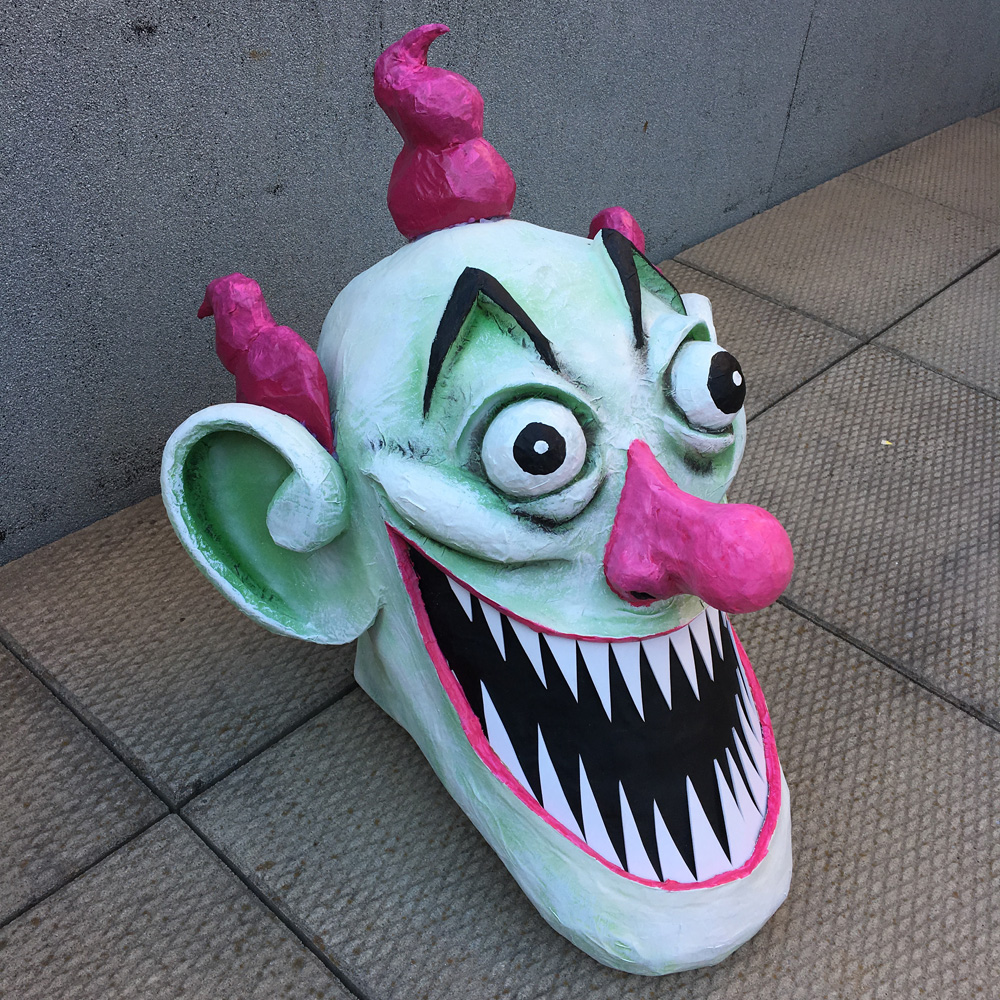
Making the evil clown head
For the spooky clown head, I started by cutting a panel of foam board that’s the same size as the top panel of the Pez dispenser body (see part one), to use as a base for the head, in order to ensure the head will fit nicely on the “neck.” I built the rest of the head onto this panel.
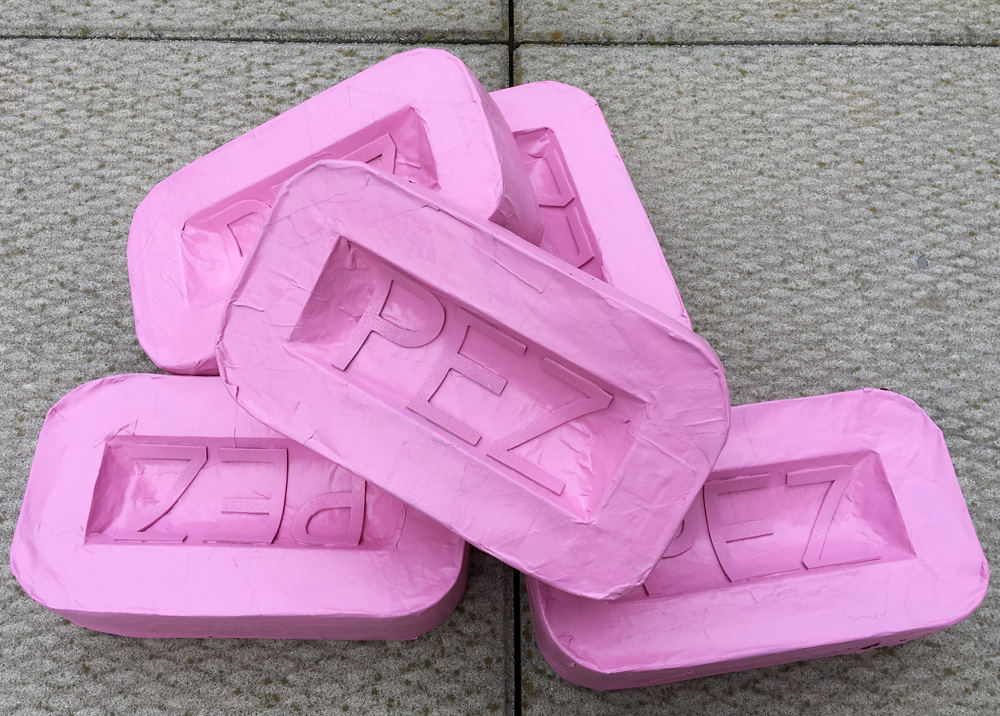
Making giant paper maché Pez candies
I made these giant paper maché Pez candies to go with my scary clown Pez dispenser prop for Halloween 2018! I made half a dozen of them, one to go in the Pez dispenser and the others to have strewn around nearby. They were easy to make! Here’s how I did ’em…
Giant scary clown Pez dispenser!!! — part 1

I made this 6-foot scary-ass clown Pez dispenser for my Halloween party in 2018! The idea came to me when I was working on some other giant candies and realized this would be a pretty easy project that would really add to the overall ambiance.
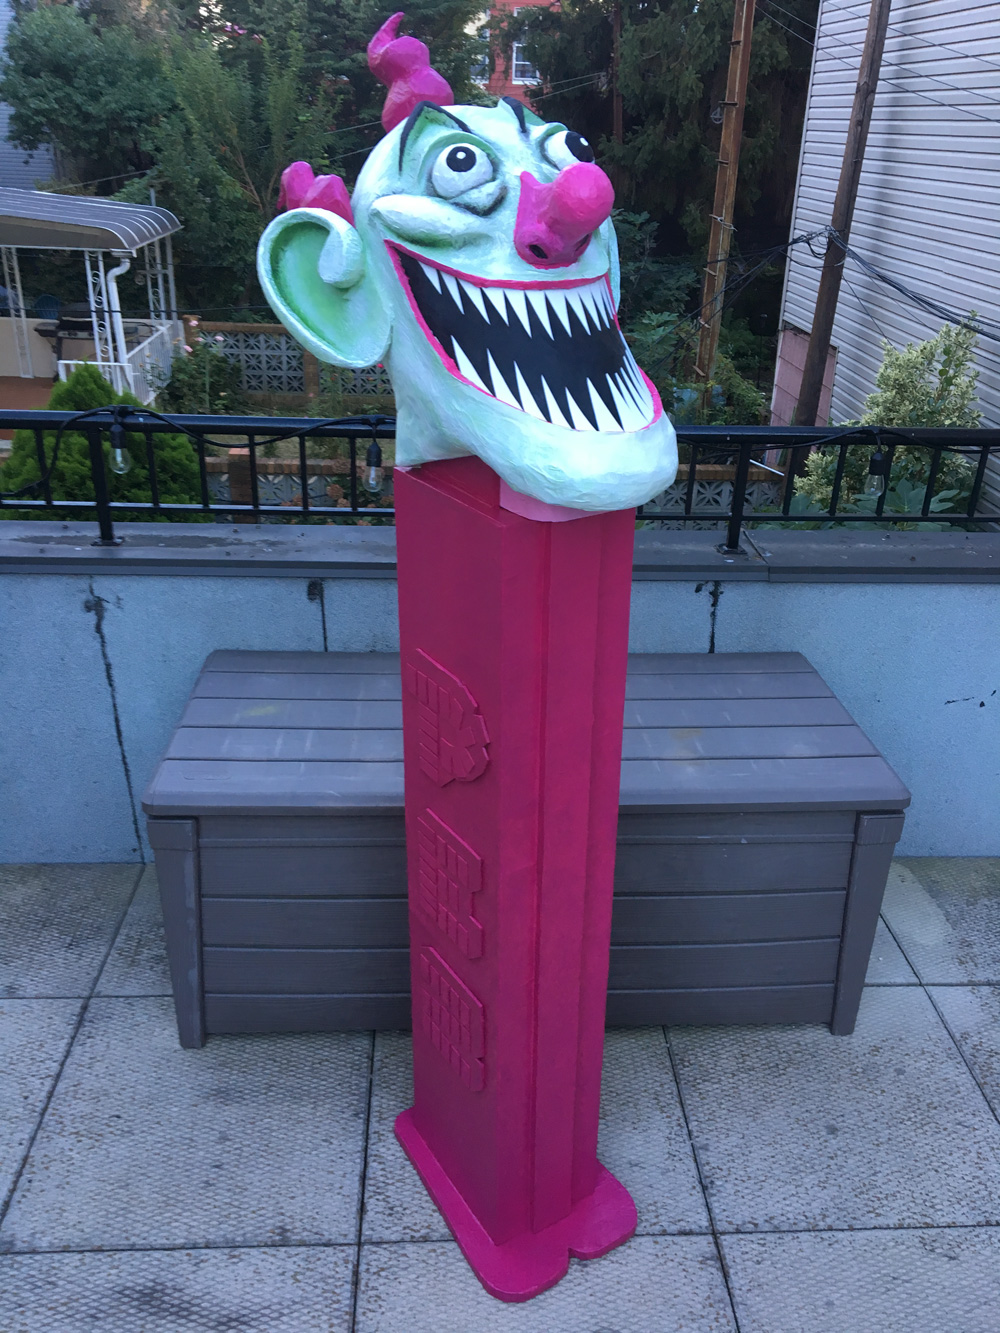
My first step for this project was laying everything out in Photoshop and figuring out the exact measurements for the “body” of the Pez dispenser — the evil clown head I pretty much just freestyled!
 About Manning Krull
 How to make a 4-foot paper maché alligator
 My violin skull mask, Mardi Gras 2015
 Three-headed paper maché dragon sculpture