
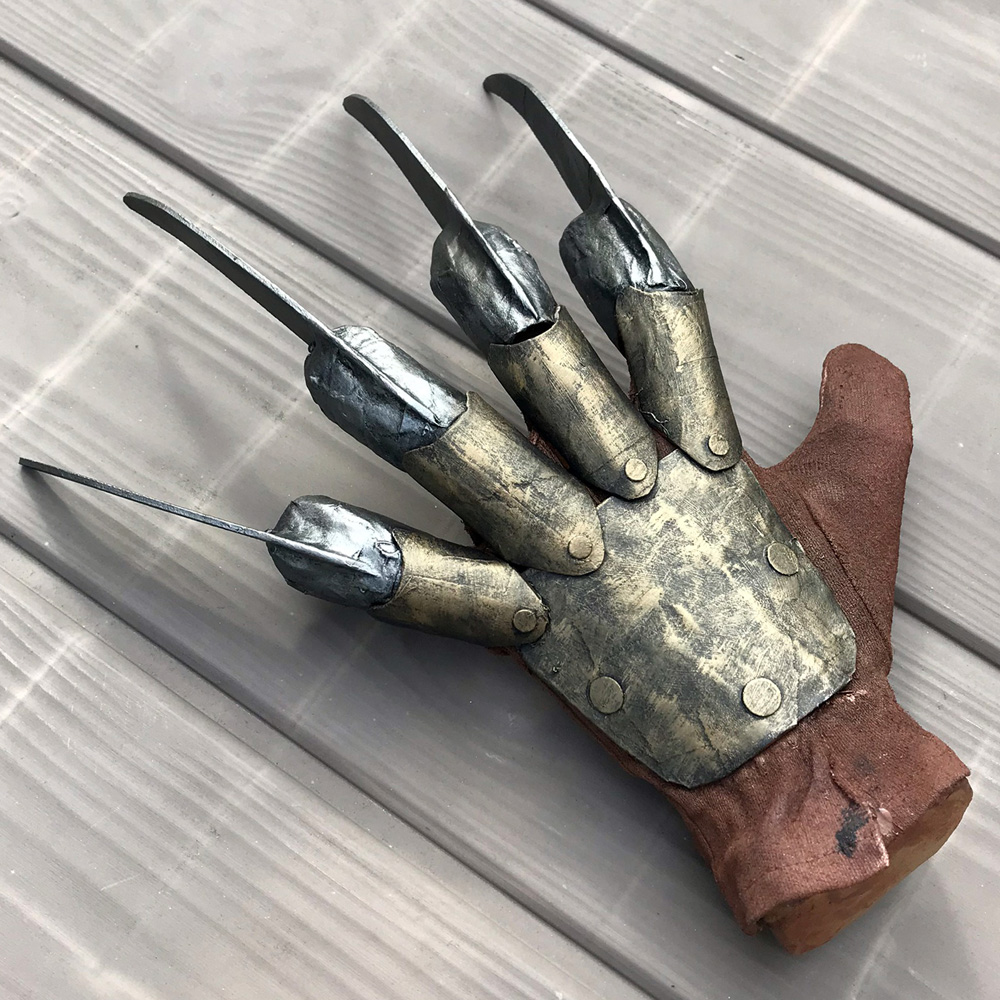
Freddy Krueger hand prop accessory!
Published by Manning on October 1st, 2019
I made this Freddy Krueger hand prop as part of my wife’s 2019 Halloween costume; soon it’ll be a wearable prop that’s bursting out of her chest! For now, here’s how I made the hand itself…
Sculpting the hand
I definitely went overboard with building the hand; I totally could’ve just stuffed a glove with wadded-up paper towels or something. But that would leave me with a really lifeless, fake-looking hand, and I wanted something more realistic, with more tension in the way it’s posed. I’m always up for overkill on these things!
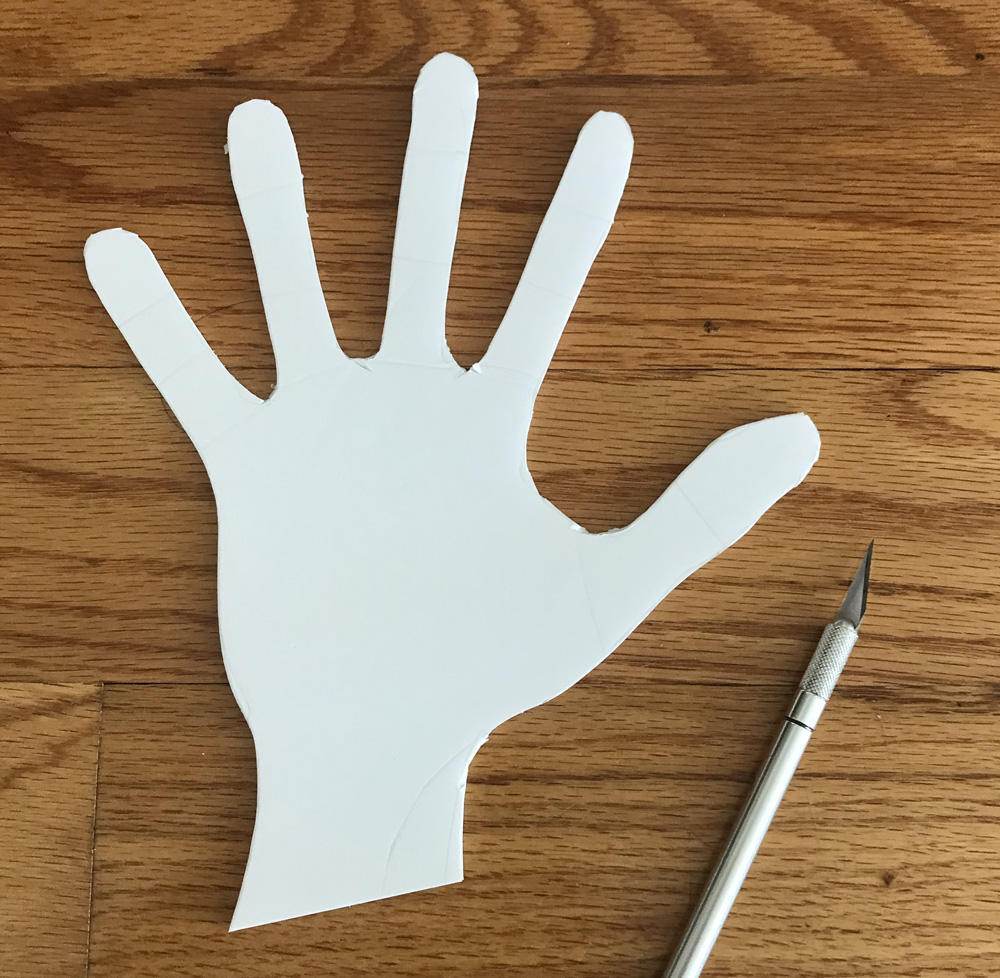
To make the hand, I started by tracing my own hand onto foam board, and drawing lines where all the joints are in my fingers. Then I cut the shape out with an X-acto knife. (Note: I first checked images of Freddy Krueger to see what hand his glove is on — it’s the right hand — so of course I planned to make this a right hand… and then I screwed up somehow and made a left hand and didn’t notice ’til it was time to put the glove on it! Luckily gloves come in pairs.)
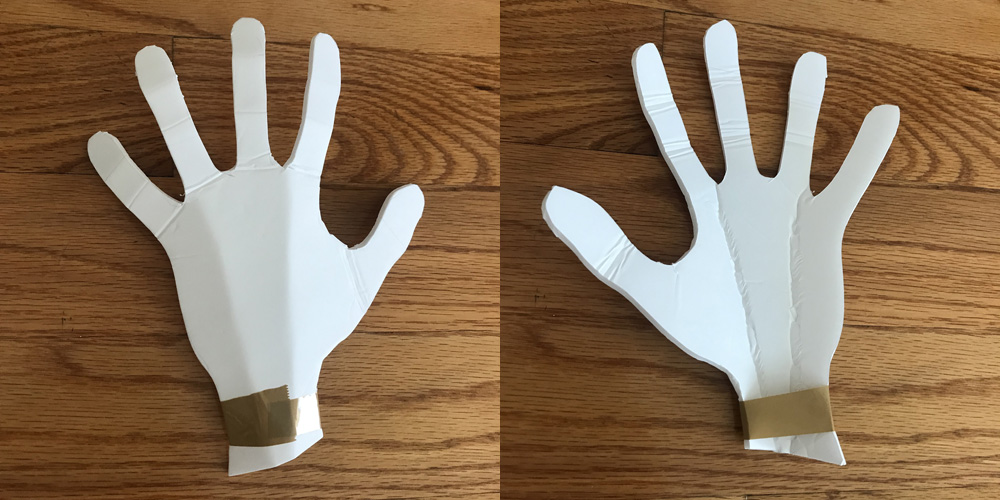
I carefully bent the foam board at each of the knuckle joints. To keep the foam board from curling or bending where I didn’t want it to, I bent each line by placing it against my kitchen counter and psuhing it down to create the bend.
I also scored two long lines down the palm with a butter knife, and bent those inward. I put a piece of shipping tape around the wrist to hold this inward curl.
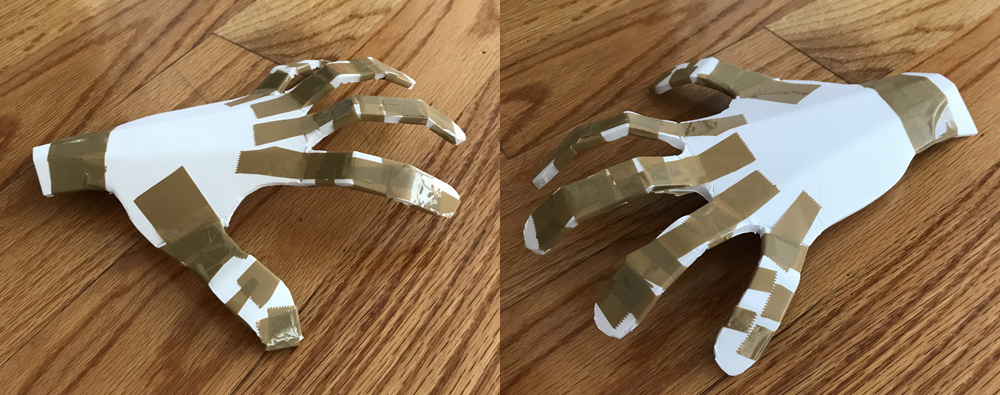
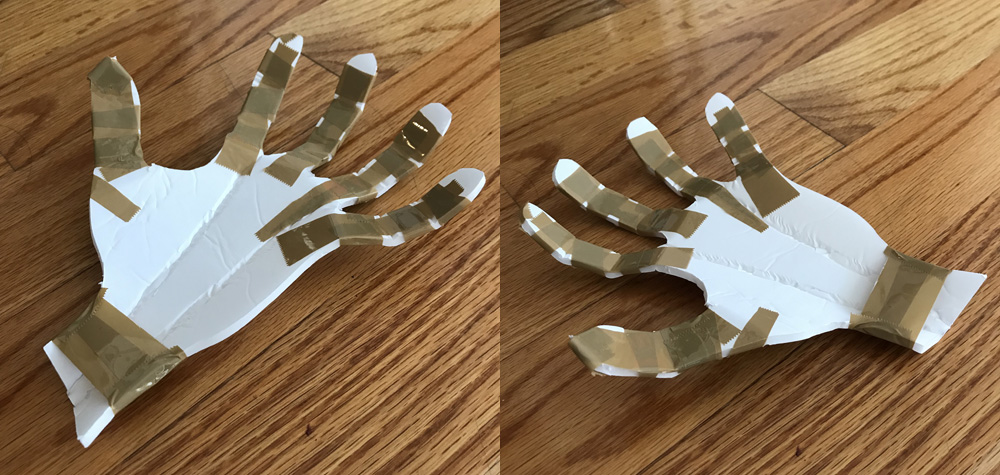
I used heavy duty shipping tape to begin creating the pose for the hand. This kind of tape is perfect for this job because it doesn’t stretch at all. I’d tear off a small length of tape using the metal teeth on the dispenser, and then I’d tear the piece down the middle by hand to make four narrow pieces — the serrated edges from the dispenser make it possible to tear it by hand like this. I’d bend a finger joint into the position I wanted, and then place the tape along the back of the fold. This does a pretty good job of locking the foam in the bent position you want; the tape won’t stretch so the foam can’t un-bend. I then added another piece of tape on the other side of the joint just for good measure; this makes the joint a bit more stable. And in a lot of places I added horizontal pieces of tape to lock the vertical pieces in place a little better.
I repeated this for all the joints in all the fingers. Note: for a really dramatic pose, the joints where the fingers meet the hand actually bend backward a bit!
Not shown: I added a layer of craft foam on the back of the hand. I just traced the hand shape onto craft foam, cut it out, and taped it in place. The idea was, the soft edges of the craft foam will help conceal the hard edges of the foam board when this thing gets covered in paper mache. It’s possible this step didn’t really make much difference at all; hard to tell!
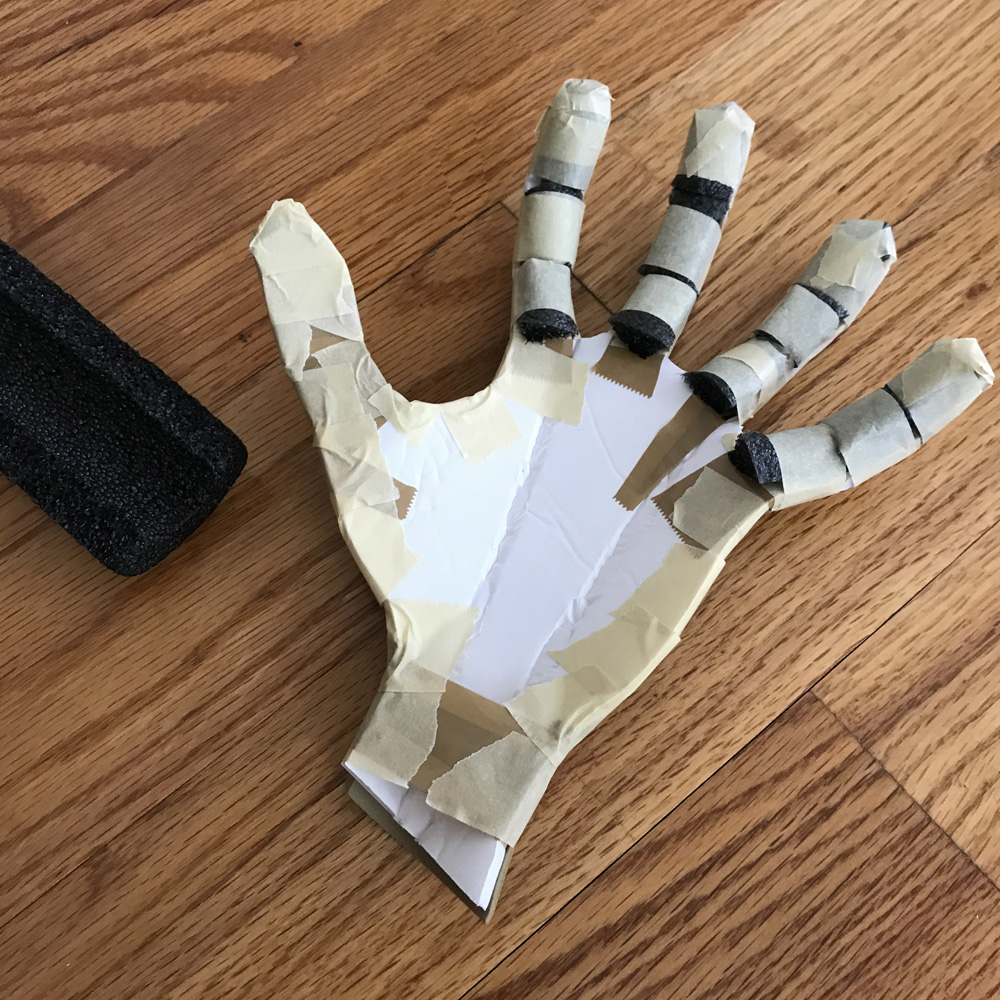
I then used pieces of foam insulation tubing to pad out the hand and fingers. I just took a foam tube and used scissors to cut pieces off at various sizes, and I taped them in place with masking tape. When this was all done, I covered the entire shape in masking tape.
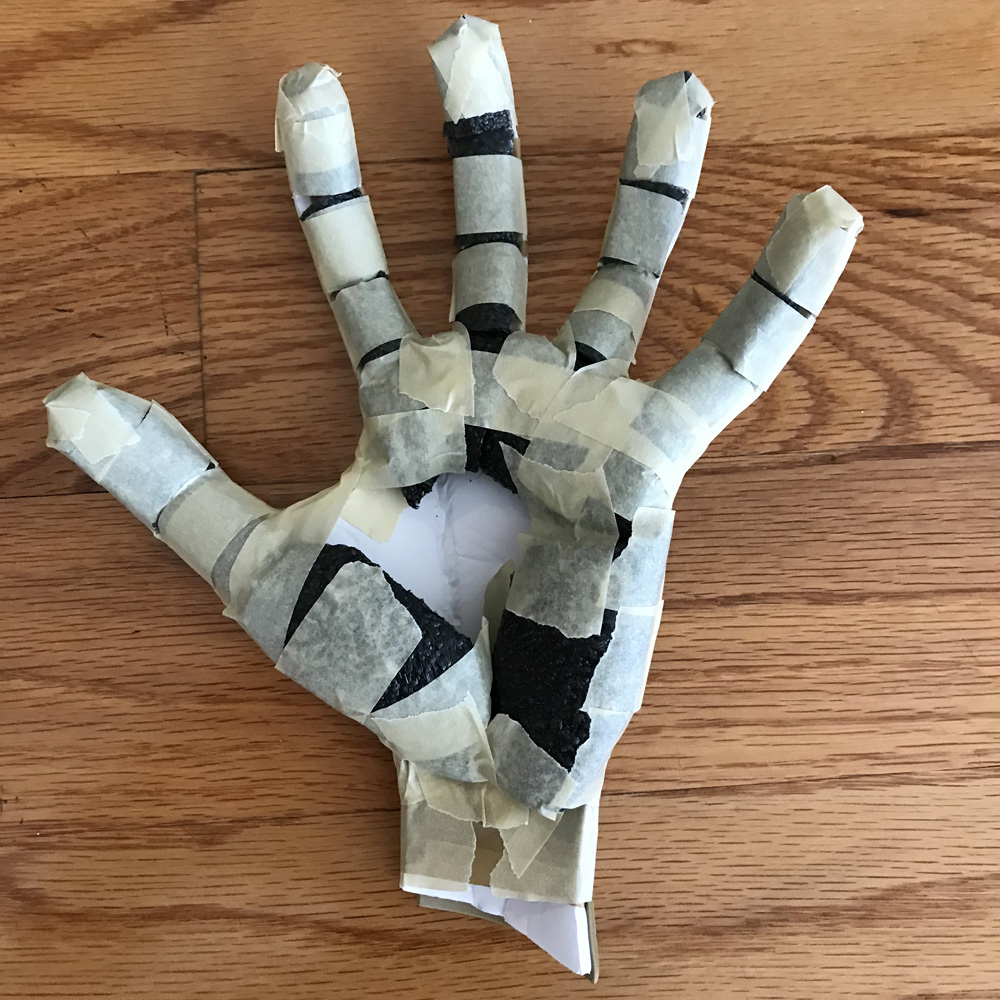
I added a few pieces of craft foam on the back of the hand — some long thin pieces where the bones of the hand are, and some little knobby pieces across the four knuckles.
I added a wrist made from some rolled up poster board, which I attached with tape and then stuffed with newspaper. I closed up the back of the wrist with a disk of foam board and lots of tape.
Paper maché
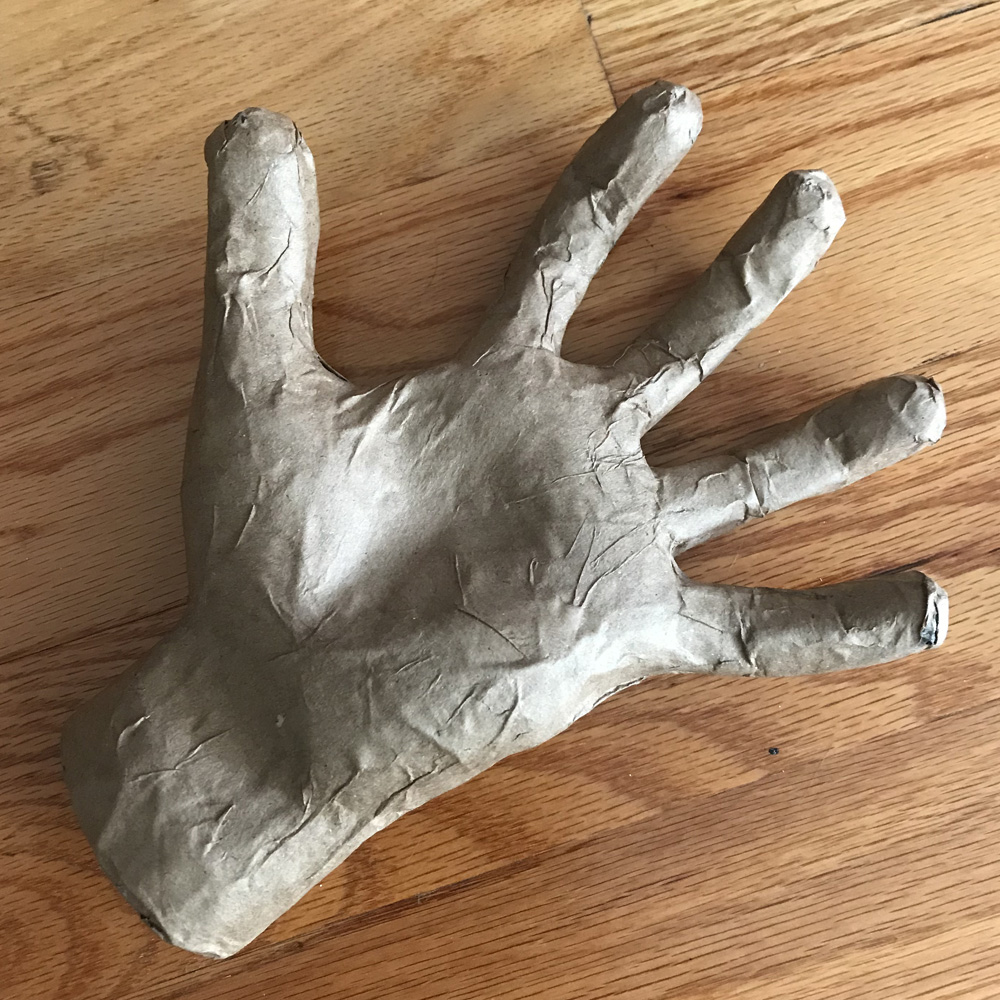
I covered the hand and wrist in three layers of paper maché, just to make it somewhat sturdy; here’s some info about my paper maché process and materials. The short version is: I use Roman PRO-543 universal wallpaper adhesive (paid link) and alternating layers of newspaper and brown wrapping paper.

If this were a more serious sculpture that needed to last longer, I’d use more like six or eight layers.
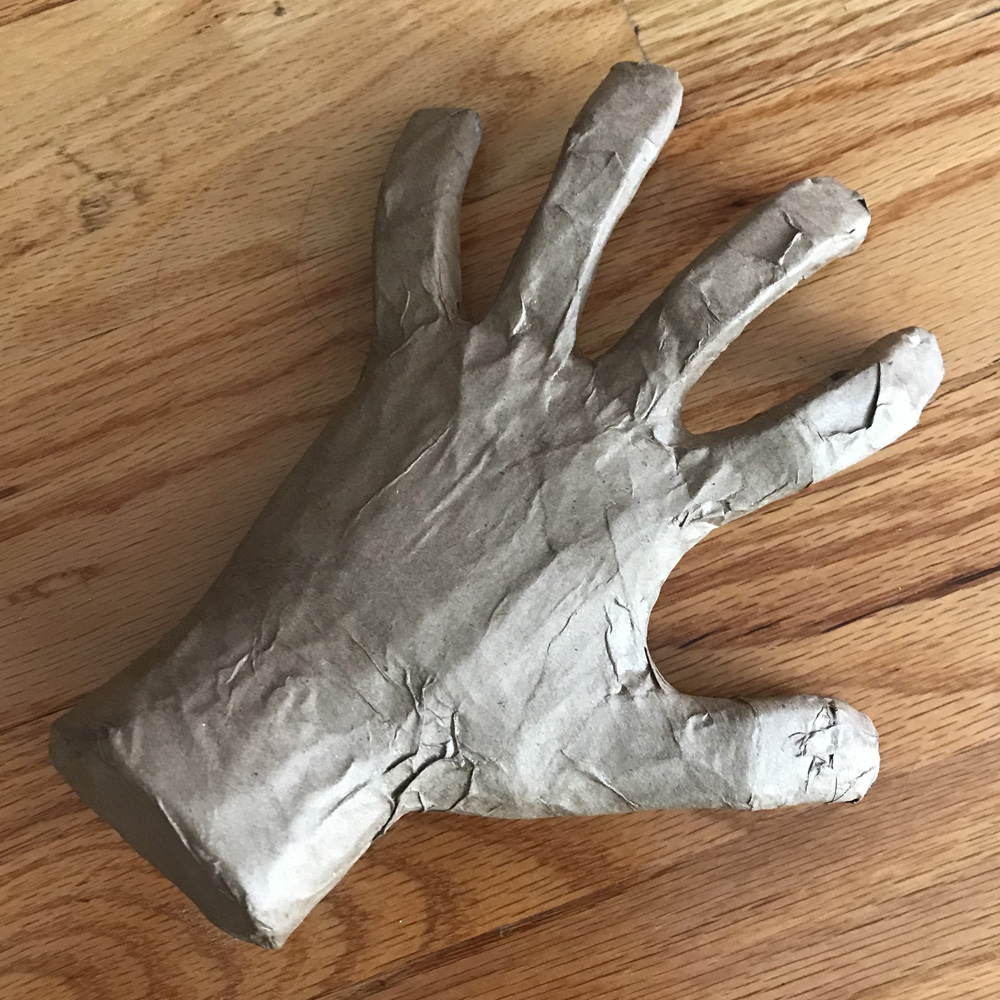
I did a really sloppy job with the paper maché, because I knew it would be covered by the glove; no need to avoid wrinkles this time. Plus, it’s Freddy!
I’ve gotta say, I was thrilled with how the hand came out!
Preparing the glove
I ordered a pair of super cheap white cotton gloves (paid link) to use for Freddy’s glove.
Along with building the wrong hand, here’s another dumb thing I did: when I went to put the glove on the hand, I realized I couldn’t because the hand is all spread out! Oops! I fixed this by cutting a line up the back of the glove to slit it open; no problem because this part will be covered by the metal bits later. By really pulling at the glove and by slightly bending the fingers, I was able to get the glove onto the hand. I then used a hot-glue gun to glue the glove closed in the back; I glued the flaps right onto the back of the hand.
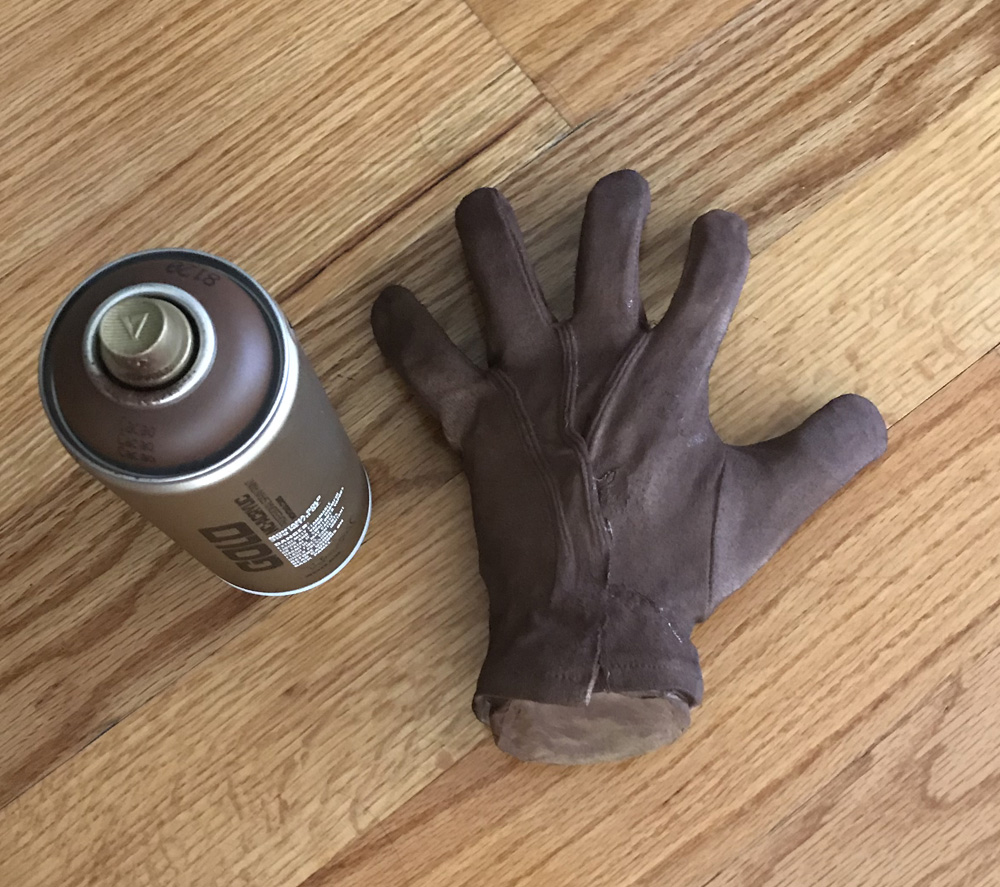
I spray painted the entire glove with brown spray paint; I tried to paint it a little bit loosely so that some contrast would show through from where I’d “dyed” it with acrylic paint earlier, but in the end it was basically a nice opaque coat all over. This was fine! Initially I was concerned that spray paint might not take on the fabric surface very well, but it totally did.
Making the knives and metal bits
There are four types of fake metal bits I had to make for the glove: the knives, the rounded finger tips, the curved parts on the back of the fingers, and the big flat piece across the back of the hand. I made all of these a little bit differently…
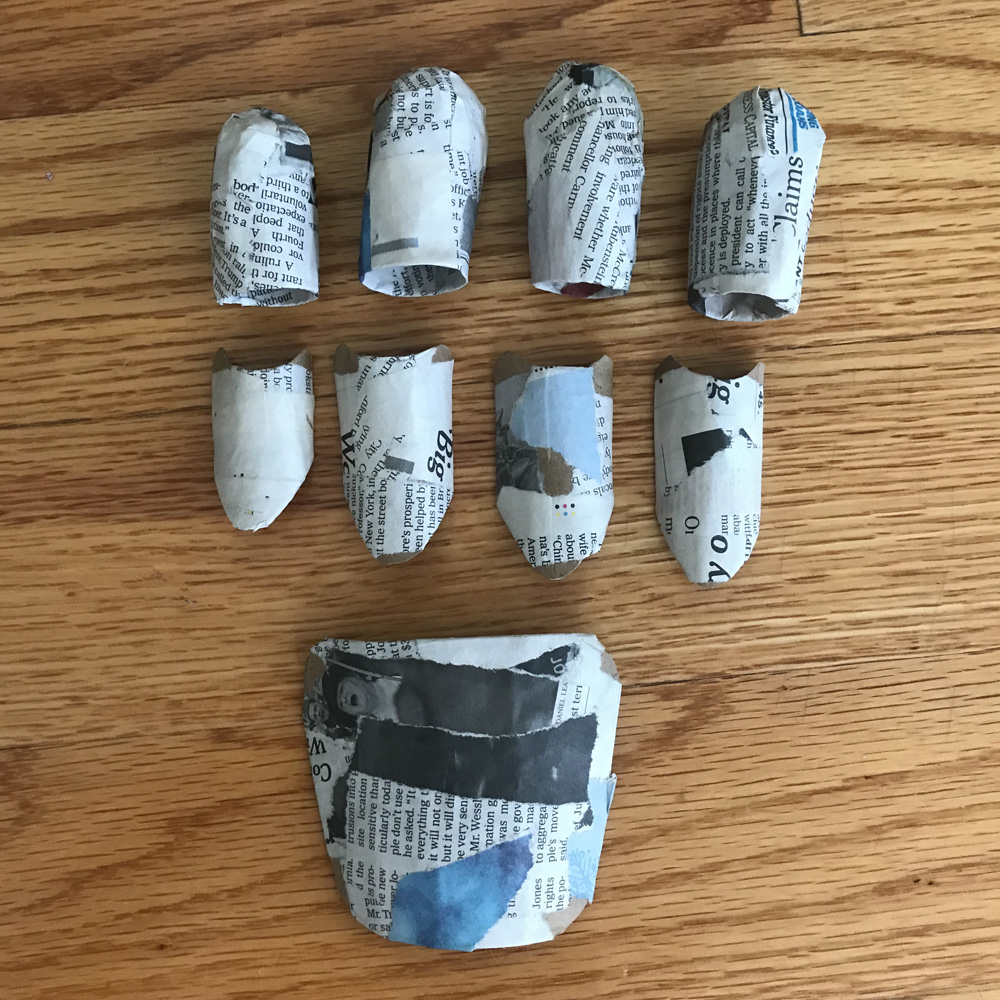
To make the rounded finger tips, I took the gloved paper maché hand and a small piece of aluminum foil, and I covered one of the fingers with the foil. Then I covered the aluminum foil with four layers of paper maché; repeat this for all four fingers. When all this was dry I could easily slide these pieces off of the hand, thanks to the aluminum foil. I then trimmed these pieces with scissors, and reinforced the trimmed edges with one more layer of paper maché.
For the curved parts on the backs of the fingers, I took a piece of scrap pasteboard (from a LaCroix box), rolled it up to give it a permanent curve, and then I covered it in paper maché. When it was dry, I cut the shapes out from that. I reinforced the trimmed edges with one layer of paper maché.
I did the same thing for the wide part across the back of the hand; more pasteboard and paper maché.
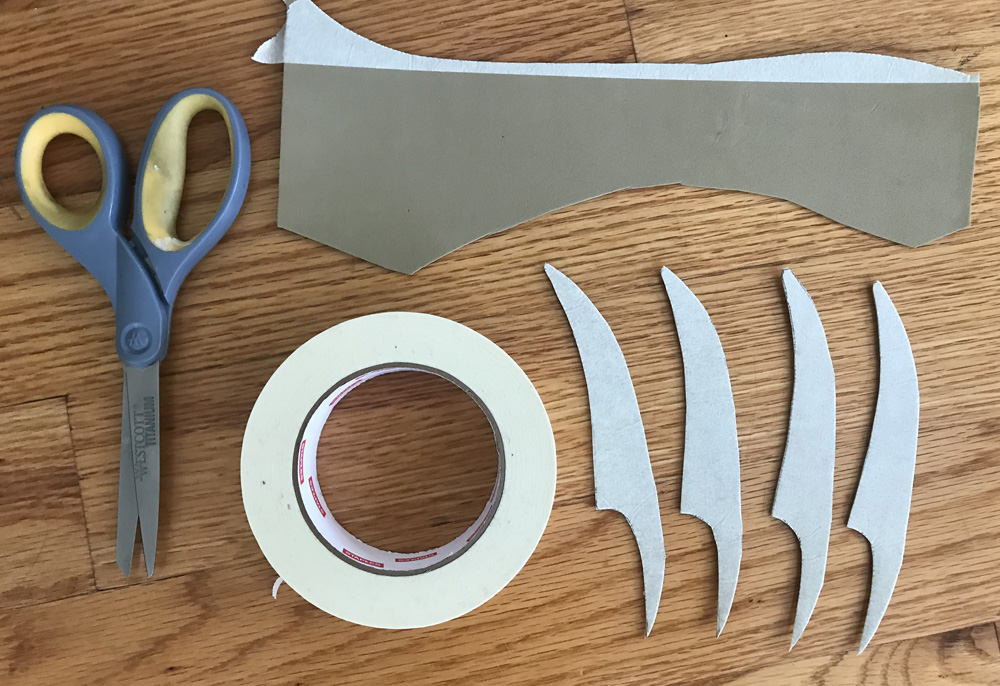
I made the claw/knife shapes out of craft foam, so they’d be nice and soft and won’t be able to accidentally stab anybody. I first put some wide (2″) masking tape on either side of the craft foam. I then drew and cut one knife shape out of pasteboard, and I traced that four times onto the masking tape and foam and cut them all out.
Last thing: I used a 1/4″ hole punch and a 3/8″ hole punch to punch out some little circles of paste board for the rivets or whatever on the back of the glove.

I glued all the fake metal bits onto the glove with a hot glue gun — first the finger tips, then the wide part on the back of the hand, and then the pieces in between. I also hot glued the knives onto the finger tips. The knives looked a little too big once they were in place, so I trimmed them with scissors a bit. I then paper maché’d some tiny strips of paper onto the points where the knives connect to the finger tips to smooth them over a little.
I glued the little circles in place with tiny dots of Tacky Glue.
Painting
I spray painted the whole hand prop again with the same brown spray paint that I used on the glove earlier. The reason I sprayed the glove once before putting the metal bits on is that I wanted to make sure there wouldn’t be any little unpainted spaces around/under the metal bits. This was maybe unnecessary! No big deal.
Time to paint all the metal parts. First, I painted them all with black acrylic paint, being careful not to get any on the glove. Then, I did two layers of metallic colors for each piece.
For the back of the hand and fingers, I used a mixture of black, brown, and a metallic bronze color. I first made a mixture of these that was pretty dark, and did a loose dry-brush effect all over the pieces, covering them almost completely, but with a little of the black base coat showing through. This I made a new mixture that was a little brighter, with less black and brown, and did a lighter dry-brush effect over the pieces again, letting some of the darker bronze color show through. These three steps — black, dark metallic, light metallic — create a really nice dirty metal texture.
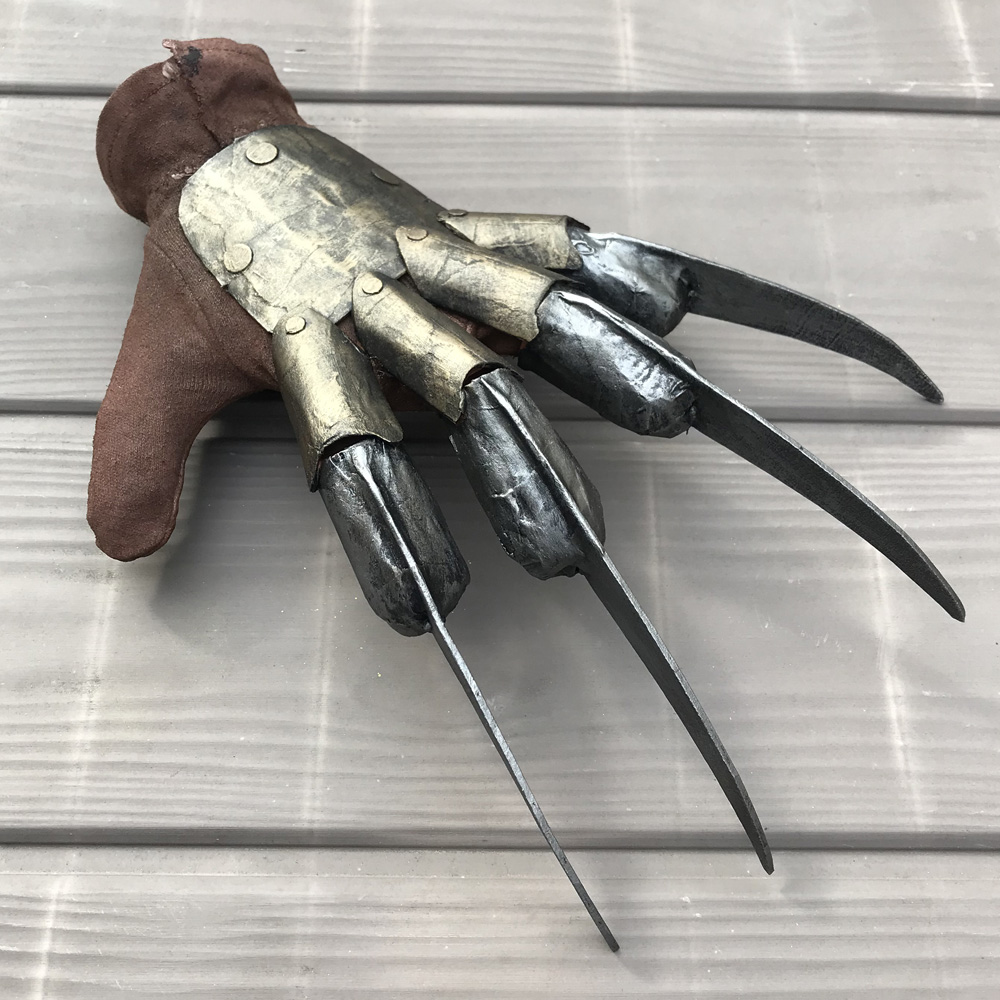
I did the same three steps for the fingertips and claws, but replacing silver paint for the bronze color.
And that’s it for the hand/glove! Next we’ll be turning this into a wearable chest-bursting prop, but that’s a post for another day!
 About Manning Krull
 How to make a 4-foot paper maché alligator
 My violin skull mask, Mardi Gras 2015
 Three-headed paper maché dragon sculpture
Leave a comment