
Posts tagged "sculpture":
Giant robot Halloween decoration
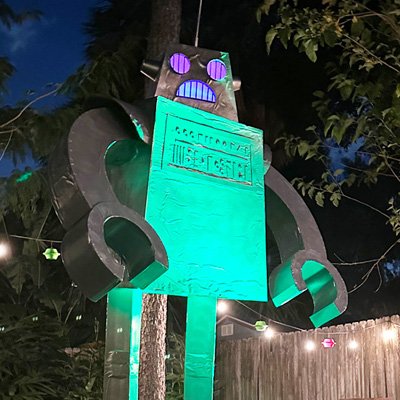
With just a few days left before our 1950s-themed Halloween party I decided to make this simple giant robot statue, loosely based on the robot I drew for our animated party invitation. Read more…
Lifesize paper maché Nosferatu statue!
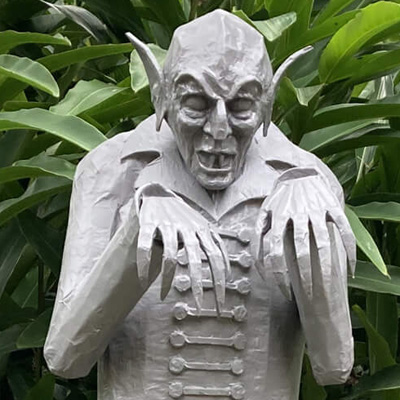
Check this thing out! For Halloween 2022 our party’s theme was the 100th anniversary of the film Nosferatu (well, the U.S. release) and I wanted to try making a lifesize paper maché statue of good ol’ Count Orlok, aka the guy that jabronis like you call Nosferatu.
Cryptique vampire bat standard!
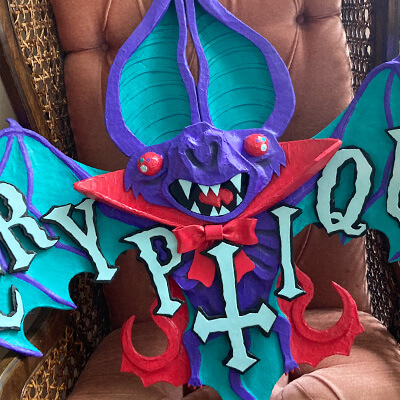
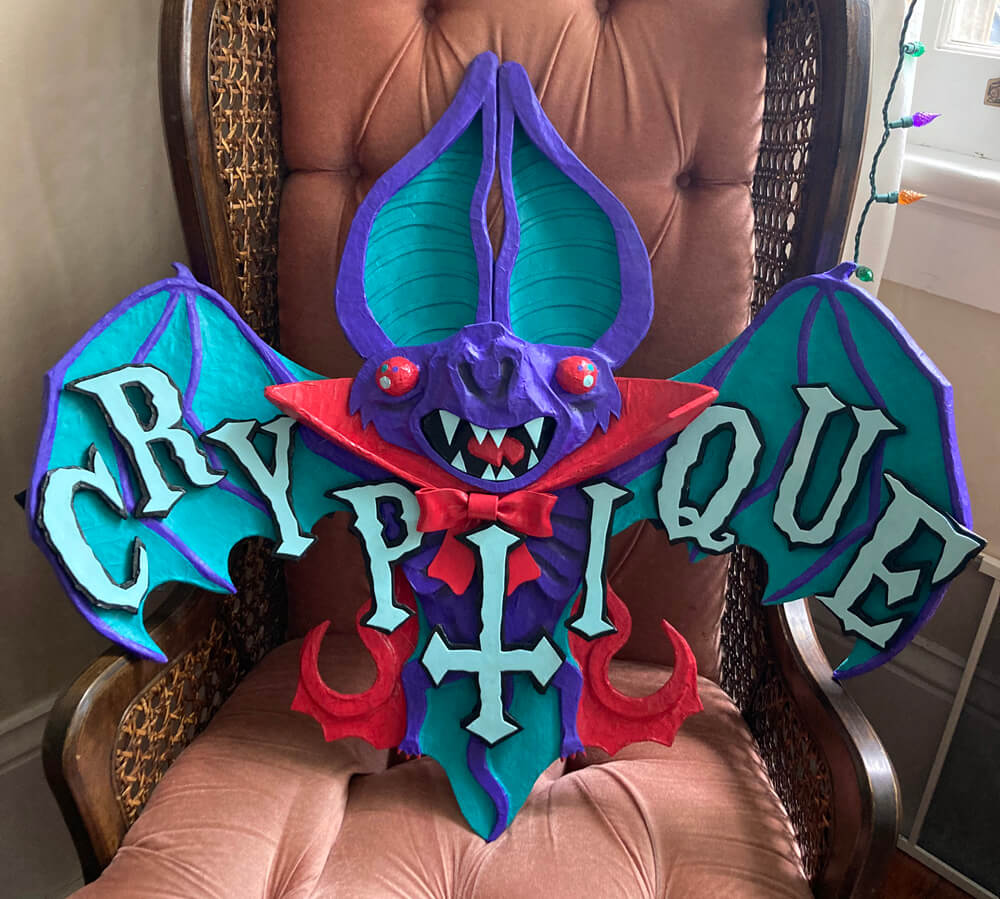
I made this standard for my Mardi Gras krewe, Cryptique; one more fun thing for us to carry on our march. It’s based on this illustration I did; I call this design our bat-de-lis (like fleur-de-lis):
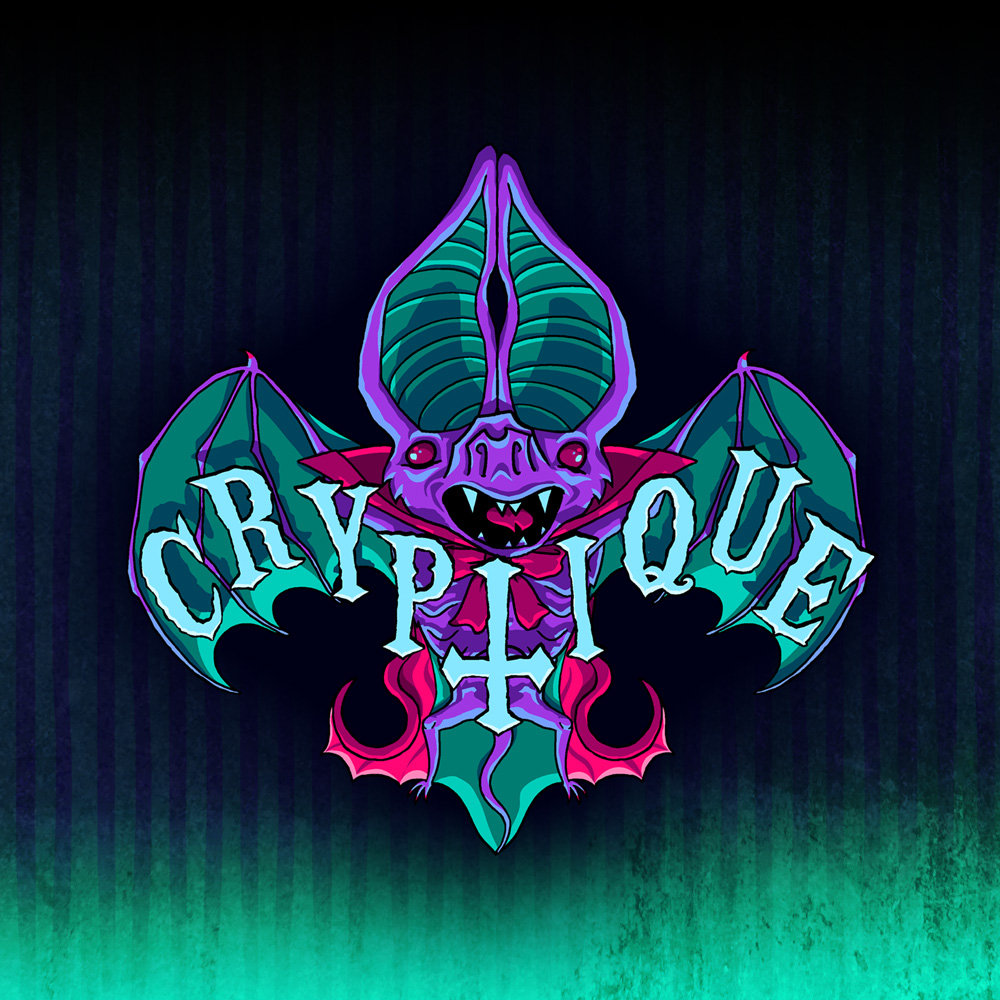
Here’s how I made the standard!
Tiger piñata sculpture!
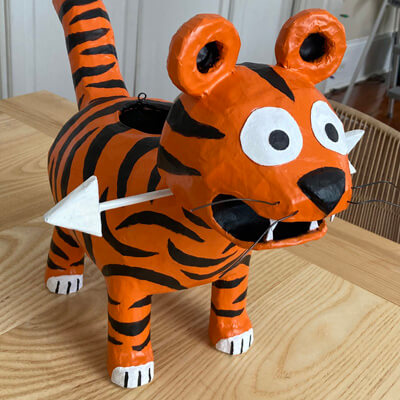
I made this lil’ tiger piñata for one of my favorite people in the world, writer and illustrator Jon Morris; it’s for his Gordo book project, which you can read about in this thread! The tiger sculpture I made isn’t a real piñata, in that it’s not (completely) hollow and it’s not intended to be destroyed. It’s just a prop that’s meant to look like a piñata. Here’s how I made the thing!
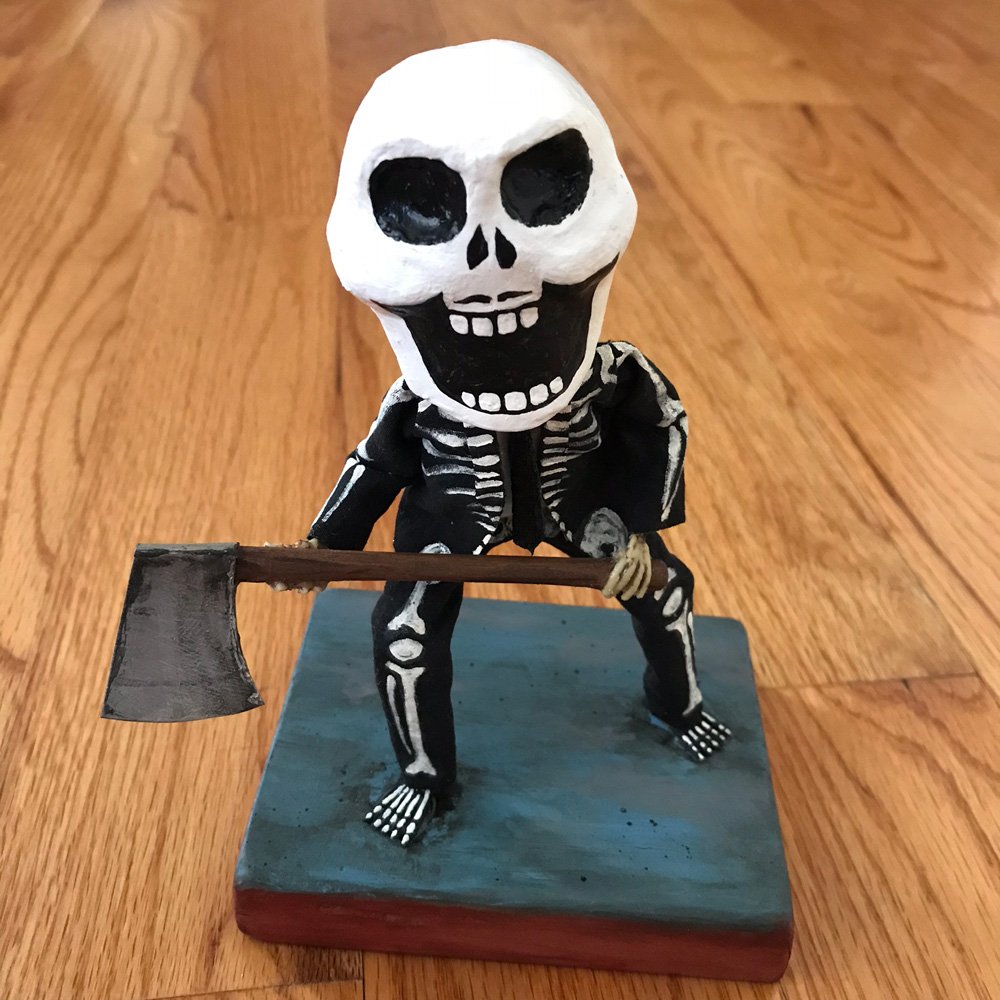
Axe Man sculpture from History Bones!
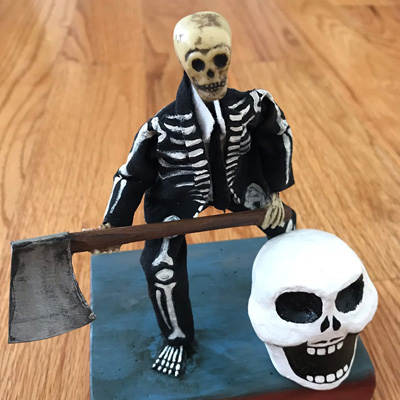
I’m still recovering from Halloween, and this is a thing I’ve been dying to post about for weeks: Lee from History Bones sent me her sculpture of my Axe Man costume! Holy shit! Incredible! The whole thing is not even 7″ tall! The mask comes off! And the likeness underneath is uncanny!
Paper maché gingerbread men!
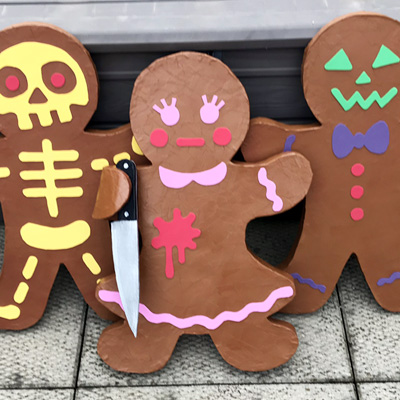
I made these evil paper maché gingerbread men (excuse me, gingerbread people!) for Halloween 2018. They were easy!

I started by designing a basic gingerbread man shape in Photoshop so it would fit on a sheet of 20″ x 30″ foam board (aka foam core). I printed it out as several pages, taped ’em together, and cut the shape out.
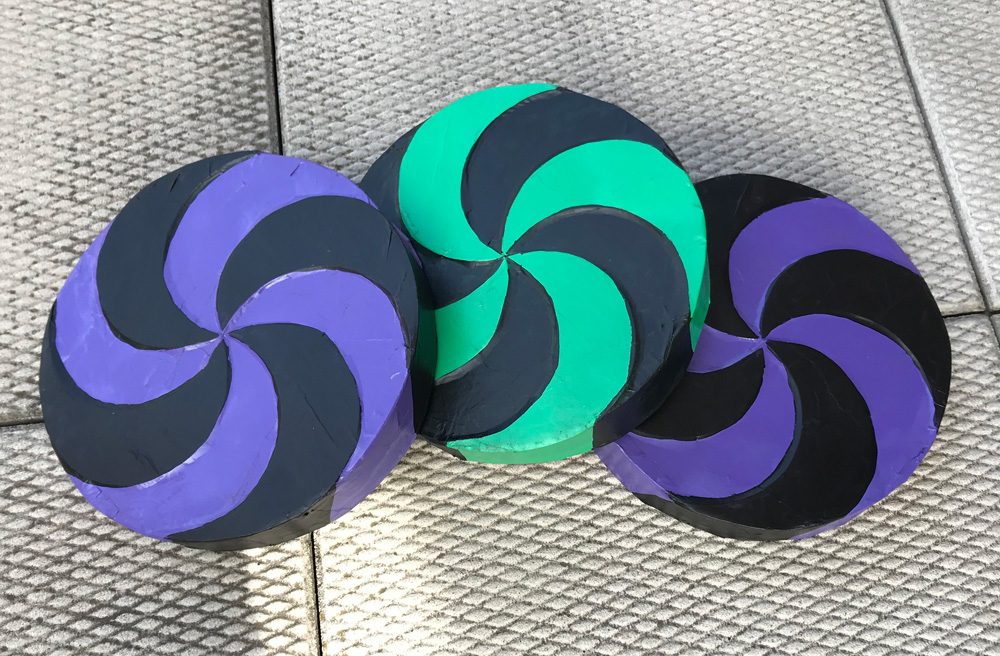
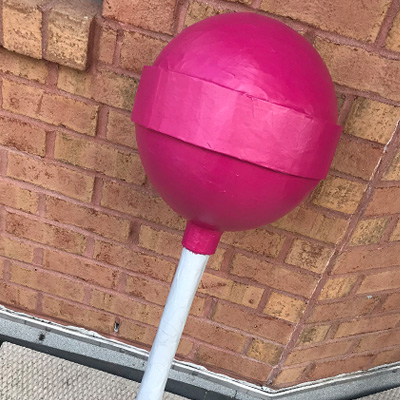
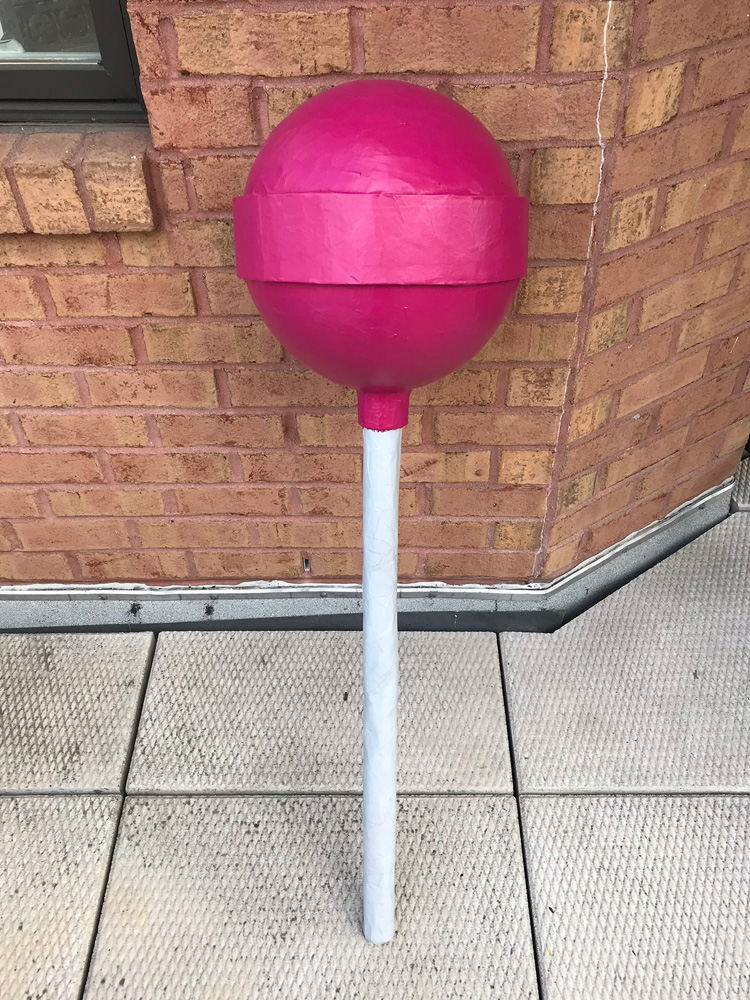
Another giant paper maché lollipop
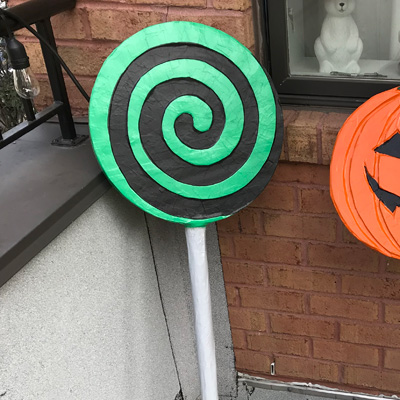
I made this giant paper maché lollipop with a spiral design (the one on the left, duh) as part of a group of giant candy decorations for my gingerbread house Halloween party. Here’s how I did it…
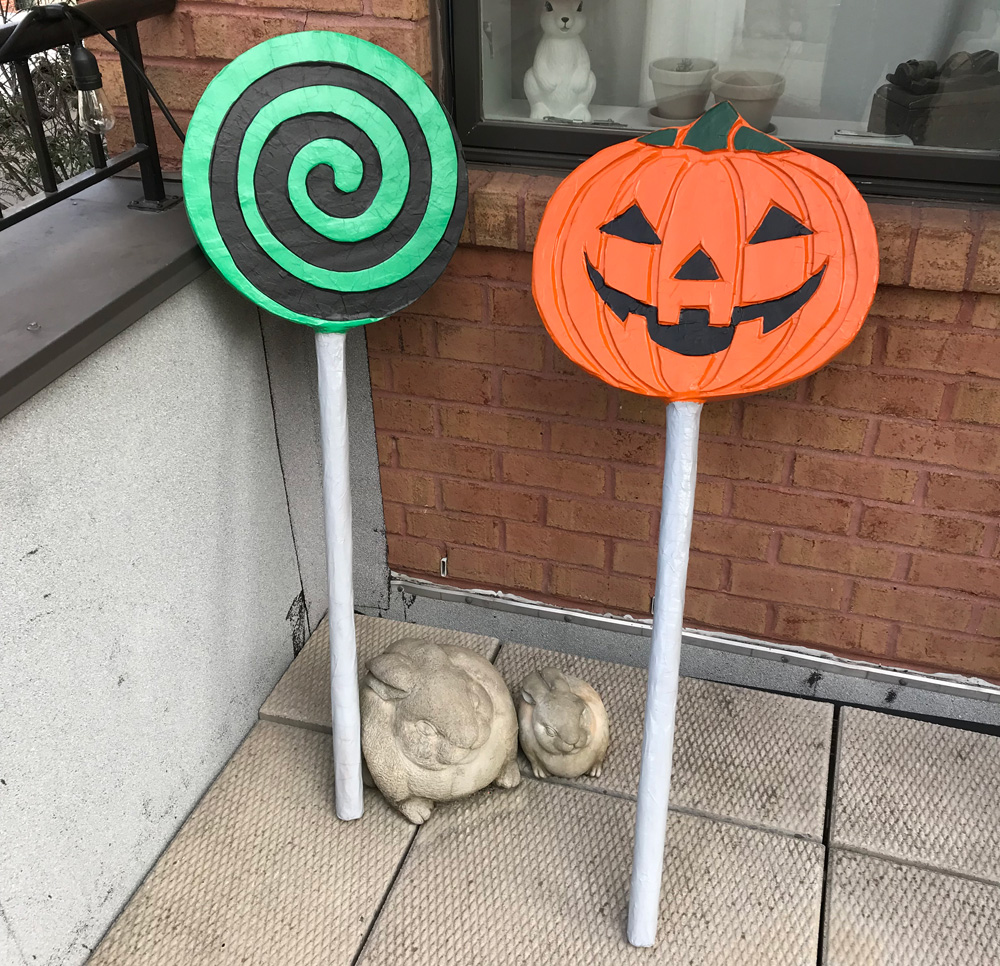
Jack o’ lantern lollipop prop
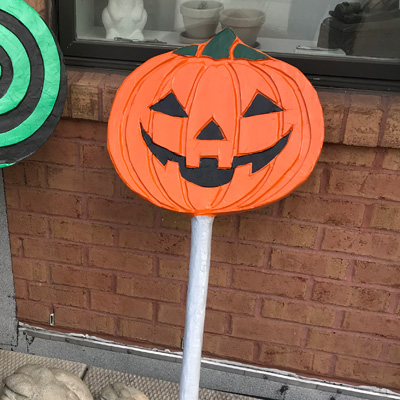
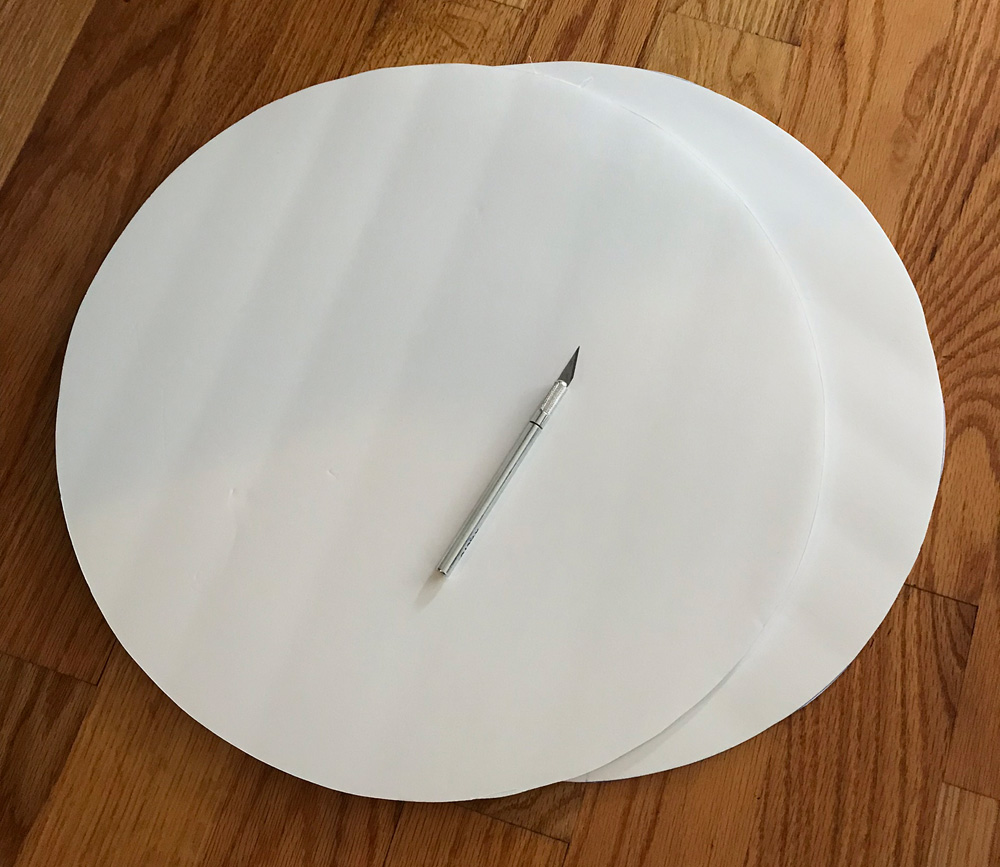
I made this big jack o’ lantern lollipop decoration (the one on the right, duh) for my Halloween party in 2018. It was easy!

I started by drawing the shape of the jack o’ lantern on a piece of foam board and cutting it out with an X-acto knife. I then traced and cut out two more copies, for three total.
Paper maché peppermint decorations for Halloween

I made these oversized paper maché peppermint decorations as part of a set of giant candy props for Halloween 2018. Here’s how I made ’em…
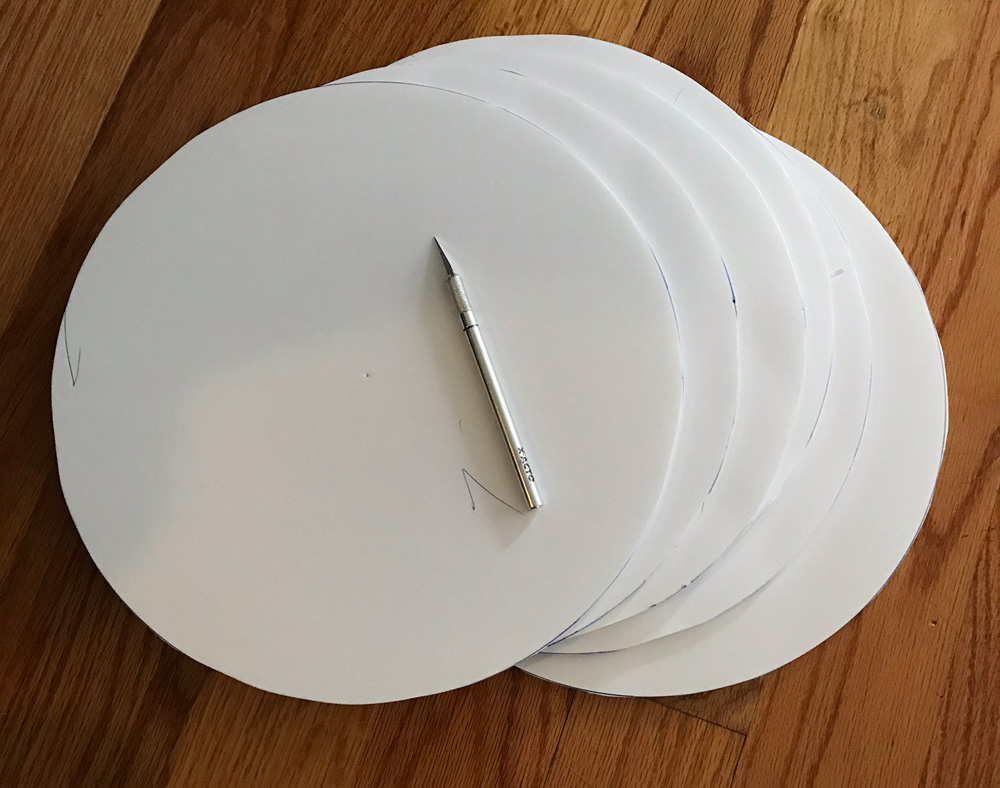
I gathered materials to make three peppermint candies at the same time. I cut out six 12″ circles, two for each candy. See my article about drawing precise circles! I cut the circles out with an X-acto knife.
Making a giant paper maché lollipop
This giant paper maché lollipop was the easiest project in the world! I made this along with a bunch of other types of giant candy for my gingerbread house Halloween party. Here’s how I did it…
I started by searching Amazon for “inflatable ball” and bought the cheapest one I could find in the 15″ – 18″ range; it turned out to be a globe, which is kind of funny because the last time I ordered inflatable balls it was to make two paper maché globes!
Giant scary clown Pez dispenser — part 2
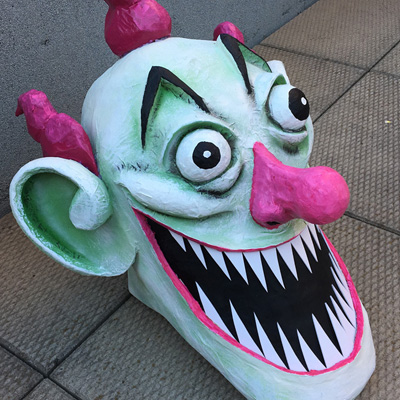
This is part two of my giant scary clown Pez dispenser project! See part one here.
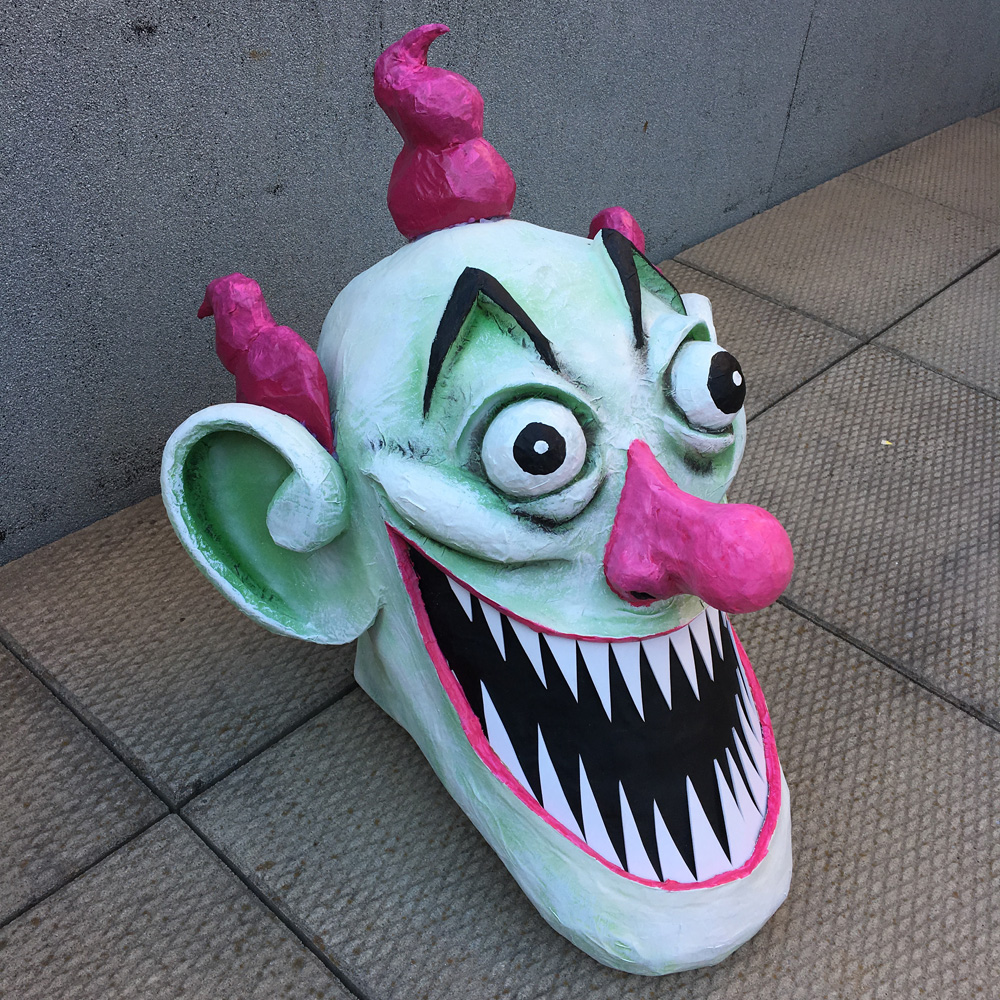
Making the evil clown head
For the spooky clown head, I started by cutting a panel of foam board that’s the same size as the top panel of the Pez dispenser body (see part one), to use as a base for the head, in order to ensure the head will fit nicely on the “neck.” I built the rest of the head onto this panel.
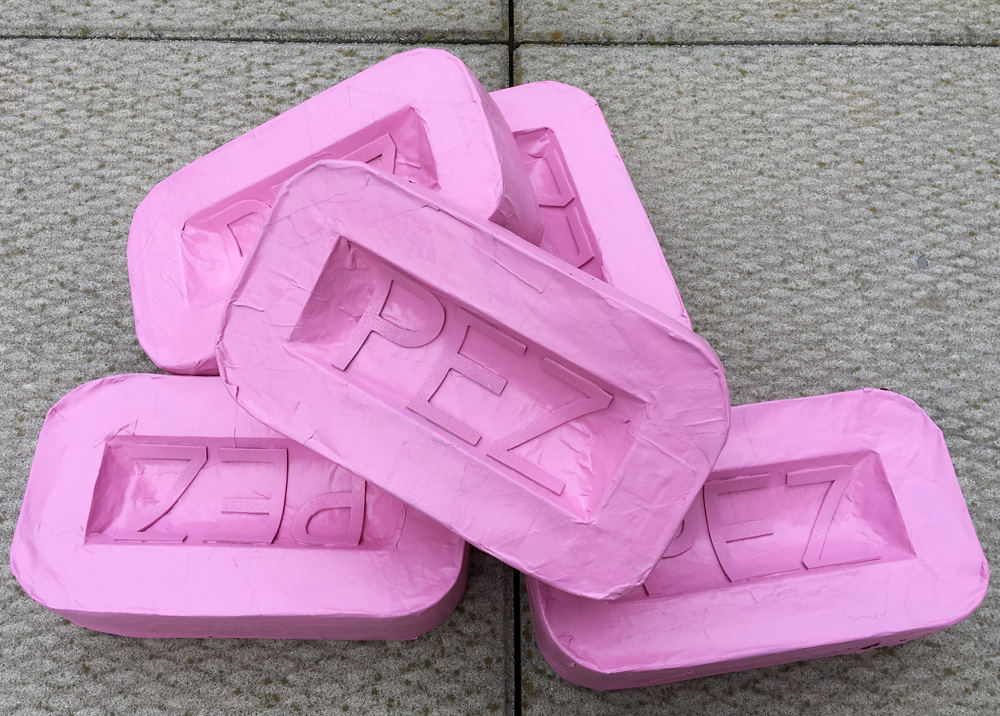
Making giant paper maché Pez candies
I made these giant paper maché Pez candies to go with my scary clown Pez dispenser prop for Halloween 2018! I made half a dozen of them, one to go in the Pez dispenser and the others to have strewn around nearby. They were easy to make! Here’s how I did ’em…
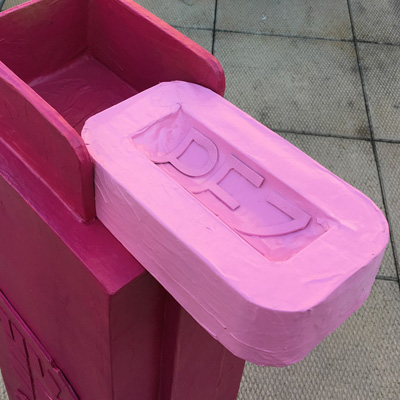
Giant scary clown Pez dispenser!!! — part 1

I made this 6-foot scary-ass clown Pez dispenser for my Halloween party in 2018! The idea came to me when I was working on some other giant candies and realized this would be a pretty easy project that would really add to the overall ambiance.
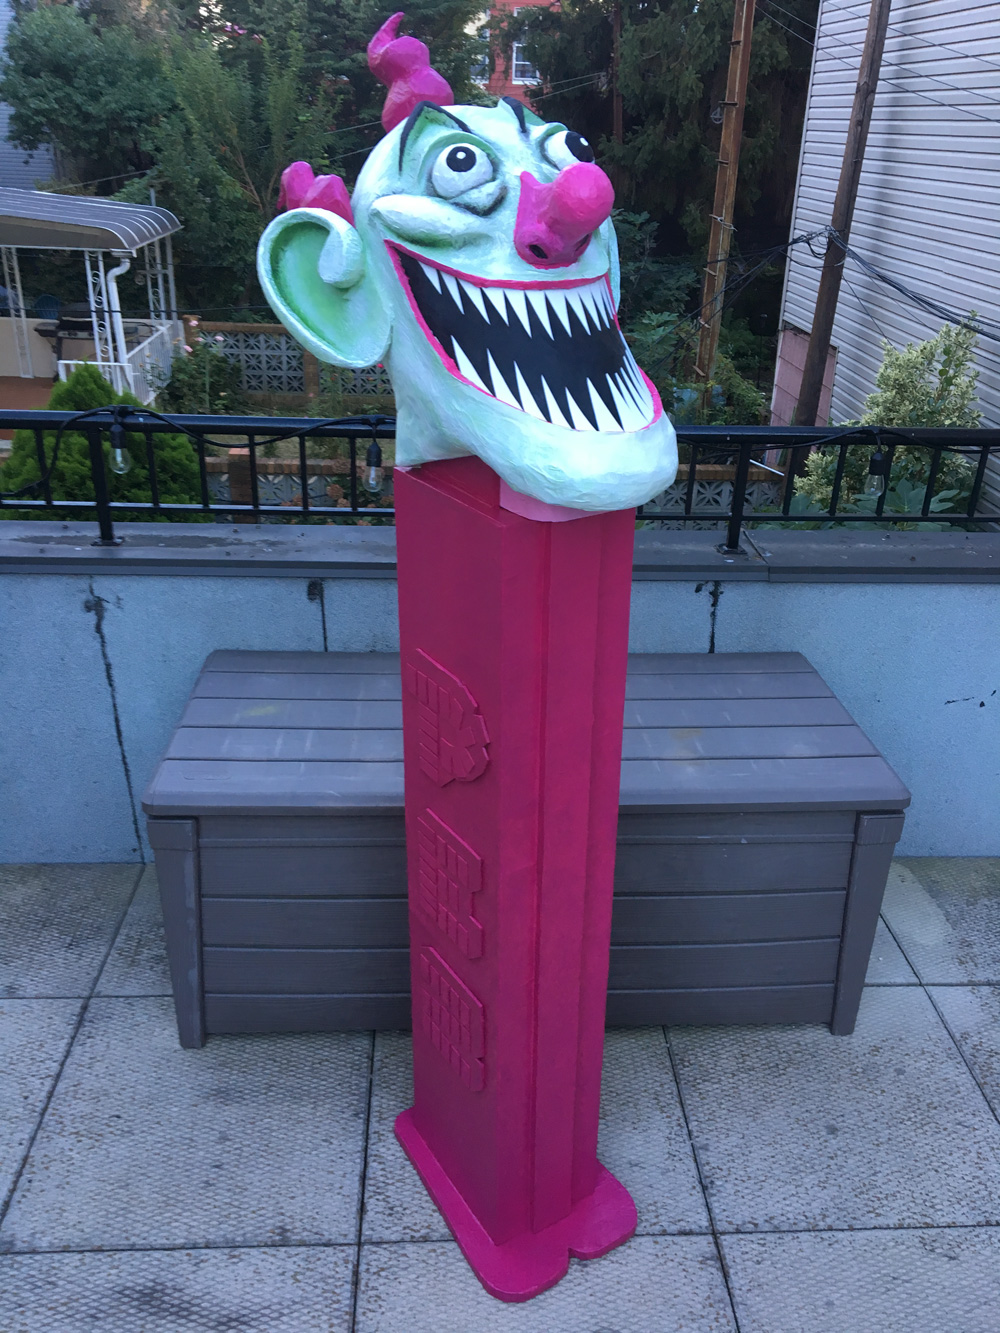
My first step for this project was laying everything out in Photoshop and figuring out the exact measurements for the “body” of the Pez dispenser — the evil clown head I pretty much just freestyled!
Paper maché giant gummi bears!
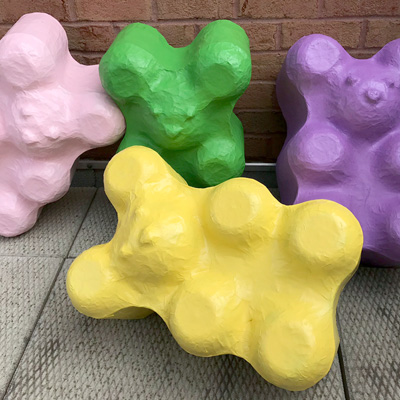
These were so fun! I made these paper maché gummi bears as part of a set of giant candy decorations for my haunted gingerbread house Halloween party!
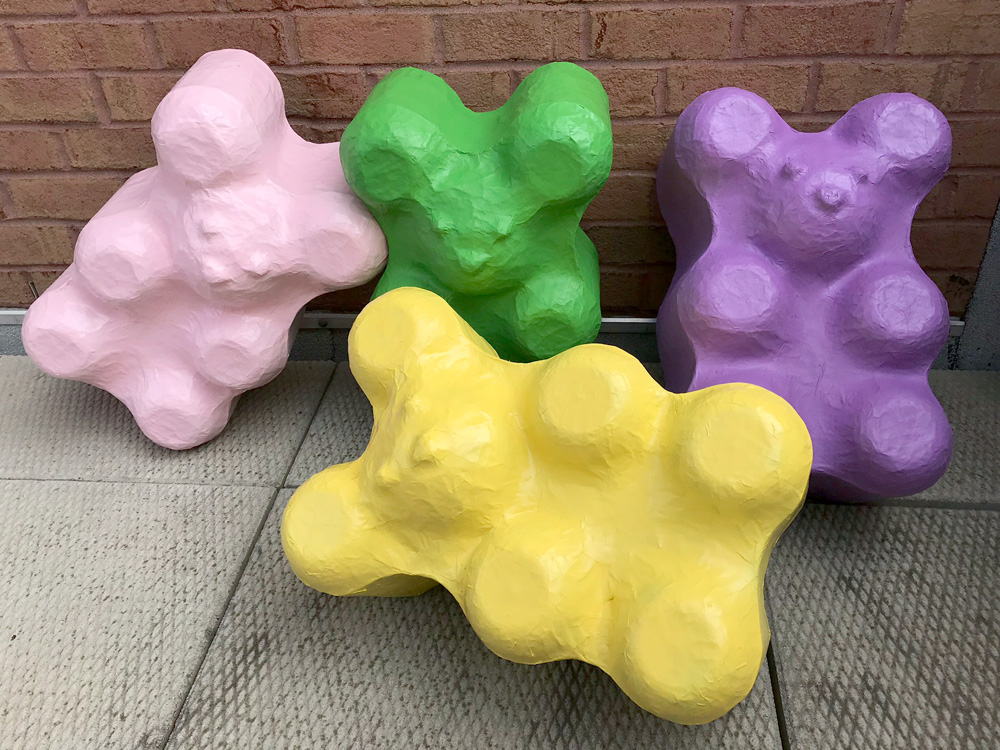
I created a reusable base for the giant gummi bears; I built one nice solid gummi bear shape and then used it to make multiple paper maché copies. (Other projects where I used a reusable base: paper maché baby chicks, twin skull masks)
Paper maché candy corn decorations!
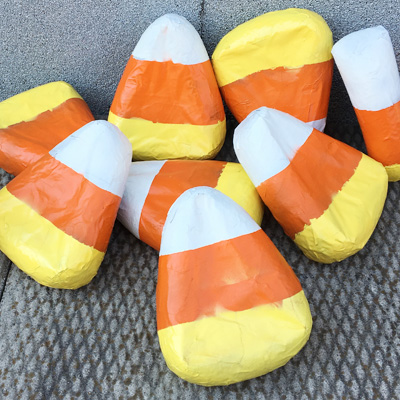
I made these candy corn decorations as part of a set of giant candy decorations for my haunted gingerbread house Halloween party! They were easy and fun! My main goal for the candy corn was to keep them super cheap and super quick, so I could make a ton of them!
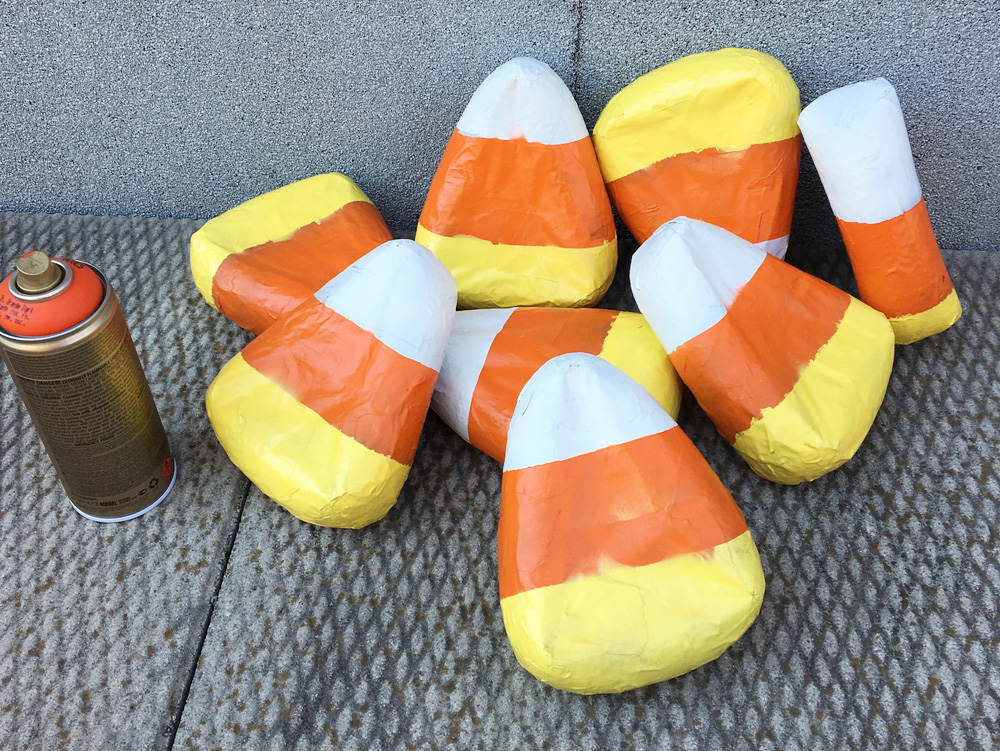
I started with a bunch of foam pipe insulation; I use these things for tons of art projects. I buy them at Home Depot in bags of four 36″ tubes for about three bucks each. Read more…
Giant candy cane decorations!
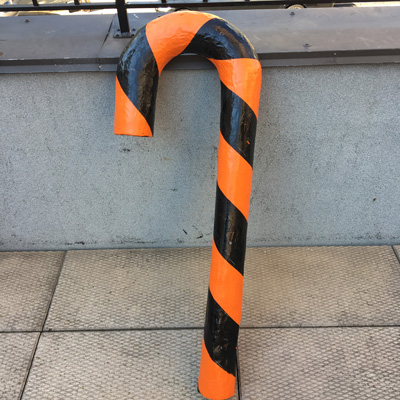
I made these giant 4-foot paper maché candy cane decorations as part of a set of giant candy decorations for my Halloween party — that’s why they’re orange and black rather than red and white! Our theme was basically “haunted gingerbread house” so I made lots of different kinds of giant spooky candies. I did these in Halloween colors but of course you could do them in more traditional colors for Christmas!
Making paper maché shapes with a reusable base
This is my method for creating multiple paper maché copies of a shape using a reusable base. I’ve tried different variations on these steps over the last few years and have settled on this process as my favorite.
Start with a base
First, you wanna build a base for your sculpture, so that you can cover it in paper maché and make copies of it. Read more…
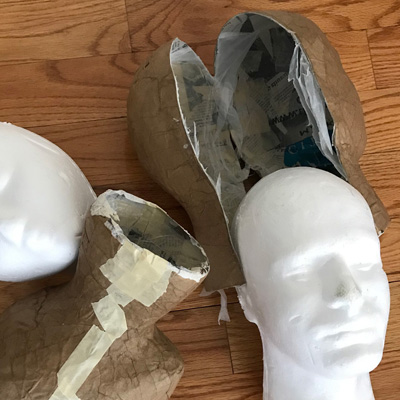
Custom SLY skull trophy sculpture
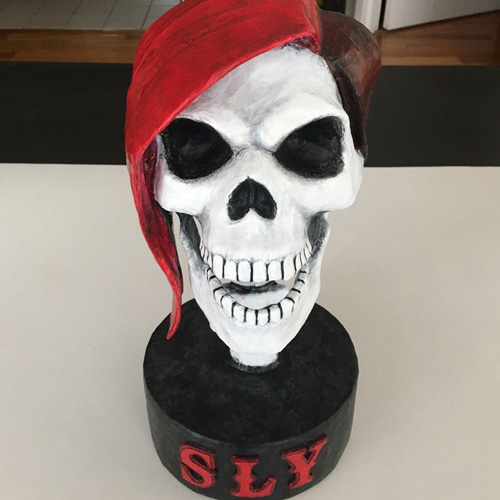
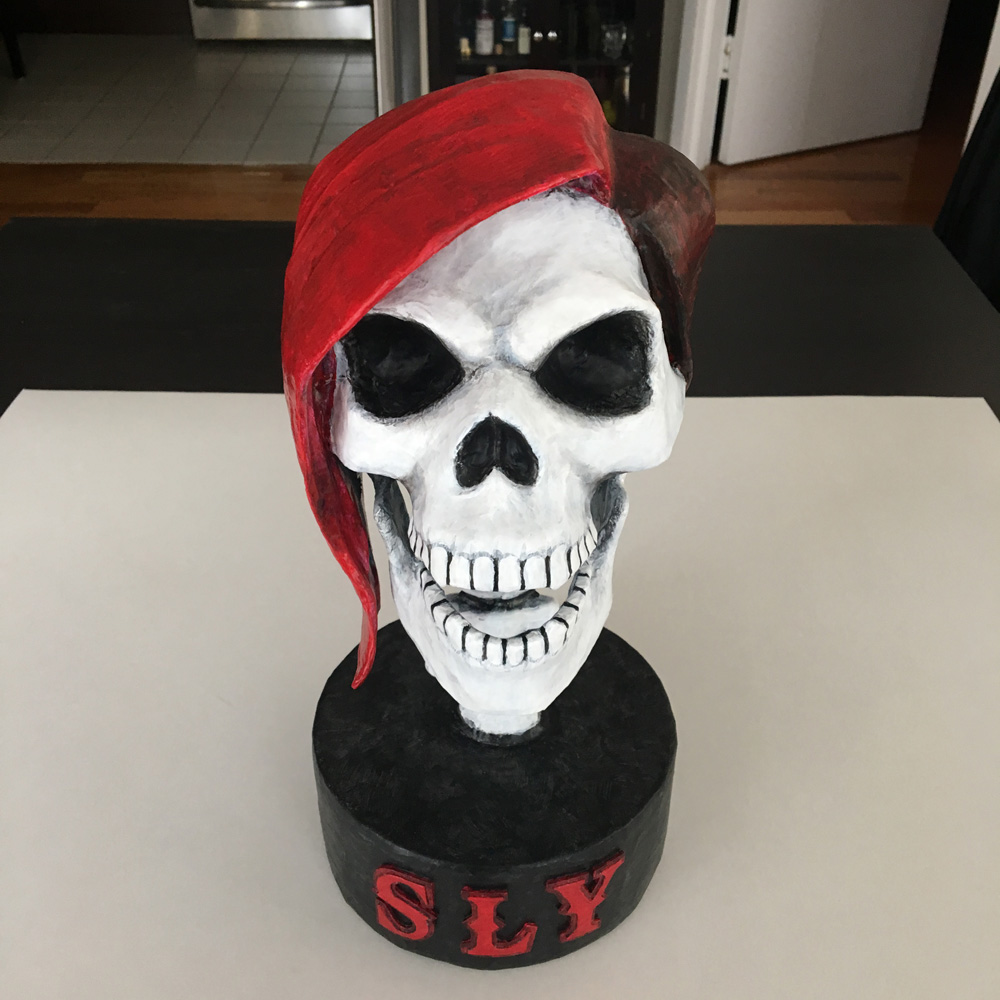
I made this skull sculpture (skullpture??) for my good friend, Twitch superstar Slyvinlisha, aka Sly. I made the sculpture based on two different versions of her logo illustration, pictured below.

I started with a nice plastic skull from one of my Halloween skeleton decorations that broke in half due to a spooky Halloween mishap! I broke the neck off at the base and put the rest of the bones away to use for other Halloween decorating purposes. Read more…
Craft foam sea serpent and other relief shapes
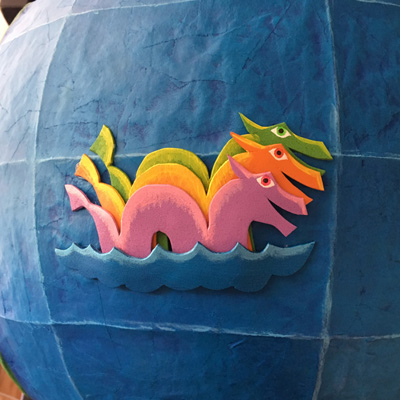
I made these layered craft foam reliefs to use as decorations on the paper maché globes I made recently.
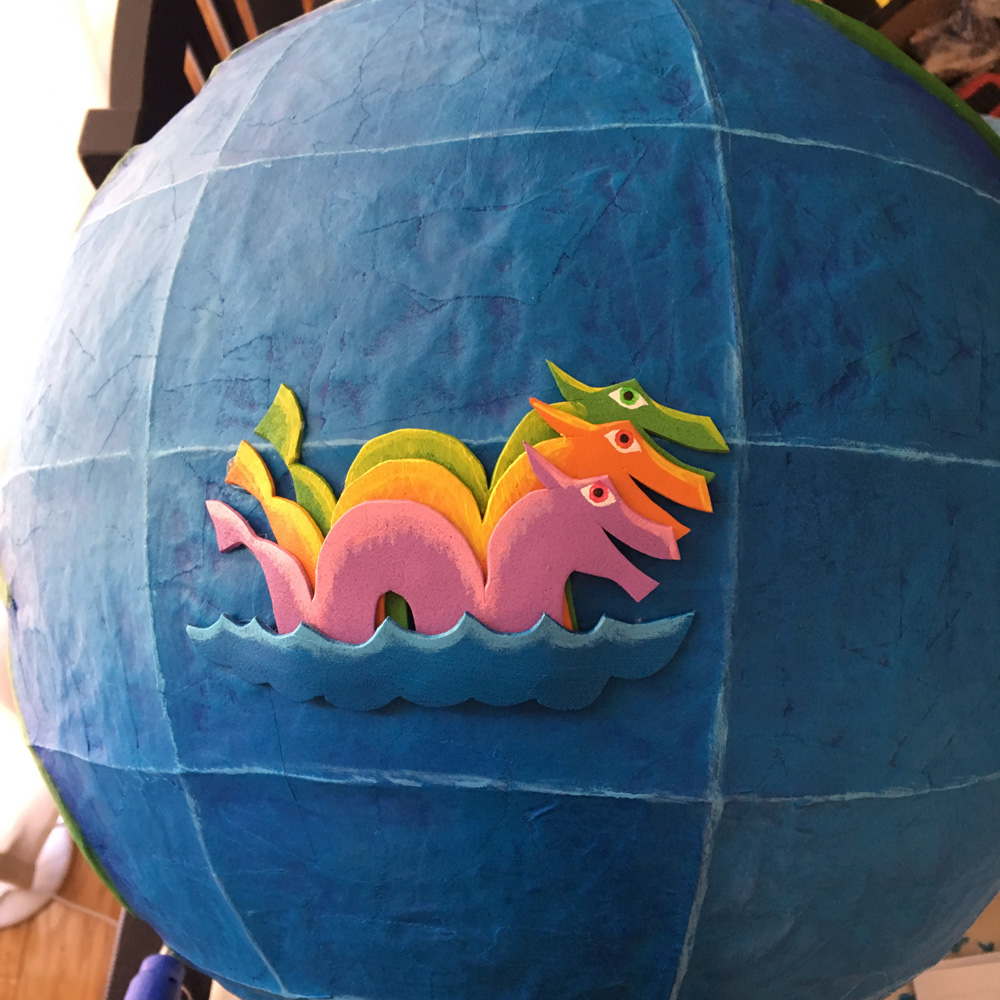
I designed three different relief elements for the globes: Isabella the three-headed sea serpent, a ship based on the Crewe of Columbus logo, and a simple compass shape. I decided to make two copies of each, so each of the two globes could have all three elements.
Paper maché globe decorations
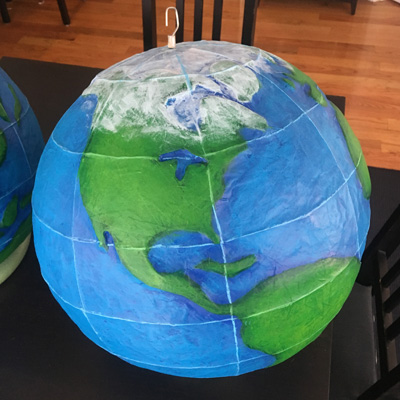
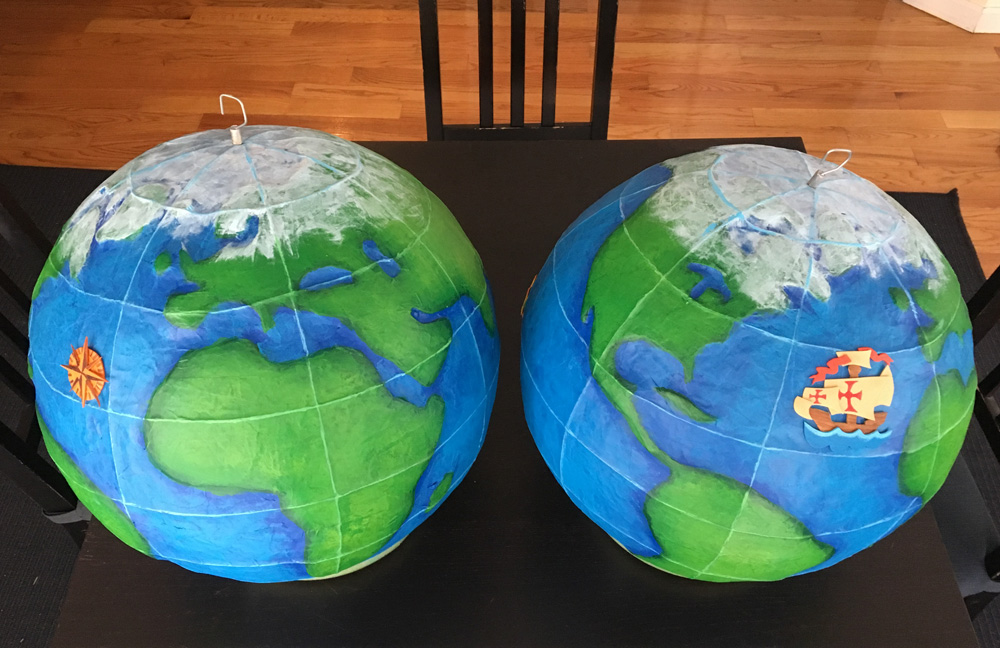
You may remember recently I posted about making a three-headed sea serpent sculpture for the Crewe of Columbus, a Mardi Gras parade group in Mobile, Alabama. The same wonderful client from that project also commissioned this pair of paper maché globes, which go along with the Crewe’s theme of world exploration; they’re going to be hung up as decorations in the same ballroom as Isabella. These were really fun to make!
 About Manning Krull
 How to make a 4-foot paper maché alligator
 My violin skull mask, Mardi Gras 2015
 Three-headed paper maché dragon sculpture