
Giant witch statue! — part 2
Published by Manning on October 29th, 2018
This is part two of two of my giant witch statue for Halloween 2018. See part one here.
Making the witch’s oversized broom
I needed the witch’s broom prop to be much longer than a real broom, so I started with two metal mop handles from the dollar store. I connected these at the ends with a couple layers of shipping tape wrapped around, which felt a little flimsy, and then I rolled a piece of construction paper tightly around the connection point, and then I wrapped some more shipping tape around that. All this made the connection surprisingly sturdy! The broom handle needs to be pretty strong in order to support the weight of basically the top half of the witch statue.

So that’s the interior structure of the broom handle, but I needed to add a wider exterior. I had a funny idea for this: I decided to use two brand-new rolls of brown wrapping paper; the same stuff that I rip up and use for paper maché. I simply slid the long metal rod through the two rolls of wrapping paper (still in their plastic wrapping) and taped them together. The nice thing is that when it’s time to break down the witch statue I can keep these two rolls of paper for future use.
An important step here was planning out the size of the head/bristles of the broom and leaving that much of the metal mop handle exposed, so it can run down inside the length of the bristles and reach the floor. I settled on 18″ for this. It’s important that the metal part reaches all the way to the floor because it has to support the weight of the witch statue. I taped the rolls of paper to the metal rod at the correct position to leave 18″ exposed; I’ll build the broom head onto this part later.
I then wrapped the entire broom handle (except the exposed metal) in some construction paper that I had left over from other projects, and secured it with tape. I added a little ball of newspaper at the top, covered with masking tape, to round out the top of the handle. Then I wrapped the entire handle in one layer of paper maché. Hopefully when I’m breaking down the statue, the construction paper layer inside will easily lift away from the plastic wrapping on the rolls of wrapping paper; fingers crossed! (Post-Halloween update: this totally worked!)
I designed the shape for the broom head/bristles on foam board — I had 18″ of the metal rod to build this onto, so I designed a knot shape at the top that’s 3″ tall, and the bristles area at 15″ tall.

For the big part of the broom head/bristles, I measured and cut out eight flat panels to fit around the handle. I used various leftover scraps of foam board for this, hence the scribbling on some of them. (I also numbered them, but in hindsight this didn’t serve any purpose; just a habit when I’m making multiple copies of anything.)
I put all these panels together on the broom handle with tons of shipping tape and masking tape. I build shapes like these for the base of a lot of my projects, and they always start out feeling extremely flimsy, but as you add lots of tape to connect the individual pieces the whole structure becomes more much sturdy. For example, when you start out with a shape like this one, the individual panels want to flop back and forth pretty easily, but once you’ve attached each panel to the ones next to it, suddenly none of them can move.
Next, I wrapped lots of rolled up sheets of newspaper around the base, to round out the shape. I attached all of these to the broom base with tape.
I then wrapped this whole broom head shape with strips of bubble wrap to round it out even more; I took a 12″ roll and cut it into four 3″ strips and taped them together end to end. I wrapped the strip around and secured it with tape. With each step, the eight ridges become less defined and the whole shape starts to look fairly round.
I did two quick and lazy layers of paper maché here; I covered the whole shape with tons of wallpaper adhesive and then I wrapped big pieces of newspaper and then paper towels around it. No need to use small pieces and be precise here, ’cause this layer will get covered up by the bristles.
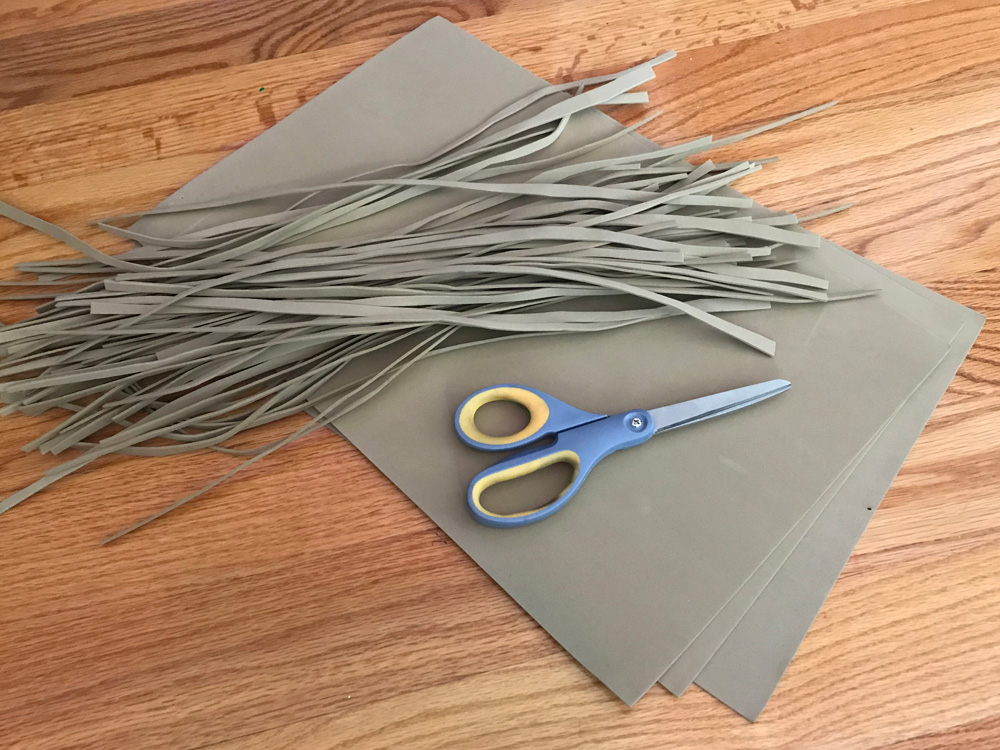
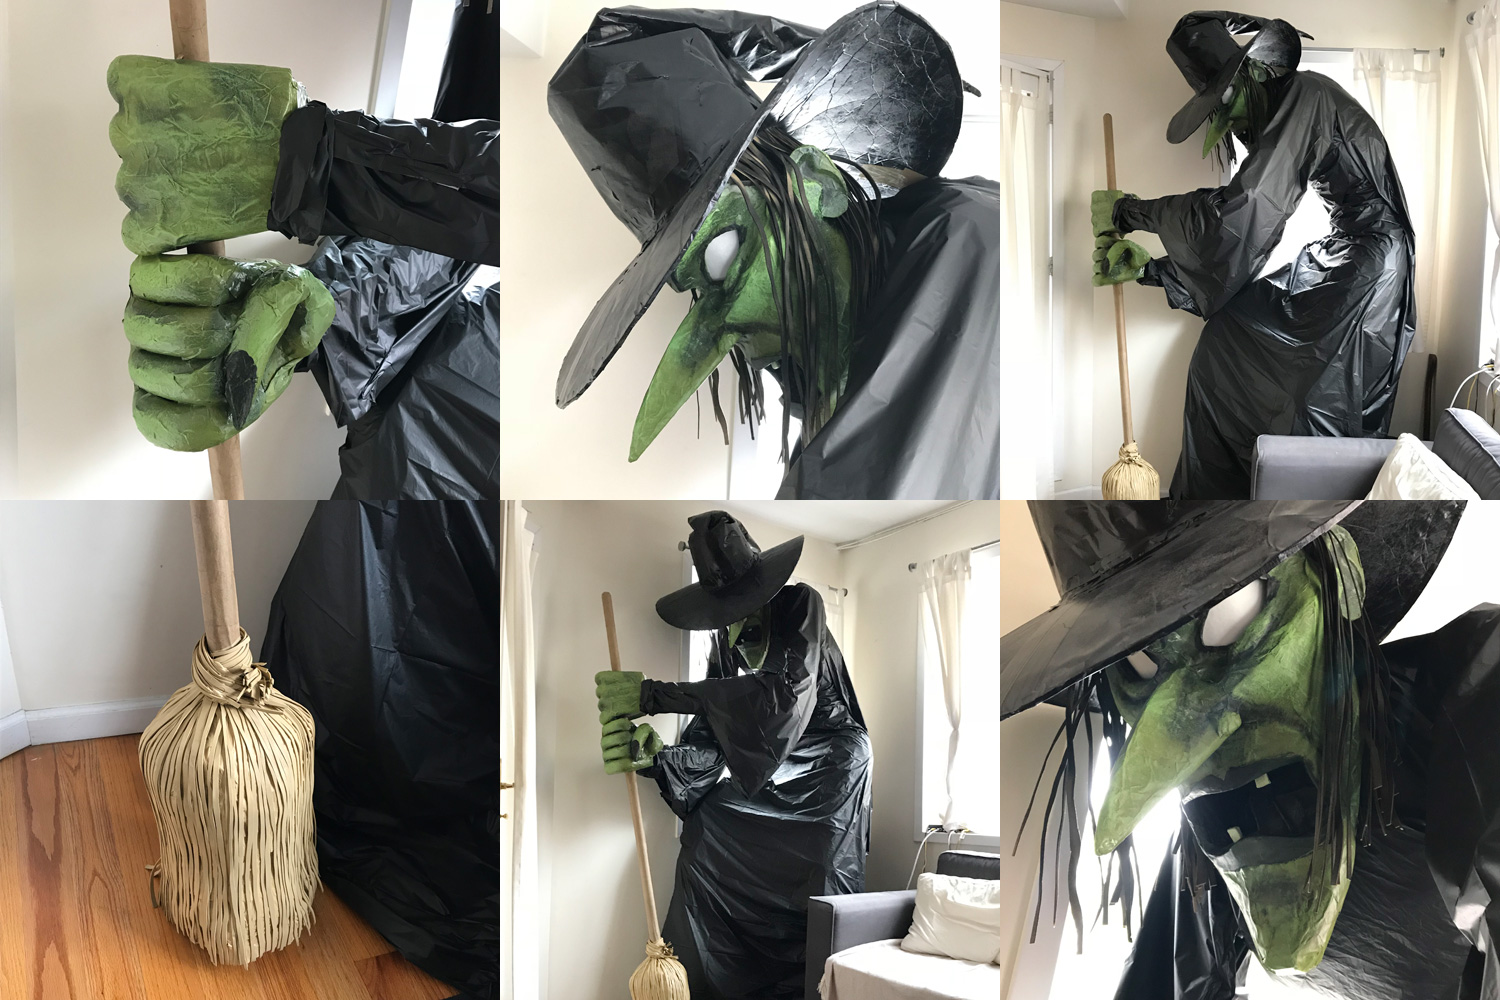
I’d cut out a million thin strips of craft foam ahead of time to make the bristles. I just cut slightly wavy strips and kept them as thin as I could get them, and then I twisted them up by hand a little bit. While the paper maché was still wet on the broom head base, I spread even more wallpaper adhesive over the surface and laid the bristles in place all the way around.
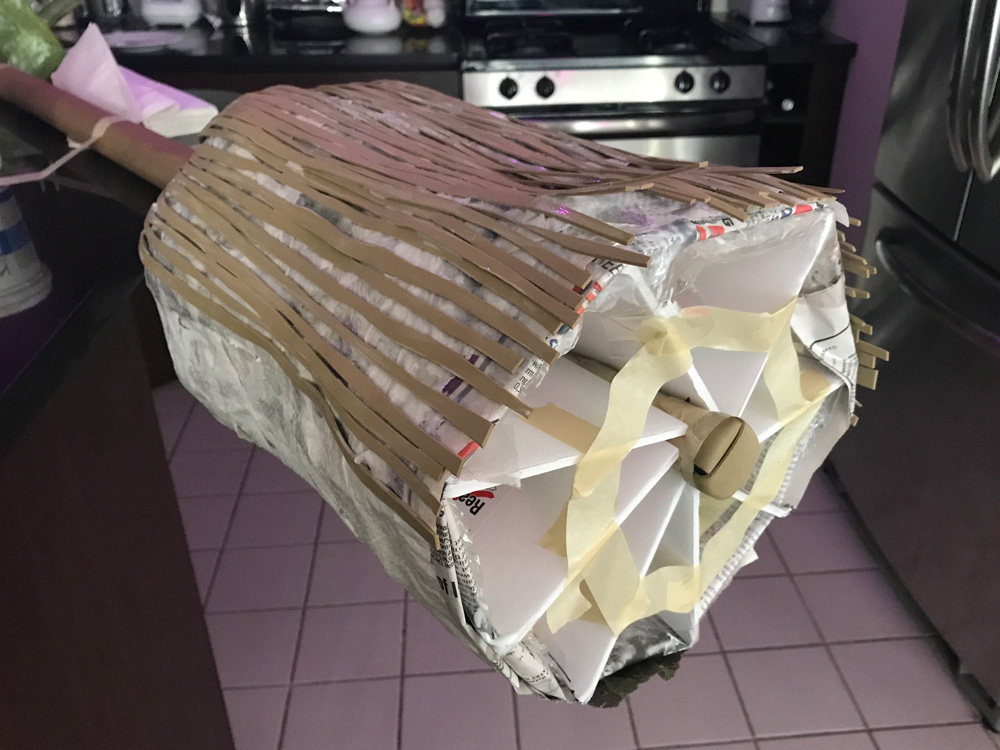
Oh yeah, in the above pic you can see where I covered the bottom end of the metal mop handle with craft foam, to protect my floor — that’s that brown shape in the middle. It’s two strips crossed over each other and taped in place.
I made up a really lazy process for making the big knot above the broom head; I just took a bunch of the leftover craft foam bristles I’d made, twisted them together, wrapped them around the broom handle, and hot-glued them in place.
When all this was done, I protected the broom handle with newspaper and masking tape and spray painted the whole bristles area a light tan/yellow color. I left the handle itself un-painted, since it’s already covered with brown paper. That’s all for the broom!
Assembling everything
Putting all these parts together was a little tricky! Having an assistant for this was key.
I started off by creating loose connections between the limb sections with packing tape. Let’s use an arm as an example; I took a forearm and upper arm and ran a long piece of shipping tape along one side of them, and then another long piece along the other side. This gives me a narrow elbow joint that’s totally flexible and twist-able into any position (for now) but won’t tear.
I did the same thing with the leg sections; I made loose joints out of shipping tape for each piece. Finally I had all four floppy limbs assembled.
At this point I stuck the head onto the neck; it held on by itself with no tape or anything. I then stood the witch torso up on the umbrella base, and had my assistant hold it up so it wouldn’t fall over. The base wanted to slide around on the floor a lot more than I predicted, so I decided to tape it down with tons of shipping tape.
I got nervous here that the witch wasn’t going to be strong enough to stand up on her own, so I did something that turned out to be unnecessary: I tied a piece of string to the curtain rod behind her on one side, wrapped it around her neck, and then tied it to the curtain rod on the other side. Later on while moving the statue and finishing all the connections, I noticed the string was hanging with a little bit of slack; it wasn’t doing any work at all. So I removed it.
Okay, next I loosely taped the legs in place on the hips with lots of shipping tape. I then figured out where I wanted the feet to be positioned on the floor. I taped the front foot to the floor with shipping tape, and then I taped that ankle onto the foot. All of these connections were still loose.
Like I mentioned previously, since the witch’s back faces the corner of the room, it turned out I didn’t need the back foot at all, so I didn’t attach it. In fact, leaving the back foot off allowed me to position the witch a little further back in the corner, so she takes up a little less space in the apartment.
While my assistant was still holding the torso in position, I used tons of shipping tape to firm up all the leg joints. Whew! The statue was finally standing up on its own!
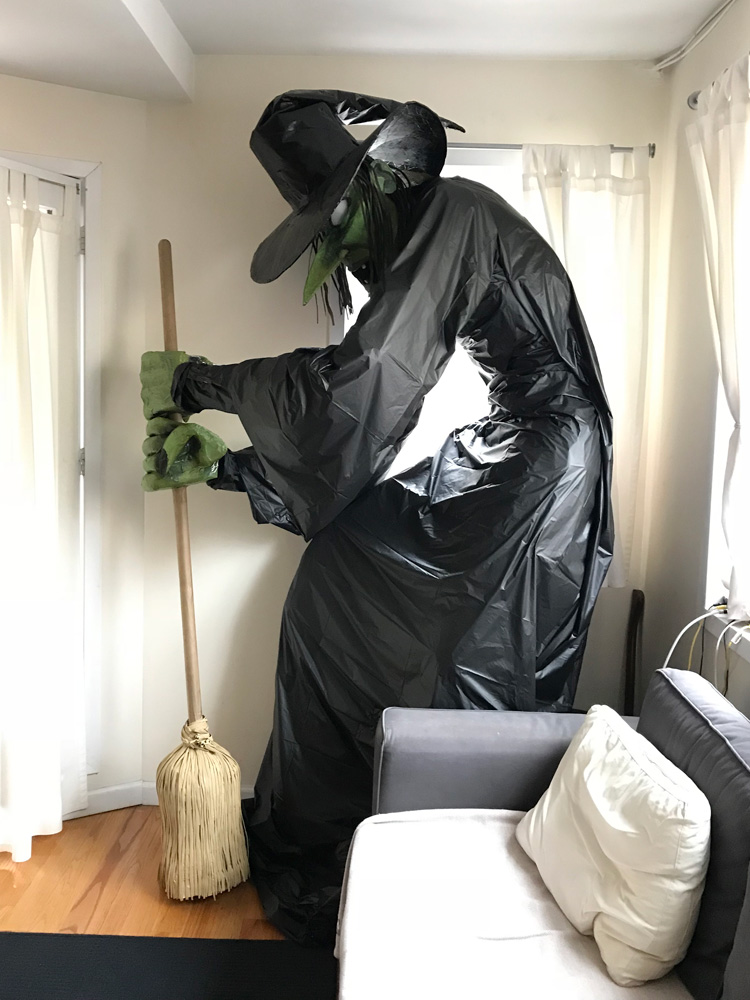
Next, I put the broom handle through the witch’s hands and glued them in place at the right height on the handle with Gorilla Glue. I let that dry, and then my assistant held the broom in place while I taped the arms onto the shoulders and the wrists to the hands, making very loose connections with tape, just like I did for the elbows.
I then did the same steps for solidifying and padding out all the joints with lots of tape.
The whole witch was assembled! The head was hanging downward a little more than I wanted, so I put some shipping tape on the back of the brim of her hat, pulled it backward a few inches, and taped it firmly onto her body. This helped hold the head up a little more.
Dressing the witch

When the body of the statue was fully assembled, my fiancee dressed her with about a dozen black plastic table cloths we got from the dollar store. She secured the table cloths with clear shipping tape, hiding the tape from view as much as possible. She did an amazing job, making some parts tight and some parts loose and really adding a lot of dimension and character to the witch. I probably would’ve just wrapped the whole thing tightly and then draped some more around her waist to make the skirt.
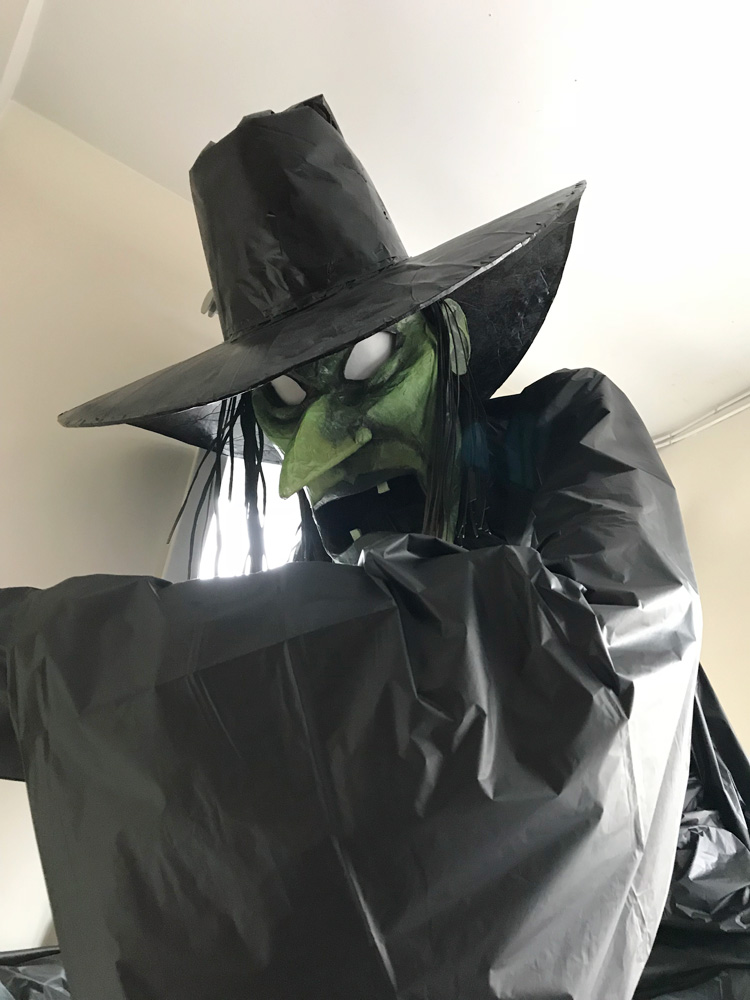
The witch stood up on her own, and didn’t sag or break or fall, for the full week we left her up.
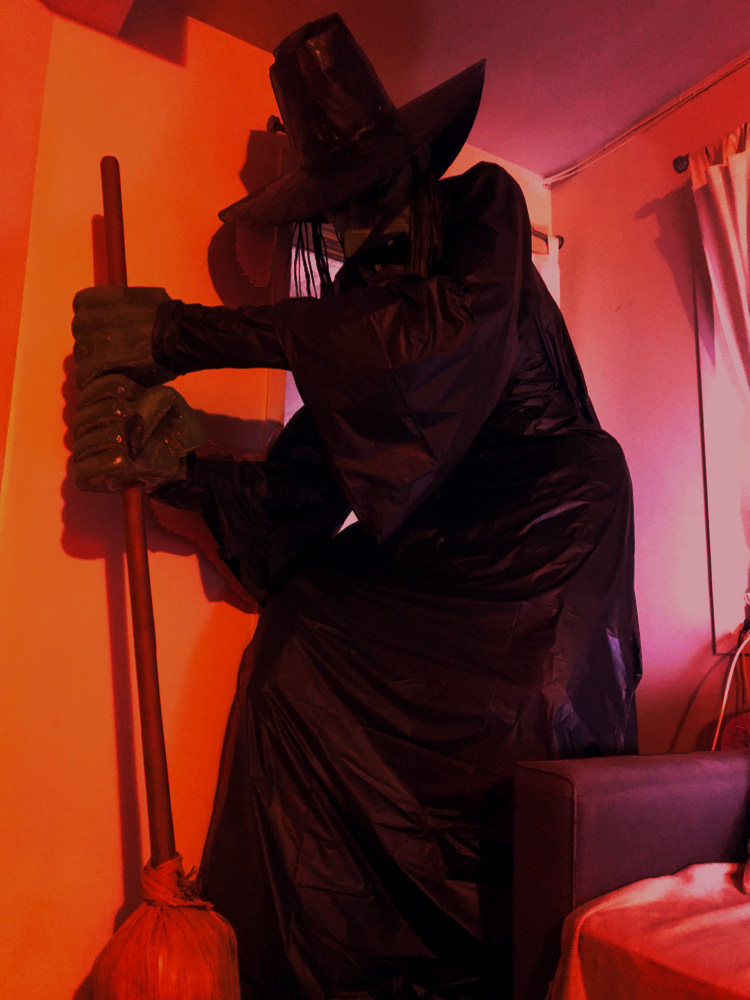
Here’s what the witch looked like in the orange-y lighting of the Halloween party:
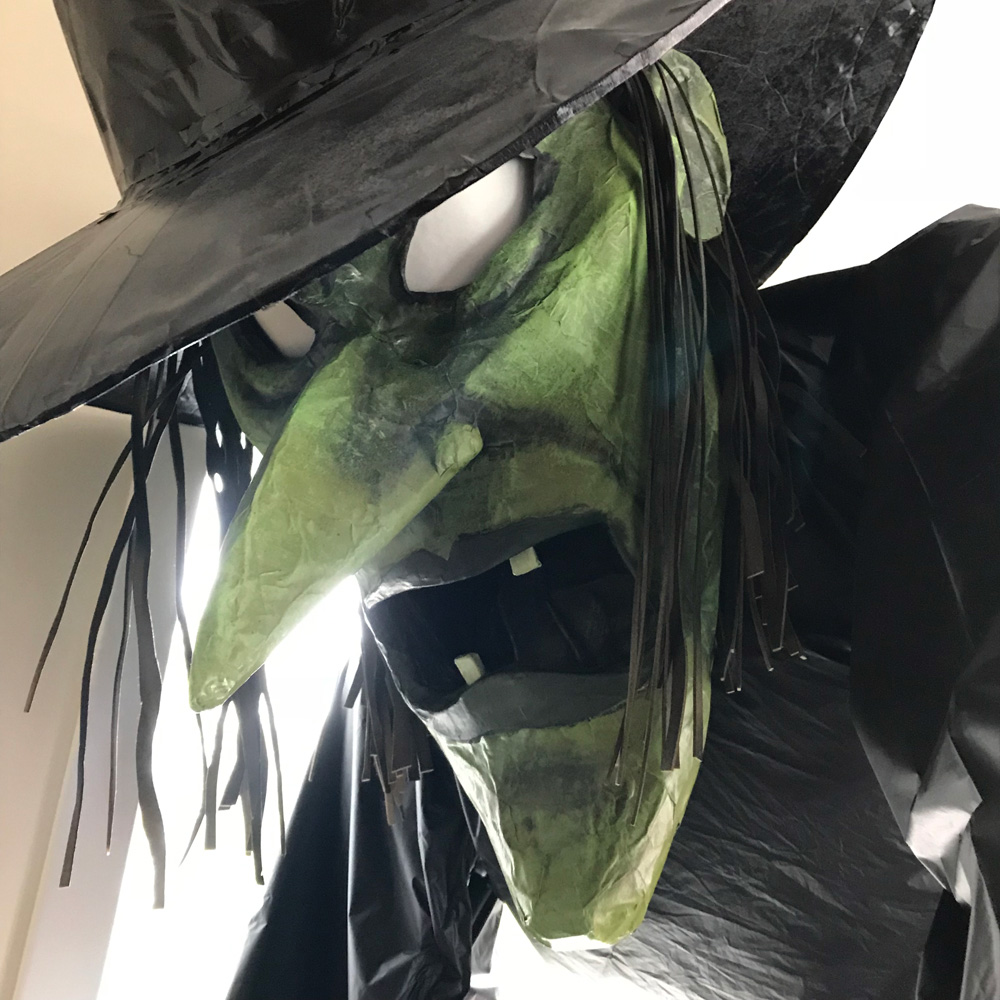
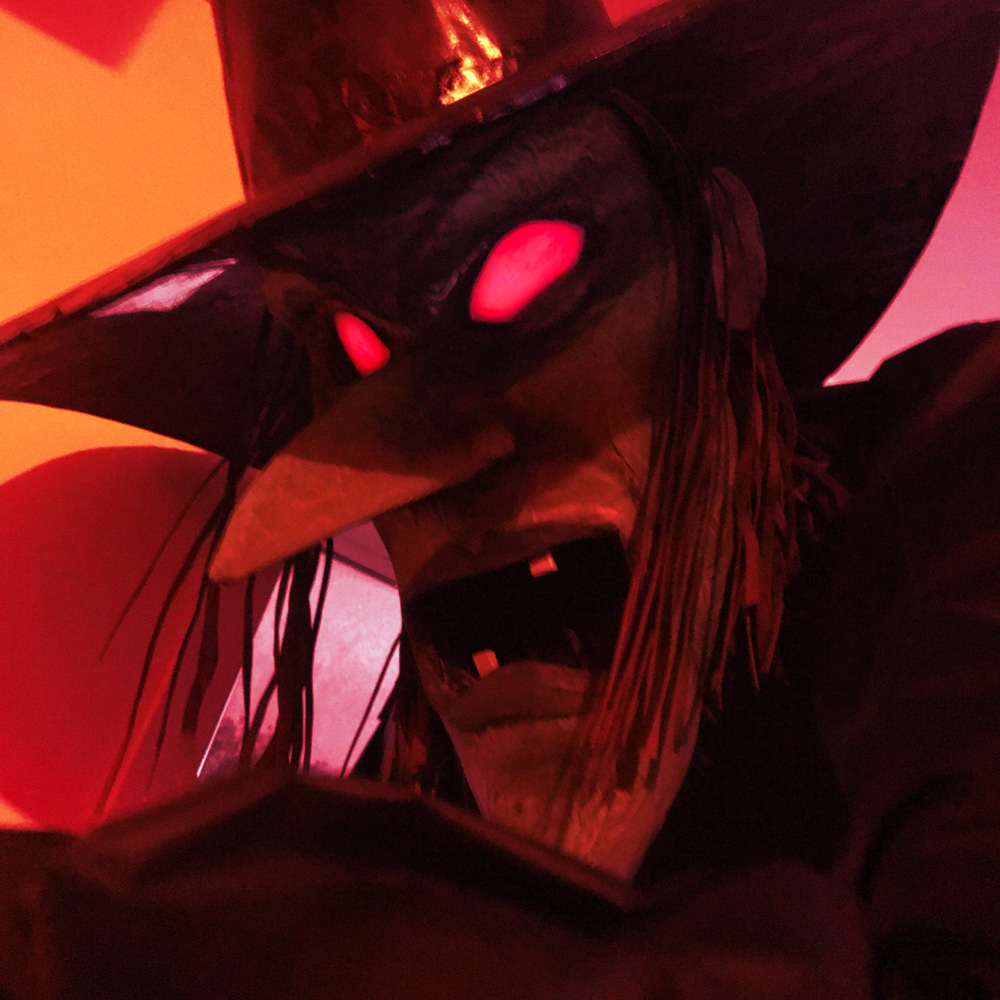
And here’s a closeup of her light-up eyes:
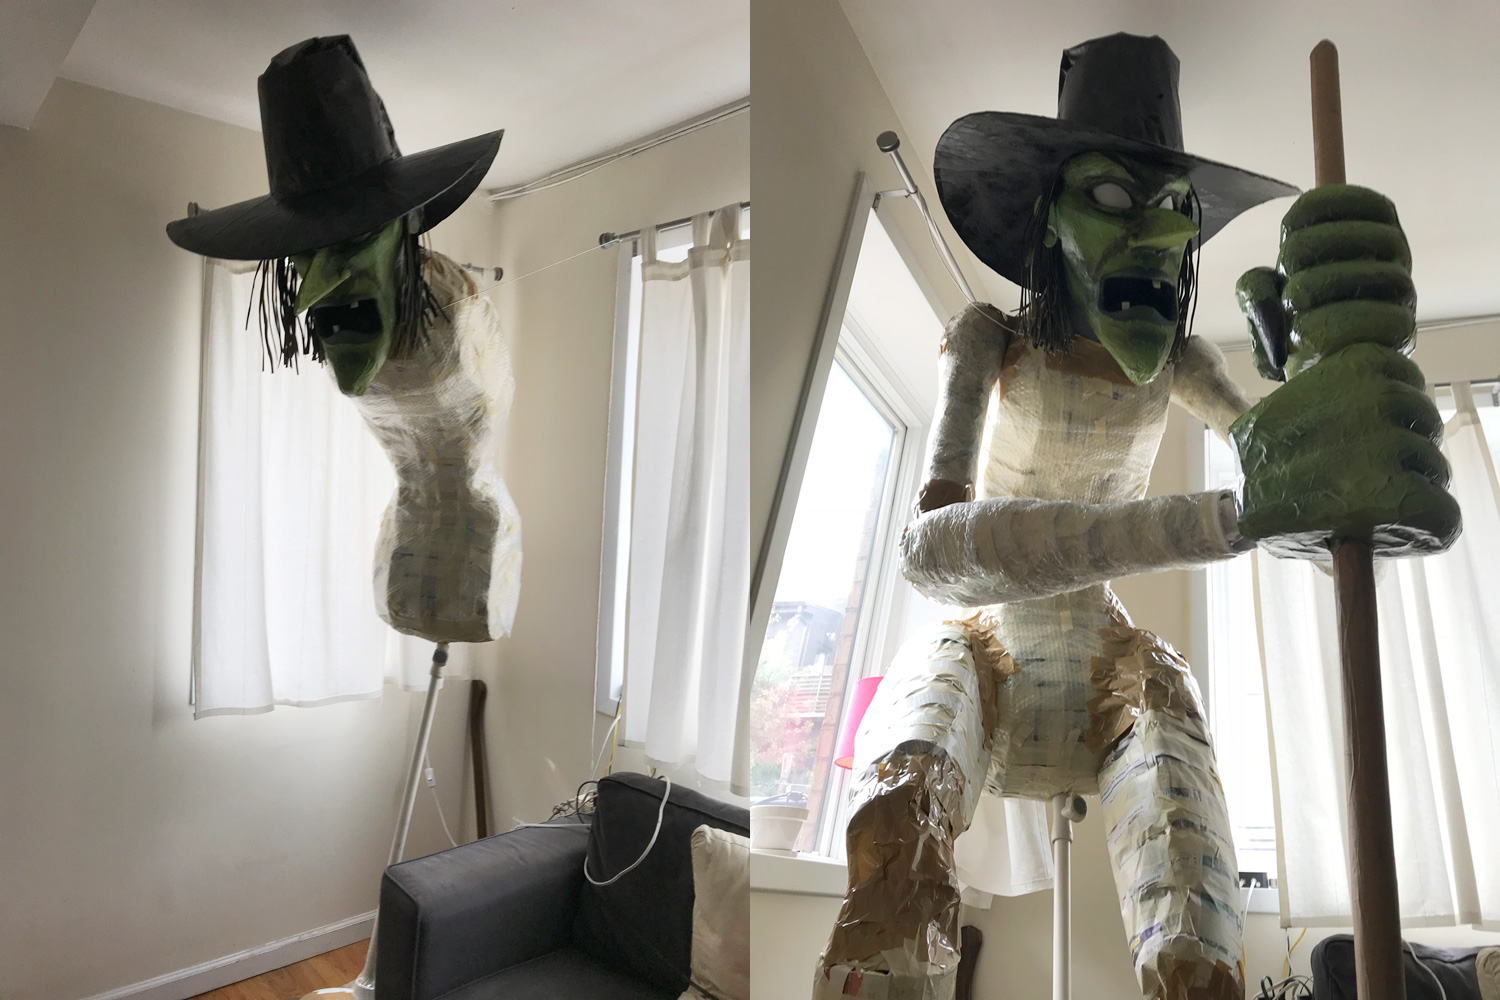
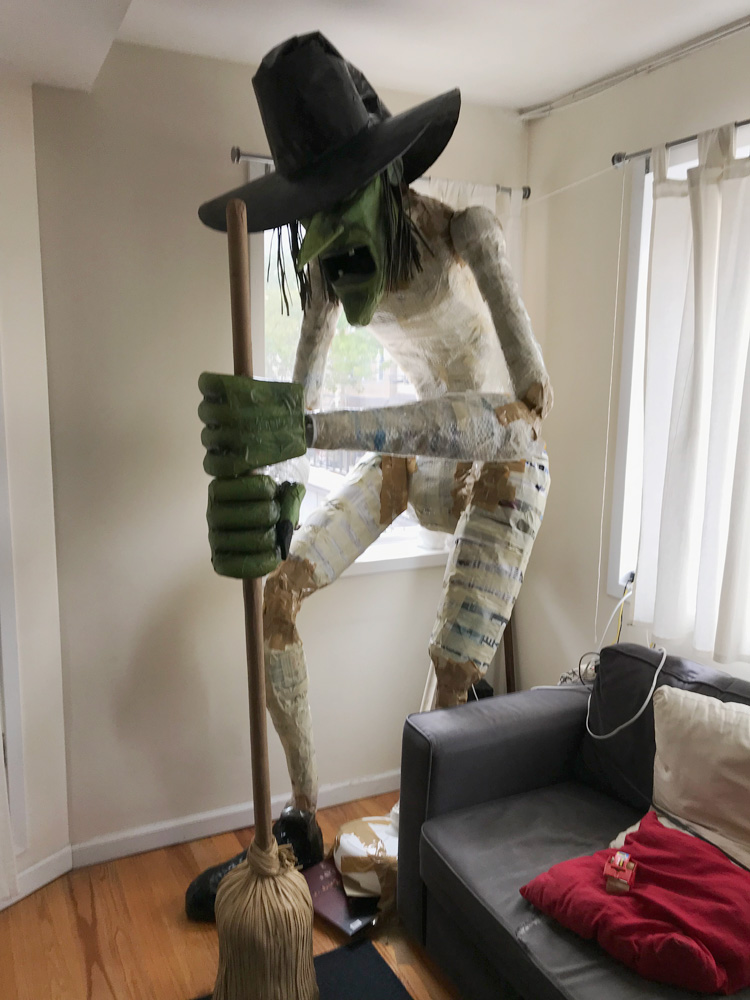
I took all the daytime pics above on the morning after our Halloween party; here’s a very hungover human being for scale:
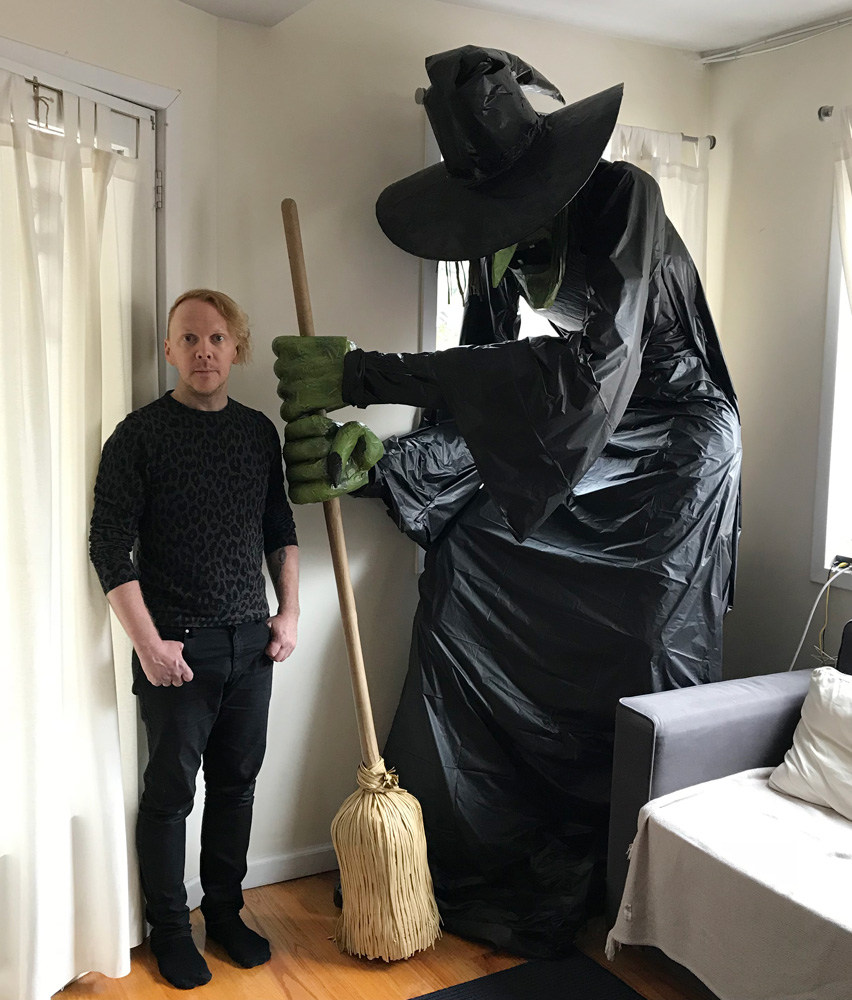
Whew! This was an enormous project! Both physically and in terms of time and effort. I’m really pleased with how it came out! I’m already looking forward to next year’s projects…
Post-Halloween update
In building all the parts for the witch, I decided we should wait until just a day or two before the party before actually assembling her and standing her up — I was afraid the statue would sag and warp and begin to fall apart under its own weight if we left it up for longer than that. So we put her together the day before the party. However, we left her standing there for more than a week longer, and she didn’t move or sag at all! She remained exactly the same the whole time. I really thought we’d see her head hang lower by by day, her arms and legs begin to sag and hang loose, etc. So this was a good lesson for next time — the foam board is rigid enough to hold its shape and the shipping tape we use to connect everything is strong enough to not stretch. Those are my main two materials for so many of my projects but this was the biggest test I’d ever put them to, and they performed beautifully.
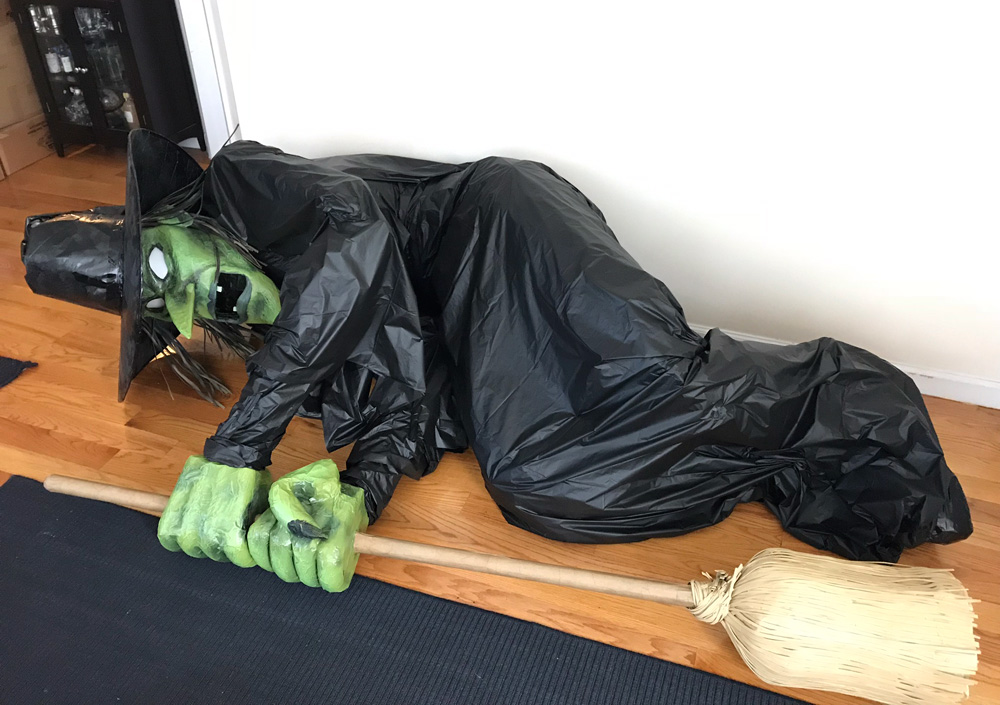
Here’s the witch statue on the day I took her down; it’s always sad to break down my big Halloween projects and throw them out! I tore the statue into a million pieces, and it filled up five big trash bags.
Now I’m thinking about what other huge statues I can make for future parties! I’m already sketching some ideas…
 About Manning Krull
 How to make a 4-foot paper maché alligator
 My violin skull mask, Mardi Gras 2015
 Three-headed paper maché dragon sculpture
September 14th, 2020 at 9:34 pm
Why did you tear her up? You need a storage container or spare room to keep all of your projects in. I found this site because I need a large witch broom to attach to my e-bike so it will look like I am a witch riding a broom this Halloween :)
October 5th, 2020 at 3:30 pm
Wish I could afford more space! We give away as many pieces as we can, but in a city like New York basically no one can take in a giant witch. :)
May 29th, 2021 at 12:47 am
Oh my goodness! What incredible talent you have ! I love the witch you made for Halloween ! My son is such a Halloween fan! You creations are truly an inspiration ! We live in New Brunswick Canada , if we ever make it out to New York … we would love to see your creations! My son would be thrilled and inspired !
Stay well! And happy creating !
Marz
June 2nd, 2021 at 1:31 pm
Hi Marz, thank you so much for your comment, it made my day! Looking forward to having something closer to a real Halloween this year, hopefully! Fingers crossed.
August 22nd, 2021 at 12:29 am
Omg! I absolutely love the witch, I needed her 2 yrs ago when I done the Wizard of Oz for Halloween.
Your work is amazing, I had to go threw and look at all your unique art projects. Your an inspiration , keep doing good things and have fun at it. ✌️
September 18th, 2021 at 2:59 am
I was super sad when I read that I had destroyed the witch, I wouldn’t have the courage. something like this here in Brazil is very expensive and we appreciate handicrafts, as they are unique pieces. Congratulations on the creativity.
October 17th, 2021 at 3:25 pm
How wonderful! I make small things in this same paper,tape,glue style. I’ve been wanting to do a large haunted tree. I love the idea of foam board and bubble wrap. I also never though of wallpaper glue! Yay! Way cheaper than tacky glue!
October 23rd, 2021 at 11:55 am
Amazing!!! I’m in Westchester and have a truck, I will happily pickup any project you want to get rid of !