
Giant witch statue! — part 1
Published by Manning on October 29th, 2018
My fiancée and I made this giant 8-foot witch statue for our 2018 Halloween party! This is by far the biggest thing we’ve ever made. It was a great learning experience. Here’s how we did it…

I used my fiancée as a model for the witch! I had her pose with a broom and I took pictures from various sides to use for reference. I also had her hold a 24″ ruler alongside the broom so I could use that to measure everything in Photoshop and calculate the size of the scaled-up giant witch.
I measured the height of our ceiling (8 feet) and brought the pictures into Photoshop so I could plan out the statue’s dimensions; I wanted it to fit right up against the ceiling. From there I could calculate the sizes of all the body parts, hat, broom, etc that I’d be building.
I decided to build the statue onto the stand for our big patio umbrella, so I’d have a very stable base to build around. The umbrella base would get concealed by the fabric of the witch’s clothing (actually plastic table cloths) that we’d add later on.
The witch statue would rest on four points — the legs, the broom, and the umbrella base. Now to build all the body parts…
Making the witch’s torso
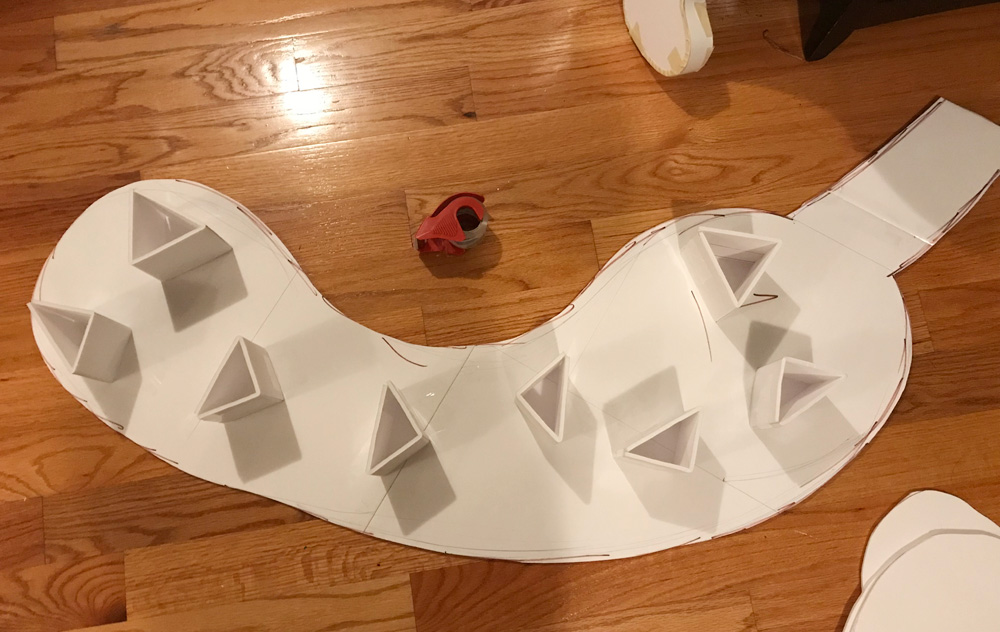
For the torso, I cut out a few huge pieces of foam board to start; I designed these to work like layers, held apart at specific intervals. The first piece was basically a picture of the witch in profile from the neck down to the pelvis; in the above photo her back is toward the bottom of the pic, and the neck is to the right.
Then I made two smaller pieces of the same shape, one for her left side and one for her right side. Then I cut out a couple smaller pieces for her shoulders and hips. You’ll see these in the next pic.
I measured and cut out a lot of strips of foam board to turn into triangle-shaped supports; you can see these above. I taped ’em in place on the first panel of foam board.
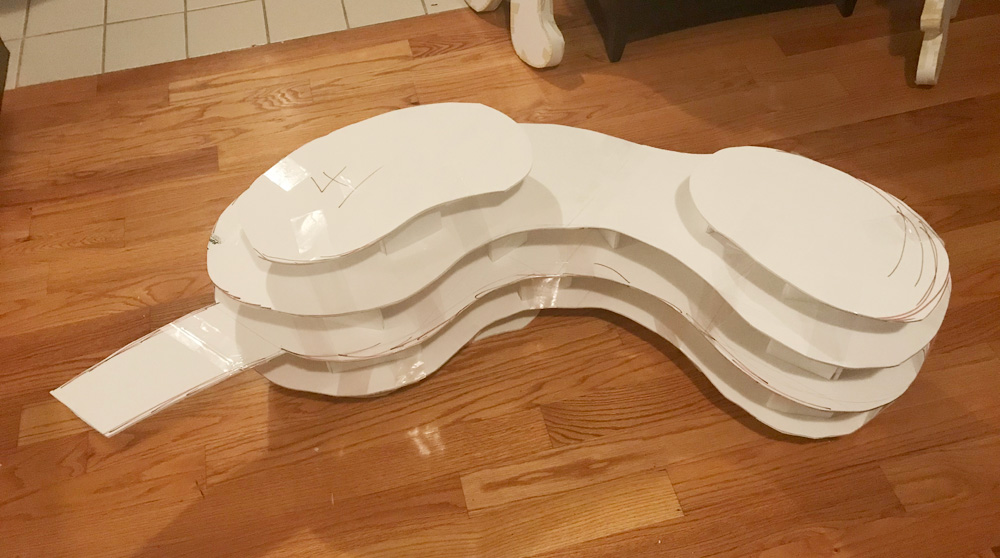
Then I assembled the remaining panels, with more triangular supports between all of them. The shape of the witch’s torso started to come together. In the above pic her she’s laying on her right side; the big blob at the left is her left shoulder, and the blob at the right is her left hip.
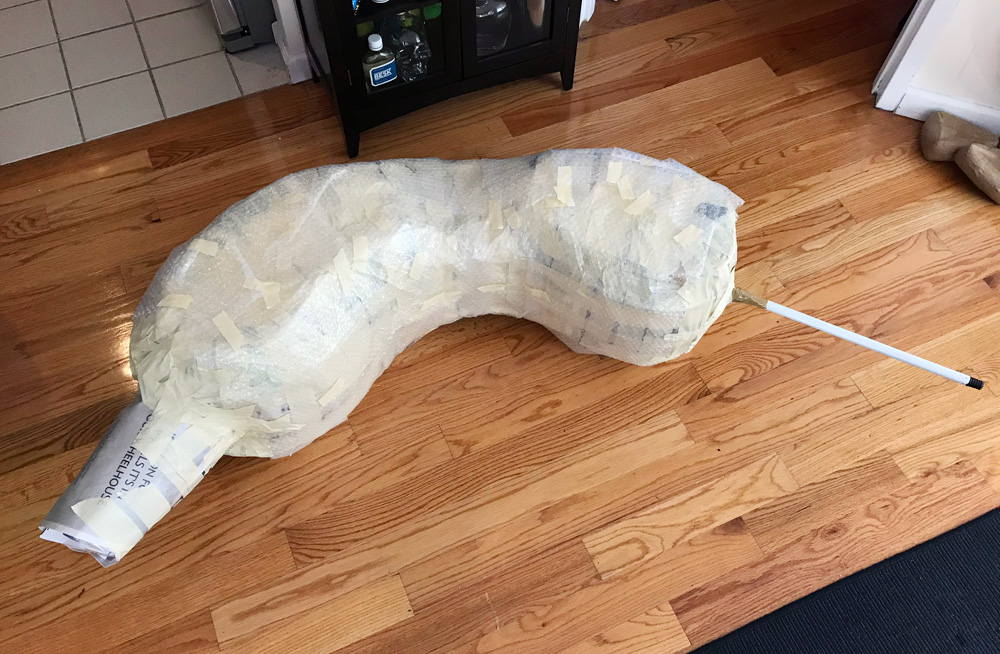
When these pieces were all assembled, I wrapped big sheets of newspaper onto them and taped them in place. This covers the blank spaces between the sheets of foam board and starts rounding out the shape. I wrapped lots of masking tape around the shape too, to secure the newspaper. I then wrapped the whole torso with bubble wrap; this smoothed out the shape even more, and then I added a lot more masking tape to hold everything in place. The finished shape was nice and padded out and a bit less angular.
I inserted a metal mop handle into the pelvis of the witch and secured it with tons of shipping tape; this would go into the umbrella stand when it was time to assemble the whole statue.
I rounded out the neck with the same techniques I used for the limbs — strips of foam board curved around, and then newspaper/tape/bubble wrap.
Making the witch’s arms and legs
I used the same basic materials and techniques to build out the shapes for the witch’s forearms, upper arms, thighs, and shins; eight separate pieces in all.
Let’s use a forearm as an example. I started by drawing the forearm shape onto foam board and cutting it out. I kept the shape a bit skinnier than I wanted the finished forearm to be, because I’ll be padding it out with other materials.
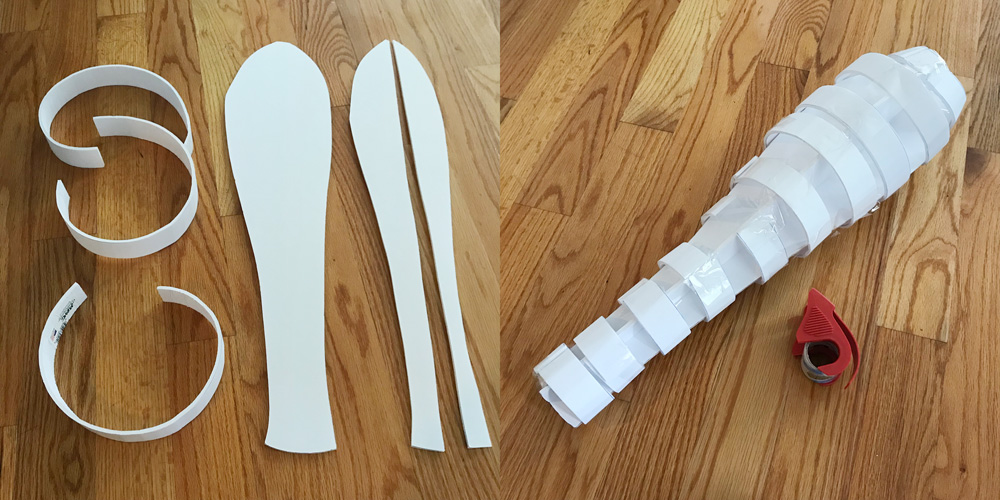
I cut out a second similar shape, sliced it in half down the middle, and then taped these pieces firmly onto the first shape at 90-degree angles using shipping tape.
I then cut out lots of long 1.5″ strips of foam board, rolled them up to give them a permanent curve, and then wrapped them along the length of the forearm base, attaching them here and there with tape and trimming them to size as I went. The foam board strips help round out the form of the arm.
I then wrapped the forearm shape in a few big sheets of newspaper, loosely wrapped around and then taped tightly in place. This step helps smooth out the ridges that form of where the foam strips are.
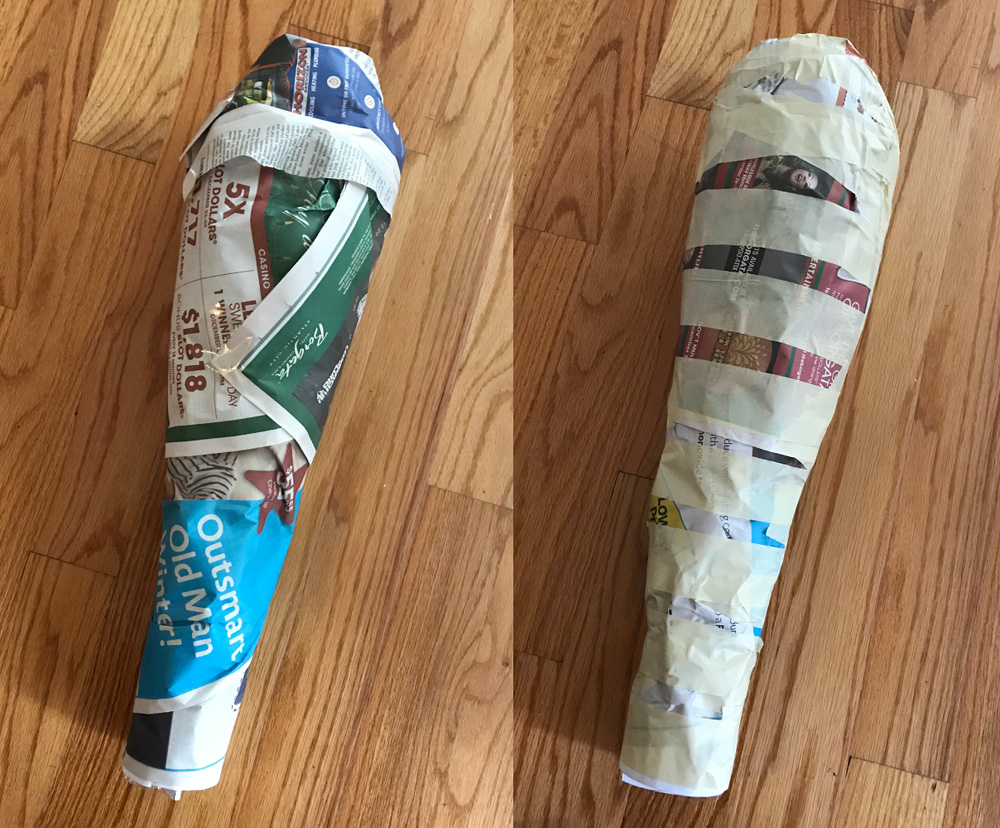
I then wrapped the forearm with long strips of bubble wrap, taped in place. To make these strips I took a 12″ roll of bubble wrap and cut it down its length a few times to make 3″ strips. I wrapped the strips onto the arm pretty tightly, being careful to slightly overlap the edges for even coverage. I secured the strips here and there with tape. The bubble wrap helps further smooth out and round out the shape.
With all these layers of different materials you end up with a shape that’s nice and curved and relatively organic-looking. It sounds like a lot of work but it goes by pretty quickly.
I opted to skip the bubble wrap for the leg pieces, since they’ll be draped with (plastic) fabric later on.
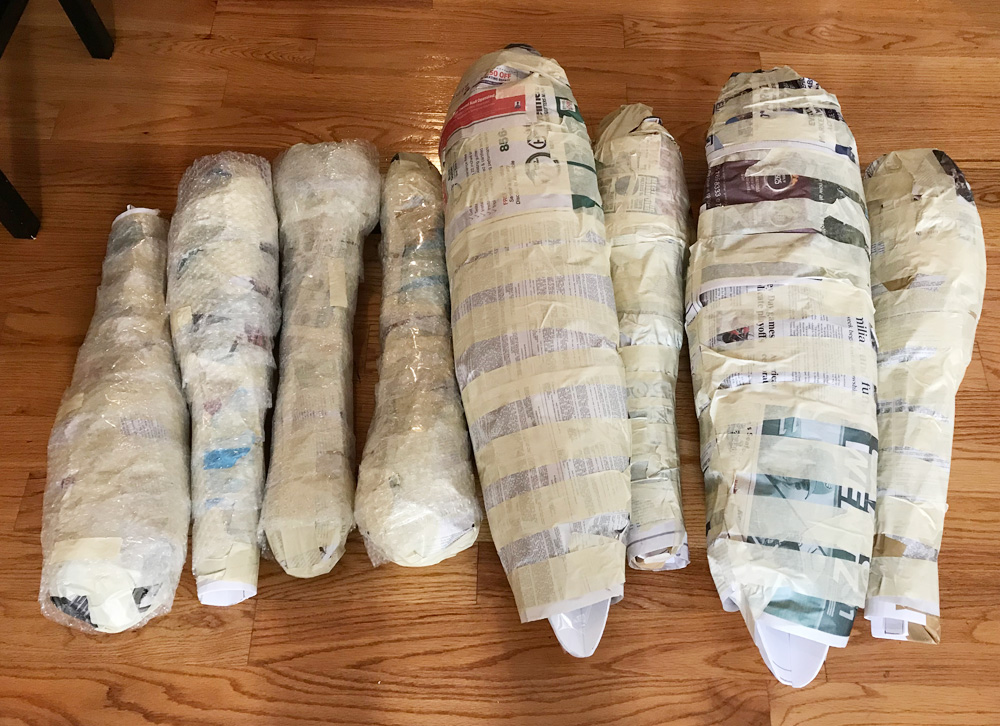
So that’s everything for the limb segments before assembly. Here are all eight finished limb segments.
Making the witch’s hands
I built the witch’s hands starting with some little trapezoid-shape boxes I made out of pieces of foam board and lots of shipping tape. I used foam insulation tubing for the fingers; I split the tubes down the middle with an X-acto knife, so each finger is a half-tube taped in place.

I covered the hands all over with one layer of paper maché, and then I added a million more layers (okay, maybe eight) on the top and bottom surfaces of the fists, because these parts will connect to the broom handle, so they’ll need to support a good amount of weight. You can read about my paper maché process and materials here. The short version is: I use Roman PRO-543 universal wallpaper adhesive (paid link) and alternating layers of newspaper and brown wrapping paper.

I made a sort of wrist bone out of several sheets of construction paper, rolled up tightly and secured with tape, and then inserted into the hands and locked in place with a bunch of Gorilla Glue. Adding these makes it way easier to connect the hands to the forearms, and the connection will be a lot stronger — important, because the wrists have to support the weight of the torso as it leans toward the hands and broom.
Making the witch’s feet
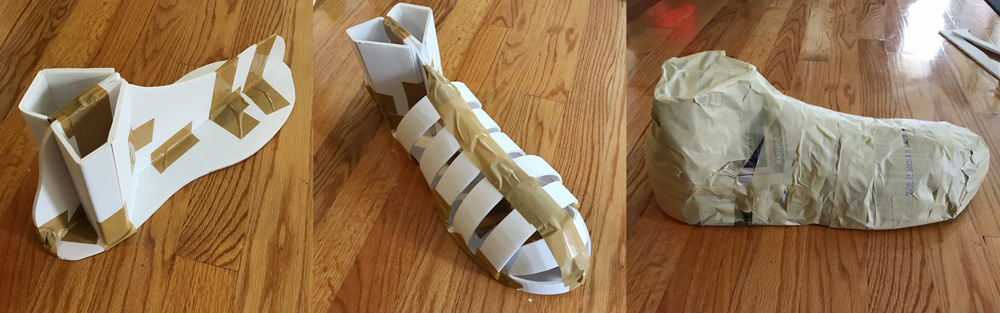
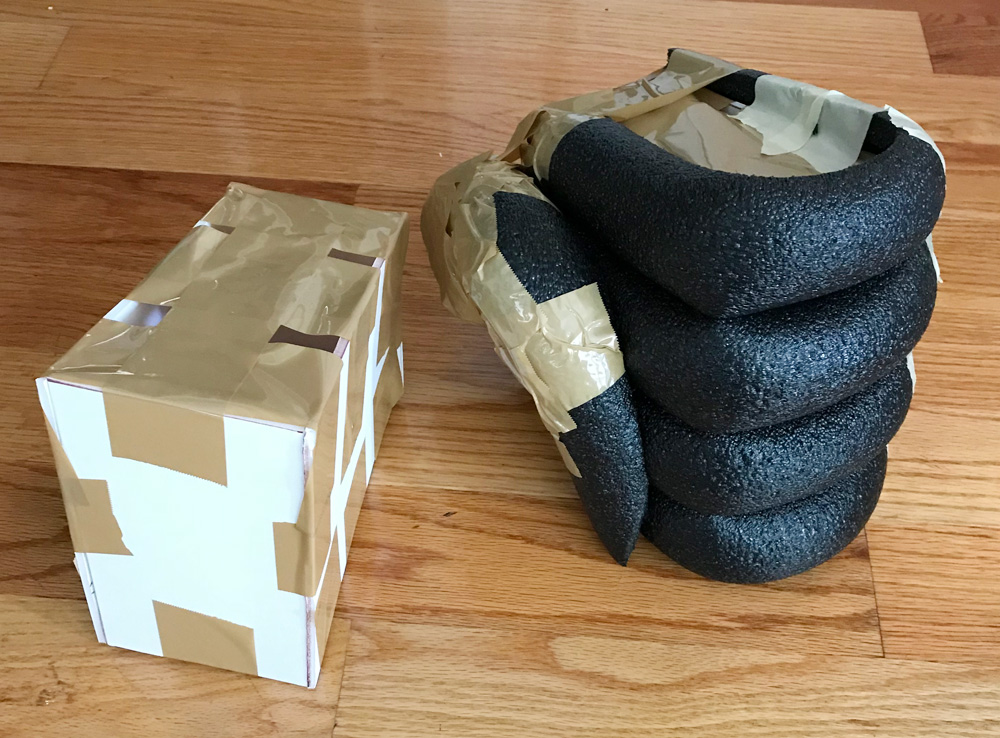
I built the witch’s feet with the same basic method as the limbs and torso: I started with some flat pieces of foam board taped together, then I padded them out with curved strips of foam board and lots of tape, and then I wrapped them with newspaper and more tape.
I needed the feet to be able to support a lot of weight pushing down on them without getting crushed, so I added two triangular towers of foam board in the ankle, one on either side of the central piece of foam board.
The above pics show the “front” foot; the shape of the back foot is a lot weirder because it’s positioned standing on its toe, but I made it pretty much the same way as the first one. In assembling the witch (coming up in part two) it turned out I didn’t need the back foot at all, since her back was facing the corner of the room, so I didn’t bother to attach it.
Making the witch’s head and hat
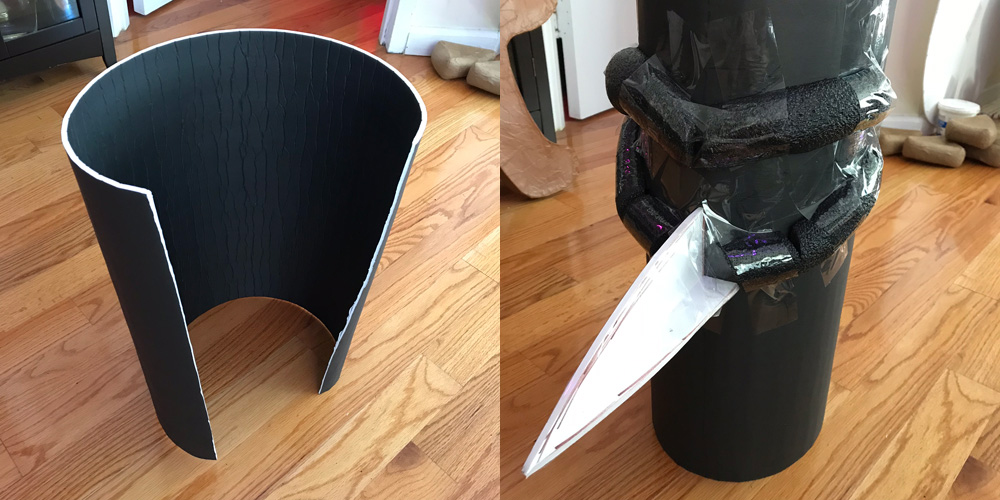
I made the witch’s head on a base of foam board rolled into a tube. I built the nose out of some scraps of foam board and tape, and I used pieces of foam pipe insulation tubing to build up the eyebrow ridges and cheekbones. I left part of the tube shape sticking out on top; this is where the hat will get attached later.
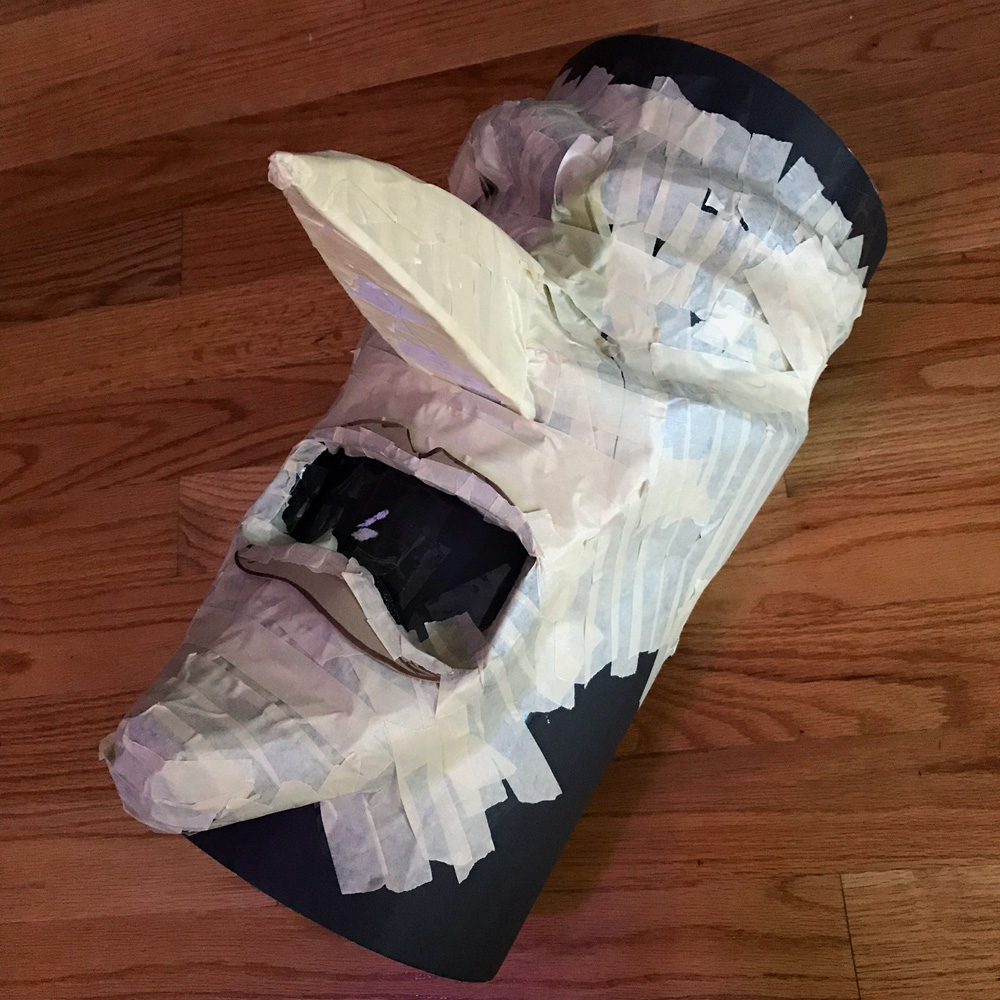
I built the witch’s lips and chin with more pieces of pipe insulation tubing, and then I covered the whole face in masking tape to smooth out the gaps between all these pieces.
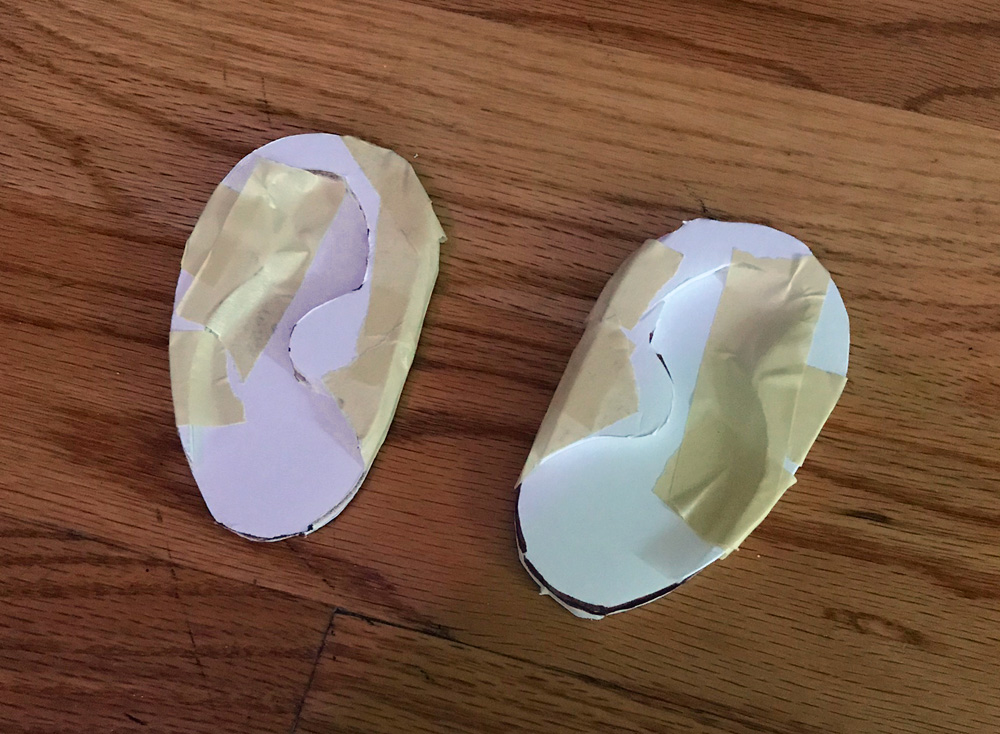
I made the witch’s ears out of two layers of foam board and some masking tape.
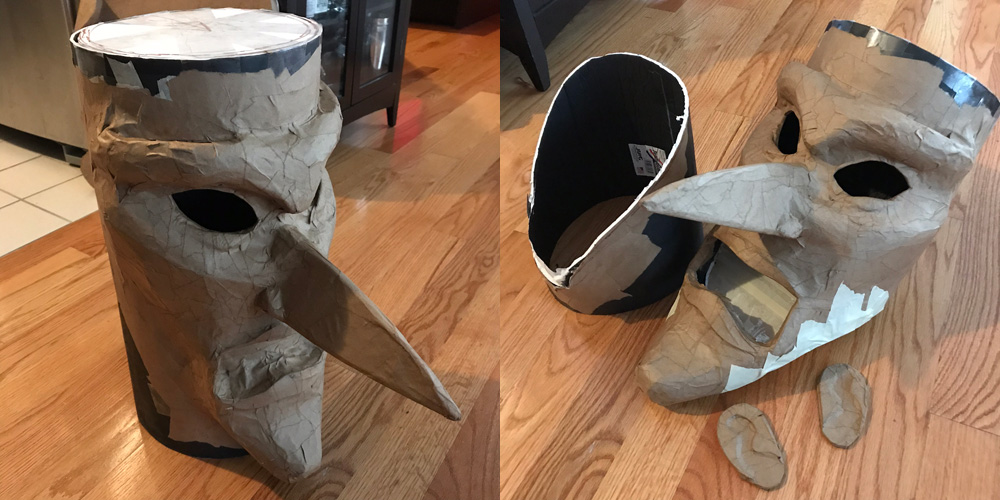
I applied one layer of paper maché over the whole face. I covered the ears with paper maché separately. When this was all dry, I cut off the extra foam board at the bottom of the witch’s head to give her a normal jawline. I taped over this area and covered it with more paper maché.
Not shown: I hot-glued the ears in place and then added more paper mache over the connection points. I also added two little teeth made out of foam board.
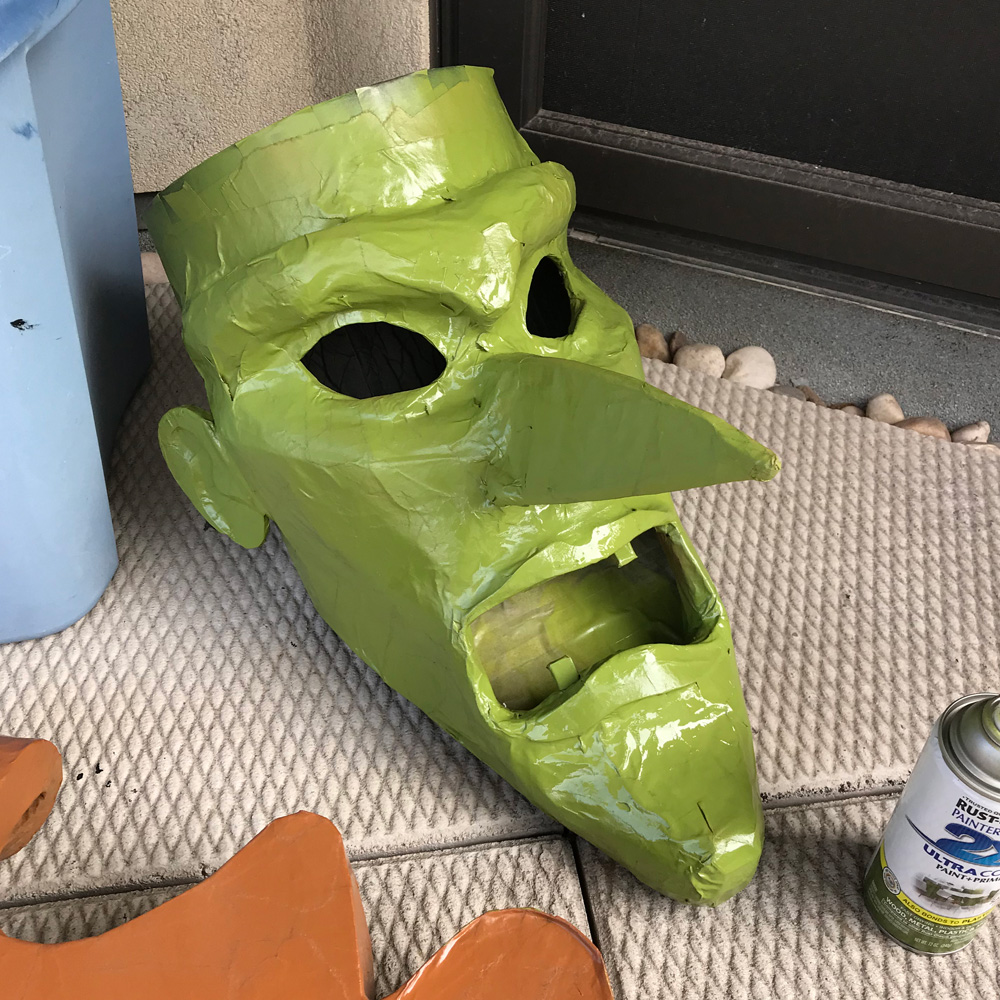
I spray painted the witch’s head green. When that was dry, I added some shadows with black spray paint, and then I gave the whole head another light dusting of green to fade the shadows back a bit.
I mixed up a lighter green color using acrylic paint: green, yellow, black, and white. I used a dry-brush technique to lightly brush this color all over the raised surfaces of the face.
Oh yeah, I should mention, I used these same steps to paint the hands.
I added a little bit more detail to the witch’s face with black acrylic paint; eyebrows, nostrils, some shadows, etc.
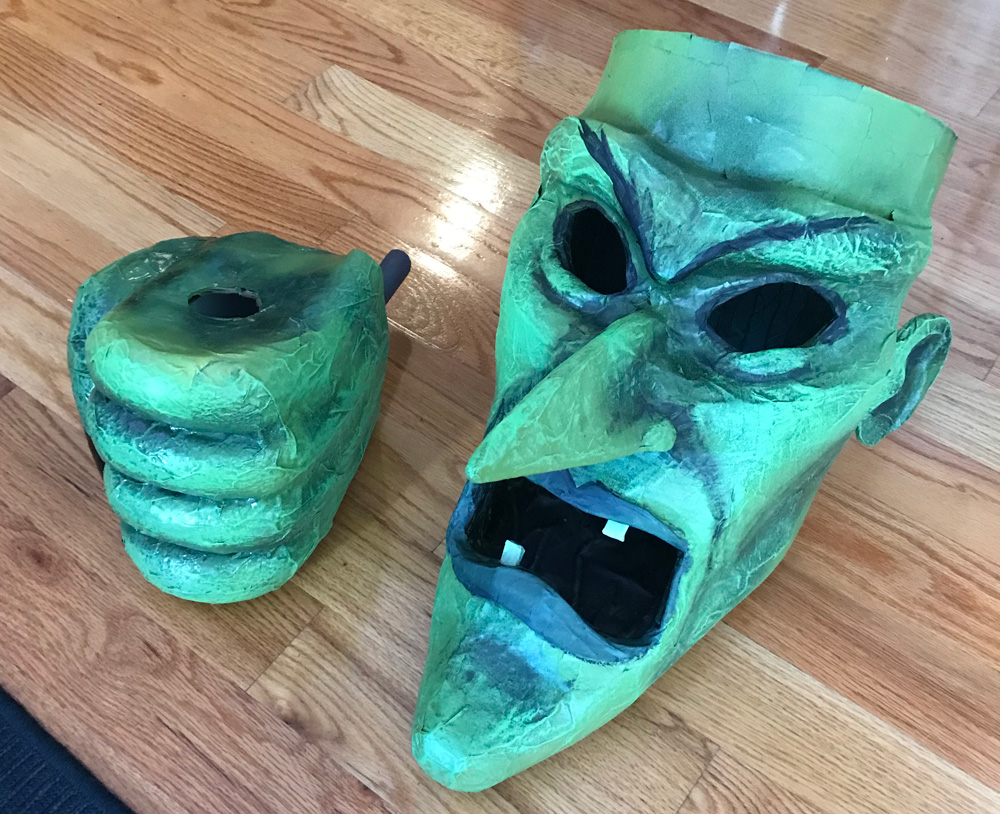
Here’s the finished head, and one hand — the other hand is elsewhere, already glued to the broom handle; more on that coming up.
After this, I realized I needed to spray paint the back and sides of the witch’s head black, to match the hair I’d be adding later.
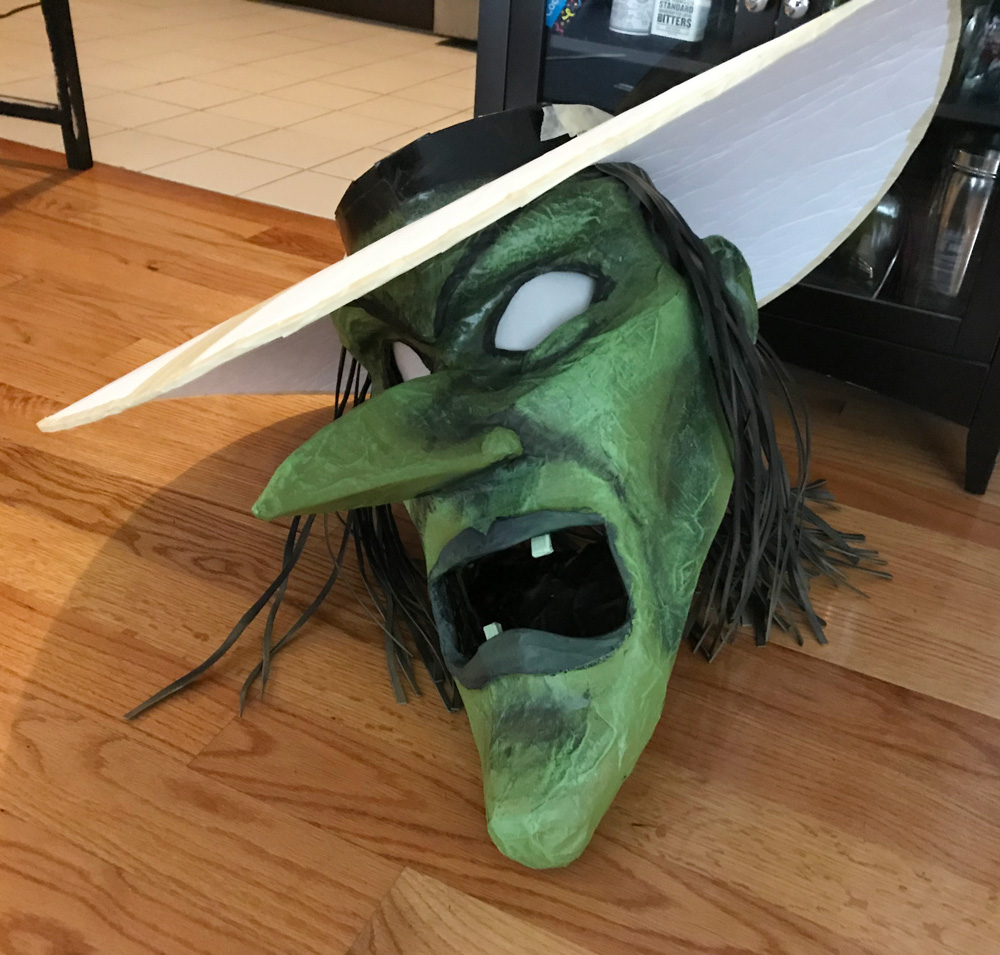
The reason I cut out the eye holes is because I wanted to put lights in there! I taped a folded-up piece of tracing paper behind the eyes, and taped a small magnet in the middle. I took two small batter-operated lights and taped them together and taped a magnet on them. Right before the party, I turned on these lights and inserted them through the mouth so they’d connect with the magnet inside. Worked like a charm.
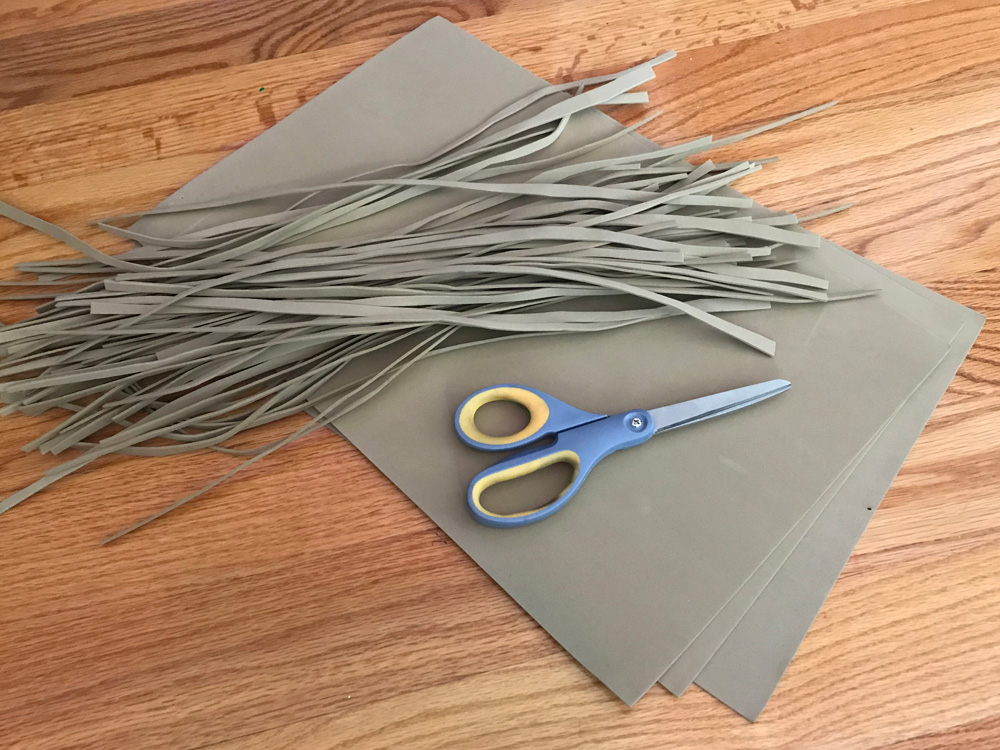
I made the witch’s hair out of a couple sheets of craft foam that I cut into thin, slightly wavy strips. I used the exact same technique for the bristles of her broom (coming up)! I taped these in place on a long strip of paper, and lightly spray painted them black to dirty them up a bit. I ended up making two strips like this, and I taped them in place along the top edge of the witch’s head.

The witch’s hat was pretty easy! To make the brim, I taped two sheets of foam board together and cut out a big circle, with a hole in the middle for the witch’s head. I carefully curled up this foam board by hand to give the brim a nice curve.
I popped this onto the witch’s head and then built up a cone shape with poster board (not shown); this took some trial and error to get the angles right. I taped the poster board firmly onto the brim.
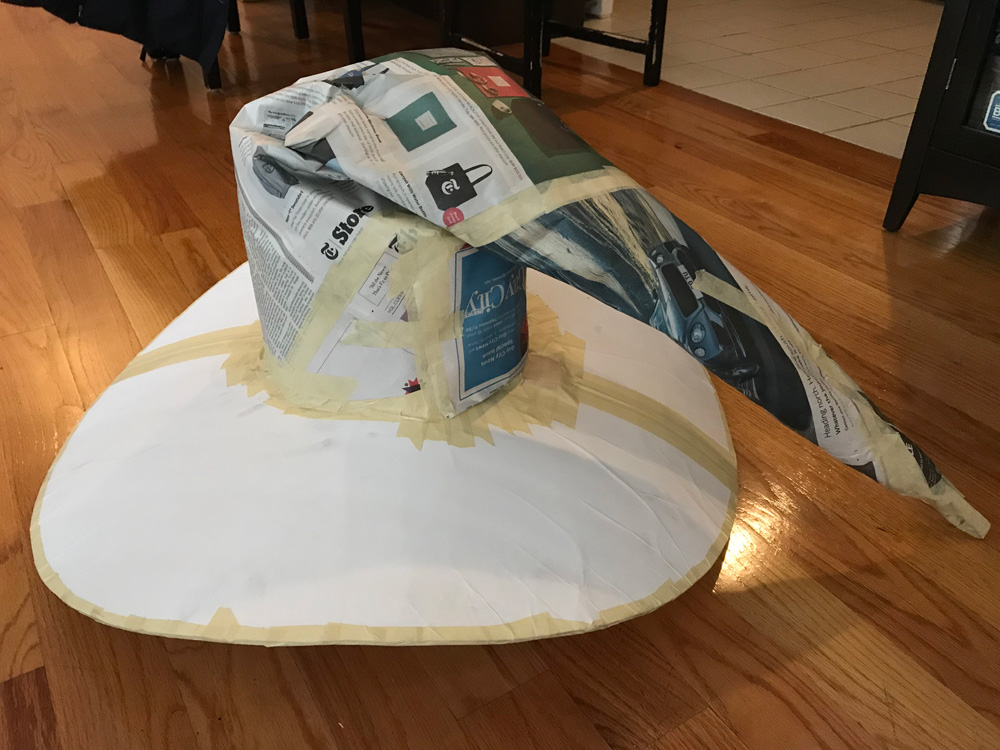
I made the rest of the hat with newspaper and tape. I laid out four big sheets of newspaper and taped them together, and then I added a second layer of the same thing and taped that in place. I then carefully curled up this whole thing into a big floppy cone shape and held it up to the rest of the hat to figure out the size. I trimmed off a bunch of the paper with scissors until it was the right fit, and then I slipped the cone over the poster board tube and taped it in place.
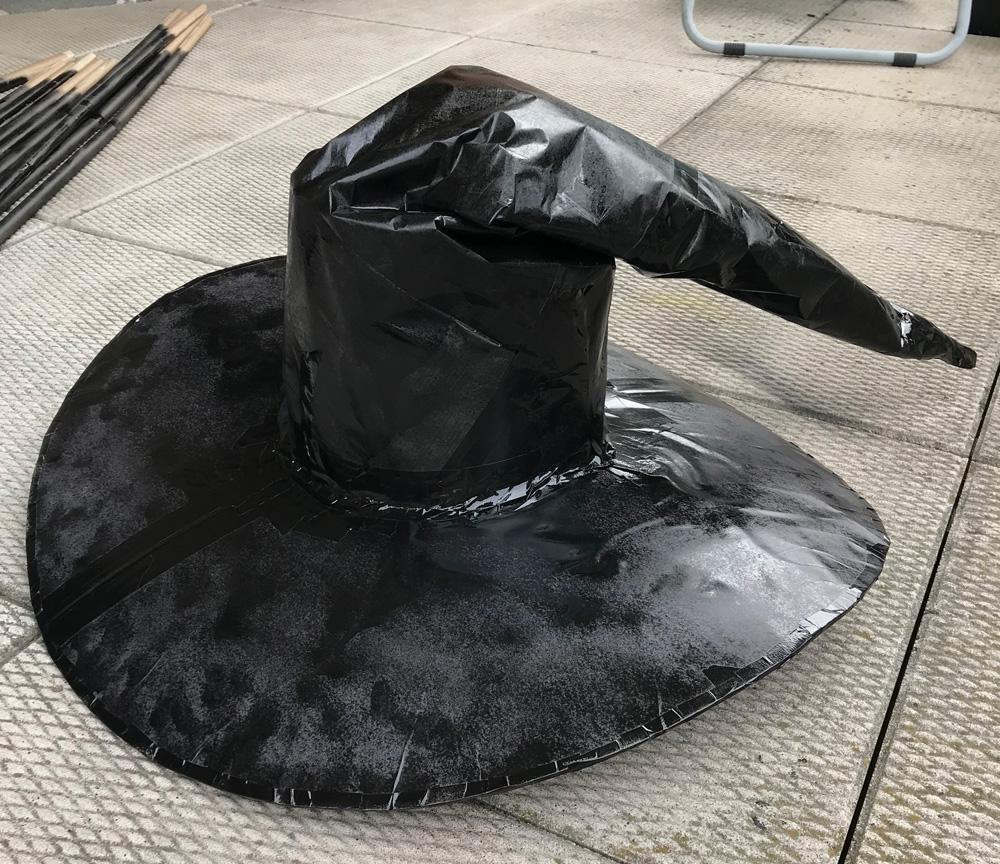

I spray painted the hat black, let it dry, and then I used Gorilla Glue to permanently attach it onto the head.
That’s all for part one! Next: part two, making the broom, assembling the statue, etc!
 About Manning Krull
 How to make a 4-foot paper maché alligator
 My violin skull mask, Mardi Gras 2015
 Three-headed paper maché dragon sculpture
January 15th, 2019 at 7:39 pm
You have a very nice website, and I am a bit envious of your creativity. Your witch and other items are so very nicely done, and it is obvious that you enjoy creating things by the care you take in designing and implementation. Please keep posting so those of us that are not as genius as you can virtually enjoy your creations. Best of luck in all your endeavors going forward.
January 17th, 2019 at 3:25 pm
Thank so you much, Galina; your comment made my day!
October 25th, 2019 at 12:55 pm
You are an artist!!! Congratulations!!!!! 👏👏👏
October 25th, 2019 at 9:22 pm
Gracias Ana!!
July 30th, 2020 at 1:37 pm
I just stumbled on this post (I’m a huge Hansel and Gretel fan), and immediately looked at all of your related projects for your 2018 theme – WOW!!! I’m blown away. Did you take any photos or videos of everything put together once it was all set up?
July 30th, 2020 at 4:32 pm
Hey, thanks Brian!!! Unfortunately I almost never have any good pics or video from our Halloween parties, because we’re working so frantically right up ’til the guests arrive and then the whole thing seems to fly by in minutes! I need to consider hiring a photographer for future parties!
October 7th, 2020 at 5:44 pm
OMG, I just want to be your friend! So much fun and creativity! You’re amazing!
October 8th, 2020 at 2:24 pm
Aw, thank you Elise!!
October 1st, 2022 at 12:10 pm
Hi do you have the measurements you used for this piece?
October 7th, 2022 at 1:57 pm
Me dejó pasmado su creatividad, es usted una de las personas que realmente merece la admiración de cualquier artista, saludos y que continúen los éxitos.