
Haunted flying books decoration
Published by Manning on November 11th, 2016
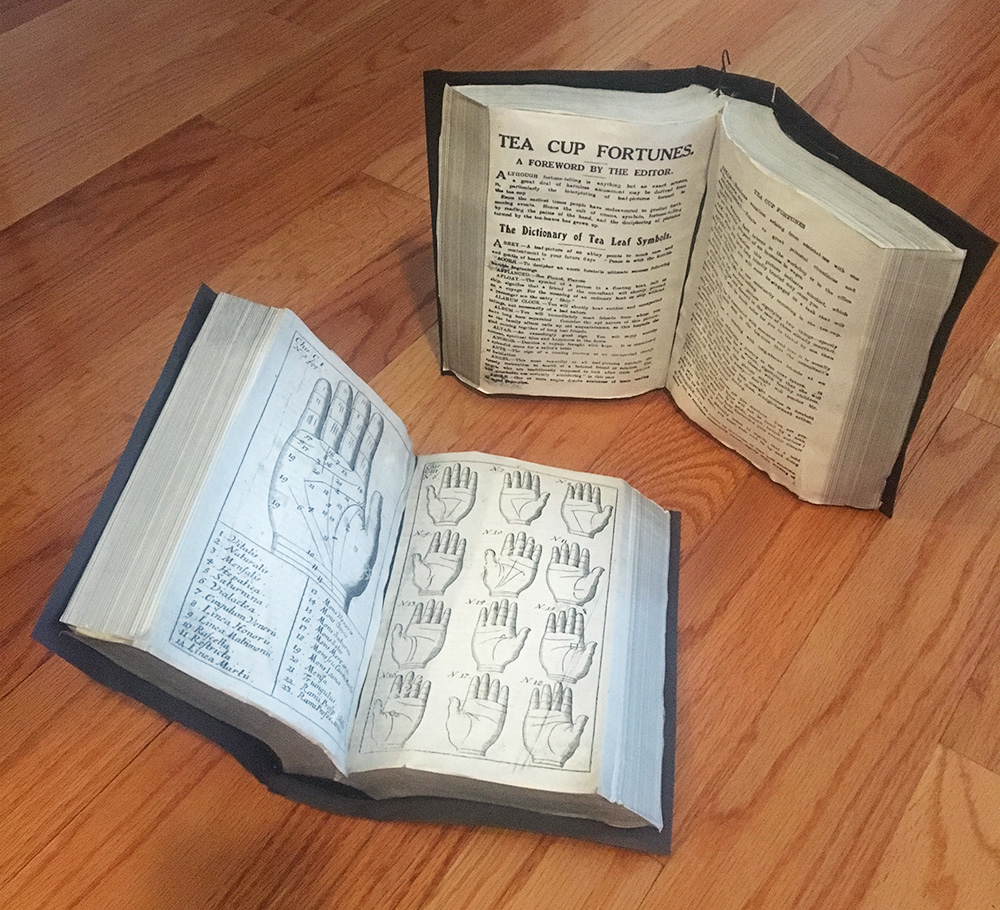
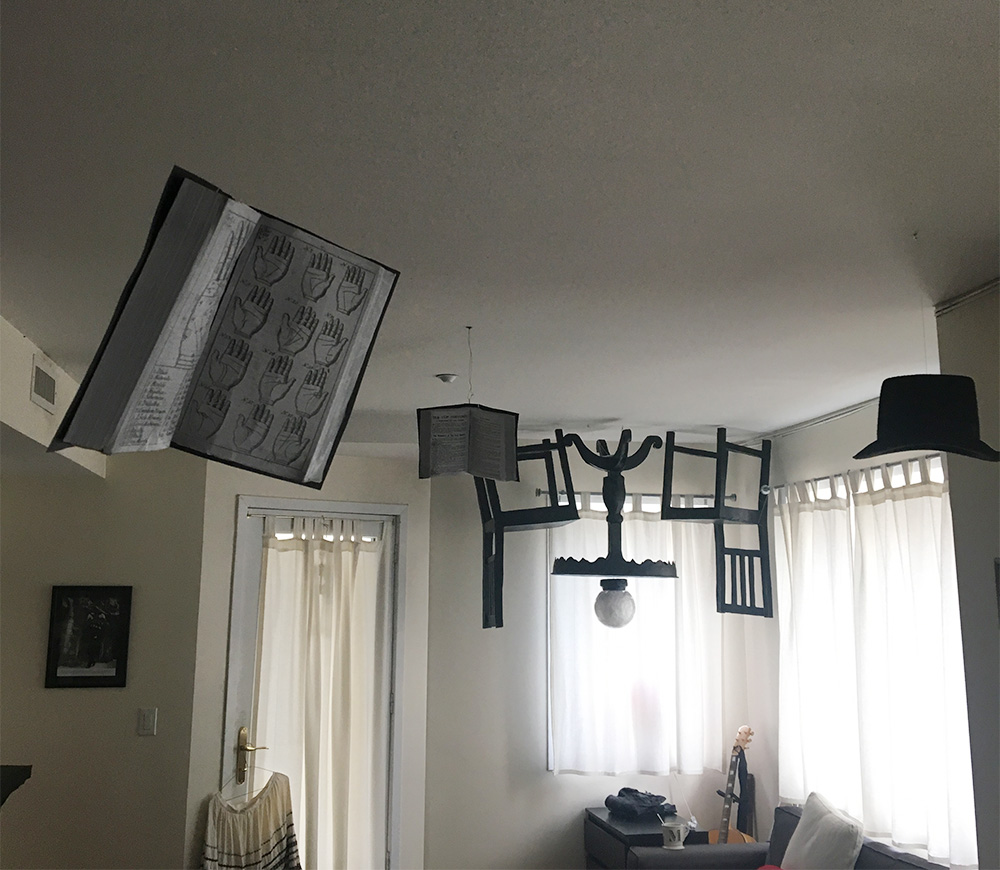
I made these lightweight fake books to hang from the ceiling for my seance Halloween party, to look like they were floating around the room due to spectral activity! These were really cheap and easy and fun to make!
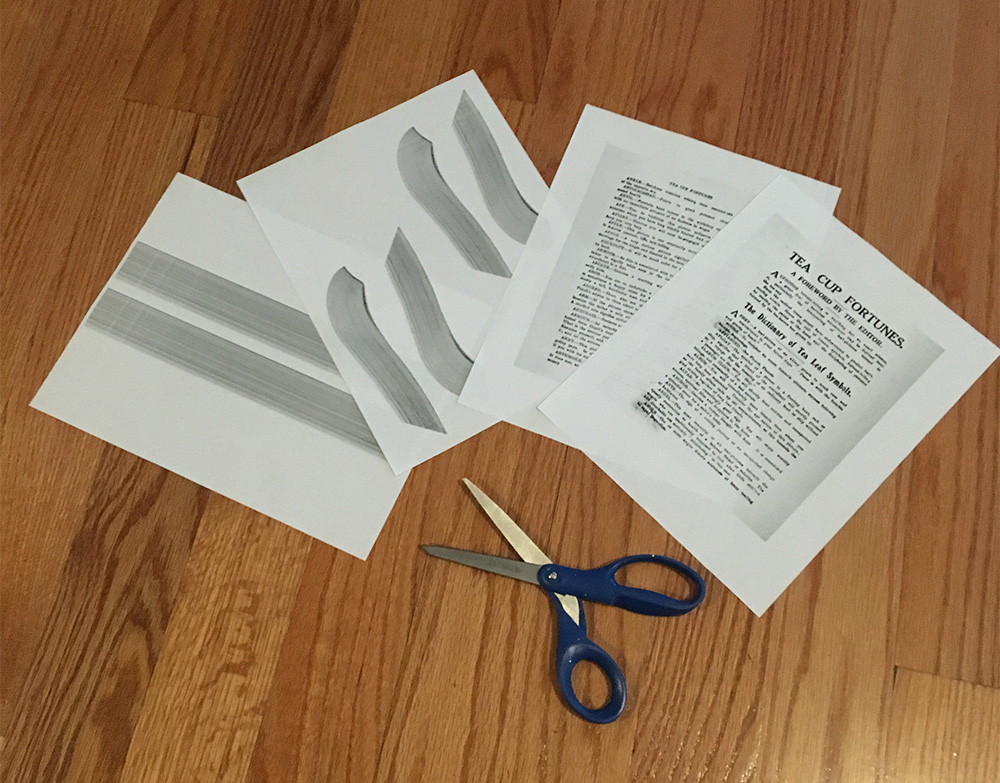
I made graphics in Photoshop for several of the surfaces of the books: the pages, the left and right edges of the pages (those are the long straight pieces pictured below), and the tops and bottom edges of the pages (i.e. the curved pieces). I did some Google image searches of old books to find references for all of this, and then did a lot of tweaking and measuring in Photoshop. I didn’t know what to expect with how the assembly of these pieces would go, so I made a few guesses. In hindsight it would’ve been fine to have the curved pieces be attached to one another, rather than separate. And I miscalculated a bit with my actual pages and ended up having to trim way more around the edges than I expected, leaving less margin than I wanted, but it was fine. Anyway, you could totally do this kind of project without printing out any graphics; you could just draw all the pages and their edges with pencils, markers, etc.
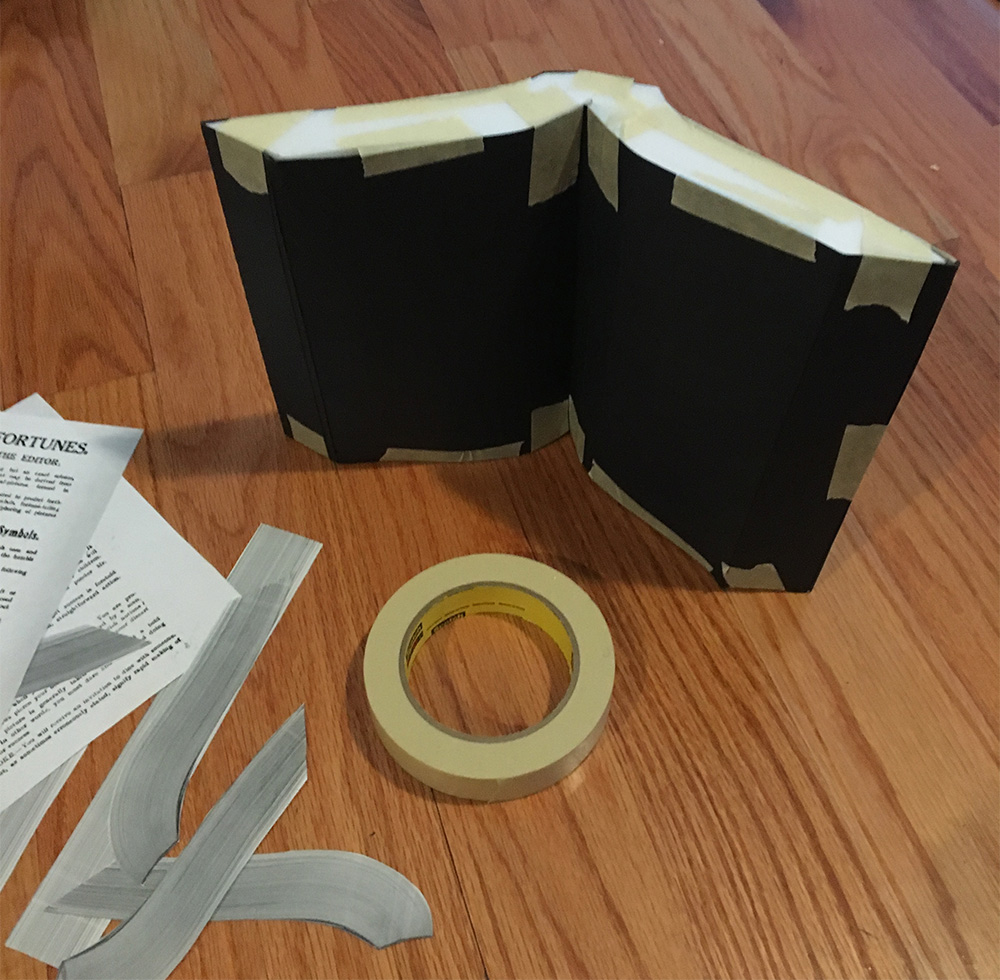
After my graphics were printed and cut out, I traced the curved edges onto foam board and cut them out with an X-acto knife (those are the white curvy bits you can see at right in the pic below). I then measured and cut a long piece of black poster board to serve as the main box-like shape of the open book — basically seven panels; the pages, the side edges of the pages, the covers, and the spine. I measured where the poster board would need to be folded in order to create all these parts of the open book shape, and then I scored those lines with a butter knife to make them fold up much neater.

I made all the folds, and then attached the foam board pieces into the folded-up poster board with masking tape. This took a good deal of patience and manual dexterity, getting all the pieces to line up and sit still for taping, but the resulting shape looked pretty good and was pretty stable, if a little uneven and warped-looking; no problem for a rotten old-timey haunted book.
I then pasted the pages into the book with wallpaper paste (Elmer’s glue would also be fine for this). I spread the paste evenly onto the poster board with my fingers so the pages would be completely sealed into the book, so that no areas could bubble or curl up. I then did the same with the side edges and top and bottom edges of the printed-out graphics.
Once that was dry, I made some simple black book covers for the books. For some of them I used craft foam (that thin rubbery stuff that’s kind of like yoga mat material), and for some I just used construction paper. The important thing is that you want to cut the covers to be slightly larger all around than the poster board shape, like how the cover of a real hardcover book is larger than the pages inside. I measured and cut three pieces for each cover: the front and back covers, and the spine. I pasted these in place with wallpaper paste, but Elmer’s glue would do the trick too. The craft foam book covers looked pretty authentic when they were done, whereas the construction paper ones looked pretty thin and flimsy, so I recommend the craft foam.
And that’s pretty much it for these books! One last little step I did when everything was dry was taking a small paint brush and some black acrylic paint and cleaning up a few of my mistakes where the printed pieces didn’t join up with the base very well and the masking tape was a little bit visible here and there; it just took a second to cover those bits with black paint, and that helped the overall look a lot. If you’re more careful than I was you can probably avoid this part!
When each of the books was finished, I poked a hole near the top edge of the spine with an awl, looped some fishing line in there, and tied it in a knot. Then I attached the other end to a thumbtack and stuck in the ceiling. All done! These things are seriously lightweight and they stayed up for over a week without any of them falling.
I kept these books extremely simple because I knew they’d be displayed high up and in very low lighting for my Halloween party. If they were going to be more visible I’d probably do a few more tricks to make them look a little more real and old and spooky. The printed out paper bits could be stained with tea in order to make them nice and yellowed, and I’d probably do a very light dusting of black (or dark brown) spray paint from about a foot away to dirty up the pages and cover. I didn’t bother to put any text or imagery on the covers themselves, but of course that’s an option too. Have fun!
 About Manning Krull
 How to make a 4-foot paper maché alligator
 My violin skull mask, Mardi Gras 2015
 Three-headed paper maché dragon sculpture
March 16th, 2024 at 2:31 am
Hello! I love your flying books decorations. Do you have a template for this you can share?
Thank you!