
Painting new skeleton pants
Published by Manning on February 13th, 2017
I’ve been wearing my hand-painted skeleton suit for five Mardi Gras in a row now, with a few Halloweens thrown in there as well, and for some reason the pants seem to be harder to squeeze into every year! Huh! I wonder how that could be; they must keep shrinking in the wash a little more every single year! Yeah, that’s gotta be it. So anyway, it’s reached a point where I absolutely needed to make new ones for this Mardi Gras; last year I seriously thought they might split open on me during a parade! I learned a lot from how I made these last time, and luckily this was a much more successful project my second time around…
My biggest take-away from painting the skeleton pants last time was: acrylic paint stops fabric from stretching! With my first pair of skeleton pants I started with a pair of pants I’d been wearing for a while; they fit great but as soon as I painted them they were suddenly way too tight, and I realized this was because the large areas that I’d painted could no longer stretch at all. That first year I was still able to wear them with no problem, but they were definitely a lot tighter than before I painted them. Fast forward to last Mardi Gras morning and I could barely get into them at all; I had to hop up and down to get them all the way on, and I could barely button the top button!
So, for this year, I started by buying a new pair of pants, with a waist size that was one inch larger than I’d normally buy. They felt nice and loose when I tried them on, but I knew this would change a bit after painting.
For my first pair, I’d simply painted them while they were laying flat on my newspaper-covered dining room table; this was a mistake! This time I knew it would be important to force the pants to be stretched out a bit during painting.
Drawing guidelines for the bones
But, I’m kind of getting ahead of myself. The very first thing I did this time was try on the new pants, and use a white china marker (aka grease pencil) to mark a small circle where my knees were. I did this first because once the pants are laid flat you have no idea where your knees will actually be, and it’s important to line those up correctly before you paint anything. It’d look really weird if you put on the finished skeleton pants and the knees were too high or too low. So it’s important to plan out the placement of the knees, and the rest is easy to freestyle from there.
After marking the knees, I laid out the pants flat on my table and drew the rest of the bones in, very lightly with the white grease pencil. I recommend drawing the outlines of the bones to be narrower than you actually want them, so you can paint completely over the outlines. If you leave parts of the china marker lines exposed, they may not wash out completely. Better to cover the lines with paint and make the bones a little thicker.
Stretching the clothes out with objects
Now, before painting, I did two things. I inserted long rectangular pieces of foam board into the legs. This is to hold the legs flat and and also prevent the paint from absorbing through the fabric and sticking the front of the pants to the back of the pants. You might be tempted to put wax paper or plastic wrap around the foam board, but I learned the hard way that this isn’t a good idea. For the first part of this project I was using just plain foam board and I happened to be using some paint that I’d mixed to be too thin, and I was surprised at how much the paint bled through the fabric onto my foam board. It wasn’t a disaster; the paint job looked good and I was able to easily pull the foam board out afterward, although some tiny bits of paper peeled off and were stuck inside the pants. So for the next section of leg I put wax paper on my foam board to prevent this. Weirdly the paint bled into the fabric much more because of the wax paper! The paint looked very thin and not at all opaque on the fabric and it bled way outside of my outlines. Strange! When I pulled out the foam board and wax paper I could see that basically all of the paint was on the board and the interior of the fabric, whereas the outer surface looked like it had barely been painted! This was a really strange science experiment. So, I stopped and let everything dry, and then continued with just plain foam board and everything was much better. The most important takeaway from this is: use paint that’s thick rather than watery. On the parts where I used thicker paint, it only bled into the fabric a tiny bit; the interior surface just had some small white splotches.
Another super important thing! For this pair of pants I packed a small waste basket and a bunch of books into the waist of the pants, crammed in as tightly as possible. This is the crucial step I was missing last time; when I painted the pelvis onto the pants last time as they were simply laid out flat, the paint dried into this wide hardened sheet of acrylic which permanently stopped that part of the fabric from stretching. This is the main reason the pants were way too tight right from the first Mardi Gras when I wore them.
Packing the waste basket and books into the waist meant that I was painting onto fabric that was already stretched out, so they’d still fit really well when the paint was dry. This also means that when you remove the books, the pants don’t quite want to lay flat anymore; the dried paint resists the way the fabric wants to naturally lay. Who cares? The important thing is that they fit and that they look good when you’re wearing them. (Note: a little bit of paint bled through onto my waste basket and books; I was fine with that but be careful!)
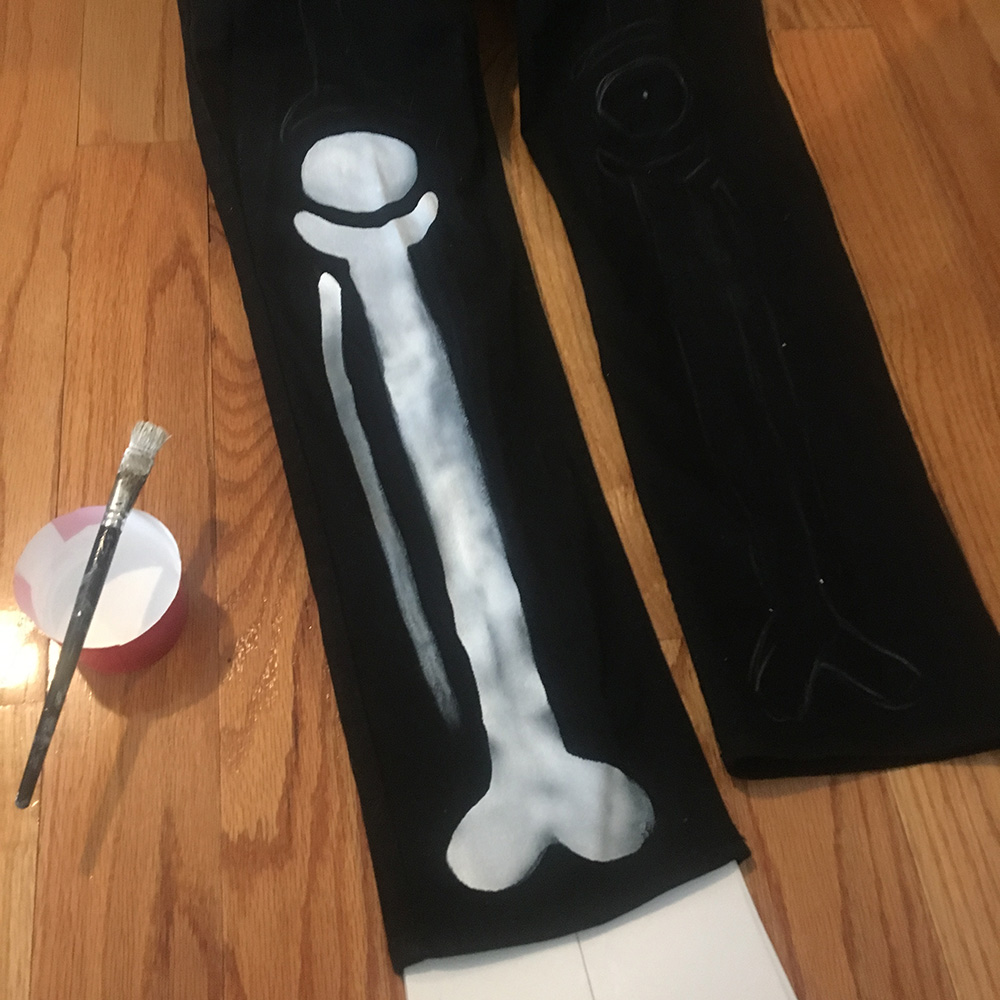
I painted all the bones with white acrylic paint, and it took about three coats to get the paint 100% opaque and solid-looking. I bought a gigantic 32-oz bottle of Golden brand acrylic paint like six years ago and I’m still using it! It’s gone into all my big skull masks and dozens of other projects. I remember when I bought it I asked for the most opaque white paint they had, and it still takes about three coats to get it 100% opaque on black fabric. I sometimes water the paint down a little bit to give me some finer control over the lines, but like I mentioned above, don’t overdo it!
Here are a few pics of my progress…
This first one is what a few of the bones look like with just one coat of paint:
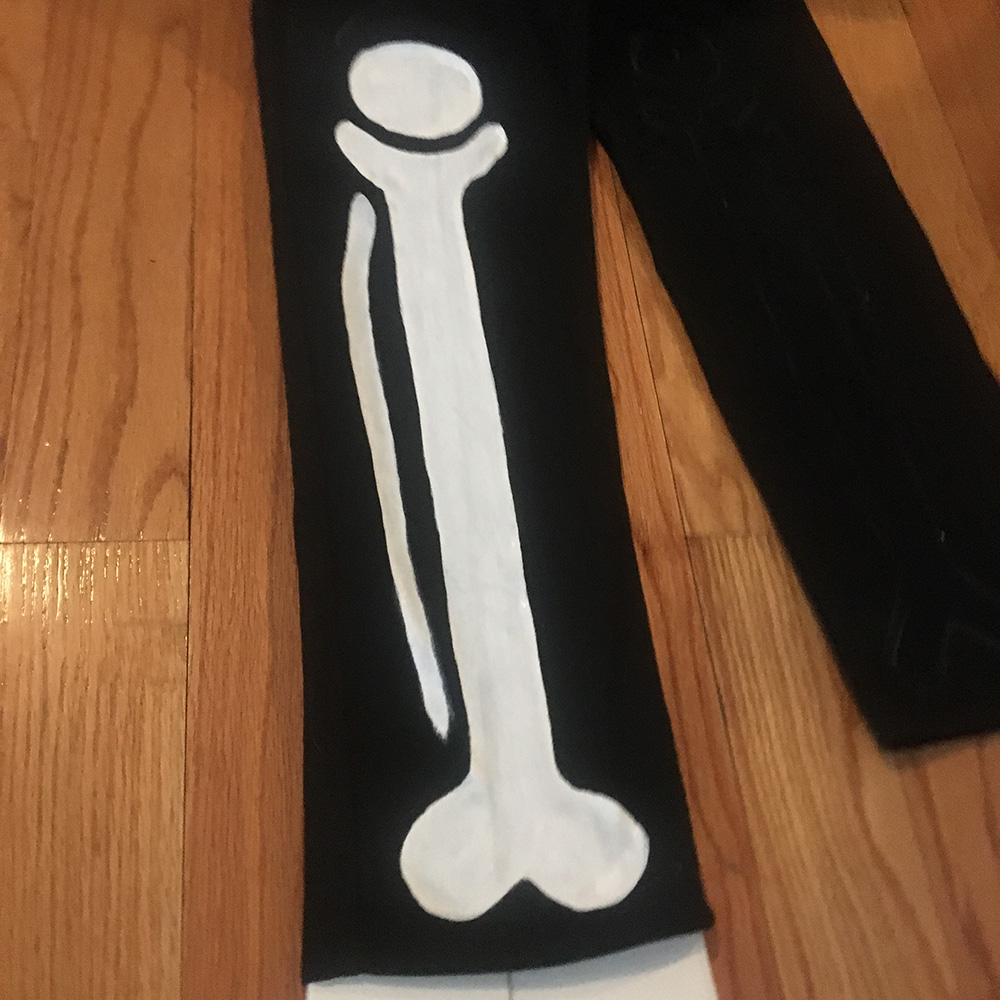
After three coats, they’re nice and opaque!
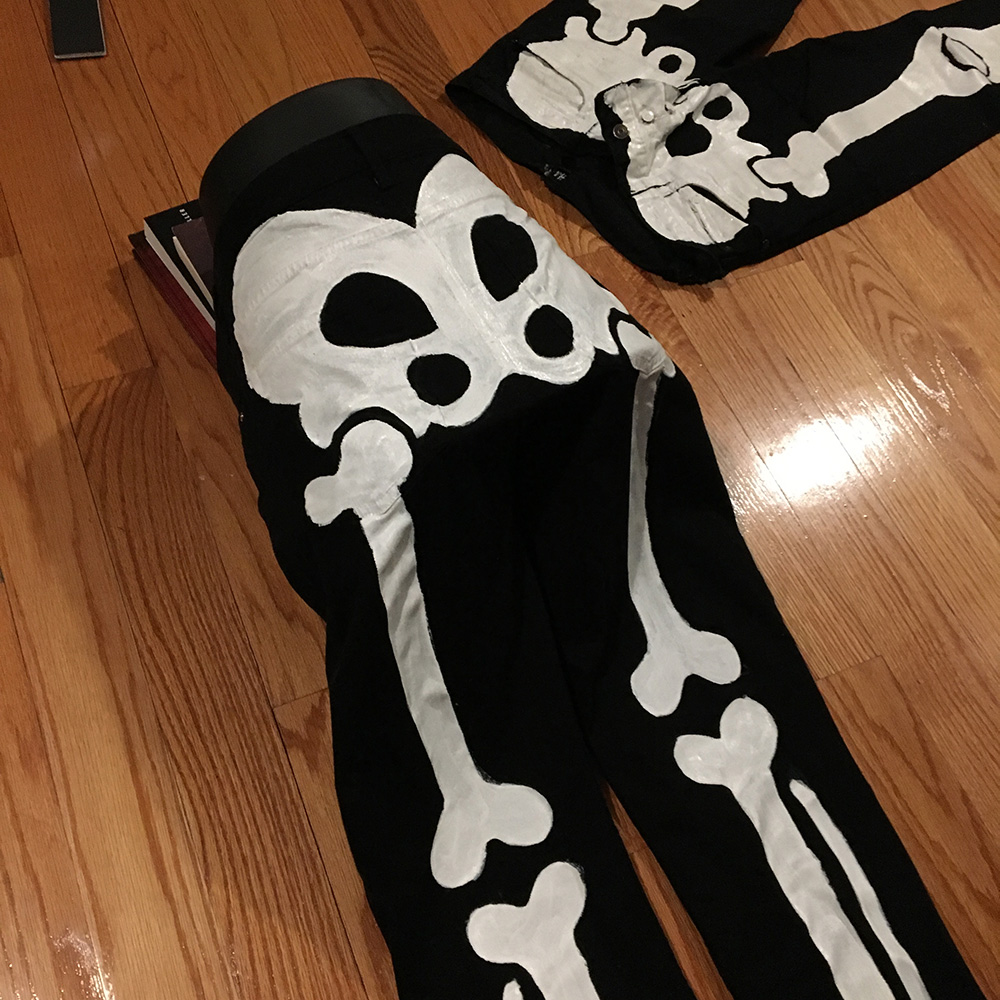
Here you can see how I stuffed the waste basket and books in there to pad out the shape. You can also see the faint outline of the bones that I drew with the china marker.

For the legs this isn’t important; the paint only takes up a narrow area on the legs and doesn’t prevent most of the fabric from stretching. You can see my old skeleton pants on the right; I used them as a guide for these new ones.
Fixing mistakes
One more great tip: you will almost definitely make mistakes with your white paint — maybe fudge an outline here or there, maybe spill a drop of paint somewhere — and there’s an easy fix for this: let it dry and paint over it with black paint! No need to be a total perfectionist and correct every tiny mistake, but I always fix the more noticeable ones.
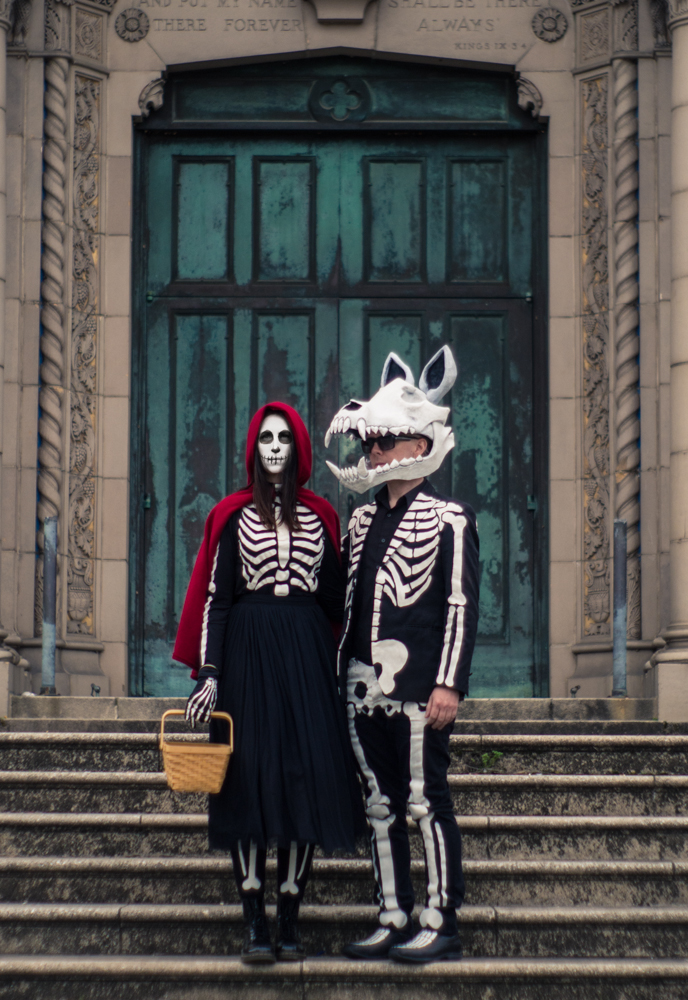
You can see the finished pants in this pic from right before Mardi Gras:
Caring for your skeleton suit
Can you wash your painted clothes in the washing machine? Yes! I’ve learned from experience that it’s totally fine to throw acrylic-painted clothes into the washing machine, and even in the dryer on the delicate setting. The paint stays put just fine. Every couple years I touch up the paint on my suit a little bit, just because tiny cracks tend to develop around the joints, but even these are almost invisible.
I should mention, I even throw my skeleton suit jacket in the washing machine every year and it’s held up fine; if anything it’s stayed in better shape than the pants because the fabric of the jacket is stiffer and the paint doesn’t have to bend and stretch as much as in the pants. The jacket has fit just fine this whole time; it’s just the pants that have shrunk.
Hopefully I’ll be able to wear my new skeleton pants for another five years!
 About Manning Krull
 How to make a 4-foot paper maché alligator
 My violin skull mask, Mardi Gras 2015
 Three-headed paper maché dragon sculpture
February 20th, 2017 at 7:51 pm
I just discovered your website and have really enjoyed reading through it. I’m contemplating using some of your ideas for a costume later this year. I’ll be sure to give you credit with any creation I come up with. Please keep posting – you have a lot of talent!
February 20th, 2017 at 9:17 pm
Thank you, c! Good luck and don’t hesitate to reach out with any questions!
March 21st, 2017 at 3:37 am
if you make a new pair try speedball paint that is used for screen printing, its made for use on fabric it doesnt harden like acrylic paint.
March 21st, 2017 at 10:31 am
Thank you, Sarah! I will definitely try that next time! I found that the paint hardening wasn’t much of a problem for me but it was much more of a problem for my lady, as she tried painting bones on thin/stretchy clothes — leggings and a turtleneck — and when the paint dried it was a little bit scratchy inside. I’ll get her some fabric paint for next year!
November 3rd, 2018 at 4:02 pm
Just wanted to say that I’ve been looking at your site for almost a month as I made my skeleton suit. I followed your instructions and pictures and the outfit turned out fantastic. Thank you so much for sharing your techniques! The acrylic paint worked great and I look forward to having my suit as a part of my Halloween wardrobe for years.
November 3rd, 2018 at 10:28 pm
Thanks Gerry, glad to be of service!