
Paper maché ancient Egyptian canopic jars
Published by Manning on October 30th, 2017

I made these canopic jars as decorations for my Halloween 2017 party. Canopic jars are a set of four jars with the heads of Egyptian gods on top, and they were used during the mummification process to store various organs. I’ll let Wikipedia explain more about them rather than try to write about them myself. I wanted to make these for our ancient Egypt Halloween party to use as decorations in our mummification scene.
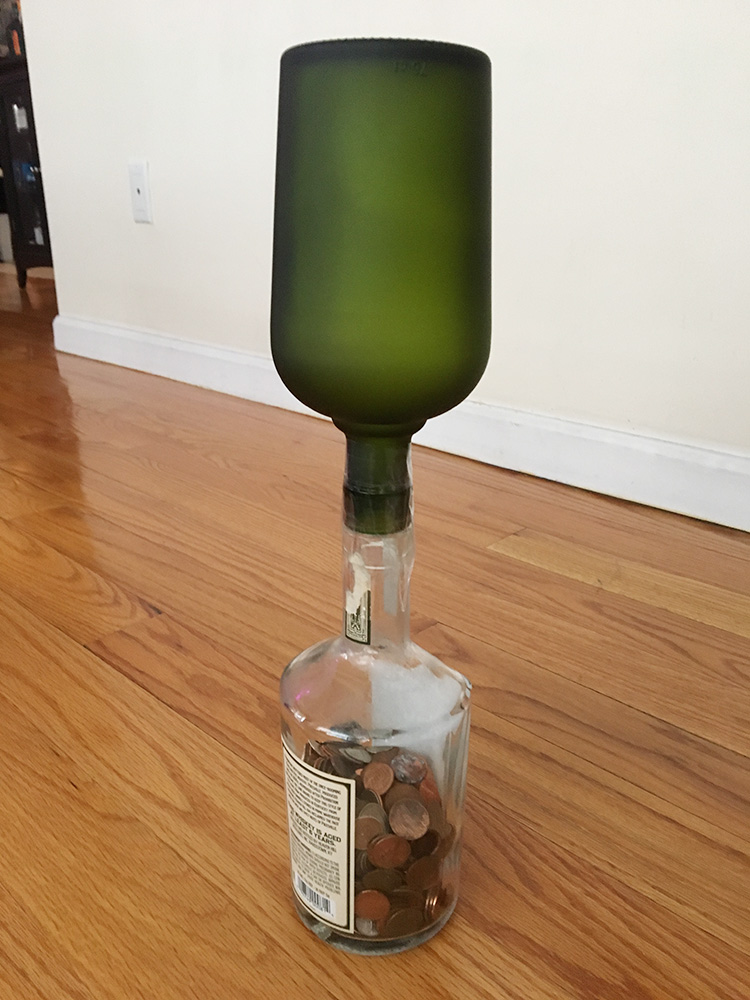
I started by emptying a few bottles of my favorite rum. How I suffer for my art! (Hey Diplomatico! Sponsor me!) I removed the labels with nail polish remover and the rough side of an old sponge. After this project was all done, I used these same bottles to make some beautiful lanterns for the party; more on that later.

I worked on the bottles upside down; I mounted each one upside down on another bottle weighted down with coins, and taped everything in place with packing tape. This made it a lot easier to get at the whole shape of the bottle, especially the bottom surface.
I covered the bottle in plastic wrap before doing the paper maché. This would allow me to easily remove the paper maché from the bottle when finished. Of course, you want to do this as precisely as possible so the plastic wrap is tight around the bottle, without a lot of bumpy parts. (You could also use aluminum foil for this — foil would be harder to apply nice and smooth, but much easier to cut open and remove later.)
I then applied five layers of paper maché to the bottle. You can read about my paper maché process and materials here. The short version is: I use Roman PRO-543 universal wallpaper adhesive (paid link) and alternating layers of newspaper and brown wrapping paper.

In this case I did all five layers in a row, in one sitting. It happened to be wintertime and in New York and the air was dry and our heat was blasting — luckily that helps dry paper maché very quickly.
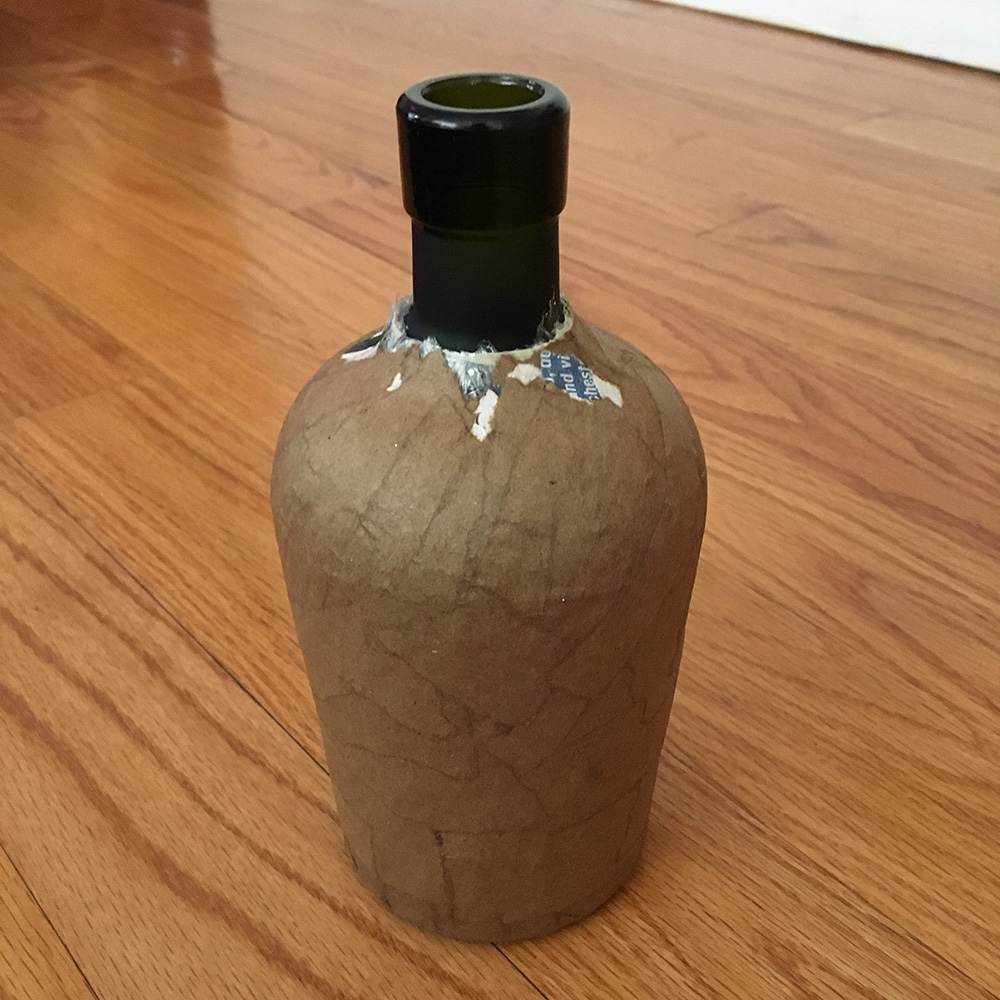
It’s important that the paper maché is 100% dry before the next step, and that means leaving it alone for a couple days. And keep in mind, paper maché dries slower when it’s applied over plastic wrap or any other non-porous surface.
After allowing the jar to dry for a couple days, I sliced it open with an X-acto knife, making a wavy line from the top of one side, down along the side, across the bottom, and back up the other side. I always make a wavy incision when opening up a paper maché shape like this, so that it’s easier to perfectly line up the pieces when I put them back together, like puzzle pieces.
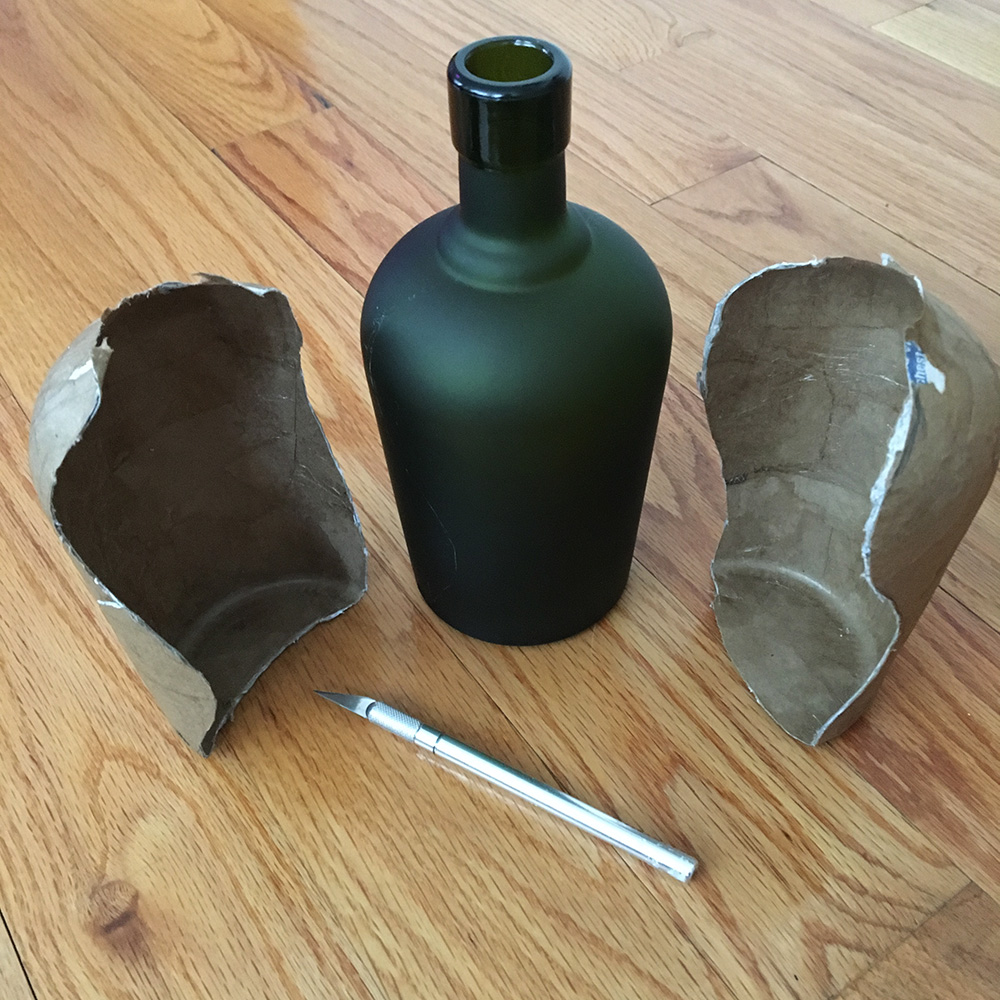
Slicing the shape open completely was a lot harder than I’d hoped! I had this perfect picture in my head of making the incision and having the two pieces just fall away. That was pretty much how it went for my twin paper maché skull masks, but the bottle shape turned out to be a lot harder. When I finished making the incision, the pieces felt completely stuck to the bottle. It turned out they weren’t stuck to the glass at all, but it was nearly impossible to cut all the way through the paper maché and the plastic wrap in one long cut with the X-acto knife. The knife cut the paper but only dragged along some parts of the plastic wrap, so the two halves didn’t want to separate right away. I had to saw all the way along the incision a second time in order to cut through the plastic wrap completely. Luckily, as soon as I managed to do that, the two halves did come off of the bottle really easily! The edges of my paper maché ended up a little more chewed-up looking than I’d hoped, but it would be easy to repair all of that in the next steps.
Let me mention here, slicing the paper maché on the bottle felt very dangerous; I had to apply a lot of pressure with the X-acto knife and I could tell it would be very easy for it to slip, and it was impossible to pull the knife in any direction other than toward me! So I grabbed a huge softcover book of illustrations, about 12″ x 18″, and placed it against my chest and stomach as I cut. This way if the knife were to slip off the bottle it would hit the book and not me. Luckily I was careful enough that this never happened. If you’re a kid, definitely get an adult to do this part for you!!!
After removing the paper maché halves from the bottle, I carefully pulled out the plastic wrap from inside the paper maché; luckily it came out nice and easy.
I then re-attached the halves of the jar with masking tape, and covered the seam with two layers of paper maché. I let everything dry over night.
Next, I carefully measured and drew a line where the opening of the jar would be. I sliced along that line with an X-acto knife.
At this stage, the jar and lid were separated, but they don’t fit together very well like this; the lid just sits on top of the jar and can easily slide off or tilt and fall partway inside. So I added a few things:
I added a ring of craft foam inside the edge of the jar. This would create a thicker wall so the lid can sit on the jar and be more stable.
I also added a second, taller ring of craft foam inside the jar, sticking up a bit. This would create a lip for the lid to hold onto. I covered all of this with thin strips of masking tape.
I then added a layer of paper maché over all of the craft foam parts, as well as the edge of the lid.
When this was all dry, the lid fit nicely over the lip of the jar, but it was still a little loose, so I added a couple more layers of paper maché on all the edges. When that was dry, finally everything fit together nice and snug.
I also added a layer of paper maché on the inside of the jar and lid, to make those surfaces nice and smooth and to hide the incision I made when I cut the two halves apart a few steps ago. (If you don’t care what the inside of the jars look like, of course you can skip this step! More on shortcuts below.)
Of course, at this stage, the tops of the jars look rough and unfinished; they’re fine like this because they’re going to get covered with the four Egyptian god heads that I’ll be making next.
I planned on keeping the heads on the lids as lightweight as possible, but I knew the jars would still feel a bit top-heavy when they were done, so I added a layer of pennies inside the bottom of the jars and covered them over with paper maché.
Okay, all of that was the easy part! Now it was time for the hard part: the heads.
Sculpting the heads
I did a ton of research through Google image search ahead of time and sketched out the four heads at the real sizes I wanted for the jar lids, just to give me a visual reference to keep next to me while working on the real 3d heads.
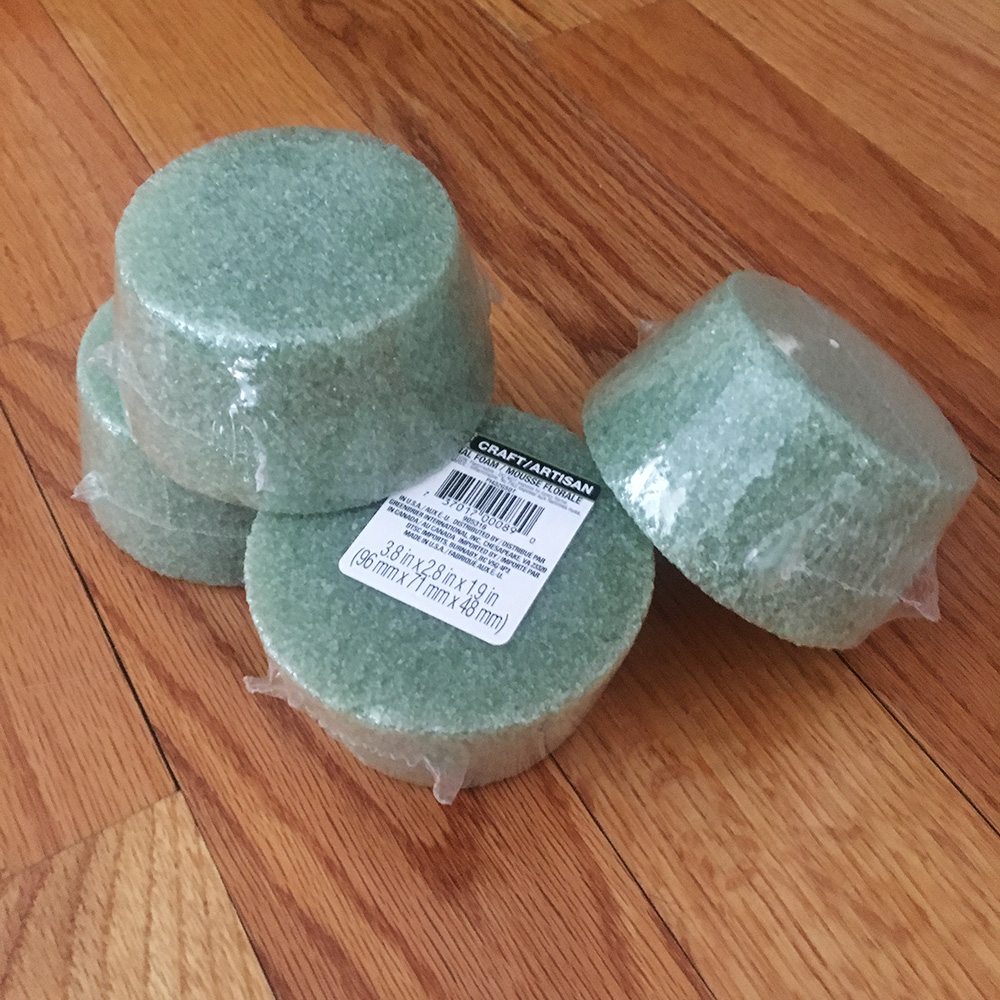
I made a base for each head out of a piece of floral foam — these styrofoam blocks that you’d stick fake flowers into. I happened to find these sort of tapered cylinder shapes at the dollar store and realized they were the perfect shape and size for my canopic jar lids. I bought four of them, but I could’ve just bought one; my plan was to remove them entirely from the base of the lids when the paper maché was done. But buying four meant I could work on all four at the same time.
I rounded out the flat top of the foam shapes with some big blobs of aluminum foil and tape.
I sculpted the four gods’ faces out of Activa Plus modeling clay, molding the clay right onto the base of floral foam and aluminum foil. I was in a real rush on these so I kept the details very simple! I let the clay dry for a few days, and then I covered the heads carefully with a sheet of aluminum foil, and added four layers of paper maché. When this was dry, I sliced open the heads and removed the clay/foam/foil. I then reattached the halves of the heads and covered the seams with more paper mache.
When that was dry, I cut out the bottom surface of the heads so I could mount them onto the lids of the jars. I attached them with some masking tape, and of course covered that seam with more paper mache. Finally all the paper-maché-ing of the jars and lids and heads was done! Whew!
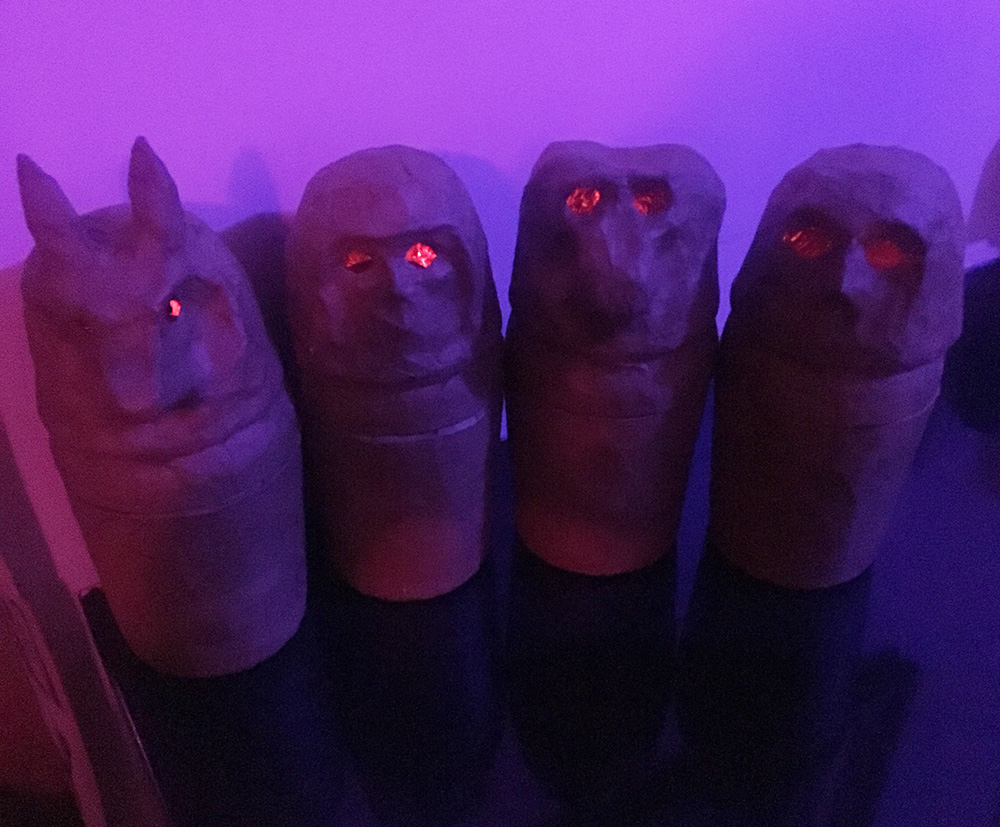
I had very little time left before my party so I opted not to paint these jars; the brown craft paper texture looked great on its own. I did decide to cut holes in the eyes and insert a small red LED light in each head; this created a really neat spooky effect!
These were a lot of fun, and if I had it to do all over again I’d definitely spend more time on the face sculptures, and I’d paint these things as well.
A couple shortcuts you can take
For certain parts of this project, you may be able to save yourself a ton of time and skip a lot of steps, depending on what your goal is. So, it’s important that you decide ahead of time if you want the jars to just be sculptures/decorations or if you want to actually be able to open them and store things in them. And if you do want to actually use them, it’s important to decide if you care what the inside of the jars looks like or not. What I mean is, if you don’t plan to actually use the jars as jars, you don’t even need to make the lids removable! You can just leave them attached and skip a lot of steps. (Now that I think about it, you don’t even need to remove the bottle! You can leave it in there if you don’t need the bottle for anything else.)
If you do want the lids to be removable but you don’t care what the inside looks like, then you can skip the steps where you apply tape inside to re-attach the two halves, and you can skip adding a layer of paper maché all over the inside.
I wasn’t sure what I wanted out of these things so I went to the extra trouble to make the lids removable and to make the inside of the jars look nice. That way after our Halloween party I can keep them as year-round decorations or give ’em away or somethin’.
 About Manning Krull
 How to make a 4-foot paper maché alligator
 My violin skull mask, Mardi Gras 2015
 Three-headed paper maché dragon sculpture
October 31st, 2017 at 8:45 am
What were the dimensions of you rum jars lxwxh…And what were the dimensions of the finished canopic jars. Thanks
October 31st, 2017 at 11:48 am
Hey Laurel, the rum bottles (minus cork) are about 8″ tall and 4″ wide, and the finished jars are about 8.5″ tall and 4.25″ wide.
May 28th, 2018 at 7:38 pm
These are great. I just came across this. Coincidentally I made papier-mâché canonic jars myself. I did mine with plastic flower pots and balloons shoved into the top to get the shape
May 29th, 2018 at 7:54 pm
Thanks Jorge! I’ve been meaning to do this project again someday at a bigger scale so I can get a lot more detail out of the faces; your flower pot and balloon method sounds perfect for that!