
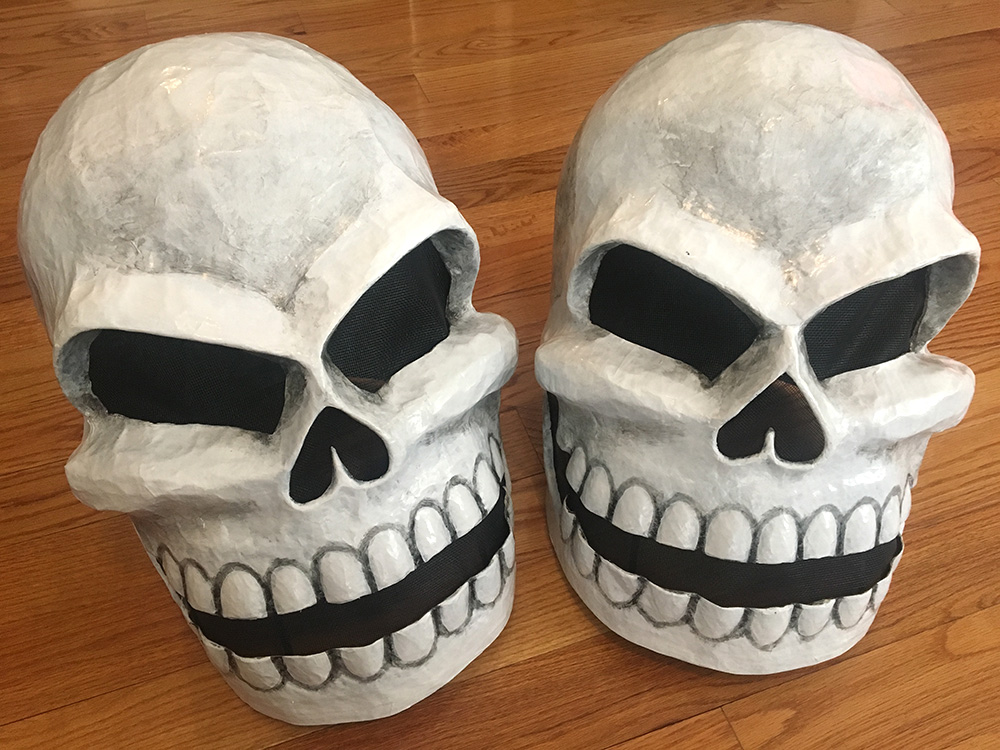
Twin paper maché skull masks
Published March 20, 2017
A new project, a new experiment! I received a custom order for a pair of twin paper maché skull masks; the request was to base them on the design of my first Mardi Gras skull mask and keep them more or less identical, and there was a very short timeline to get them both done. So, I decided to try a reusable base! This was a first for me.
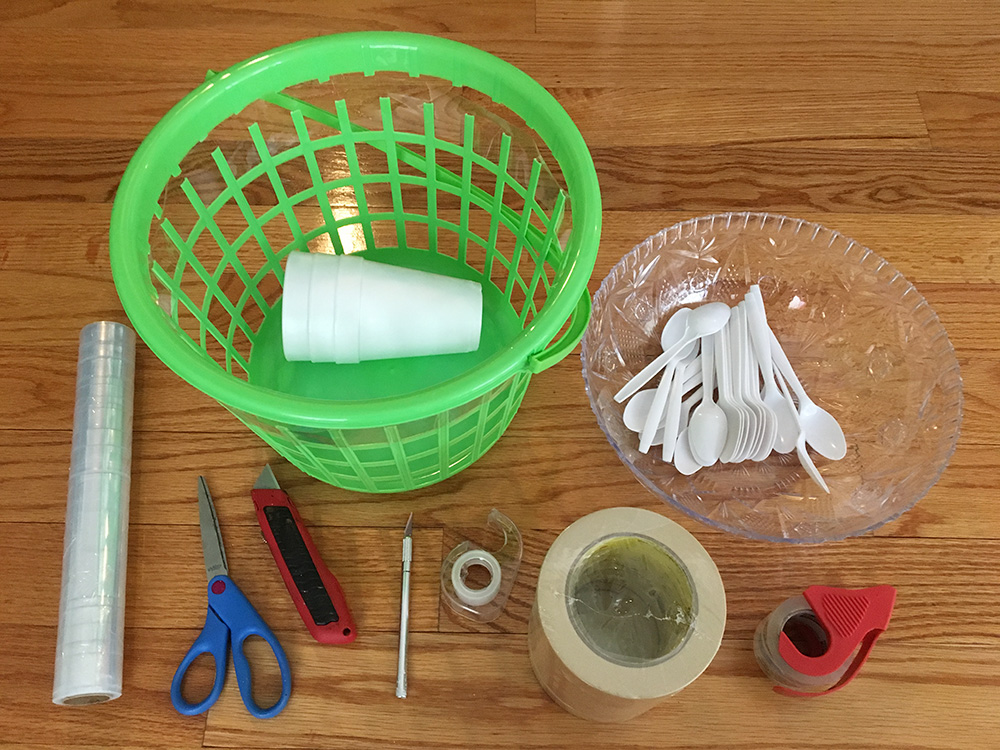
Luckily I have that article about how I made that first Mardi Gras skull five years ago; otherwise I probably wouldn't remember how I did it! Of course it would be impossible to get these new ones exactly the same as that one, but I'd do my best to get them close. I started by visiting the dollar store and buying similar materials to what I used in the first one: a plastic basket for the bottom, and this time a large plastic bowl for the top of the skull. I also stocked up on foam board, poster board, craft paper, masking tape, packing tape, plastic spoons, styrofoam cups, craft foam, and two boxes of aluminum foil sheets. The aluminum foil would be the key to reusing the base.
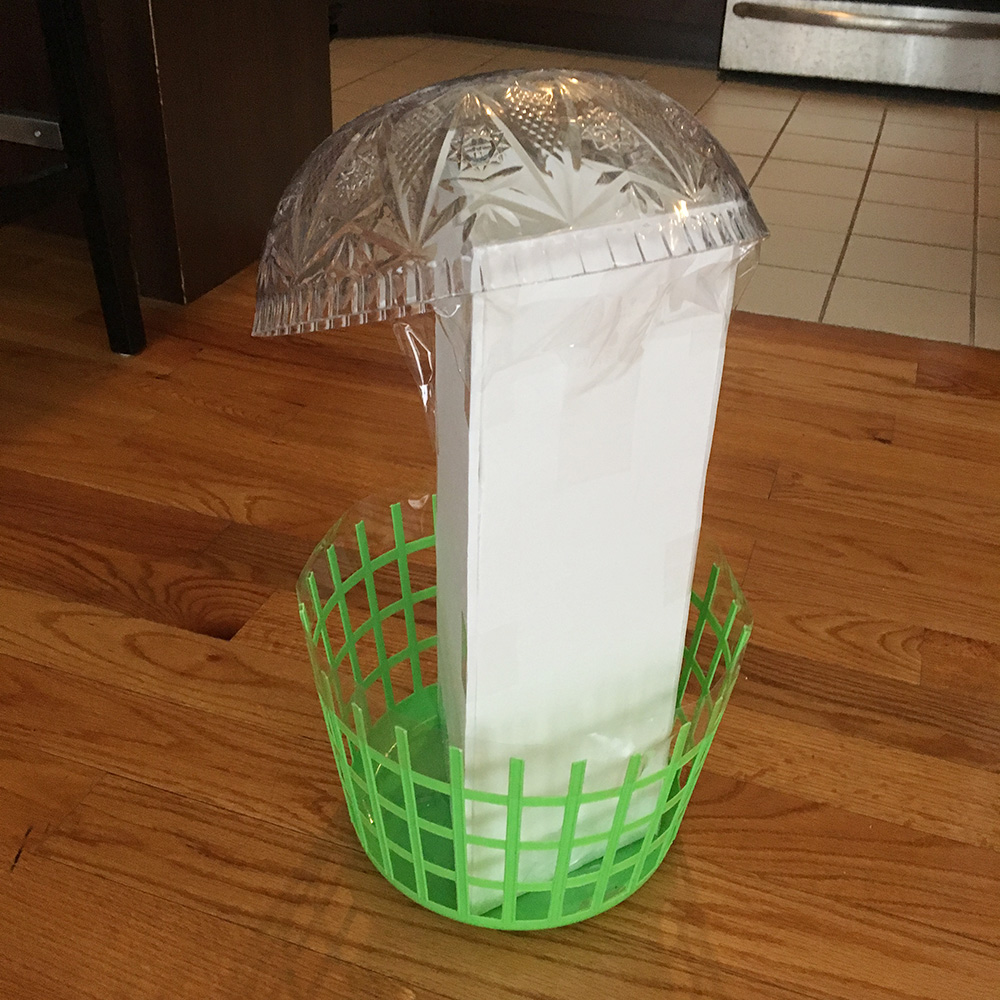
You can read about my first Mardi Gras skull mask to see how I assembled these parts to make the base. Basically, basket on the bottom, bowl (instead of a basket this time) on the top. I made a tall foam board tower-shaped thing to separate the basket and bowl and give the structure the height I wanted, and taped everything together with packing tape. The bowl is taped in place tilted back at an angle.
Then I taped long strips of poster board over the whole thing to build out the slightly curved walls structure.
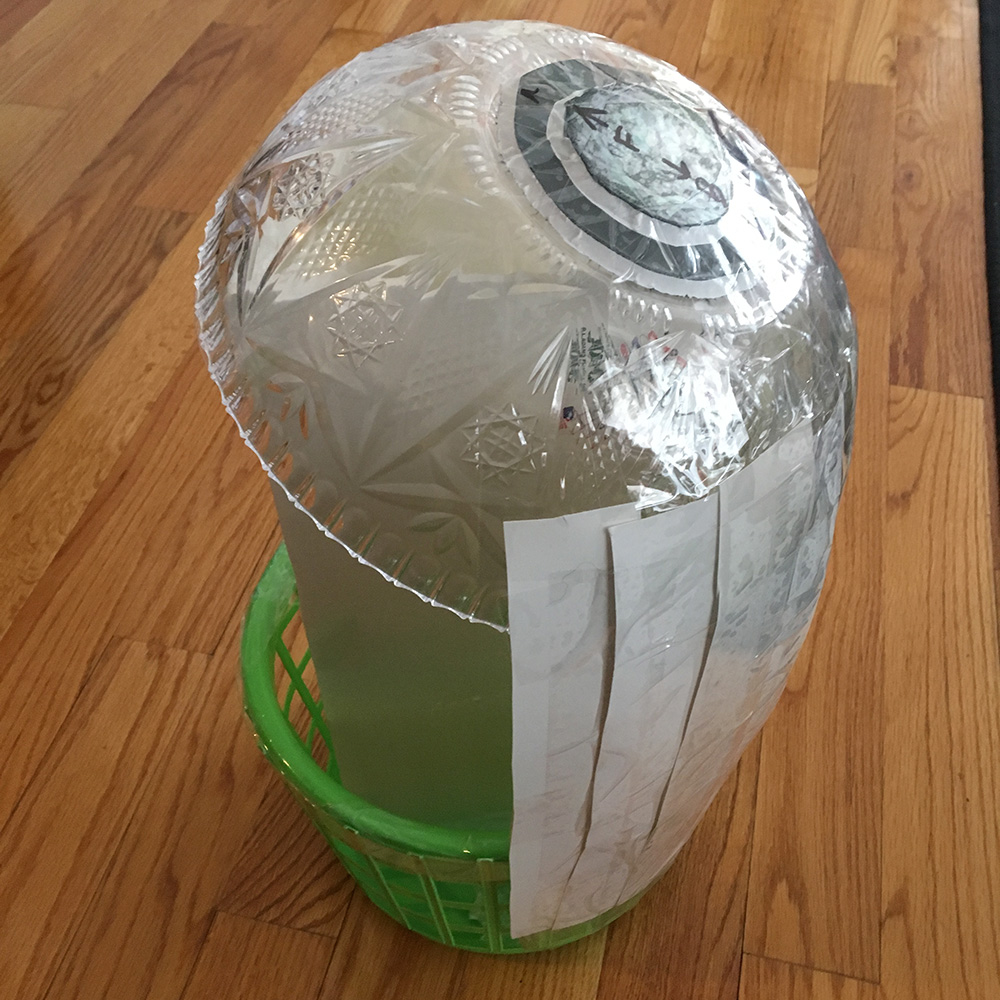
You might be able to see here, the bottom of the bowl was flat, so I added two disks of black foam board and lots of packing tape to round out that area.
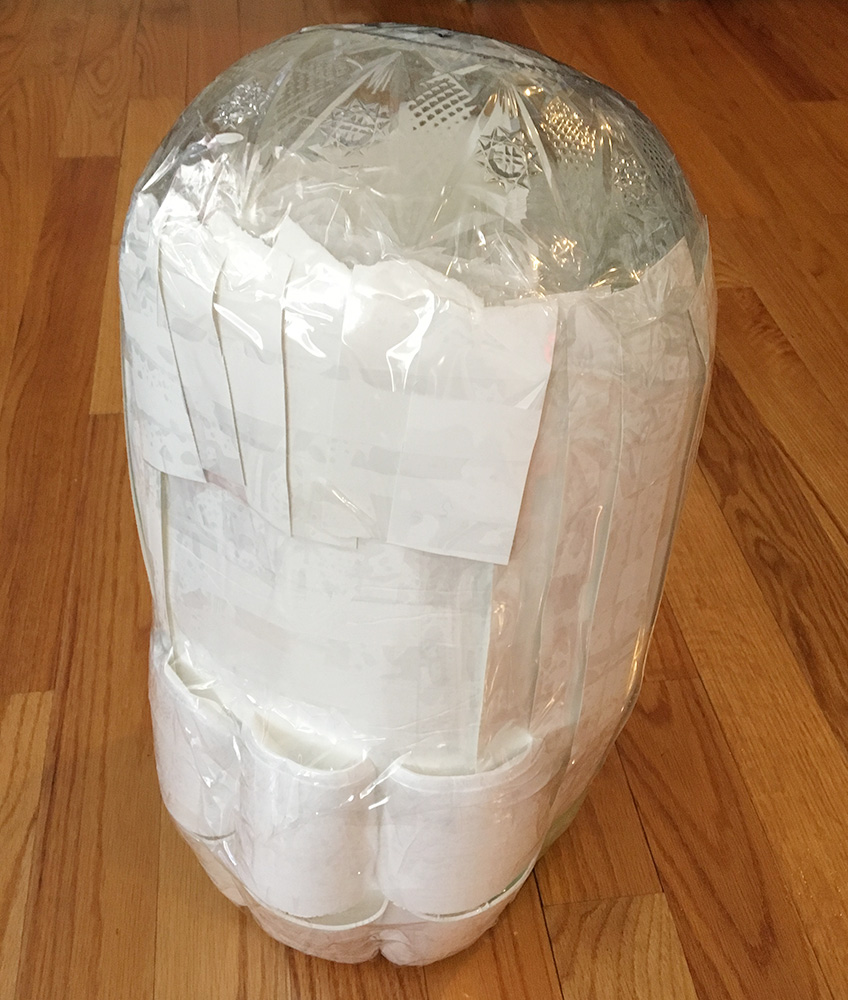
I used three styrofoam cups, sliced down the middle and with the bottoms cut out, to build out the jaw. I taped them in place and then covered them with tons on tape. If you haven't learned by now, basically everything in my projects gets covered with tons of tape.
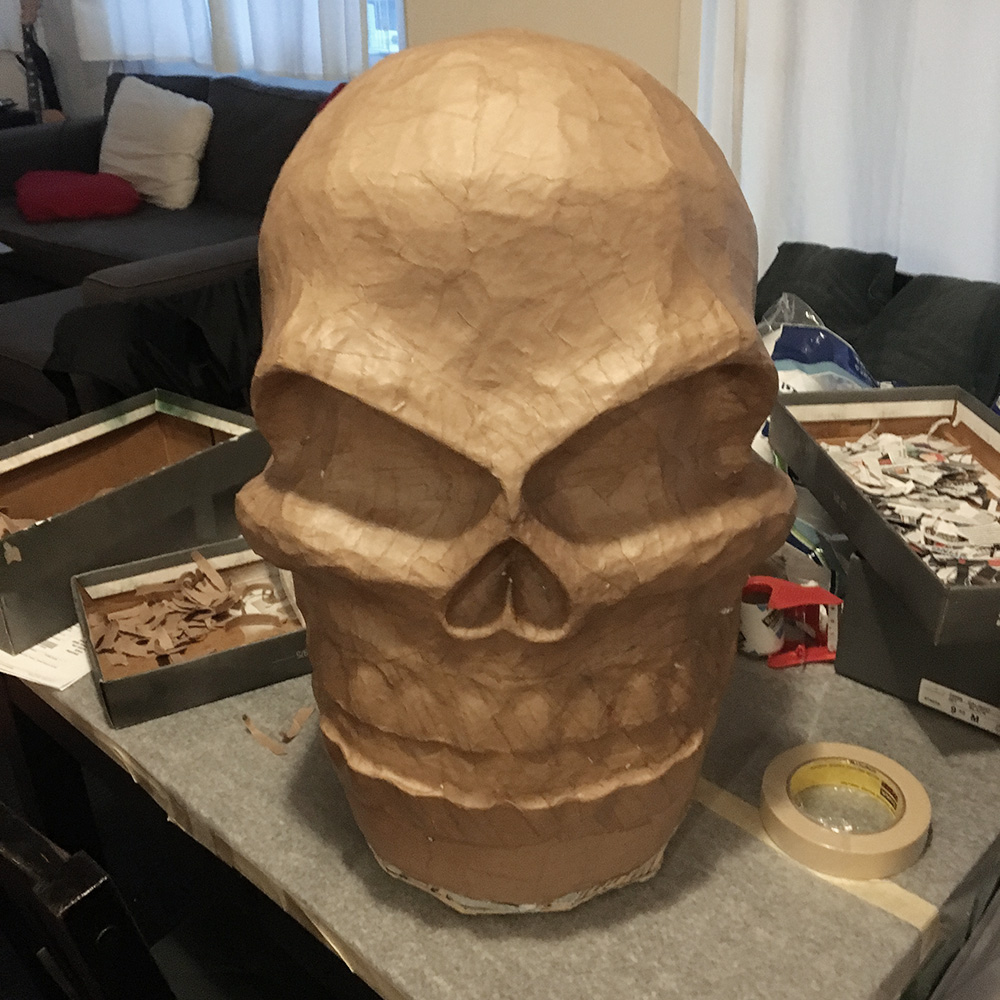
I forgot to photograph one step! After attaching the cups for the jaw, I wrapped the entire base structure in a long thin strip of bubble wrap. I took a roll of bubble wrap (12" x 6 feet) and cut it into four long 3" strips. I then taped the ends of those strips together to make one very long strip. I taped one end to the bottom edge of the base, and carefully wrapped the strip around the base tightly, just barely overlapping at the edges, and I periodically put a piece of tape in place to hold it all together. The tight layer of bubble wrap really helps smooth out all the shapes and weird angles in the base. When that was done, I then covered the whole thing with masking tape.
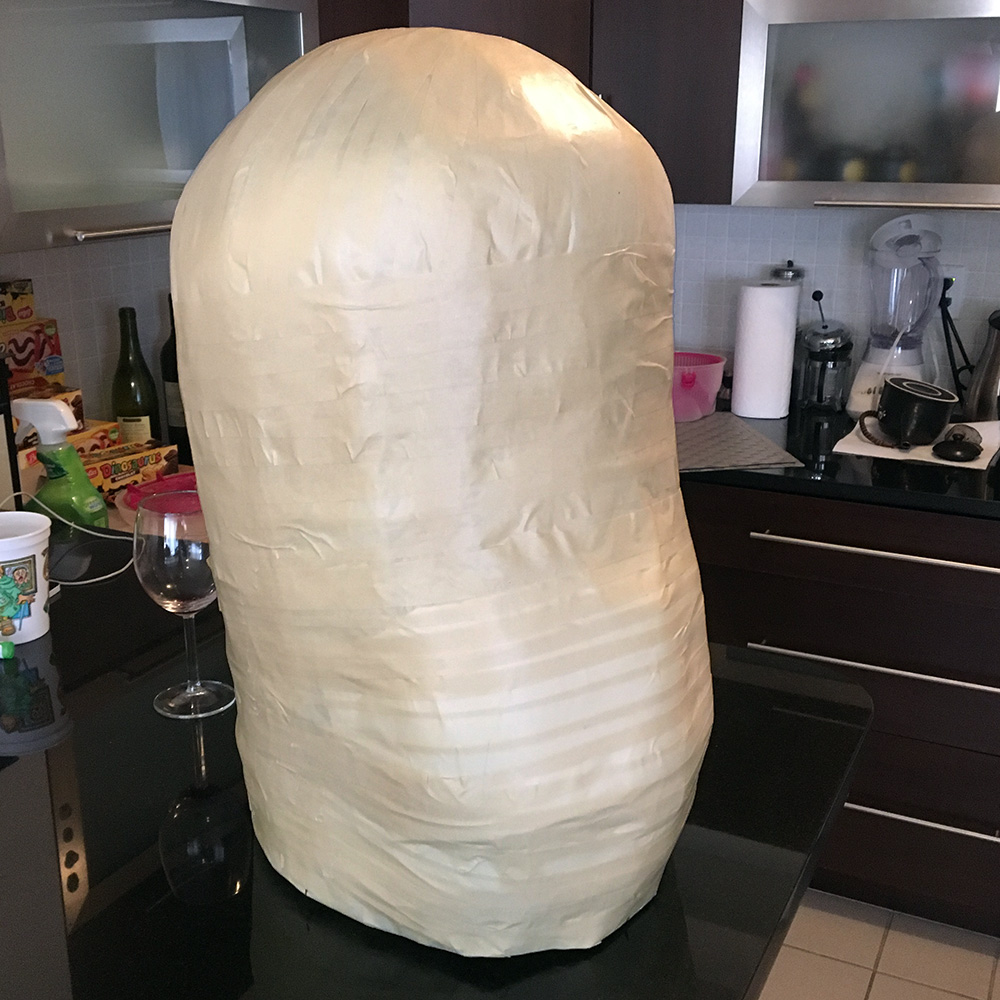
Looking a little Homer-Simpson-y there!
Teeth
In my first mask skull mask that these new ones are based on, I wasn't happy with how the teeth looked because of the way they were made separately and glued on — they looked, well, glued on! They didn't look like they were really merged with the rest of the skull; if you looked closely you could see a little bit of space between and even behind them and it made it look like they were barely holding on. I also hated that there was no gum line to help it look like the teeth were actually rooted into the skull.
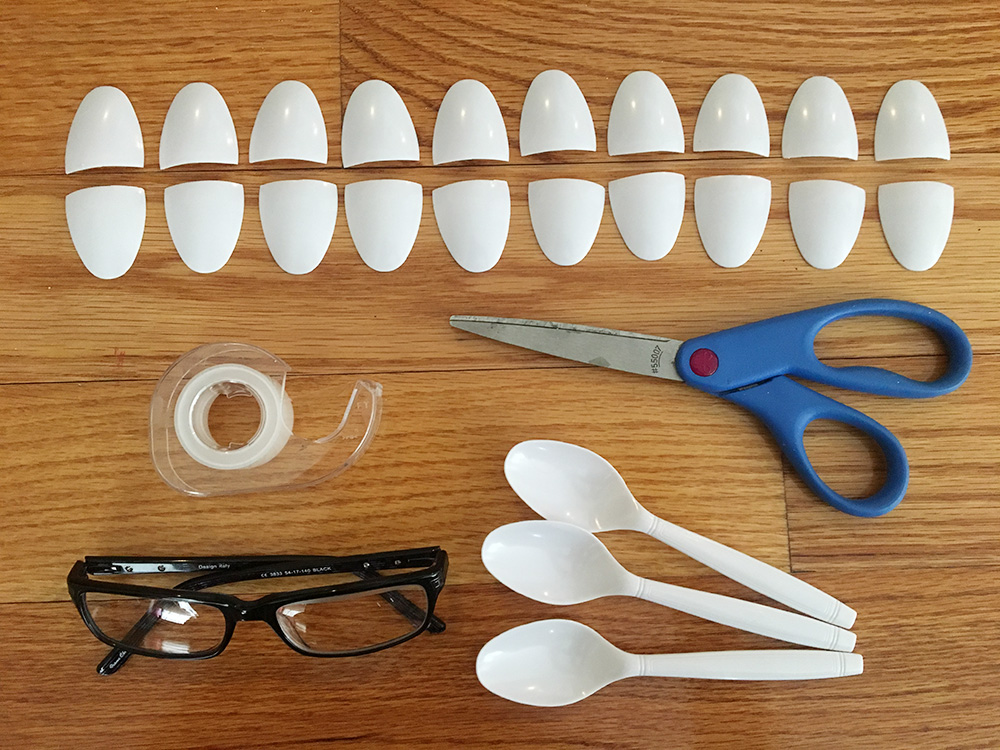
So, to remedy all of this, I decided to build the teeth directly onto this new base and to do all my paper maché over them; that would definitely make them look more integrated with the skull. I made the teeth the same way as before, with plastic spoons that I cut to size.
If you want to try this, two things to keep in mind: 1) it's important to put a piece of tape on the spoon where you're going to cut it, to keep it from cracking/shattering, and 2) you should wear goggles — or just plain glasses, which is what I did — to protect your eyes from any tiny pieces that might go flying.
I cut twenty of these teeth and and taped them right onto the base.
I also added a gum line made from a strip of craft foam — the sort of thin rubbery foam you can buy at the art store that's sort of like yoga mat material. I cut out the arched shape of the teeth from the strip of craft foam and taped it in place, and then added a ton of masking tape on the outer edge — away from the teeth — to smooth it onto the rest of the skull. I happened to only have brown craft foam handy; you can see a little of it poking out from under the tape here.
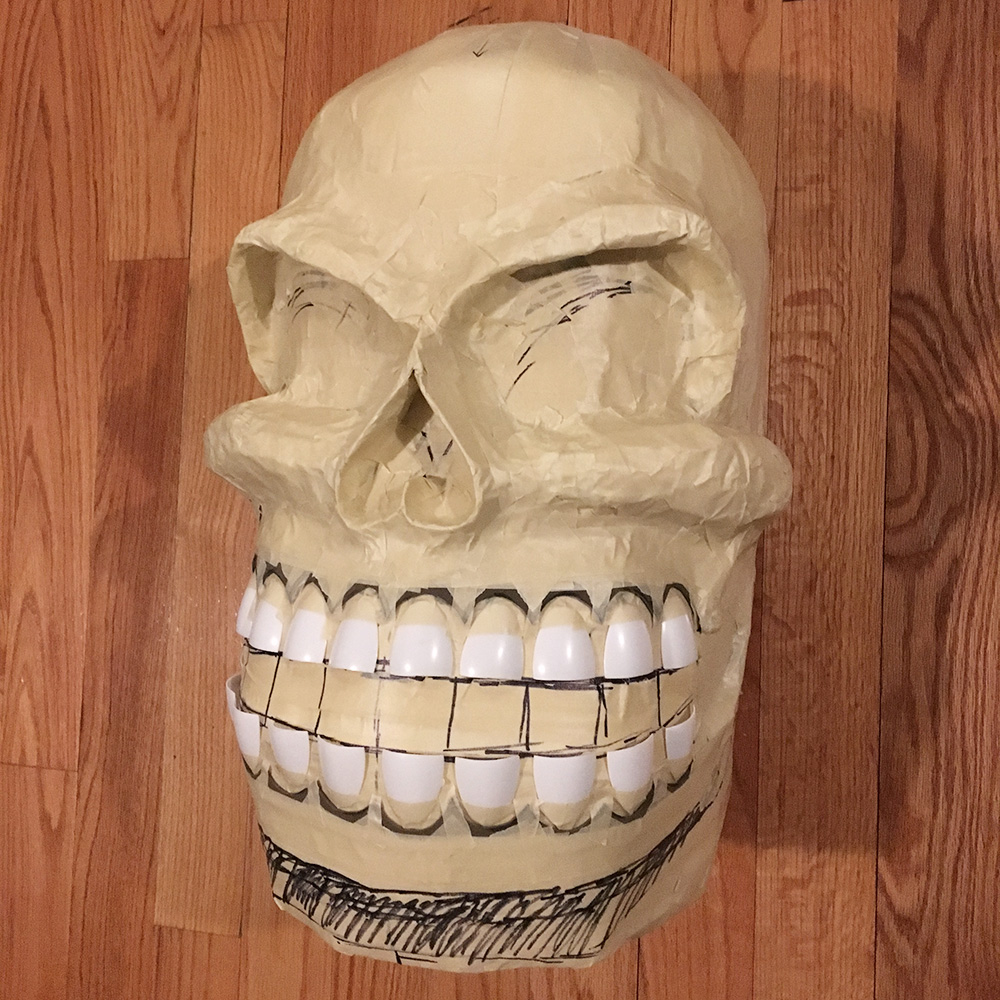
The area at the bottom where I scribbled on it with marker is the part I'm going to cut off for the finished mask.
Time to start the paper maché! First, I knew I wanted to cover the whole skull with aluminum foil so that it could act as a release agent for the paper maché — this would allow me to remove the finished paper maché from the base and re-use the base for the second skull. I started by carefully covering the teeth with aluminum foil, since they were by far the trickiest shapes. Then I added more aluminum foil along the whole base, taping the sheets to each other.
I did seven layers of paper maché in all, over several days. I use Roman PRO-543 universal wallpaper adhesive (paid link) and alternating layers of newspaper and brown wrapping paper.
One downside of working with paper maché over aluminum foil is that it takes longer to dry, since no air can get in from the side with the foil. An electric fan helps speed up the drying time a lot!
Normally when all my layers of paper are done, I slice open the bottom of the mask with an X-acto knife and begin chopping up and removing all the base materials — the base gets completely destroyed in this process, which is actually a lot of fun! But since I needed to reuse the base, I used a different method. I carefully sliced a wavy line all the way around the side of the skull — from the bottom of the left side, all the way up to the top of the head, and all the way down the right side. The goal here was to slice all the way through the paper maché and the aluminum but try not to go too deep into the masking tape and the rest of the base; you're definitely going to slice up the base a little bit, but it's not a big deal.
The reason for making the incision a wavy line is so that it's easier to line the pieces back up when you're going to reconnect them — they fit like puzzle pieces. If they line were straight it would be harder to line them up perfectly.
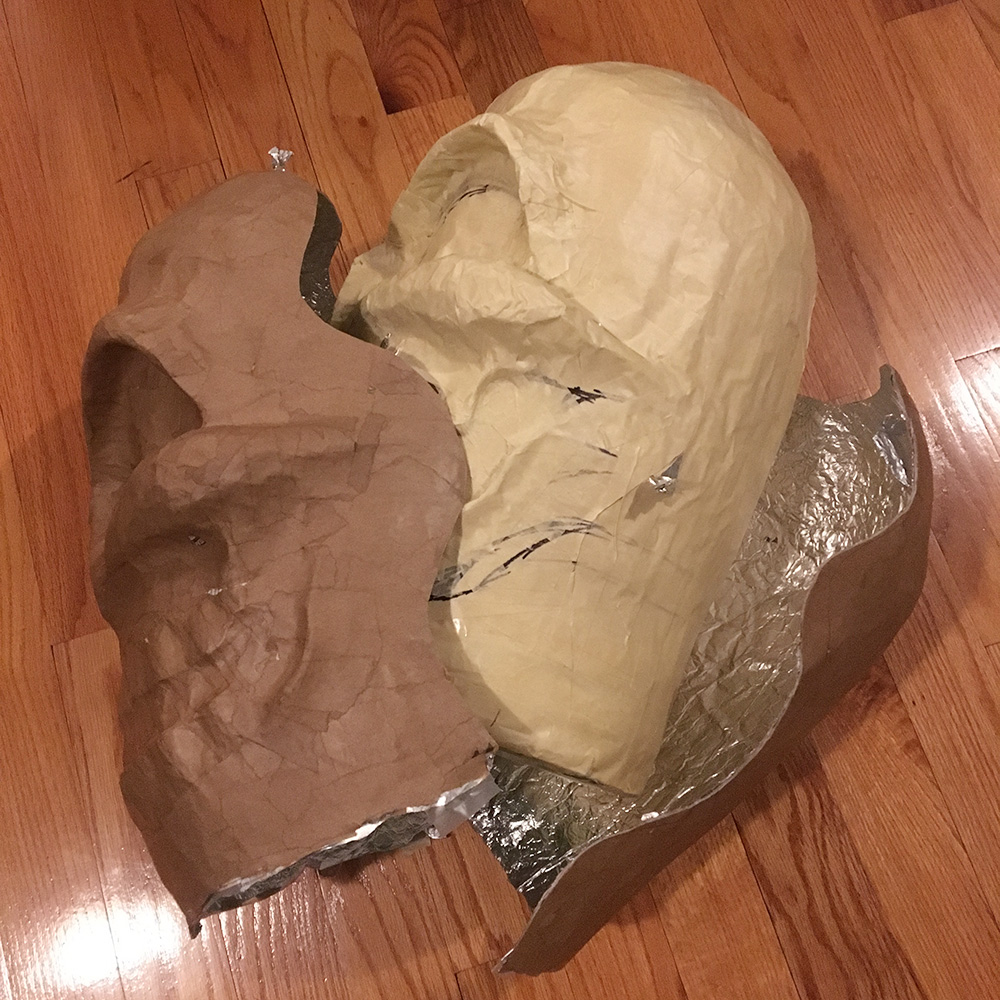
After making the long incision with an X-acto knife, I carefully removed the two big paper maché halves along with the aluminum foil. I was relieved that the pieces separated from the base very easily!
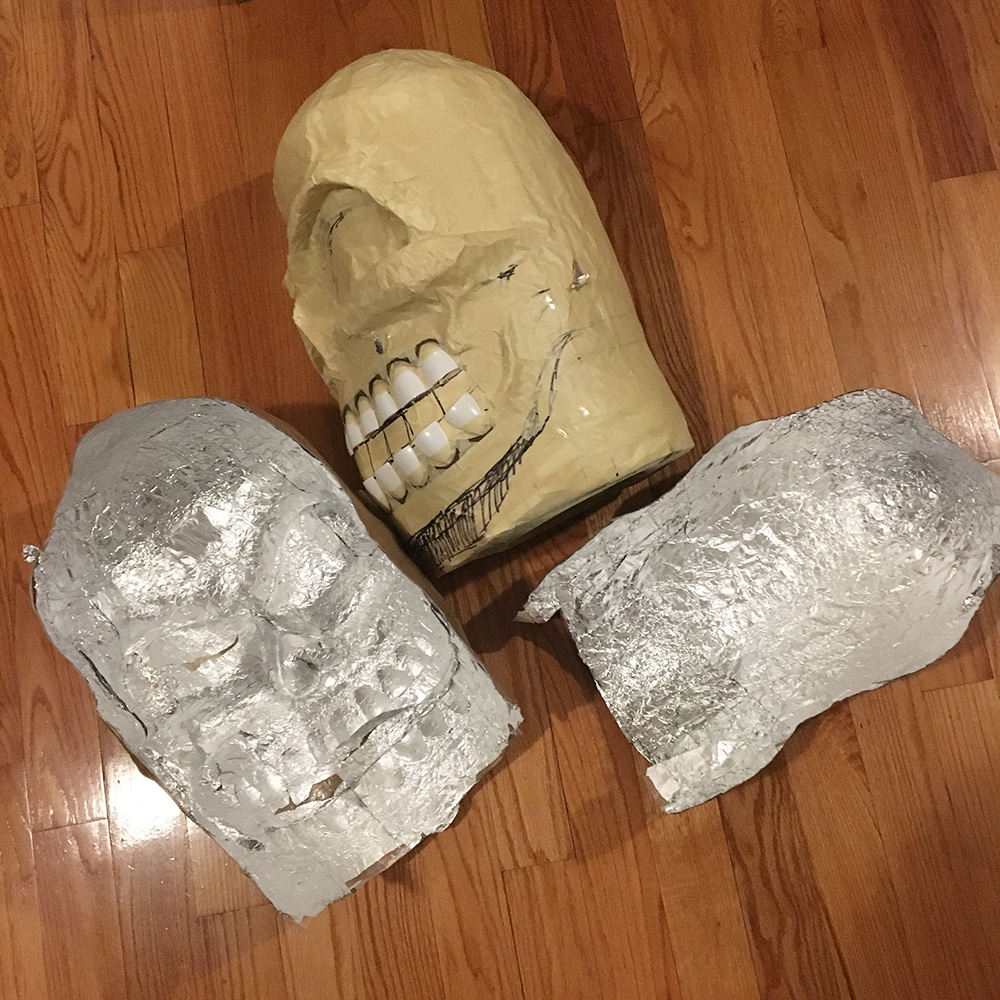
I then peeled the aluminum foil out from inside the paper maché halves of the mask. This part turned out to be a lot harder than expected. I thought the aluminum foil wouldn't stick to the paper maché much at all, but some parts were really glued in there. In the end I could only remove about 90% of it. But this doesn't really matter, as it's inside the mask and won't be visible, and it hardly adds any weight at all. Also, I always spray paint the inside of my masks black, so that would help hide the foil as well.
I reconnected the two halves of the skull with masking tape; I applied the tape along the incision line on both the outside and inside of the skull.
I used an X-acto knife to cut out the eyes, nose, and mouth holes, and I used scissors to trim the bottom edge of the masks.
For masks like this with a wide rounded opening I always use plastic zip ties to reinforce the interior bottom edges. I grab some zip ties, snip off the square opening bits with pliers, and tape them inside the mask with masking tape, all along the interior bottom edge. These will help prevent the opening of the mask from warping, like if the mask is stored in a standing position for a long time. (Note: it's much better to store masks like this on a vertical stand of some kind, rather than standing up on their own; they can warp a bit under their own weight.)
You might think that zip ties seem like a pretty flimsy object to strengthen a mask like this, but you'd be surprised; in curving the zip ties inside the base of the mask and attaching them firmly, you're putting them in a constant state of wanting to straighten back out, so they're essentially all pushing outward equally on the interior edge of the mask. This makes the mask feel very solid and stable but still slightly flexible. Pre-zip ties, if you set down a mask like this it wobbles a bit as those big side and back walls of the mask remain somewhat flexible. After the zip ties are in, the mask sits perfectly still and the walls feel much more solid. Physics!
So, then it was time for the final bits of paper maché. I did a layer of paper maché over all the tape that connects the two halves of the mask, as well as a layer over the zip ties and tape inside the mask, and I also reinforced the edges of the eyes/nose/mouth holes with tiny strips of paper maché, just to smooth out those edges and make them look nicer.
When dry, this skull was ready to paint, but I set it aside to finish later. I wanted to switch gears here and make my second skull so I could paint the two together.
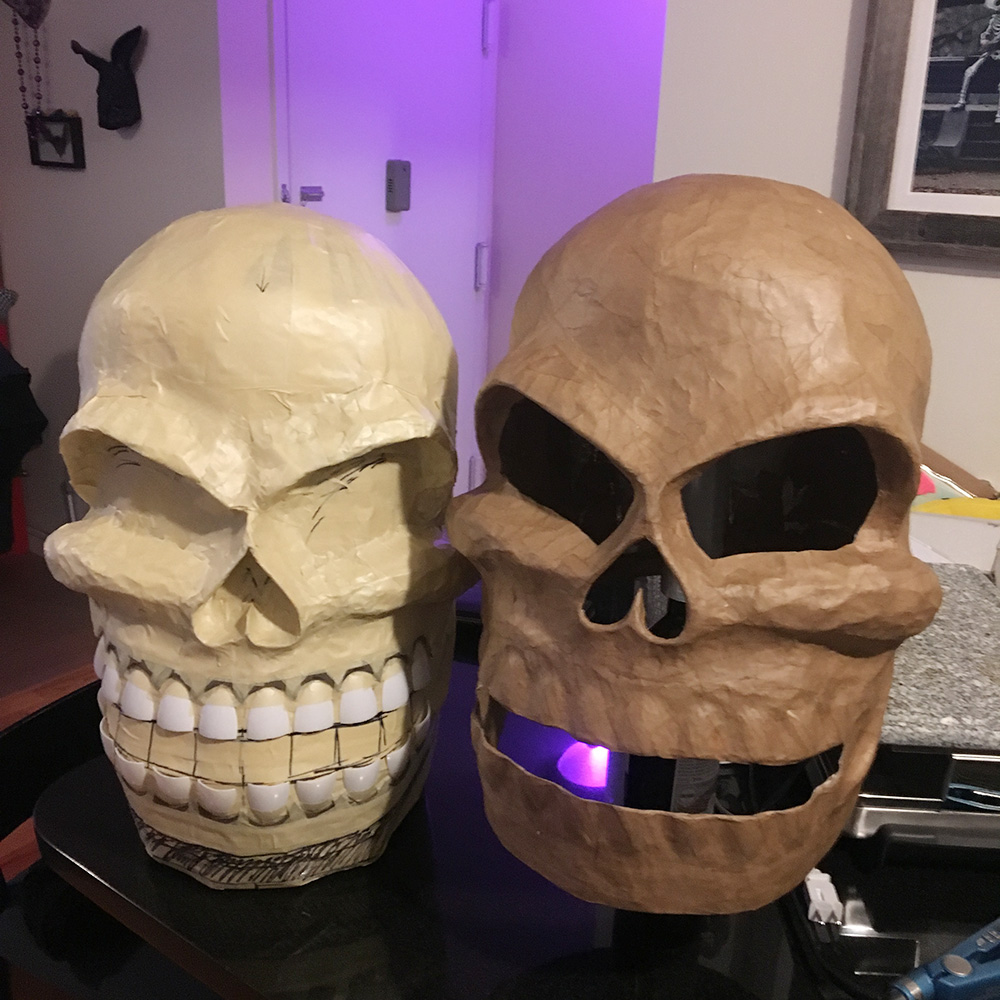
At this point I went back to my base structure and did some quick repair work in the areas where I accidentally sliced it up a bit with the X-acto knife while removing the first paper maché mask. I simply added a bunch more masking tape along the line where I'd cut, and it was pretty much good as new. Here's the base, ready to use again, next to the first paper maché mask.
Then it was time to do the paper maché for the next mask! I skipped the aluminum foil this time and just applied the paper maché right onto the base. That meant that when the paper maché was done I'd have to destroy the base in order to remove it. No worries, I'm done with it after these two masks.
After finishing seven layers of paper maché and letting them dry, I chopped up the bottom of the base and started removing all the junk inside; the basket, the poster board, the bowl, the foam board, and a mountain of tape.
Then I did the same steps as for the first mask: cutting out the eye/nose/mouth, trimming the bottom edge, adding the zip ties, and finishing all those last paper maché bits.
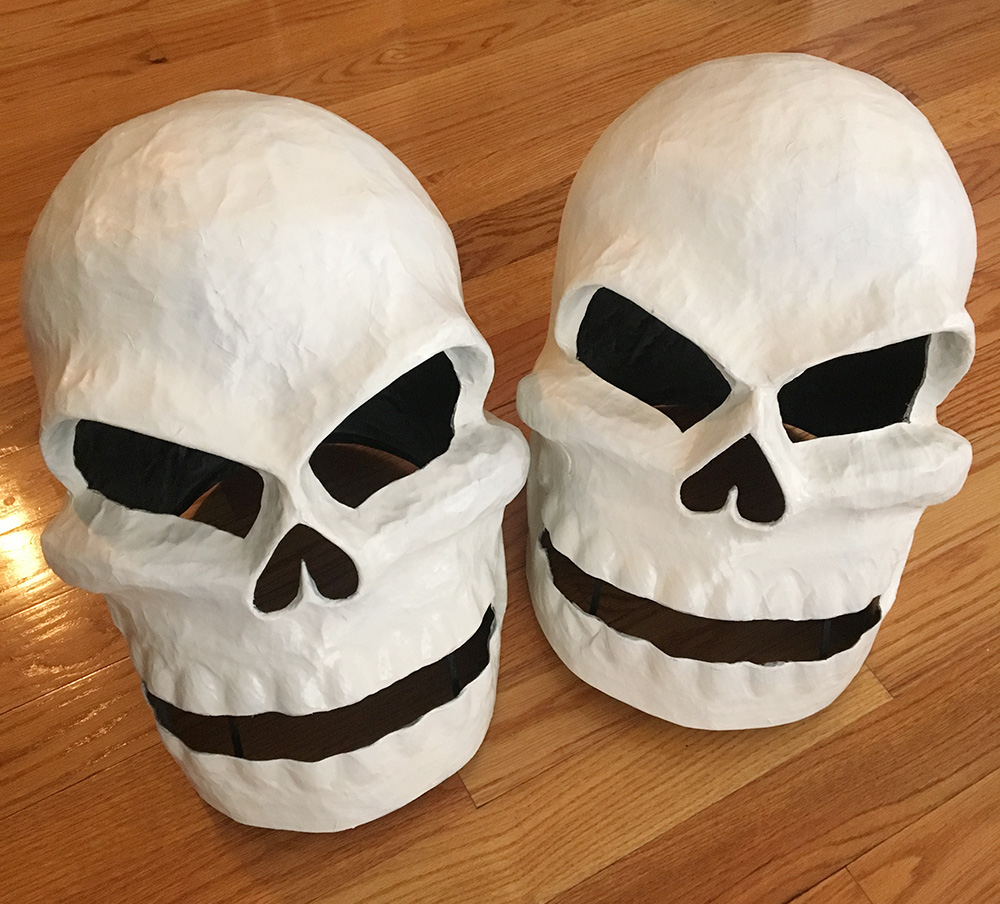
Finally, I had two finished paper maché skulls, ready to paint! You can read about my painting process here. I did my usual routine: I started by spray painting the interior of the masks black. Then I spray painted the exterior white and let the masks air out outside for three days. Then I did a coat of black acrylic paint applied roughly with a sponge to dirty up the whole shape, and then I did a few rounds of dry-brushing with white acrylic paint to bring out all the highlights. I then neatened up some small details (like the teeth) with a small brush, and finally added a coat of matte spray to protect the paint job.
Here are the two masks with just spray paint. With this solid white base coat you can see a bit of a difference in the texture on the two skulls; the one I used the aluminum foil for (left) is a bit bumpier than the one where I did the paper maché right onto the relatively smooth base (right).
Here are the skulls after dirtying them up with a sponge and black acrylic paint.
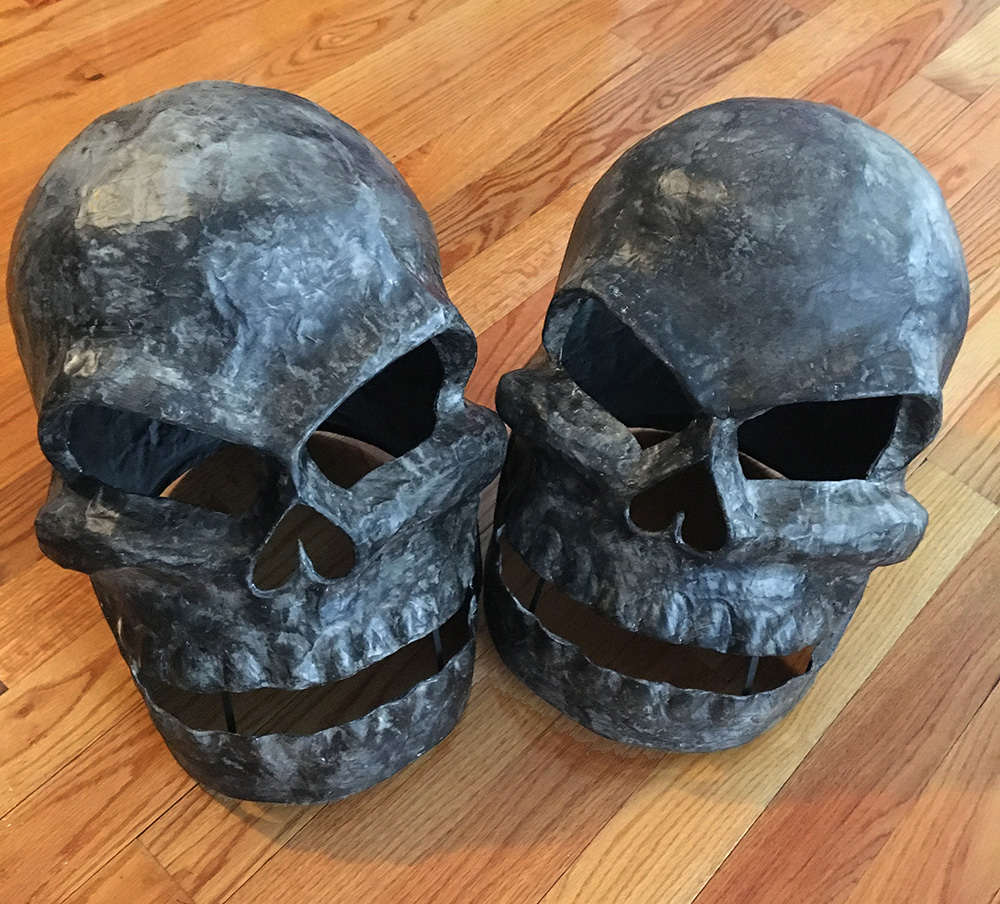
And then here they are after using a sponge with white acrylic paint and then a quick round of dry-brushing with more white acrylic. You can see how the white/black/white again technique creates a neat, varied, bone-looking texture with lots of highlights and shadows.
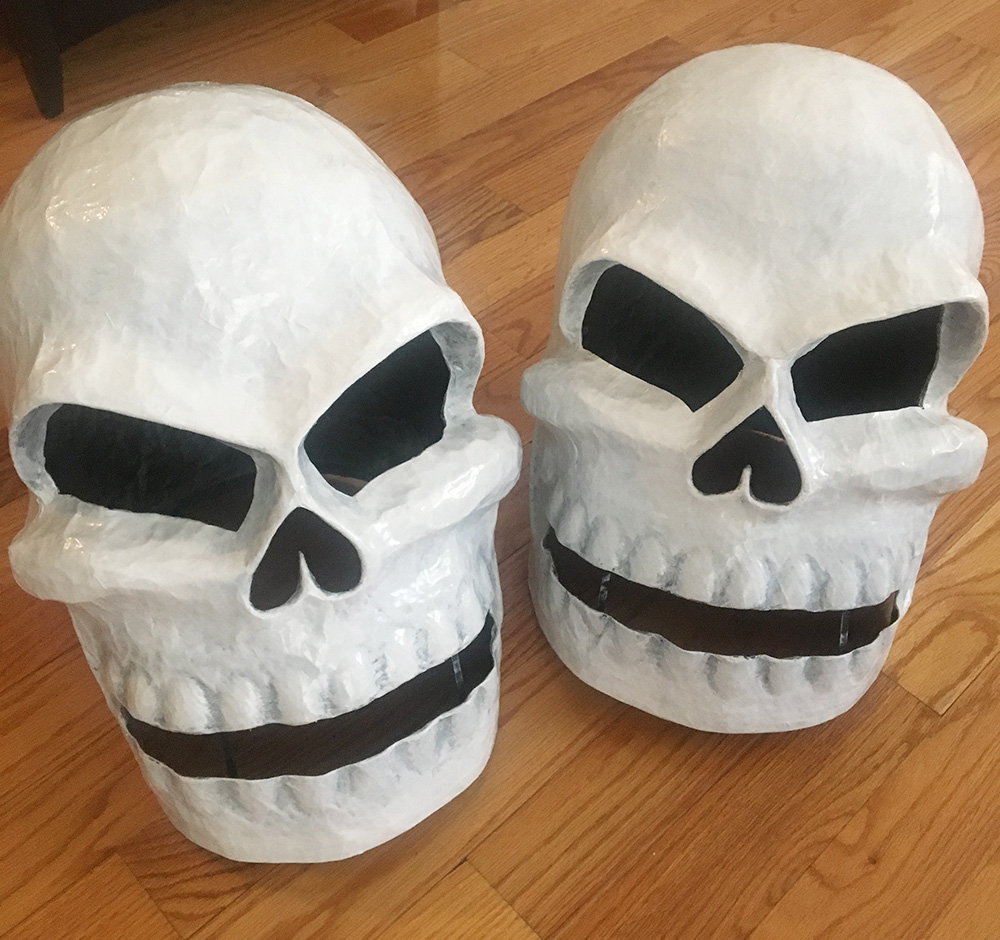
Then I added some big areas of shading with a tiny amount of black acrylic and a sponge, and I accentuated the shading between the teeth with black acrylic and a small foam brush. (I've sometimes used a Q-tip for this kind of thing too.) I also went over the teeth one last time with white acrylic and a small brush to make the shapes of the teeth nice and crisp.
The difference in texture between the two skulls is much less noticeable since the highlights and shadows I painted sort of imply their own degree of texture, and I was able to make that pretty similar across the two skulls. Also, hard to see here, but I filled in the areas at the sides of the mouth with solid black to create the illusion that the mouth opening is wider. I didn't want to cut the entire mouth out because that would weaken the overall shape of the mask too much. If you go back up to this pic you can see how wide I actually cut the mouth opening (at the far right) — just to the end of the teeth — and if you go back to this pic you can see the shape I sculpted into the jaw to imply that the opening goes back further than the teeth; that's the part I filled in with black paint to complete the illusion.
After painting, I attached black screen material inside the masks to cover the eyes/nose/mouth areas, and then I attached some wooden coffee stirrers vertically behind the mouth to reinforce that area; otherwise the wide opening of the mouth could slowly warp if the mask is set down for a long period of time; the weight of the head would make the mouth want to close a bit.
I installed a hard hat in each mask with Gorilla Glue, using styrofoam blocks to prop the hard hat up in the right position. I always scratch up the surface of the hard hat with a small saw to give the glue a better surface to hold onto. A friend who makes masks gave me a great idea: punch a bunch of holes in the top of the hard hat with an awl and hammer (or with a drill), and that lets the Gorilla Glue seep through and expand, locking the hard hat in place. Easy and very effective!
And that's about it! Here's a quick video that shows a 360-degree view of the finished skull masks.
These came out pretty cool and I learned some useful new stuff. Now on to the next project!
Interested in a custom paper maché mask or sculpture? Check out my page about custom work.