
Paper maché axe prop
Published by Manning on August 5th, 2019
I made this here paper maché axe prop for my 2019 Halloween party — theme to be announced soon! It was really easy; here’s how I did it…
A little background: you may remember I made a way-oversized axe prop a while back for my Axe Man skeleton costume (why would you remember that?). So I’d already learned a few lessons from that project, and I decided to do this one a little differently. Along with being oversized, I intentionally designed that axe to be a little bit exaggerated in its proportions; almost a little cartoony.
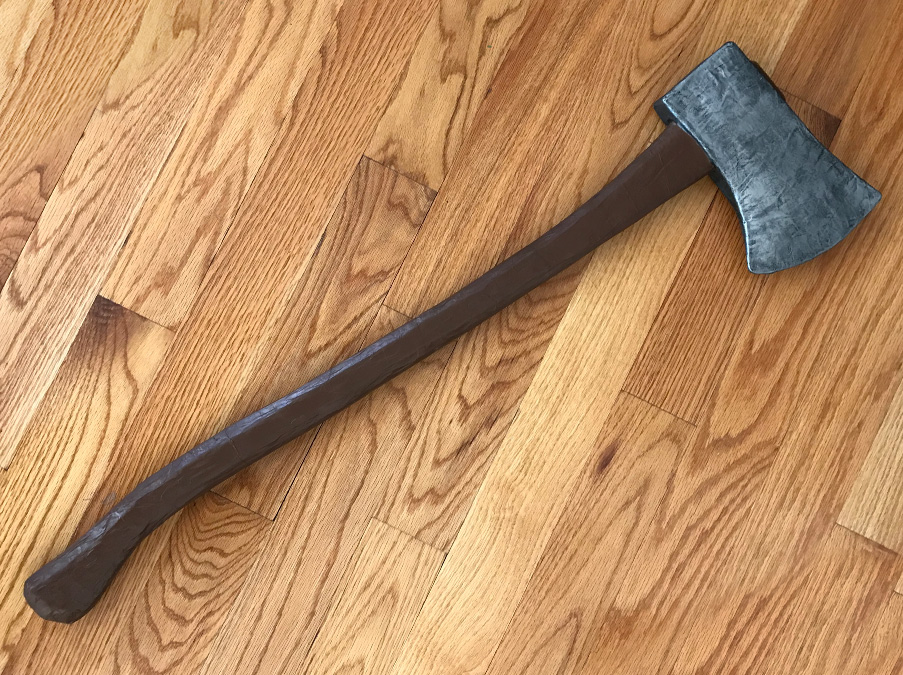
For this one I wanted to get it as realistic as I could. Luckily, I already have a real axe that I could use as a model — long story, one day there was a knock at my door and I looked through the peephole and saw my neighbor holding an axe; I thought she was there to kill me, but it turned out she was moving away and wanted to give it to me.
Anyway, if I didn’t have a real axe to use for this project, I would’ve just found a high-res image online and printed it out at real size, and worked from that.
Making the axe handle
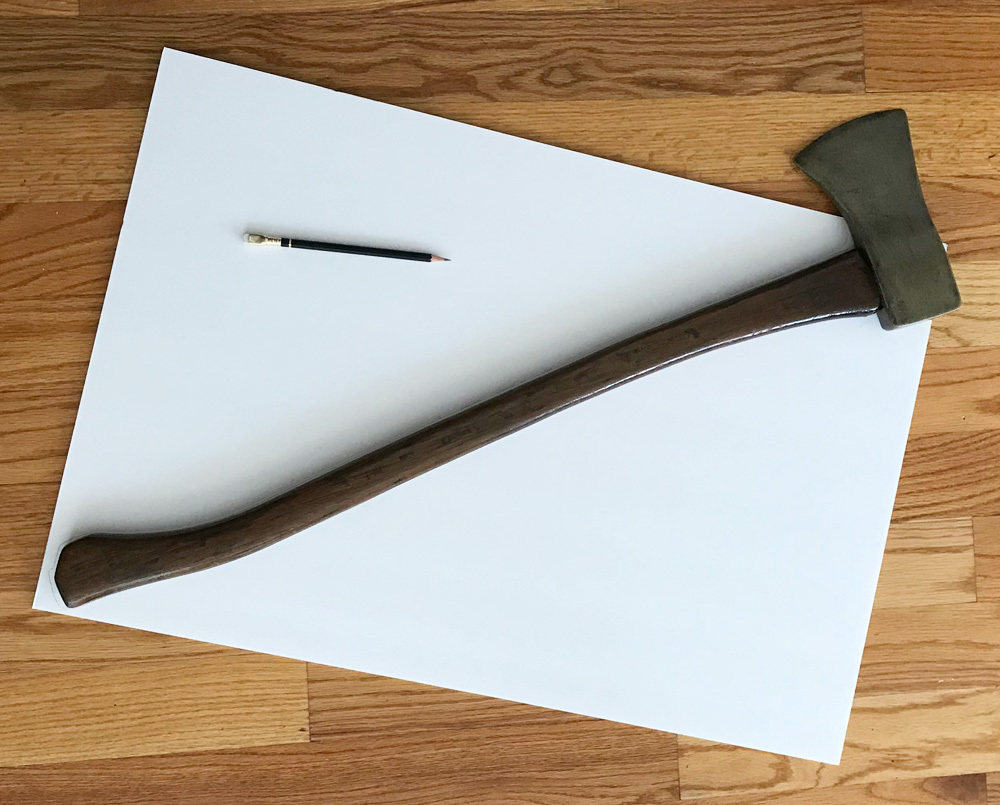
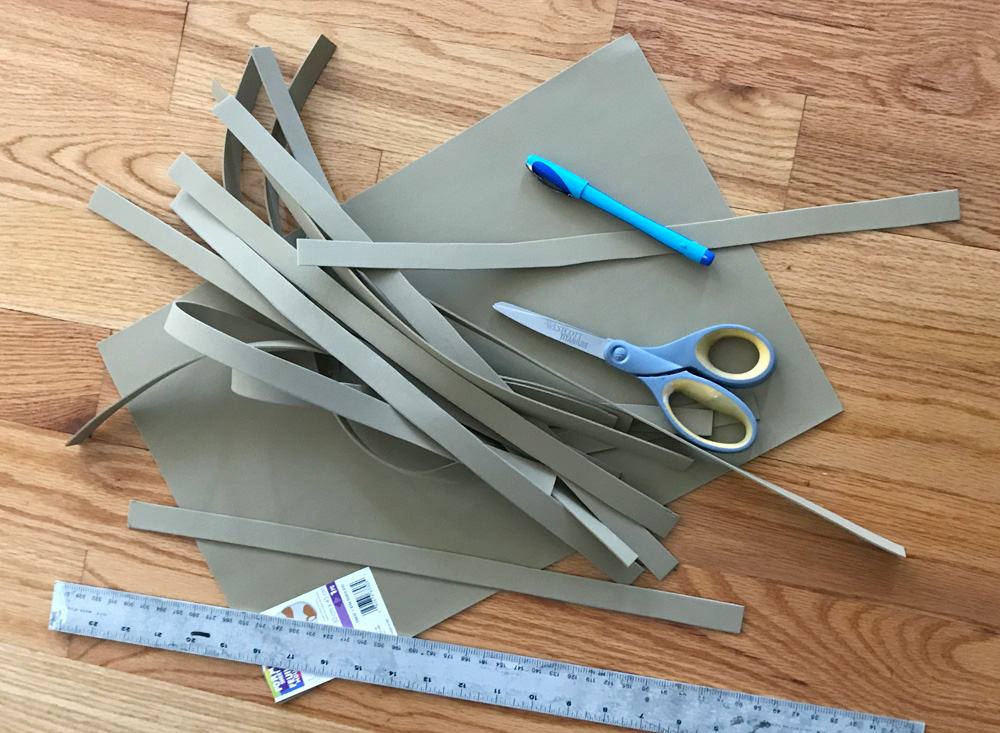
I made the base for the axe handle out of several layers of foam board. I traced the handle of my real axe onto a 30″ x 20″ sheet of foam board. I then drew a smaller outline inside of the handle shape, about 1/8″ in from the first one; this is to allow for the craft foam and paper maché that I’m going to be wrapping the handle in later. I cut out this smaller outline with my X-acto knife. You can see this shape at the top of the pic below.
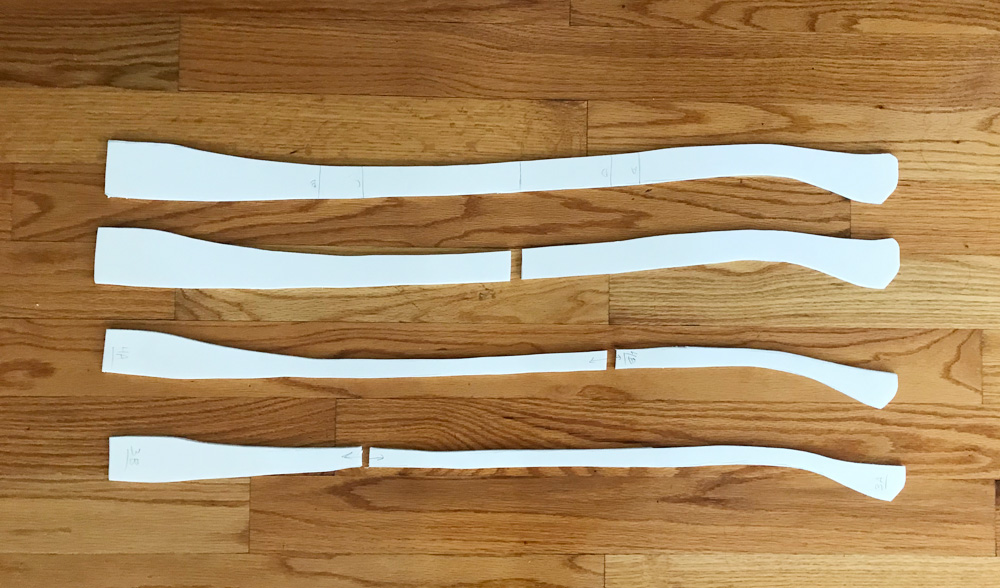
I wanted to trace this handle shape and make an identical copy, but I didn’t have enough space left on the foam board for the whole shape, so I traced it in two pieces and cut them out separately; they’ll get connected later. That’s the second shape in the pic above.
Now I had two copies of the main handle shape. I also wanted to make two more copies, but much thinner, to go on either side. I traced my main shape two more times (each in two pieces again), and then drew an outline about 1/4″ inward from those outlines. I cut out these very narrow shapes. This gave me four foam board pieces to make the handle. I always mark letters and numbers and arrows on everything so I can remember what connects where; you can barely see that here. I’m kind of obsessive about this! I know I’m too dumb to remember what’s what and what goes where.
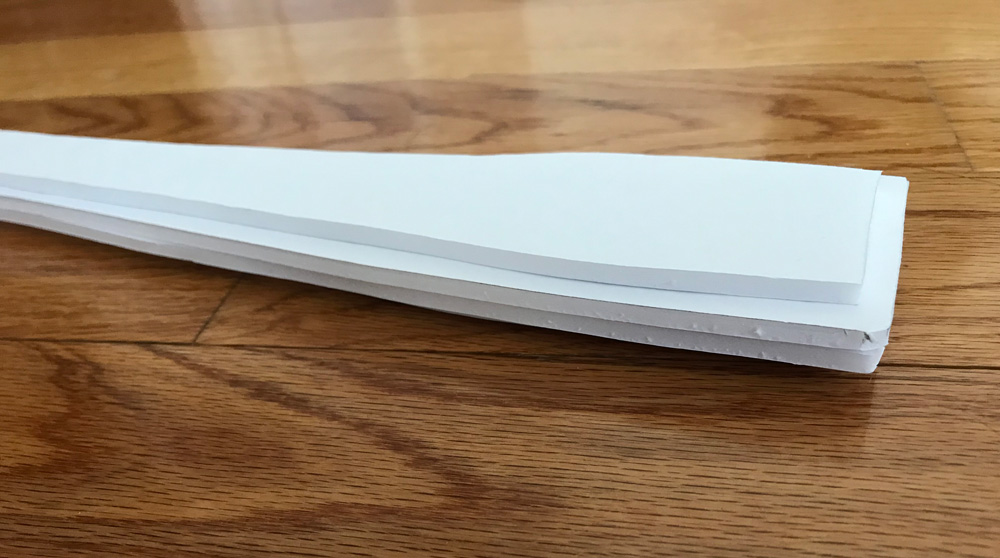
I hot glued the wider pieces together, and then I hot glued the narrower ones onto this; one on each side. The four long pieces of foam board together created the proper thickness for the handle, and the narrow pieces on either side create a guide for making the handle nice and rounded all the way around.
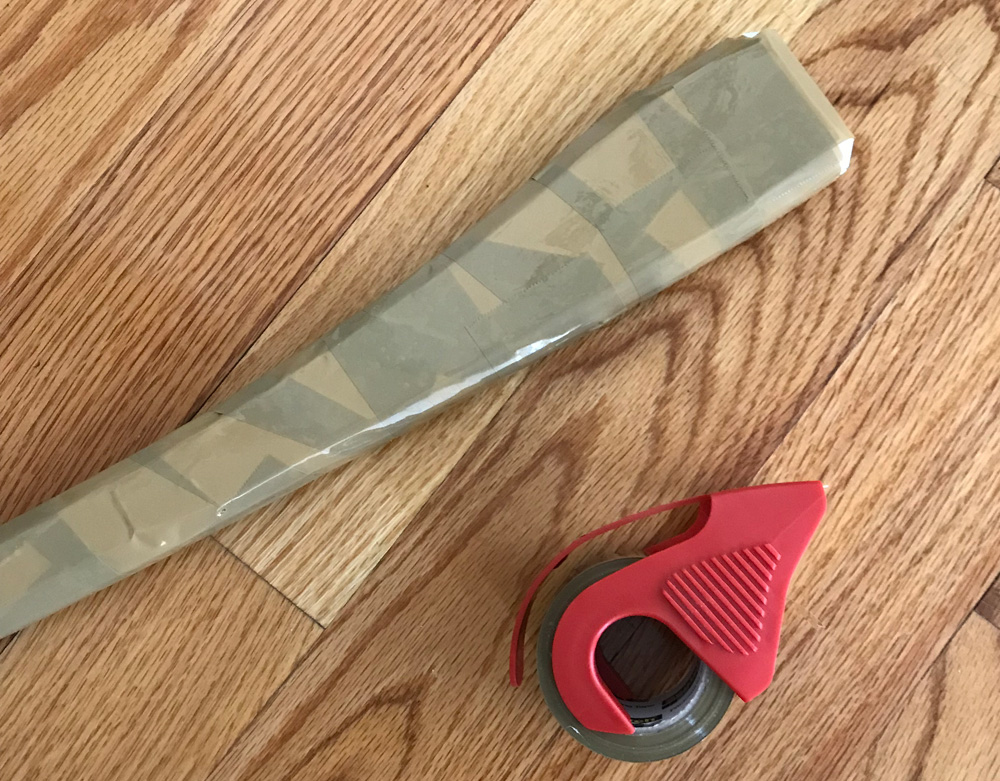
I wrapped this whole handle shape in heavy duty shipping tape, to make the shape more rigid and to begin smoothing out the edges.
I then took a sheet of 18″ x 12″ craft foam and cut it into 3/4″ strips. I taped all of these strips end to end with masking tape, to make one super long strip of foam.
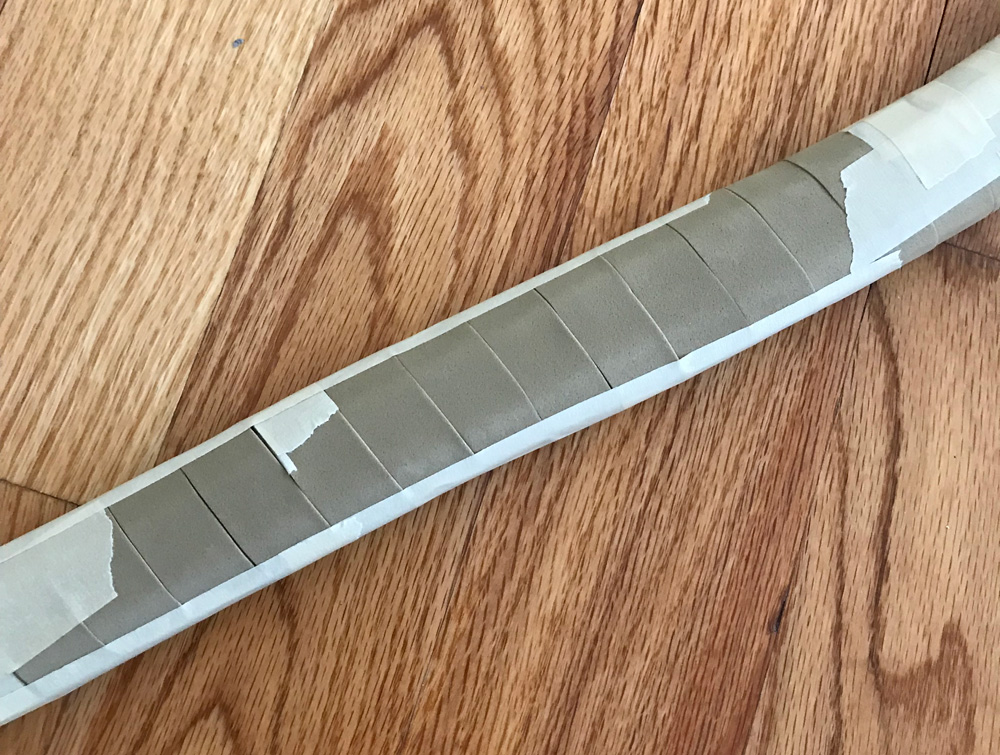
I taped one end of this strip onto the handle shape, and then I carefully wrapped the strip around the whole length of the handle, making sure to keep the edges perfectly smooth and touching but not overlapping. I added lots of pieces of tape here and there to secure everything as I worked on it.
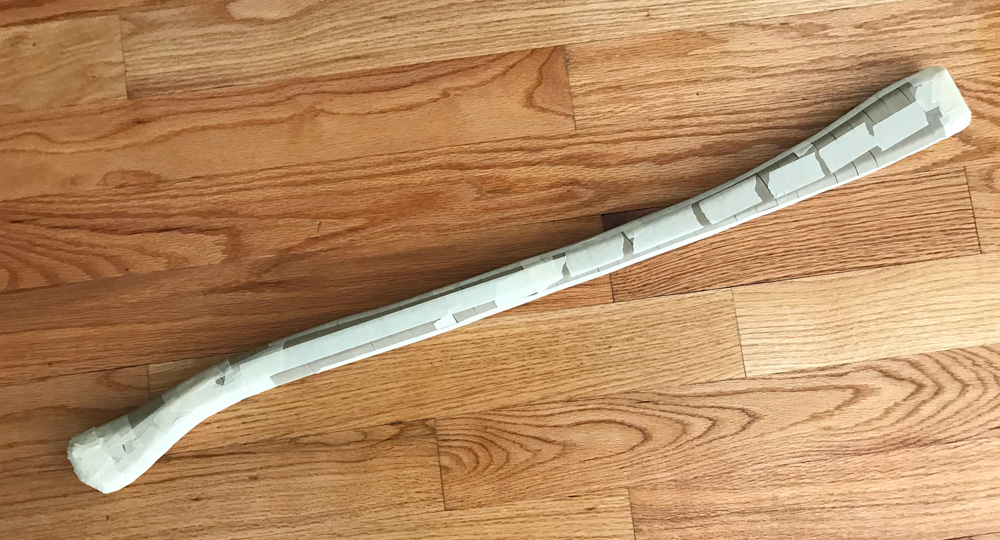
Toward both of the irregularly-shaped ends of the handle I had to give up with neatly wrapping the foam strip around. I simply cut the strip with scissors and taped down the loose ends. I then cut out a few small irregular shapes of foam to fill in the little empty spaces near the ends of the handle. This part was pretty inexact; I just rounded out the shape through trial and error and covered it with lots of masking tape. I didn’t need this to be perfect!
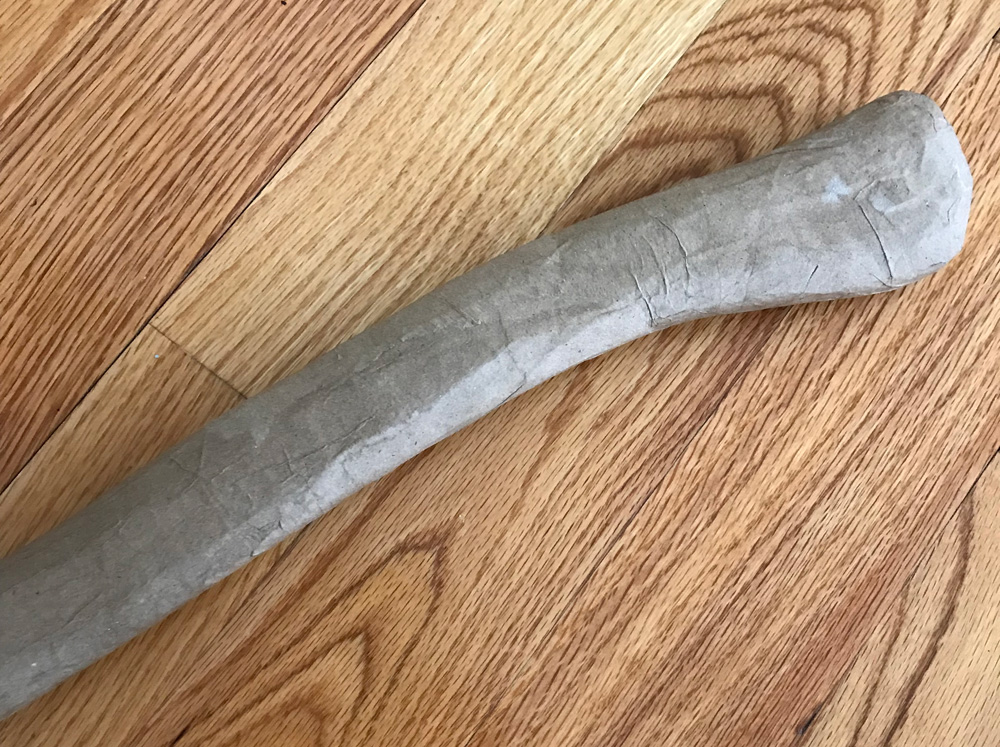
I then covered this handle shape with four layers of paper maché; here’s some info about my paper maché process and materials. The short version is: I use Roman PRO-543 universal wallpaper adhesive (paid link) and alternating layers of newspaper and brown wrapping paper.

Making the axe blade
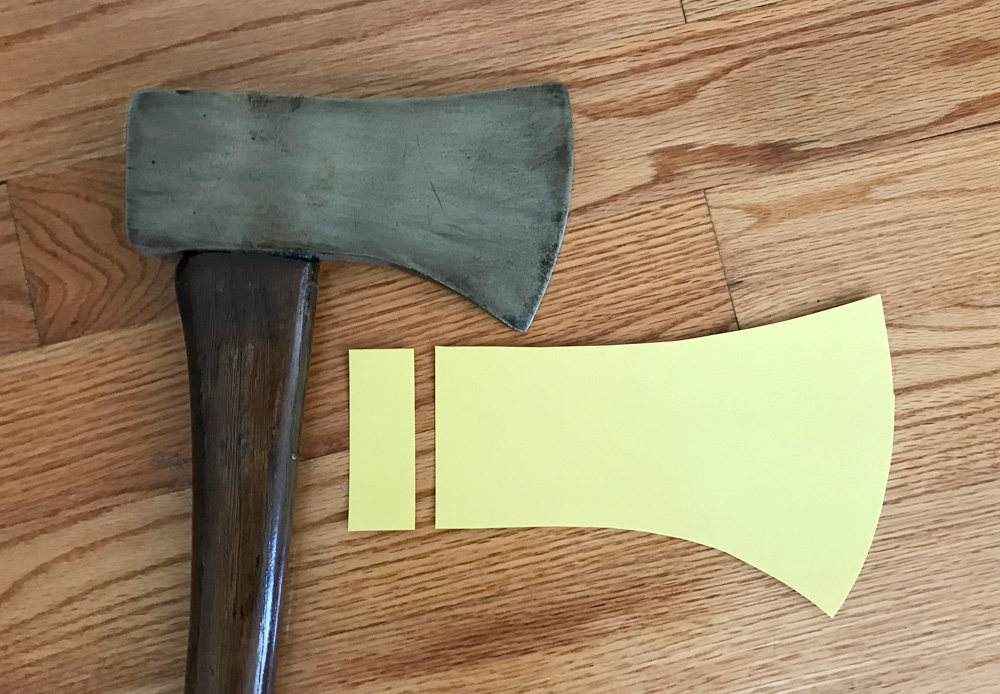
I traced the blade of my real axe onto construction paper. I then drew a second, slightly larger outline to exaggerate the size of the blade a bit. I cut this larger shape out. I also traced the little rectangular back side of the blade and cut that out.
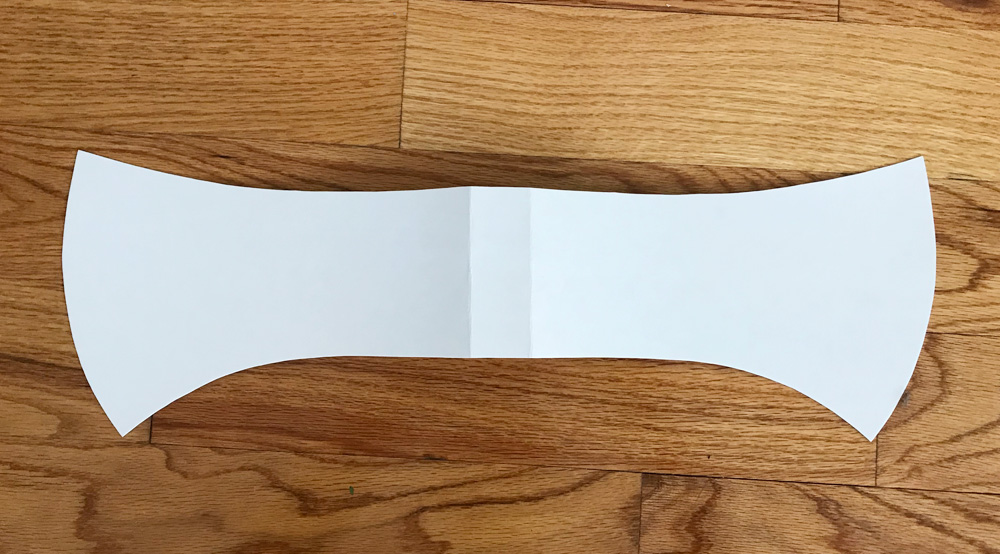
I arranged these shapes on poster board and traced them to make one big shape that I could cut out and fold up. Before cutting this out, I covered the poster board with a couple layers of clear heavy duty shipping tape on one side. This is a simple trick I use sometimes to make any kind of paper a little bit thicker and more rigid.
I cut out and folded this shape, and then I attached the two halves of the blade at the front with masking tape.
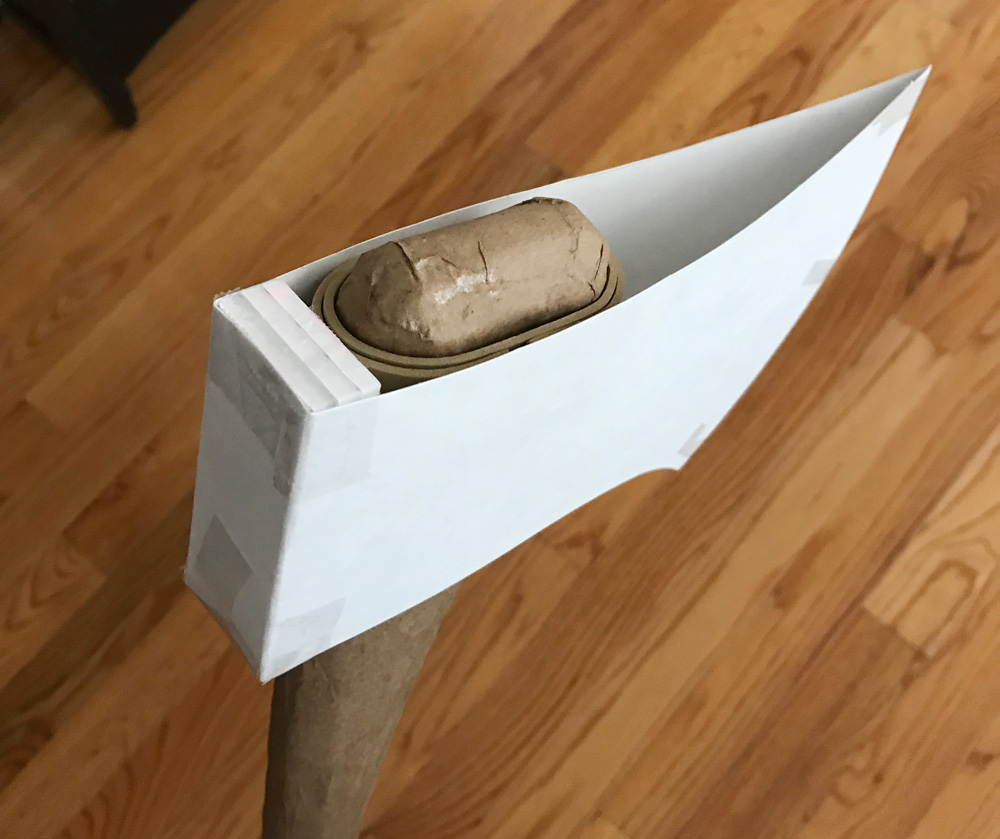
I measured and cut out a wide strip of craft foam to wrap around the axe handle, inside of where the blade goes. I taped this in place, and then did a second one of the same thing. You can see these two layers of craft foam around the handle in the pic below. They’re there to pad out the sides of the blade.
I went back to that little rectangle of construction paper and traced it onto foam board three times and cut those out. I taped these rectangles in place at the back of the axe handle, to pad out the back of the blade. I slipped the poster board blade over all this stuff and taped it in place.
Then I used masking tape to cover the open space at the bottom edge of the blade, basically building a wall of tape there. I stuffed the blade with bits of paper towels that I wadded up, in order to pad it out a bit and give it some firmness.
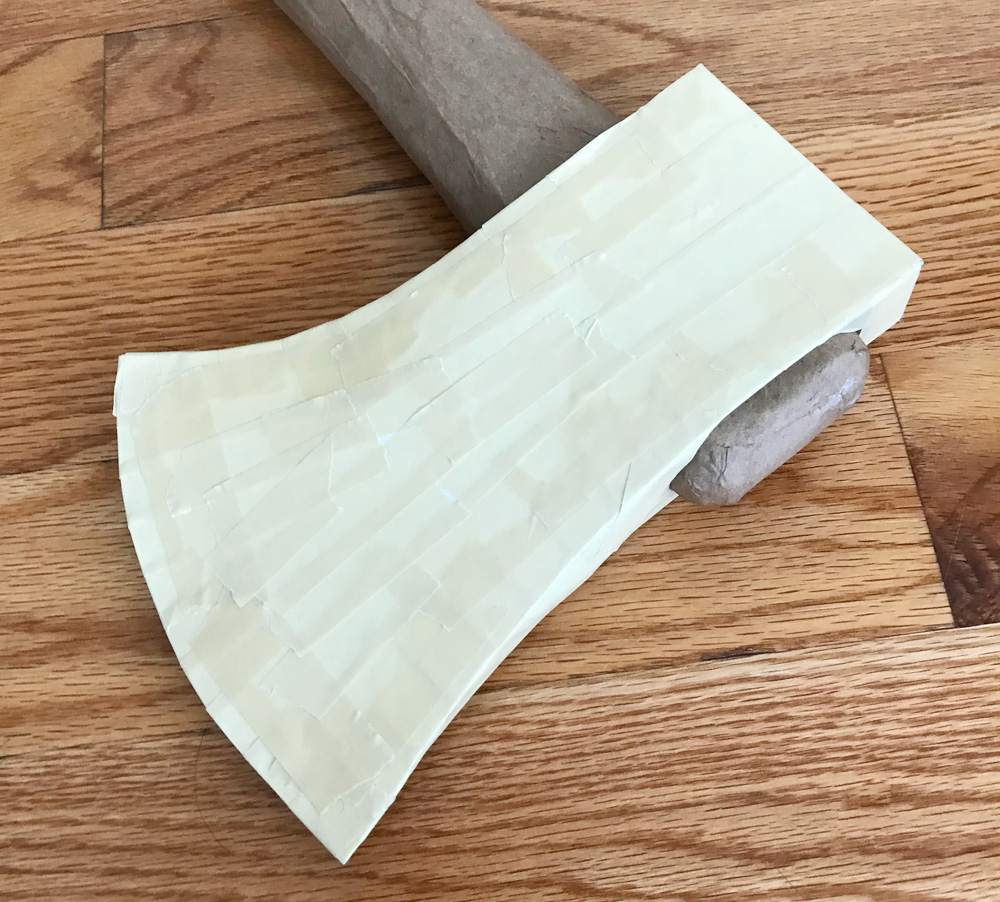
I then covered the top edge of the blade with masking tape to close it up, and then I covered the rest of the whole blade with masking tape.
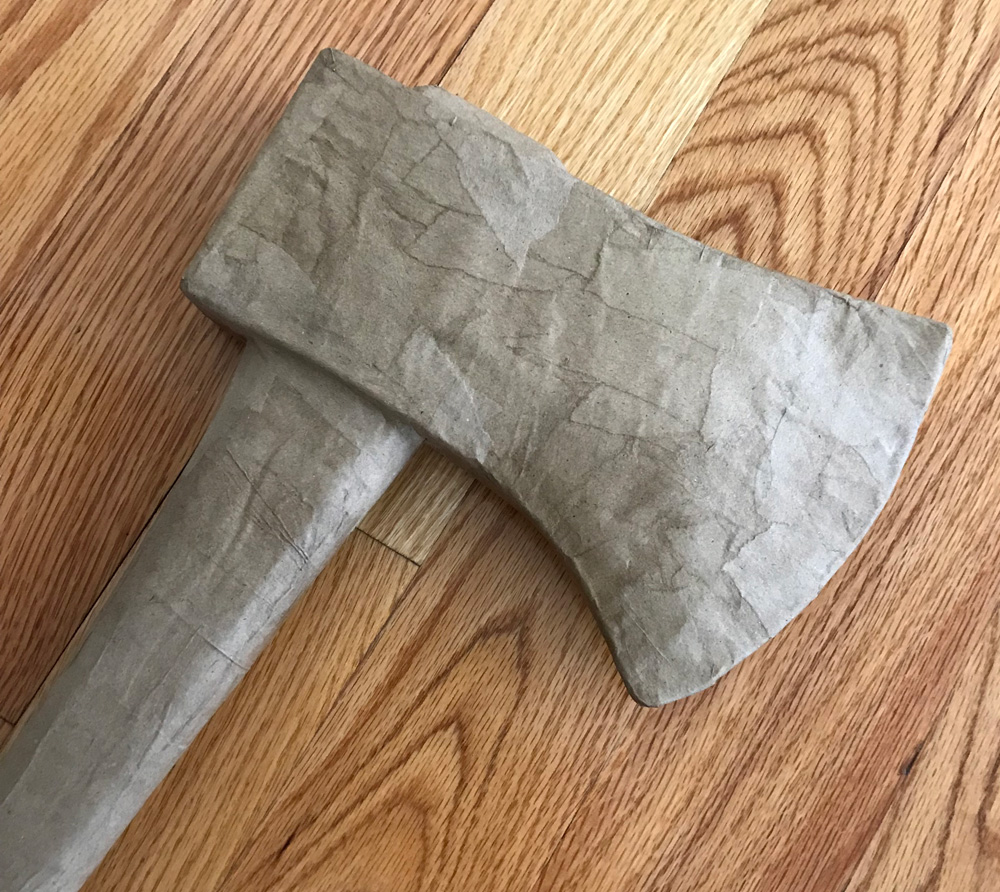
I covered the blade shape with four layers of paper maché, making sure to also cover over the places where the blade connects to the handle, to make that connection nice and strong.
I only did four layers of paper maché on this axe prop because this thing is meant to just be a flimsy decoration that really only needs to last one night. If this were going to be part of a costume or something where it was going to be handled by people and/or needed to last a long time, I’d probably do more like eight layers of paper maché, to make it really solid.
Painting
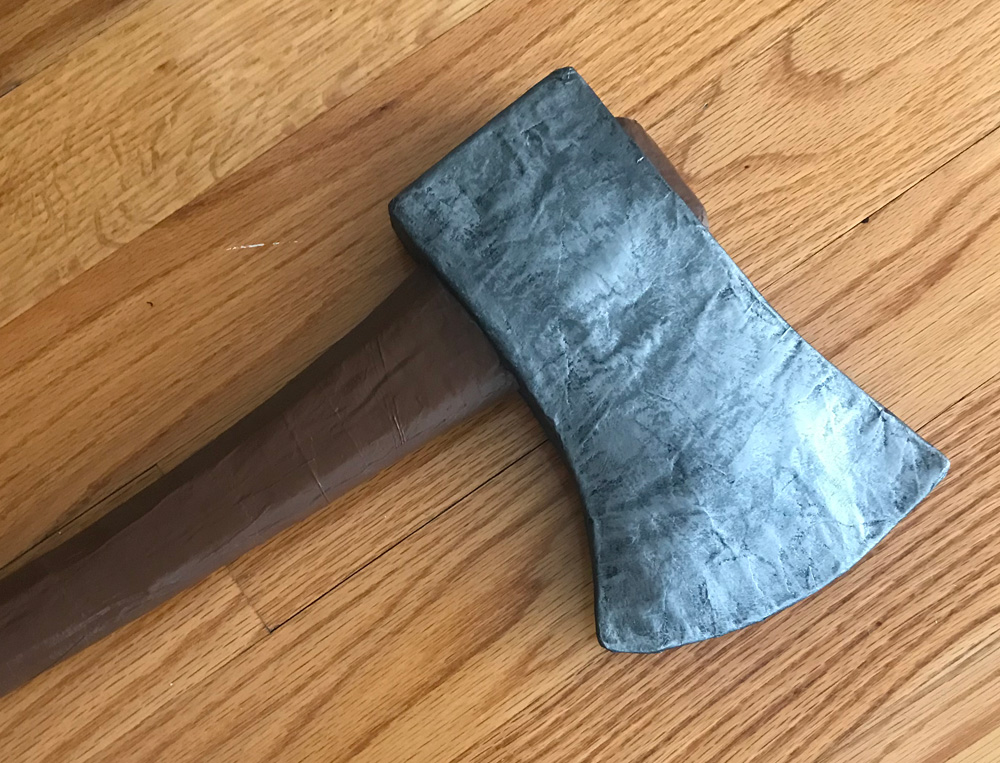
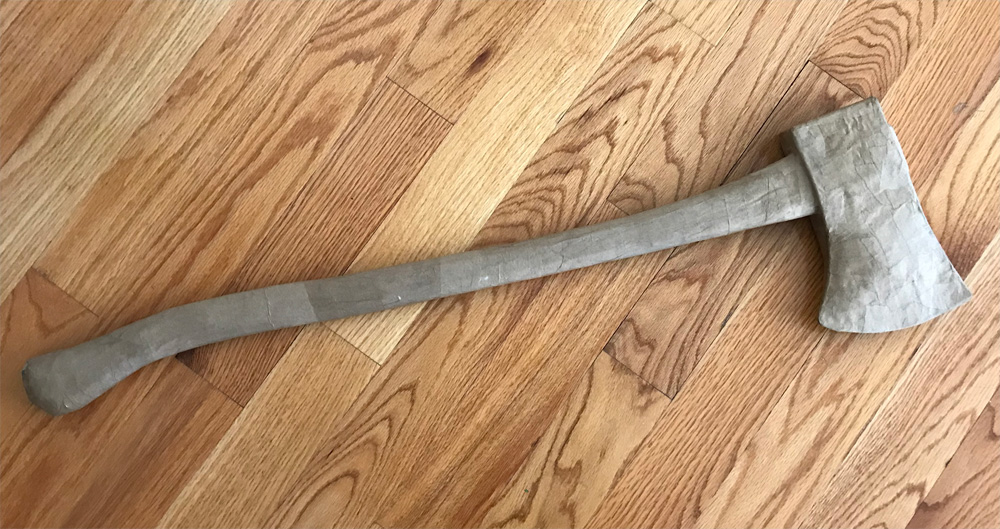
I spray painted the axe handle brown (not worrying about getting spray paint on the blade), let that dry and set, and then I painted the blade by hand in two steps: first, a coat of black acrylic paint, and then when that dry I mixed some black and silver paint and applied them roughly with a big brush, to create a sort of textured effect.
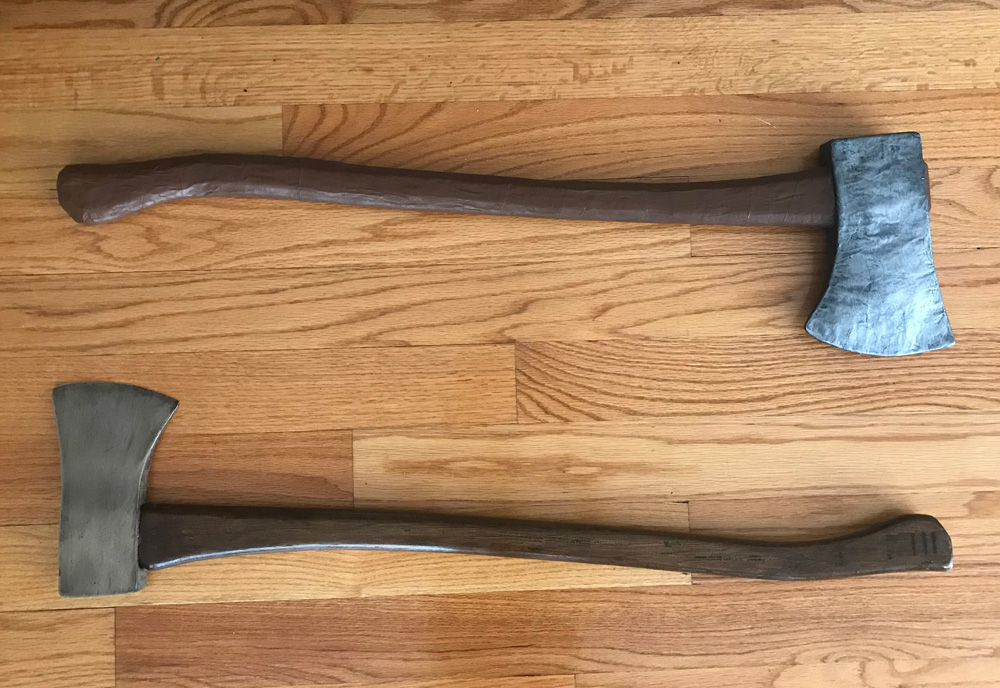
Here’s the axe prop with the real axe for comparison.
Next, I’ll be doing a blood splatter effect with red paint, but I’m waiting to have several pieces done so I can do all of them at once. I’ll post pics soon!
I’m really pleased with how this project came out considering how quick and easy it was.
On to the next project!
 About Manning Krull
 How to make a 4-foot paper maché alligator
 My violin skull mask, Mardi Gras 2015
 Three-headed paper maché dragon sculpture
September 17th, 2019 at 4:16 am
I just have to say that I appreciate your detail in the posts that you make. By far you are one of the best resources for paper mache on the internet. Thank you.
September 17th, 2019 at 6:31 pm
Thanks, April! I’m checking out your blog now!
October 2nd, 2023 at 7:22 am
Hey There! I found you’re website through Pinterest and love all the props! I’m making the ax for a photoshoot of the headless horseman im doing this month! I don’t have a website just yet but I’d love to tag you on my instagram when I go through the process. Skulls_and_dragons_empoirum.
October 3rd, 2023 at 6:35 pm
Hi! Just added you on Instagram! Please feel free to tag me in anything, thanks! Looking forward to seeing your progress!