
Tips for applying Halloween makeup, hair color, fake blood, contact lenses, etc!
Published by Manning on June 26th, 2015
My makeup method is pretty simply and I use different variations of it almost every year.
For my face, the main type of makeup I use is Ben Nye Creme Colors (paid link) — they come in a little flat jar and you can find them at a lot of Halloween stores, often behind the counter because they’re a little pricier.
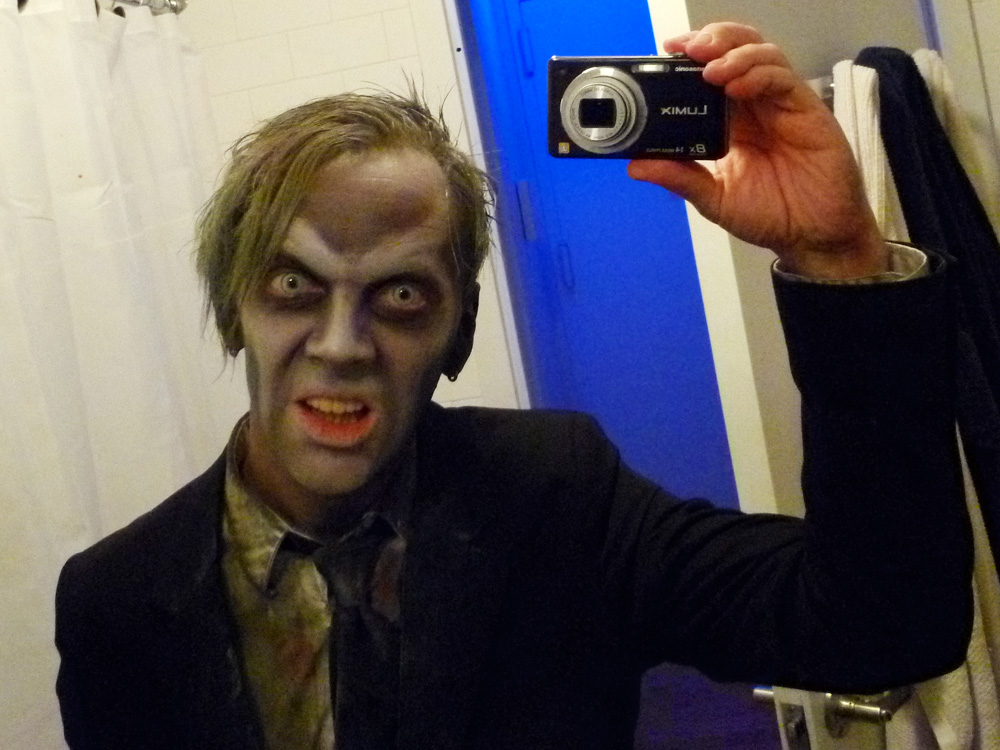
For zombie makeup or general scary ghoulish makeup, I usually just use black and white Ben Nye Creme Colors, and I just use my fingers to apply it. I start off with a base of white, all over my face. Then I use black makeup on my finger tips to apply heavy black areas around my eyes, under my cheekbones, etc, and blend them out toward the white. I use my finger tips to add shadows down the creases on the side of my mouth, and on the sides of my nose, at my temples, above my brow ridge, etc.
Usually by the time I’ve added all these shadows and blended them all out toward the white, I’ve overdone it a bit and made all the shadows a bit too large. So I wash my hands with soap and water and then do some more white, again with my finger tips, to bring out the highlights on the bridge of my nose, my cheekbones, my brow, etc.
That’s the basics! If I’m going for a rotten look, a stipple sponge (paid link) is super easy to use and creates a really great effect. I’ll dab the stipple sponge in the black makeup and use it at the edges of all the black shadows on my face; it adds a perfect scratchy-looking texture. You want to dab the sponge on your face, never drag it or rub with it, or you’ll ruin the effect.
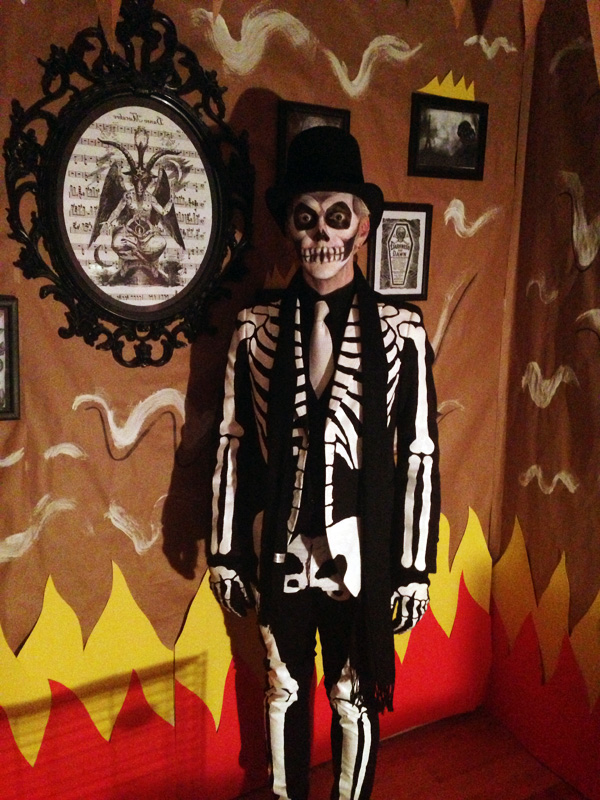
If I want to create some fine lines or details, I’ll sometimes use a Q-tip to apply the makeup, or even a narrow paintbrush with stiff bristles. A stiff, square-tipped paintbrush is great for things like drawing on teeth for a skeleton face.
Depending on the costume I’m doing, I might mix one or two other colors of the Creme Colors into my usual black and white. Mixing in some dull green is great for zombies. Yellow-brown for mummies, blue-ish shadows for a drowned zombie, red for a devil, etc!
Blood!
If I want to add blood, I use Ben Nye stage blood (paid link). This stuff is thick and runny, and has a slightly minty flavor so it’s not too gross if you get some in your mouth by mistake. I’ve applied this stuff with my finger tips or with a Q-tip. A good trick for getting a good dripping look is to get a lot of the blood on your finger and dab it on the area where you want the dripping to come from — maybe the side of your mouth, or up at your temple — and let it drip down naturally. You may want to apply some blood multiple times at the same spot to give it enough to drip all the way down. The end result will look way more realistic than if you try to draw the dripping shape onto your face; just let it drip naturally!
Beware, the stage blood takes a while to dry, and may drip on your clothes, on the floor, etc. Less is more; start with a little and add as needed. You can also help set it with a hairdryer.
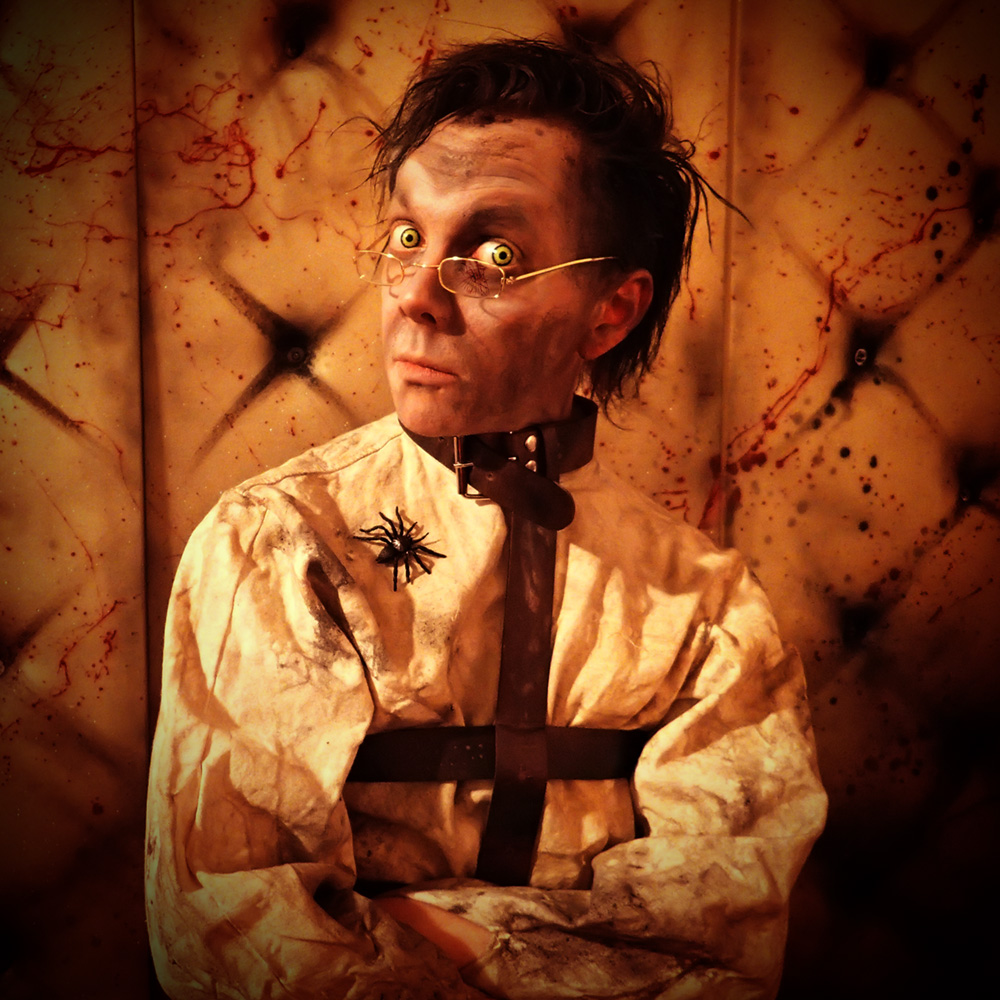
Another great trick you can do with this blood is to flick it on with a toothbrush! This creates a nice splatter effect of tiny dots, and it looks amazing. Just spread some fake blood on a toothbrush with your finger, then hold the toothbrush up to your face and scrape your finger back over the brush away from your face to flick the blood droplets onto your face. Very easy and looks really cool! You’ll look like you just hacked someone to death.
I’ve had good luck with this kind of stage blood washing out of clothes, but you never know! So be careful! Also be really careful with your white walls and upholstery. I, uh, actually have some blood droplets on my bathroom ceiling as a result of the above flicking method. Heh.
Hair
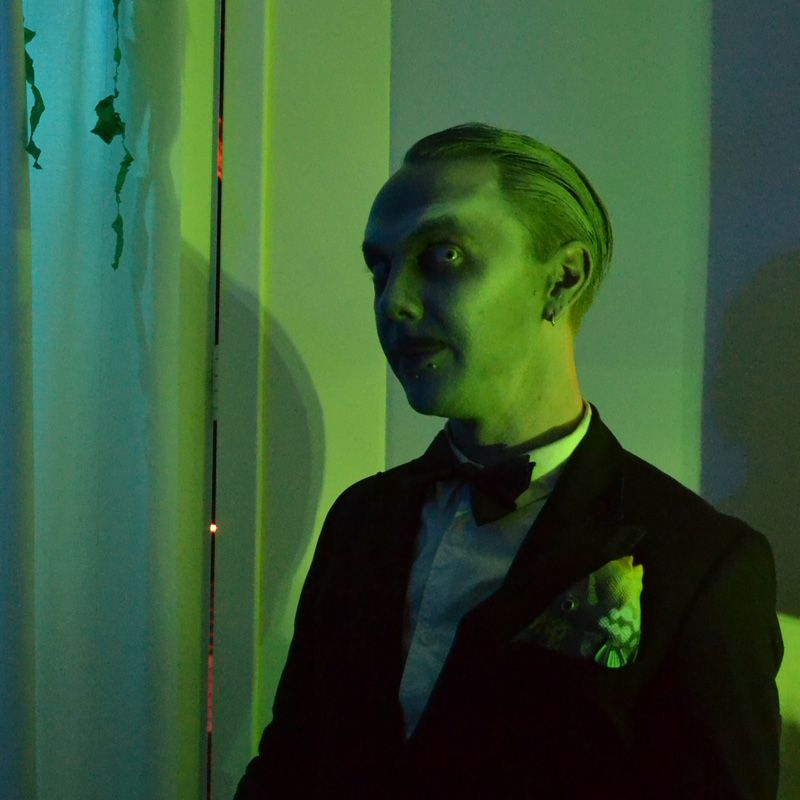
I made up a great trick for easily changing your hair color and, almost as importantly, having it extremely easy to wash out! I’ve never liked those colored hair sprays you find at the Halloween store; they go on really uneven and they dry hard and you can’t do anything with your hair once they’re applied. My method is way better: buy a couple tubes of very cheap Halloween creme makeup in whatever color; I’m talking the really cheap stuff you’ll find at the dollar store or Halloween store. Squirt a bunch into your hand, rub it on your palms, and work it through your hair. Use a ton of it, and comb it through to even it out. This will make your hair heavy and give it a slightly oily/gelled feel, and the color will be really solid if you use enough of the makeup. You can style it or slick it back, or run your fingers through and mess it all up and make it all matted and crazy. It will slowly dry and become a little less workable, but it never dries completely hard like hair spray or gel; I actually sometimes mix in some hair gel while I’m applying the makeup if I want it to really stay put. The best part about this is that this stuff washes out very easily. I’ve used two tubes of black makeup in my bleached-white hair, left it in all day, and it washed out completely and easily with one regular shampooing. The stuff is so cheap it doesn’t really stick to anything.
Anyway, this makeup-as-hair-color trick works great for any costume where you want your hair to look dirty or oily or messed up. It wouldn’t work if you want your hair to look nice and clean and dry. I’ve used this method for messed up zombie hair, slicked back vampire hair, crazy Renfield hair, etc.
Colored contact lenses
I also buy colored contact lenses for almost every costume I do; they really complete the effect! The most important advice I can give you about colored contact lenses is to stick with very light colors. If you’re going to be at any kind event with dim lighting, or if you’re going to be outside at night, then only light colored lenses will have any kind of visible effect at all. Anything from medium to dark in color won’t even be noticeable in anything dimmer than normal home lighting.
So I always pick a light color that goes with the costume I’m doing; maybe light yellow for a vampire, light green for a werewolf, light gray for a zombie, etc.

Then there are sclera lenses! These are the crazy lenses that cover the whole visible part of your eye! They are a lot of fun and they create a really spectacular effect; people are really wowed by these things. They’re also crazy expensive, and they can be really difficult to learn how to put in and take out. I had a really hard time with them my first time, but they got really easy once I got the hang of it.
With any kind of colored contact lenses, if you’re someone who doesn’t normally wear contacts, I really recommend you practice wearing them several times before your Halloween party or event. A week or two ahead of time, give yourself plenty of time to figure out how to put them in — believe me, it’ll take you longer than you think it will — and then wear them for just an hour or two around the house. You might find them irritating or uncomfortable; this will get better the more times you wear them and the more you get used to them. Wear them for a couple hours every day or two until you’re totally comfortable with them. You’ll also get way faster at putting them in and taking them out! By the time your Halloween party comes around, you’ll be able to put them in in a minute and wear them all night with no problem.
Liquid latex and spirit gum
If you want to attach anything to your face — bugs, horns, a fake nose, etc — most people will tell you to use spirit gum, but I actually haven’t had great success with spirit gum, and I prefer to use liquid latex for these kinds of things. There are pros and cons to both, but for me liquid latex wins every time. Spirit gum is nice because it dries clear, but for me it just doesn’t hold very well most of the time, especially if you might be sweating a bit. Liquid latex dries sort of translucent white, so it’s harder to conceal, but I really prefer it. It creates a sort of rubbery skin texture that holds really well. Liquid latex also smells really bad; sort of fishy, but you get used to it. I’ve used it a million times, with great results.
Have fun!!
 About Manning Krull
 How to make a 4-foot paper maché alligator
 My violin skull mask, Mardi Gras 2015
 Three-headed paper maché dragon sculpture
Leave a comment