
Creature from the Black Lagoon mask, WIP part 1
Published by Manning on January 5th, 2023
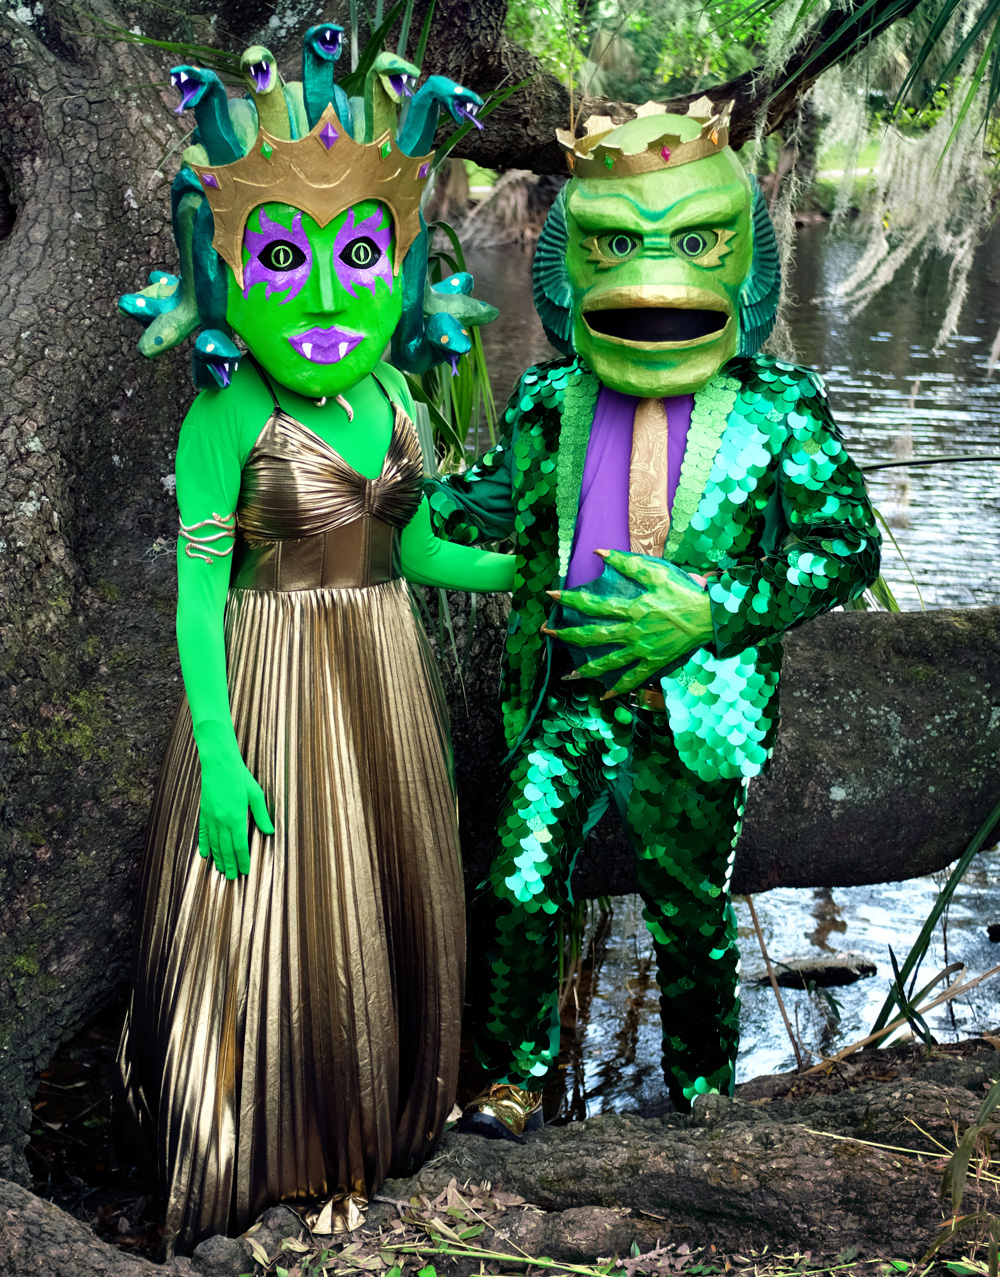
For Mardi Gras 2023 I made a Creature from the Black Lagoon(/Bayou?) mask and costume! I makde this stuff for my second year marching with my Mardi Gras krewe, Cryptique. Here’s my article about making the mask!
Making the base
Like last year for my skeleton wrestler costume, I used an inflatable bouncy ball (paid link) for the base of my Creature mask.
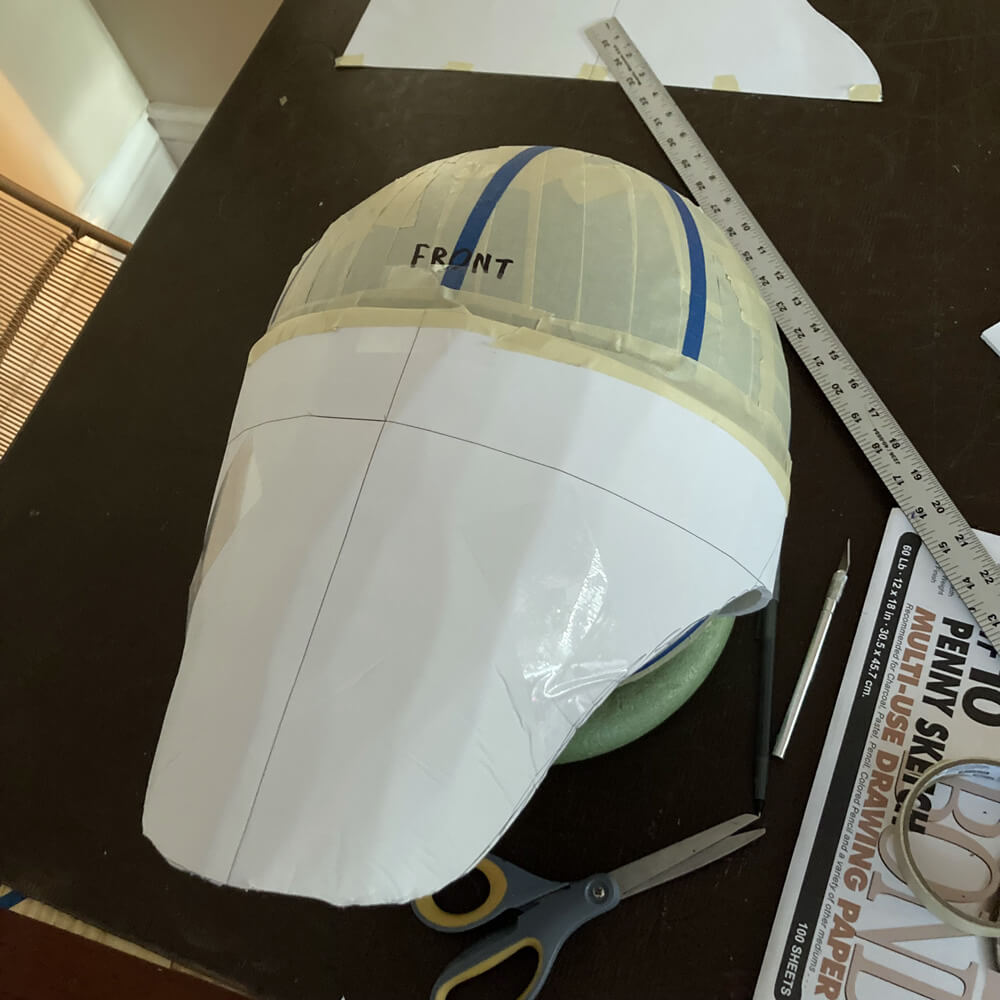
Last year I learned that tape doesn’t stick to this kind of plastic, and this year I came up with a new way to start working on the ball: I started out by wrapping it in a long piece of cling wrap. The cling wrap stuck to the ball okay, and when it wrapped all the way around it stuck onto itself perfectly. I just used the one long piece and attached it in a circle around the ball. This left the sides a bit exposed, but that was not a problem. One the cling wrap was on, I could easily wrap the whole ball in masking tape. The tape sticks to the cling wrap just fine, and it doesn’t stick to the exposed surfaces of the ball, but it was easy to just place long strips of tape over the exposed areas, so the tape sticks to the tape on either side. Took no time to cover the ball completely.
The next thing I did was to draw and cut out a jaw shape from a sheet of foam board. I carefully rolled and crunched the foam board in my hand to give it a nice curve shape, and then I taped it in place on the ball. Just like that, I now had an okay idea of what this head would look like!
My next step is always to wrap the basic head shape with strips of bubble wrap (not shown), in order to smooth out the edges of the foam and to make the whole mask a little bigger. After the bubble wrap I cover the whole head in masking tape, to help solidify it a bit.

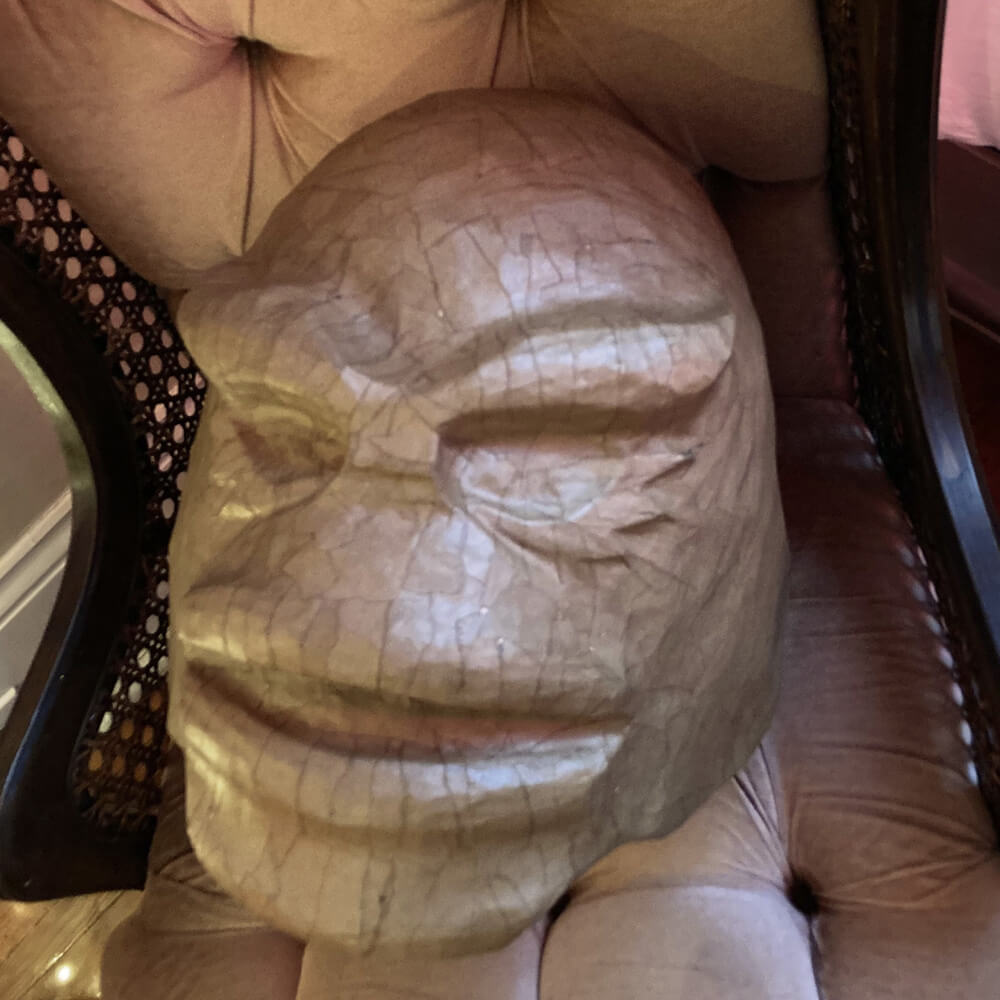
I often draw a face on the base for the mask with a marker, just to get an idea of where the eye holes will be and stuff like that. After drawing the face, I often realize that it will have to be placed a bit differently, and in this case here I realized I’ll need to move all the facial features up a bit. No problem, I can do that as I attach all the pieces for the facial features.
You can also see in this pic that I’ve added pieces of foam board for where the gills will go — just the first layer of gills, which will define the bottom edge of the mask. More on the gills coming up.
Sculpting the face
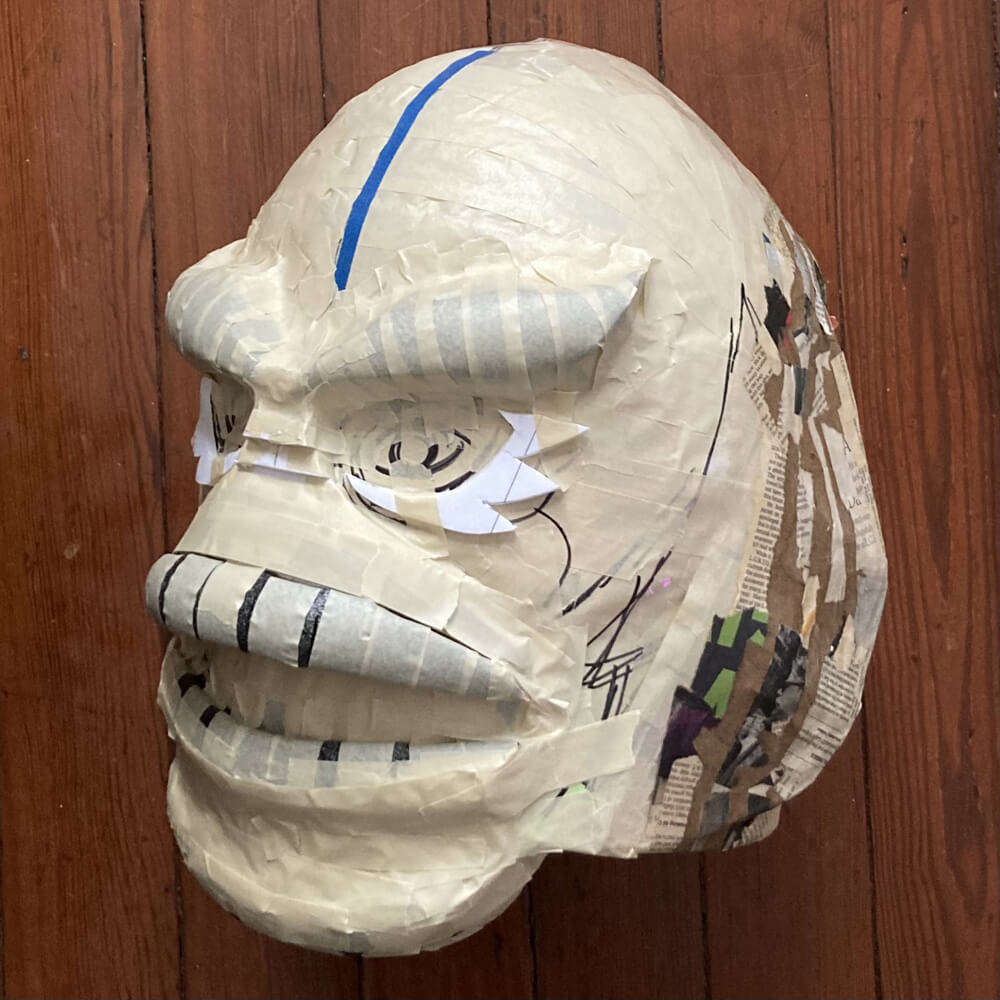
For the facial features of the mask I used pieces of foam board as well as pieces of pipe insulation foam tubes, all taped in place. This kind of foam is dense and soft and easy to cut, and tape sticks to it really well.
When all the facial features were done (minus the other layers of gills), I covered the entire head base with Scotch heavy duty shipping tape (not shown). I use this kind of tape for all my paper maché projects where I want to remove the base materials from the paper maché. This tape acts as a perfect release agent; paper maché doesn’t really stick to it, so when the paper maché is finished and dry, it’s very easy to pull the base materials out of the mask.
And with that, it was finally time for…
Paper maché!
I applied eight layers of paper maché to the whole head shape; here’s some info about my paper maché process and materials. The short version is: I use Roman PRO-543 universal wallpaper adhesive (paid link) and alternating layers of newspaper and brown wrapping paper.

These days I have a new approach to covering a whole head with paper maché; it’s not really easy or practical to cover the entire head in one go, so I start by turning the head upside down and doing all my layers on the bottom half first, then flipping the thing over and doing all my layers on the top half. Of course this is all spread out over several days! For this mask I’d do about three layers at a time and let them dry before continuing.
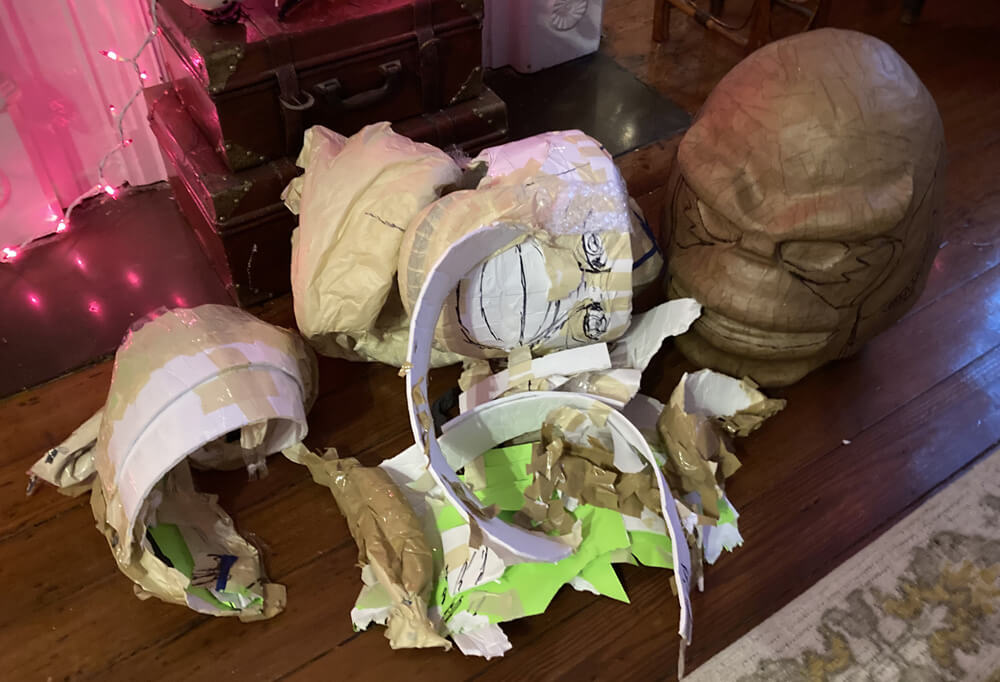
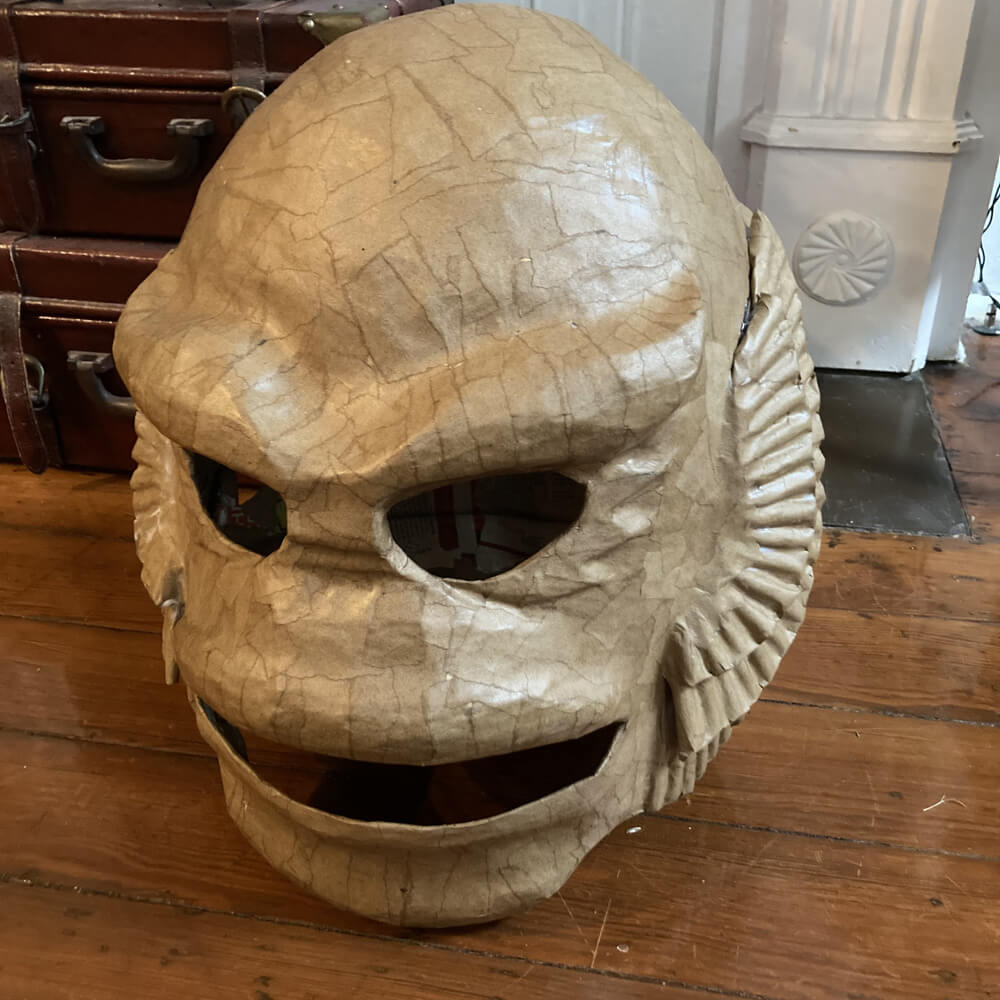
When the paper maché was 100% dry, I sliced open the bottom of the mask with my X-acto knife and pulled out all the base materials; I always love this step!
Then I cut out the eye holes and mouth hole, and I added more holes behind the gills, for better hearing and air circulation.
I then reinforced all the cut edges of the paper maché. For the bottom edge of the mask, I tape plastic zip ties in place (with the square ends snipped off) and put two layers of paper maché over those. For the eyes/mouth/etc holes, I just reinforce the edges with one layer of tiny strips of paper maché.
When all that was done, I was left with a very sturdy and lightweight mask!
Making the gills
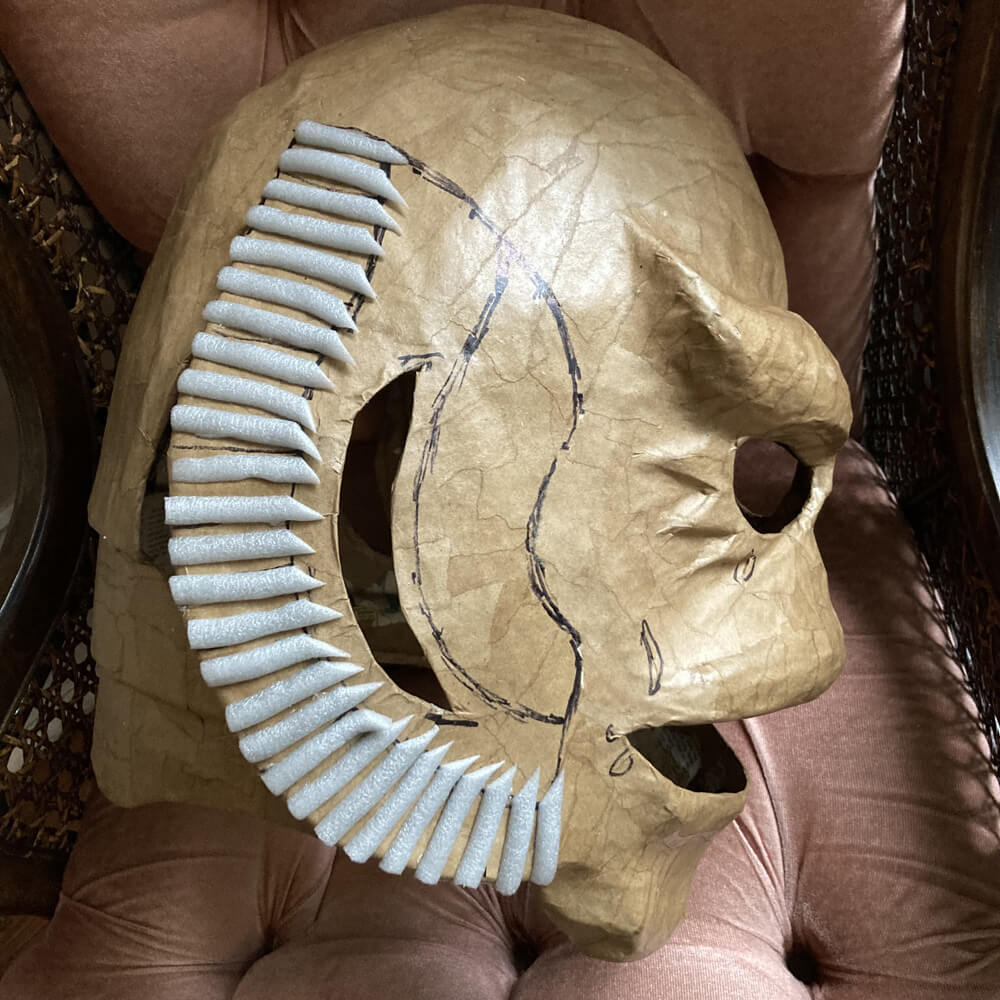
To create the ridged look of the Creature’s gills, I used this neat kind of foam I’ve never worked with before: caulk saver foam backer rod (paid link), which is 3/8″ thick and comes in a long roll. I cut pieces of this foam to the lengths I needed, and then sliced them down the middle with my X-acto knife. I hot-glued these in place on the gills, and then trimmed the edges a bit to make them fit perfectly.
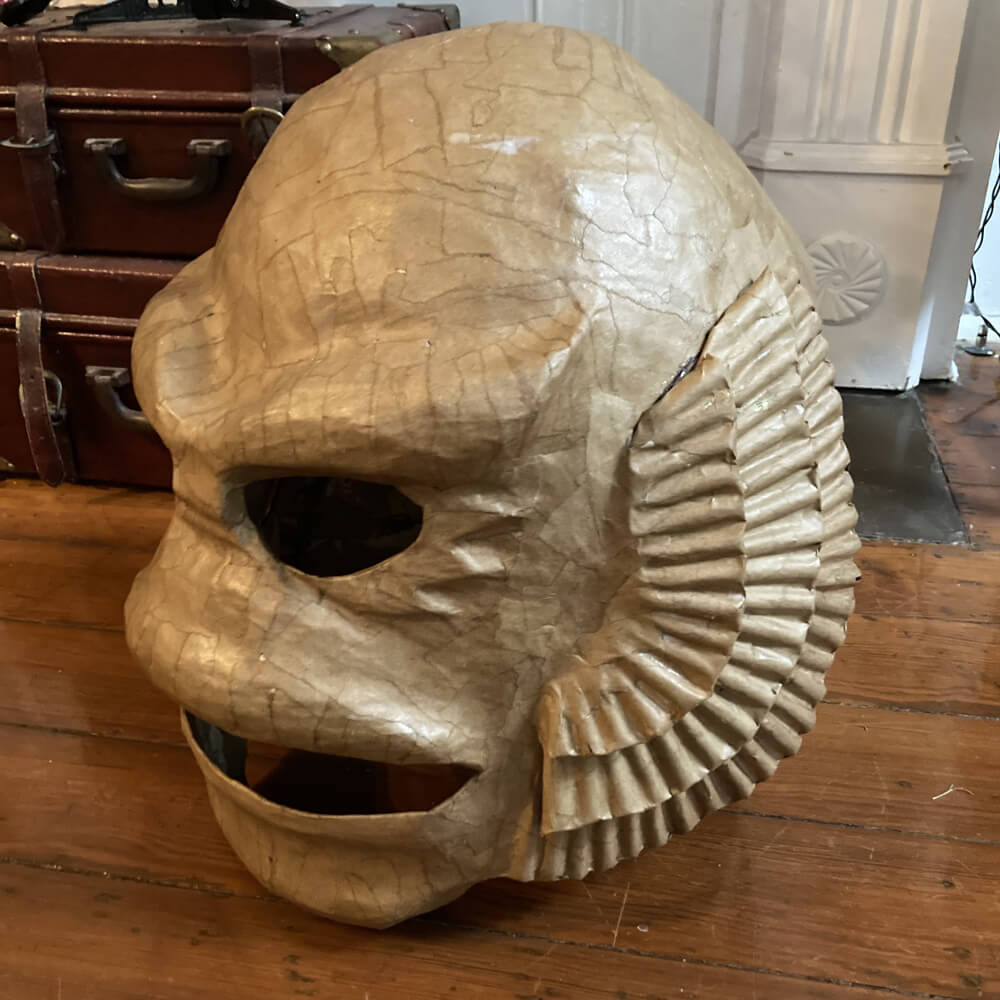
I added two layers of paper maché on the gills — just two, because I didn’t want to lose all the details of the little strips of foam, and the mask base itself is already very sturdy. The more layers of paper you add on a complex surface like the gills, the more smoothed out everything gets. So I’m knowingly taking a bit of a risk with the gills in that their surface won’t be very sturdy. If I were to, say, bump the side of the mask into a doorway or something (it happens!), there’s a good chance that the surface of the gills will get dented. I’m willing to take this chance in order to keep the ridged surface looking as detailed as possible.

When that paper maché was dry, I started on the second layer of gills. I made these out of craft foam — this soft, rubbery foam that you can get in arts and crafts stores. I loosely taped these in place to get their shape correct, and then I hot-glued more of the little foam strips in place, and covered all this with two layers of paper maché. Repeat for the third layer of gills.
Paper maché is done! Next steps: painting, installing screen and a hard hat, etc! On to part two.
 About Manning Krull
 How to make a 4-foot paper maché alligator
 My violin skull mask, Mardi Gras 2015
 Three-headed paper maché dragon sculpture
January 7th, 2023 at 12:21 am
Very cool. Love the use of different kinds of foam. I use paper mache often in making miniatures. Definitely going to be reading all your tips. This gives me inspiration to finish my Cthulhu Xmas tree topper someday.
January 12th, 2023 at 3:37 pm
Wow!! just found your website and wanted to say I love your work you are so talented!! I can’t wait to see the Creature from the Black Lagoon mask finished!! I have done some very basic paper mache’ items and your website inspires me to do more!
January 13th, 2023 at 12:40 am
Thank you Stacy!!! Your comment made my day!