
Creature from the Black Lagoon mask, part 2
Published by Manning on February 6th, 2023
This part 2 of my Creature from the Black Lagoon(/Bayou?) mask process. See part 1 here!
Okay, so the paper mache for the Creature head was all done, and now it’s time for painting all the other finishing touches.
Painting the Creature head
For all my big masks, I always use some kind of base coat before moving on to spray paint. This time I tried something new: I started with a coat of Mod Podge (paid link) that I brushed on; I really like the texture this stuff creates, and it does a great job of filling little crevices and imperfections and smoothing things out.
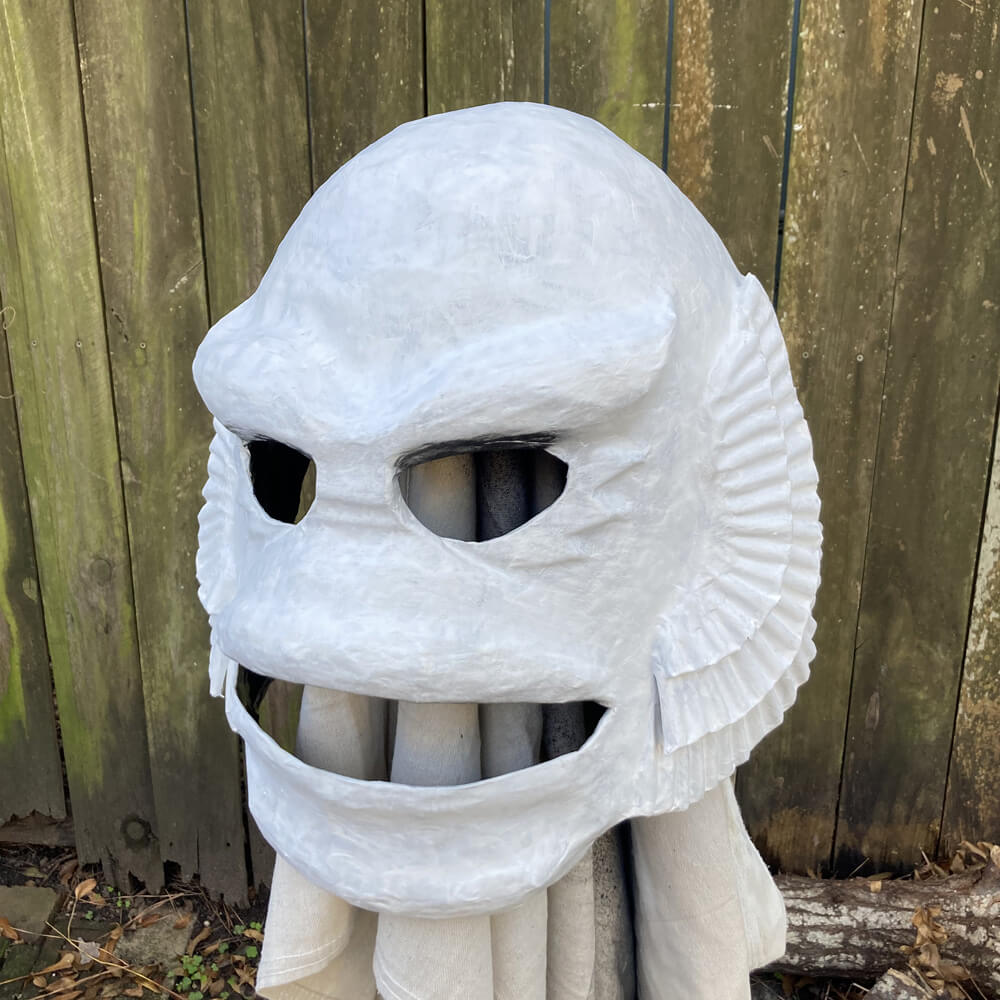
After the Mod Podge I brushed on a coat of white gesso (paid link), and let that dry and then did a second coat. This is partly to give me a white surface to paint on, to really make the colors pop, and on top of that, gesso acts a bit like Mod Podge in smoothing things out nicely.
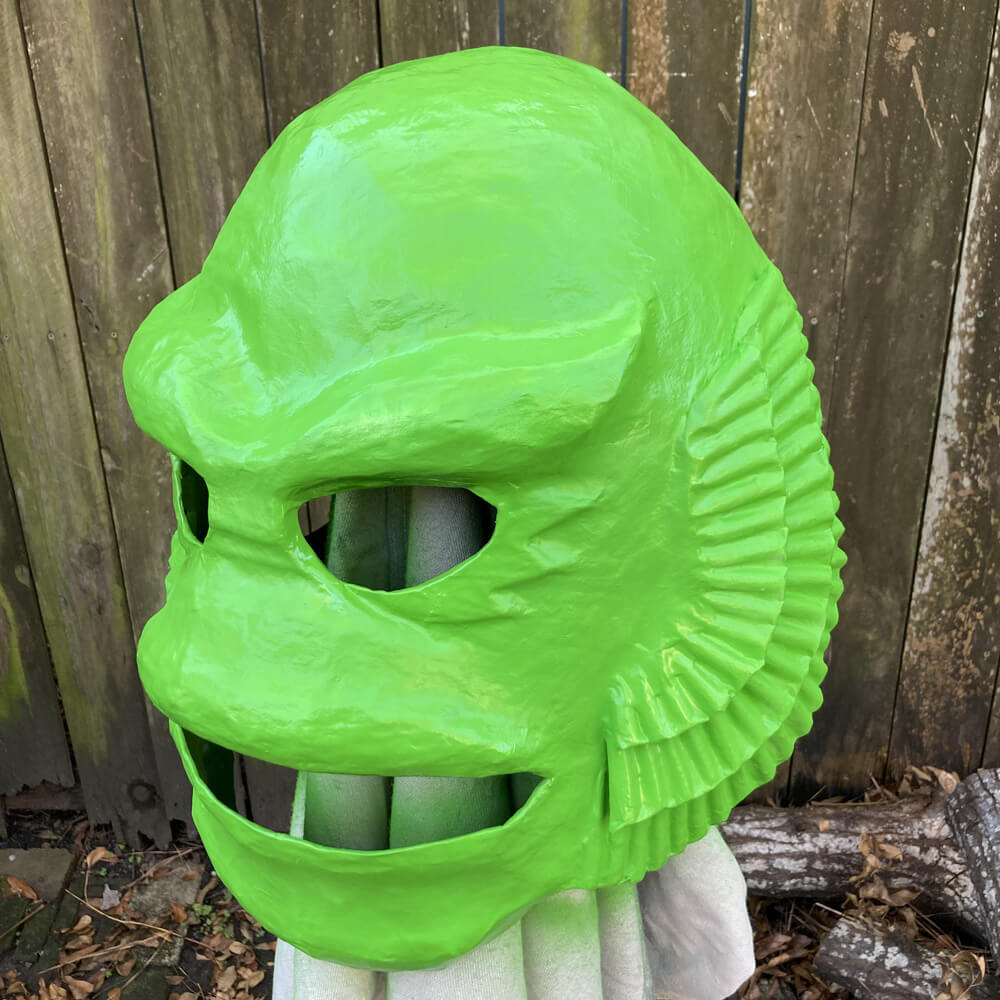
When the gesso was dry I then spray painted the Creature head with Montana spray paint; the color is called “green light” (paid link). Montana spray paint is the highest quality spray paint that I use, and they’ve got an incredible range of beautiful colors. They’re not paying me to say that, it’s really true! I cheap out on spray paint for some of my projects that only need really basic colors, but for anything where I want a really brilliant, eye-catching color, and/or a very specific/unusual color, I buy the Montana stuff.
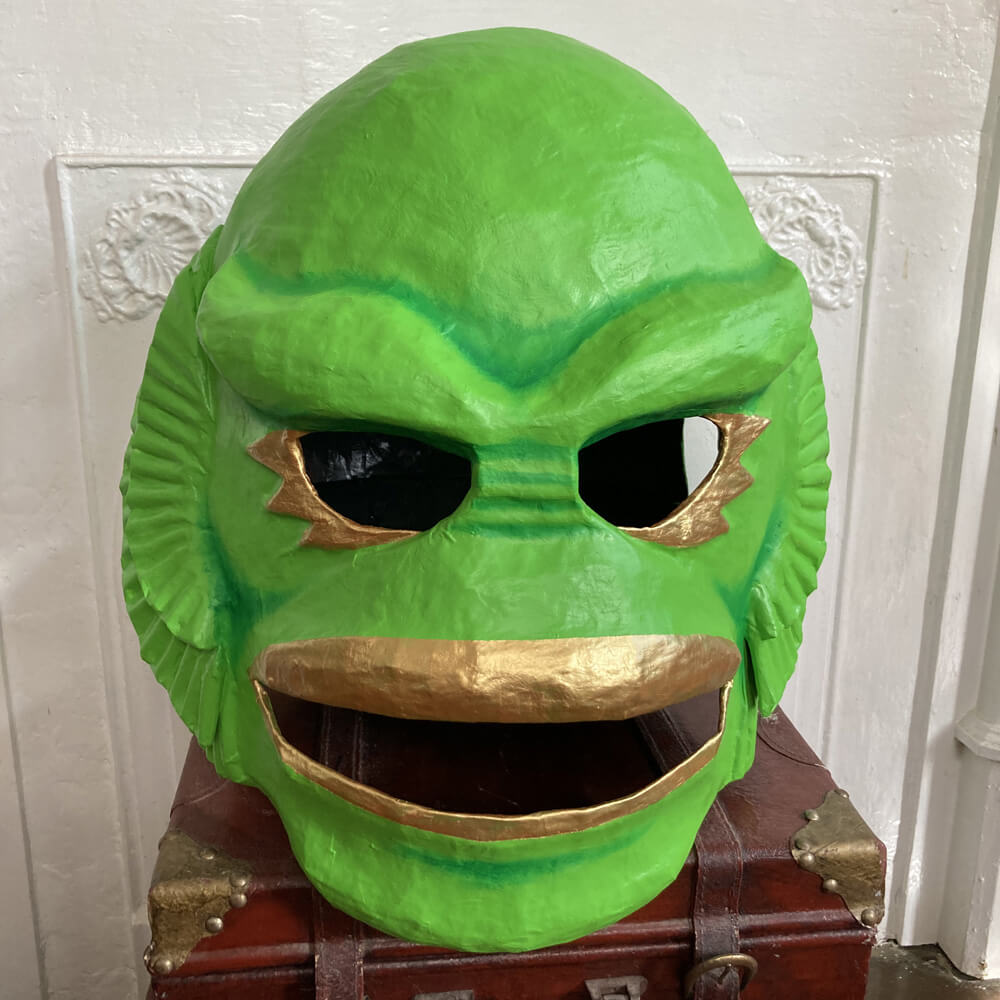
Okay, so after spray painting I painted the lips and eye details with gold acrylic paint; I did this by hand.
When that was dry I applied a couple coats of Krylon Glitter Blast, Citrus Dream (paid link). I generally avoided the area of the gills because they’re about to get painted a different color — but I didn’t bother to properly mask them at this stage.

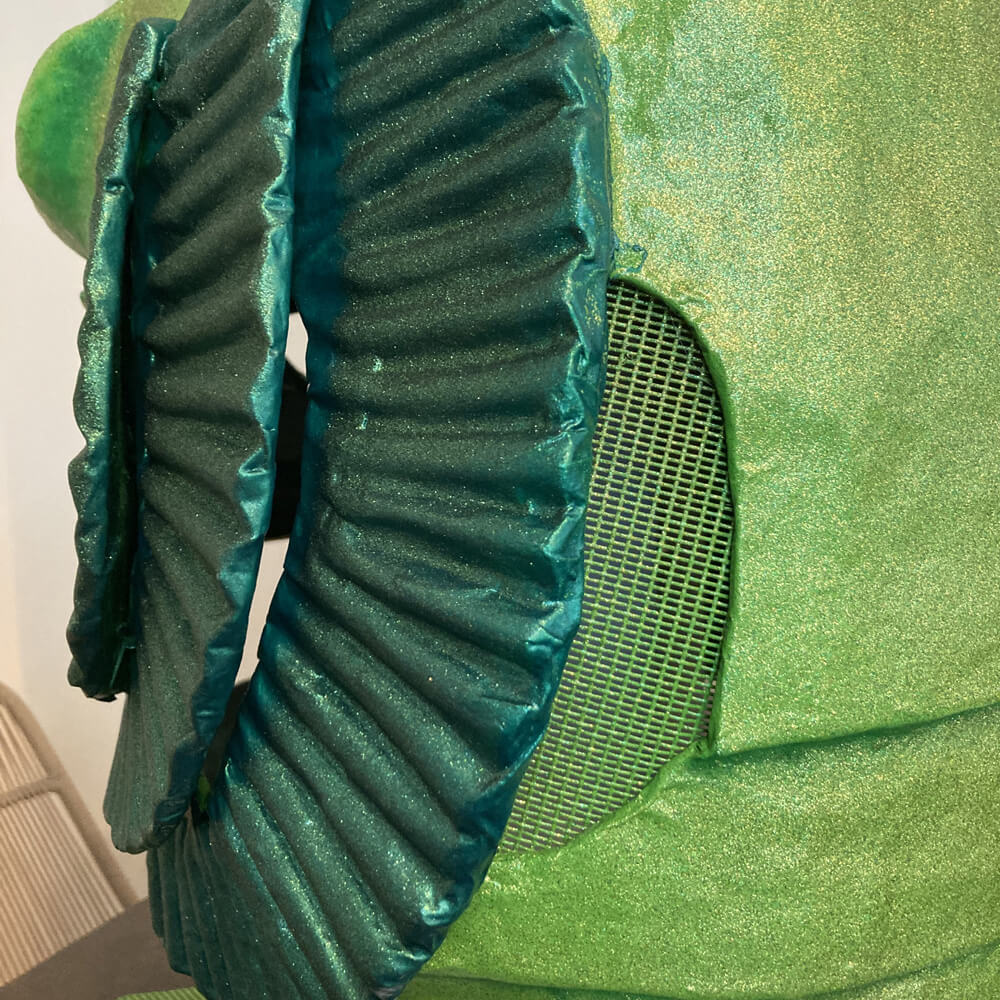
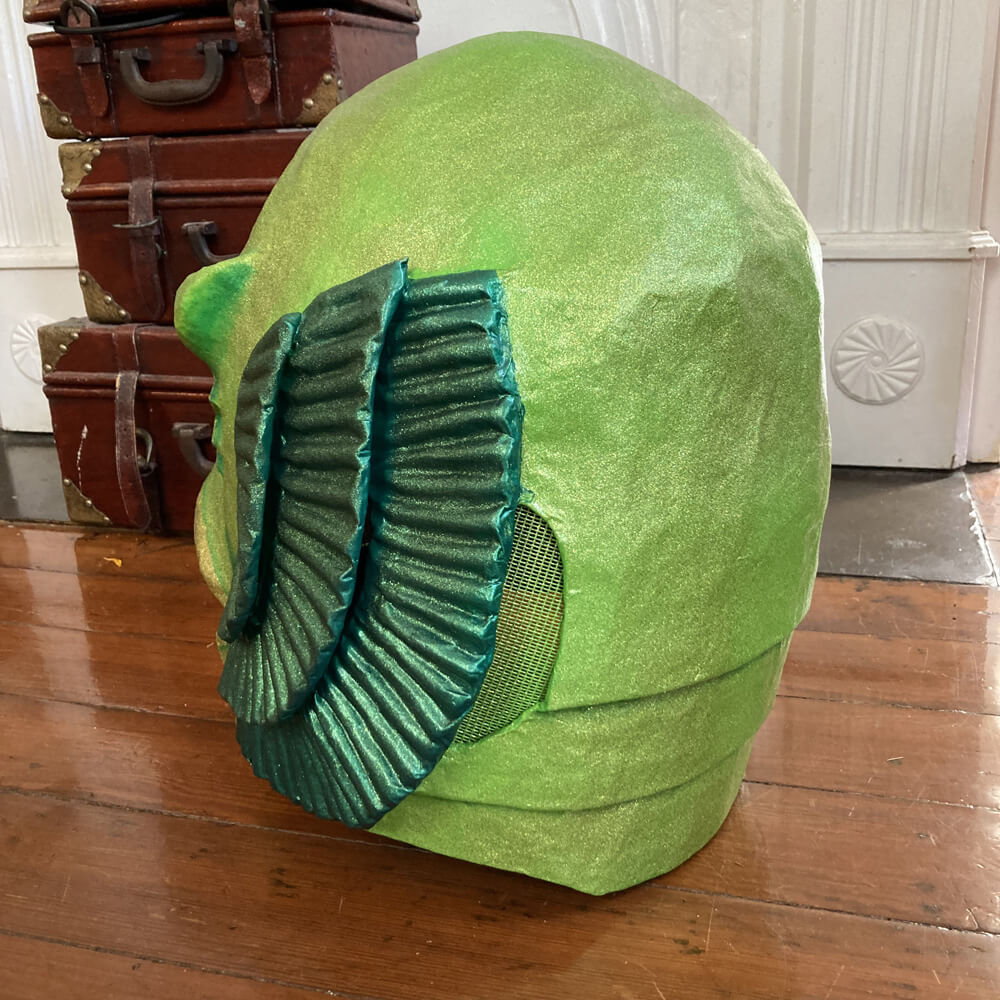
Next, I used Scotch blue painter’s tape (paid link) and newspaper to mask out everything but the gills. I sprayed the gills with Rust-Oleum Automotive Lacquer Spray, Emerald Green (paid link); this stuff is great because it dries with a sort of satiny metallic sheen.

When that was dry I sprayed the gills with a darker green glitter spray, Krylon Glitter Blast, Lucky Green (paid link).
When all that was dry, I removed the tape and paper; duh.
A really important step: I sprayed the whole mask with a good heavy coat of Rust-Oleum Glitter Sealer (paid link). Before this step, the glitter rubbed off very easily on my fingers. After the glitter sealer was on there, the glitter did not rub off at all. I was really impressed.
Last thing: I used a darker green acrylic paint and a rough brush to paint all the shading stuff on the face.
Screen and eyes
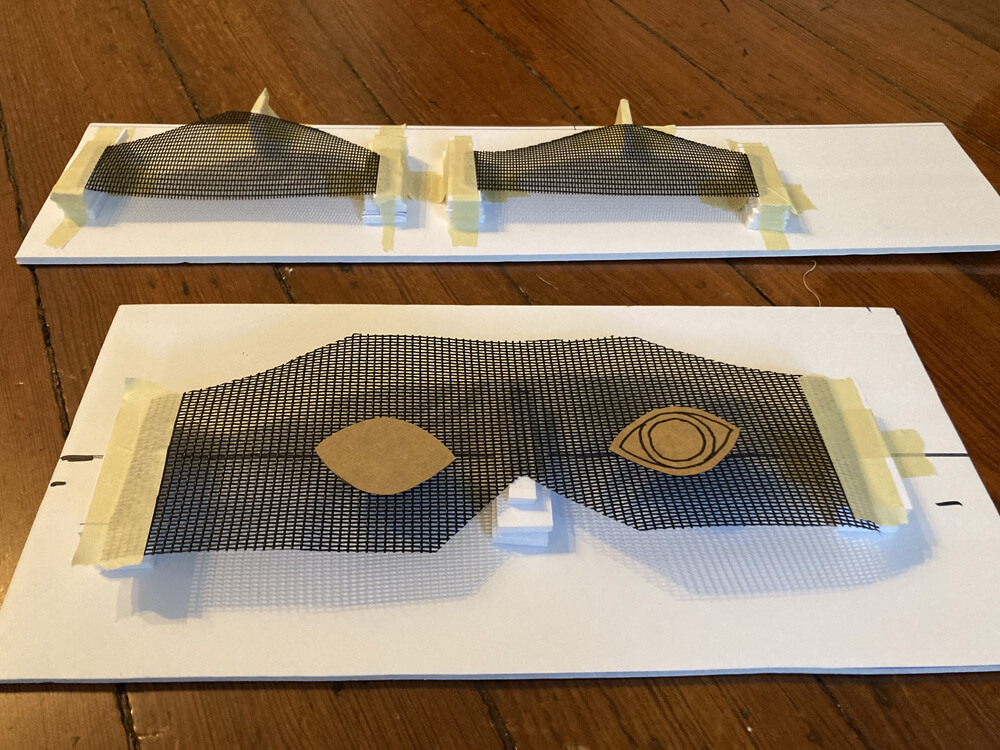
I always put pieces of screen door material in the holes of my masks. I wanted to paint the pieces with the same green spray paint and glitter spray as the mask itself, so I built a little structure to paint them on. I learned the hard way a while back that if you just lay down a piece of screen and spray paint it, the paint bleeds through and makes the screen stick to the surface under it, and the paint pools in the holes in the screen, blocking them. So I taped together some little scraps of craft foam to hold the screen up off of the board behind them.
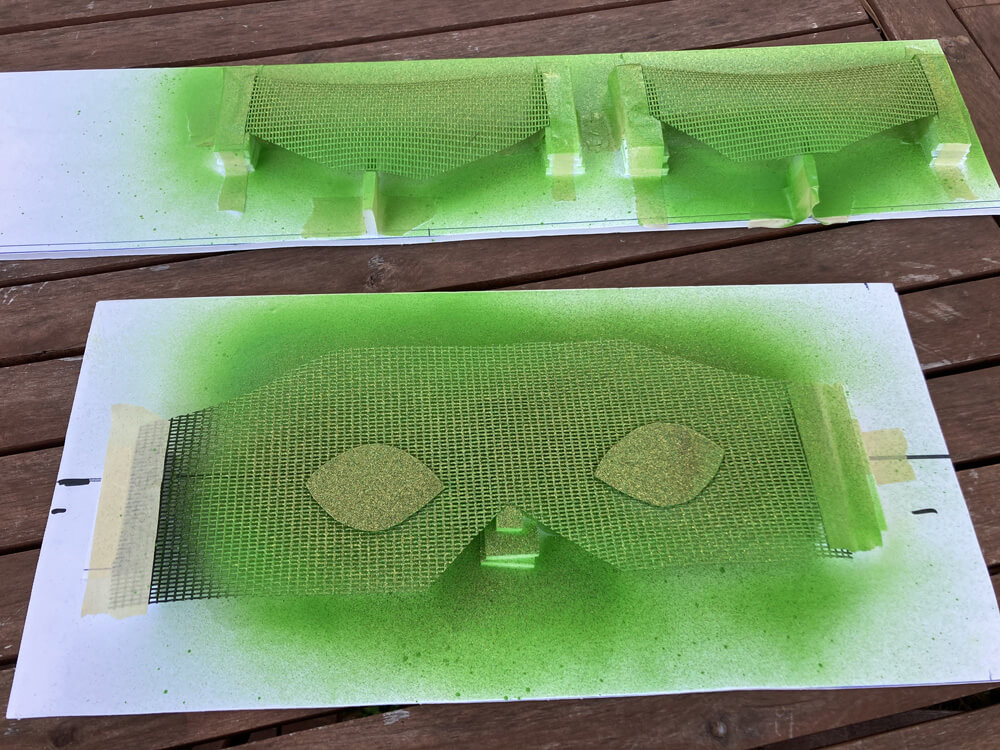
For the eyes, I wanted the area of the eyeballs to remain black, so I masked out those bits with pieces of paper. In order to make sure they were placed correctly on the screen, I first put this strip of screen inside the mask and taped it in place. Then I cut out the paper eyes and taped them onto the screen. Then I removed the screen from the mask, keeping the eye shapes on there, and then it was ready for painting.
So yeah, spray paint, let dry, glitter spray, let dry, glitter sealer, let dry.
Here’s a tip! When spraypainting on screen like this, you might see that some of the little holes get filled up with paint. You don’t want to let them dry like that! The solution is easy: simply blow on the screen to knock the paint out of there.
Oh yeah, and the mouth was easy; I just left the screen black.
To prepare the screen pieces for installing in the mask, I did something new. I hot-glued some folded strips of paper onto the edges of the screen. This is to make the screen pieces easier to glue into the mask. For years, I’d just struggle with hot-gluing the screen bits directly into the mask; this is tricky because, of course, the hot glue goes right through the screen when you press it down. You can’t press it down with your finger because the glue will come through and burn ya. I’ve tried pushing the pieces down with a coffee stirrer or something, but then the coffee stirrer ends up getting stuck as the glue cools. So anyway, having these paper edges on the screen bits made them way easier to glue in. I wish I’d thought of this years ago.
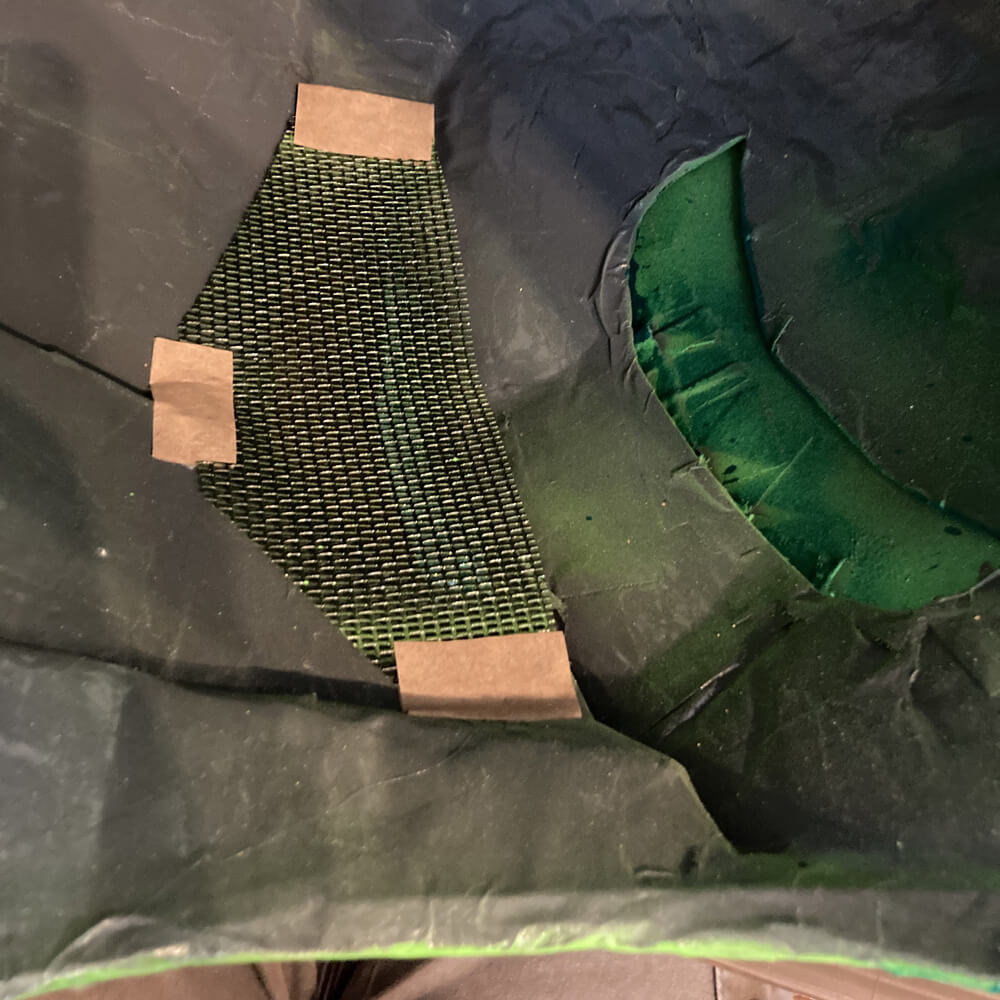
I use a head-mounted light (paid link) when gluing the screen inside the mask; it’s a huge help! No matter how well-lit your work area is, when you’re working inside the mask you tend to block the lighting with your big ol’ head.
Eyes
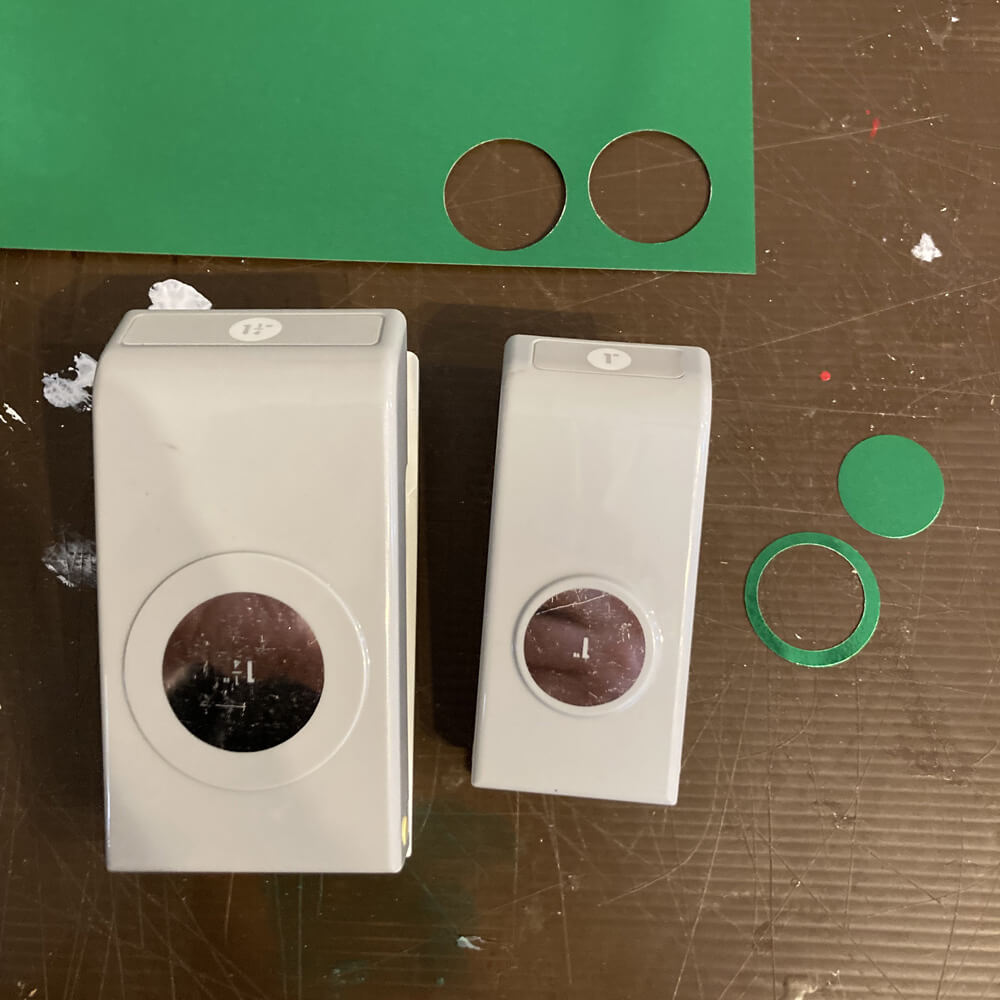
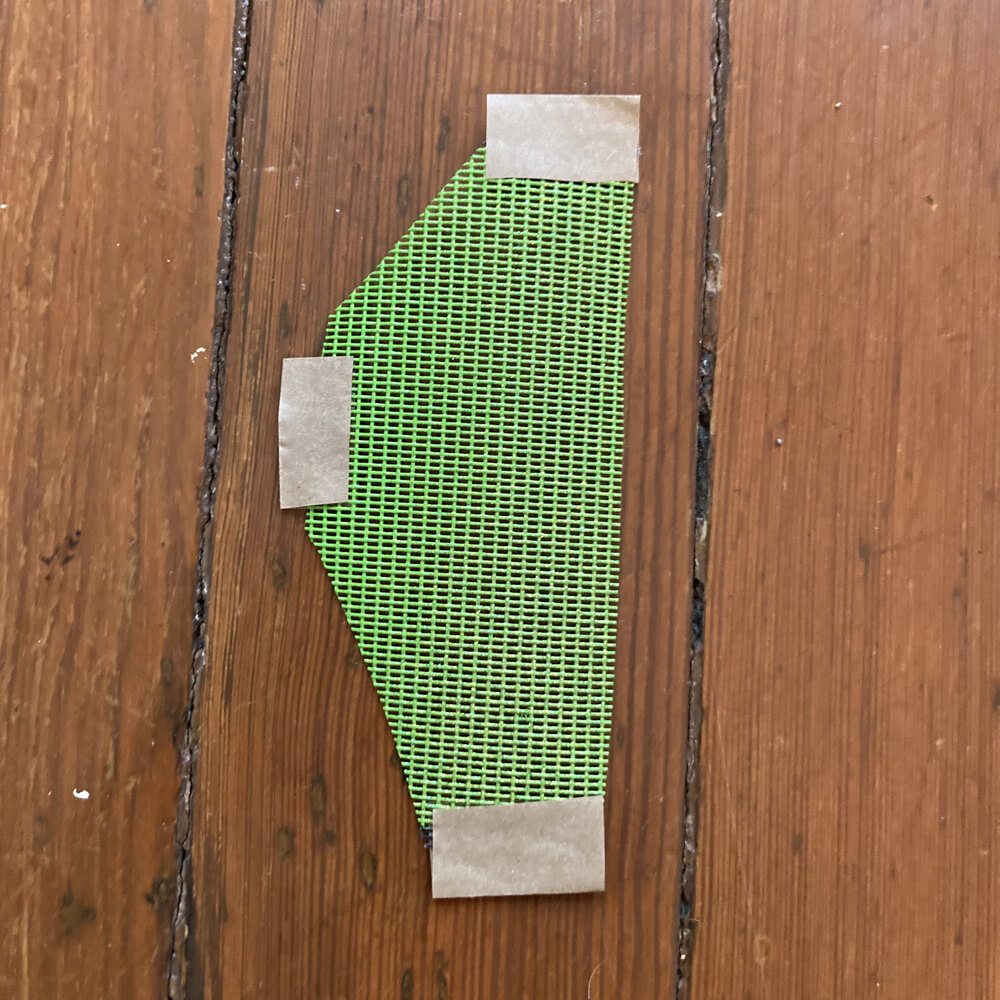
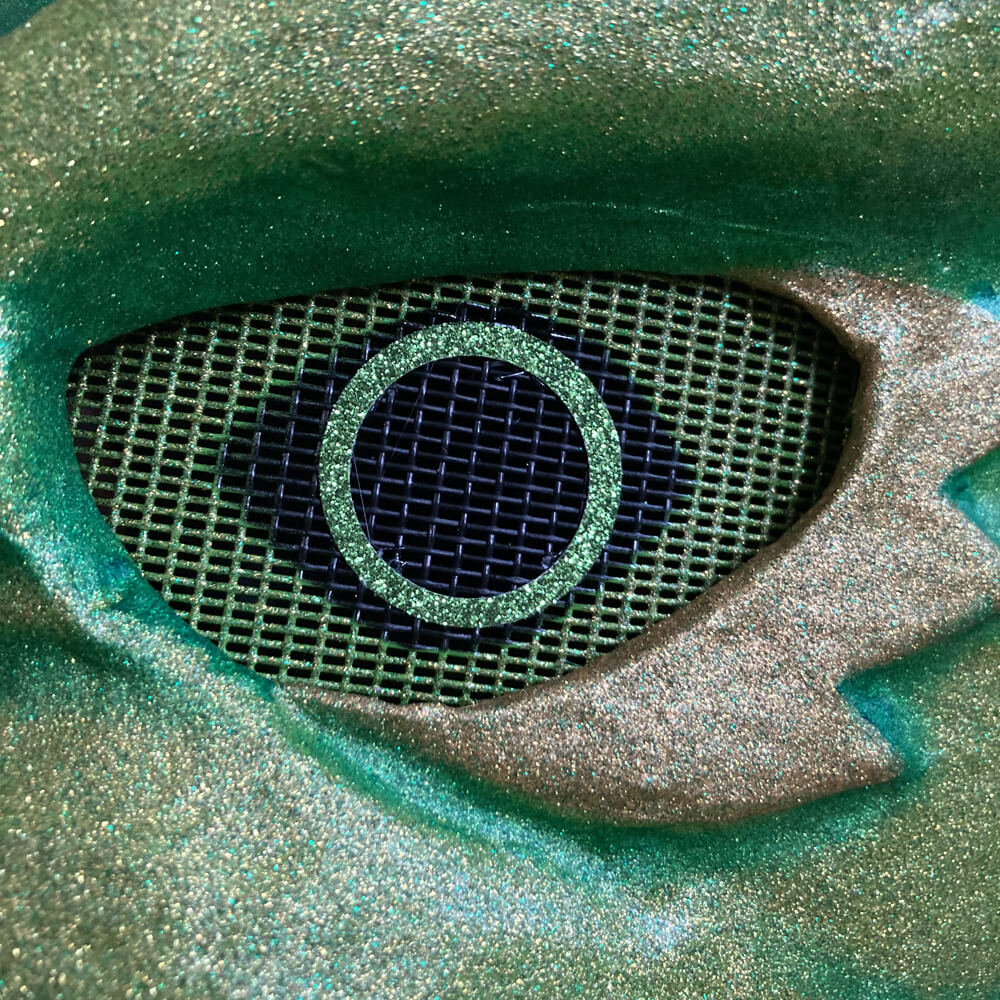
To make the sparkly rings for the eyes, I used some of the same thick green glittery paper that I’m using for the scales on my suit. I have a bunch of different-sized hole punches, and I used two of them to make the thin rings of paper. I started by punching out a 1-inch hole, and then I punched out a 1 1/4-inch hole around that. Easy! I hot-glued these in place on the screen with tiny dots of glue. Here’s a link to the type of hole punch I use (paid link); these things are great. (Note; the paper that’s pictured above is different from the glittery paper I ultimately used for the eyes; this was an earlier test.)
Installing a hard hat
I put a modified hard hat in all my big masks. I didn’t take any pics of this one but you can see the process in my pro wrestler skeleton mask from last year; just scroll down near the bottom.
My last step is usually to add a counterweight in the back of my masks, as they tend to be front-heavy, but this one didn’t need any.
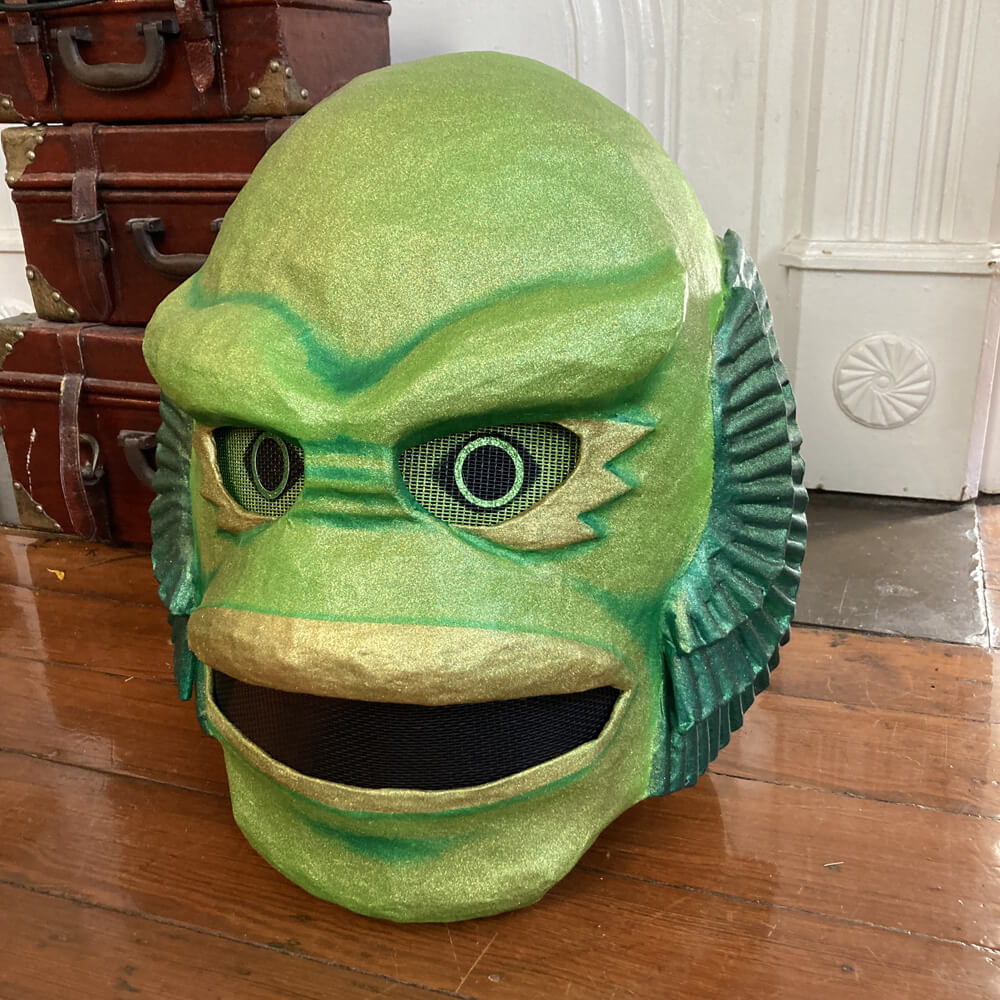
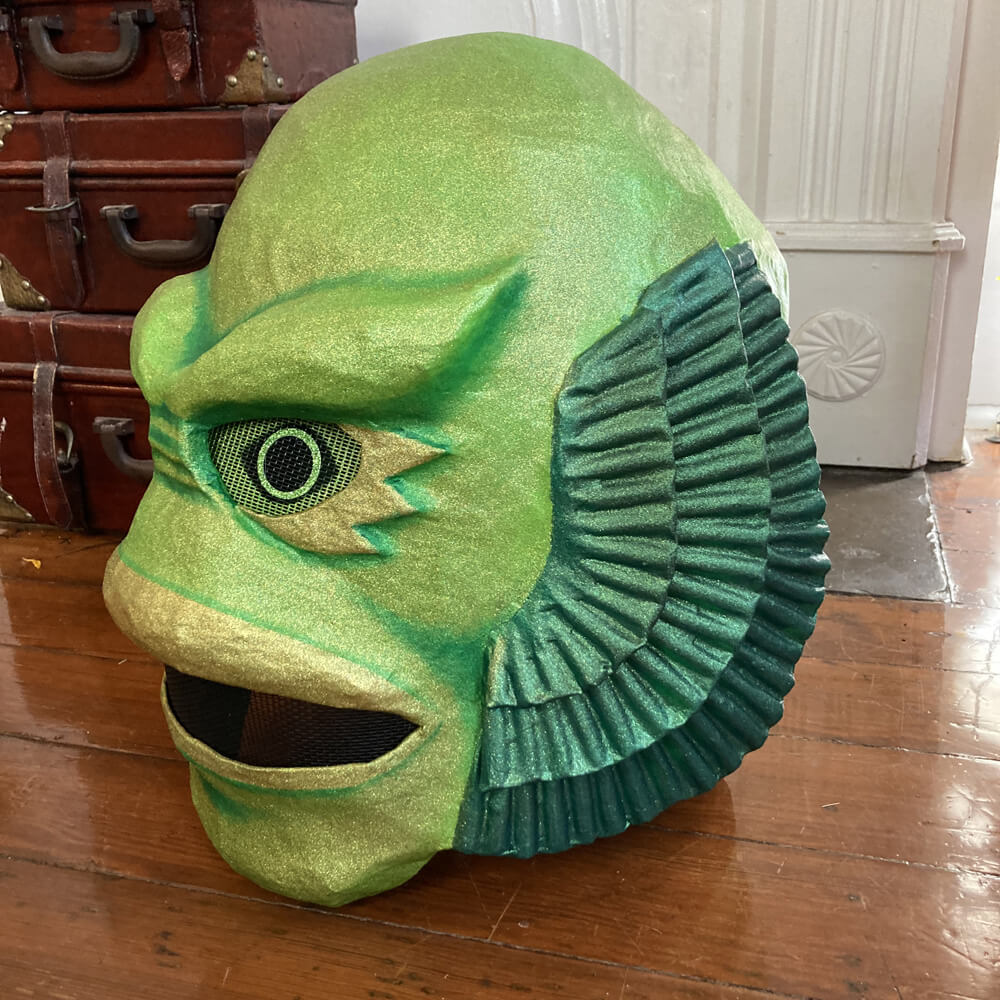
This Creature head is done! Next up: making the Creature’s hands!
 About Manning Krull
 How to make a 4-foot paper maché alligator
 My violin skull mask, Mardi Gras 2015
 Three-headed paper maché dragon sculpture
February 6th, 2023 at 6:08 pm
Thanks for posting these when you can. It’s absolutely fascinating to watch you create!
February 6th, 2023 at 7:49 pm
Aww, thank you InarticulateQuilter! :)