
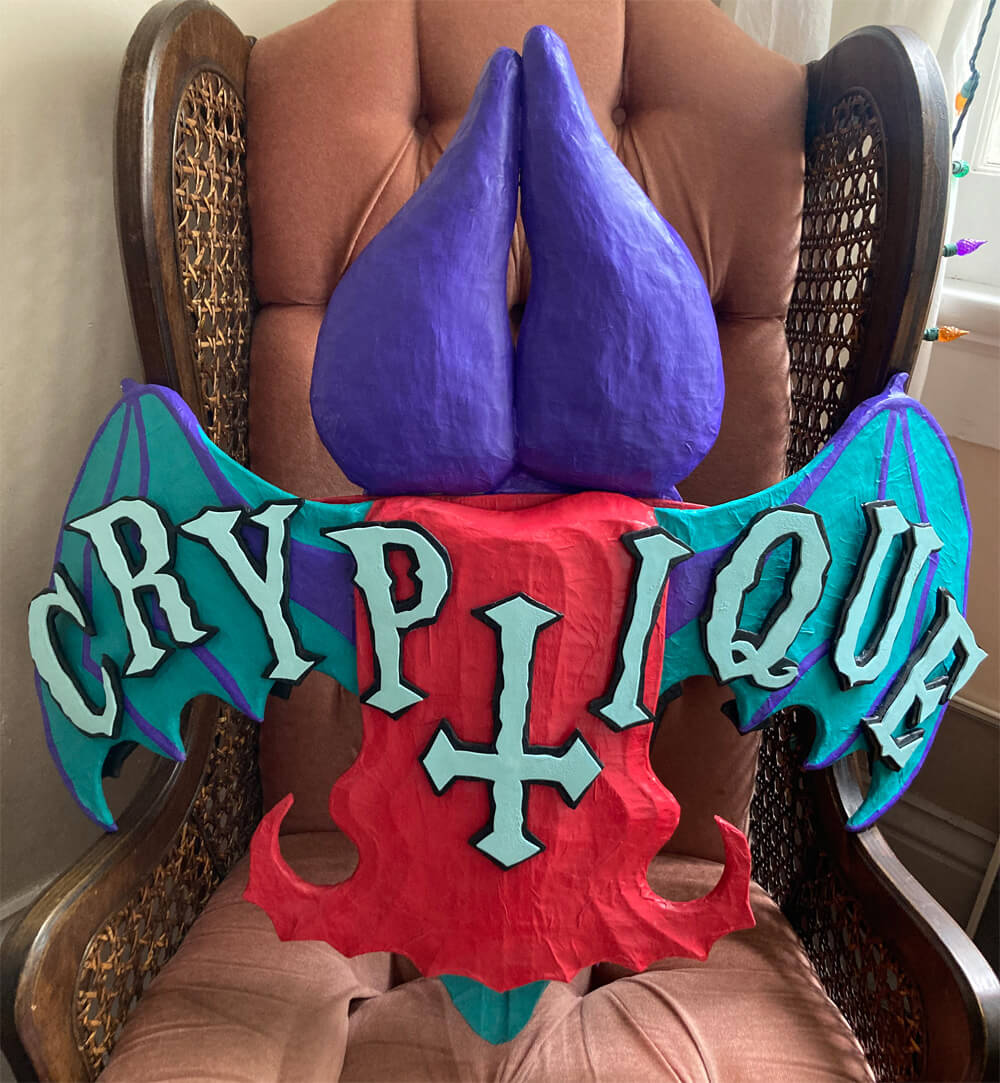
Cryptique vampire bat standard!
Published by Manning on May 20th, 2022
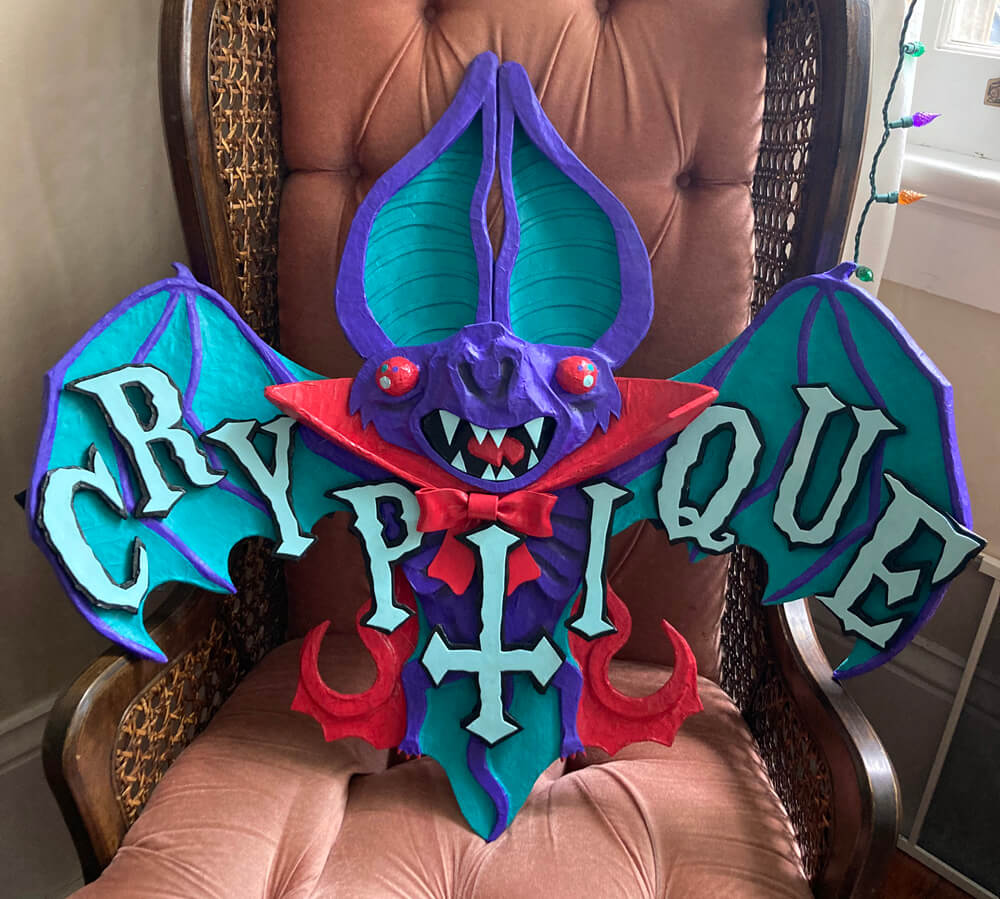
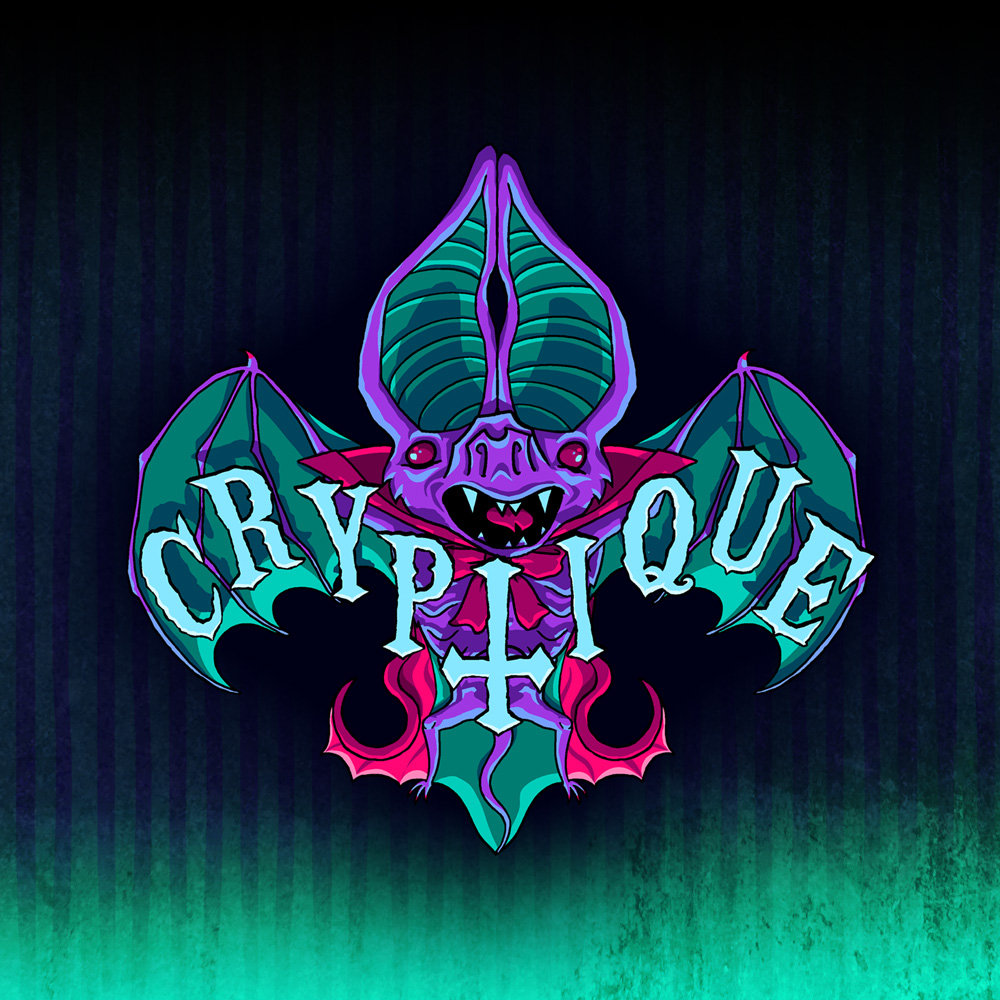
I made this standard for my Mardi Gras krewe, Cryptique; one more fun thing for us to carry on our march. It’s based on this illustration I did; I call this design our bat-de-lis (like fleur-de-lis):
Here’s how I made the standard!
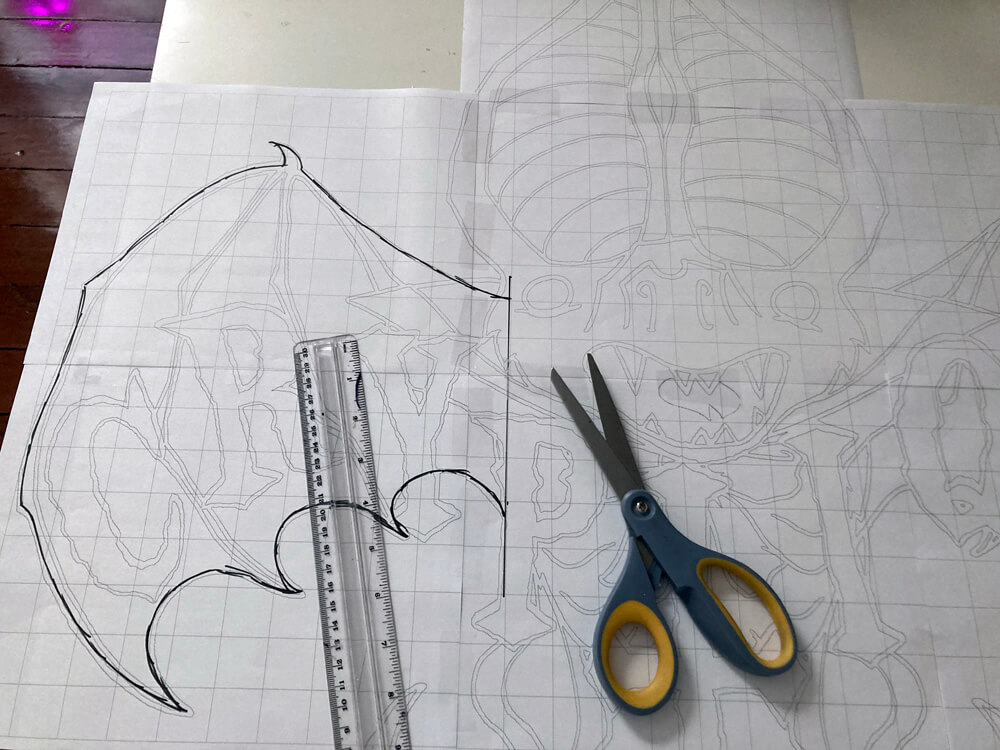
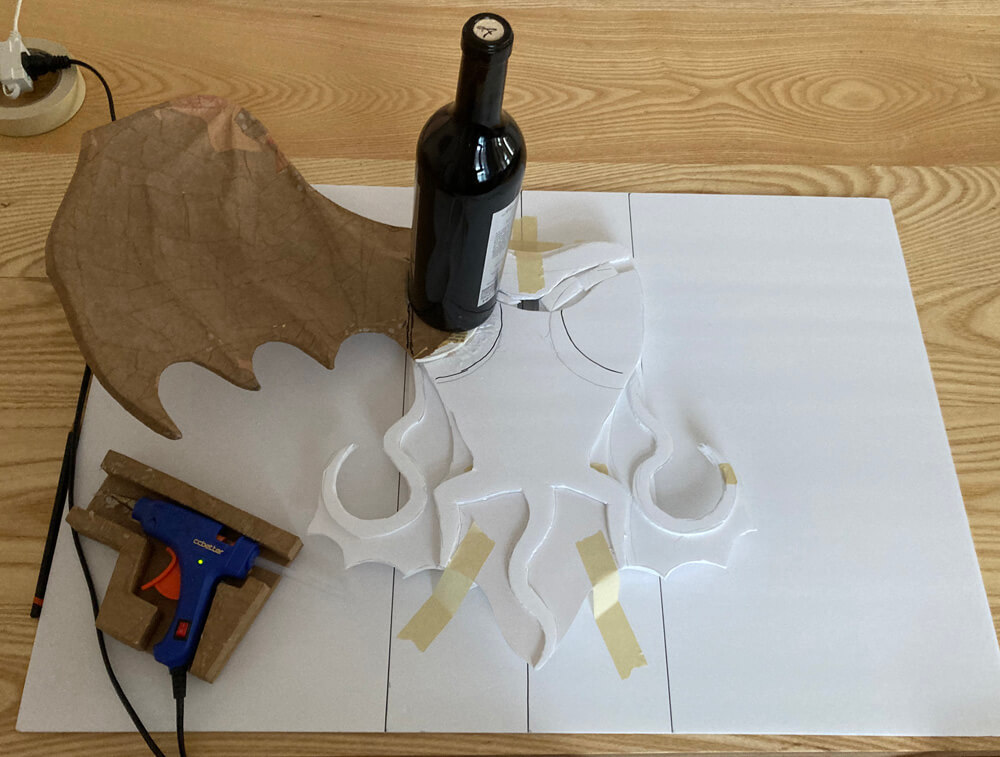
First I brought my drawing into Photoshop and laid it into a grid so that I could print it out at 30 inches wide, with several pages stitched together.
I should mention, I wanted to try making the bat sculpture not fully 3D, but more like a picture in relief; somewhat flat overall. I’d never done anything like that before! It was a fun learning experience.
Wings

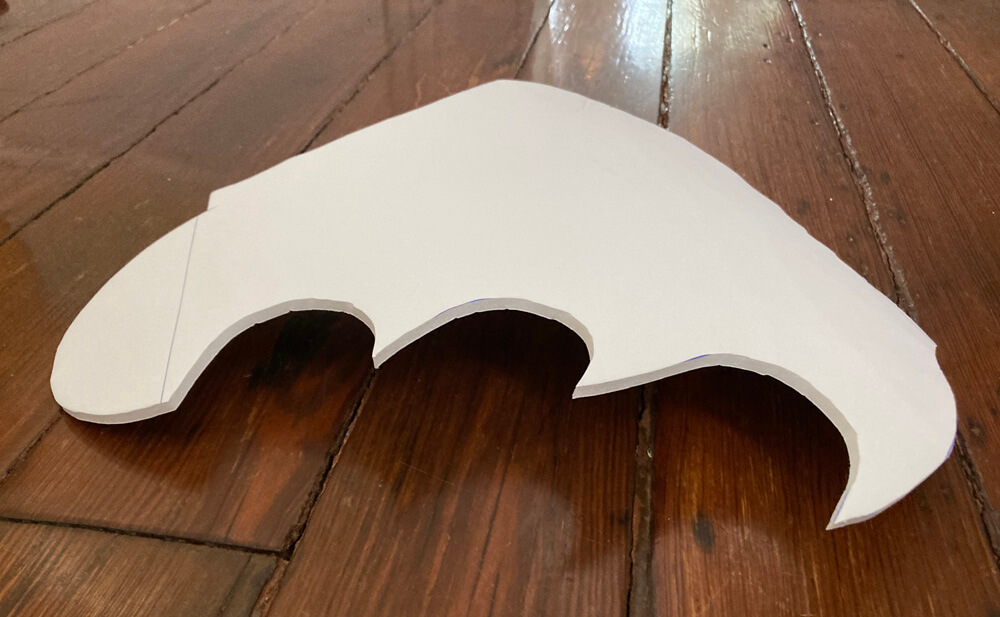
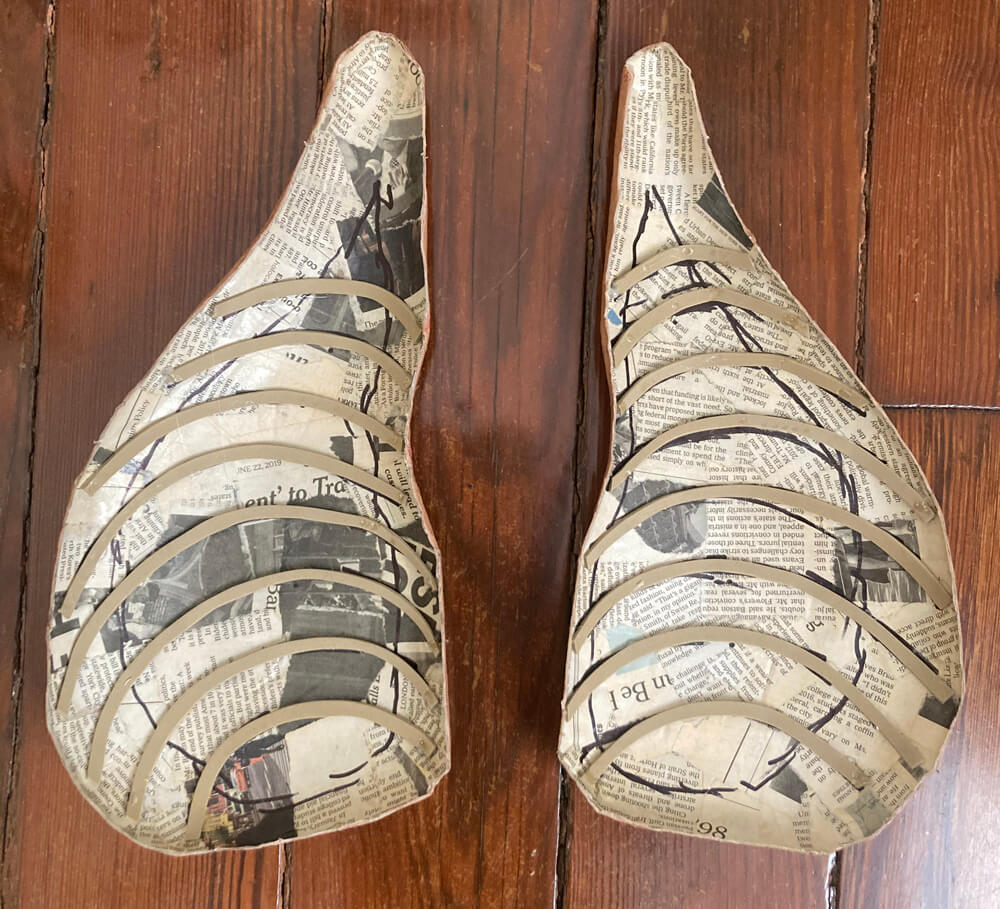
I tackled the wings first. I cut the wing shapes out of foam board and rolled them up a bit by crunching up the foam in my hands, to give them the curved shape. I decided to apply paper maché on the wings by themselves before they’re attached to the body; it’s easier to handle them when they’re separate like this.
here’s some info about my paper maché process and materials. The short version is: I use Roman PRO-543 universal wallpaper adhesive (paid link) and alternating layers of newspaper and brown wrapping paper.

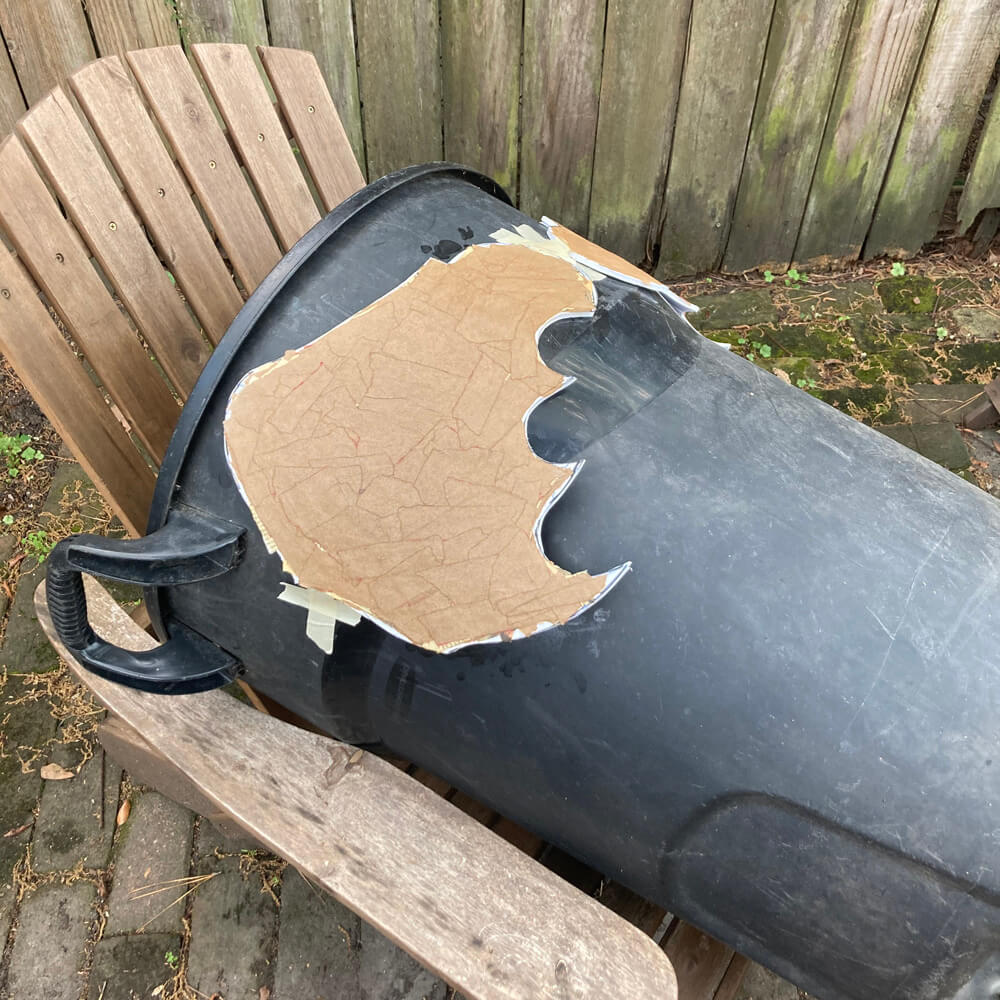
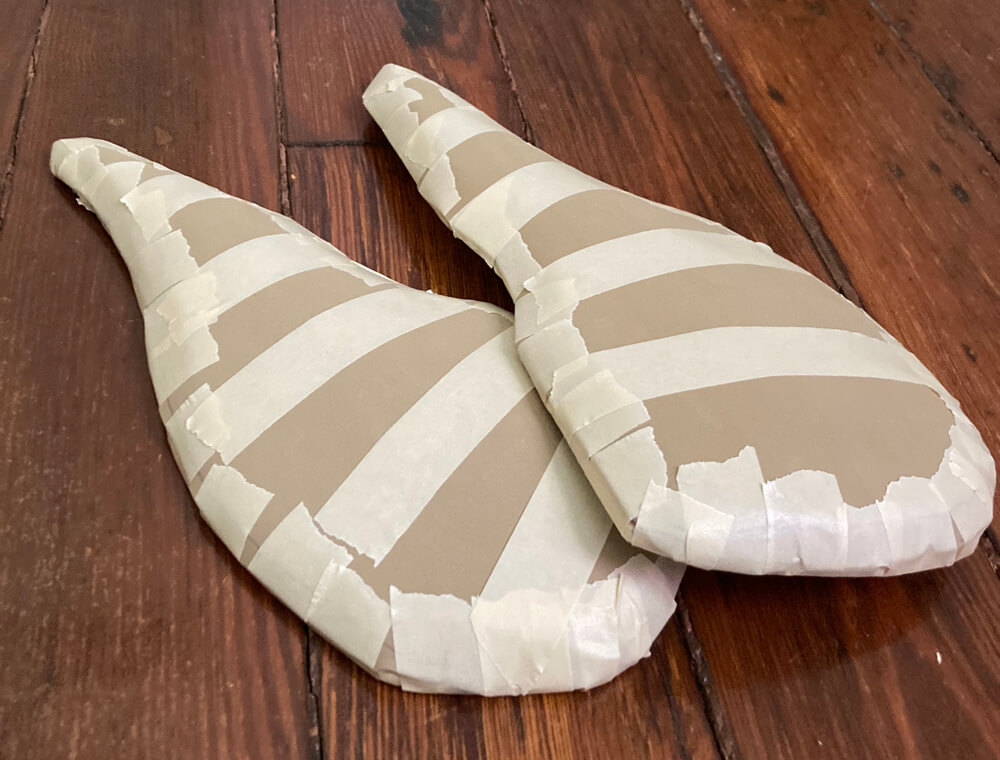
I used a weird trick to get both wings to have the same exact curve: I taped them onto a trash can and put the paper maché on them there. (I cleaned that side of the trash can with some Windex first!) So, I applied six layers of paper maché onto the back side of the wings, all in one go. When they were completely dry (the sun really sped this up), I took them off the trash can and did the other side.
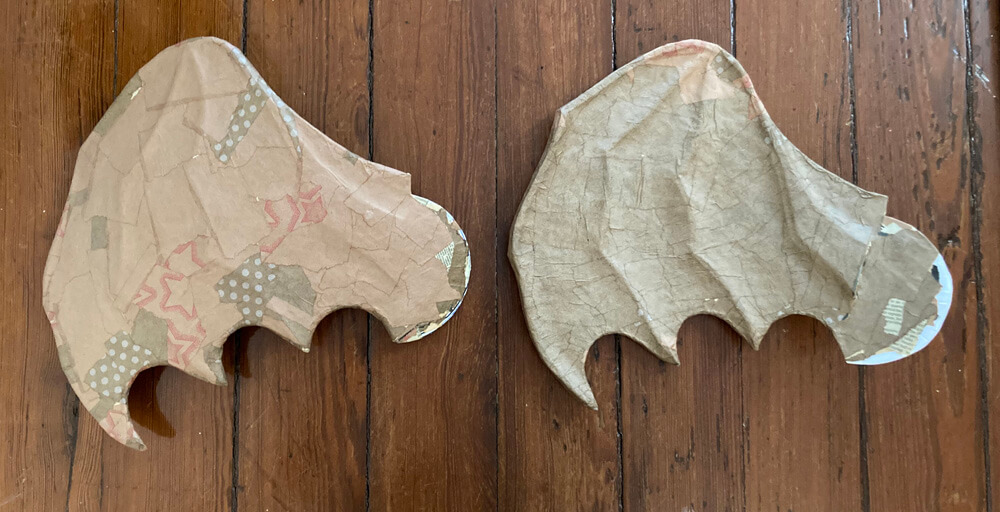
I made the ridges for the finger bones out of thin strips of foam board that I cut and taped in place. I covered these with 4 layers of paper maché. I did this on both sides of both wings.
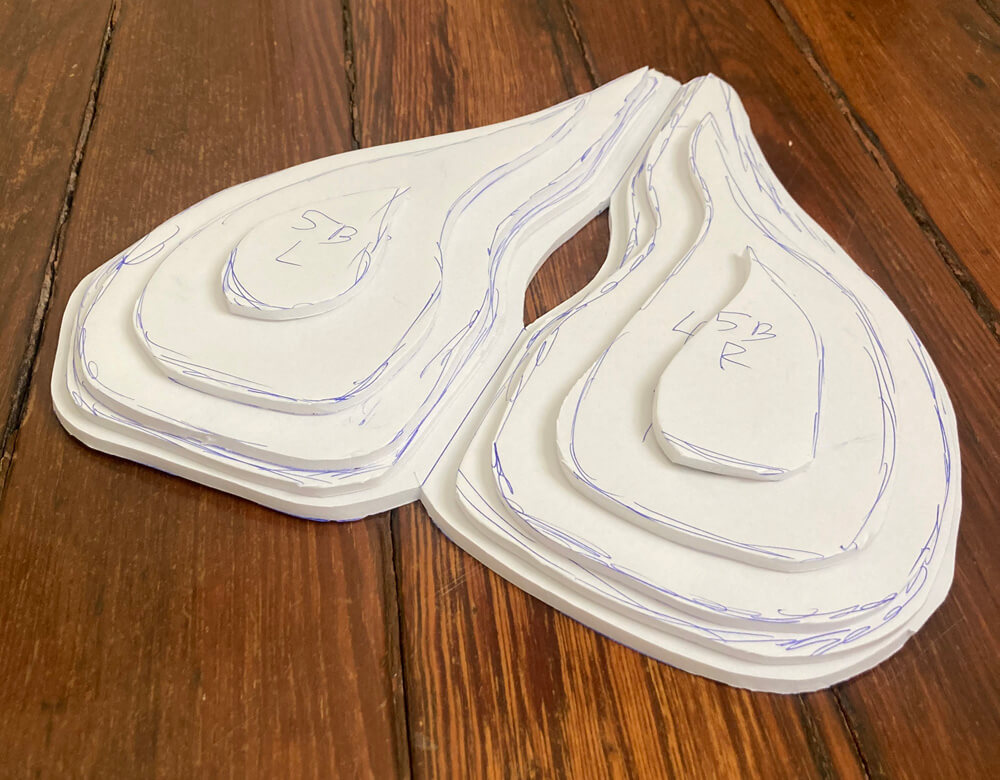
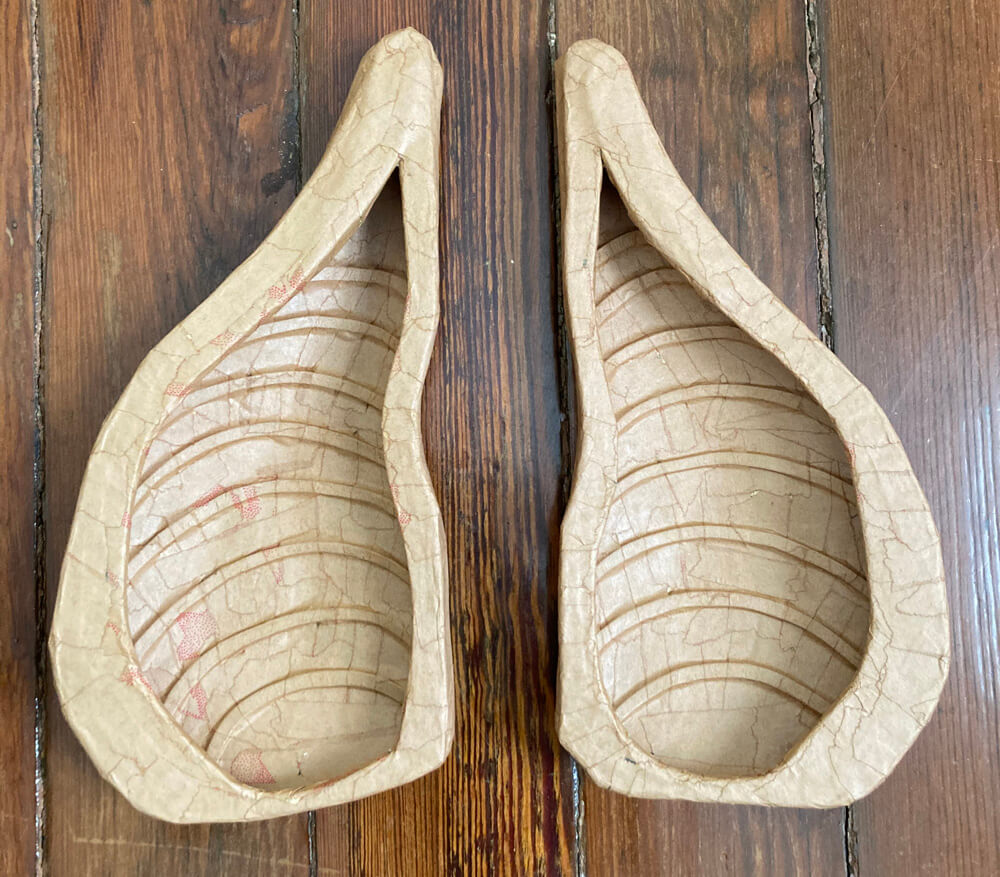
Ears
Next: the bat’s ears. I traced the shapes from my printout onto foam board and cut them out. I made a plan to build the rounded back part of the ears first.
I took the flat foam board cut-out and added a few more layers of foam board. Each layer gets a little bit smaller to create an approximation of a rounded shape. I covered these shapes with masking tape (not shown) and then with a slightly larger piece of this soft craft foam, curved around the shape and taped in place. When that was done I covered the whole thing with shipping tape. Shipping tape acts as a release agent for paper maché; all this junk has gotta come out in a bit.
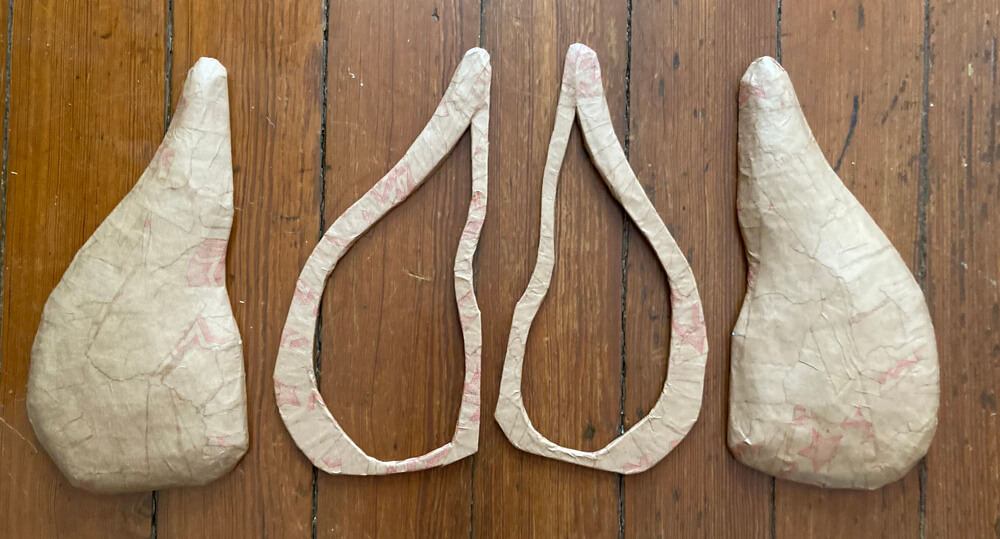
I covered these back parts of the ears with six layers of paper maché. When they were dry, I cut them open with an X-acto knife and removed everything but the curved back surface of the ears.
I created the little ridges inside the ears with thin strips of craft foam. I hot-glued these in place and covered them over with two layers of paper maché.
I then made the front surface of the ears out of foam board. I covered them with two layers of paper maché.
When everything was dry, I connected the front of the ears to the back of the ears with masking tape, and covered over the connections with six layers of paper maché.
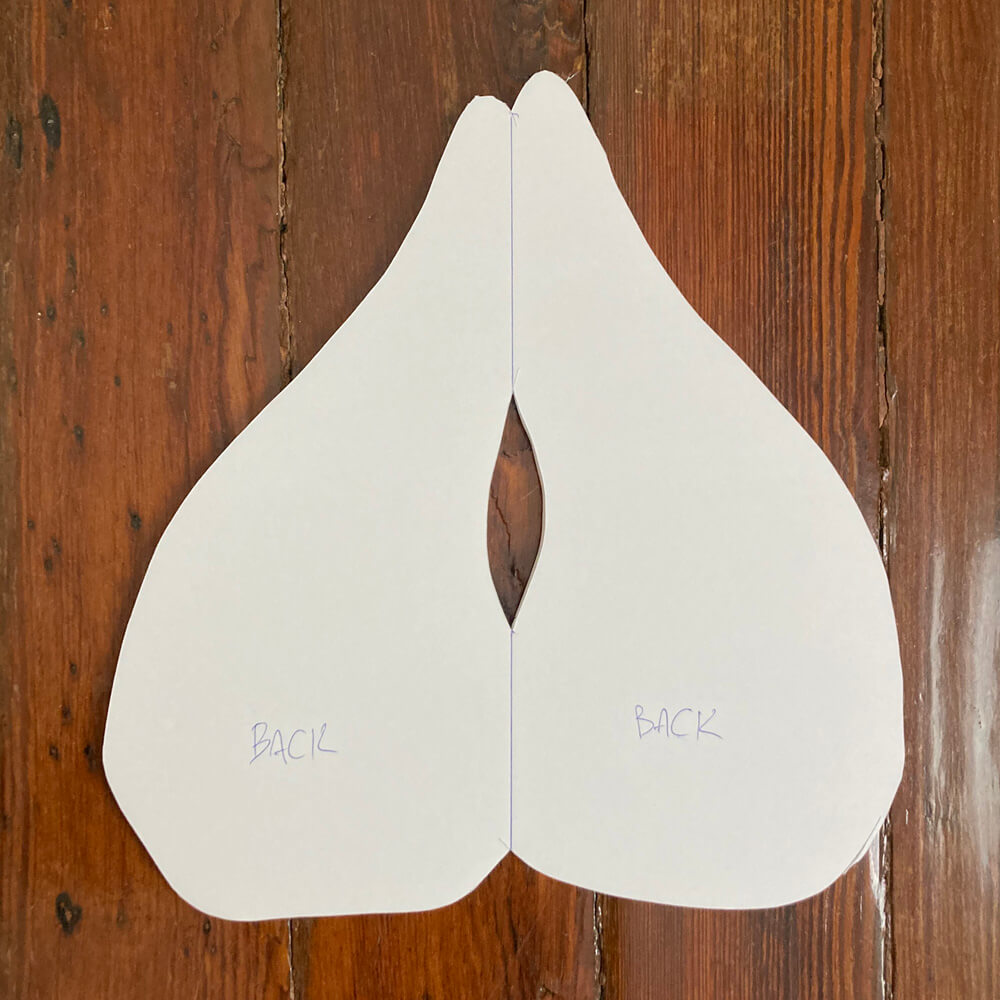
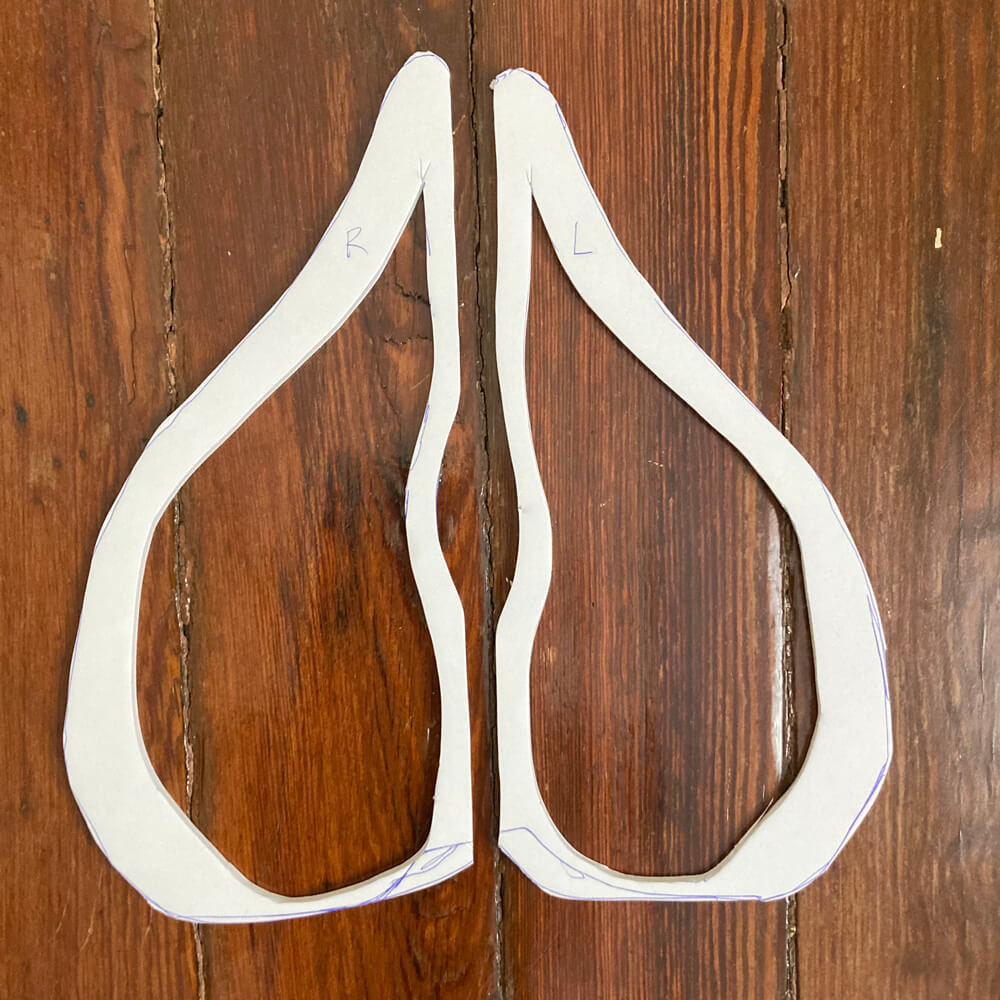
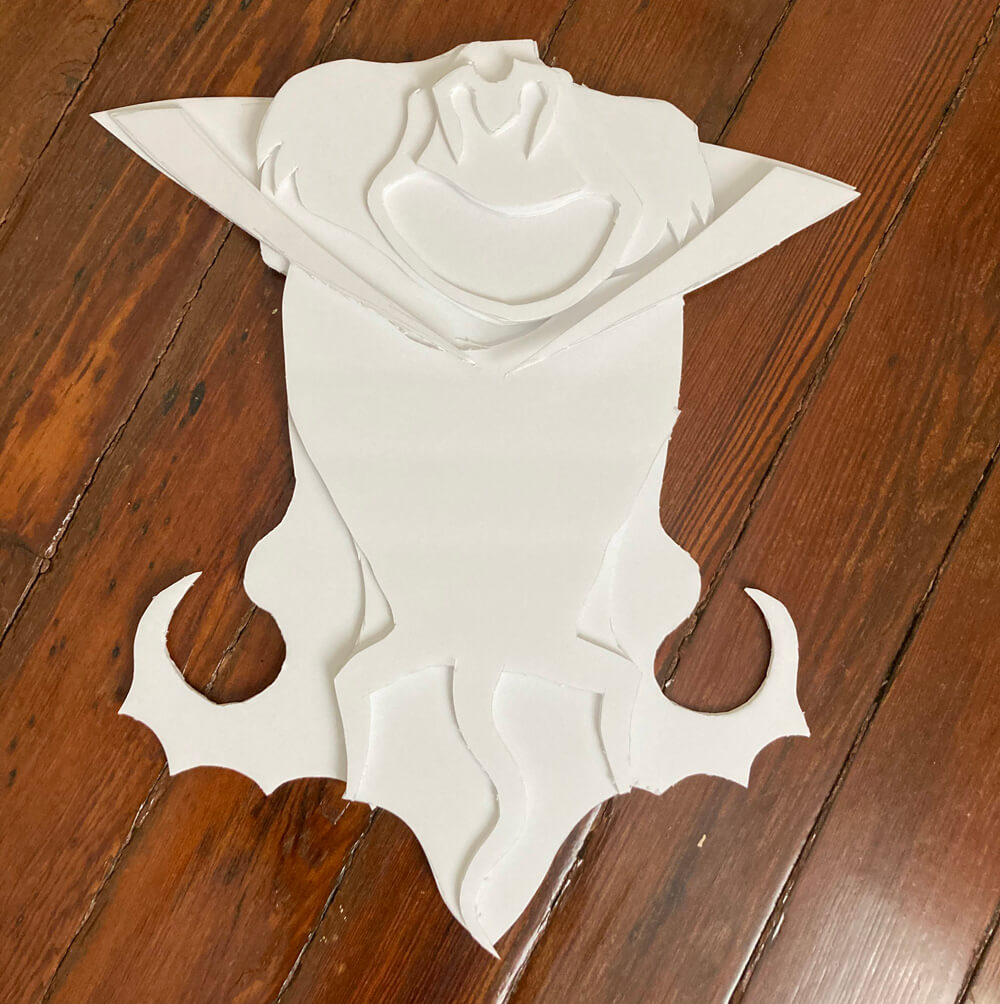
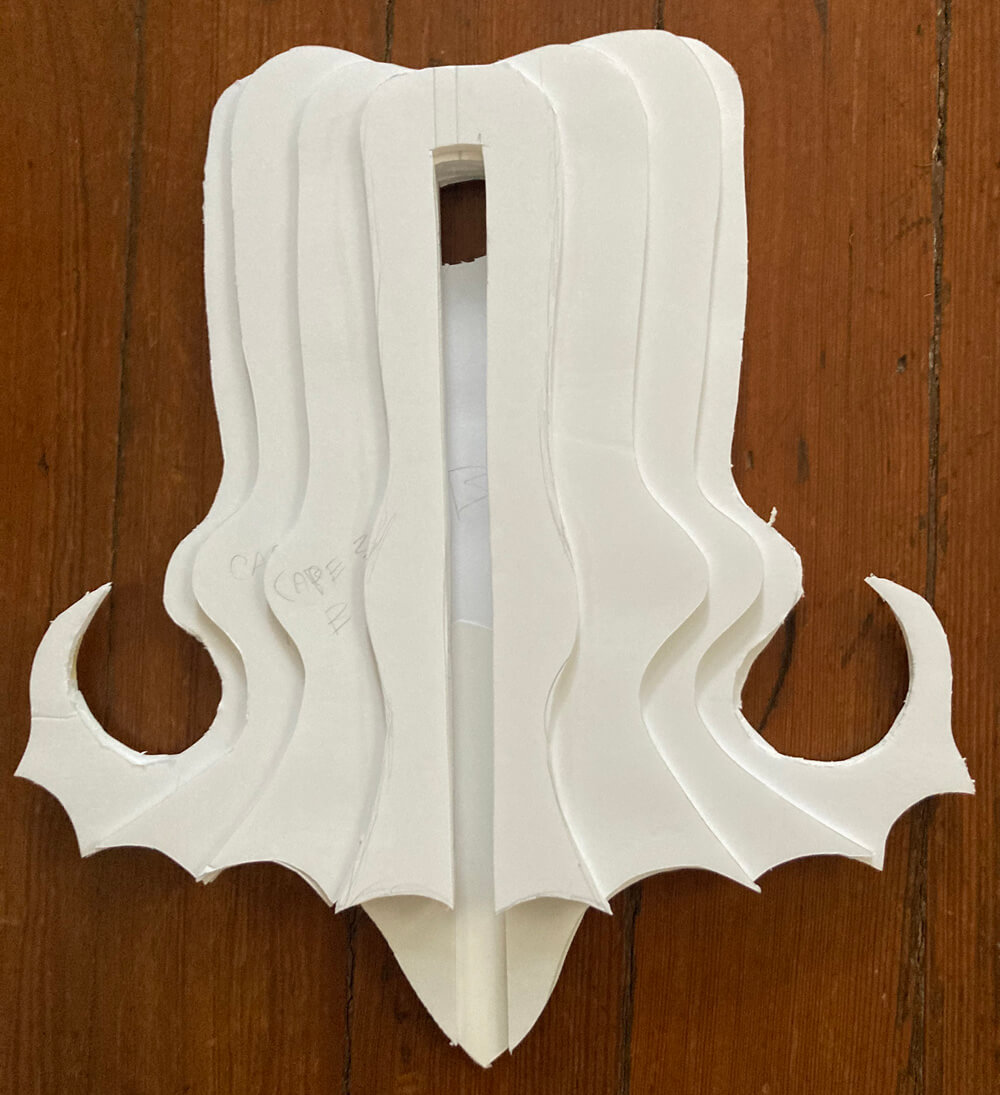
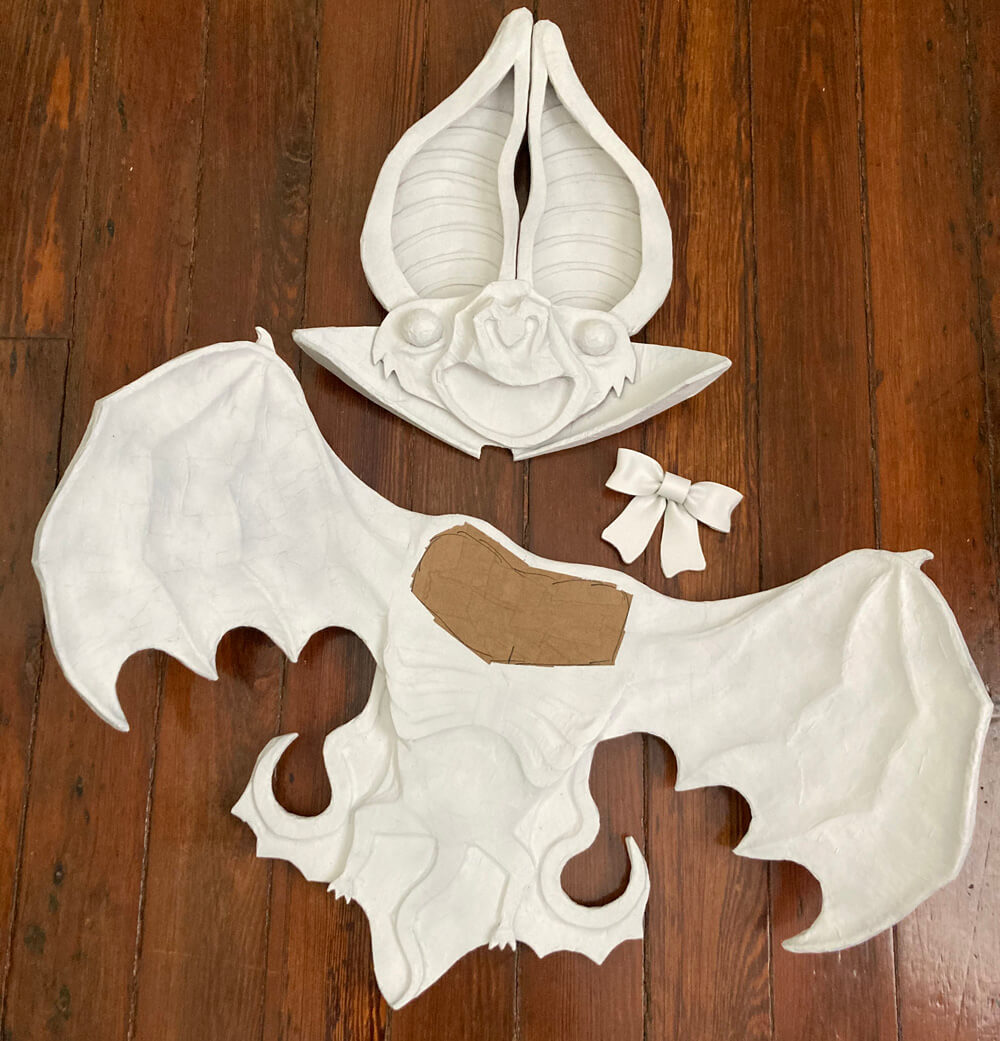
Face, body, and cape
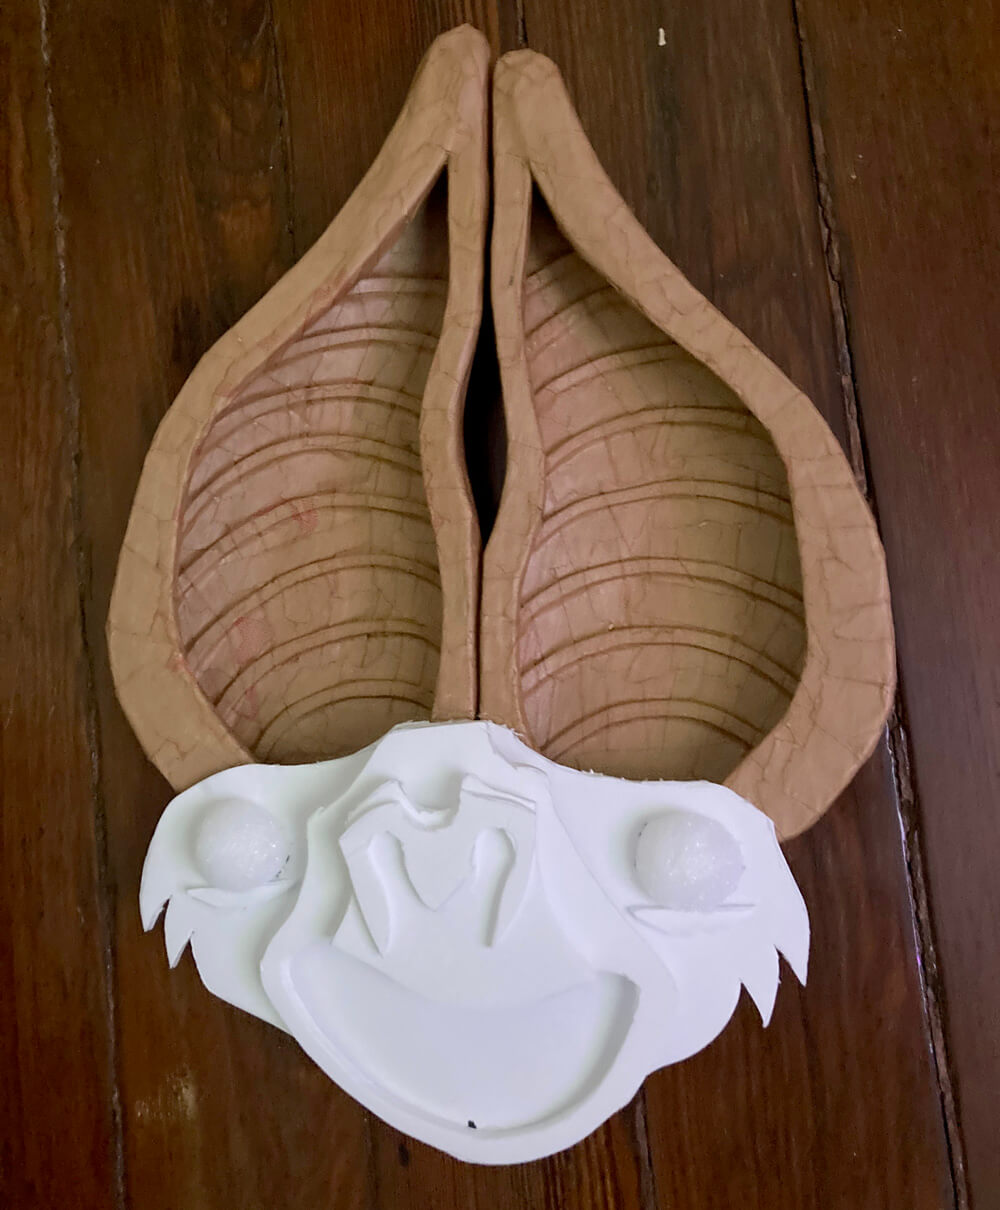
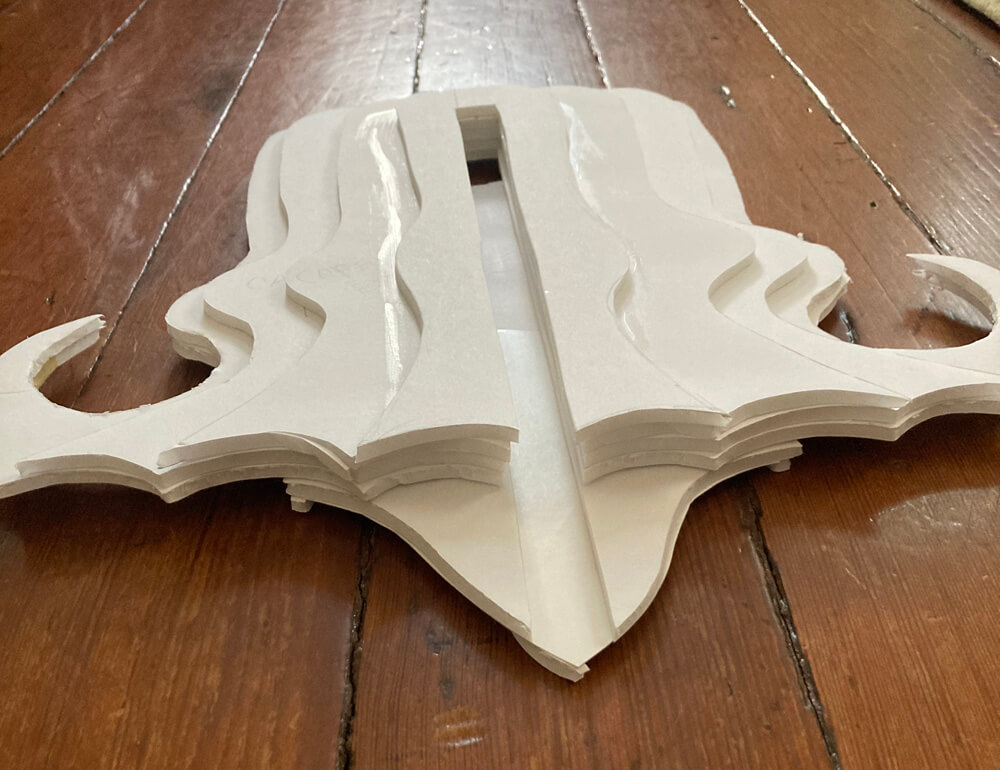
I made the face and body out of several layers of foam board that I (somewhat-)carefully planned out and cut out and stacked up. In designing these shapes I also measured and cut a long hole in the back so I can insert a broom handle into the thing.
I made the eyes out of a small foam ball that I cut in half.
Once all these big flat pieces were connected with a little bit of hot glue, I attached the wings to the body. I did this with a ton of hot glue applied to the tabs of the wings. I also glued another panel of foam board over the chest and the tabs of the wings together, so they’re glued in on both sides. I was pleased with how nice and sturdy they felt right away.
I then built up some shapes for the ribs/chest, stomach, pelvis, etc, with pieces of craft foam. I covered all this with four layers of paper maché.
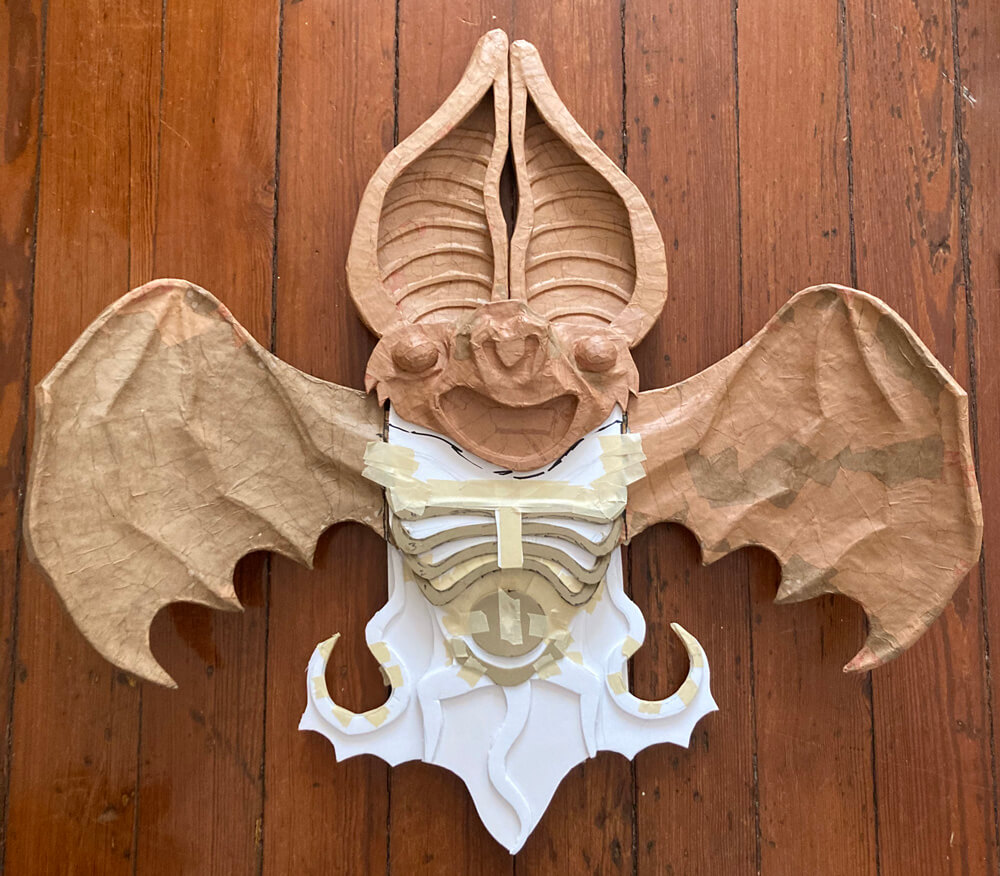
Not shown: I made the collar for the cape out of some foam board and paper maché.
I also added little feet and thumbs, both made of tiny pieces of foam board, covered in even tinier pieces of paper maché.
Bow
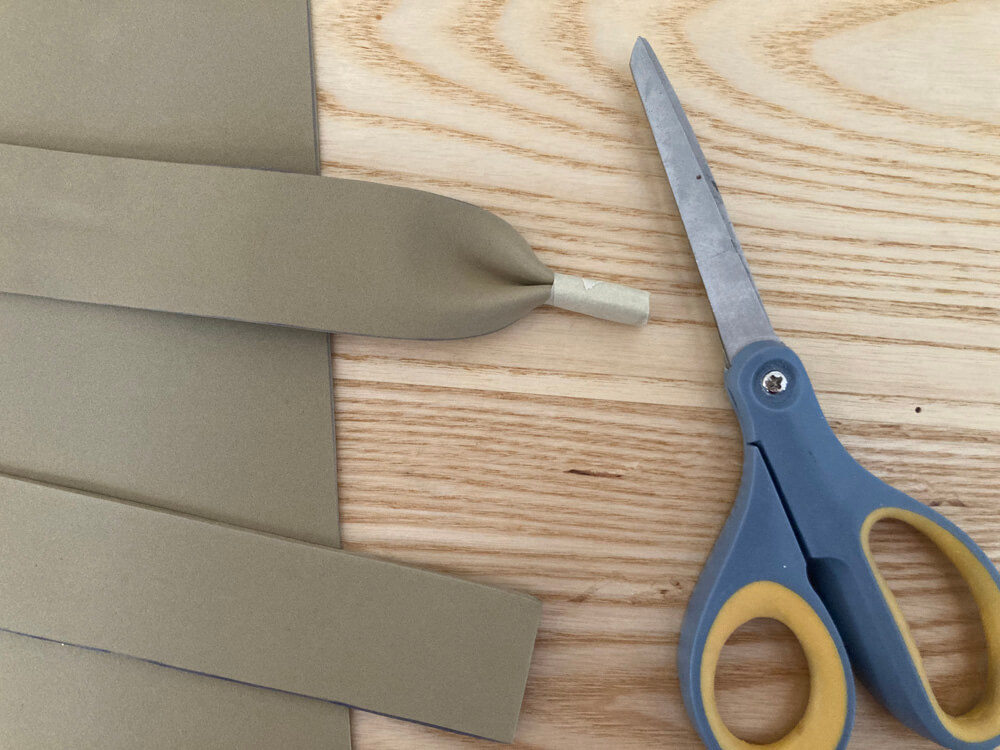
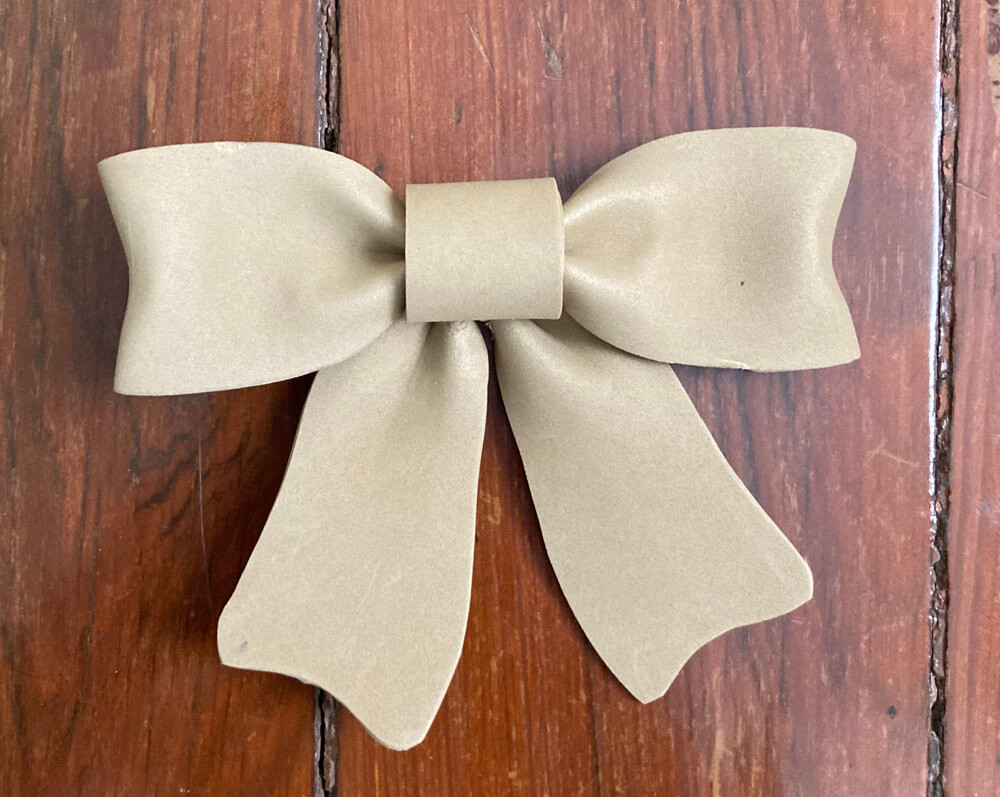
I made the bow out of strips of craft foam which I pinched and taped/hot-glued to create those little folded-looking shapes. I made up this technique when I was making the bow for my Pumpkin Night mask. The bow for this here bat is five separate pieces all glued together — the left loop, the right loop, the two hang-y bits, and the little piece wrapped around the middle.
Letters
I need two sets of “CRYPTIQUE” letters, one for the front of the bat and one for the back. And I wanted each letter to be two layers; a black background layer and a light blue front later. So I cut out four copies of the letters in all: two slightly larger sets from foam board and two smaller sets from craft foam.
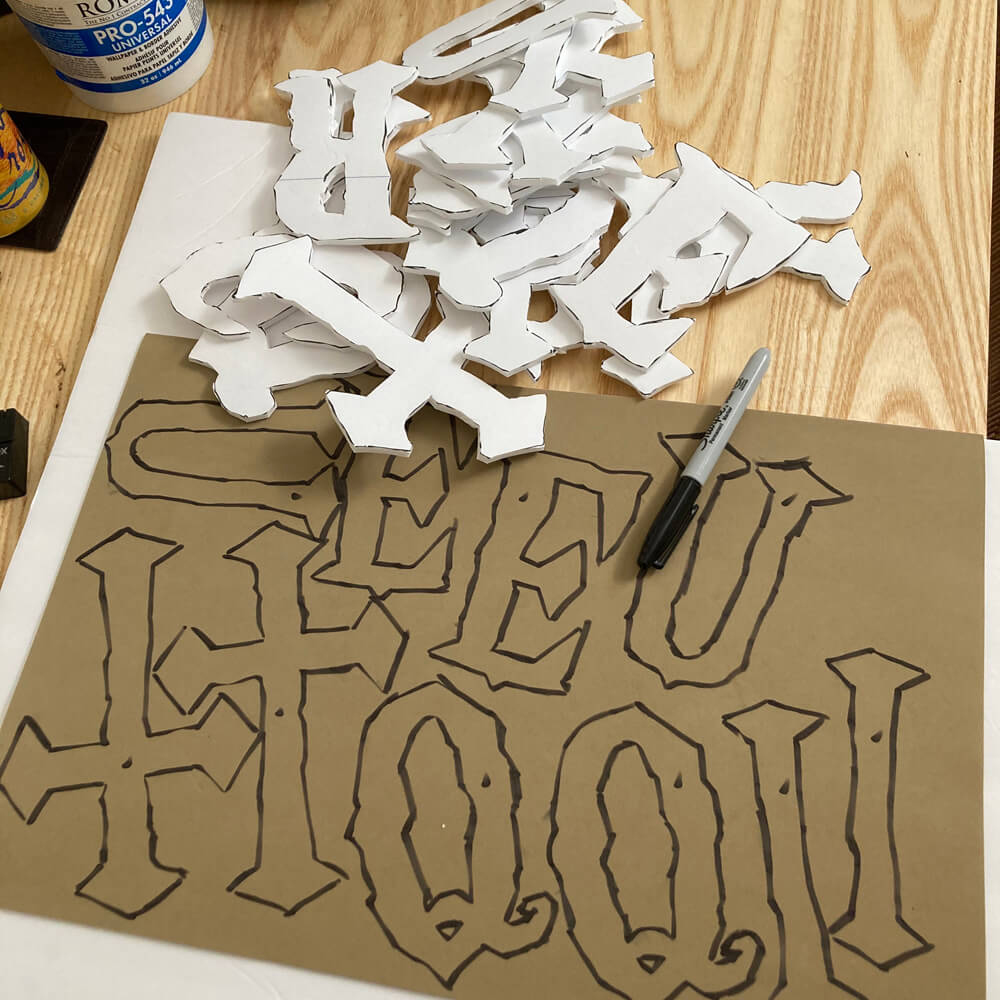
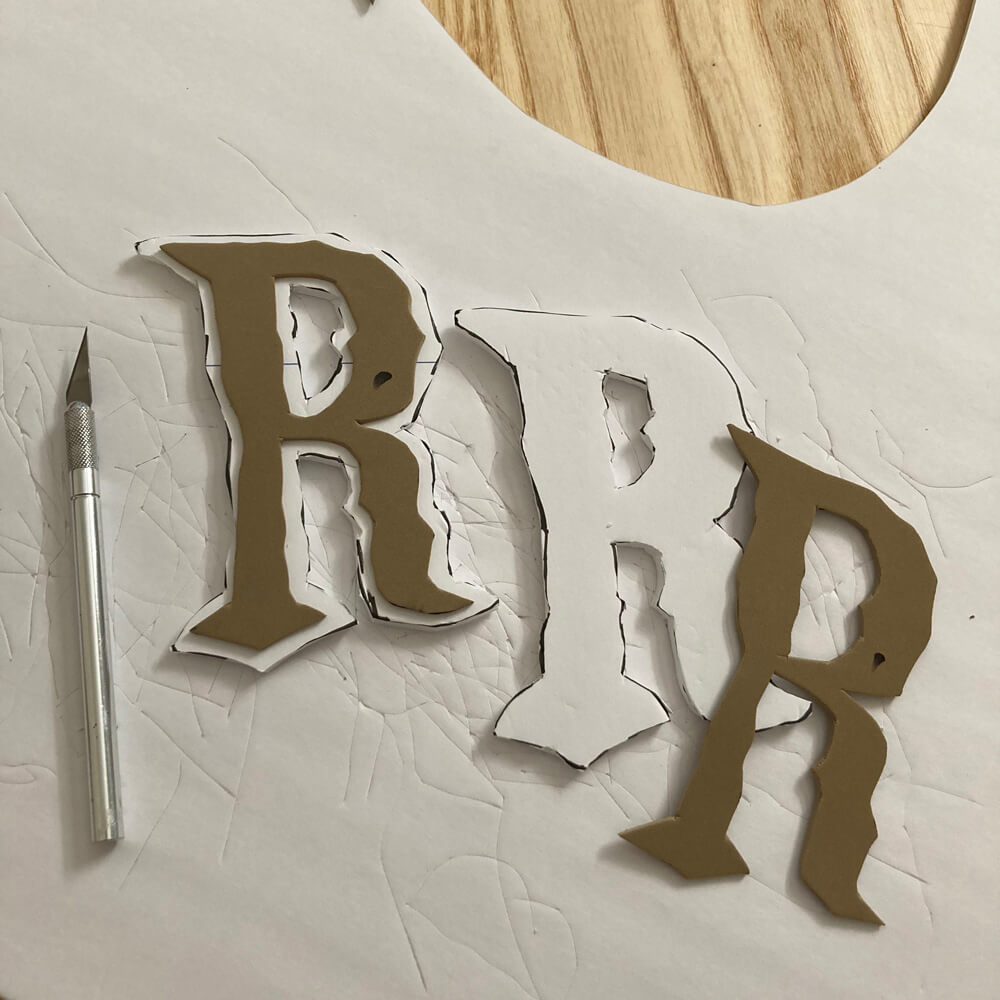
I covered the foam board letters with one layer of paper maché. No need for paper maché on the craft foam cut-outs.
Broomstick
This is boring but I extended this hollow metal broom stick a bit by inserting a thick wooden dowel into it, taping it in place with tons of heavy duty packing tape, and then adding six layers of paper maché around the connection. This is so the pole can be a bit longer; the metal part will be exposed and the wooden down will be inserted into the bat.
Painting the body and letters
I painted the head and body separately to make it easier to get at all the little shapes.
I first applied one coat of Krylon spray gesso (paid link) on everything: the head, the body, the bow, and the letters. Of course I did one side of all the pieces, laid them down to dry, and then flipped ’em over and did the other side. You can see I left some of the paper maché exposed where I’ll be gluing everything together.
I let the gesso set for 24 hours, and then I painted all of the shapes and details of the bat by hand with acrylic paint and various brushes. This took several days and about four coats of paint in most places.
For the letters, after the gesso, I spray painted the background parts black, and I hand-painted the front parts with a light blue acrylic paint.
Once I was done painting everything, I connected the main parts of the bat; I glued the head onto the body with Gorilla Glue, and I hot-glued the bow in place.
Teeth and tongue
I made the tongue out of a couple layers of craft foam and covered it with two layers of paper maché. The teeth are just craft foam, no paper maché. Gluing the teeth into the mouth was a little complicated! I made little supports for the backs of the teeth out of poster board and hot-glued everything together.
Attaching the letters
I also hot-glued all of the craft foam letters onto the thicker foam board bases.
I knew the flat letters wouldn’t sit perfectly on the irregular shape of the bat, so I added some pieces of foam on the backs of the letters, placed strategically to create as much surface area as possible for gluing. I hot-glued the letters in place with tons of glue to make the connections as strong as possible; I don’t want ’em getting knocked off!
I inserted the broomstick into the bat but didn’t glue it in; it holds on pretty well without glue, and I’d rather keep the pieces separate for easier storage.
I sprayed the whole bat sculpture with a coat of Krylon Satin Crystal Clear spray (paid link). I usually use matte spray but while painting the bat with matte acrylic I decided that for something so colorful and festive it might look better with a little bit of shine. I have some gloss spray but I thought that might be overkill. The satin spray turned out to be perfect.
All done!
Whew! This thing was fun! Can’t wait to march with it in parades!
 About Manning Krull
 How to make a 4-foot paper maché alligator
 My violin skull mask, Mardi Gras 2015
 Three-headed paper maché dragon sculpture
Leave a comment