
Crystal ball decoration for my séance Halloween party
Published by Manning on October 31st, 2016
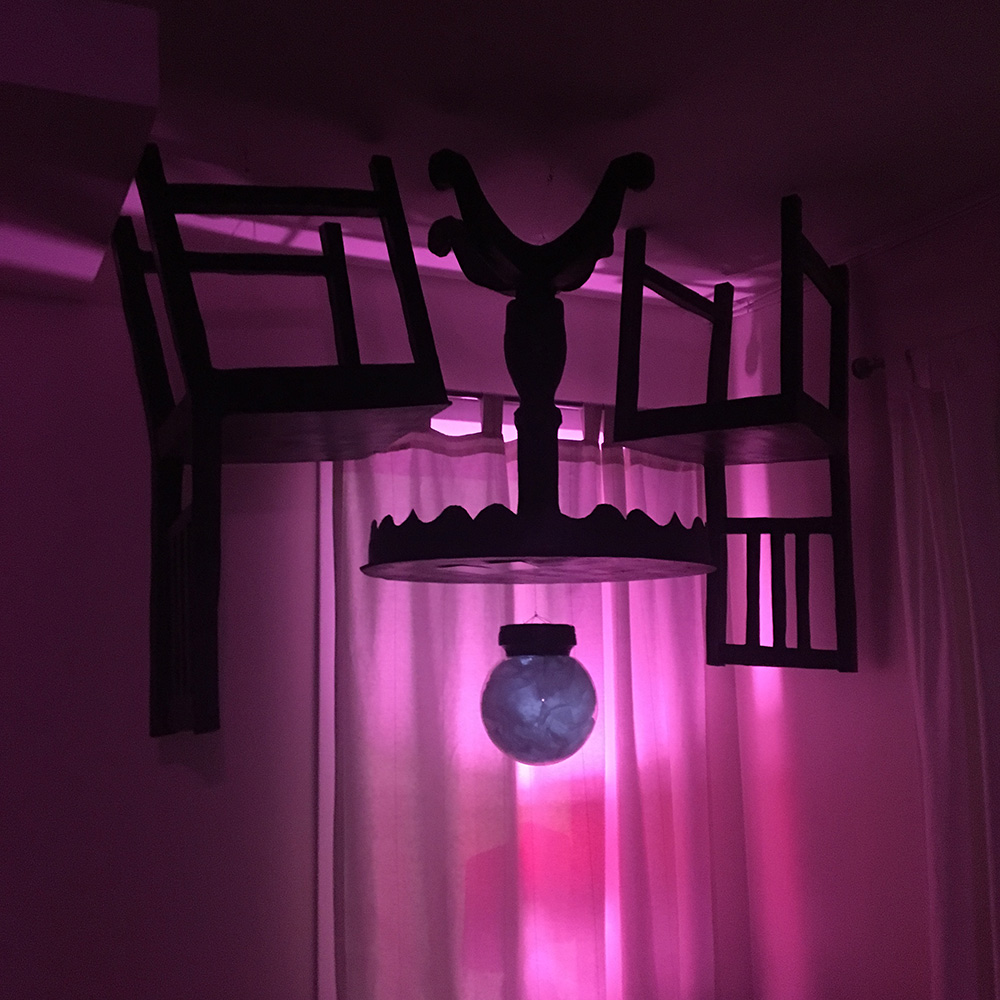
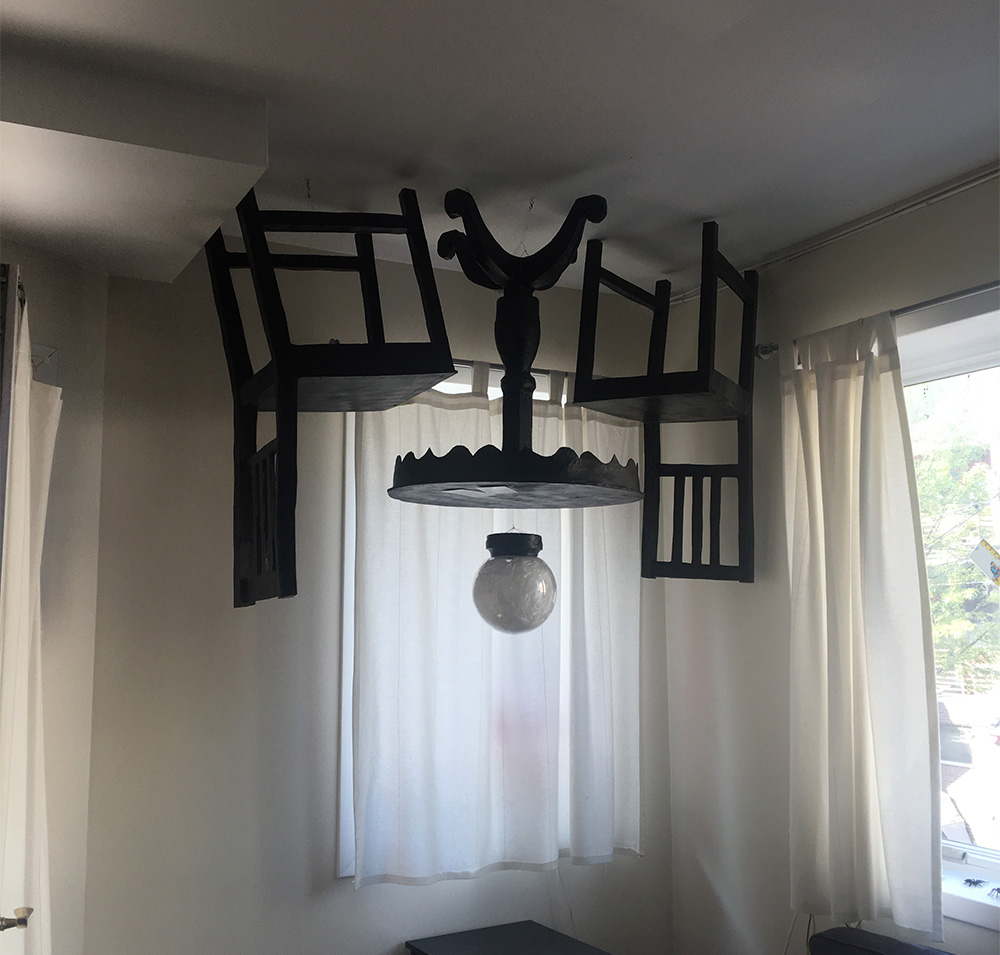
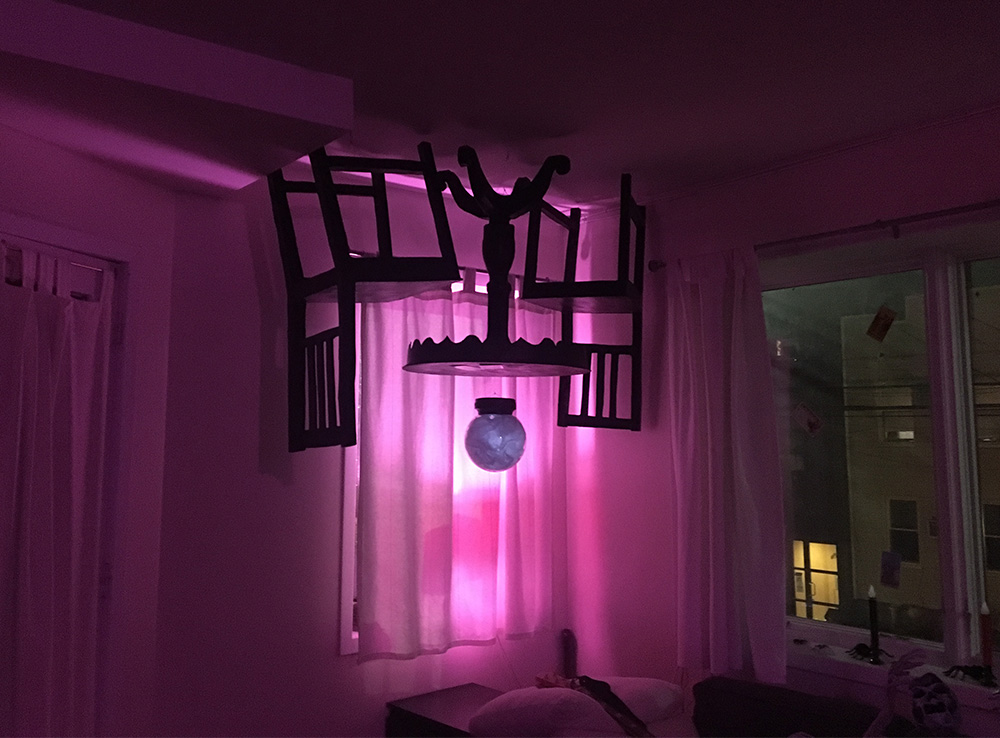
This homemade crystal ball decoration was for my séance Halloween party. The main decorations for the party were lots of pieces of lightweight paper maché furniture hung upside down on the ceiling. This crystal ball was the centerpiece for all of that, hanging upside down from the little paper maché table I made. It was fun and easy to make!
I considered a lot of options for the clear ball part itself; my main criteria were that it had to be lightweight, transparent, and preferably cheap. I ended up buying an 8″ acrylic globe off of Amazon; these are meant to go over a light, like on a light post in front of your house or whatever. They come in a lot of sizes, with options for clear or frosted, and mine ended up being about $11. You can find these at Home Depot too.
For any of my projects, I hate buying anything already made, especially when it’s such an important part of the finished piece. So I also considered trying to make my own translucent globe out of paper maché with white tissue paper, but then I realized I’d need some sort of globe-shaped base to build it on, and I didn’t have anything for that, so decided I might as well just buy the actual transparent globe and save myself a little bit of hassle.
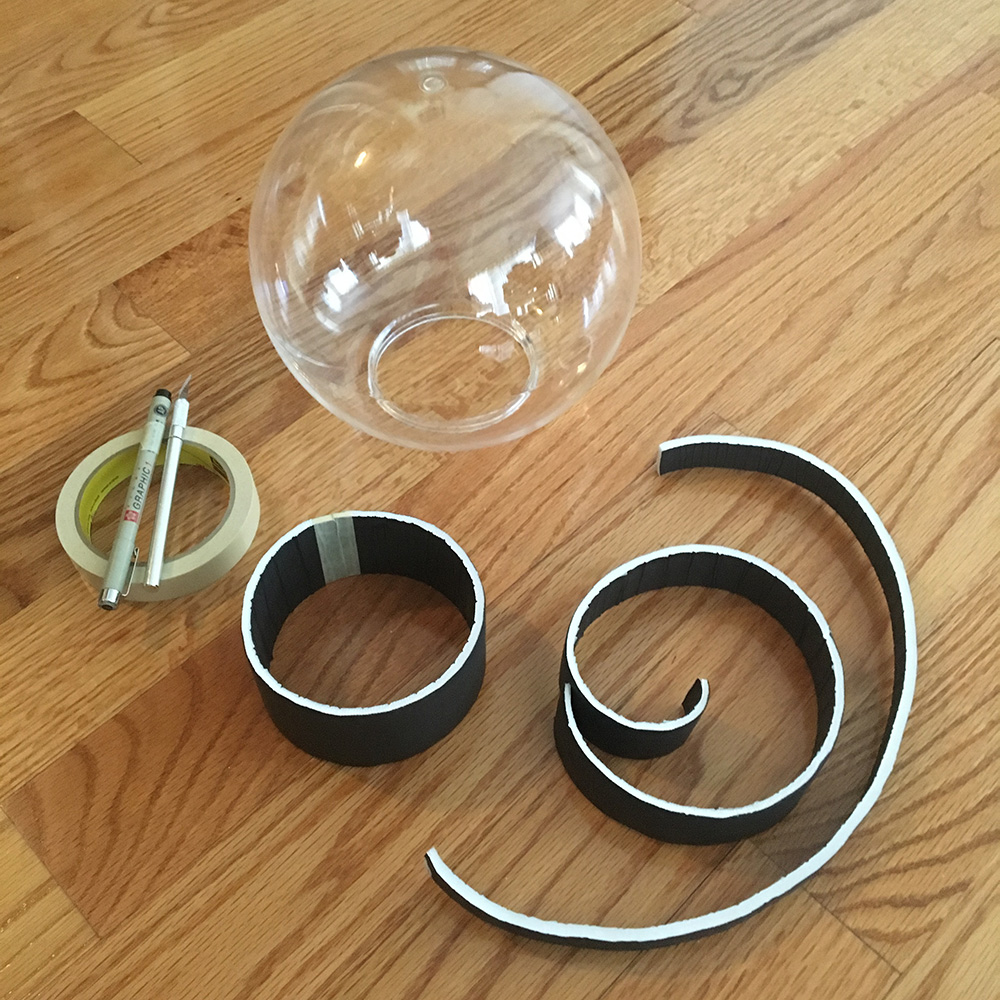
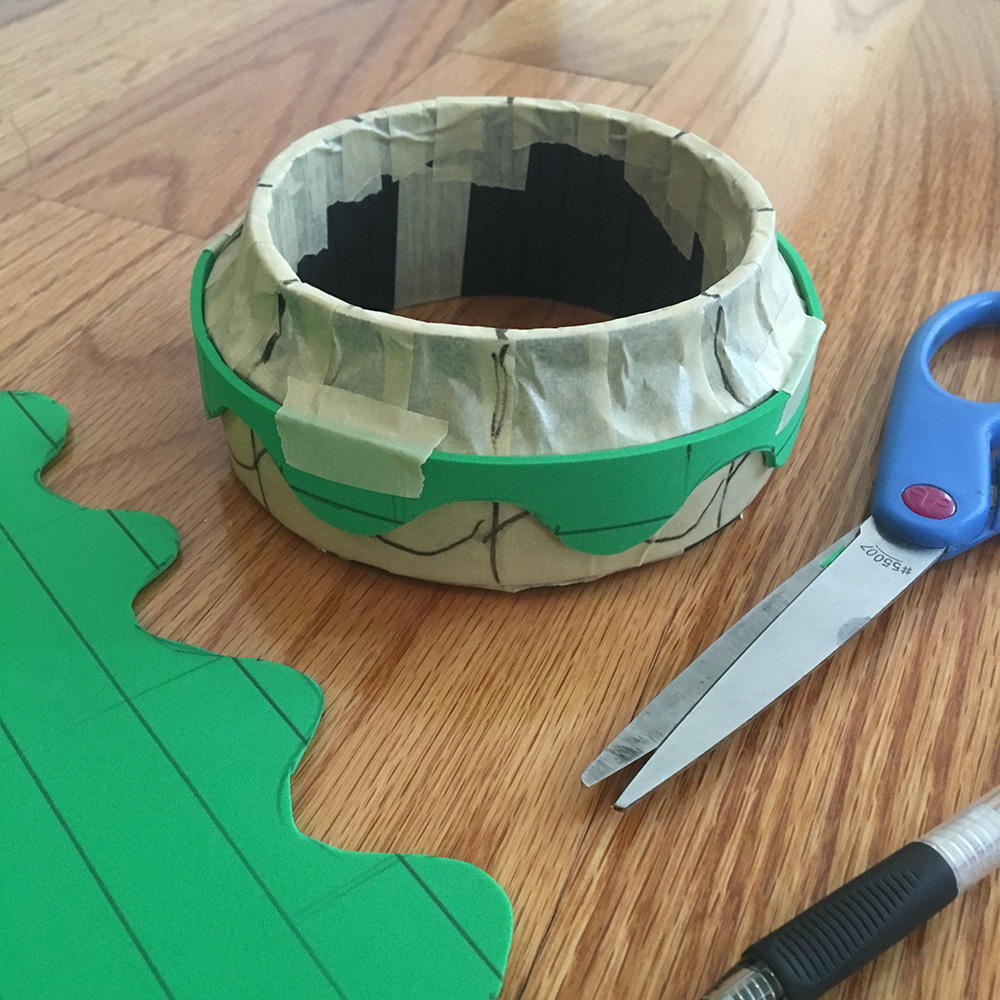
I made the base for the crystal ball with strips of foam board and masking tape. I cut three long strips of foam board, one about 2.5″ wide, one about 1.5″ wide, and one about 1″ wide, and carefully rolled them up. Some kinds of foam board curl easily without breaking, while others crack and break right away. If yours wants to break, try putting a strip of masking tape on both sides; that should protect the foam inside and make the whole thing nice and flexible.
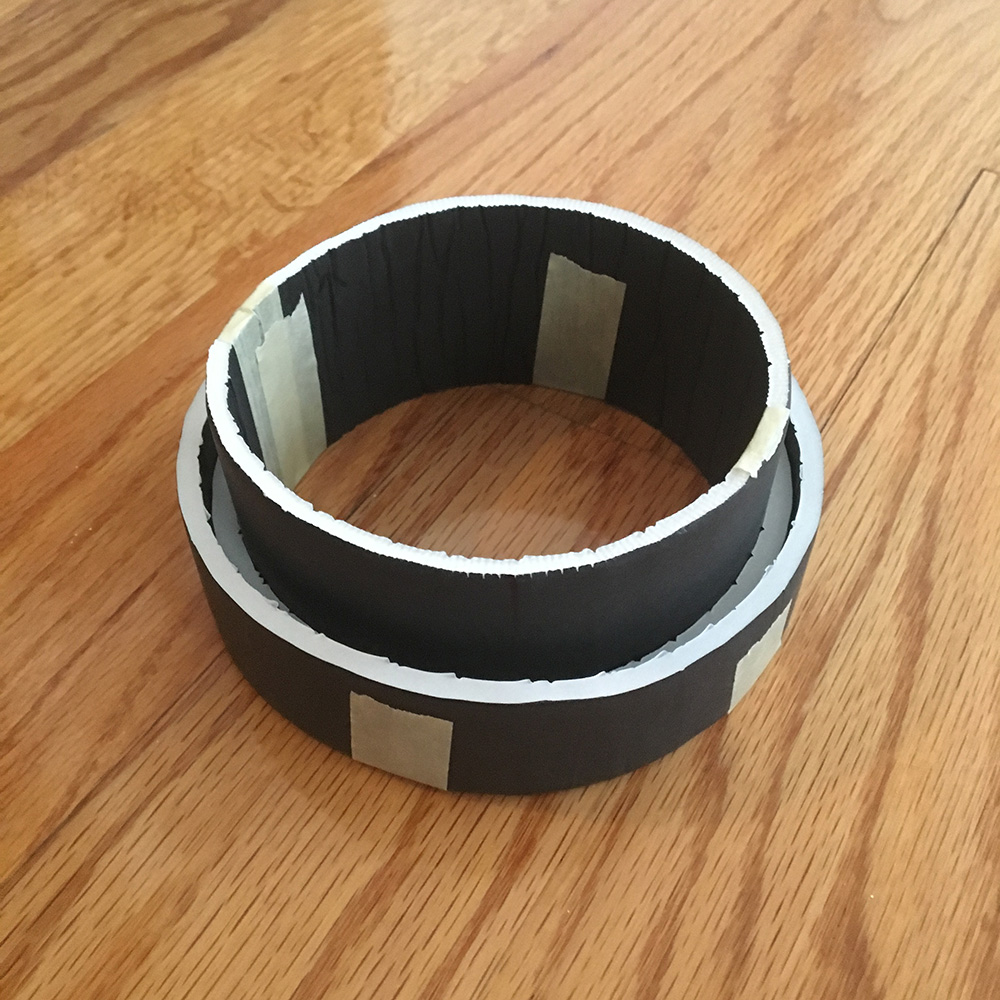
I wound the widest strip around the base of my acrylic globe, and snipped off the extra length. I taped this loop closed. Then I wound the thinner strips around the first one, and did the same. The thinnest one is in the middle; I wanted an empty space between the inner and outer strips, which I would then connect with masking tape. That part’s next…
I used a lot of masking tape to connect everything and create a sort of curved diagonal wall all the way around that connects the wide base to the more narrow part above.
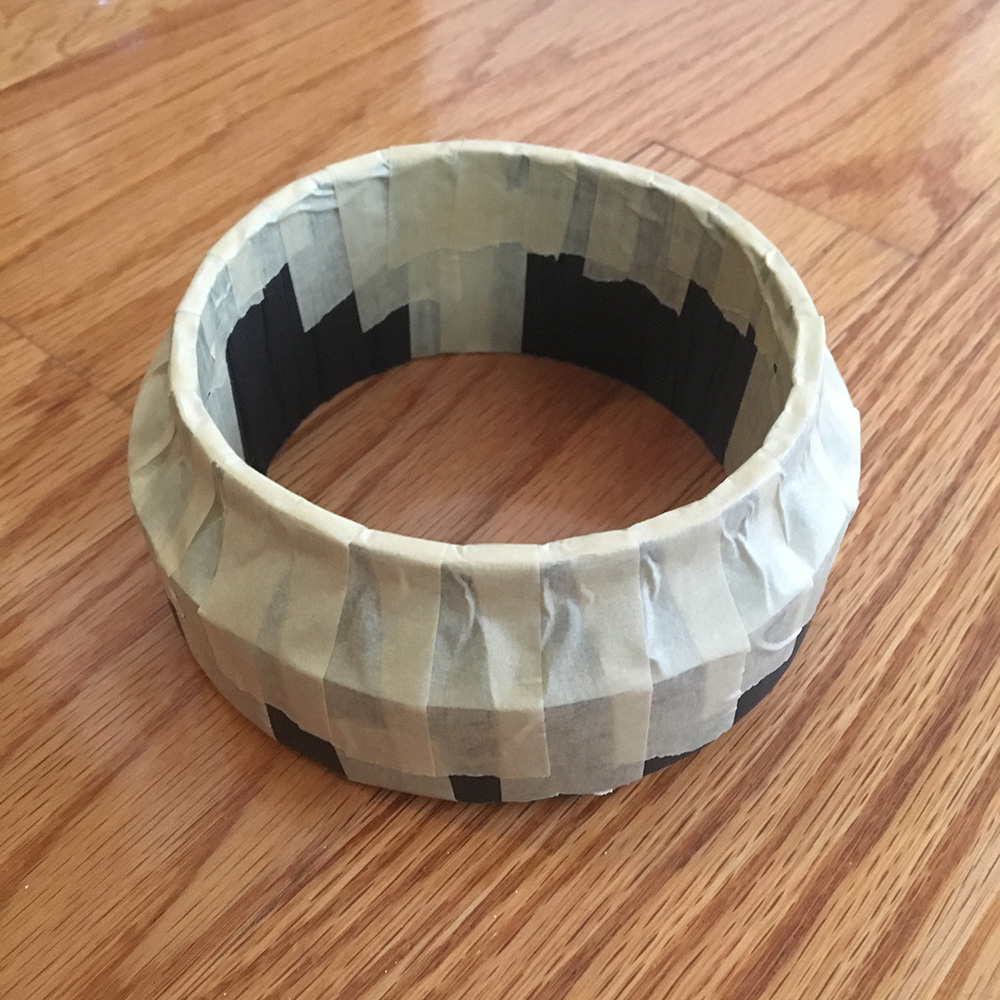
I created a curved decorative edge with a piece of craft foam, cut it to size and taped it on. Then I covered the whole thing with one layer of paper maché. When that was dry, I spray painted the whole base black.
Paper maché tends to shrink a bit as it dries, so the globe now fits very tightly in the base. However, since I needed mine to be hanging upside down, I added tape around the inner edge to create a stronger connect, and painted over that with black acrylic paint.
I did a little bit of dry brush painting on the base with brown acrylic paint in order to get a wood texture sort of look, but in the low lighting of the party I doubt this will even be visible.
There are several different things you can do with the interior of the crystal ball to get different kinds of spooky glowing looks. I’d read that a big blob of fake spider webs can look cool, but I tried that and didn’t love the end result; it didn’t diffuse the lights inside in a way that I liked. The next thing I tried was plain ol’ wax paper — it doesn’t look like much in normal lighting, but when you put a light inside the globe and look at it in a dark room, the texture of the crinkled-up wax paper makes for a cool effect. I used two long sheets of wax paper, so what you’re seeing is about two layers deep. That diffused the lights inside perfectly.
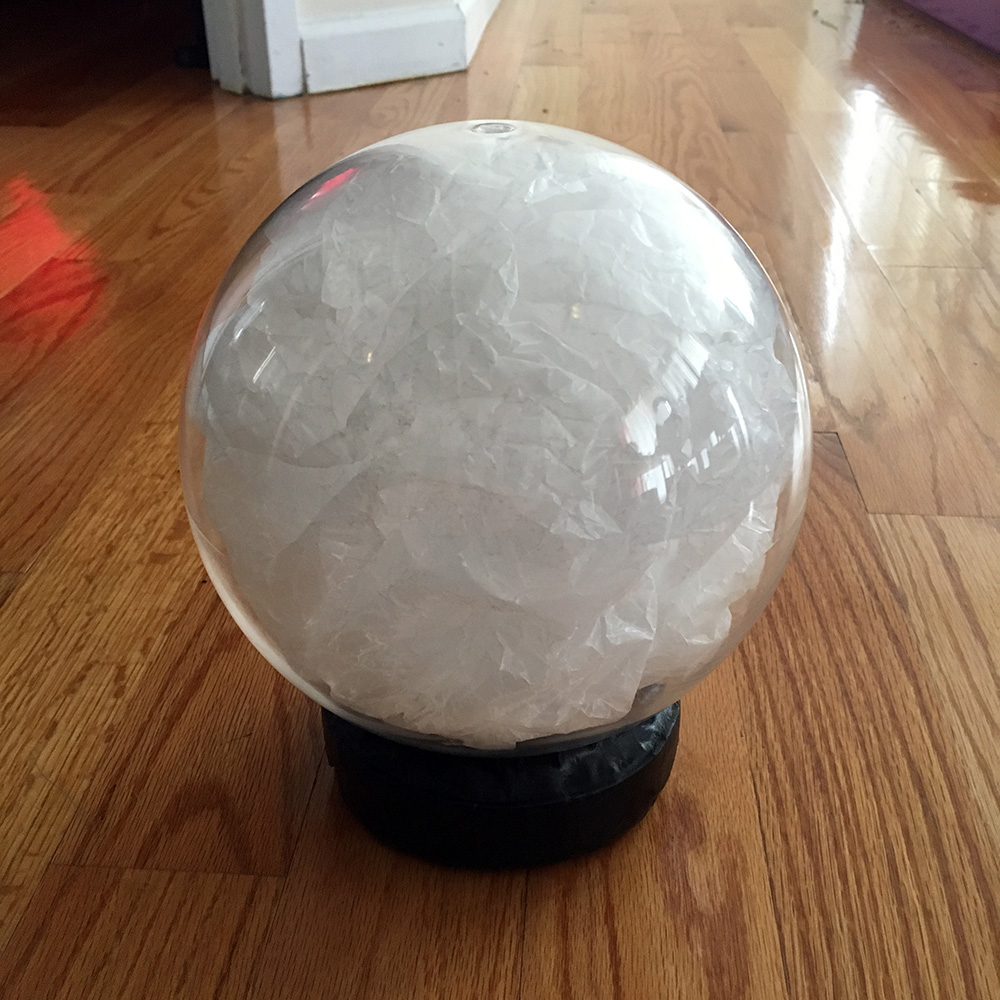
I have some tiny battery-powered lights that simply twist to turn on. I positioned two of these lights in a clear plastic water bottle with some thin steel wire, and inserted that into the middle of the globe; the purpose of the bottle is to position the light right in the center of the globe, so it doesn’t simply sit at the bottom. I also added a flickering multi-color light that’s made to go in a pumpkin. Those lights together did the trick. I posted a short video of the crystal ball in action over on Instagram, which sped the video up for some reason.
If I were going to display this crystal ball on a normal table, I’d run a real light fixture in there and put one of my Hue light bulbs in there, with a program to make it glow and flicker with different colors. A simple black light or any color party bulb would look great too; any kind of bulb that doesn’t get too hot! But since my crystal ball needed to be upside down on my paper maché séance table, I needed to keep it lightweight and cable-free. So the little battery-powered lights had to do.
You could also use those little battery-powered tealights for this; you might need several of them since they’re not very strong, but they have that nice flickering effect. I also have some neat battery-powered strobe lights from the dollar store; those could work too. Or even a combination of all of these things!
 About Manning Krull
 How to make a 4-foot paper maché alligator
 My violin skull mask, Mardi Gras 2015
 Three-headed paper maché dragon sculpture
Leave a comment