
Custom SLY skull trophy sculpture
Published by Manning on March 31st, 2018
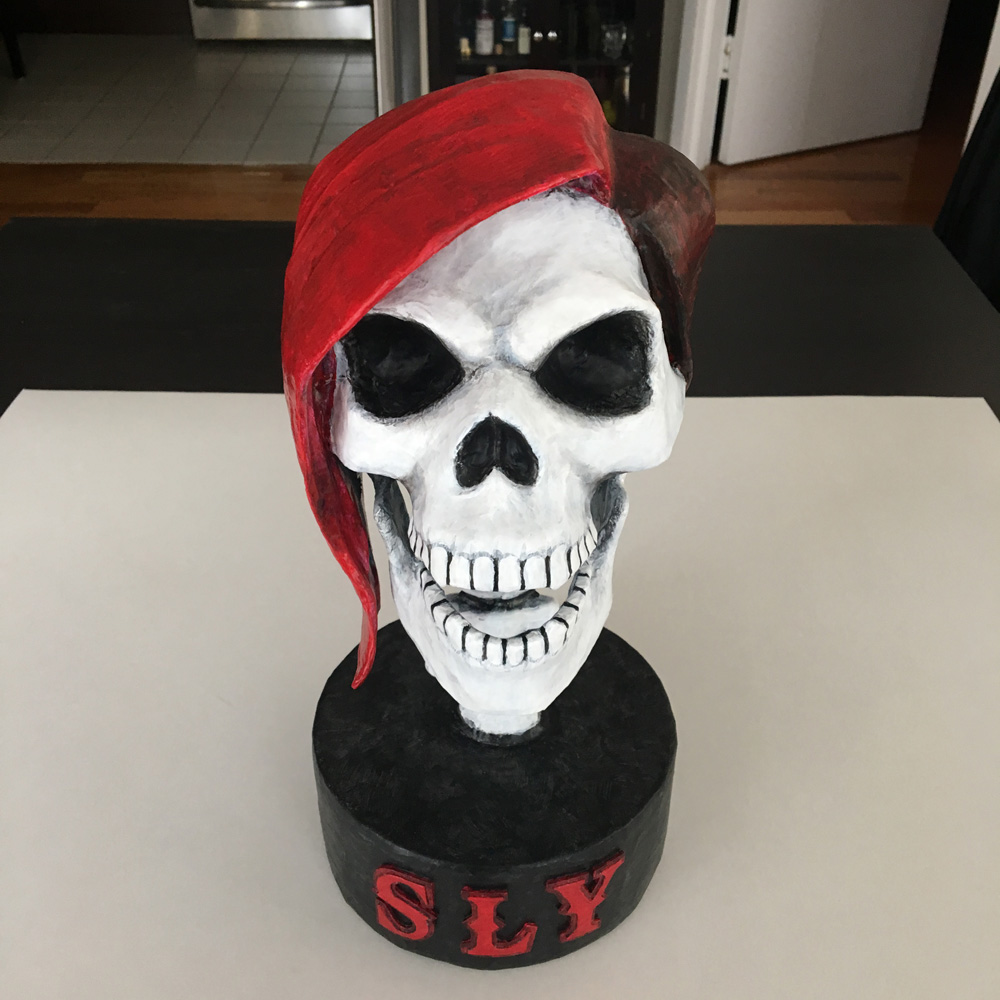
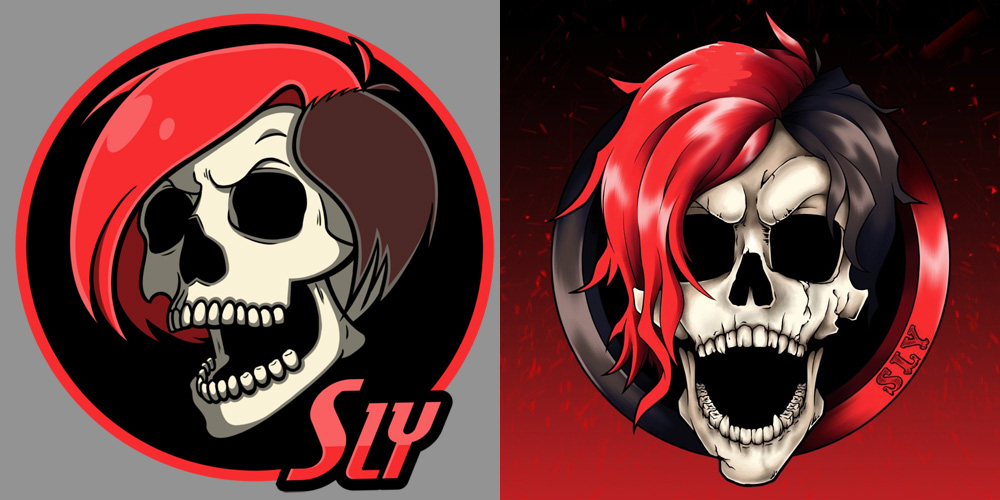
I made this skull sculpture (skullpture??) for my good friend, Twitch superstar Slyvinlisha, aka Sly. I made the sculpture based on two different versions of her logo illustration, pictured below.
I started with a nice plastic skull from one of my Halloween skeleton decorations that broke in half due to a spooky Halloween mishap! I broke the neck off at the base and put the rest of the bones away to use for other Halloween decorating purposes.
I initially intended to use the plastic skull as a base for my paper maché and then remove it, but in the end I decided to leave it in there. This was a rare project for me where I didn’t care about the weight, and in fact I ended up adding a bunch of extra weight in the base.
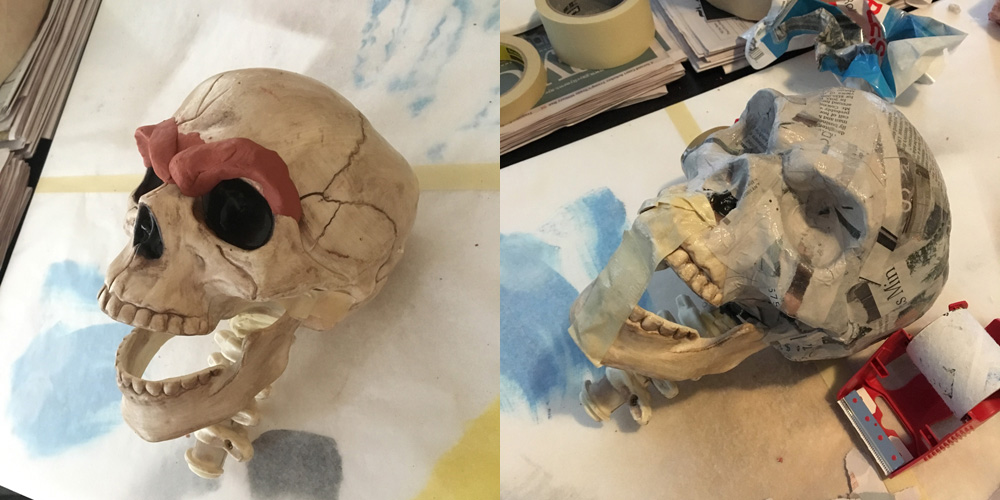
I made some slight modifications to the skull to make it better match Sly’s logo. I added a little bit of modeling clay on the eyebrow ridges to make them a little bit slanted downward and angry-looking. I also made tiny points for the canine teeth out of aluminum foil (not shown) and taped them in place. I fixed the jaw in a halfway-open position with a couple pieces of masking tape down the front; I removed this after adding enough paper maché on the sides of the jaw to lock it in place. These little changes gave the skull a lot more personality.
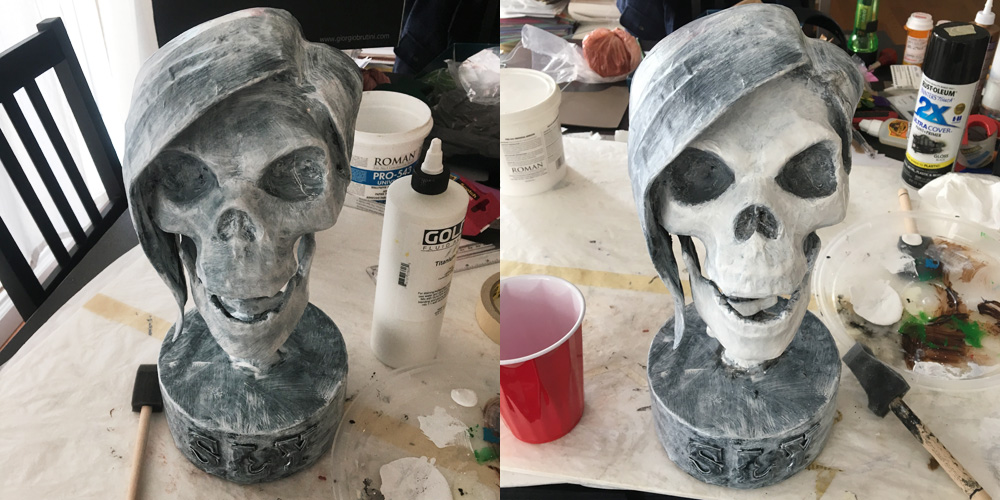
Now it was time for paper maché! I covered the skull and neck bones with just two layers of paper maché; you can read about my paper maché process and materials here. The short version is: I use Roman PRO-543 universal wallpaper adhesive (paid link) and alternating layers of newspaper and brown wrapping paper.

The main purpose for adding paper maché here is to create a unified texture for the whole outer surface of the sculpture, and to give it a better surface for painting.
Making the hair with craft foam
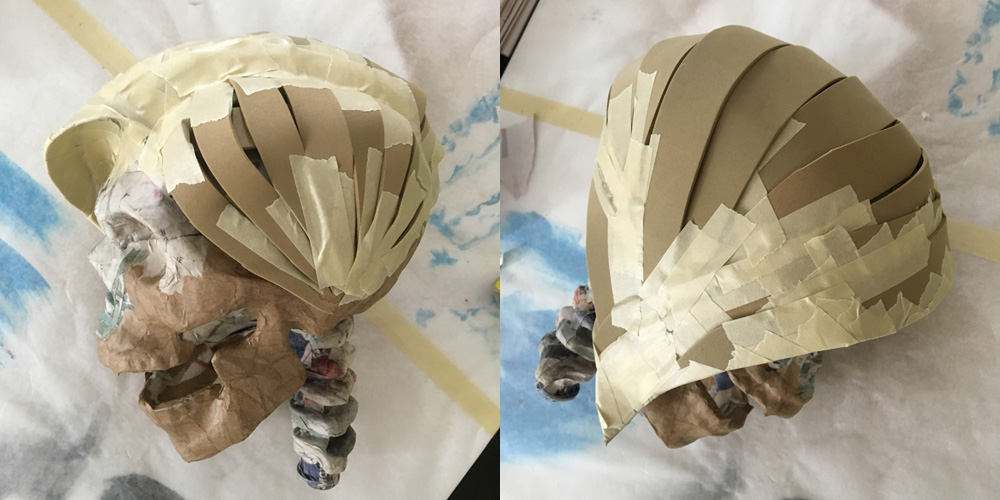
I made the hair out of many strips of craft foam, which I cut into various sizes and taped in place in various curved shapes. This took lots of trial and error but was really fun to figure out. I stuffed small pieces of paper towels under the craft foam strips here and there as I went along, to help puff up the curves and give the hair more body.

When that was done, I covered the hair with three layers of paper maché, to help solidify everything.
When all the paper maché on the head/neck/hair was done, I modified the neck a bit. I used a box cutter to carefully remove the bottom surface of the neck, revealing the hollow space inside. I took half a dozen wooden coffee stirrers and stuffed them inside the neck so that they filled the space very tightly and left a couple inches of wood sticking out. I wrapped all of this in masking tape to stabilize everything. The exposed ends of the coffee stirrers formed a nice sturdy stick that would go into the base and support the whole head.
Building the base
Then it was time to make the base — I neglected to take pictures of the next few steps but they were really simple. I made the base shape from two disks of foam board that I measured and cut out, and I taped two long strips of poster board around them to create the outer walls. Before taping the top disk permanently in place, I stuck a huge blob of cheap modeling clay inside the base, and stabbed the wooden neck support into it at an angle, to create the hole where the neck will later be permanently attached into the base. I used a ton of clay here to help make the base nice and heavy; if the base were mostly-hollow, the weight of the head would make the whole sculpture tip over.
I crammed lots of torn-up, wadded-up paper towels all around the clay to fill up all the remaining space in the base; this will prevent the clay from becoming dislodged inside the base, and it’ll help the walls of the base resist being dented or squished.
I removed the head and neck from the clay, and looked at exactly where the hole in the clay was so that I could cut a hole in the same place in the top foam disk. I cut the hole in the disk and taped it in place, and left the shape alone for a couple days to let the clay air-dry inside.
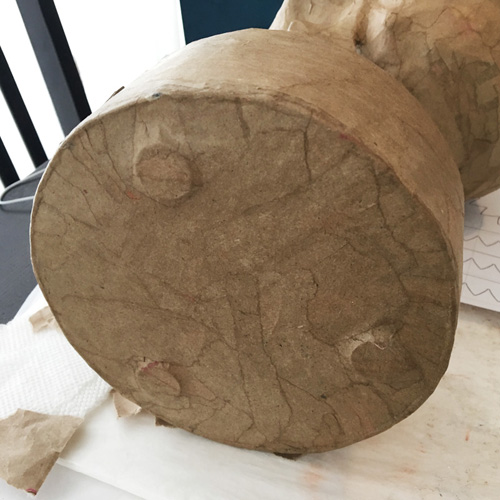
I added three little supports made out of pennies on the bottom of the base; each one is two pennies stacked up and taped in place, for a total of six pennies. With any shape like this that has a flat bottom, I always add little raised supports like this rather than have the whole flat surface rest on the flat shelf or desk or whatever. No matter how flat you think the bottom surface of your sculpture is, you may find out that it wobbles a bit when you set it down on something flat; adding feet on the bottom makes it sit nice and stable and wobble-free. Three feet always works like a charm. If you go with four feet you introduce a whole new risk of wobbling!
I then covered the entire base shape with three layers of paper maché, leaving just the hole for the neck exposed.
When that was dry, I poured a bunch of Gorilla Glue into the hole in the clay, set the neck in place in the hole, and let it sit for a few hours to dry. I used two wine bottles and some masking tape to hold the head in the right position while the glue set (see pic a few paragraphs down). Gorilla Glue expands a huge amount as it dries, so it filled up the hole around the neck support and then some; the glue expanded up out of the hole a little bit. This was fine, as the neck wasn’t perfectly flush with the base, and I needed to fill in that area a bit. I used a small amount of clay to fill in the shape between the neck and base, and covered it over with two layers of paper maché.
Making the letters
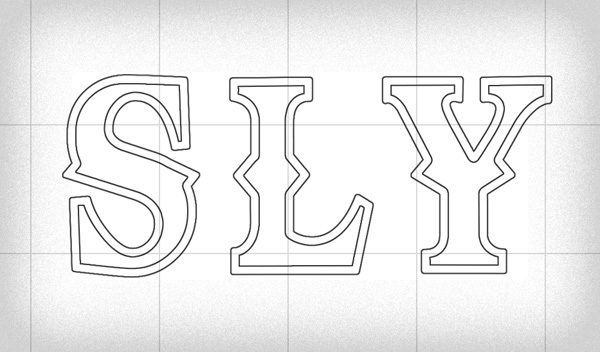
I designed the “SLY” letters in Photoshop, laid out as a smaller layer and a larger layer, to create the stroke effect around the letters. I printed out two copies of the letters and cut them out with a lot of extra paper around each one. I pasted one copy of the letters onto craft foam (these would become the outer shapes of the letters) and the other copy onto pasteboard (for the inner shapes). I used the same wallpaper adhesive for this that I use for paper maché; I just smooth a ton of paste onto the surfaces with my hands, add the piece of paper, and smooth more paste over them.
When these were all 100% dry, I carefully cut the letter shapes out with a pair of good sharp scissors. I soaked the foam letters in water for about ten minutes to make the paper print-outs easy to remove. For the pasteboard letters, the print-outs were permanently glued onto them, and that was fine.
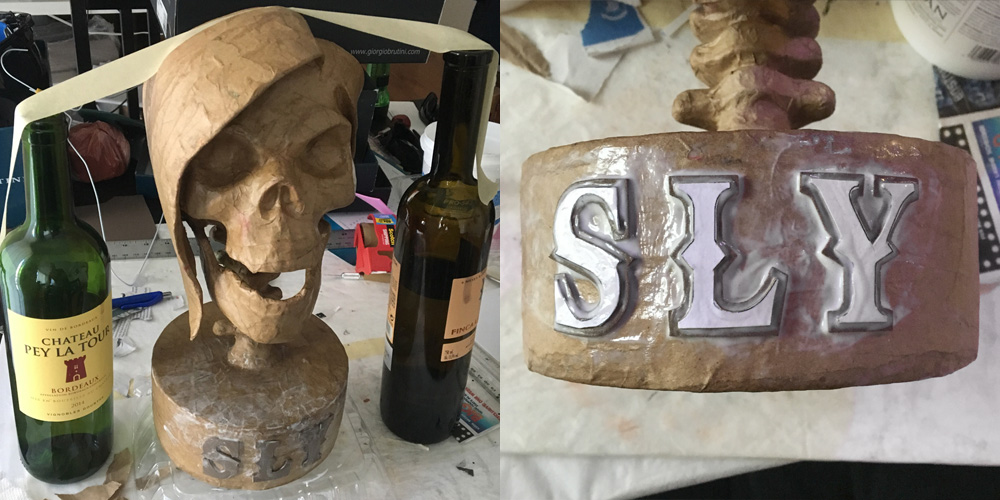
I pasted the larger craft foam letter shapes (dark brown, above) onto the cylindrical base of the sculpture, let them dry, and then pasted the smaller pasteboard letters (in white, above) onto them. I used tons of paste for all of this so that it would soak into the letters as much as possible and really bond everything together.
When all this was dry, the sculpture was done! Now it was time to paint.
Painting
I brought the sculpture outside and applied three light coats of spray gesso (not shown), waiting about two hours between coats. The gesso goes on somewhat thick and helps to smooth out the textures of the paper maché sculpture a little bit.
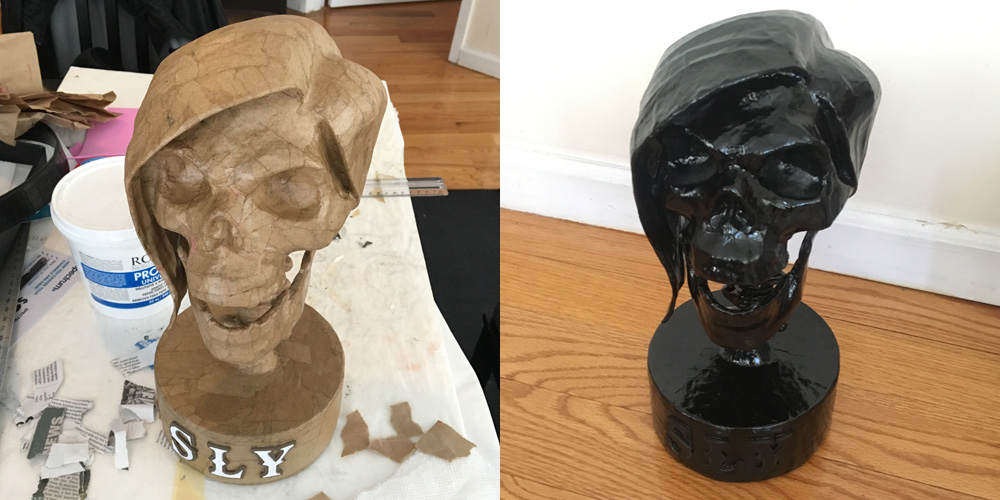
The next day I applied a coat of black spray paint over the whole sculpture. I let that set outside for 24 hours.
I then brought the sculpture inside and did the rest of the painting by hand with acrylic paint. First I applied a coat of white acrylic paint over the whole sculpture with a foam brush, which lightened the sculpture but didn’t cover the black paint completely, and it left a lot of nice rough texture. I let that dry and added a second and third coat of white to accentuate the highlights of the protruding areas and skipping over the recessed areas.
I then did a few alternating steps of dirtying up the surface with watered-down black acrylic paint, letting that dry, and then adding more white acrylic paint on the highlighted areas, letting that dry, repeat, until I achieved a nice balance.
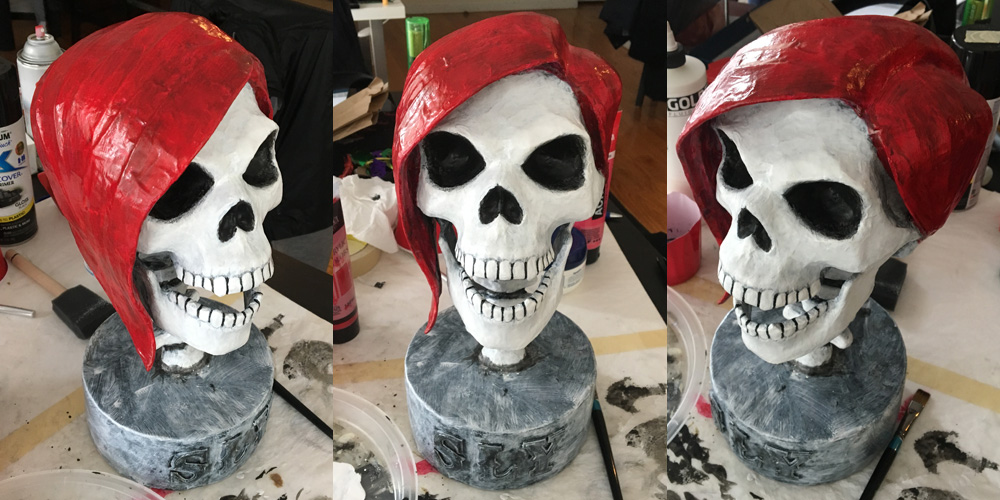
I painted the hair with red acrylic paint, just one coat, to let the texture from the black and white coats show through a little bit. When the red was dry I added a coat of brown acrylic paint on the left side and back of the hair.
Somewhere along the way here I added a lot of detail to the teeth; I painted thin black lines between and around them, and faded the gumline back with watered-down white. I also painted some thin vertical lines on the teeth with watered-down black, let them dry, and then painted over them with watered-down white, to create some very subtle striation.
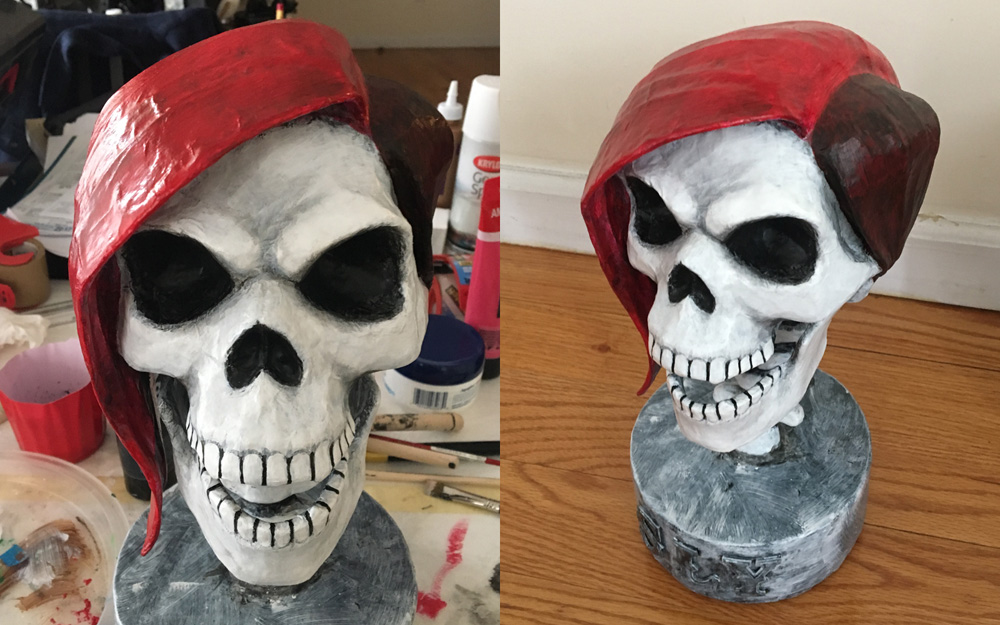
I added some shading on the brow ridge, cheekbones, etc, with a stiff brush and the absolute minimum amount of black acrylic paint I could get onto it. I’d just barely dip the brush in the paint, then rub most of it off on a piece of paper, and then use this nearly-dry brush to dirty up the shaded areas a little bit. When that was done, I dialed the effect back a little bit with some watered down white acrylic. The finished effect accentuates the highlights and shadows of the skull in way that looks pretty natural. Compare the brow/forehead in the above side by side pic with the previous row of three pics a little higher up the page to see what I’m talking about.

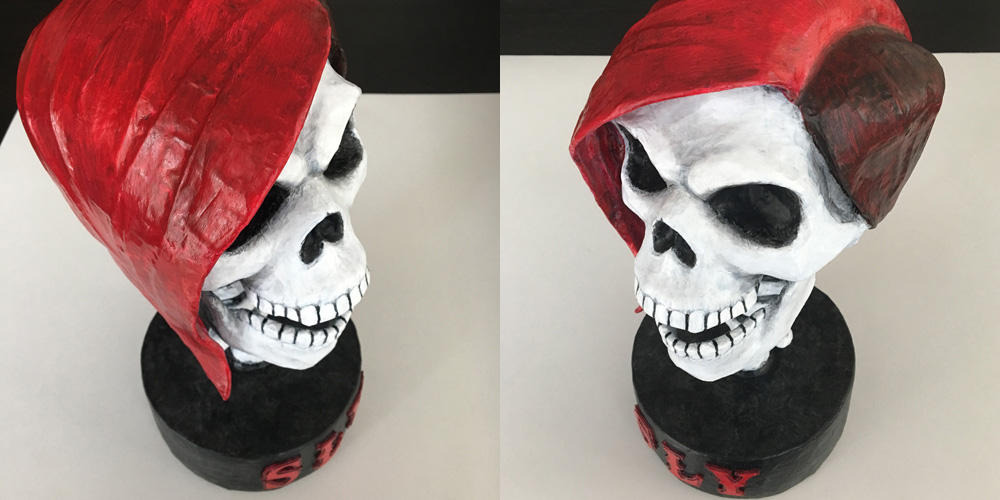
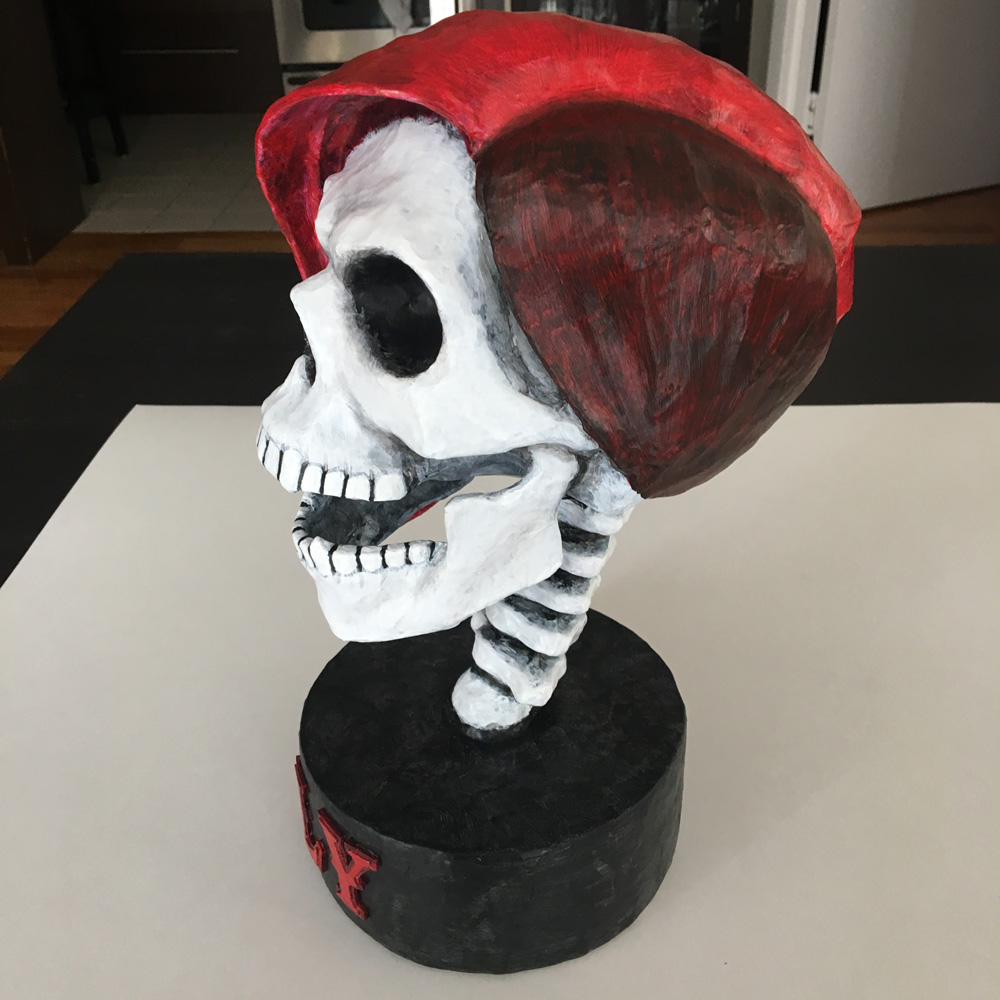
I painted the base black with a large stiff brush to leave some of the white/gray texture showing through. I very carefully painted the letters red, let them dry, and then used watered-down black paint to darken up the outer stroke area and accentuate the shadows there.

And voilà! I finished the paint job with a coat of matte spray and let it set outside for a day or two. And that’s it, this thing is all done and ready to ship!
Interested in commissioning a paper maché sculpture, mask, or cosplay accessory? See my page about custom paper maché pieces.
 About Manning Krull
 How to make a 4-foot paper maché alligator
 My violin skull mask, Mardi Gras 2015
 Three-headed paper maché dragon sculpture
Leave a comment