Devil Man mask with horns — part 1
Published by Manning on October 17th, 2015
(See the finished mask in part 2!)
For my Voodoo Bayou Halloween party, I’m going as New Orleans urban legend the Devil Man! The Devil Man struck fear into the hearts of New Orleanians in the early 20th century; he’s mentioned briefly in this great book called Gumbo Ya-Ya, along with tons of other bits of Louisiana folklore.
There’s very little info available about the Devil Man; the only three details about his appearance that are listed in Gumbo Ya-Ya are 1) he has black horns, 2) he has eyes like a chicken, and even weirder, 3) he has “ears like pink sunflowers.” What the heck? Nothing else is mentioned about the Devil Man’s appearance but I set out to make a costume based on these details. I’m making a mask with horns and sunflower ears, and I’ll be sporting yellow contact lenses. I’ll be wearing an ugly old suit and white gloves, and I’m adding a monkey tail to the suit — one other detail about the Devil Man is that he can transform into a baboon! Naturally.
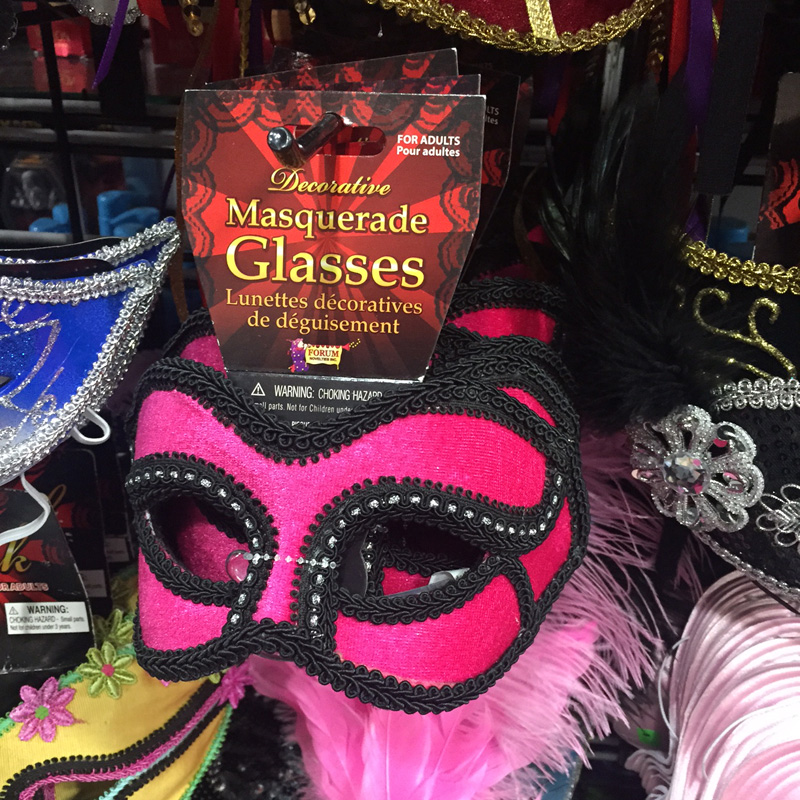
I wanted to build my mask using an existing mask as a base; this makes things a lot easier because good quality store-bought masks are already molded to the contours of the human face, and are generally made to be relatively comfortable to wear. I opted for a mask that’s mounted on earpieces, like a pair of glasses, rather than an elastic band. This mask is also nice ’cause the interior is lined with soft felt, so it’s very comfortable to wear. Here’s a picture of the mask I bought; it was about eight bucks:
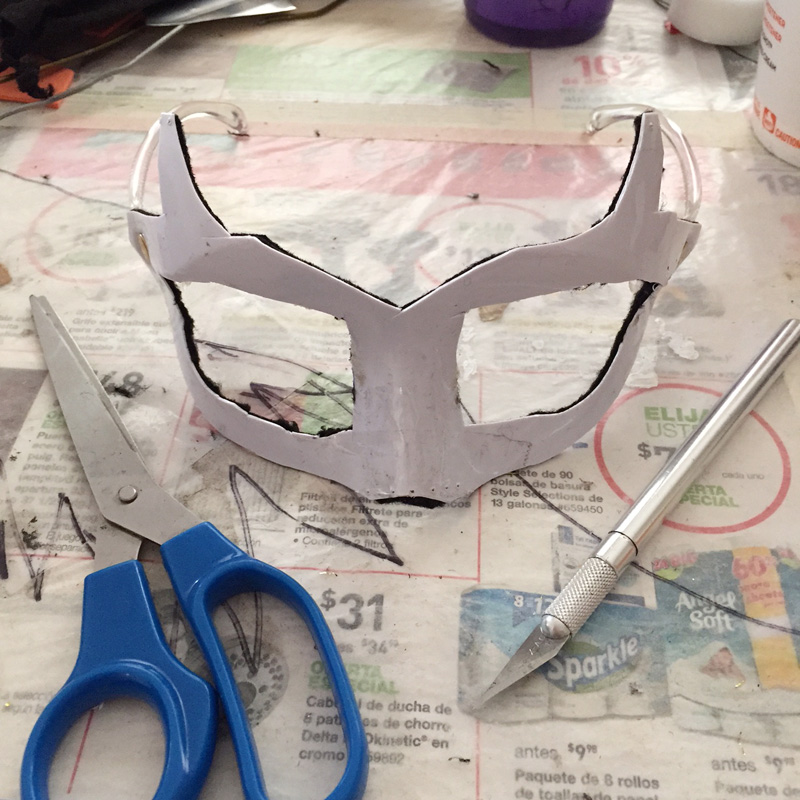
First thing I did was take an X-acto knife and carefully slice always all the fabric and braiding from the front of the mask. Then I used the X-acto knife and scissors to cut away as much of the plastic as possible; I made the eye holes much larger and removed as much of the outer edge as possible. This was a little trickier than I expected as the plastic was both very hard and somewhat brittle. I ended up causing a crack from the bottom of the nose almost to one of the eye holes. I repaired that was heavy duty packing tape and fortunately it held, and nothing else cracked. I also ended up stabbing myself in the thumb with the X-acto knife! The plastic is hard enough that you have to apply some real pressure when cutting it, and the knife slipped and jabbed right into the tip of my thumb. Ouch. So from then on I was very careful to make sure I was always cutting away from myself, as of course you should do all the time. If you’re a kid, definitely get a grownup to do this part for you! Let them chop their fingers off.
In cutting away a lot of the mask, I left two points near the top. I’ll be attaching my horns to these points.
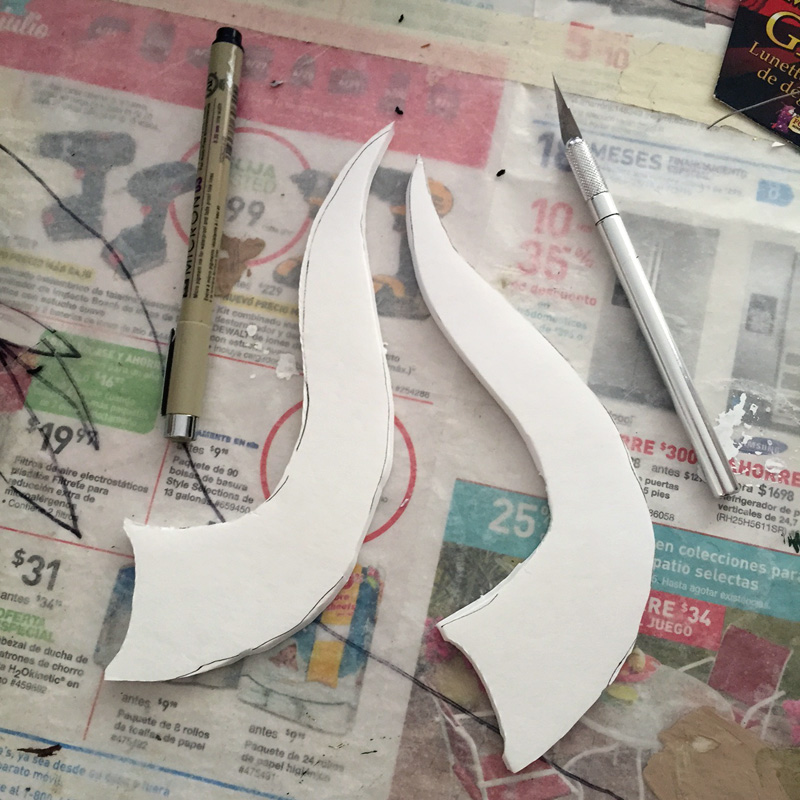
Then I started on the horns. I began with two shapes cut out of foam board.
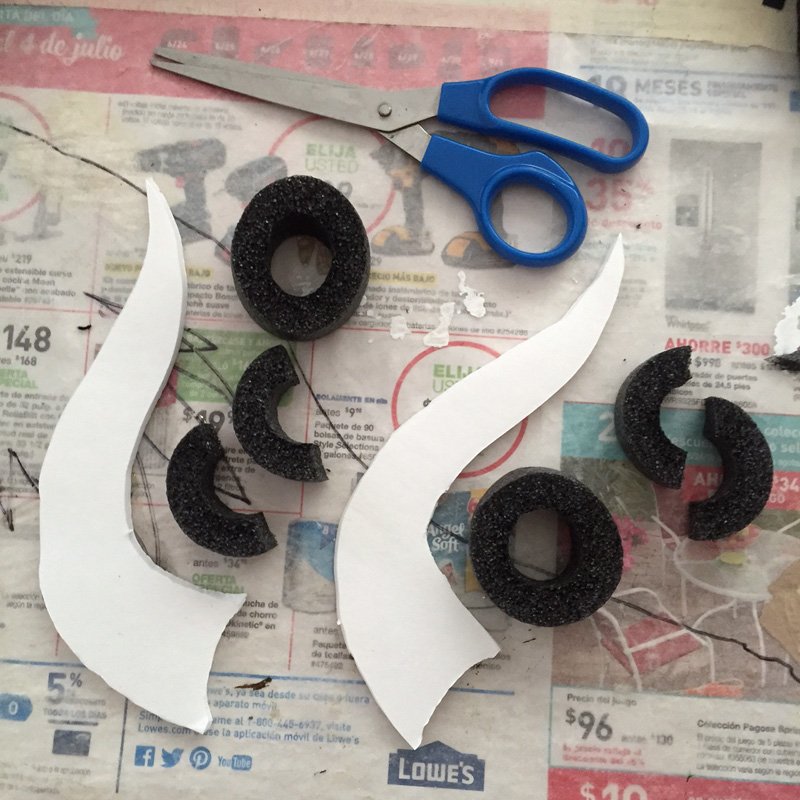
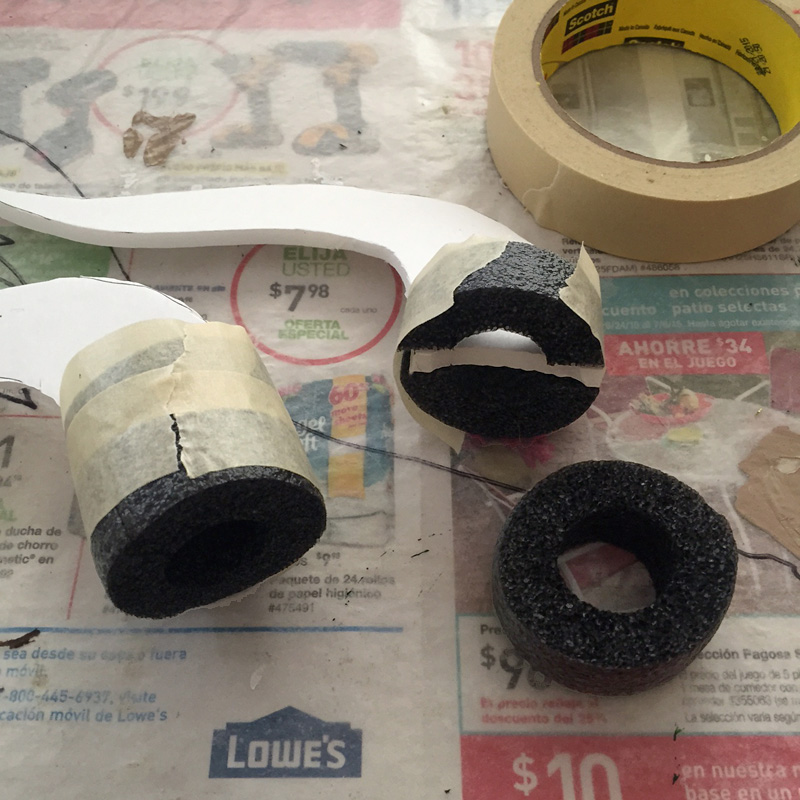
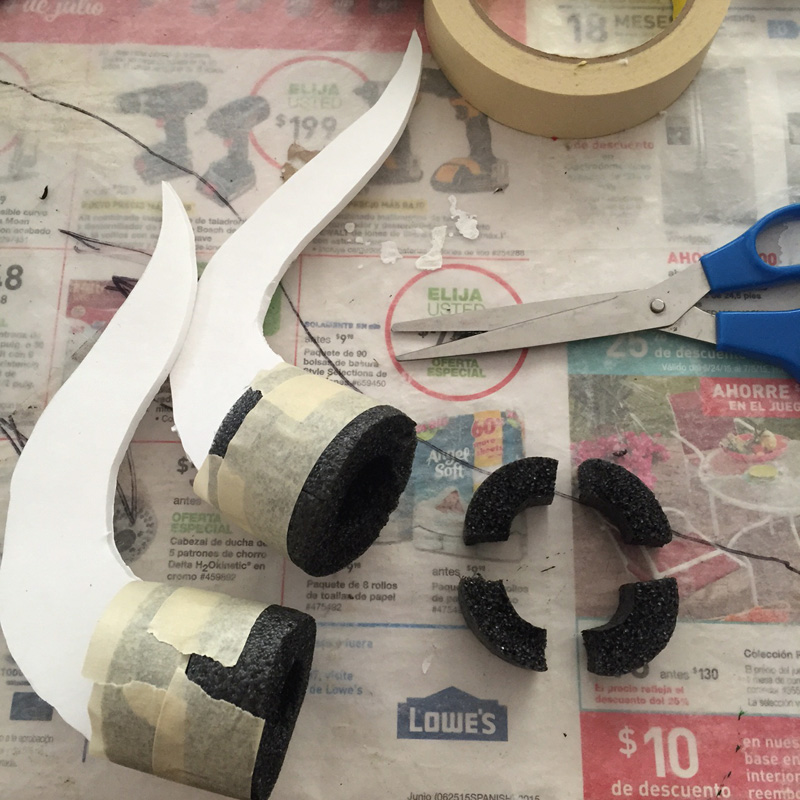
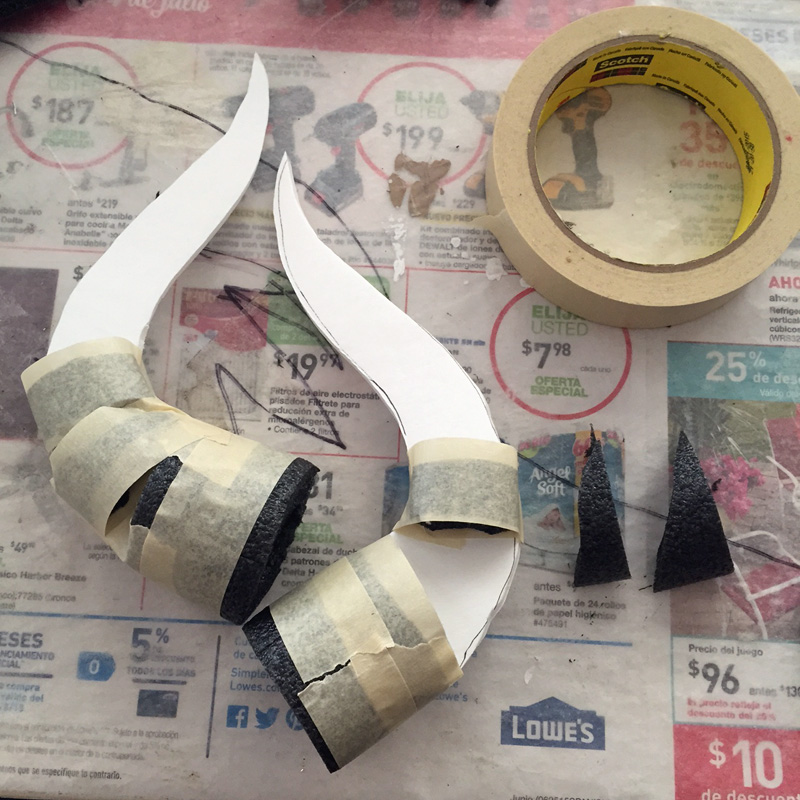
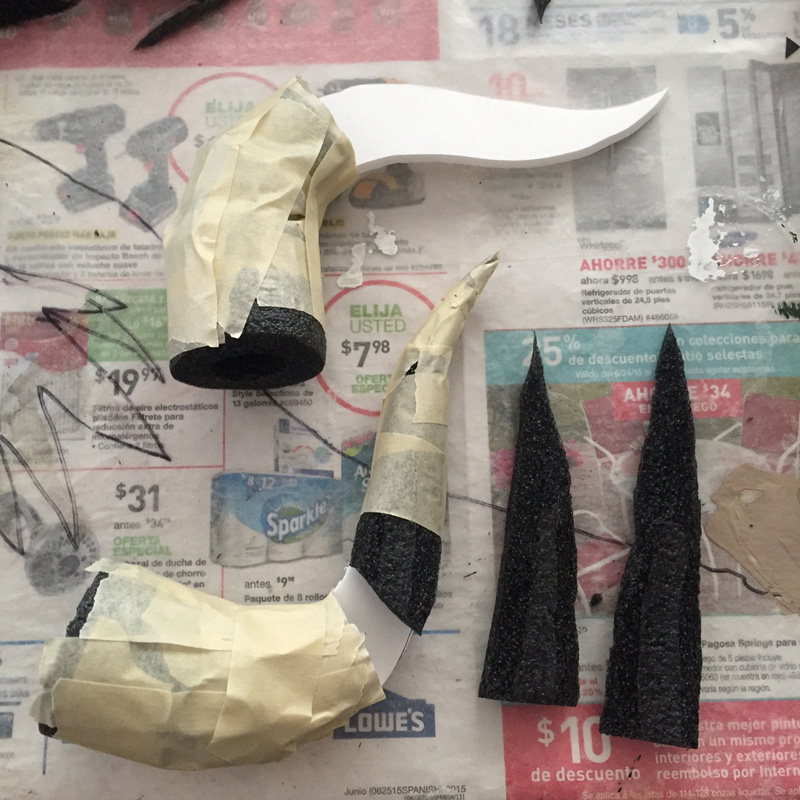
I then sliced up some bits of foam tubing which I used to create the 3d shape of the horns. I made this part up as I went along; here are some pics of what I did:
Half a foam ring on each side of the horns for the base.
Then, some quarter-ring pieces squished on to build up the middle parts.
Long pointy foam pieces curved onto the horns for the narrow parts all the way to the tips. Then I jammed some small scrap pieces into the remaining empty areas and taped over them. Remember, I’m doing all these steps on both sides of the horns!
When I was done building the horn shapes, they were covered in masking tape. This turned out to be important later on!
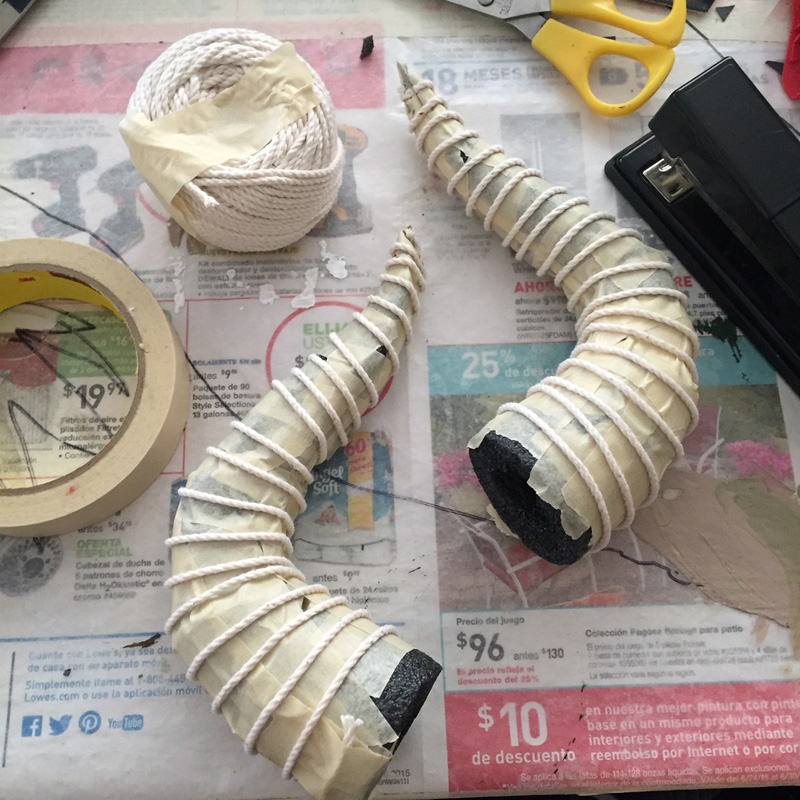
Next I wound string around the horns to create ridges. Believe it or not, that’s about five feet of string on each horn. I taped the string to the horns at each end.
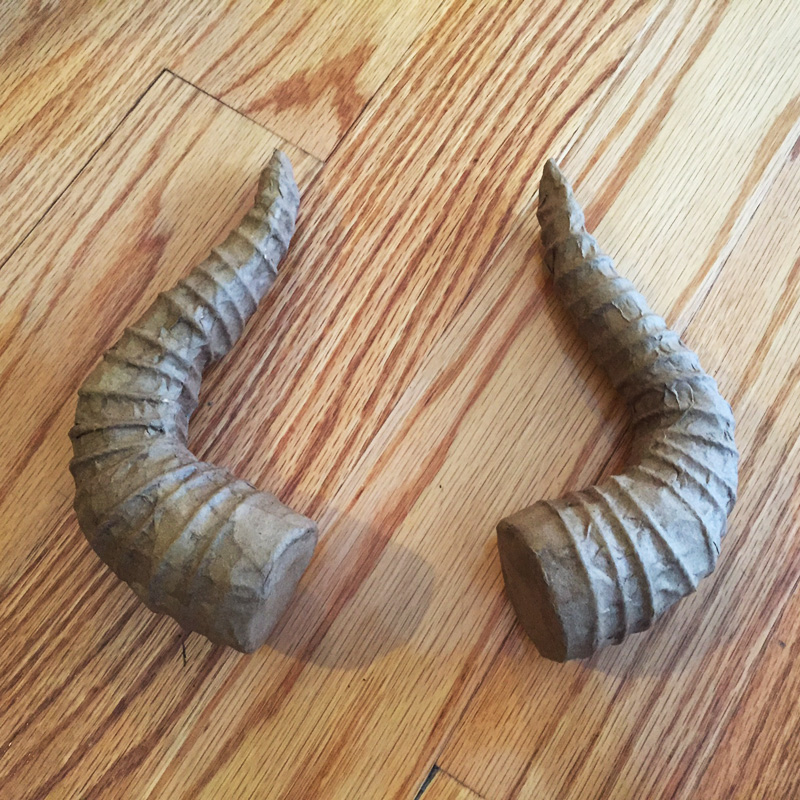
Then I did one quick layer of paper maché over the horns. You can read more about my usual paper maché method and materials here The short version is: I use Roman PRO-543 universal wallpaper adhesive (paid link) and alternating layers of newspaper and brown wrapping paper.
When the horns were dry, I did a quick test to see how they worked on the mask. I sliced some holes in the bottom edges of the horns and stuck them on the pointy bits of the mask. I didn’t glue anything in place, since this was just a test. The horns looked great on the mask, but unfortunately they were much too heavy! They sagged a bit and bounced around when I moved my head. What a drag!
I decided to attempt something very dangerous that could have easily ruined the horns. I decided to see if I could open them up and remove all the foam board, foam tubing, string, and masking tape. I wasn’t optimistic it would work, but I had nothing to lose. If I didn’t try, I’d have to make new (lighter) horns anyway.
For all of my Mardi Gras mask projects, I do about eight layers of paper maché, and when they’re dry, I open up the mask and remove all the guts. Before the paper maché, I always cover my base with masking tape. The type of wallpaper paste I use doesn’t stick to the Scotch masking tape very well, so it’s possible to very carefully peel the masking tape away from the finished paper maché from the inside. So for my horns I wanted to try the same thing, but they only had one layer of paper on them! I knew there was an excellent chance this would tear the horns to shreds.
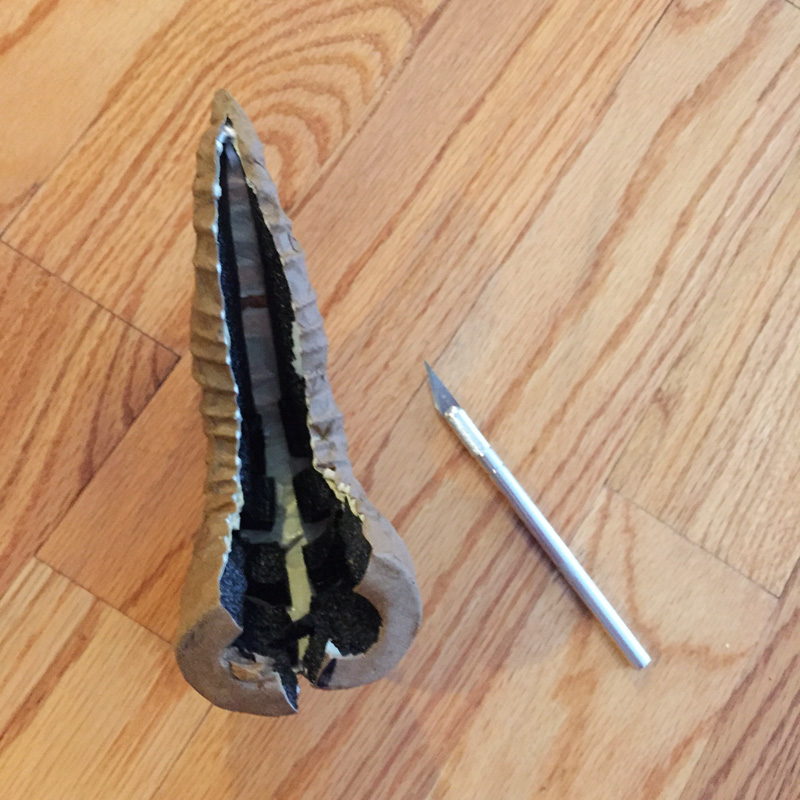
I carefully slit the horns open from the back using an X-acto knife. I then slowly spread the horns open, revealing all the guts inside. With a few careful slices I was able to remove the foam board base without much trouble. I then very slowly started slicing and removing pieces of foam tubing, and some masking tape, and eventually the bits of string. Amazingly, I only tore a few tiny holes in the thin paper of the horns.
When I was all done, the horns were much lighter, but they definitely looked a bit beat up. I figure no one will notice though, since they’ll be painted black and the lighting at my Halloween party will be pretty low. Anyway, no one but me (and you!) will see what the horns looked like before I opened them up and removed everything. So they’re fine as is.
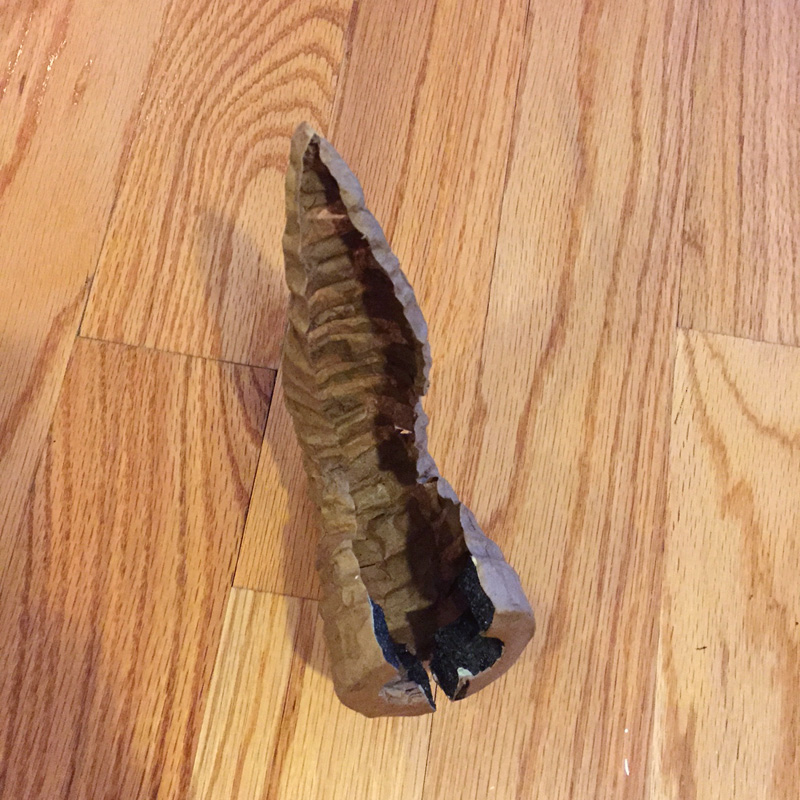
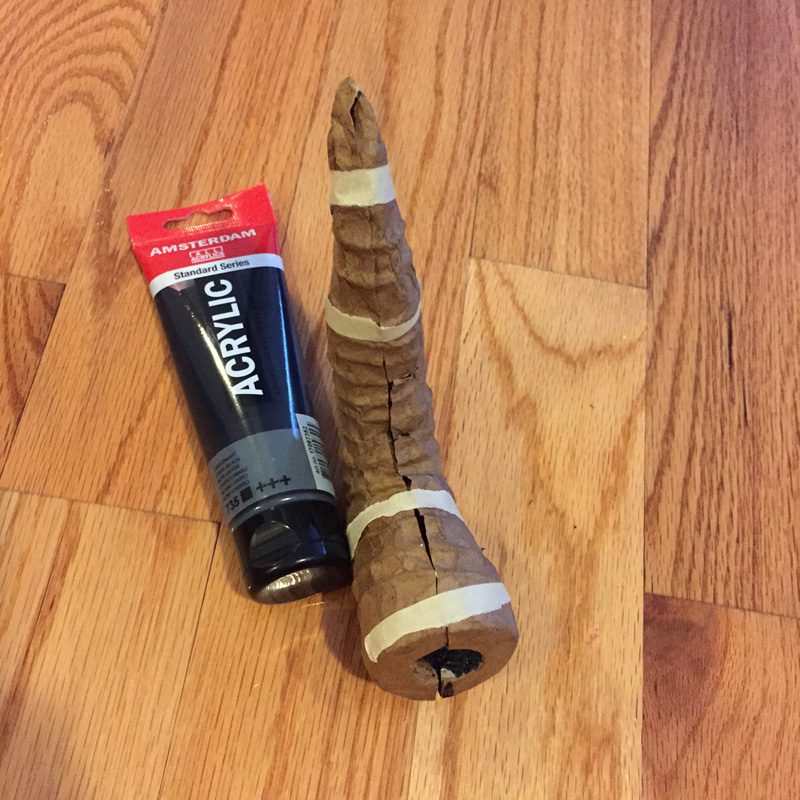
I carefully closed up the thin paper horns, and began figuring out how to seal them up. I tore some extremely thin strips of paper to use as little bandages to close up the horns. I had to do this in two stages. First, I used very thin strips of masking tape to hold the horns closed in a few places. Then I applied those tiny strips of paper maché to the areas not held together with tape. When this was dry, I removed the masking tape and did a second round of tiny strips of paper maché where the masking tape had been, thereby sealing up the whole sliced open part. It doesn’t look perfect, but this is the back of the horns, which no one will see. (That tube of paint is just there to hold the horn open-side up for the picture.)
Once the newly-sealed horns were dry, I took them outside and spray painted them black. Same for the mask. Speaking of the mask, I forgot to take pictures of a lot of my steps! I’ll explain more of that in my next post, and I’ll add the sunflower ears, a mustache, etc!
Next: See the finished mask in part 2!



 About Manning Krull
 How to make a 4-foot paper maché alligator
 My violin skull mask, Mardi Gras 2015
 Three-headed paper maché dragon sculpture