
Posts tagged "process":
Experiment time: paper maché versus plaster cloth
I’ve always used paper maché for my big masks and sculptures, and although I really enjoy the paper maché process it can be very time-consuming. A friend of mine mentioned that she recently tried plaster cloth — aka plaster wrap, plaster of paris strips, craft wrap, etc — and she said it saved her a ton of time. She’d made a couple Halloween masks with the stuff and they definitely looked great; she said she was so happy with the results that she’d never go back to paper maché. Huh! I was skeptical, but intrigued.
Creating 3d relief shapes with craft foam
A few years ago I made up this method for cutting out precise shapes with craft foam, to create 3d relief shapes on a lot of my various sculpture projects.
Craft foam, aka wonder foam, is a soft rubbery material that I often describe as being similar to a yoga mat, but much thinner. You can buy it in any arts and crafts store, and it comes in tons of colors. Read more…
Making paper maché shapes with a reusable base
This is my method for creating multiple paper maché copies of a shape using a reusable base. I’ve tried different variations on these steps over the last few years and have settled on this process as my favorite.
Start with a base
First, you wanna build a base for your sculpture, so that you can cover it in paper maché and make copies of it. Read more…
Twin paper maché skull masks
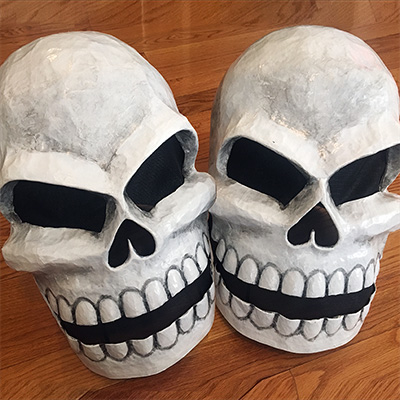
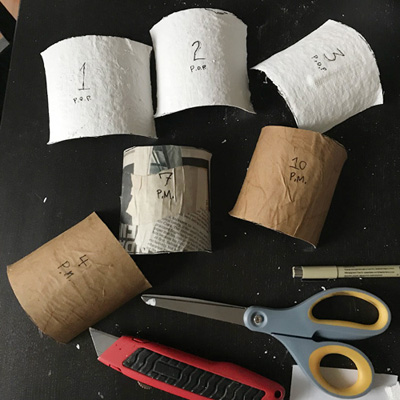
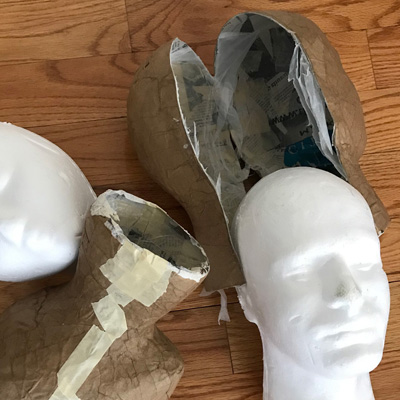
A new project, a new experiment! I received a custom order for a pair of twin paper maché skull masks; the request was to base them on the design of my first Mardi Gras skull mask and keep them more or less identical, and there was a very short timeline to get them both done. So, I decided to try a reusable base! This was a first for me.
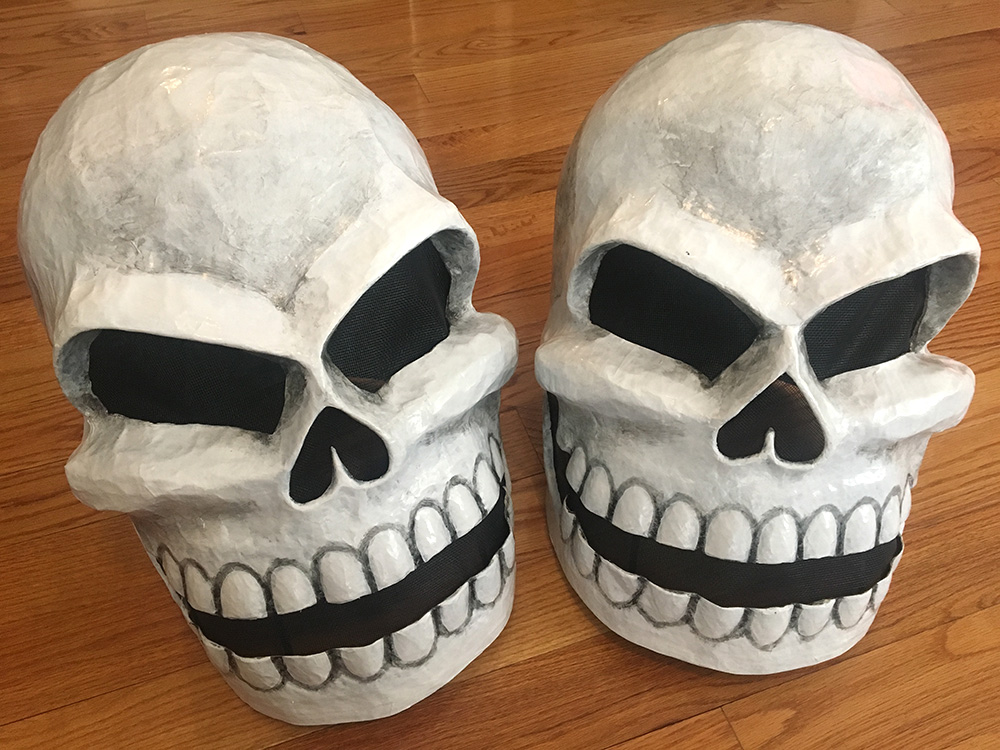
Luckily I have that article about how I made that first Mardi Gras skull five years ago; otherwise I probably wouldn’t remember how I did it! Of course it would be impossible to get these new ones exactly the same as that one, but I’d do my best to get them close. Read more…
My process for writing and drawing comics
Okay, a change of pace today! Instead of paper maché and stuff, I’m going to write about my process for writing and drawing and coloring comics, since it’s something I get asked about a lot, and this is the place where I write about my processes for various art things. For reference, you can see a bunch of my comics in my illustration portfolio.
Of course there are other ways of organizing a comic project, but this is the rhythm I fell into many years ago and I’ve basically worked this way on all the comics I’ve ever done. Read more…
Tips for working with gesso
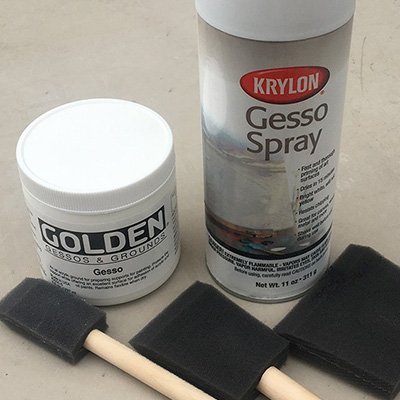
If you’ve ever created any paper maché projects and then painted them, you’ll surely have noticed that the edges of your paper are often still visible, sometimes even after several layers of paint. I hate seeing those paper edges in my stuff, and I’ve learned I can reduce this with a few techniques, like being really precise with my last layer of paper, and doing a final layer of just paste smoothed over the whole shape with my hands. Still, even when I do that stuff I end up still seeing those paper edges through the paint sometimes. It drives my crazy.
Devil Man mask with horns — part 1
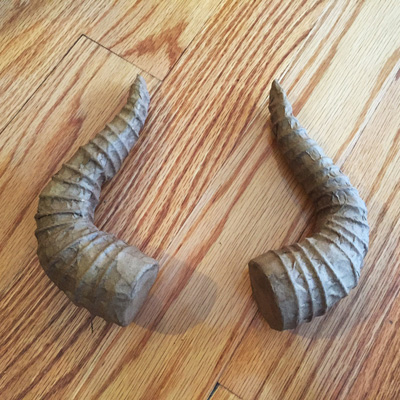
(See the finished mask in part 2!)
For my Voodoo Bayou Halloween party, I’m going as New Orleans urban legend the Devil Man! The Devil Man struck fear into the hearts of New Orleanians in the early 20th century; he’s mentioned briefly in this great book called Gumbo Ya-Ya, along with tons of other bits of Louisiana folklore.
There’s very little info available about the Devil Man; the only three details about his appearance that are listed in Gumbo Ya-Ya are 1) he has black horns, 2) he has eyes like a chicken, and even weirder, 3) he has “ears like pink sunflowers.” What the heck? Nothing else is mentioned about the Devil Man’s appearance but I set out to make a costume based on these details. I’m making a mask with horns and sunflower ears, and I’ll be sporting yellow contact lenses. I’ll be wearing an ugly old suit and white gloves, and I’m adding a monkey tail to the suit — one other detail about the Devil Man is that he can transform into a baboon! Naturally.
Making plastic bones look aged and dirty
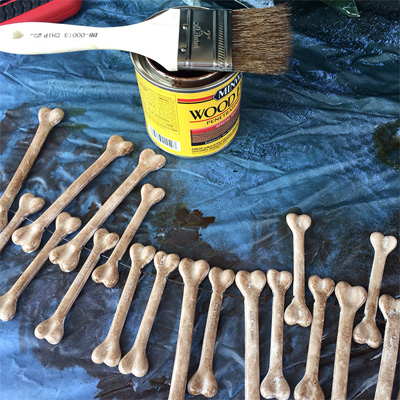
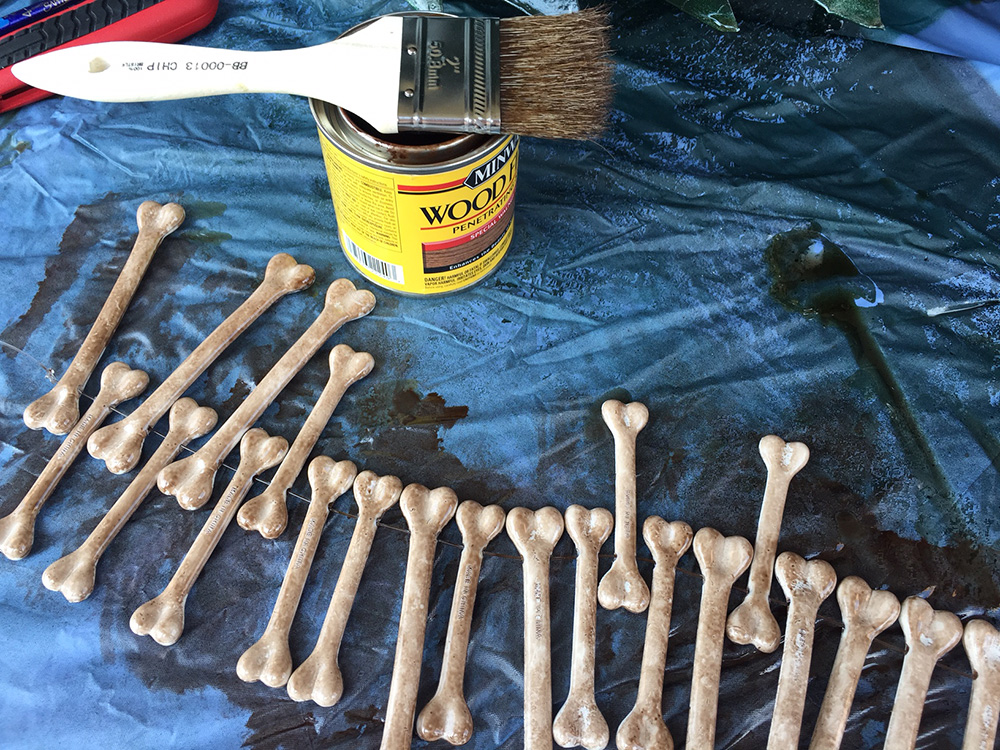
For my bayou/voodoo-themed Halloween party, I ordered a hundred little plastic bones; I wasn’t sure what I wanted to do with ’em, I just knew I wanted ’em! They were pretty cheap; I got ten packs of ten bones for a total of about $22 from some online party supplies store.
When I got the bones, they were pure white and smooth and shiny, and I wanted to make them look old and dirty before incorporating them into my decorations. This is what they looked like right out of the package:
Read more…
Paper maché skeleton lion prop
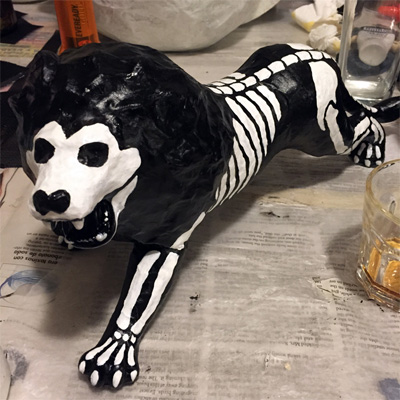
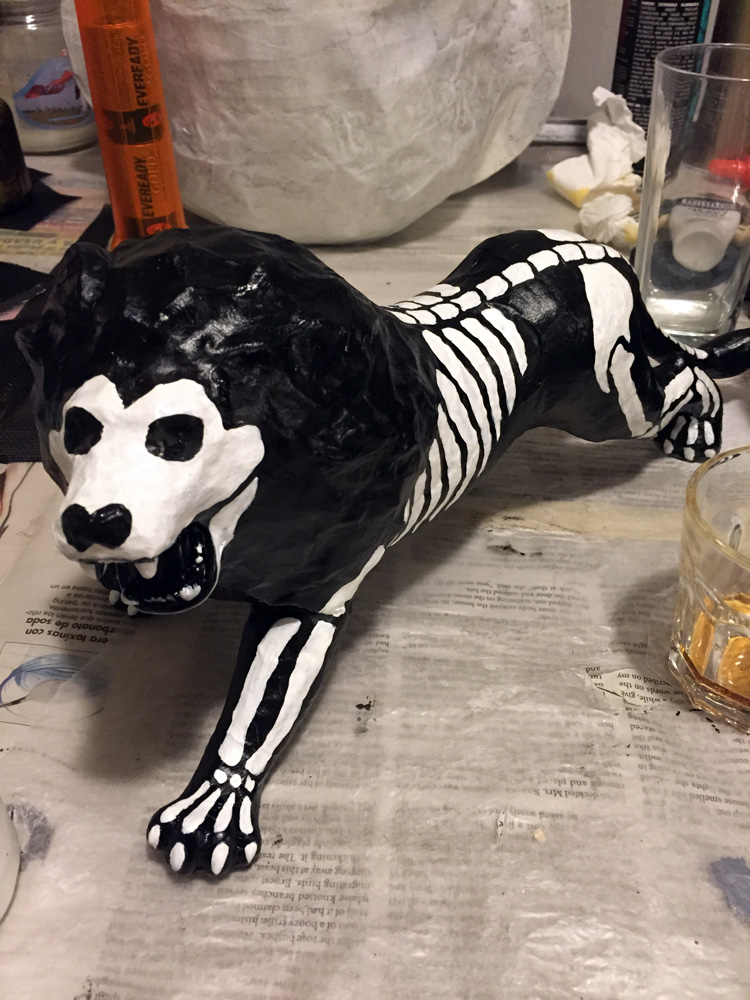
I made (or modified, really) this little paper maché skeleton lion prop for my fiancée’s skeleton lion tamer costume. She mentioned there was this weird soft rubber lion model at her work that they didn’t need and I told her I could paint bones on it for her so she could use it as a prop for her costume. But when she brought it home I saw it had these deep grooves all over it to imply a fur texture, and I knew it would be basically impossible to paint nice clean lines over it for the bones. So I did a couple layers of paper maché over the whole thing, and then painted it; easy! See my post about my paper maché process here. Because the scale is much smaller here than for my usualy big skull masks and other projects, I did the paper maché a little different; I started with my usual alternating layers of newspaper and brown wrapping paper (just one layer each), and then I added a final layer of tissue paper to get the surface as smooth as possible. Then I spray painted it black and painted the bones on with white acrylic and a brush. Fun!
Read more…
My painting method for my paper maché skull masks and other projects
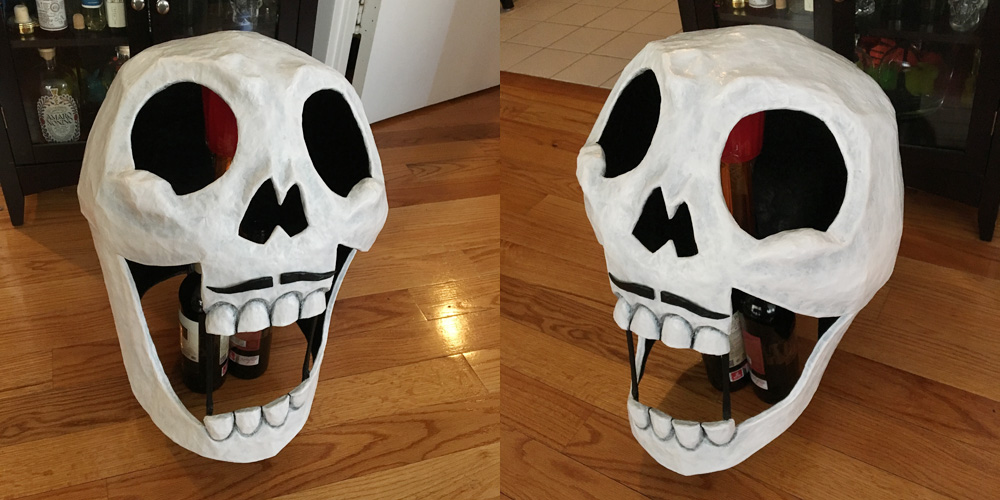
I use basically the same process for all of my big paper maché skull masks, and a lot of my other big paper maché Halloween projects and stuff as well. Here are the materials I use:
Read more…
 About Manning Krull
 How to make a 4-foot paper maché alligator
 My violin skull mask, Mardi Gras 2015
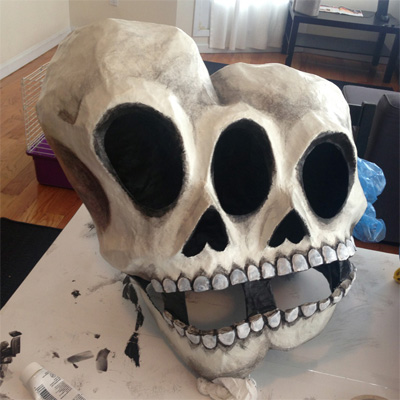
 Three-headed paper maché dragon sculpture