
Making a foam board Egyptian sarcophagus
Published by Manning on October 30th, 2017
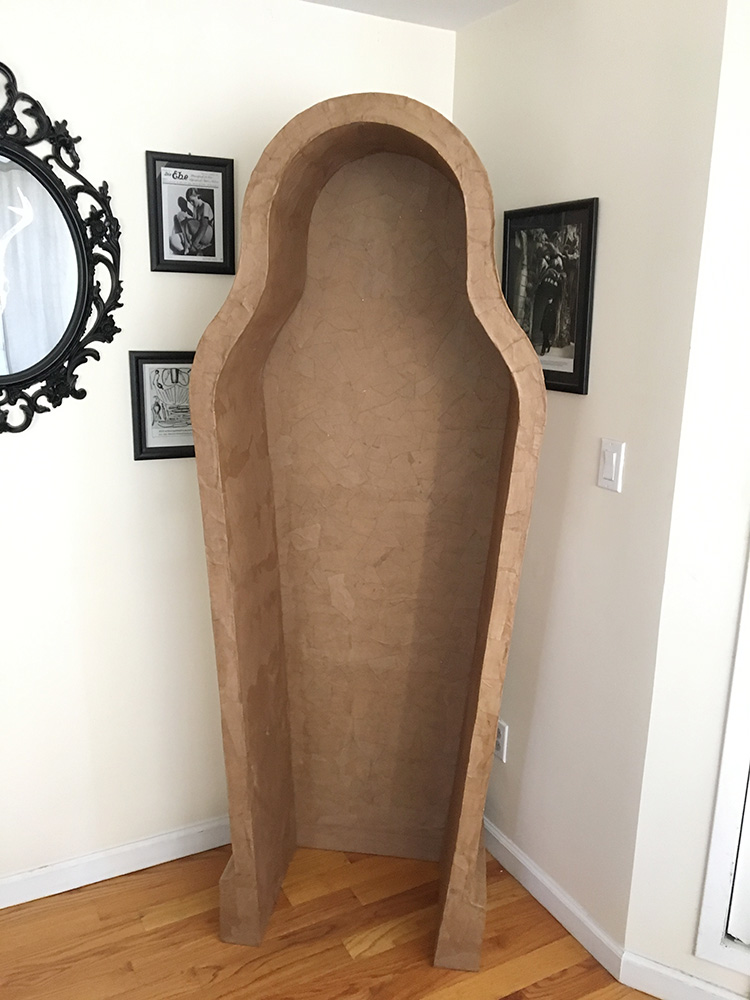
I made this standing sarcophagus for Halloween 2017 — basically a big selfie booth! Here’s how I did it…
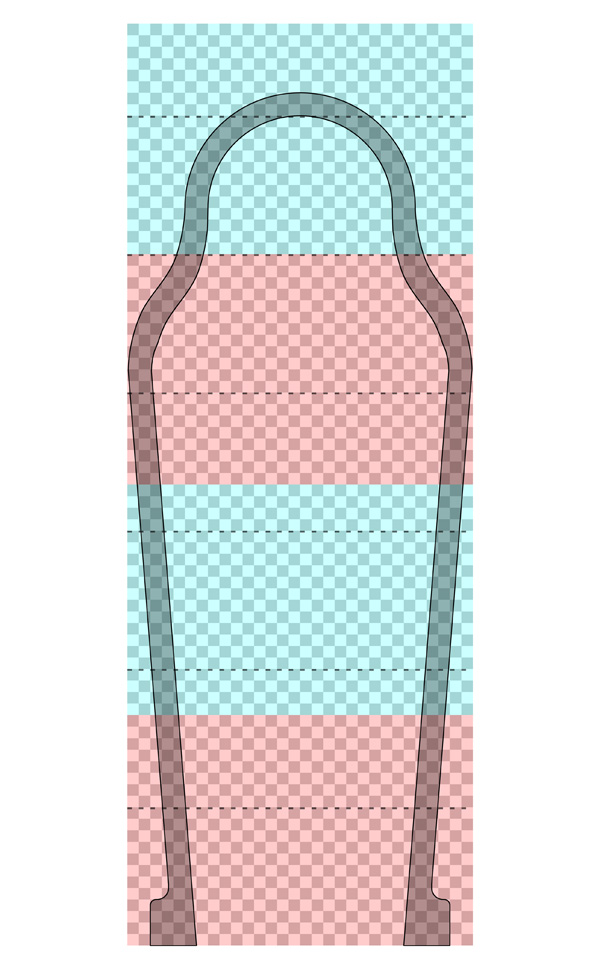
I started by planning out the dimensions of the sarcophagus in Photoshop. The red and cyan boxes represent 30″ x 20″ sheets of foam board, and the grid is square inches, with dotted lines to denote feet. I don’t have a Photoshop template for this stuff; I just wing it and lay out and measure whatever parts I think are going to be important. You can see that my design was 6’2″. I built the sarcophagus at this size and later decided to add three more inches at the bottom, for a total of 6’5″.
I decided to build the sarcophagus in two big separate pieces — the back panel, and the outer walls — and combine them at the end.
I started by printing out just the curved parts of the sarcophagus, in order to save some paper. I knew I could easily draw the straight parts with a ruler, so there was no need to print them out.
I then grabbed 12 sheets of 30″ x 20″ foam board and taped them together with heavy duty packing tape in three groups of four — one long piece for the back of the sarcophagus, another for the front edge of the “walls,” and another for the back edge of the walls. I put packing tape on both sides in order to make the connections really strong and rigid.
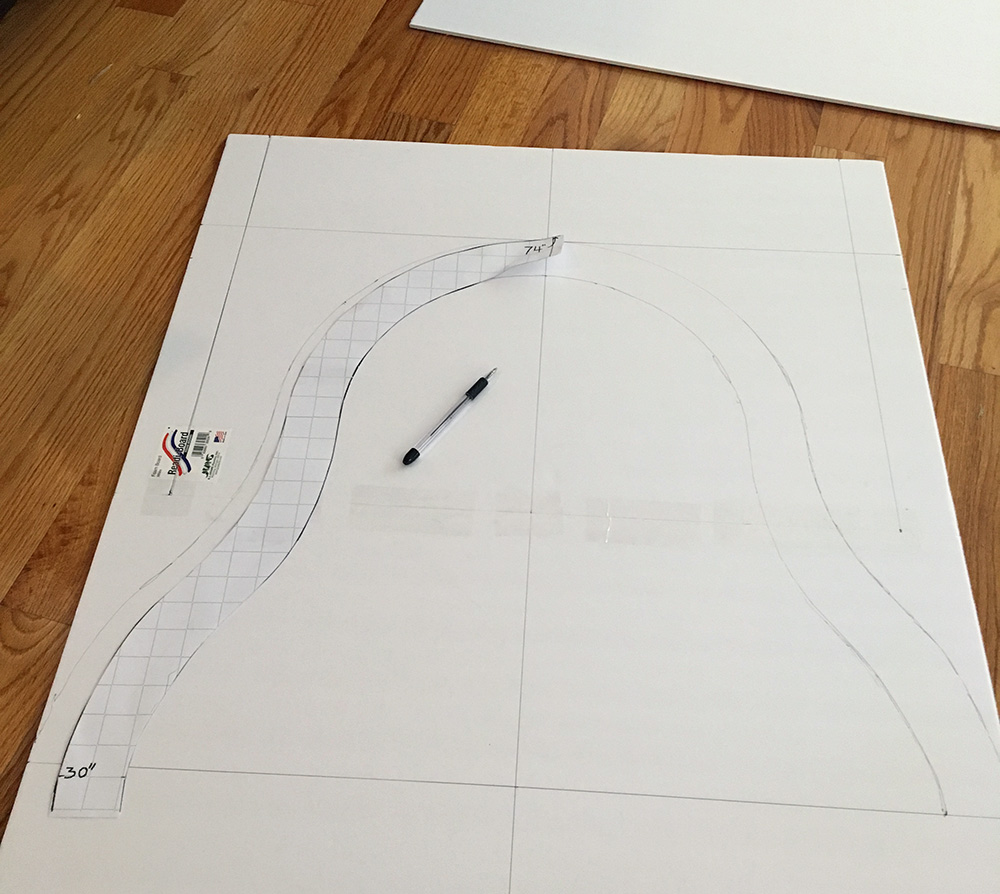
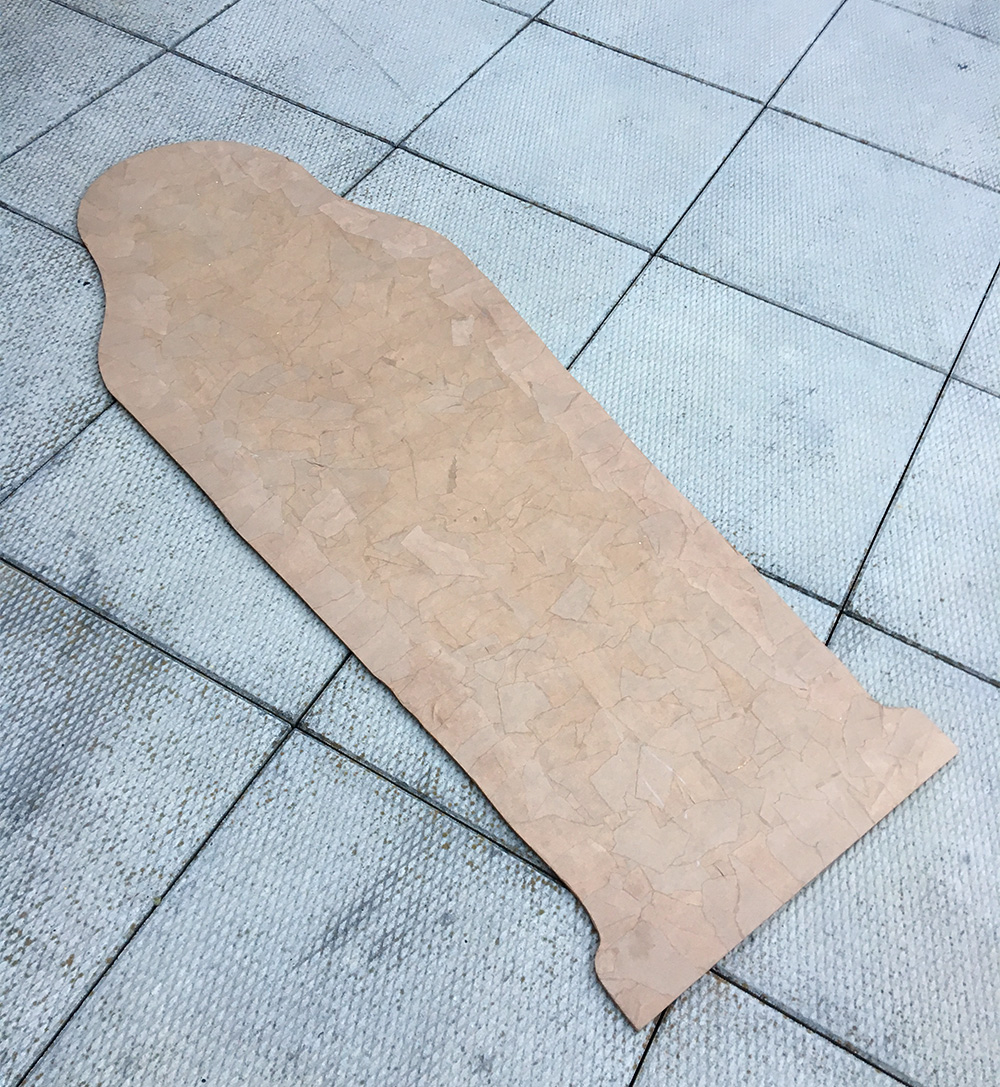
I cut out my printed-out guide images and traced them onto one of the big foam board panels — well, the printouts were only half the image, so I traced them, then flipped them, and traced them again. I drew the rest of the lines with a ruler. I then cut out this big shape with an X-acto knife.
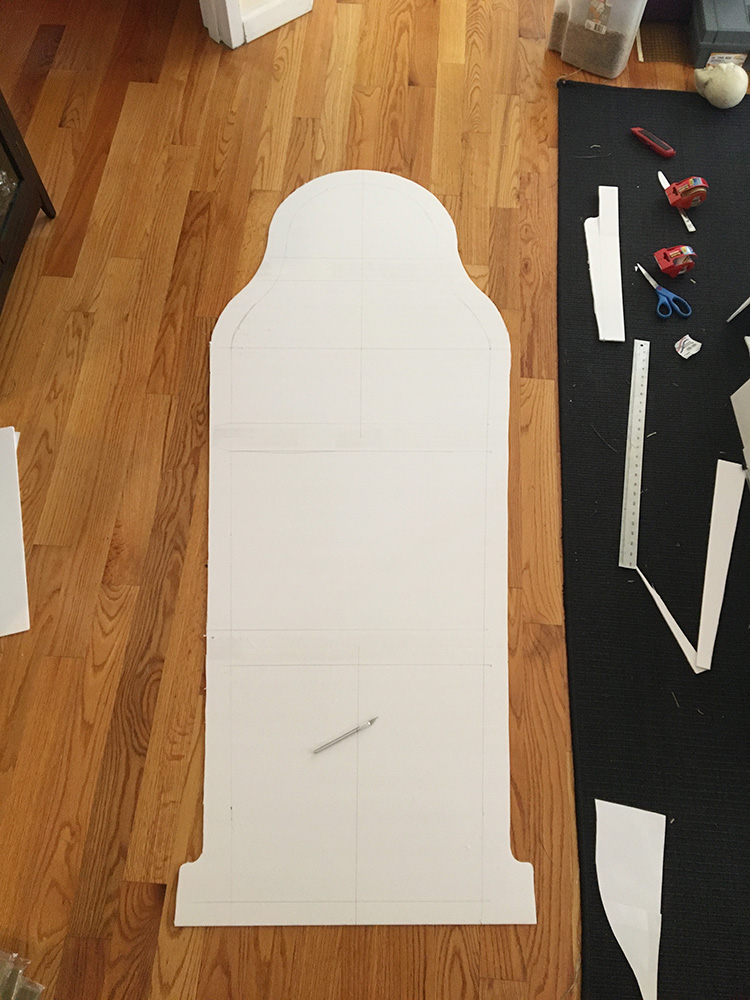
I traced the cut-out sarcophagus shape onto the other two panels and cut them out as well. I cut the back panel to be a little bit smaller all around — by about half an inch. This was so when I attached the walls later, the outer edges of the back panel definitely wouldn’t stick out at all.

I then cut the negative space out of the two panels that would be the front and back edges of the sarcophagus’ walls. In cutting out these pieces, I decided to leave some horizontal slats across the empty spaces. The purpose of these slats was to help hold the shape of the sarcophagus nice and firm and even while attaching all the parts and applying paper maché. I’d cut the slats off later when the paper maché was done. More on that coming up.
I bought a ton of cheap packing tape for this project. I did some math to determine the amount of total square inches there were on all surfaces of the sarcophagus, and then I did some shopping around and bought a large quantity of the cheapest packing tape I could find — enough to more or less cover the entire sarcophagus, which ended up being six rolls. I use tape in a lot of my paper maché projects to prevent any big pieces of foam board from warping — paper maché tends to grab onto the paper surface of the foam board and shrink it and curve it and warp it as it dries. A layer of tape between the foam board and paper maché helps reduce this by a lot.
Making the back of the sarcophagus
I covered one side of the back panel of the sarcophagus with long strips of tape; I didn’t cover it completely but made a lot of stripes that are very close together. I only did this to one side of the back panel, since I’d only be applying paper maché to one side — no need to bother with the side that’ll be facing the wall.
I applied one layer of paper maché to the back panel of the sarcophagus; you can read about my paper maché process and materials here. I used fairly large pieces of brown wrapping paper — as big as about five inches square.
I knew that, even with the tape, the foam board would want to warp somewhat, so I made a plan to minimize this. I first covered the whole middle area of the panel with paper maché, leaving about five inches clear all the way around the outer edge. I then set this outside in the sun with lots of heavy books on the uncovered edges of the foam board to weigh the thing down and prevent the shape from warping as it dried.
When that was dry, I covered all the edges with paper maché, and then set that in the sun with books in the middle this time to prevent any more warping. This two-step method worked really well! The finished panel was pretty flat, with just a little bit of a curve, which I wasn’t worried about. I set this panel aside for later.
Making the sarcophagus’ walls
Now, onto the walls. For the perfectly straight parts of the walls, like from the shoulders down to the floor, I used sheets of foam board to make the inner and outer walls. For the curved parts from the shoulders up, I used poster board. I’ll start with the flat parts…
I measured and cut some big rectangles of foam board (not shown) for the inner and outer walls segments — I ended up making the walls 15″ tall (like if the sarcophagus were lying on the floor, the walls would be 15″ tall), and I cut 12 pieces of foam total to make the inner and outer surfaces of the walls.

If I were to simply attach my wall panels to the sarcophagus’ edges, they’d be very flimsy and easy to crush with nothing in between. So I needed to add some structural supports inside of the walls. To do this, I measured and cut little strips of foam board to make triangular supports (above) to hold these wall panels apart at the right distance, i.e. to create the right thickness for the walls. I taped these triangles between the wall panels, and then taped the finished wall panels in between the big front and back edges of the sarcophagus. To do this, I set the back edge of the walls on the floor, and propped up the front edge of the walls on some boxes and stuff, and carefully taped the walls in between, working my way around.
When the flat walls were all taped firmly in place, the sarcophagus was strong enough to stand up on its own. I then measured and cut the curved parts of the walls out of poster board, and taped them in place.
I ran out of poster board when I was almost done with the curved parts of the head and shoulders, and rather than wait ’til the next day when the dollar store would be open I just filled in these parts with construction paper, which was very flimsy. I covered the construction paper with few layers of masking tape and packing tape to make it a bit stronger. Paper maché (coming up) will help a lot.
The “feet” of the sarcophagus have some little curved shapes to them, which I made with construction paper that I curled up and taped in place. These areas were very flimsy at first so I covered them with a few layers of masking tape and then two layers of paper maché right away to help stabilize them.
I grabbed my cheap packing tape and covered the entirety of the sarcophagus’ walls with long strips, in a similar striped pattern to what I did on the back panel.
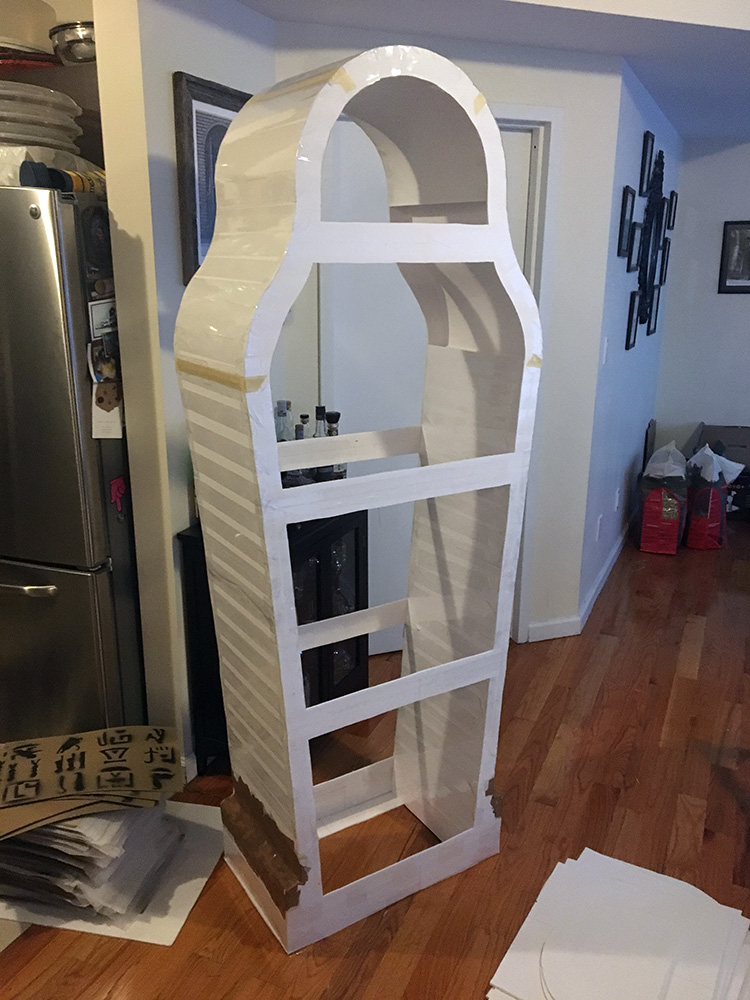
In the pic above you can see the (almost) finished walls — the flat foam board parts, the curved poster board parts, all those strips of clear tape everywhere, and the feet areas where I already did a little bit of paper maché. You can also see the missing segment inside the shoulder area where I ran out of poster board; like I mentioned above, I ended up just using construction paper and tape in there.
Looking at the size and shape of the mostly-finished sarcophagus for the first time, I decided I wanted it to be a little taller, so I added a three-inch wall of foam board at the bottom, and I added the same thing on the back panel as well.
Finally the sarcophagus was ready for paper maché… just when I had to go out of town for a long weekend for a wedding. My fiancée helped out enormously here and spent two days covering the entire surface of the walls with one layer of paper maché, of course skipping over those horizontal slats which we’d be removing later.
When I got back, the paper maché was dry, so I removed the slats with an X-acto knife and covered over the exposed surfaces with a little more paper maché. I then taped the back panel in place, and covered those connections with paper maché. The sarcophagus was done!
I’d originally planned to paint the thing gray and stencil hieroglyphs on it in white, but I simply ran out of time! That’s what happens when you plan half a dozen huge projects at the same time with a hard deadline. However, I’m really happy with the plain brown look; it goes fine with the rest of our color scheme and looks authentic enough for me.

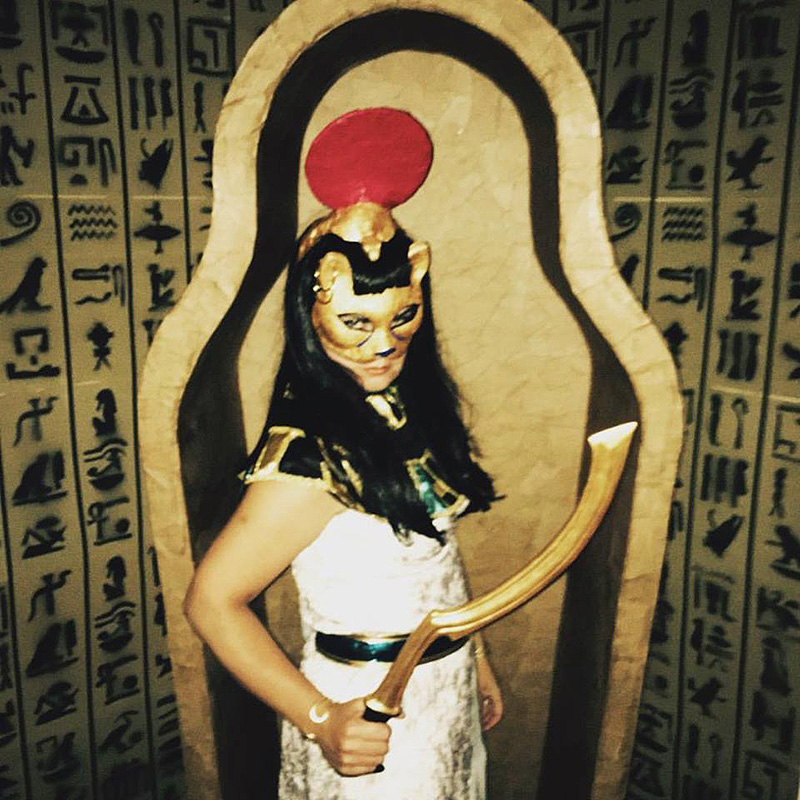
Here’s our friend Collie in her Sekhmet costume at the party, posing in the sarcophagus.
People had a great time taking pictures in the sarcophagus all throughout the party! If you dug this project, you can also check out a similar thing I did a couple years ago: a foam board pine box coffin.
 About Manning Krull
 How to make a 4-foot paper maché alligator
 My violin skull mask, Mardi Gras 2015
 Three-headed paper maché dragon sculpture
September 24th, 2019 at 2:03 am
What did you do with the sarcophagus after the party? Put it in storage, gift it, toss it?
September 24th, 2019 at 3:55 pm
Most of my Halloween stuff gets broken down and thrown out, but this one I managed to re-home! I put a post on NextDoor to see if anyone in the neighborhood might want the thing, and this nice lady came and picked it up in her station wagon; she traded me home-made mummy cookies!!!
July 30th, 2021 at 9:09 pm
Could I hire you to make two more of these?? I need them by October 1st.