
Hansel and Gretel light-up oven prop! — part 2
Published by Manning on September 25th, 2018
This is part 2 of my paper maché oven prop for Halloween 2018; see part 1 here.
Making the fake flames
Making the fire was an interesting challenge! I needed to find a material that would be translucent enough to diffuse the light properly, and also rigid enough that it could stand up in the oven. One thing I thought of ahead of time was that if I curved the material for the flames, that might help it stand up better; think about holding a piece of paper vertically and curving it a bit so it’s somewhat rigid. Make sense? More on this coming up.
I ended up buying a big 25″ x 20″ sheet of thick translucent plastic at the art store — I’m not sure what it’s called; I just asked someone for help and they showed me this stuff. The art store lady showed me that the plastic had a removable layer of thin plastic on one side (kind of like how new electronics have a removable layer of plastic), and she suggested I leave it on there because it added a little to the translucent-ness (translucence??).
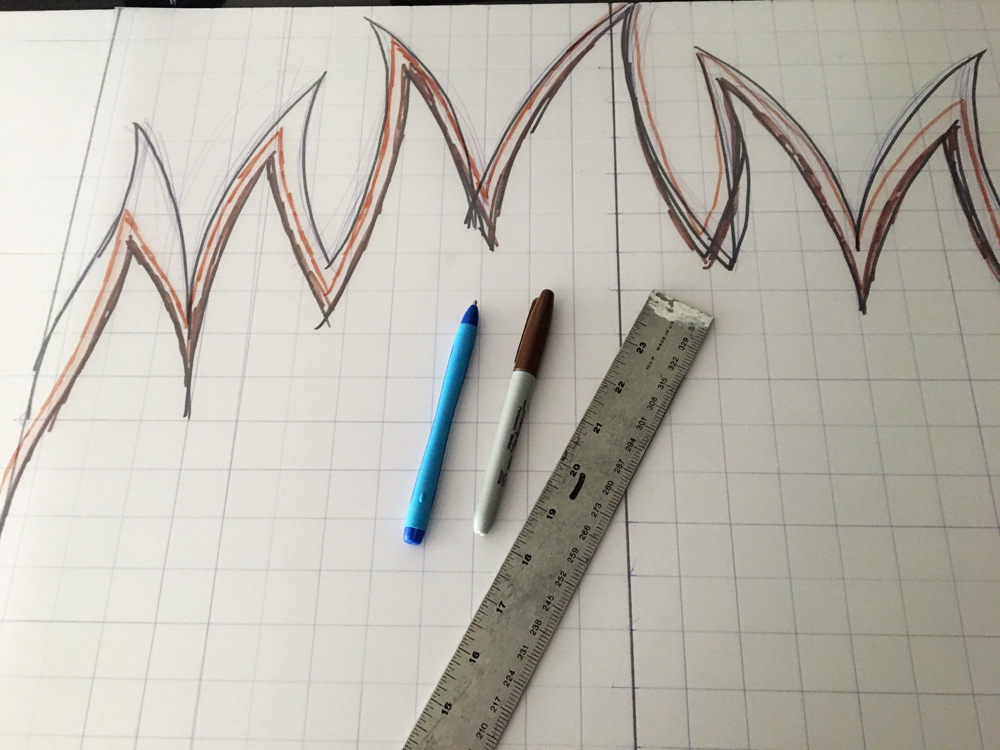
I designed the flame shape on a sheet of poster board based on the measurements of the opening in the oven sculpture. When the drawing was done, I laid the plastic over it and drew the outline on the plastic with a Sharpie marker — I drew the outline a little larger so that when cutting I could make sure to cut off all the bits that had ink on them. I cut the flame out with scissors.
The plastic by itself was still too transparent for the lights behind it, so I decided to add a layer of thin paper. I used shipping paper for this — it’s essentially blank newspaper; I used to use this stuff for some paper mache projects. After some testing with various kinds of paper and the plastic, shipping paper turned out to have the right amount of translucent-ness. It also happened to be big enough that I could use one big sheet of the stuff.
I didn’t get pics of a few steps here! I built a big curved base out of foam board for the next couple steps; basically a box with a curved surface that I could use as a guide for curing the plastic flames. I temporarily taped the plastic flames in place on this curved box. Then I spread wallpaper adhesive all over the plastic flames, and laid a big sheet of shipping paper in place on the plastic. It was important to curve the plastic before this step; if I’d pasted the paper in place, and then tried to curl the plastic, the paper would either get scrunched (if it was on the inside of the curve) up or stretched and ripped (if it were on the other side).
While this was drying, I curved up a strip of foam board and taped it in place at the bottom of the flames, and I added a couple layers of paper mache over this piece; this thing, along with the shipping paper on the flames, will help encourage the plastic to retain the curve.
I snipped the tape that held the plastic onto the curved box and carefully lifted the flames off the base. I used scissors to trim the paper a bit around the plastic flames. I could see that the wallpaper adhesive didn’t want to hold the paper onto the plastic very well, but I simply decided to leave it alone and just be really careful with it.
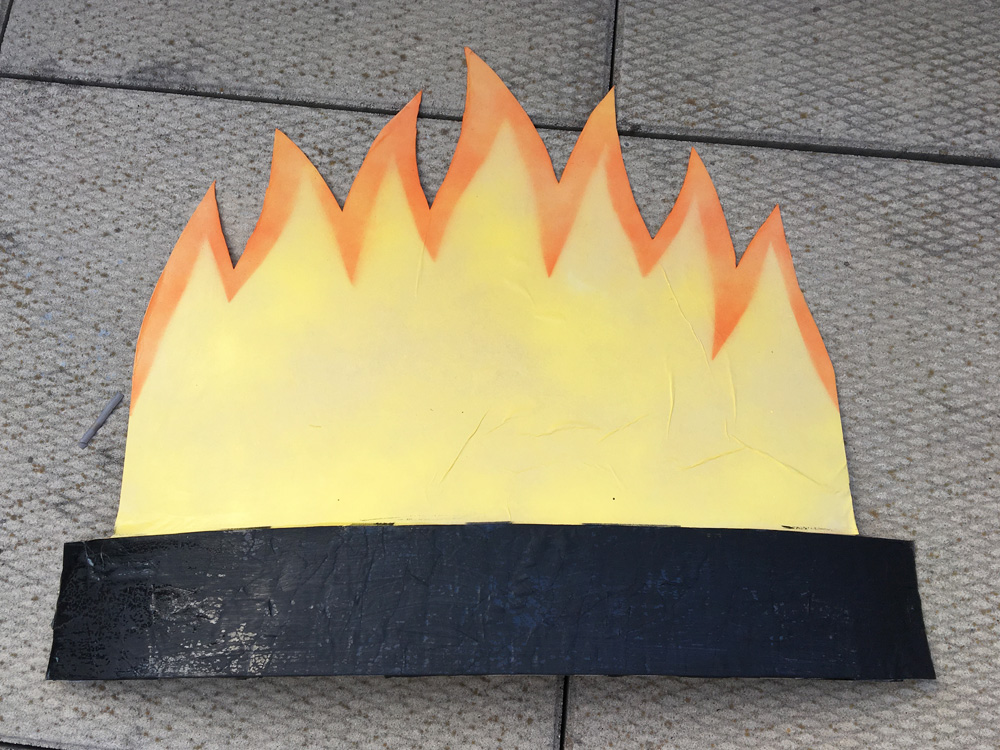
I lightly spray painted the flames yellow, and I made a stencil out of paper so that I could also lightly spray paint the edges orange. I didn’t want the paint to be opaque at all because I want the maximum amount of light to get through. I also painted the base section black; it’s still drying in the above pic.
Lighting
Like I mentioned in part one, I left an open space for lights behind the bricks at the bottom of the oven. I put a layer of aluminum foil in this space to help reflect and amplify the light.
I couldn’t be sure how I’d need the light fixture to sit in this open space until I could try a few different things with it, so I didn’t make a real plan for how I’d position it or attach it. I cut a panel out of the bottom of my oven sculpture with an X-acto knife and set that piece aside. I put one of my Hue light bulbs in the fixture and set it to flicker yellow and orange. I then did a bunch of trial and error with positioning the light differently and temporarily holding it in place with tape, wire, books, etc, until I found the best position that lit up the fake flames the way I wanted.
Once I’d figured that out, I modified the bottom panel of the oven to hold the light fixture permanently in this position. This included a little support that I made out of foam board and tape. I painted this black and glued it in place. I then taped the bottom panel back on the oven and sealed it with some paper maché on the bottom. This is why I couldn’t paint the oven before now!
I’d found a good deal on Amazon for four little strings of battery-powered orange fairy lights for nine bucks. These worked out great, and I ended up buying two packs of them. I just stuffed these in the spaces behind and in front of the flames and turned them on. If I wanted to get fancy I could’ve taped them carefully in place at nice even intervals, but there was really no need.
Painting!

Painting, finally! I used newspaper and masking tape to cover all the black interior stuff and to protect the light fixture and cord, and then I took the finished oven sculpture outside and spray painted the exterior brick surface a brownish-gray color.
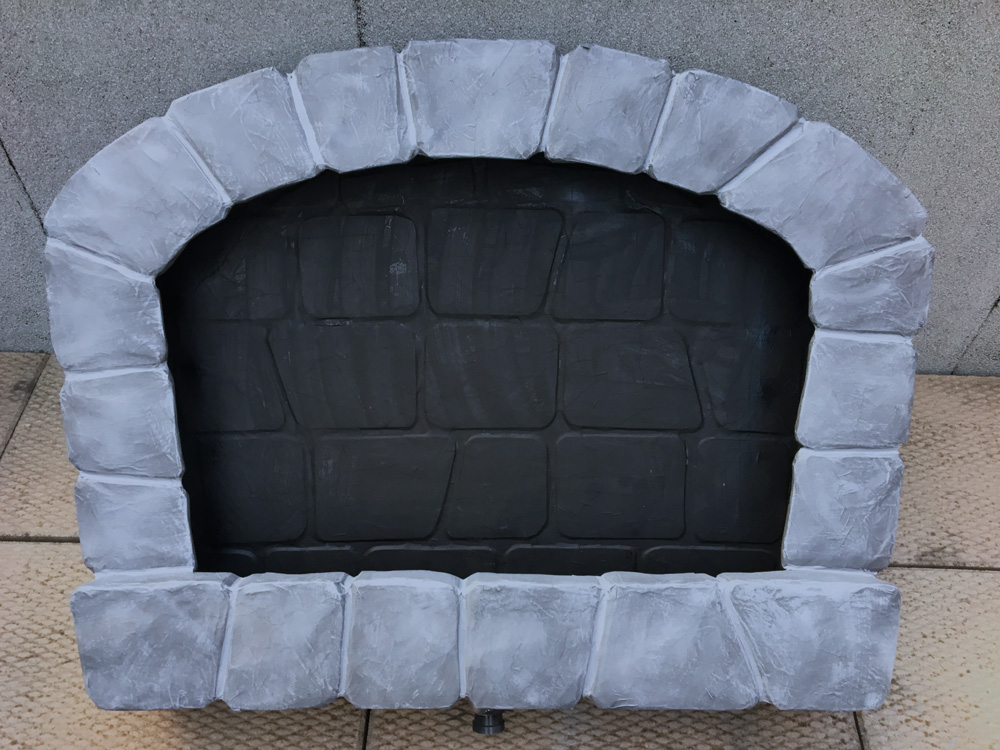
I let the spray paint set and air out for a couple days, and then I brought the oven inside and touched up the bricks with a lighter brownish shade of acrylic paint, using a dry-brush effect. I also painted a lighter gray color into all the grooves between the bricks to create the effect of cement. All of that is pretty subtle in the above pic but I know from experience that the contrast of these painting effects will become a little bit exaggerated in the low light of the party.
When that was done, I gave the whole oven a coating of matte spray, not really to protect the paint job but rather just to tone down the shininess of the paint.
Hanging
I cut two little square holes in the back of the oven near the top on either side. I reinforced these holes with a couple layers of shipping tape all around them to keep them from sagging/tearing. I added a little piece of plastic zip tie above each hole, and then I covered that with two more layers of tape. Probably overkill, but it was easy and couldn’t hurt.
The finished oven sculpture isn’t heavy at all (maybe like five pounds?), and it was easy to hang it on two of those little brass picture-hanging hook things. I measured the distance between the holes I’d cut in the back earlier, hammered the brass picture-hanging hook things into the wall at the right distance, and simply slipped the oven into place over them.
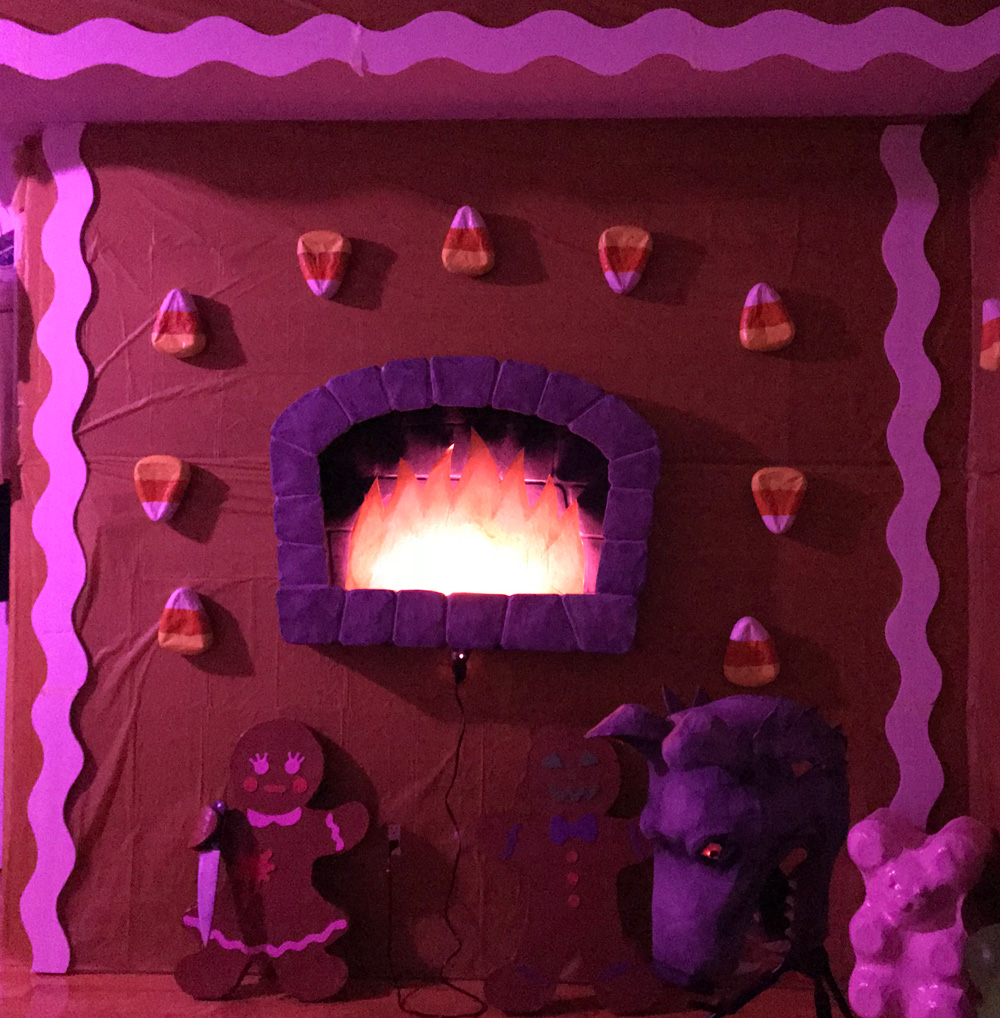
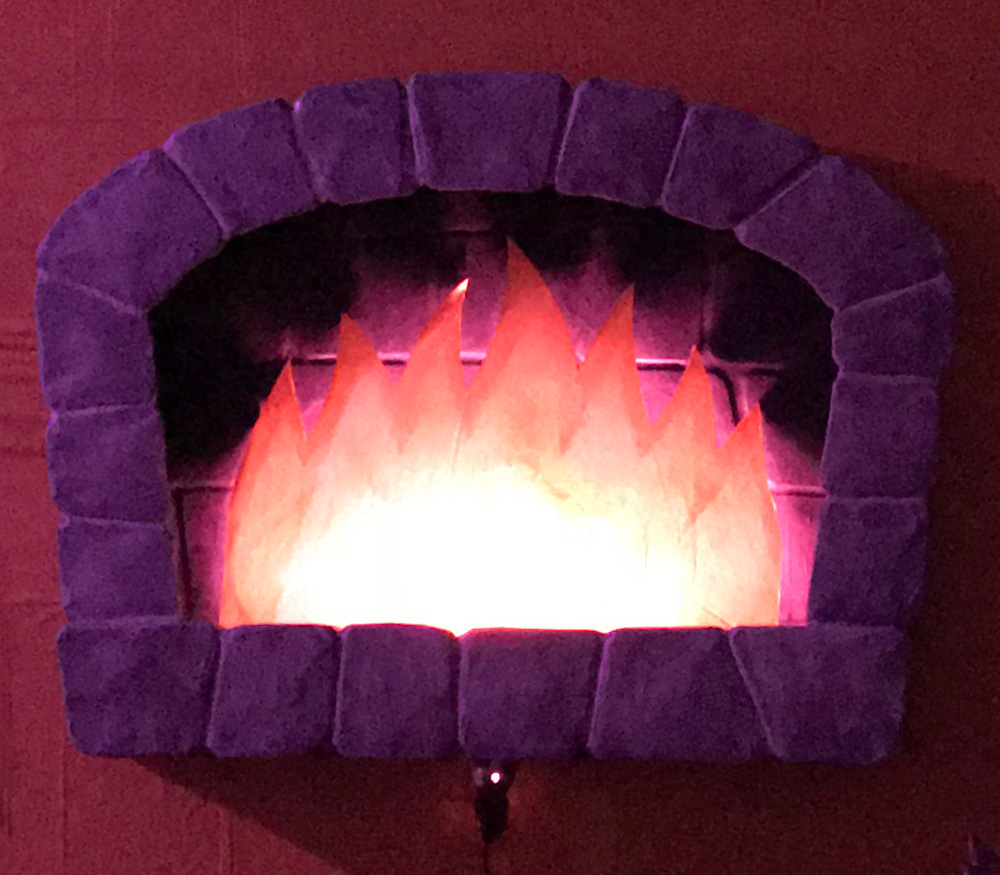
I switched on the battery-powered lights and dropped them in place, and I plugged in the Hue light and set it to flickering yellow and orange, and the oven was complete! Ready to throw some kids in!
 About Manning Krull
 How to make a 4-foot paper maché alligator
 My violin skull mask, Mardi Gras 2015
 Three-headed paper maché dragon sculpture
Leave a comment