
Hansel and Gretel light-up oven prop! — part 1
Published by Manning on September 25th, 2018
I’m making this big light-up oven prop for my haunted gingerbread house Halloween party in 2018! It will eventually be a lightweight wall hanging with some battery powered lights and one Hue light inside. So far so good! Here’s what I’ve done so far…
Building the oven base
First I designed the basic shape of the oven in Photoshop — it’s 40″ x 30″; I chose this size out of convenience because it allowed me to base the design on two sheets of 20″ x 30″ foam board connected side by side.
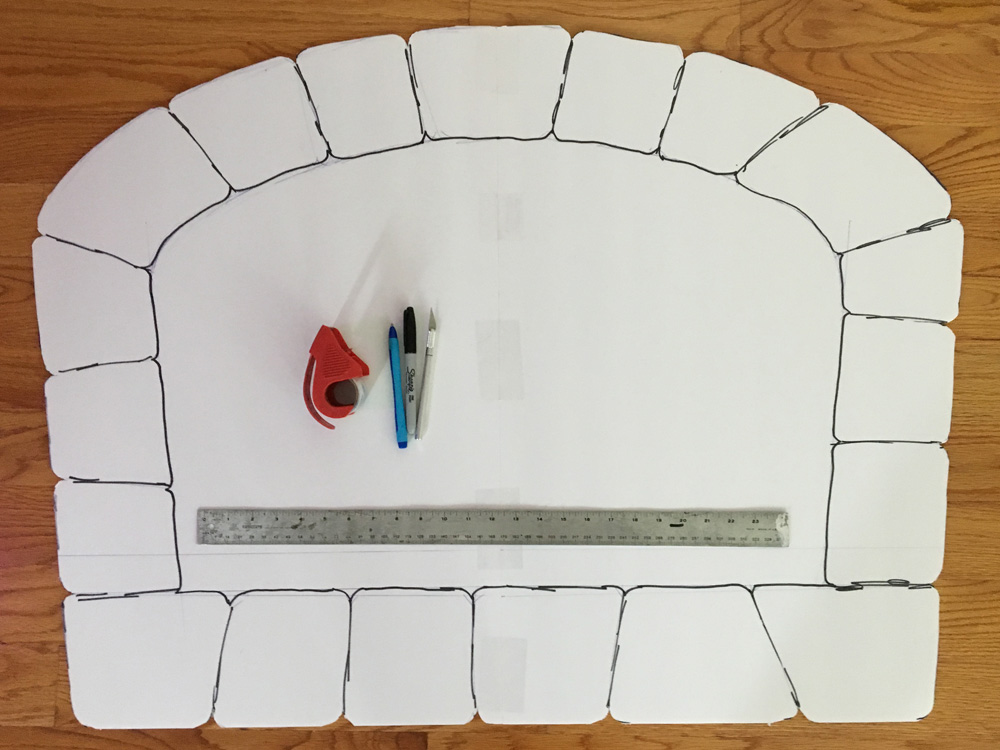
I taped together the two sheets of foam board, measured and drew the oven shape, and cut it out with an X-acto knife. I’ll be making three of these; this version that has the individual bricks drawn on it will be the front layer, and in a little while I’ll cut the bricks apart. For now I need them intact for tracing…
I taped two more sheets of foam board together and traced the outline of the oven drawing onto it. I cut that one out; this one will be the background layer.

Again, two more sheets of foam board taped together, and I traced the oven shape again, this time including the negative space inside the oven. This one is the middle layer, a sort of frame that’ll go right behind the individual bricks. Above you can see all three layers in order from front to back. (Note the tiny letter “F” for “front” on two of the panels; I’m constantly marking hints like this on pieces so I don’t forget what goes where!)
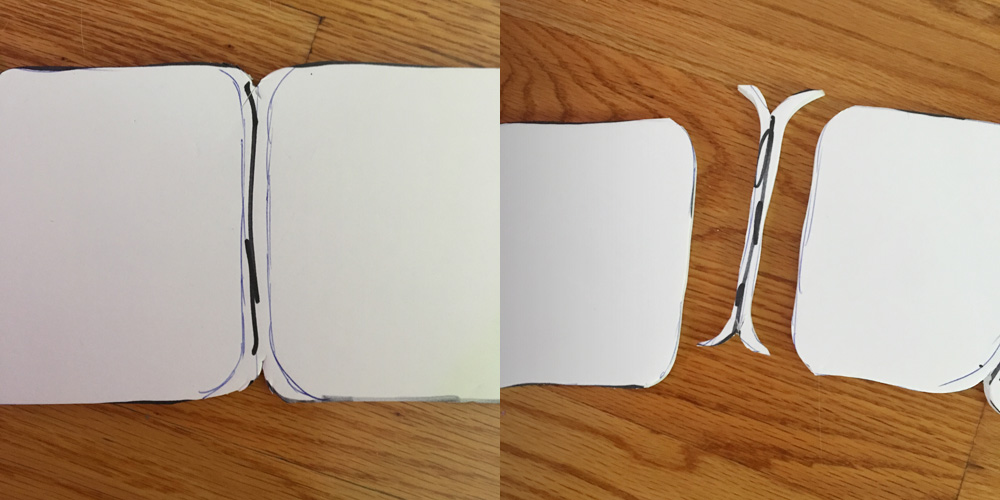
I then went back to the first piece of foam board — the one where I drew all the bricks — and cut all the individual bricks apart. (Note: I numbered the bricks first so I could keep track of them! The numbers tell me which is which and they also tell me which side is up.)
I didn’t just cut a line between each brick to separate them; I actually drew a wide space between the bricks and cut that out, to create a space of about 3/8″ or 1/2″ between each brick.

I used a ruler to draw a bunch of straight lines onto the background panel to design a set of narrow walls that the bricks will be attached to — the lines were faint and didn’t photograph well so I re-did them in red above. I cut a bunch of long strips of foam board (not shown here yet) to create these outer and inner walls. (See my article about working with foam board!) In designing these walls I made sure to leave a lot of room at the bottom of the oven for the lights. The sides and top are 3.5″ deep, and I knew I wanted to set a metal light fixture in the base of the oven shape that happens to be 5.5″ in diameter, so I made the bottom part of the walls 5.5″ deep.
I didn’t attach all these walls right away; for now I just put them aside. They’ll get glued in place later, but first…
Making the background bricks
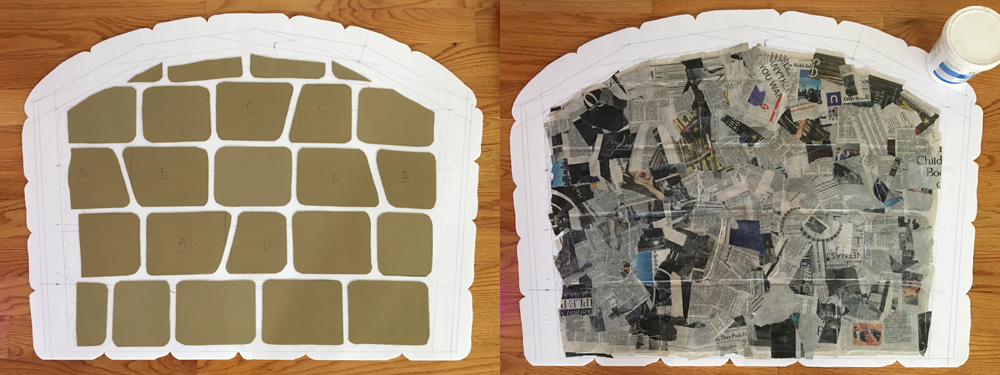
I used pieces of craft foam (this rubbery foam stuff you can get at any art store) to make a simple brick texture for the back panel of the oven. I just cut these brick shapes out, glued them in place with a tiny bit of Tacky Glue, and then covered the whole panel with a layer of paper maché. You can read about my paper maché process and materials here; the short version is: I use Roman PRO-543 universal wallpaper adhesive (paid link) and alternating layers of newspaper and brown wrapping paper.

This will all look a lot better after it’s painted!
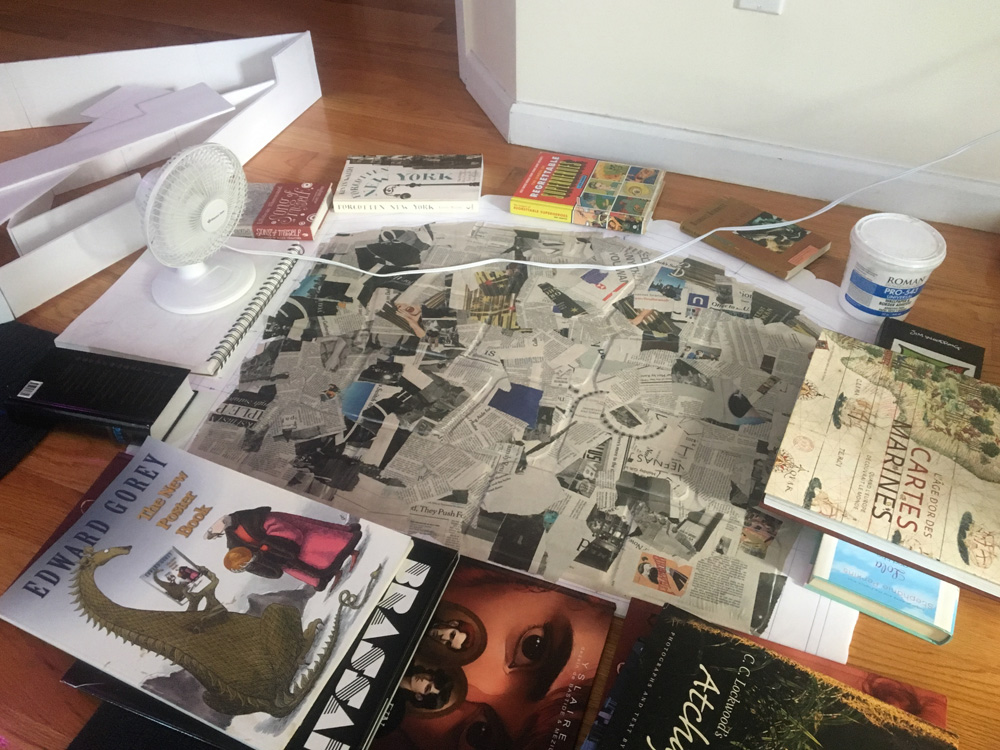
Whenever you apply paper maché to any large flat surface, it tends to warp quite a bit. To help prevent warping here, I piled some books on the edges of the back panel while it was drying. I also used a fan to speed up drying. (Oh hey, you can see my friend Jon Morris’ wonderful book, The League of Regrettable Superheroes back there. I found a good use for your book, Jon! A+++++ would use as a paperweight again!)
In the above pic you can see the foam board walls off to the left there, waiting to be attached. When the back panel was dry (well, nearly dry), I attached all the walls with a hot glue gun.
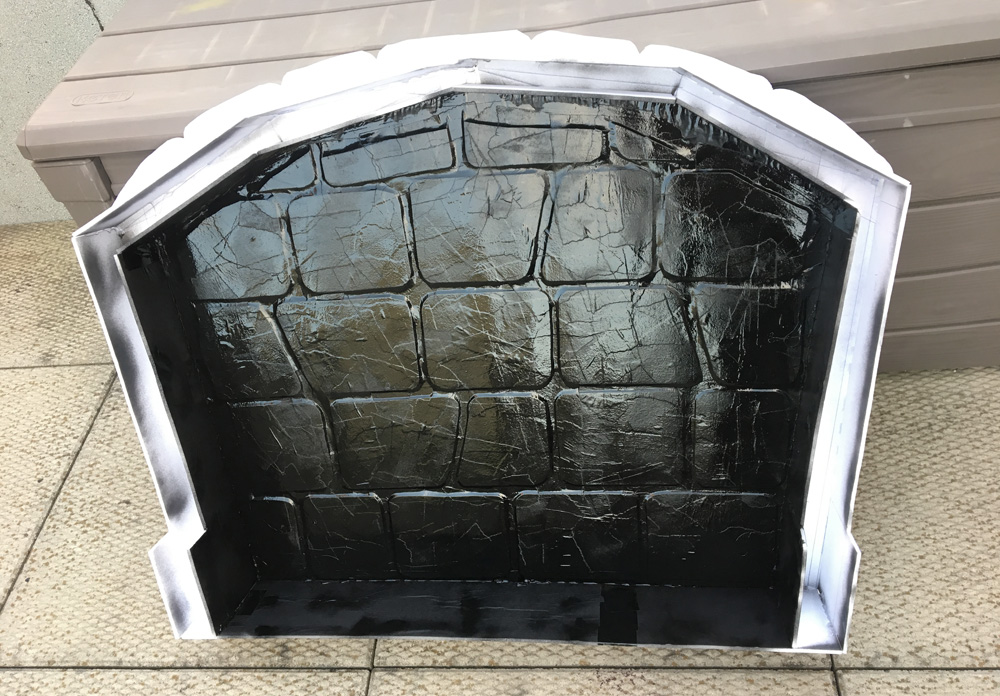
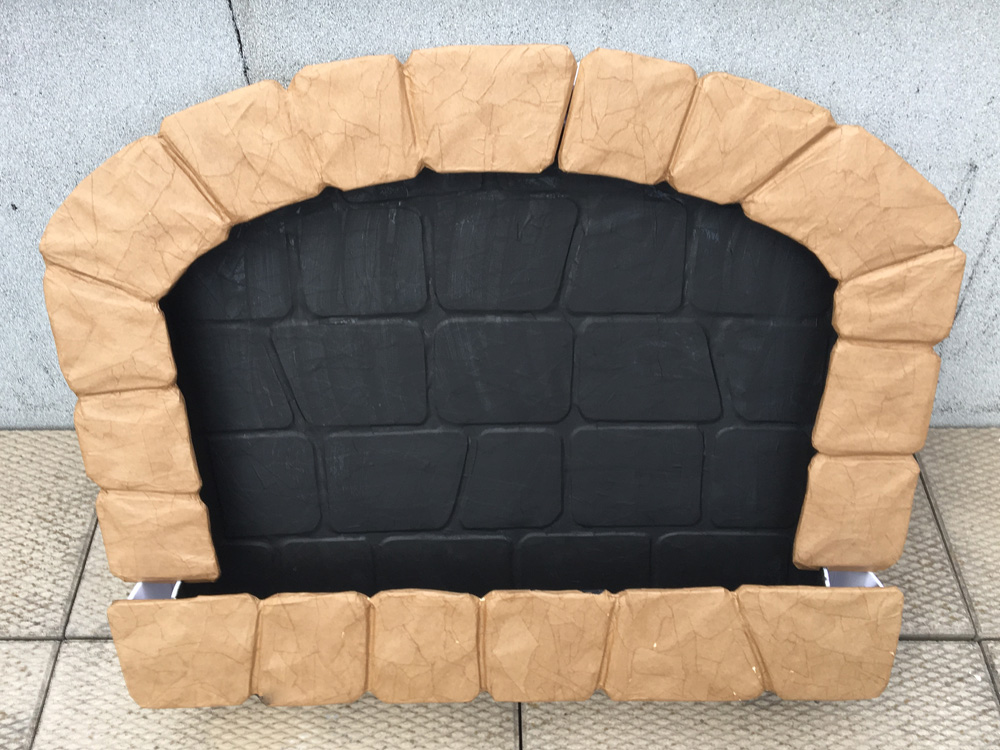
When all this was 100% dry, I took the whole back panel structure outside and spray-painted the interior bricks and the inner surfaces of the walls black. A little while later I also applied a coating of matte spray. (The above pic is before the matte spray and therefore very shiny!) Ideally I wanted the interior to be as matte as possible; the less the light reflects on that back surface inside, the more the oven can have a (slight) illusion of depth.
The matte spray ended up making the black look a little dusty (maybe due to the crazy humidity) so I ended going over this area again with some plain-ol’ watered-down black acrylic paint and a big foam brush. That did the trick! The interior was now very black and very matte, not quite Singularity Black, but close enough.
Making the foreground bricks
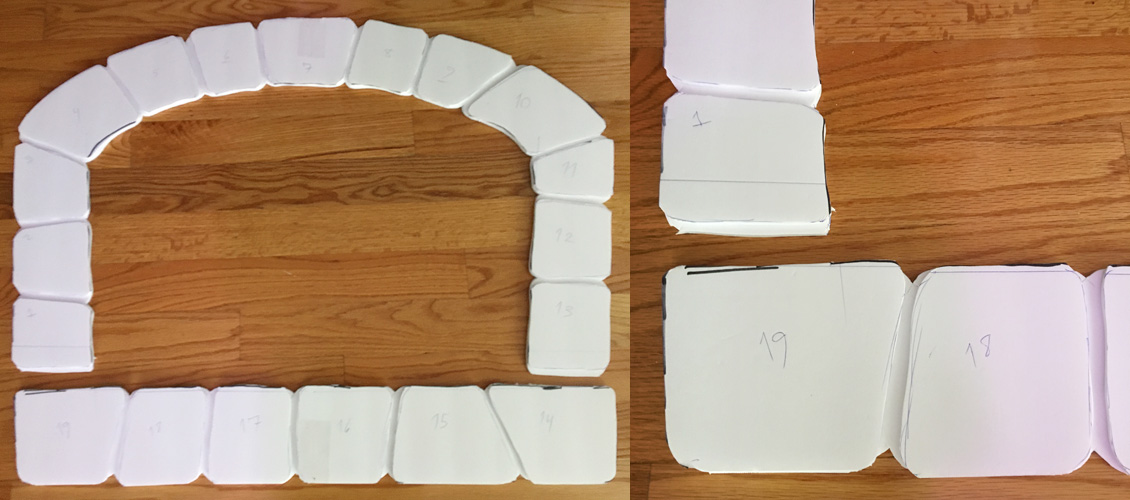
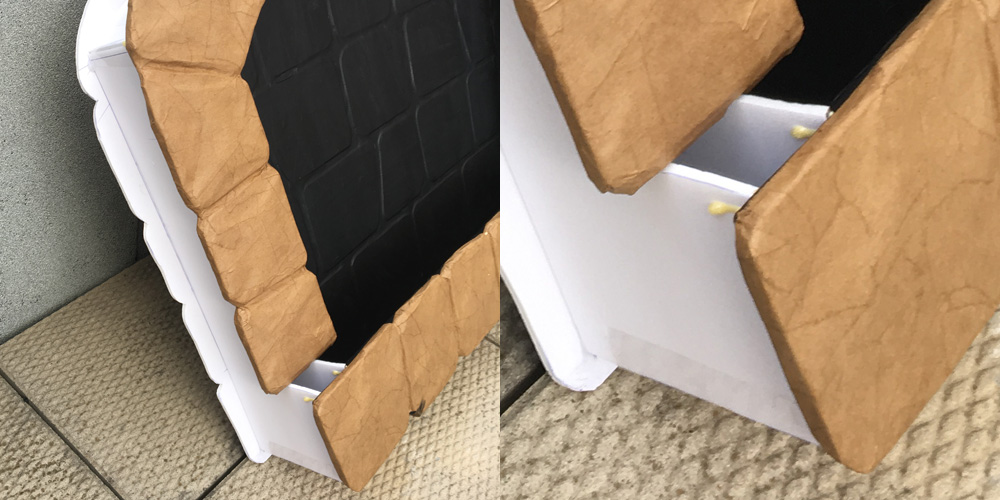
Now for the front of the oven. I glued the individual foam board bricks onto the foam board frame shape, using a tiny bit of Tacky Glue for each one. I realized I needed to cut the bottom row off of the frame, since it will be standing out a little further from the rest of the oven, to allow for that big light fixture to fit in there.
In the above-right pic you can get a good look at how the bricks have a little space between them now since I cut that slice out between all of ’em.
At this point I also realized it’d be easier to work with the frame of bricks in smaller pieces, so I cut the top arch part in two (not shown, but, like, use your imagination).
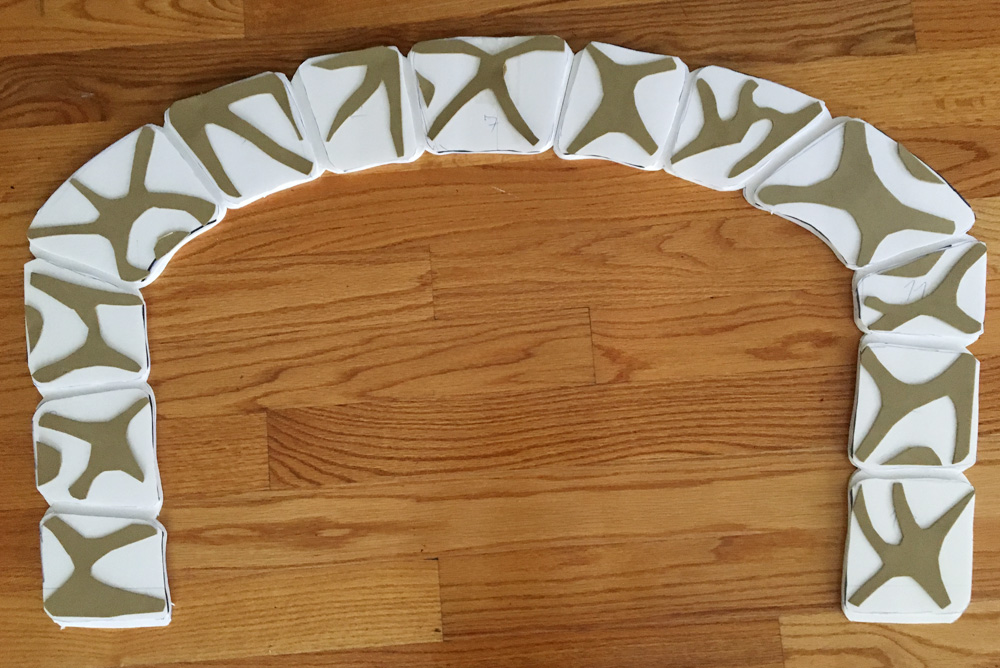
I then did a bunch of weird steps to build out the front of the brick shapes in order to make them more 3d and irregular. I took a bunch of craft foam and cut out shapes for each brick that would be the foundation for some subtle raised parts, trying to keep in mind the shape of rough-hewn stone. These foam shapes don’t look like much, but the idea is that in the following steps they’ll serve as the highest ridges of a bunch of wider, flatter shapes.
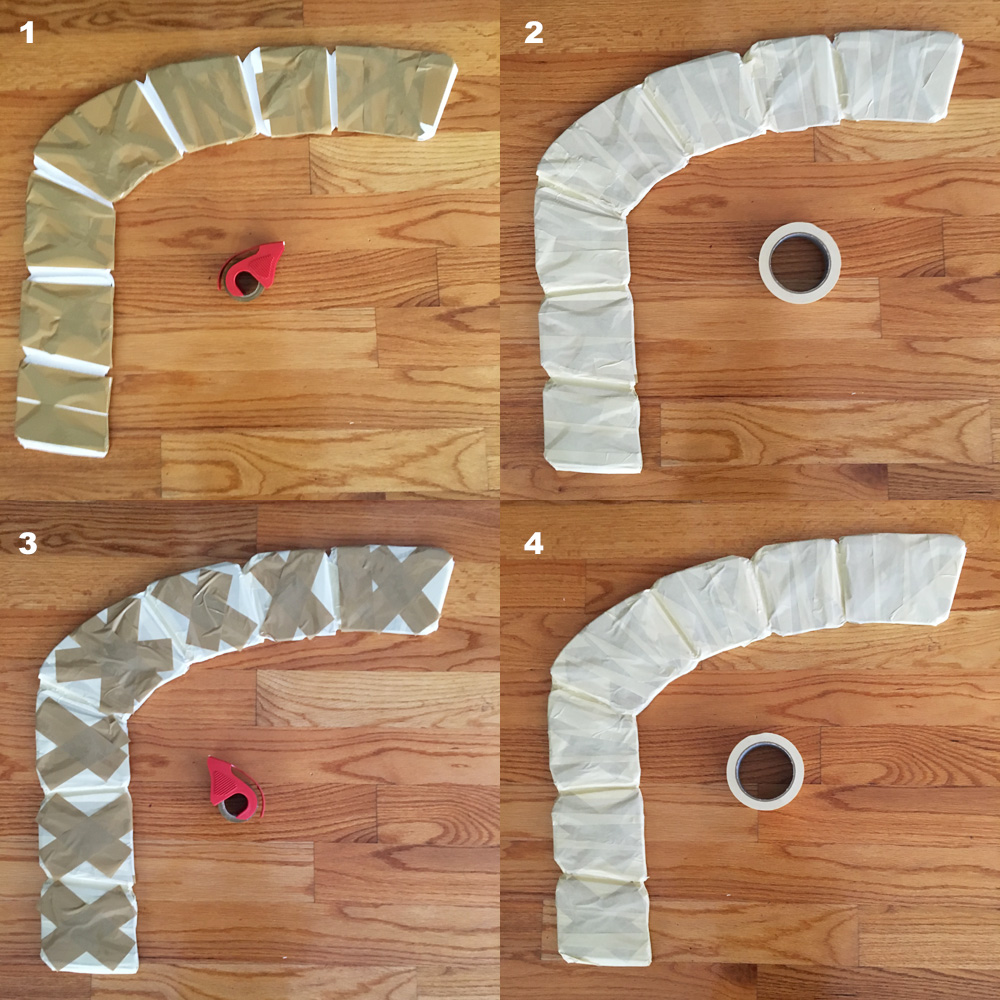
I covered these craft foam shapes with a layer of shipping tape, stretched tightly across to span over the craft foam ridges. I then did a layer of wide (2″) masking tape over this, and then another layer of shipping tape (covering mostly just the raised parts) and another of masking tape — four layers of tape in all.
After the first layer of tape, the edges of the craft foam shapes were too visible they didn’t look like stone at all. But with each layer of tape the edges of the foam got more concealed and the sloping shapes around them became more gradual. After four layers of tape and one layer of paper maché (coming up) the effect was really good! A little too subtle to really be visible in photos, but painting will help with that.
Paper maché and assembling everything
I then covered the front of all the bricks with a layer of paper maché. When this was dry, I flipped over these frame pieces and painted the back surface with some slightly watered down black acrylic paint. This is so when the bricks are attached to the back panel of the oven (coming up), the exposed inner edges won’t reflect a lot light in there. Much easier than trying to paint the inside surface after the bricks are glued on!
Finally it was time to glue the frame of bricks to the walls on the back panel of the oven. I put a bunch of tiny drops of Gorilla Glue on the top edges of all the interior walls, and set the three pieces of the frame of bricks on top of it. I set some lightweight books on the oven to hold it in place and let the glue dry for a couple hours before continuing.
Remember, if you’re using Gorilla Glue, the normal kind expands an insane amount as it dries. This is why I used very tiny drops; bigger drops might have created big blobs that run down the walls into the back panel of the oven. And it’s also why I put some weight on the oven; otherwise the glue might have lifted the front panel up a bit as it dried. In the pic above you can see where some of the glue ran down the “walls” as it dried.
Despite all this, the way Gorilla Glue expands is totally a good thing, because it means the glue creeps out into all the nooks and crannies in your surfaces and really locks them together perfectly. If you were to use, let’s say, Elmer’s Glue for this, there’s a chance your surfaces aren’t perfectly flat and don’t touch perfectly in a lot of places, and then the glue would just dry in place between them and potentially not join them together. Gorilla Glue finds those spaces and fills ’em up.
(They make a non-expanding kind of Gorilla Glue now, so watch out for that; that wouldn’t be any better than Elmer’s for this particular job. It’s useful for other things, like joining hard-to-glue materials like plastic.)
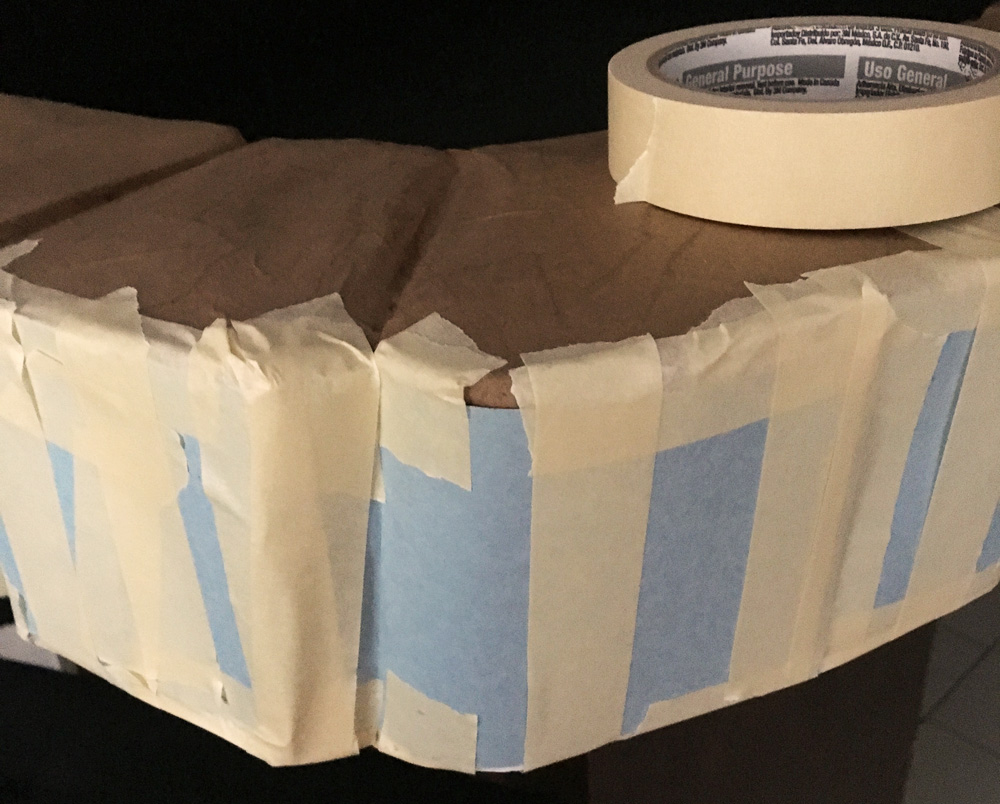
Okay! I then used strips of construction paper and lots of masking tape to build side walls for all the bricks, to connect the foreground to the background. I bent and curved the construction paper to fit around the outer shapes of the bricks and in the grooves in between. I then covered the the sides of the bricks and all the exposed masking tape in the front with one layer of paper maché.
I try to mention this as often as possible: one layer of paper maché is fine for a short-lived decoration like this that only has to survive one party and will probably be touched by people very few times. If I were building this oven to be more permanent I’d probably do about six layers of paper maché.
Anyway, I really really wanted to paint the oven at this point, but first I had to work out the flames and the lighting…
Next: part 2 — making the flames, adding lights, painting, and more…
 About Manning Krull
 How to make a 4-foot paper maché alligator
 My violin skull mask, Mardi Gras 2015
 Three-headed paper maché dragon sculpture
Leave a comment